DIY lower door rubber molding replacement (with pix)
 12-30-06, 12:50 PM
#1
Pole Position
Thread Starter

I did some searching, and although the problem is well documented and CL members have replaced these molding strips, there does not appear to be a detailed DIY write-up with pictures, so here goes it.
Jeff and Dave, please feel free to add links to this to your respective DIY pages.
Here's the problem:

Tools needed to do the job -- a 10 mm socket, a Philips head screwdriver (preferrably the 4-in-1 model with the removable/changeable tip), and one of the tips from the 4-in-1 screwdriver:

Time needed -- about 30 minutes.
I think it's important to understand how this molding strip is attached. It's not actually attached to the door directly, but rather, is attached by 5 very small Phillips head screws to the back side of the large plastic lower molding panel that covers the bottom half of the door. The large plastic lower molding panel is, in turn, attached to the backside of the door by 3 10mm nuts and some plastic clips. This will all become clear as I go through the replacement steps.
First, remove the 3 10 mm nuts from the backside of the door pictured below:
Here are the first two:

And here is the third one:

They come right off, and expose a threaded screw that's attached directly to the lower door molding panel:
Once you remove all three nuts, run your finger along the inside upper edge of the molding strip and you'll feel that it's held in place by 5 screws attaching it to the lower molding panel -- there's one at each end, and 3 more in between. In order to get a screwdriver on these screws, you'll need to slightly separate the lower molding panel from the door by about a couple of inches. Since you've already removed the 10 mm nuts, the only thing holding the lower panel to the door are some stepped plastic retention clips. From the inside of the door, apply pressure to the very bottom of the lower molding panel (basically on the molding strip) and you'll hear the clips pop out. Because they're stepped, they won't come out completely, but depending on how much pressure you exert, you may hear/feel two or more distinct releases. Here is how I was able to release the clips:

Remember where you took off the 3 10 mm nuts? As you separate the lower molding panel from the door, the 3 screws that were behind those nuts will recess back through the holes they were in and will actually help you keep the lower panel separated from the door. Look closely at this picture and you'll see what I mean:

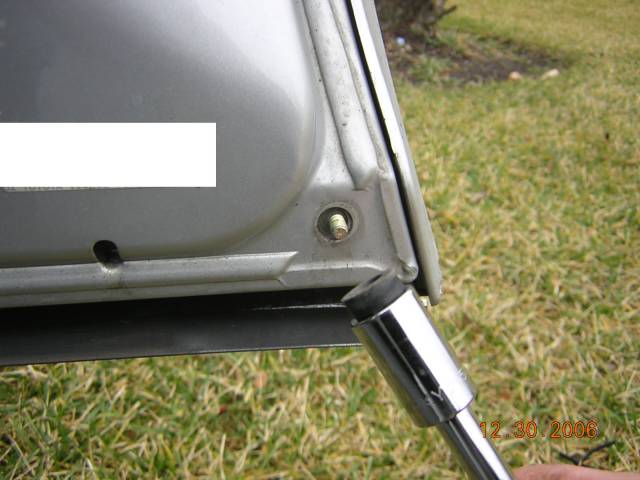
Once you have enough room between the lower door panel and the door, you can begin to remove the 5 screws holding it in place. The easiest one to remove is the one at the open end of the door, as shown here:
The other screws are harder to remove because you don't have a good angle to get to them depending on how far you've separated the lower molding panel. Here is how I reached the one closest to the car:

And here's how I was able to get to the middle ones (although, in hindsight, it would have been easier to use the insert from the 4-in-1 screwdriver):
Jeff and Dave, please feel free to add links to this to your respective DIY pages.
Here's the problem:
Tools needed to do the job -- a 10 mm socket, a Philips head screwdriver (preferrably the 4-in-1 model with the removable/changeable tip), and one of the tips from the 4-in-1 screwdriver:
Time needed -- about 30 minutes.
I think it's important to understand how this molding strip is attached. It's not actually attached to the door directly, but rather, is attached by 5 very small Phillips head screws to the back side of the large plastic lower molding panel that covers the bottom half of the door. The large plastic lower molding panel is, in turn, attached to the backside of the door by 3 10mm nuts and some plastic clips. This will all become clear as I go through the replacement steps.
First, remove the 3 10 mm nuts from the backside of the door pictured below:
Here are the first two:
And here is the third one:
They come right off, and expose a threaded screw that's attached directly to the lower door molding panel:
Once you remove all three nuts, run your finger along the inside upper edge of the molding strip and you'll feel that it's held in place by 5 screws attaching it to the lower molding panel -- there's one at each end, and 3 more in between. In order to get a screwdriver on these screws, you'll need to slightly separate the lower molding panel from the door by about a couple of inches. Since you've already removed the 10 mm nuts, the only thing holding the lower panel to the door are some stepped plastic retention clips. From the inside of the door, apply pressure to the very bottom of the lower molding panel (basically on the molding strip) and you'll hear the clips pop out. Because they're stepped, they won't come out completely, but depending on how much pressure you exert, you may hear/feel two or more distinct releases. Here is how I was able to release the clips:
Remember where you took off the 3 10 mm nuts? As you separate the lower molding panel from the door, the 3 screws that were behind those nuts will recess back through the holes they were in and will actually help you keep the lower panel separated from the door. Look closely at this picture and you'll see what I mean:
Once you have enough room between the lower door panel and the door, you can begin to remove the 5 screws holding it in place. The easiest one to remove is the one at the open end of the door, as shown here:
The other screws are harder to remove because you don't have a good angle to get to them depending on how far you've separated the lower molding panel. Here is how I reached the one closest to the car:
And here's how I was able to get to the middle ones (although, in hindsight, it would have been easier to use the insert from the 4-in-1 screwdriver):
Last edited by e-man; 01-01-07 at 10:36 AM.
 12-30-06, 12:51 PM
#2
Pole Position
Thread Starter
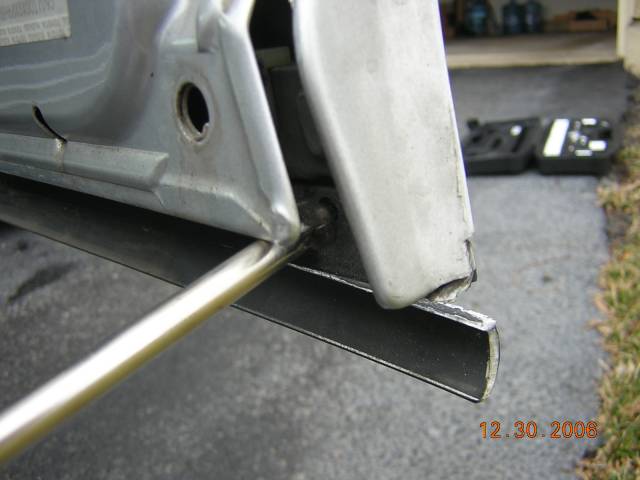
Okay, now that all the screws are off, the lower molding strip is still attached to the car on a groove, so you can't just pull it off by pulling down on it. Instead, all you need to do is close the door and slide it off towards the front of the car. Of course, this is about the time that Mr. Dumb A$$ showed up and decided that it would be better to do it this way (DO NOT DO THIS):
AND DEFINITELY DON'T DO THIS EITHER (look Mom, no socks):
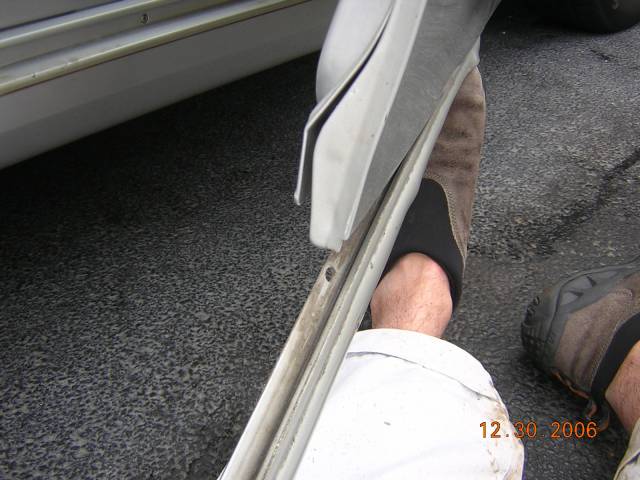
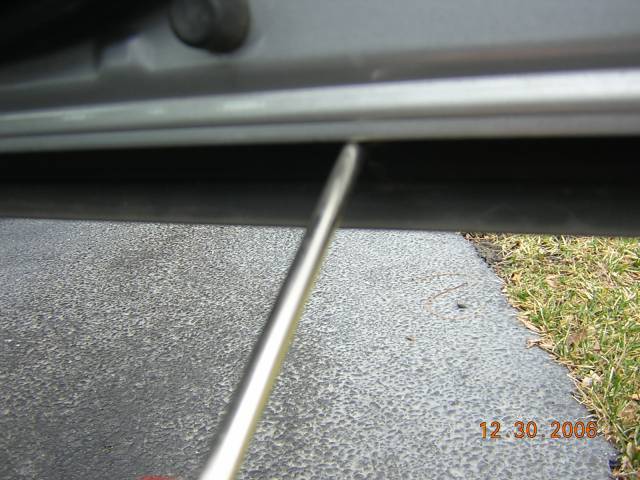
I REPEAT, DO NOT TAKE THE MOLDING STRIP OFF THIS WAY. Just close the door and slide it off towards the front. As you can see in the following picture, there is a barrier at the outside end of the door that prevents you from sliding it off towards the back. There is no such barrier in the front:
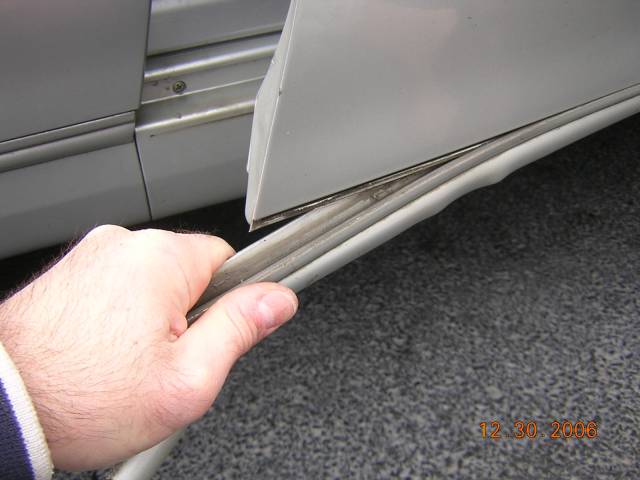
Now that the strip is off the car, just do the above steps in reverse to put the new one on. Remember, slide the new strip on from the front of the car and push it back, like this:

And here is the final result. Uhhh, Houston, we have a problem:

As you can see, the color doesn't quite match (don't worry about the gap between the doors -- I just haven't secured the lower molding panel back in place yet). I kind of knew this was going to be a problem going into this project. Check out the side by side comparison:

I guess 7.5 years/90k+ miles will do that to alpine silver. Here is a final picture from a distance.
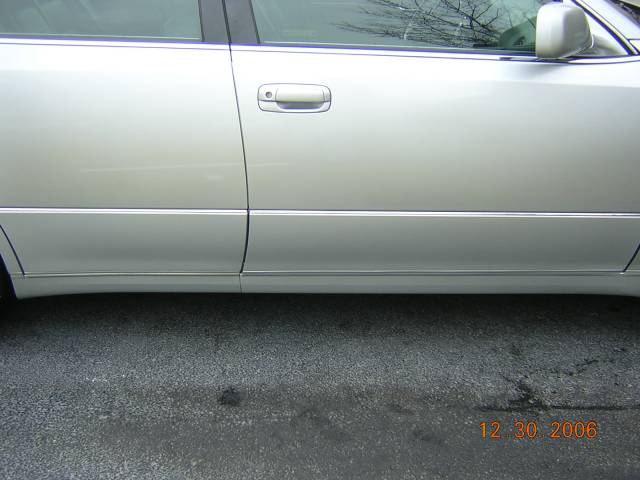
I guess it's not that bad, but chances are I will be ordering 3 more of these things from Sewell Lexus in the not-so-distant future.
Hope this helps. Please feel free to post up any questions.
e
AND DEFINITELY DON'T DO THIS EITHER (look Mom, no socks):
I REPEAT, DO NOT TAKE THE MOLDING STRIP OFF THIS WAY. Just close the door and slide it off towards the front. As you can see in the following picture, there is a barrier at the outside end of the door that prevents you from sliding it off towards the back. There is no such barrier in the front:
Now that the strip is off the car, just do the above steps in reverse to put the new one on. Remember, slide the new strip on from the front of the car and push it back, like this:
And here is the final result. Uhhh, Houston, we have a problem:
As you can see, the color doesn't quite match (don't worry about the gap between the doors -- I just haven't secured the lower molding panel back in place yet). I kind of knew this was going to be a problem going into this project. Check out the side by side comparison:
I guess 7.5 years/90k+ miles will do that to alpine silver. Here is a final picture from a distance.
I guess it's not that bad, but chances are I will be ordering 3 more of these things from Sewell Lexus in the not-so-distant future.
Hope this helps. Please feel free to post up any questions.
e
Last edited by e-man; 12-30-06 at 03:02 PM.

 .What did the Pass. door molding cost?


 time to call darrel.
12-30-06, 03:05 PM
time to call darrel.
12-30-06, 03:05 PM
#7
Pole Position
Thread Starter
Yep. I'll add it to the list of parts I'm ordering for my 90k. Here's the thing, though. In addition to the moldings at the bottom of each door, there are still 4 more small pieces that need to be replaced -- one slightly in front of each front door, and one just behind each rear door. I have no idea how to get those pieces off (assuming they even come off).
Trending Topics
12-30-06, 03:14 PM
#8
Rookie

Join Date: Sep 2004
Location: California
Posts: 55
Likes: 0
Received 0 Likes
on
0 Posts
Yep. I'll add it to the list of parts I'm ordering for my 90k. Here's the thing, though. In addition to the moldings at the bottom of each door, there are still 4 more small pieces that need to be replaced -- one slightly in front of each front door, and one just behind each rear door. I have no idea how to get those pieces off (assuming they even come off).
12-30-06, 03:46 PM
#9
Lexus Fanatic

 12-30-06, 03:56 PM
#10
Pole Position
Thread Starter

 12-31-06, 06:52 PM
#14
Pole Position
Join Date: Oct 2005
Location: IA
Posts: 366
Likes: 0
Received 0 Likes
on
0 Posts


