XenonDepot 4300K HID Kit In 1993 ES300
 02-04-08, 10:03 AM
#1
Lexucanafer
Thread Starter
INSTALLATION OF XENON DEPOT'S (9006/HB4) 4300K XTREME HID CONVERSION KIT
- 1993 LEXUS ES300
***Before starting any work, I disconnected the negative battery terminal.***
The installation of the kit went very well, but took longer than I expected, mostly due to the lack of space under the hood of the car. I needed to premap the route for the kit's cabling harnesses so that they wouldn't come into contact with any belts or potentially hot parts, and locate two points at which I would attach the ground wires. I also needed to remove the car's two headlight assemblies so as to have more room to work. There was just not enough space to maneuver without doing so. I did not need to remove the assemblies completely but removed the three mounting screws on each and pulled the assemblies forward enough so that I could get my hand in behind and fit the new HID bulbs securely into their housings. Once that was done and the headlight assemblies were screwed back into place, the rest of the installation went quite quickly and without any hitches.
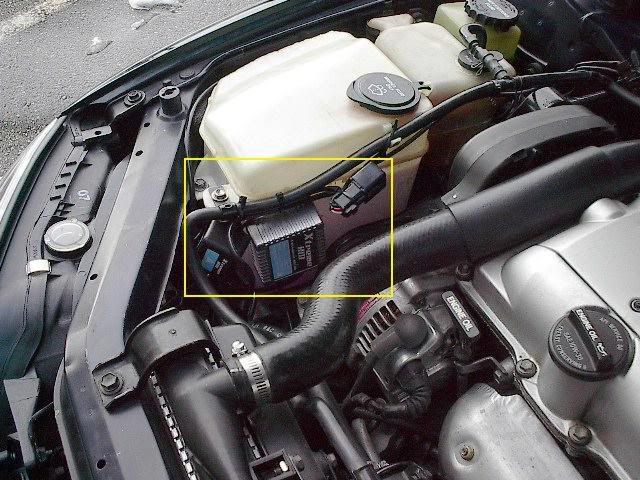
For the right-hand (passenger) side installation: I mounted the ignitor module (zip-tied), relay (zip-tied), and ballast (double-sided foam and zip-tied) next to the windshield washer fluid reservoir (see photo 1).
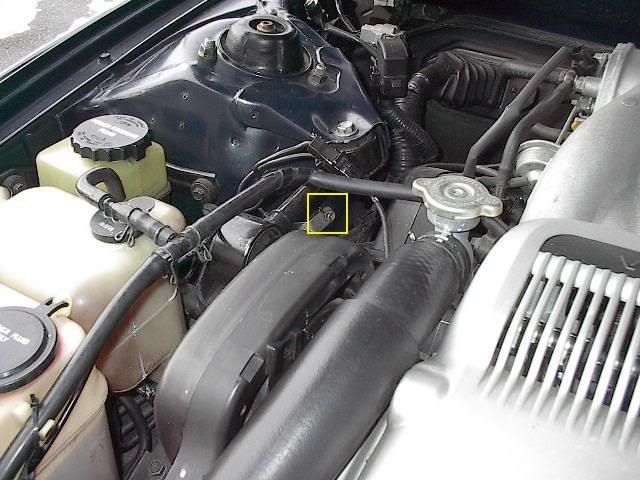
I zip-tied the ground wire for the RH harness along the hose that goes from the coolant expansion reservoir to the radiator. I connected the ground wire ring connector to a hex-head screw which secures a bracket to the inside of the vehicle's engine bay (see photo 2).
The part of the harness cable (with fuse holder) that needs to connect to the car's positive battery terminal, I routed out between the RH headlight assembly and the radiator, across in front of the radiator, and back into the engine bay between the radiator and the LH headlight assembly. I secured this portion of the harness with two zip-ties. There was more than enough cable length left to reach the positive battery terminal.
Photo 1
Ignitor, Ballast, and Relay installation - RH (passenger) side:

- 1993 LEXUS ES300
***Before starting any work, I disconnected the negative battery terminal.***
The installation of the kit went very well, but took longer than I expected, mostly due to the lack of space under the hood of the car. I needed to premap the route for the kit's cabling harnesses so that they wouldn't come into contact with any belts or potentially hot parts, and locate two points at which I would attach the ground wires. I also needed to remove the car's two headlight assemblies so as to have more room to work. There was just not enough space to maneuver without doing so. I did not need to remove the assemblies completely but removed the three mounting screws on each and pulled the assemblies forward enough so that I could get my hand in behind and fit the new HID bulbs securely into their housings. Once that was done and the headlight assemblies were screwed back into place, the rest of the installation went quite quickly and without any hitches.
For the right-hand (passenger) side installation: I mounted the ignitor module (zip-tied), relay (zip-tied), and ballast (double-sided foam and zip-tied) next to the windshield washer fluid reservoir (see photo 1).
I zip-tied the ground wire for the RH harness along the hose that goes from the coolant expansion reservoir to the radiator. I connected the ground wire ring connector to a hex-head screw which secures a bracket to the inside of the vehicle's engine bay (see photo 2).
The part of the harness cable (with fuse holder) that needs to connect to the car's positive battery terminal, I routed out between the RH headlight assembly and the radiator, across in front of the radiator, and back into the engine bay between the radiator and the LH headlight assembly. I secured this portion of the harness with two zip-ties. There was more than enough cable length left to reach the positive battery terminal.
Photo 1
Ignitor, Ballast, and Relay installation - RH (passenger) side:
Photo 2
Ground wire connection point - RH (passenger) side:
Ground wire connection point - RH (passenger) side:
For the left-hand (driver) side installation: I attached the ground wire ring connector to a hex-head screw next to the fuse box and zip-tied the ignitor module to the battery's front bracket (see photo 3). There was lots of extra length of wiring harness on this side so I coiled it up neatly and zip-tied it and then tucked it down into the pocket behind the LH headlight assembly. I did the same with the relay and the ballast. There was no need to physically mount the ballast to anything on this side as there is absolutely nowhere it can go when it's tucked snugly into the small area behind the assembly. Once everything else was neat and tidy and ready to go, I connected the two power cable ring connectors to the positive battery terminal, and reconnected the negative battery terminal. Everything was now ready to test.
Photo 3
Ground wire connection point and Ignitor module installation - LH (driver) side:
Ground wire connection point and Ignitor module installation - LH (driver) side:
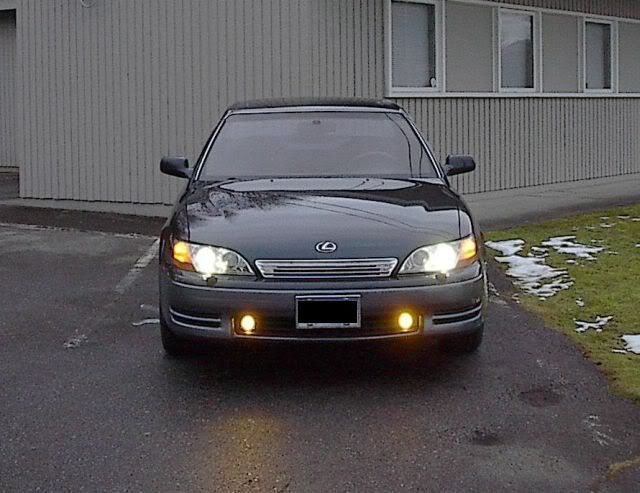
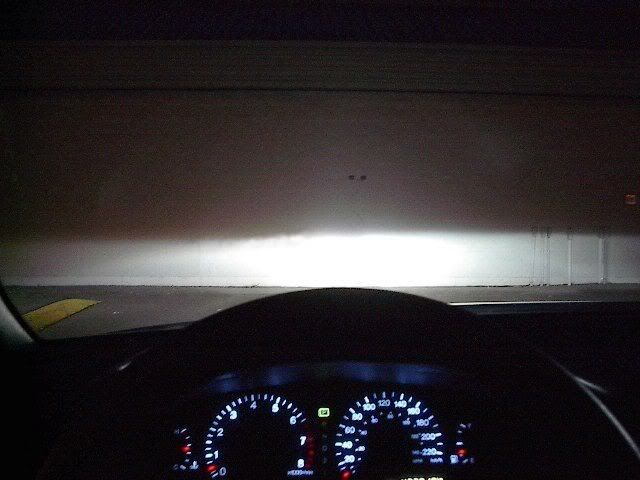
Beam Comparison Photos
Silverstar Ultra Halogen Low Beams:
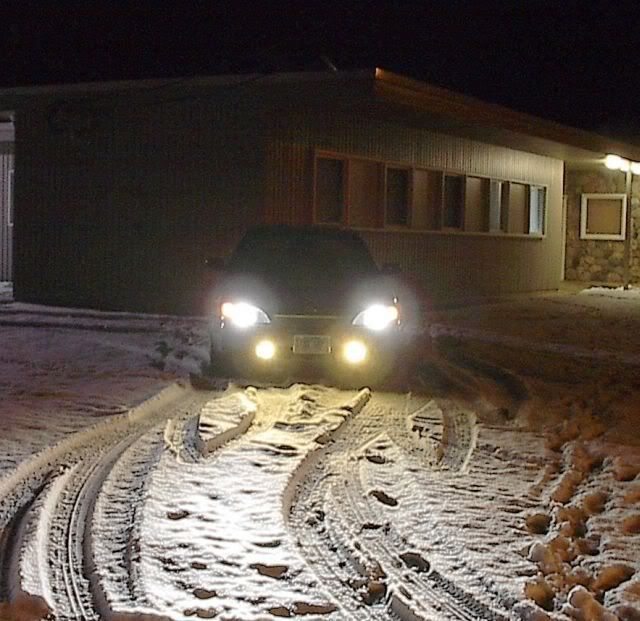
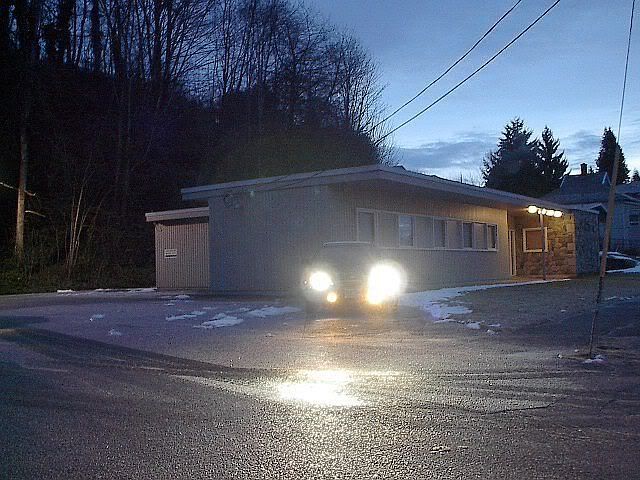
Xenon 4300K Low Beams:
Xenon 4300K Cut-Off:
Note that the right beam is slightly sharper than the left beam. This is due to the brand new headlight assembly recently installed on the right vs. a 15 y.o. headlight assembly on the left. I can live with this as I'm not about to rip the LH assembly apart to clean it or pay major bucks for another new assembly. The outer lens of the LH assembly has been polished and is crystal clear to match the RH side. With the installation of the HIDs, both assemblies provide outstanding night vision.
With regard to the quality of the Xenon Depot kit: I would say it is top-rate. The materials used are of good quality and workmanship, and the kit came with everything needed, including a package of zip-ties, two cut-to-size squares of double-sided foam tape for mounting the ballasts, and a pair of gloves for handling the bulbs (finger prints are a no-no!).
The only thing I would modify in the kit is the shape of the plastic base on the xenon bulbs. The base is round which makes turning the bulb to lock it securely into position in the headlight assembly housing somewhat difficult. I found that because of its shape, I could not get a good grip on the bulb's base to turn it without it slipping between my fingers. It took several minutes to get both bulbs properly locked into position. A squared or hexagonal shaped base (or a right-angled base such as on the halogen bulbs) would make installation of the xenon bulbs easier.
Last edited by Lexucan; 02-26-08 at 06:50 AM.
 02-04-08, 07:13 PM
#2
Lexus Test Driver
Join Date: Apr 2007
Location: FL, O-Town
Posts: 1,005
Likes: 0
Received 0 Likes
on
0 Posts
Looks so clean, so bright, so clear. I'm sold, next project found.
Could you take a picture of your lights from the view of an oncoming driver, just for curiosity?
Could you take a picture of your lights from the view of an oncoming driver, just for curiosity?
02-04-08, 08:02 PM
#3
Lexucanafer
Thread Starter

I'll try to get a better one for you. I've been driving with the HIDs for a couple of days now (mostly after dark) and not a single oncoming vehicle has flashed their lights at me, so I'm convinced that I'm not causing any annoying glare. It's kinda cool to watch the HIDs when I first turn them on. There's a bright flash of blue and then they gradually turn very white with just a hint of blue. Just what I was looking for!


 02-26-08, 06:40 AM
#5

Looks Great! Thank you for taking the time to post.
I think that you meant to write 9006/HB4 in your title though not 9600 =)
Here is the link to the 9006 4300k that Lexucan used:
http://www.kbcarstuff.com/9006_HB4_4...xt-4k-9006.htm
Steve
I think that you meant to write 9006/HB4 in your title though not 9600 =)
Here is the link to the 9006 4300k that Lexucan used:
http://www.kbcarstuff.com/9006_HB4_4...xt-4k-9006.htm
Steve

Thread
Thread Starter
Forum
Replies
Last Post

