How to a achieve a flawless, mirror finish using Meguiar's M105 and a DA polisher
 07-29-10, 06:18 AM
#1
Lexus Test Driver
Thread Starter
Join Date: Nov 2009
Location: FLORIDA
Posts: 953
Likes: 0
Received 0 Likes
on
0 Posts
Finishing with Meguiar’s M105 Ultra Cut Compound
The unique ability of Meguiar’s M105 Ultra Cut Compound to remove scratching and surface defects from paint and leave a remarkably nice finish (while working quickly) has been widely publicized, whether by use with a dual-action (orbital) polisher or with a direct drive rotary polisher. The versatility of this compound isn’t limited to its intended role however: The unique, micro-fine abrasives in M105 are so refined in fact that they are often finer (much) then the fully exhausted abrasives in a traditional diminishing abrasive polish!
This allows M105 to create a truly high gloss, micro scratch free surface that potentially rivals the highest gloss finishes created with other methods and finishing techniques. As an added benefit, the finishing techniques used to achieve that result can save time and help eliminate any chance of unwanted defect return.
Process Overview:
I will be focusing on using M105 with Meguiar’s Softbuff 2.0 pads as well using a dual-action (orbital) polisher. The process I use for finishing M105 consists of taking advantage of Meguiar’s unique abrasives by switching pads (or machines) half way through the process, as explained below. If the entire paint system has already been polished and only light machine marks remain then simply start with the finishing pad.
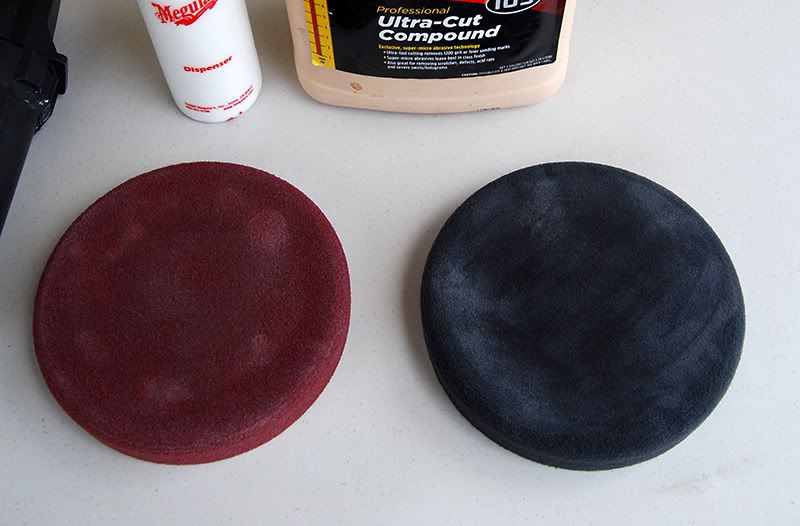
Step One: Select the appropriate polishing and finishing pads. For the sake of simplicity I am going to use both Meguiar’s Softbuff 2.0 Foam Cutting pad as well as their Softbuff 2.0 Foam Finishing pad. When polishing with a dual-action polisher, I still prefer the more aggressive action from a smaller pad.
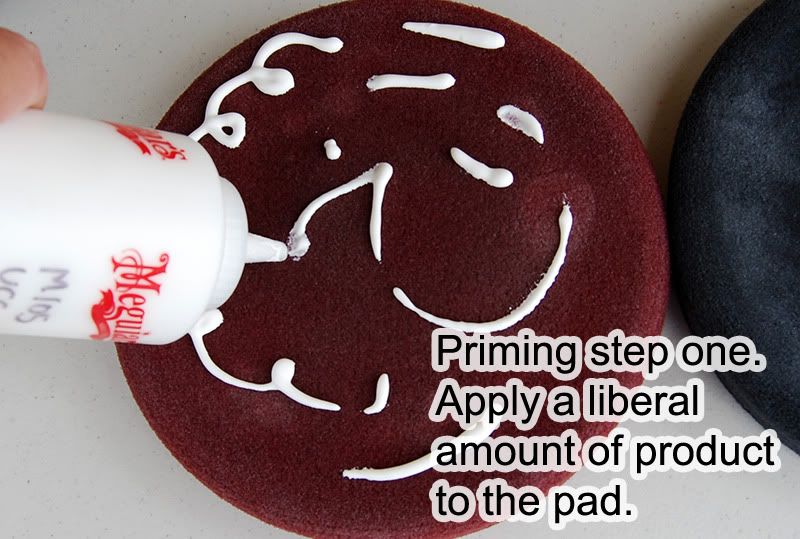
Step Two: Prime each pad with the M105 buffing liquid. This is particularly important for two reasons.
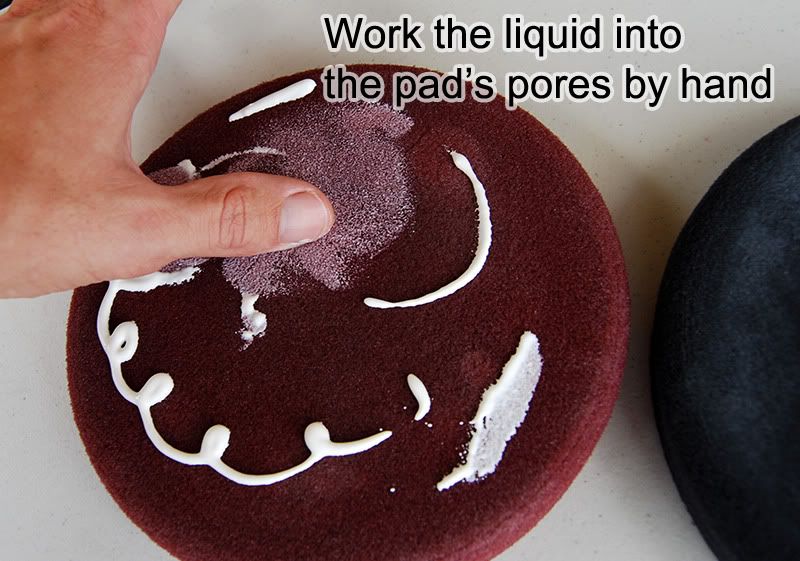
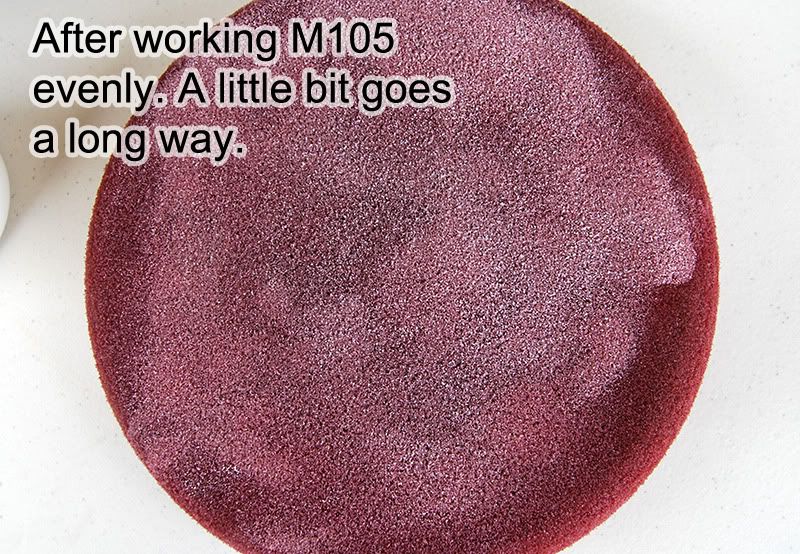
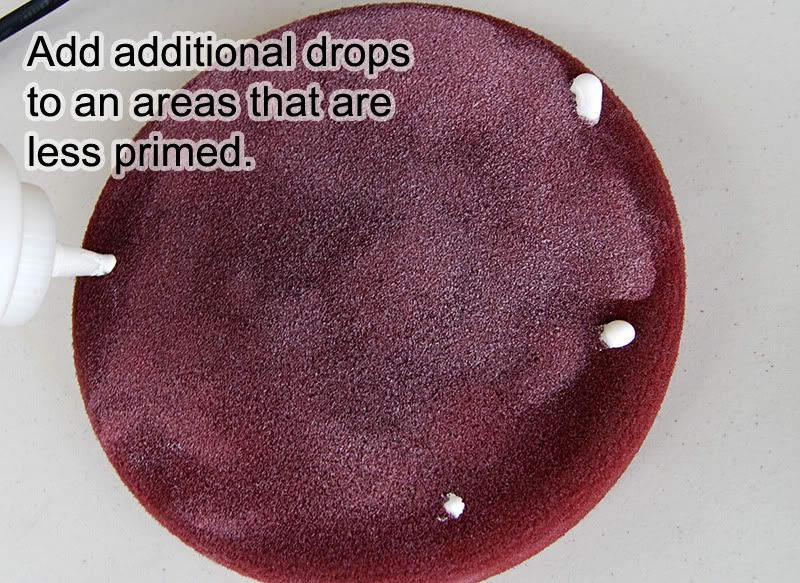
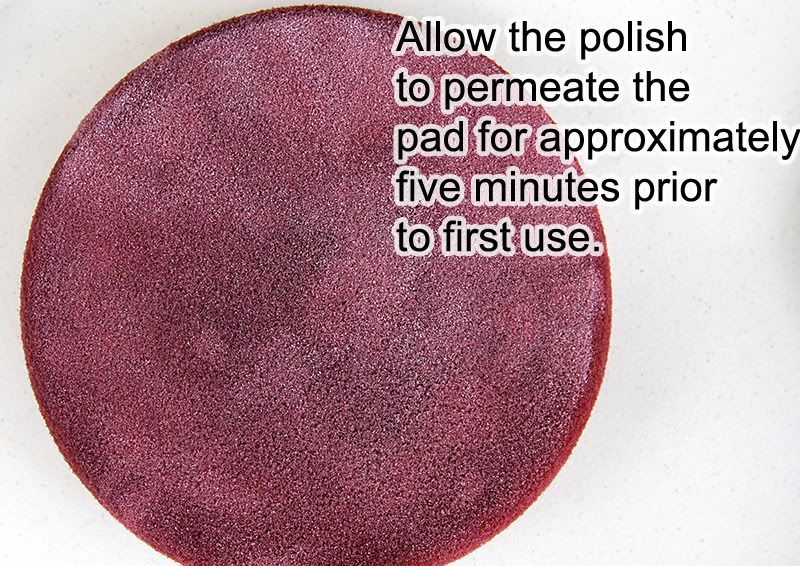
How to prime: Squirt a liberal (but not excessive) amount of product over the pad and immediately begin to work it with your fingers. The goal is coat the face of the pad with product evenly. Allow the polish to permeate the pad for several minutes then remove the excess polish by running the machine and pressing a towel into or using compressed air.
Why is priming important?
For two reasons:
1) When working with non-diminishing abrasives our cutting power limited to how many abrasives can contact the paint at one time (effective surface area). If only two of these fine abrasives are working at a given time we are losing a lot of potential cutting area vs. if two hundred thousand of these fine abrasives are working in unison
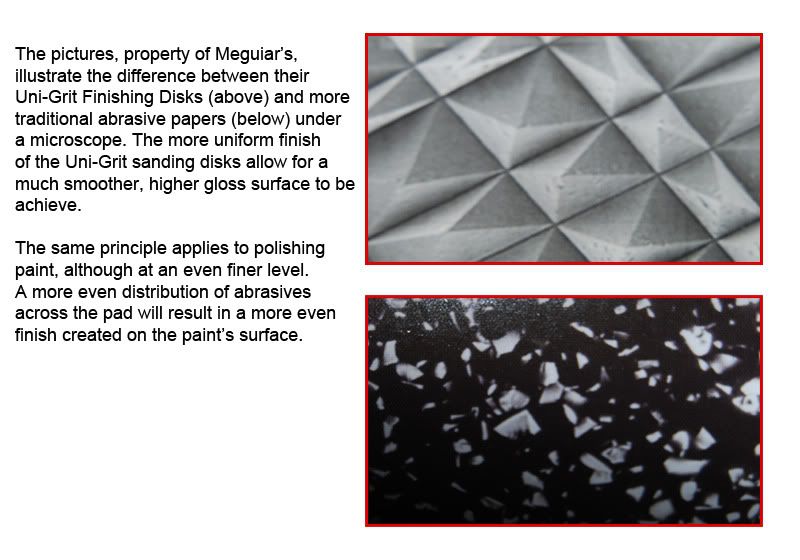
2) Perhaps more importantly for this write up, you want the most microscopically uniform surface available. If you have ever used Meguiar’s Uni-Grit sand paper vs. more traditional abrasive papers would will immediately understand. A more uniform polishing surface creates a more uniform (microscopically level) polished surface. The picture below (from Meguiar’s) illustrates the difference between traditional sanding papers and Meguiar’s Unigrit sanding disks. It is easy to see which will create a higher gloss surface at the microscopic level.
By priming the finishing pad adequately you create a more uniform finishing surface which translates into a higher gloss, micro swirl free finish.
Step Three: Use M105 and a DA in combination with a primed polishing/cutting pad to remove surface defects:
Work a small section, between 2’ x 2’ and 3’ x 3‘, depending on your goals, the contours of the body panel, and size of your polishing pad. If the paint requires more correction consider shrinking the working section to allow more focused polishing.
A lot has been written about various techniques and methods for defect removal with Meguiar’s M105 and a dual-action (orbital) polisher so I will offer the following guidelines.
Use enough downward pressure on the head of the machine to engage the pad evenly across the body panel and ensure that the orbital machine is transferred through the pad, to the paint’s surface. Larger and taller pads will require more pressure then a smaller, shorter pad because there is more area absorbing the motion. (Similar to a bowl of Jell-O giggling on itself).
Keep your arm speed constant through out the process and don‘t rush. Two inches per second is a great guideline to get started, but like pressure, this is going to be highly dependant on user preference. A little experimentation will so dial you in.
M105 is unique in the fact that it will continue to polish well, even when a product film is no longer present on the paint. However you should check the pad by touch to ensure it is still damp, and inspect the paint by sight to make sure you are still removing defects. If the pad becomes dry to the touch, or you notice that the either the finish quality is degrading or it is no longer effectively removing defects, add more M105. Once the pad is primed you do not need to add at lot. A couple of drops, smear it in with your thumb, and off you go.
Clean your cutting pad frequently, after each section if possible. You can use a brush or towel pressed into the pad (while the machine is running slowly) or compressed air if possible.
Why clean your pad frequently?
The main draw back in achieving a great finish from M105 is not from the polish but from the paint! Abraded paint (polished off the surface) will contaminate the solution and cause the ultra-fine abrasives in M105 to clump to together, creating an uneven polishing surface and degrading the quality of finish achieved. While this is not as important in the polishing/cutting stage as it would be in the finishing stage, I still like to bring the surface to the highest quality possible in each stage. This possibly reduces the work needed on subsequent steps (this is true for all faucets of detailing).
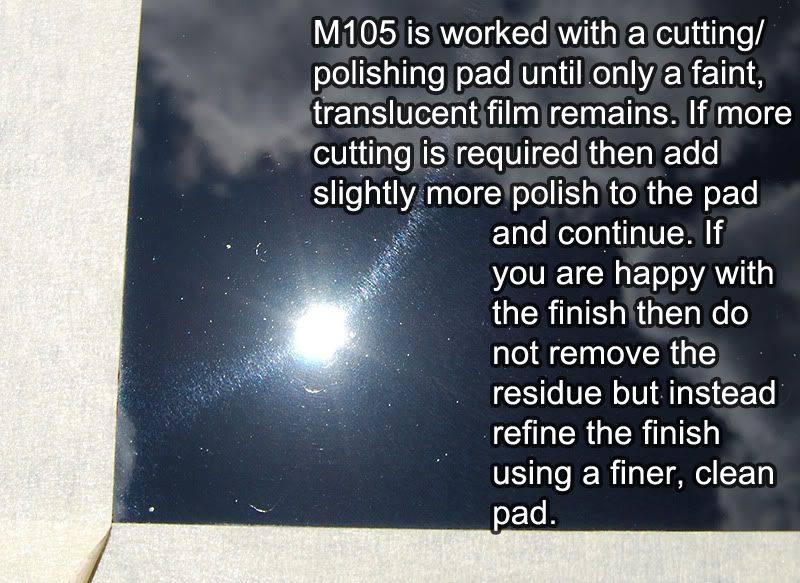
Step Four: Do not remove the residue from the paint when you are doing removing defects from the section unless there is excessive dried residue.
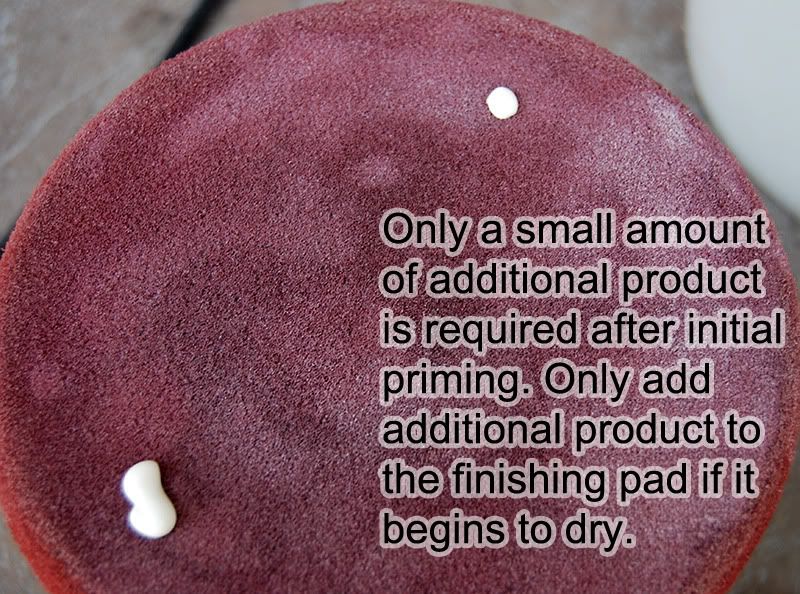
Step Five: Remove any micro marring and achieve a very high gloss finish with M105 in conjunction with a primed and clean finishing pad and a dual action (orbital) polisher. Only add more product to the finishing pad if it becomes dry, and only then a very small amount. However do keep the finishing pad clean! Buff right over the existing residue on the paint.
Because constantly swapping pads isn’t always fun it helps if you have two random orbital polishers. Alternatively you can polish a few sections before switching finishing. Just use common sense and don’t allow the polish to dry on the paint by waiting too long, such as on a very hot day.
Traditional finishing techniques on a dual action (orbital) polisher don’t lend themselves too well to finishing with M105, nor with final polishing in general, in my opinion. This would include reducing pressure and allowing the pad to rotate quickly over the paint.
Don’t reduce pressure and encourage a higher rotational pad speed to ‘jewel’ the paint with a DA and M105. In fact this can cause some unwanted side effects.
Reducing pressure will reduce the orbital motion transferred to the polishing surface from the machine, as the pad will absorb it. We want enough pressure to take up any slack in the pad.
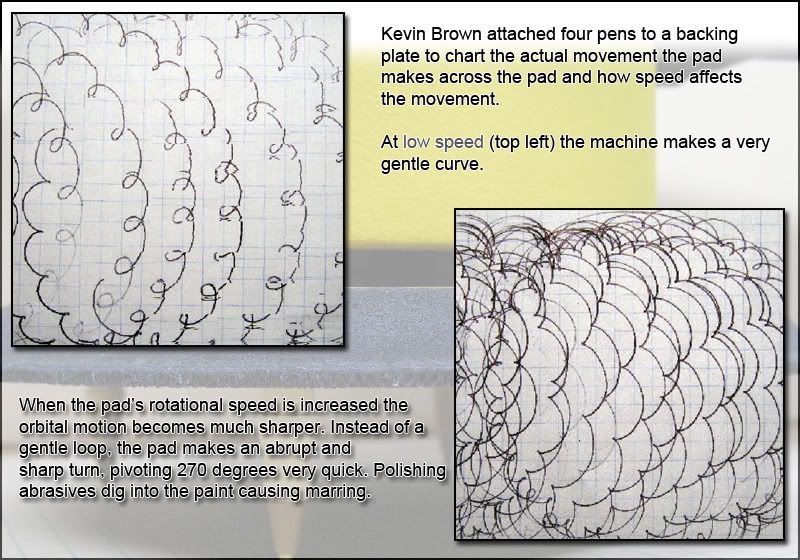
Secondly, when you reduce pressure you will increase the pad’s rotational speed. As the diagram below illustrates, a higher rotational speed in conjunction with the pushing and pulling action for the orbits will cause the pad’s actions to become more abrupt. Instead of a gentle curly-que you will have a more jagged V shape, similar to digging your heal in the ground and pivoting 270 degrees; only in the case of polishing paint it is an abrasive grain that has attached itself to the polishing pad and is being ground into the paint.
The difference in patterns between slow pad speed (top) and a higher rate of rotation (bottom).
Lastly, reducing pressure causes the pad to engage the apint unevenly. As the pad is forced in different directions by the quick, short orbital action and the long sweeping rotational action, different areas of the polishing surface are subjected to different amounts of pressure and cutting action. To create a high gloss, micro scratch free surface you need make the paint as even and as smooth as microscopically possible. Reducing pressure and encouraging more pad rotation is similar to wet sanding paint with your finger tips instead of using a foam block. A sanding block will engage all of the abrasive grains evenly and allow for a more uniform finish. Sanding with your finger tips will cause gouging and a very uneven surface.
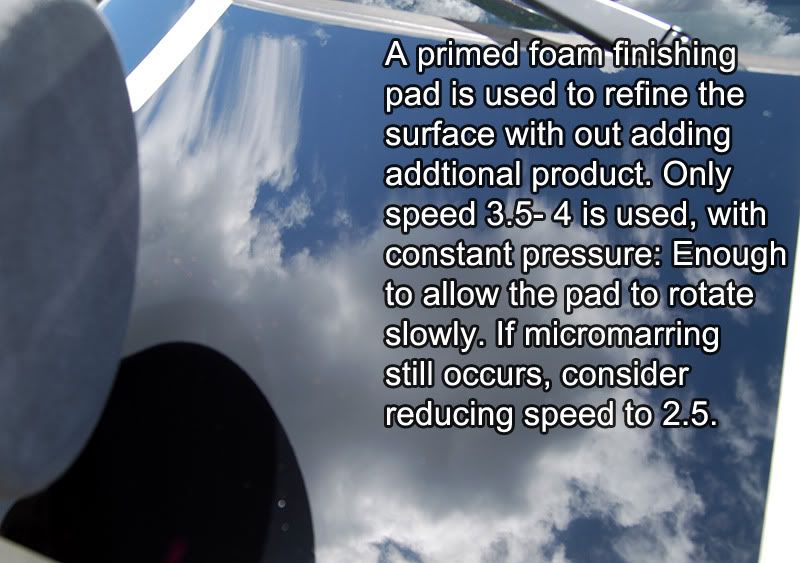
Instead of reducing pressure, keep your pressure constant (enough to encourage the pad to evenly conform to the paint’s surface and body contours as well as transfer the orbital motion of the machine to the paint) but reduce speed!
Final polish on speed 3.5-4 using firm (not excessive pressure). Make two to three smooth passes over the area, over lapping each pass slightly, then remove. Continuing to make passes over the area will not increase the finish, but may contaminate the polish reducing the finish.
Wipe off the residue with a soft towel and move on.
Process in pictures:
Prime pads as illustrated in pictures above.


Cliff Notes:
1) Wash and prep vehicle as needed
2) Prime pads as needed. Always prime a pad prior to its first use.
3) Polish a small section, 2x2 or 3x3 using an aggressive pad appropriate for the level of defect removal.
4) Using the primed and clean finishing pad, polish over the remaining residue with out adding additional product (unless the pad is dry). Use slow arm movement, speed 3.5-4, and just enough pressure to engage the foam. Wipe off.
Common Questions and answers.
Yes. Polish the car as normal but make sure to remove the residue from the paint, like you normally would. Then prime a finishing pad and begin to finish using the guidelines above. The main difference is that you will need to add a small amount of additional product to the pad before each new working area. Make sure to clean you finishing pad often and switch to a clean (but primed) pad when you are no longer achieving the quality of finish.
Do I have to finish polish right after polishing each working section?
No. I would break the hood of my HHR into 4 or 5 polishing sections, and would complete most of those before coming back and final polishing the entire half of the hood. Of course dynamic conditions will effect how well this works. You don’t want to the residue to dry on the surface before final polishing over it.
I tried this technique but am not getting the quality of finish I am used to with other polishes and methods.
Don’t give up yet (if you don’t want to)! Sometimes it takes a little refinement to certain techniques to get the finish and some paint’s simply don’t respond well to certain techniques or products.
How long should it take me to final polish an area, say half of the hood of your HHR?
If you read the run-on sentence slowly and carefully it should take you about the same time as final polishing an area as large as half of the hood as it does to read this because it only takes two to three passes over the areas with light pressure, enough to engage the foam, using speed three point five to four to avoid any jagged edges, because the abrasives do not break down and are already refining the surface from the instant the machine is turned on. Or about 30 seconds.
This write-up is from our Master Detailer Todd Helme.
Enjoy everyone!
The unique ability of Meguiar’s M105 Ultra Cut Compound to remove scratching and surface defects from paint and leave a remarkably nice finish (while working quickly) has been widely publicized, whether by use with a dual-action (orbital) polisher or with a direct drive rotary polisher. The versatility of this compound isn’t limited to its intended role however: The unique, micro-fine abrasives in M105 are so refined in fact that they are often finer (much) then the fully exhausted abrasives in a traditional diminishing abrasive polish!
This allows M105 to create a truly high gloss, micro scratch free surface that potentially rivals the highest gloss finishes created with other methods and finishing techniques. As an added benefit, the finishing techniques used to achieve that result can save time and help eliminate any chance of unwanted defect return.
Process Overview:
I will be focusing on using M105 with Meguiar’s Softbuff 2.0 pads as well using a dual-action (orbital) polisher. The process I use for finishing M105 consists of taking advantage of Meguiar’s unique abrasives by switching pads (or machines) half way through the process, as explained below. If the entire paint system has already been polished and only light machine marks remain then simply start with the finishing pad.
Step One: Select the appropriate polishing and finishing pads. For the sake of simplicity I am going to use both Meguiar’s Softbuff 2.0 Foam Cutting pad as well as their Softbuff 2.0 Foam Finishing pad. When polishing with a dual-action polisher, I still prefer the more aggressive action from a smaller pad.
Step Two: Prime each pad with the M105 buffing liquid. This is particularly important for two reasons.
How to prime: Squirt a liberal (but not excessive) amount of product over the pad and immediately begin to work it with your fingers. The goal is coat the face of the pad with product evenly. Allow the polish to permeate the pad for several minutes then remove the excess polish by running the machine and pressing a towel into or using compressed air.
Why is priming important?
For two reasons:
1) When working with non-diminishing abrasives our cutting power limited to how many abrasives can contact the paint at one time (effective surface area). If only two of these fine abrasives are working at a given time we are losing a lot of potential cutting area vs. if two hundred thousand of these fine abrasives are working in unison
2) Perhaps more importantly for this write up, you want the most microscopically uniform surface available. If you have ever used Meguiar’s Uni-Grit sand paper vs. more traditional abrasive papers would will immediately understand. A more uniform polishing surface creates a more uniform (microscopically level) polished surface. The picture below (from Meguiar’s) illustrates the difference between traditional sanding papers and Meguiar’s Unigrit sanding disks. It is easy to see which will create a higher gloss surface at the microscopic level.
By priming the finishing pad adequately you create a more uniform finishing surface which translates into a higher gloss, micro swirl free finish.
Step Three: Use M105 and a DA in combination with a primed polishing/cutting pad to remove surface defects:
Work a small section, between 2’ x 2’ and 3’ x 3‘, depending on your goals, the contours of the body panel, and size of your polishing pad. If the paint requires more correction consider shrinking the working section to allow more focused polishing.
A lot has been written about various techniques and methods for defect removal with Meguiar’s M105 and a dual-action (orbital) polisher so I will offer the following guidelines.
Use enough downward pressure on the head of the machine to engage the pad evenly across the body panel and ensure that the orbital machine is transferred through the pad, to the paint’s surface. Larger and taller pads will require more pressure then a smaller, shorter pad because there is more area absorbing the motion. (Similar to a bowl of Jell-O giggling on itself).
Keep your arm speed constant through out the process and don‘t rush. Two inches per second is a great guideline to get started, but like pressure, this is going to be highly dependant on user preference. A little experimentation will so dial you in.
M105 is unique in the fact that it will continue to polish well, even when a product film is no longer present on the paint. However you should check the pad by touch to ensure it is still damp, and inspect the paint by sight to make sure you are still removing defects. If the pad becomes dry to the touch, or you notice that the either the finish quality is degrading or it is no longer effectively removing defects, add more M105. Once the pad is primed you do not need to add at lot. A couple of drops, smear it in with your thumb, and off you go.
Clean your cutting pad frequently, after each section if possible. You can use a brush or towel pressed into the pad (while the machine is running slowly) or compressed air if possible.
Why clean your pad frequently?
The main draw back in achieving a great finish from M105 is not from the polish but from the paint! Abraded paint (polished off the surface) will contaminate the solution and cause the ultra-fine abrasives in M105 to clump to together, creating an uneven polishing surface and degrading the quality of finish achieved. While this is not as important in the polishing/cutting stage as it would be in the finishing stage, I still like to bring the surface to the highest quality possible in each stage. This possibly reduces the work needed on subsequent steps (this is true for all faucets of detailing).
Step Four: Do not remove the residue from the paint when you are doing removing defects from the section unless there is excessive dried residue.
Step Five: Remove any micro marring and achieve a very high gloss finish with M105 in conjunction with a primed and clean finishing pad and a dual action (orbital) polisher. Only add more product to the finishing pad if it becomes dry, and only then a very small amount. However do keep the finishing pad clean! Buff right over the existing residue on the paint.
Because constantly swapping pads isn’t always fun it helps if you have two random orbital polishers. Alternatively you can polish a few sections before switching finishing. Just use common sense and don’t allow the polish to dry on the paint by waiting too long, such as on a very hot day.
Traditional finishing techniques on a dual action (orbital) polisher don’t lend themselves too well to finishing with M105, nor with final polishing in general, in my opinion. This would include reducing pressure and allowing the pad to rotate quickly over the paint.
Don’t reduce pressure and encourage a higher rotational pad speed to ‘jewel’ the paint with a DA and M105. In fact this can cause some unwanted side effects.
Reducing pressure will reduce the orbital motion transferred to the polishing surface from the machine, as the pad will absorb it. We want enough pressure to take up any slack in the pad.
Secondly, when you reduce pressure you will increase the pad’s rotational speed. As the diagram below illustrates, a higher rotational speed in conjunction with the pushing and pulling action for the orbits will cause the pad’s actions to become more abrupt. Instead of a gentle curly-que you will have a more jagged V shape, similar to digging your heal in the ground and pivoting 270 degrees; only in the case of polishing paint it is an abrasive grain that has attached itself to the polishing pad and is being ground into the paint.
The difference in patterns between slow pad speed (top) and a higher rate of rotation (bottom).
Lastly, reducing pressure causes the pad to engage the apint unevenly. As the pad is forced in different directions by the quick, short orbital action and the long sweeping rotational action, different areas of the polishing surface are subjected to different amounts of pressure and cutting action. To create a high gloss, micro scratch free surface you need make the paint as even and as smooth as microscopically possible. Reducing pressure and encouraging more pad rotation is similar to wet sanding paint with your finger tips instead of using a foam block. A sanding block will engage all of the abrasive grains evenly and allow for a more uniform finish. Sanding with your finger tips will cause gouging and a very uneven surface.
Instead of reducing pressure, keep your pressure constant (enough to encourage the pad to evenly conform to the paint’s surface and body contours as well as transfer the orbital motion of the machine to the paint) but reduce speed!
Final polish on speed 3.5-4 using firm (not excessive pressure). Make two to three smooth passes over the area, over lapping each pass slightly, then remove. Continuing to make passes over the area will not increase the finish, but may contaminate the polish reducing the finish.
Wipe off the residue with a soft towel and move on.
Process in pictures:
Prime pads as illustrated in pictures above.
Cliff Notes:
1) Wash and prep vehicle as needed
2) Prime pads as needed. Always prime a pad prior to its first use.
3) Polish a small section, 2x2 or 3x3 using an aggressive pad appropriate for the level of defect removal.
4) Using the primed and clean finishing pad, polish over the remaining residue with out adding additional product (unless the pad is dry). Use slow arm movement, speed 3.5-4, and just enough pressure to engage the foam. Wipe off.
Common Questions and answers.
I don’t have two machines and it seems like a pain to switch pads frequently, can I polish the entire car with M105 then come back and finish with a softer pad?
Yes. Polish the car as normal but make sure to remove the residue from the paint, like you normally would. Then prime a finishing pad and begin to finish using the guidelines above. The main difference is that you will need to add a small amount of additional product to the pad before each new working area. Make sure to clean you finishing pad often and switch to a clean (but primed) pad when you are no longer achieving the quality of finish.
Do I have to finish polish right after polishing each working section?
No. I would break the hood of my HHR into 4 or 5 polishing sections, and would complete most of those before coming back and final polishing the entire half of the hood. Of course dynamic conditions will effect how well this works. You don’t want to the residue to dry on the surface before final polishing over it.
I tried this technique but am not getting the quality of finish I am used to with other polishes and methods.
Don’t give up yet (if you don’t want to)! Sometimes it takes a little refinement to certain techniques to get the finish and some paint’s simply don’t respond well to certain techniques or products.
How long should it take me to final polish an area, say half of the hood of your HHR?
If you read the run-on sentence slowly and carefully it should take you about the same time as final polishing an area as large as half of the hood as it does to read this because it only takes two to three passes over the areas with light pressure, enough to engage the foam, using speed three point five to four to avoid any jagged edges, because the abrasives do not break down and are already refining the surface from the instant the machine is turned on. Or about 30 seconds.
This write-up is from our Master Detailer Todd Helme.
Enjoy everyone!


 01-28-11, 07:45 PM
#6

I love the M105/M205 Combo.
I've been using a Lake County 6.5" pad cause I've got some nasty spots that need correcting?
I also use a 5.5" Orange Cobra Cross Groove pad, I seem to like this one most but need the cutting power of the yellow.
What pad/brand do you reccomend??
I've been using a Lake County 6.5" pad cause I've got some nasty spots that need correcting?
I also use a 5.5" Orange Cobra Cross Groove pad, I seem to like this one most but need the cutting power of the yellow.
What pad/brand do you reccomend??
Last edited by RDAVILA702; 01-28-11 at 07:53 PM.
Trending Topics
 01-31-11, 05:13 AM
#10
Lexus Test Driver
Thread Starter
Join Date: Nov 2009
Location: FLORIDA
Posts: 953
Likes: 0
Received 0 Likes
on
0 Posts
Not hard at all TL, it's just common sense and a little practice would do it for you and anyone else who wants to work on their car. The only way to mess up is keeping the machine in one spot and to forget to moved it or buffing with a dry pad. Let me know what you want to do by calling me at PAC.............Angelo
01-31-11, 04:38 PM
#11
Driver School Candidate

Join Date: Jan 2011
Location: MO
Posts: 2
Likes: 0
Received 0 Likes
on
0 Posts
That looks good!!! I still would use something like the Meguiar's M205 Ultrafine Polish over it because I've personally never seen Compound leave a completely 100% swirl free finish but that's just me. I don't normally use the Meguiar's Mirror glaze product line, we have the complete system at the shop but we also have the 3M perfect it system that I use. Of course they probably are the same products for the most part since 3M bought out Meguiars not that long ago lol.
And that Uni-grit paper is good stuff. With the 3000 wet you can literally work compound in by hand with little effort and get the sanding scratches completely out.
But keep up the good work man
And that Uni-grit paper is good stuff. With the 3000 wet you can literally work compound in by hand with little effort and get the sanding scratches completely out.
But keep up the good work man
Last edited by fast02max; 01-31-11 at 04:44 PM.
02-01-11, 06:37 AM
#12
Lexus Test Driver
Thread Starter
Join Date: Nov 2009
Location: FLORIDA
Posts: 953
Likes: 0
Received 0 Likes
on
0 Posts
Ans for some members looking to get more supplies for their car care, take a look at our site. : http://www.properautocare.com/index.html
http://www.properautocare.com/productlines.html
http://www.properautocare.com/productlines.html
02-02-11, 06:47 AM
#13
Former Sponsor

Join Date: Nov 2009
Location: FL
Posts: 209
Likes: 0
Received 0 Likes
on
0 Posts
That looks good!!! I still would use something like the Meguiar's M205 Ultrafine Polish over it because I've personally never seen Compound leave a completely 100% swirl free finish but that's just me. I don't normally use the Meguiar's Mirror glaze product line, we have the complete system at the shop but we also have the 3M perfect it system that I use. Of course they probably are the same products for the most part since 3M bought out Meguiars not that long ago lol.
And that Uni-grit paper is good stuff. With the 3000 wet you can literally work compound in by hand with little effort and get the sanding scratches completely out.
But keep up the good work man
And that Uni-grit paper is good stuff. With the 3000 wet you can literally work compound in by hand with little effort and get the sanding scratches completely out.
But keep up the good work man
Meguiar's is owned by the 3M, but there is very little cross over in terms of the professional compounds and polishes. The newest Mirror Glaze polishes (M95, M105, M205) as well as the consumer (SwirlX, Ultimate Compound, ScratchX2.0) and Detailer's line (D151, M86 Solo, D300 DA compound) utilize a unique abrasive that is never breaks down, also known as a non-diminishing abrasive.
Ultimately the finish we get on the car is going to be some formula of the final abrasive size and the cutting action of the pad. On a traditional polish, the abrasive grain starts out aggressive (large/sharp) and over time is broken apart. When it is fully broken apart it is known as the primary crystal, the abrasive cannot get any finer. Remember aluminum oxide is MUCH MUCH harder than paint and little crystals of oxide are 'glued' together (like a grape bunch) to form traditional abrasives that break down. With M105 you are starting with the primary crystal, that is the abrasive is SUPER SUPER SUPER SUPER fine to begin with, as fine as any finishing polish that is broken down.
That is why M105 has a dual personality. There is a lot of abrasives in the product (even though they are ultra fine) so the liquid has the potential to cut aggressively, however because the abrasives are so fine, the 'compound' has the ability to produce an extremely high gloss surface with an ultra refined scratch pattern.
Even though the abrasives are ultrafine, there is a lot of them (compared to a finishing polish) you you are still removing material at a good clip. This can cause the abrasives to become glued together by the removed paint, which is why you get swirl markes with this product. If you keep the pad clean of abraded material it is possible to produce a swirl free finish on most paints, although it might not always be the easiest route.
I also agree that using a polish that is designed to finish is often a better bet, but it is fun to play outside the box and see what you can do.
02-04-11, 01:50 PM
#14
Lexus Test Driver
Thread Starter
Join Date: Nov 2009
Location: FLORIDA
Posts: 953
Likes: 0
Received 0 Likes
on
0 Posts
Anyone looking a Kit, take a look at this link I provided for you:
http://classic-motoring.stores.yahoo...lmeguiars.html
http://classic-motoring.stores.yahoo...lmeguiars.html
02-05-11, 08:15 AM
#15

I'm a little confused on removing the residue when using M105. In one section you state not to remove it but in another section you said to remove it. I removed all residue from the car when using M105 the last time I polished my car before applying the M205.