
Ferrari 458 Italia: Full wet sand and detail in South Florida


 02-02-11, 06:54 AM
#2
Former Sponsor
Thread Starter

Join Date: Nov 2009
Location: FL
Posts: 209
Likes: 0
Received 0 Likes
on
0 Posts
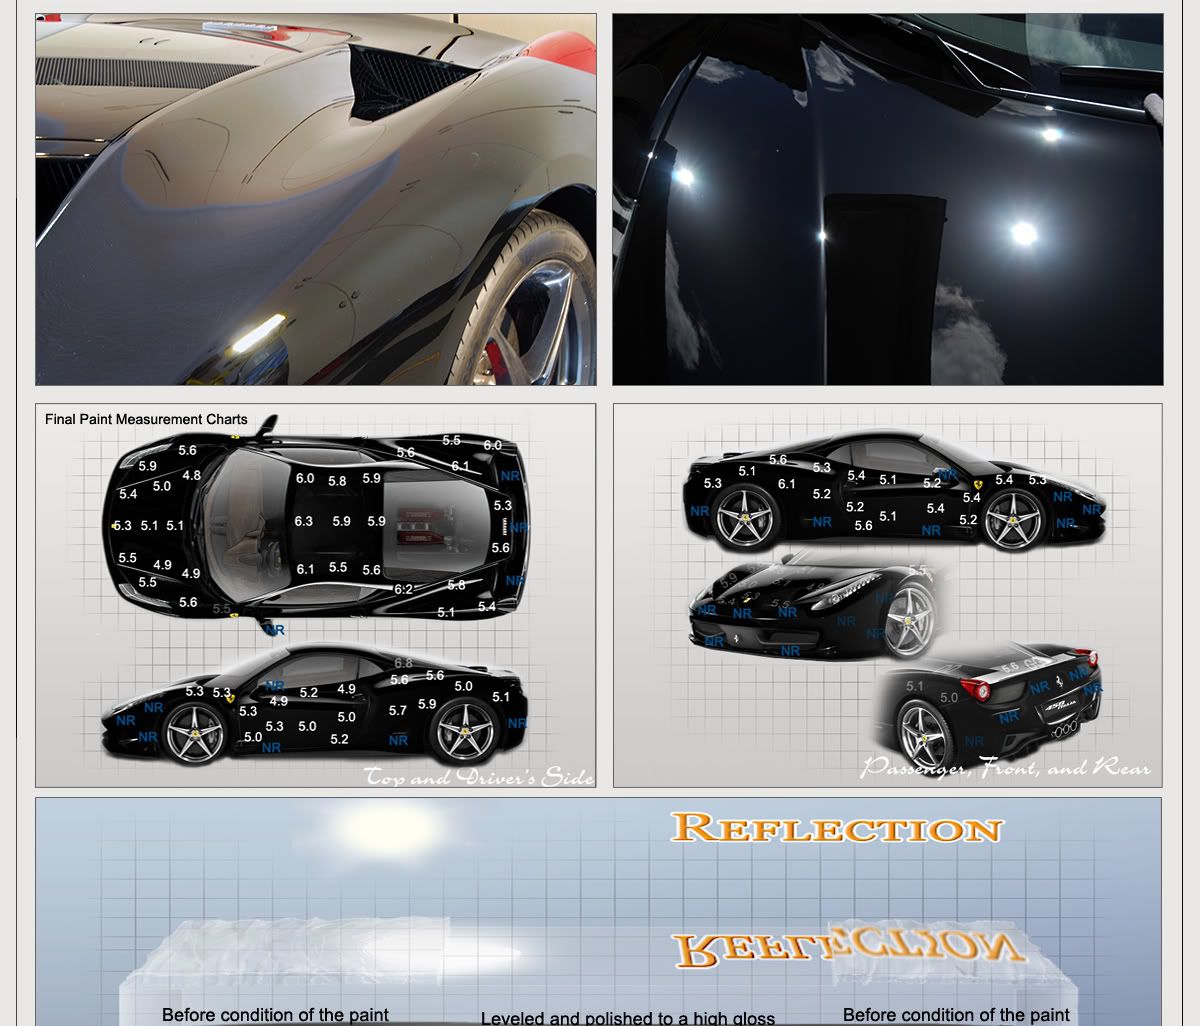

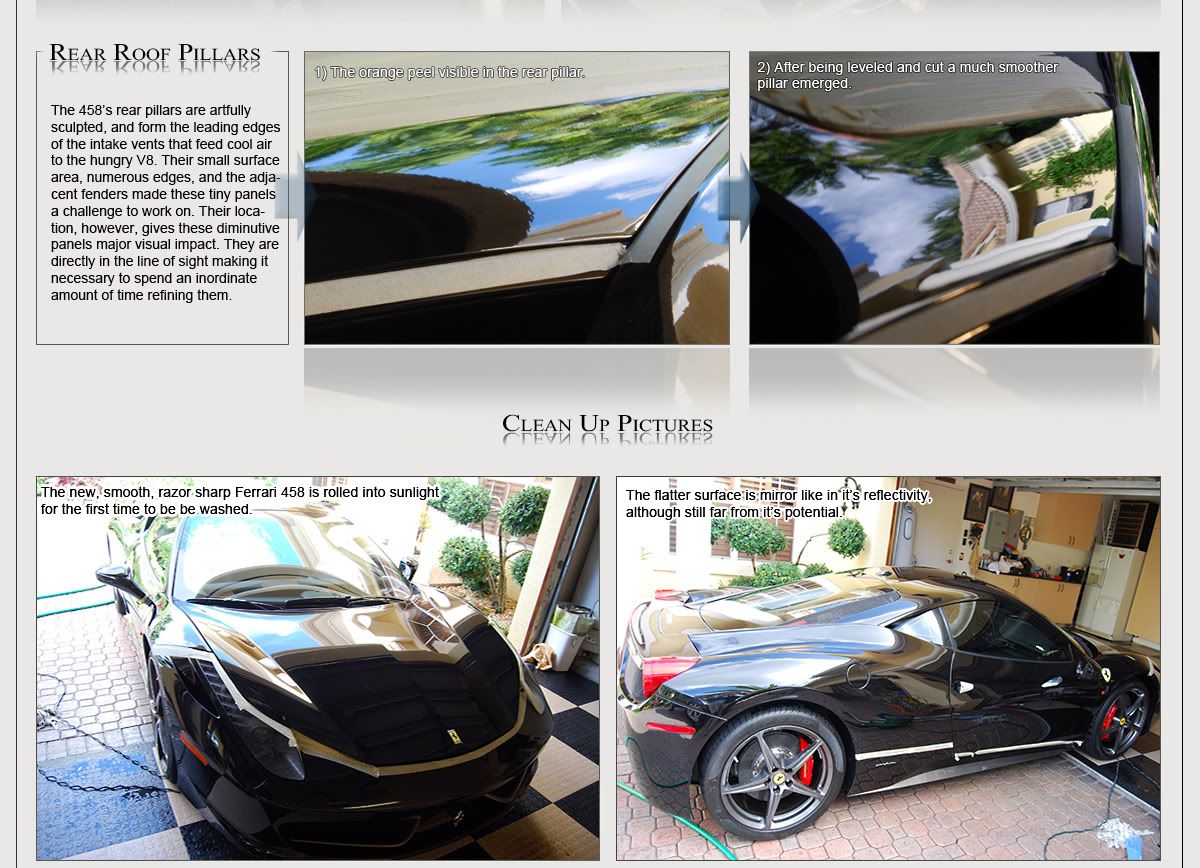
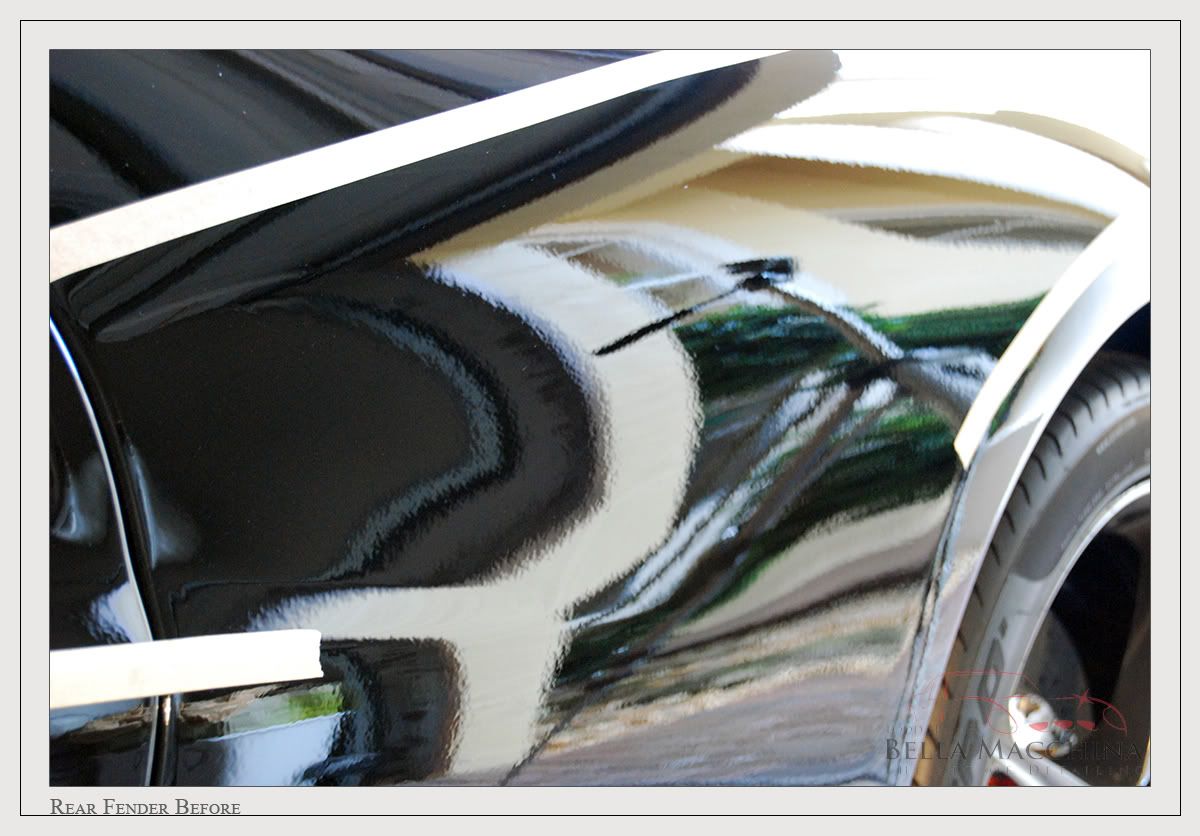
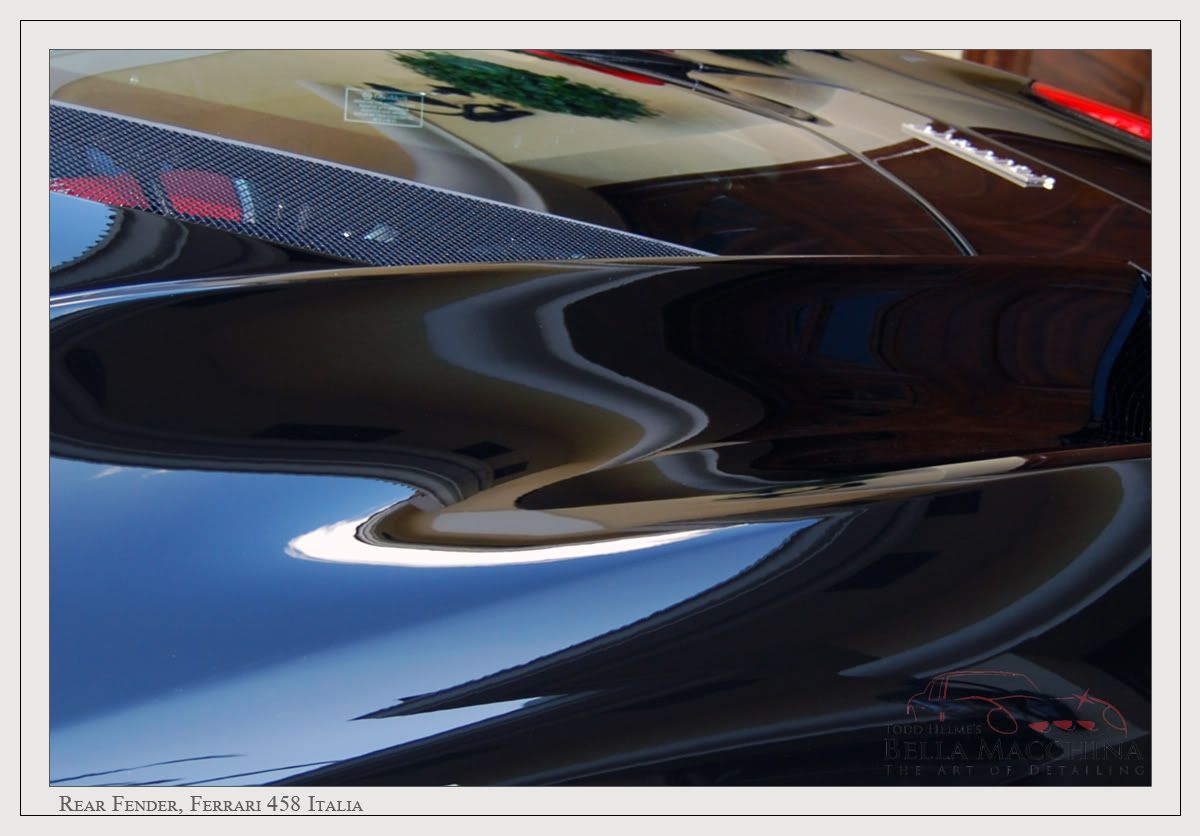
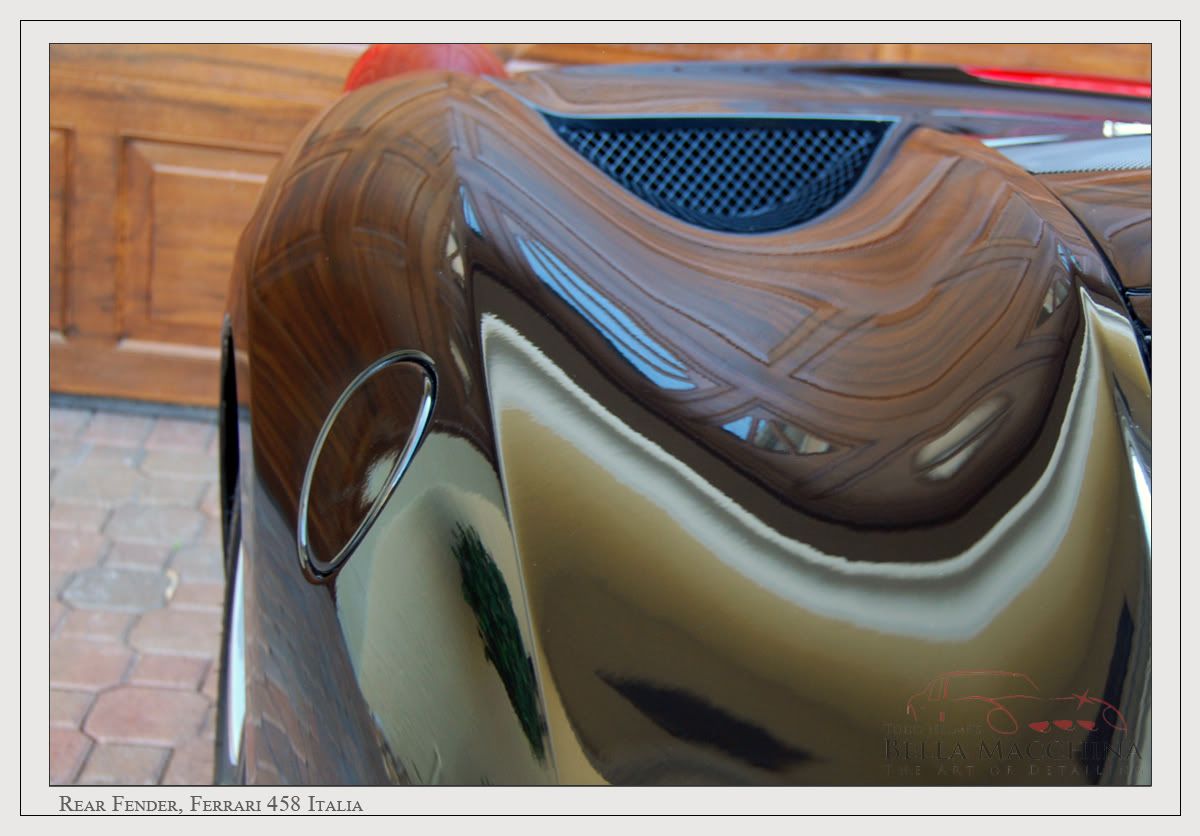
Before looking at the full sized after photos it is important to reflect with two full sized before photos.
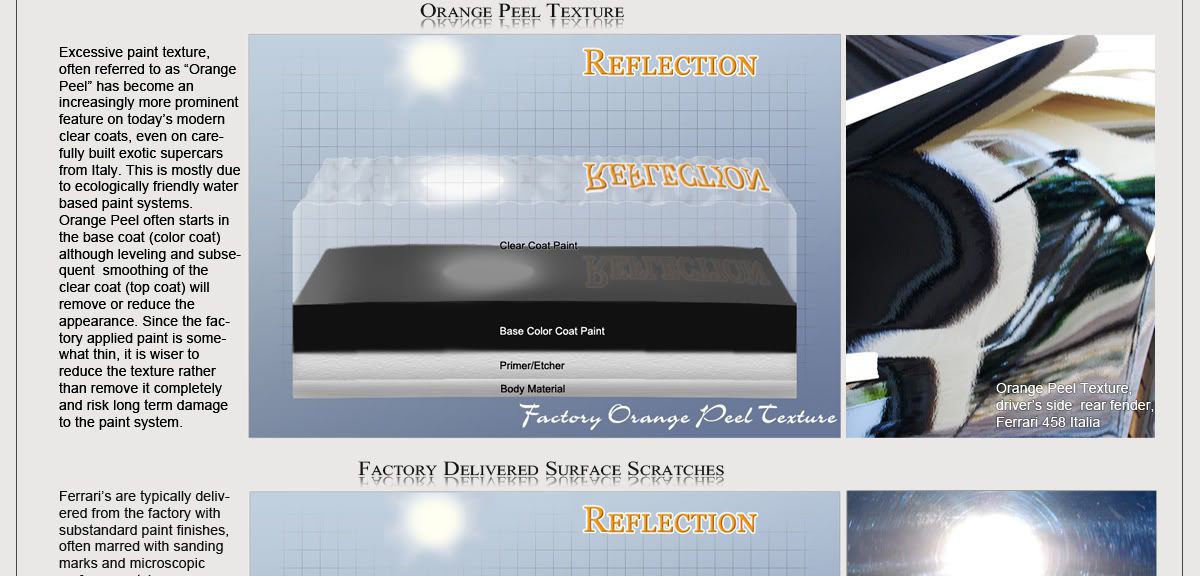
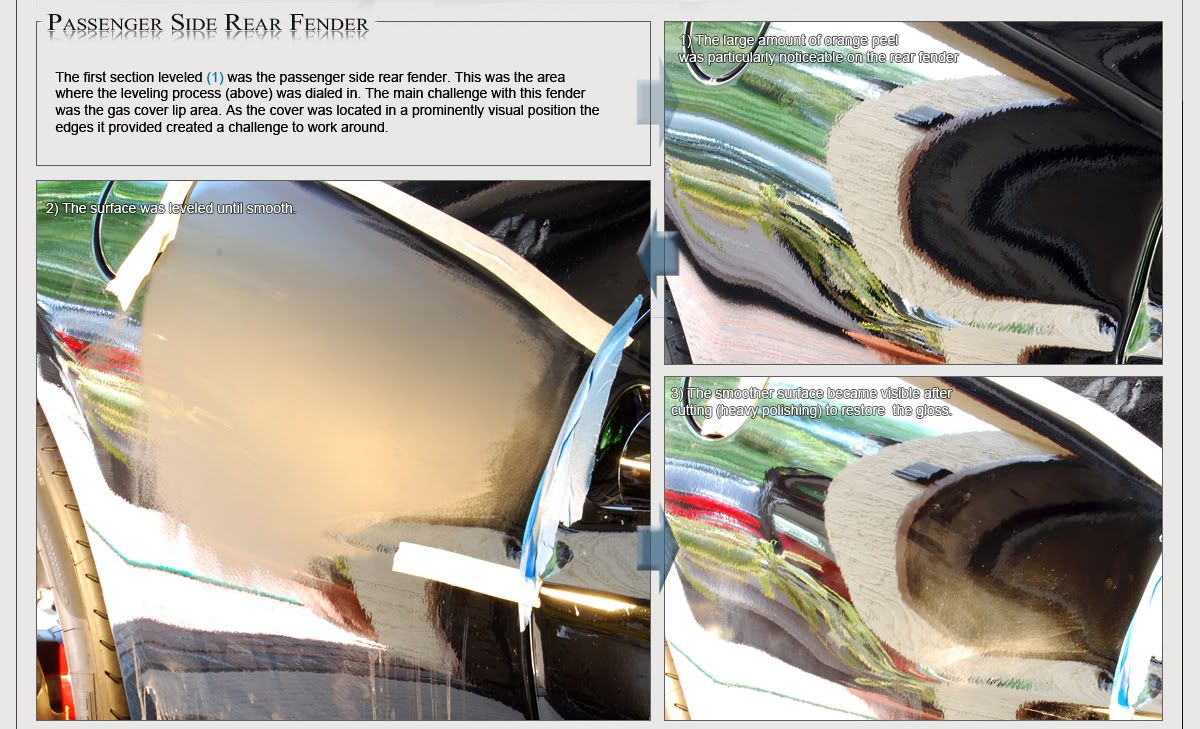
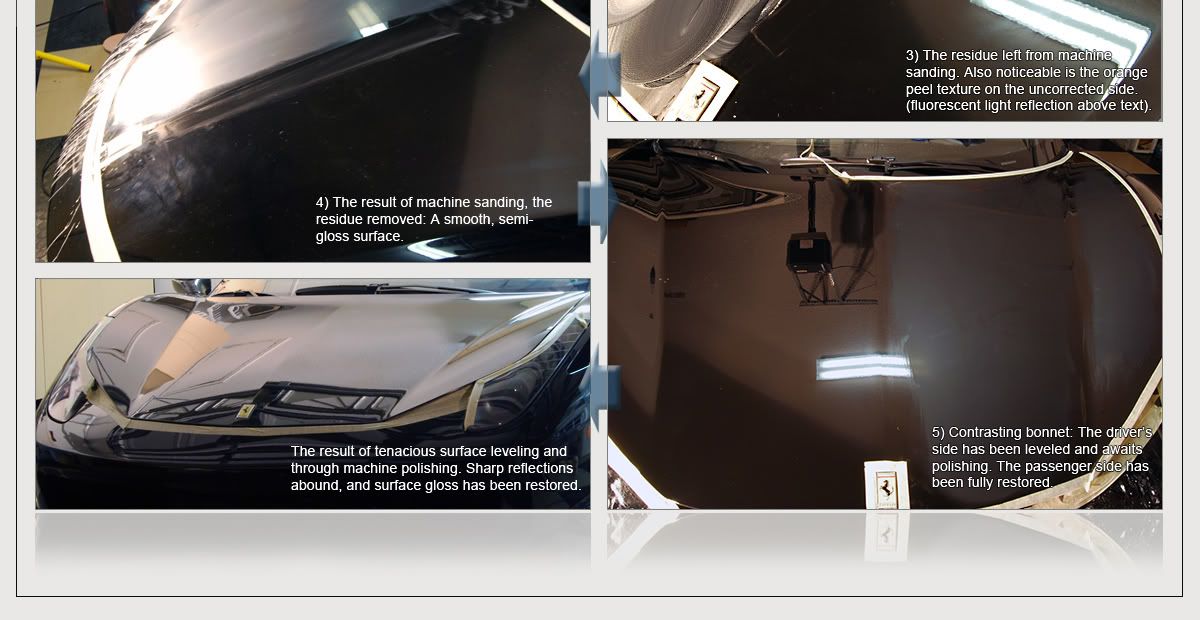
There was heavy orange peel over the Ferrari's entire surface.

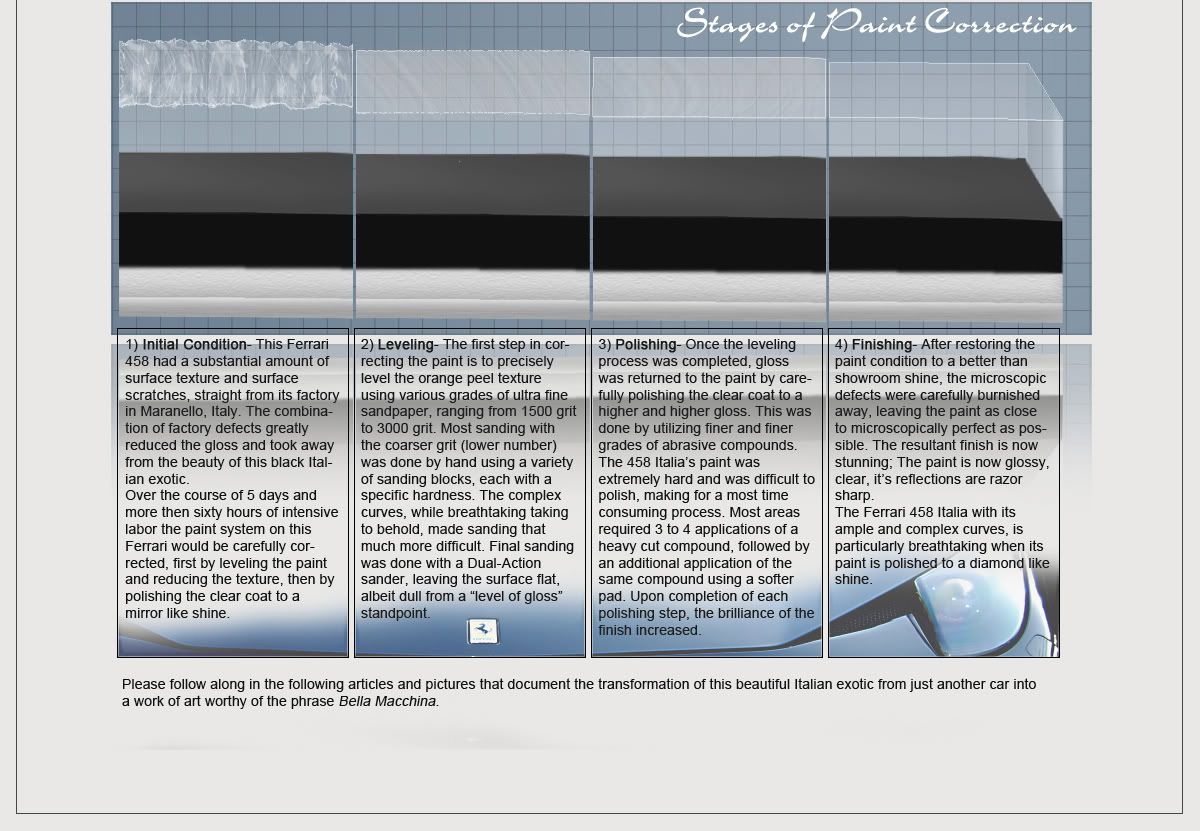
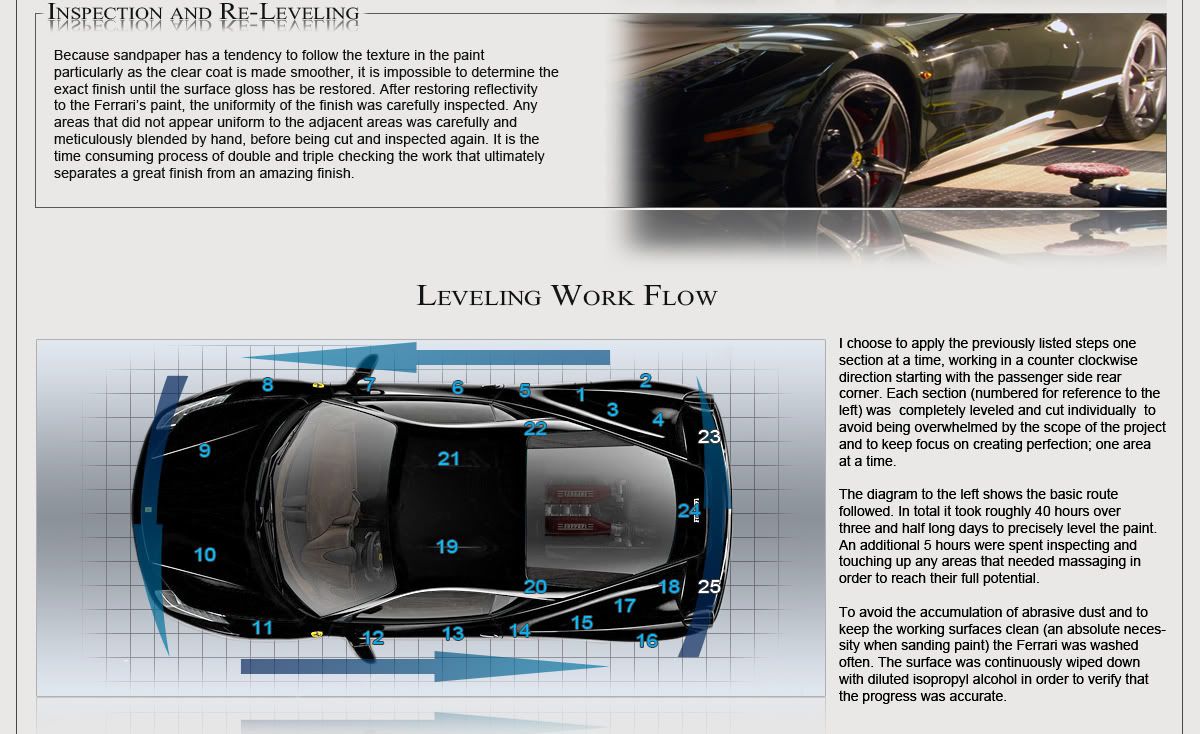
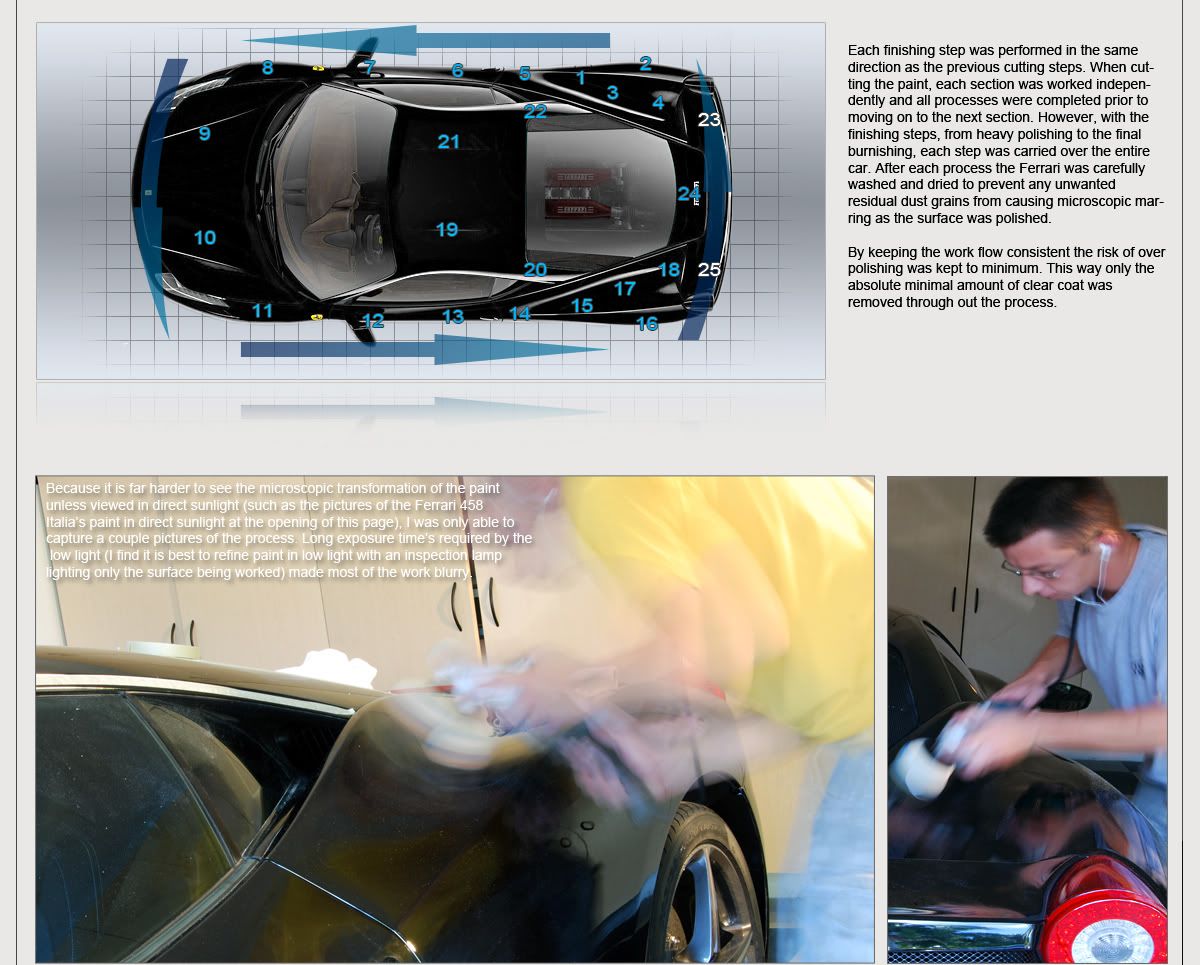
Here is an in progress shot taken of the 458 Italia prior to the end of day three. A lot of time was spent double and triple checking the progress and results. If there had been enough factory paint thickness to completely sand the body completely flat, this job would have been easier. As such the goal was to get as close to perfect as possible, which meant giving it a consistent and uniform finish everywhere. Over sanding and over flattening a small amount too much would have meant re-sanding the entire surface flatter as well to ensure total uniformity.
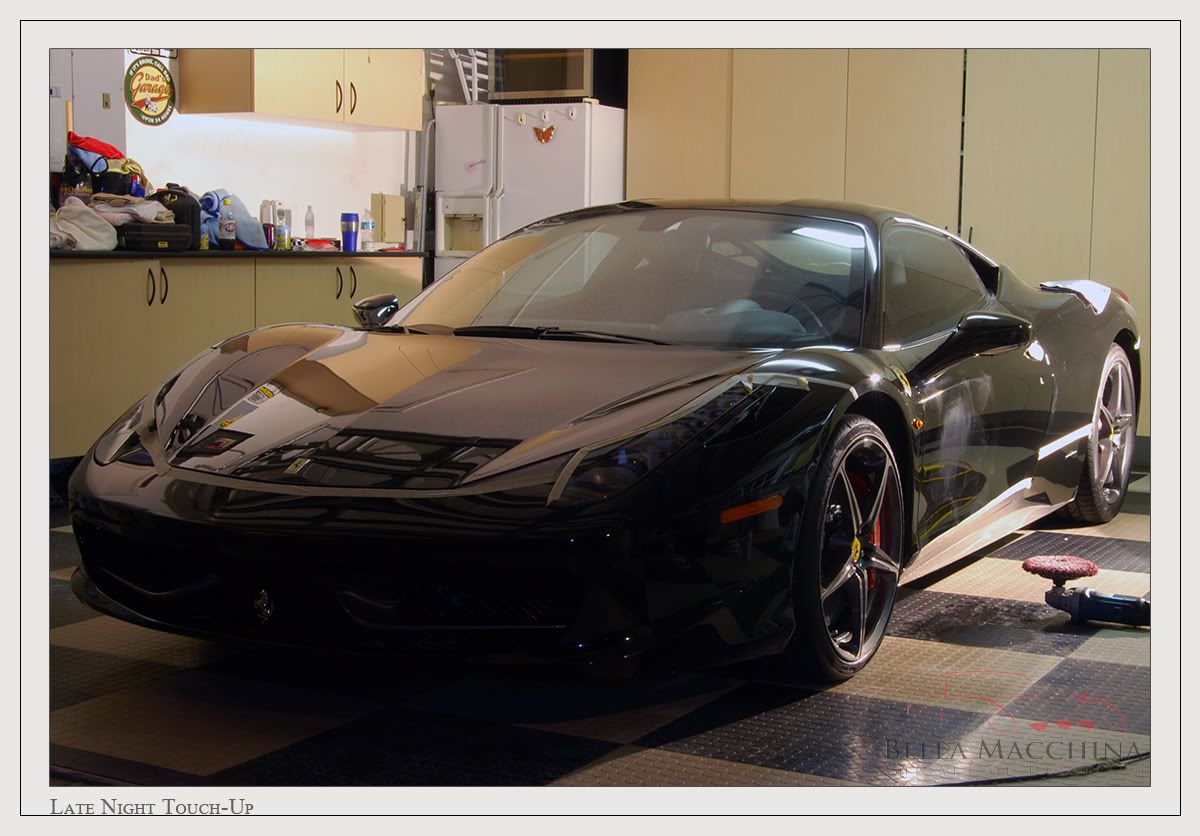
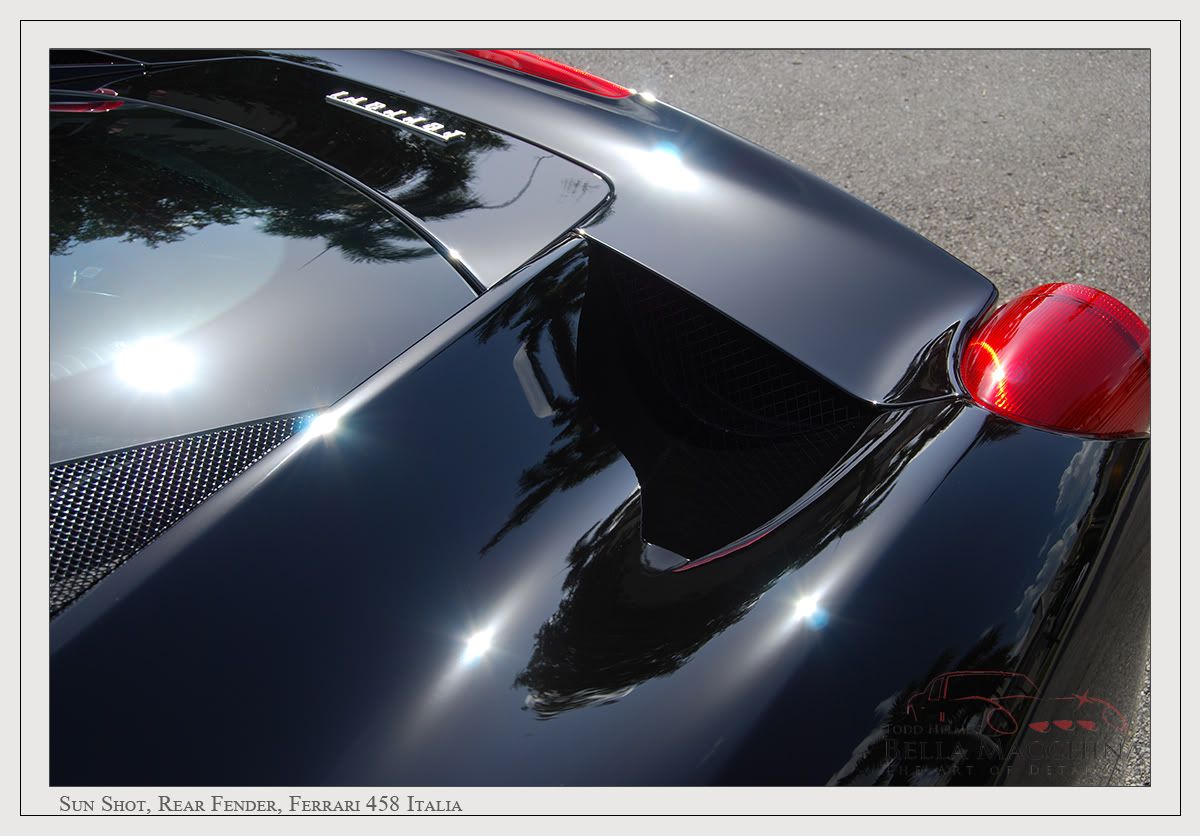
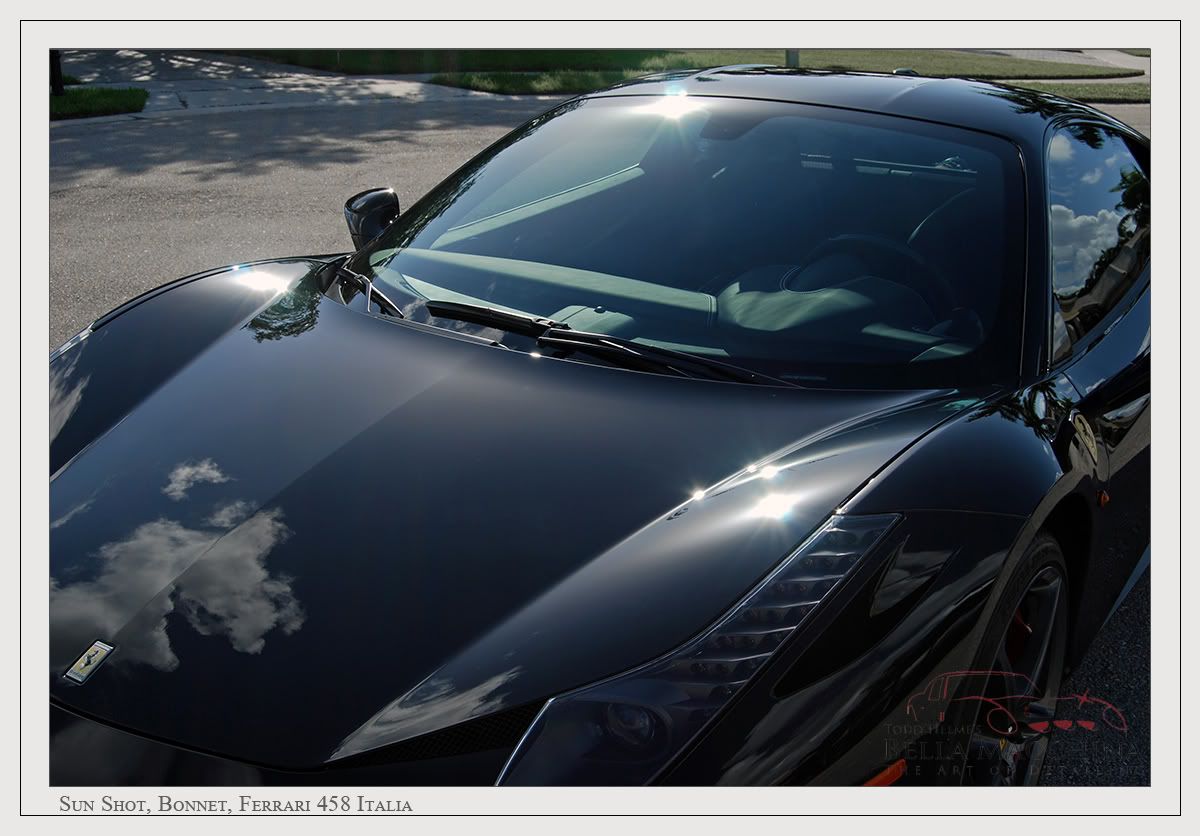
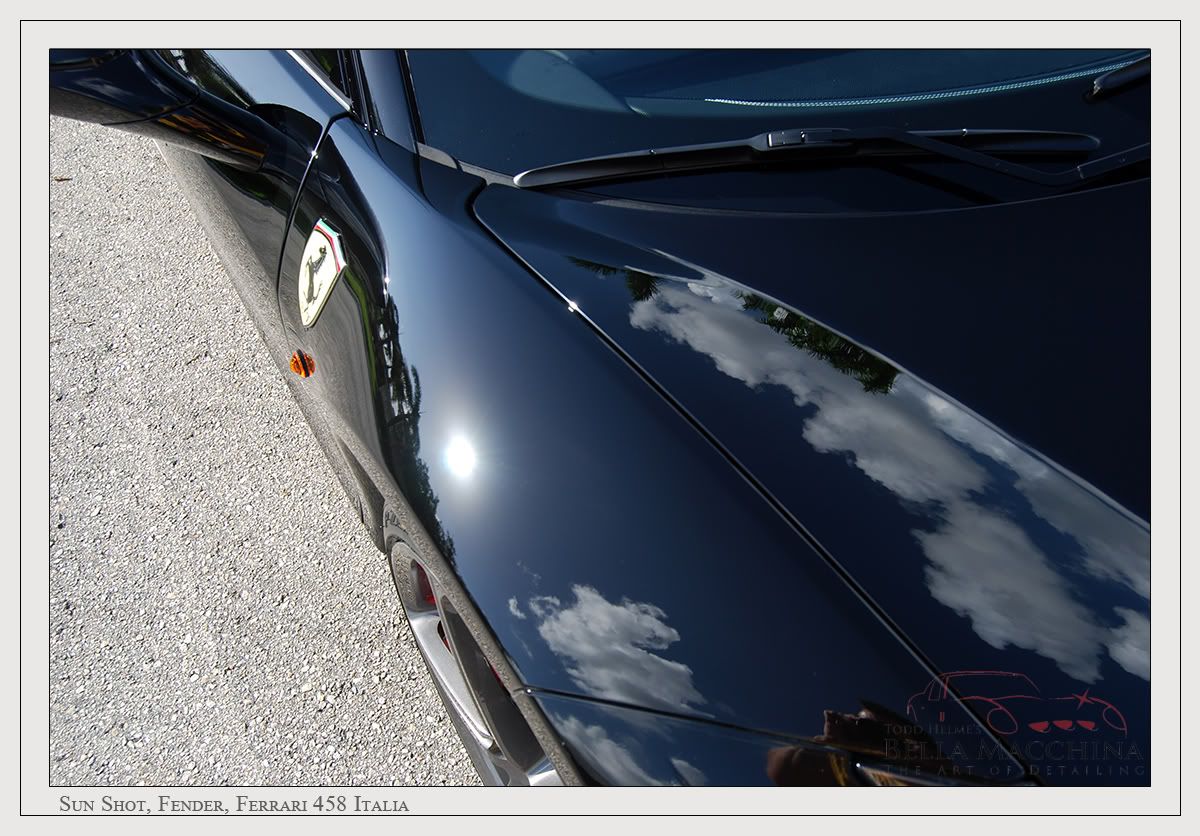
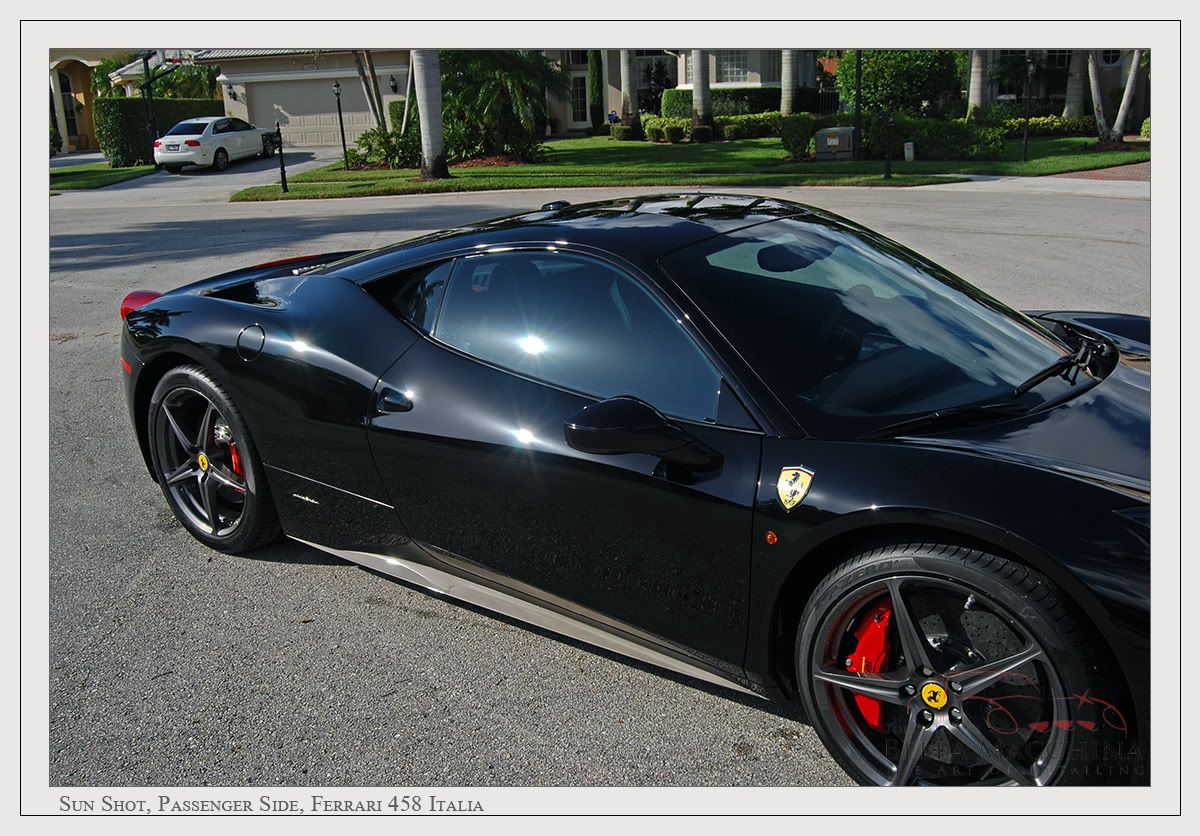
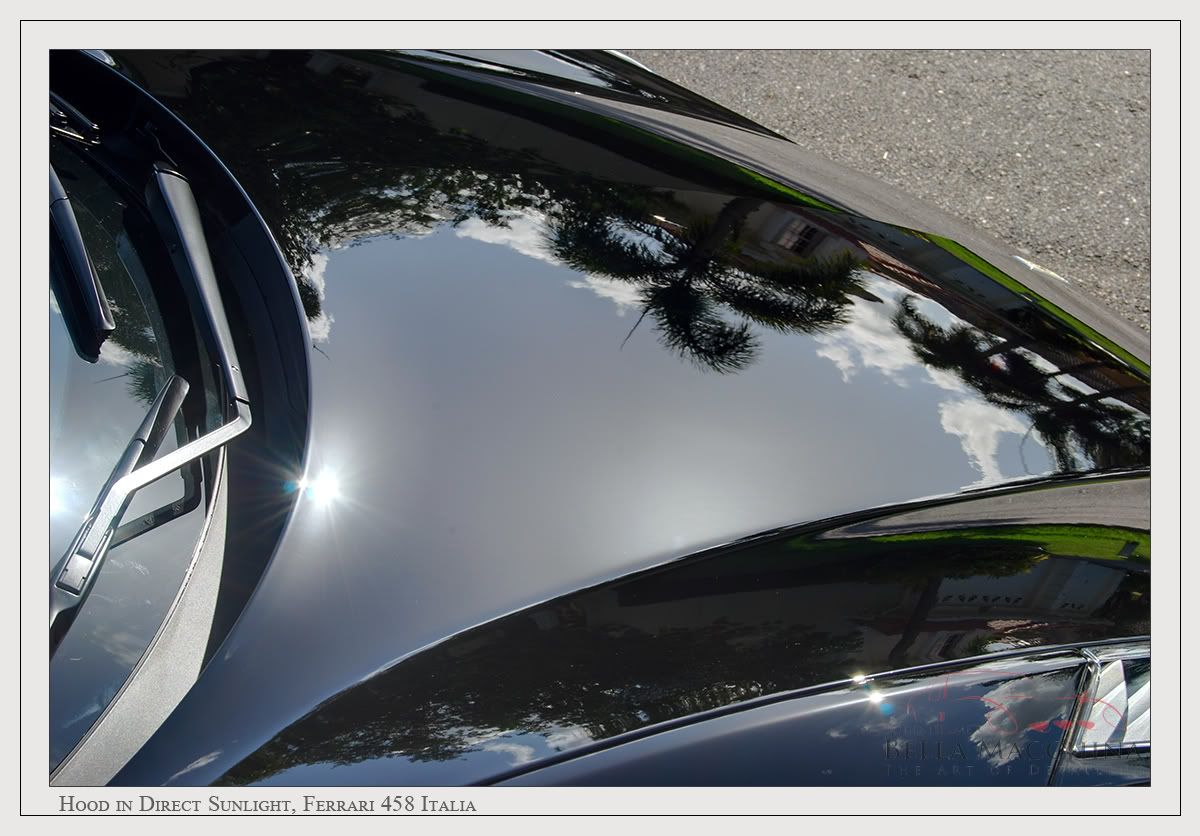
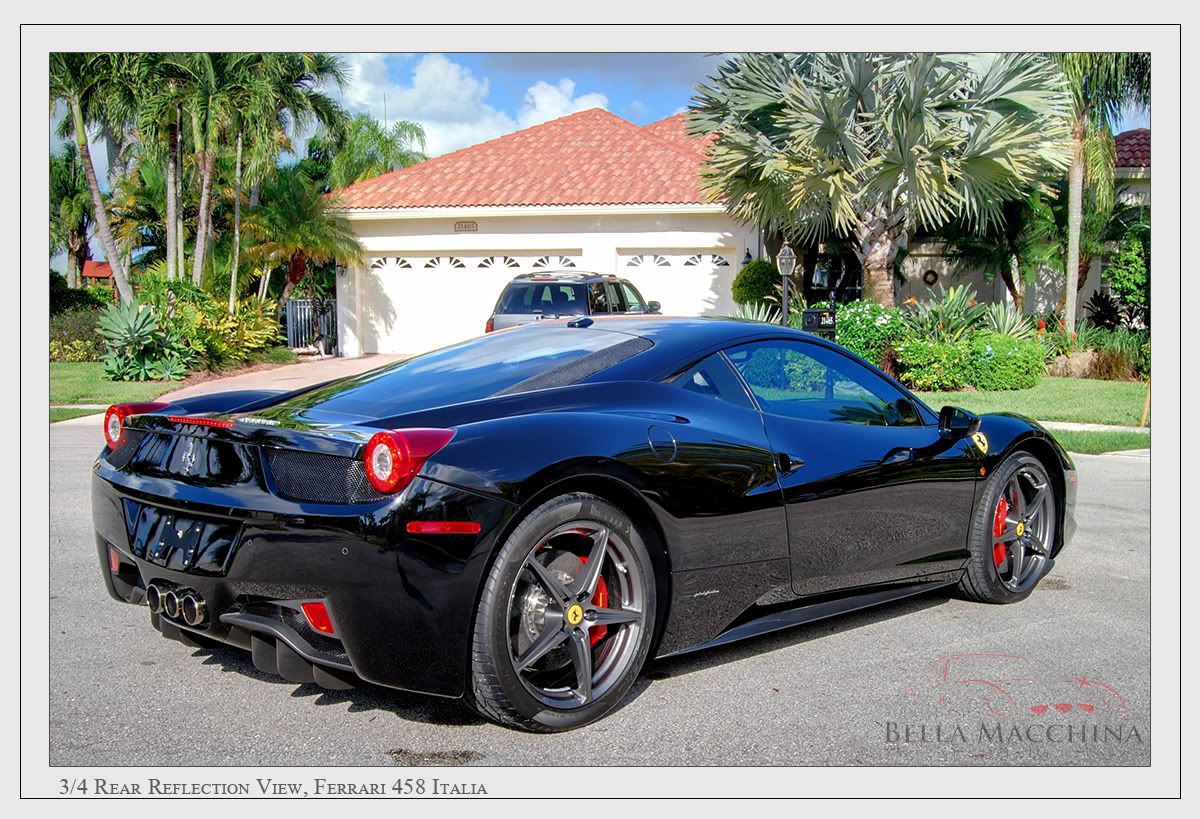
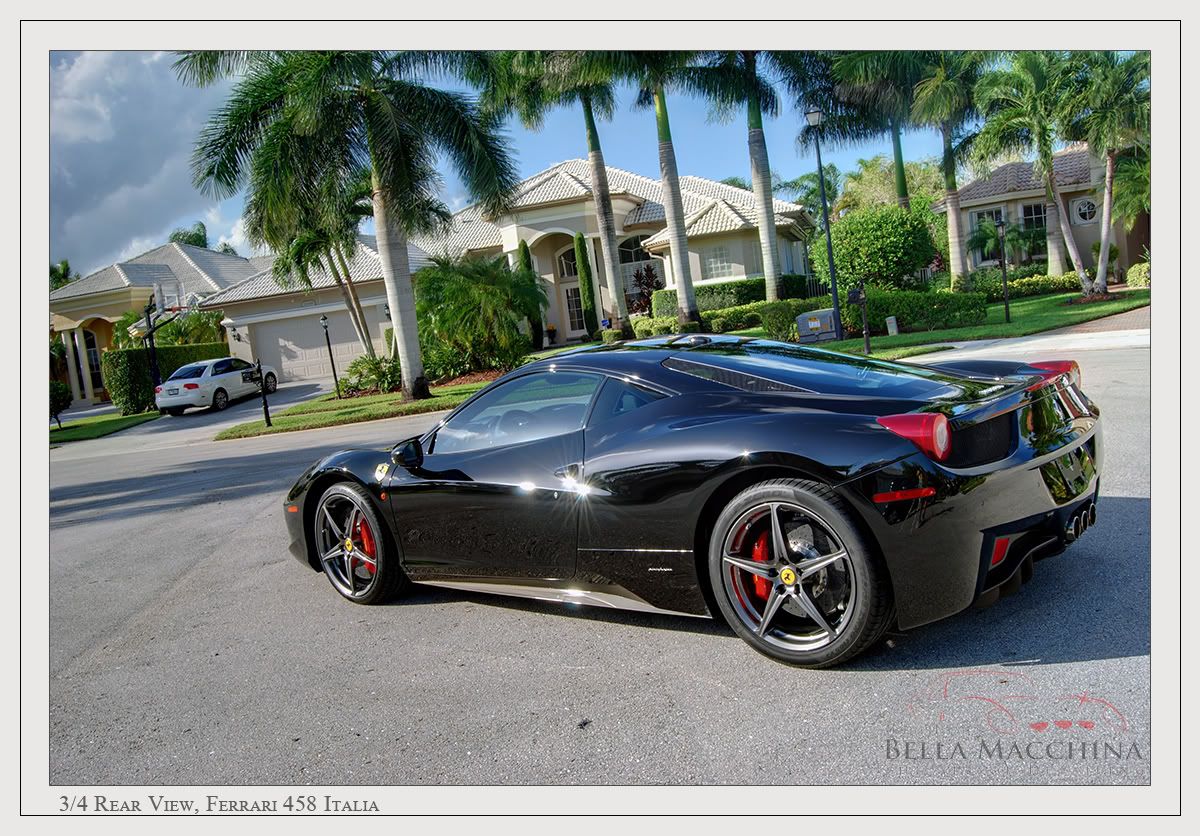
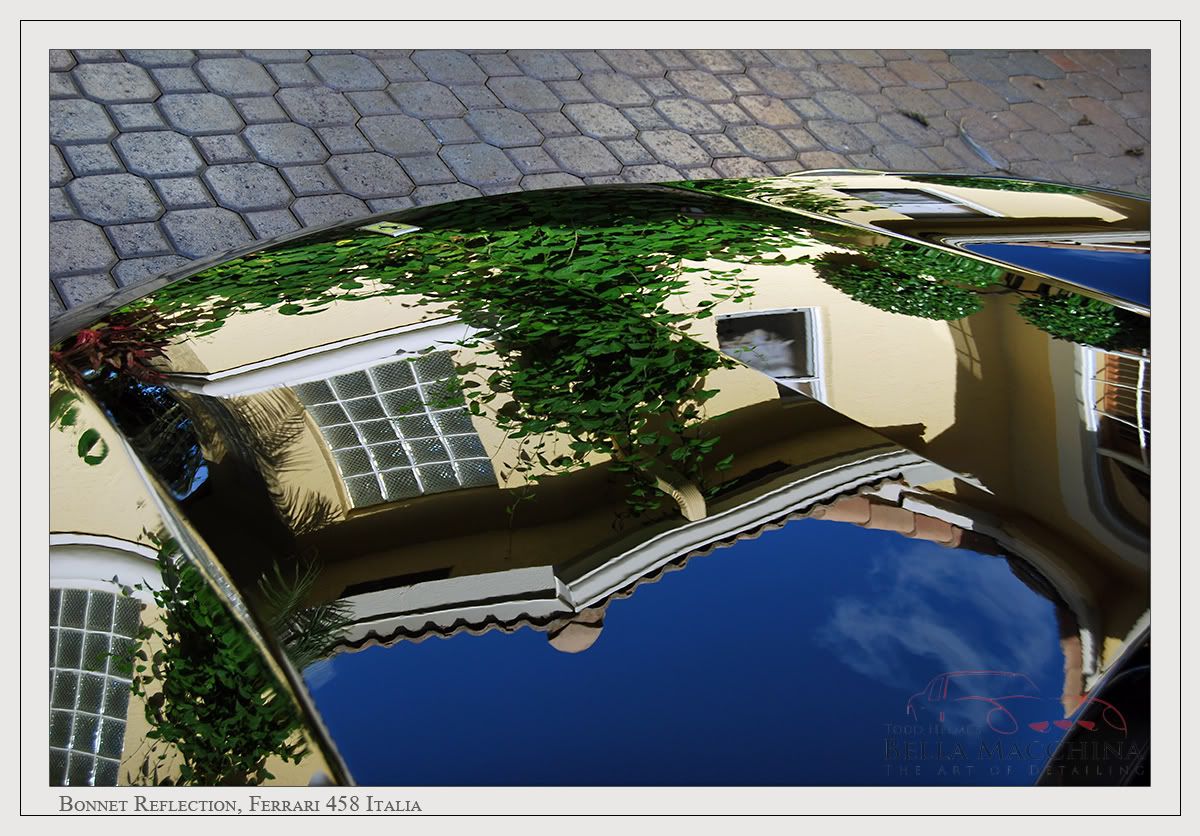
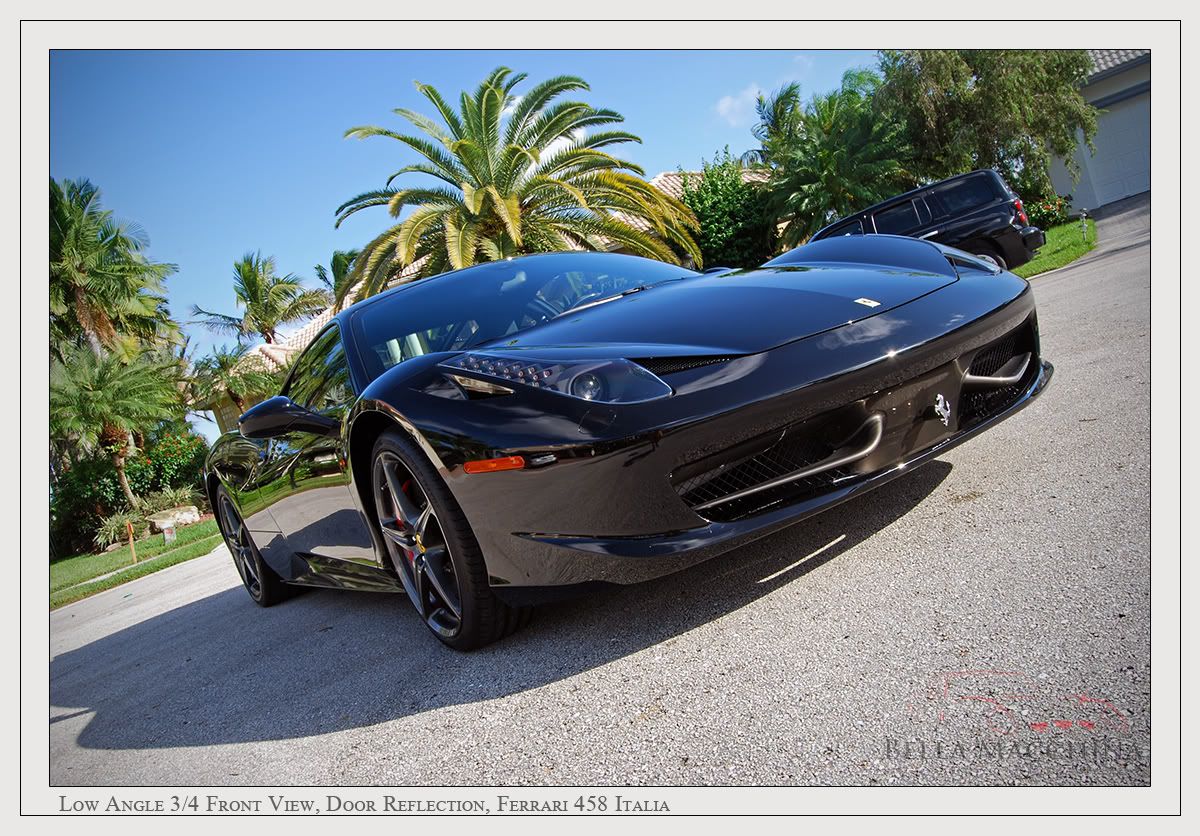
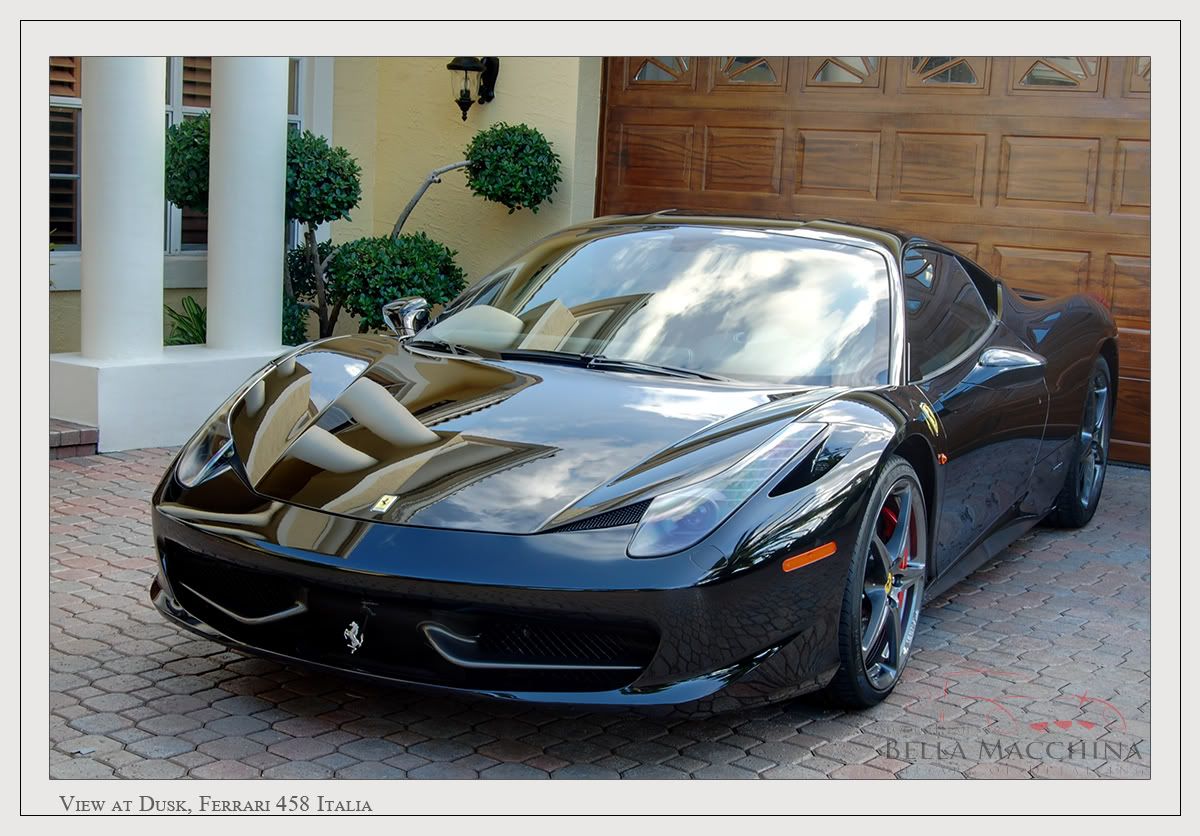
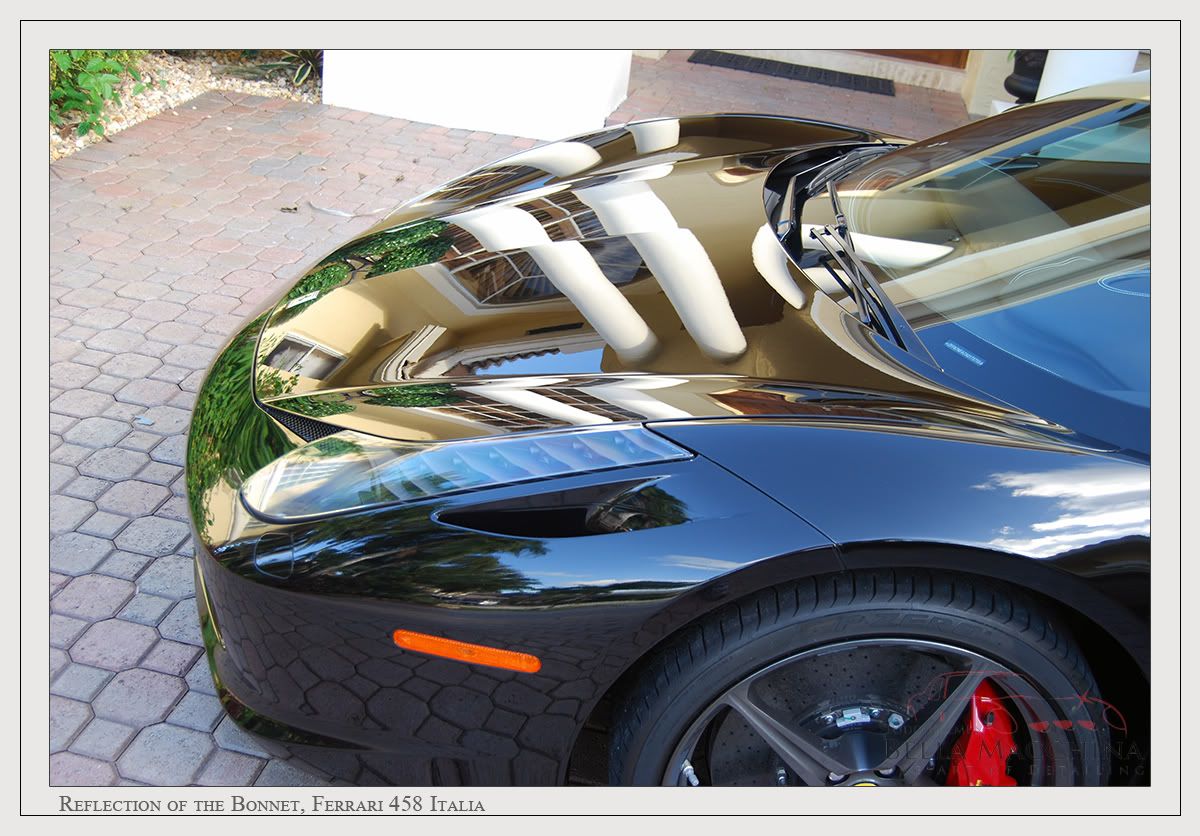
The remaining pictures are after shots, taken both in direct sunlight and in the shade close to the house. Thank you for reading.


I would also like to thank Kevin Brown for graciously taking the time to proof read this thread and for making many beneficial suggestions!
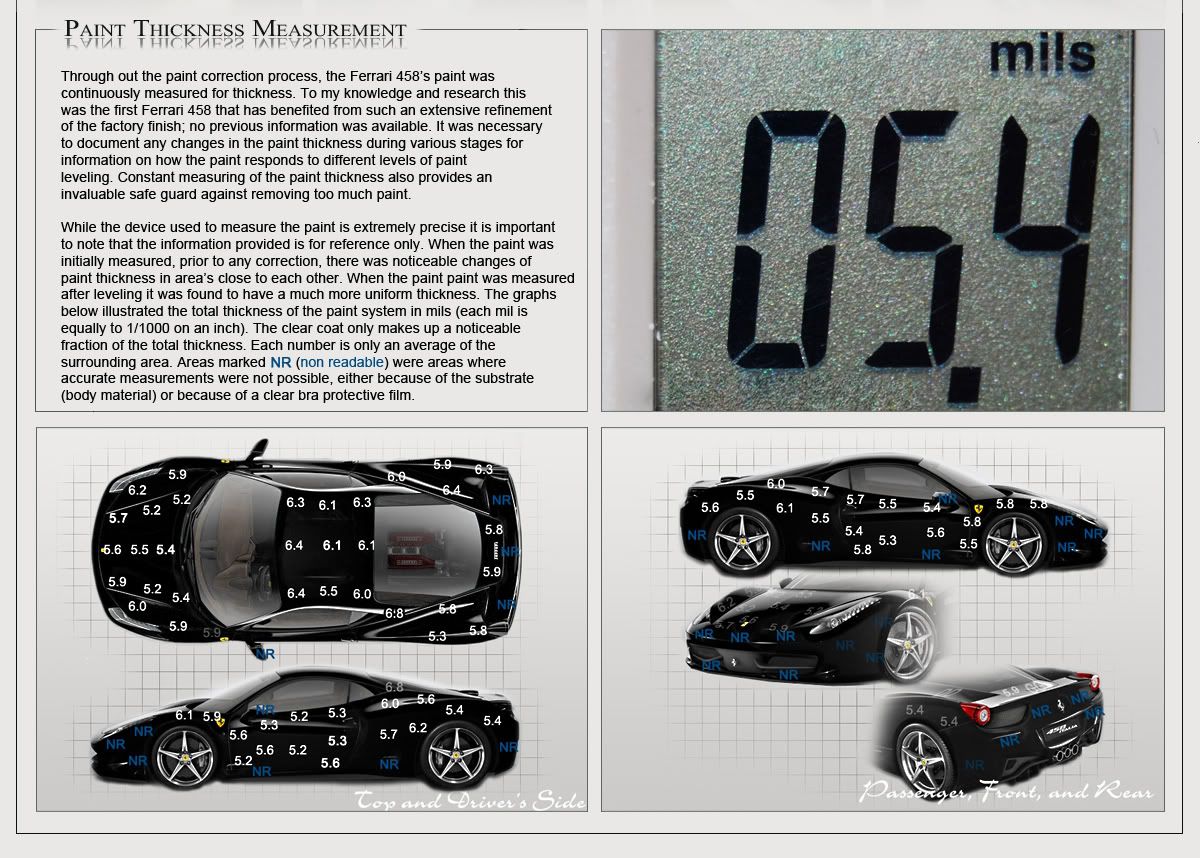
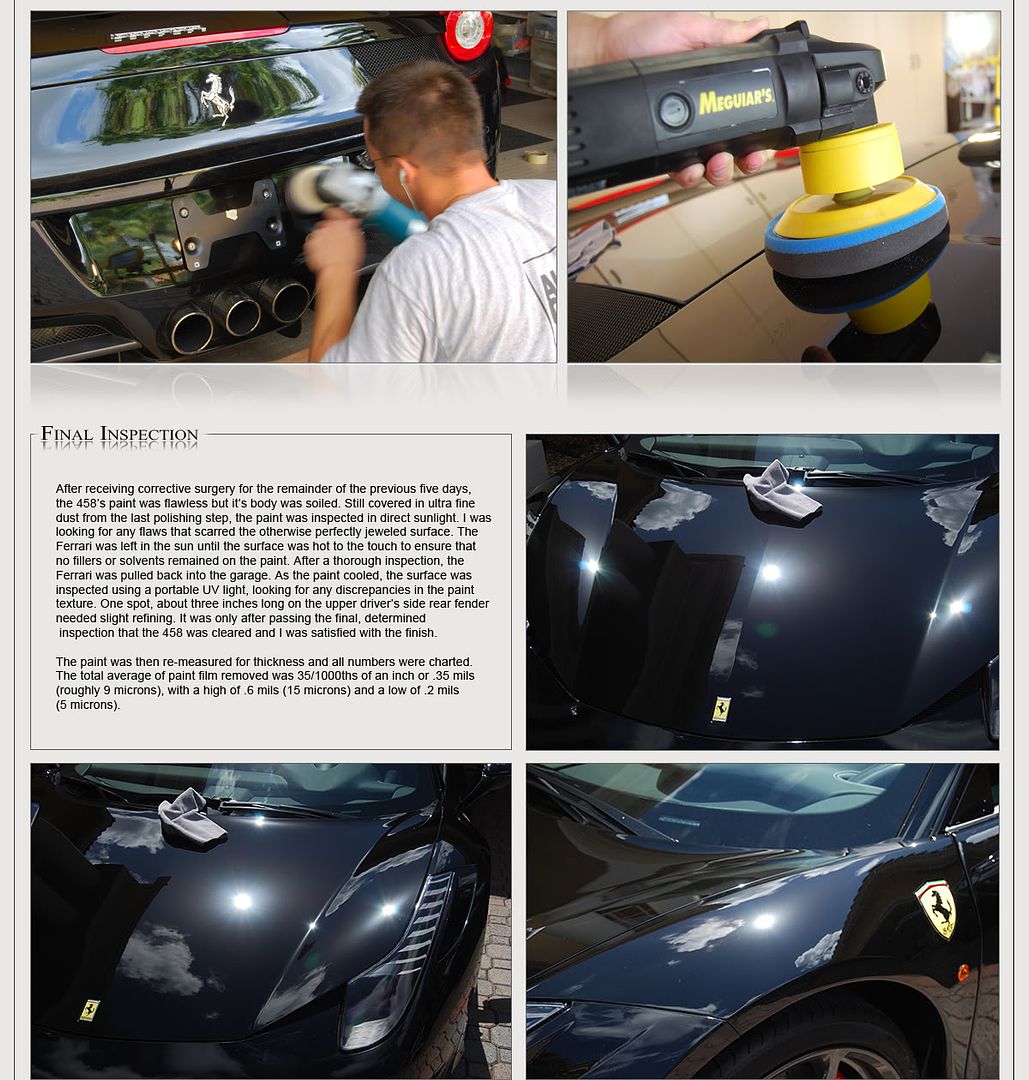
After Note:The picture of the mil gauge reading was borrowed from a previous write-up of mine but worked for the story line. Since I originally was writing this for my website, I used artistic freedom with that picture. All other pictures used on the write up and every description is 100% correct and was taken during the course of the write-up.
02-02-11, 06:55 AM
#3
Former Sponsor
Thread Starter
Join Date: Nov 2009
Location: FL
Posts: 209
Likes: 0
Received 0 Likes
on
0 Posts
Products Used
The Ferrari 458 Italia was originally washed with Blackfire Gloss Shampoo using an Australian Sheepskin Wash Mitt. For subsequent cleaning I used Dawn to help strip any residual polishing oils from the paint to aid in the inspection. Since the paint was going to get sanded, and never got more then dusty only one wash bucket (with prerequisite Grit-Guard) was used. I used a total of 4 Big Blue III Drying Towels over the 5 day detail.
The paint was clayed using Blackfire's Poly Clay II and the associated Blackfire Clay Lubricant. After claying I used a sample of Aquartz IronX do remove any rust fall out.
The wheels and brake calipers were cleaned with P21s Wheel Gel. The wheel wells, tires, exhaust tips, and weather stripping was cleaned with Optimum Power Clean. I also used the Eimann Fabrik Wheel Woolies for the wheels, brake calipers, and many other tasks (cleaning the front vents, door jambs, etc).
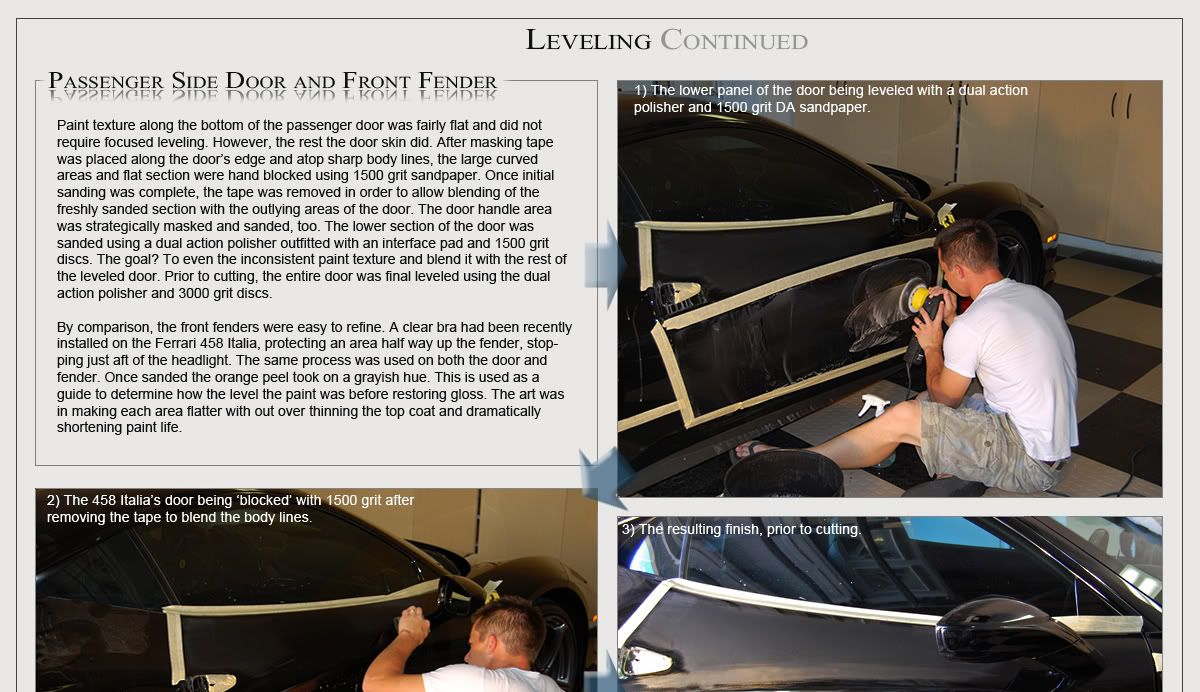
Before leveling the paint I used Meguiar's Masking Tape to mask off any edges and tape up any vents. Because many areas were re taped multiple times (as needed) I ended up using a full roll of the 3/4" tape and almost a full roll of the 1.5" tape
All of the sanding was done using Meguiar's Professional sanding products. First the Ferrari was sanded with by hand using 1500 Unigrit paper. the sanded in a cross hatch pattern with 2000 grit.
Prior to use the sanding papers were allowed to soak in a bucket for at least 15 minutes to soften them. I added a couple drops of Optimum No Rinse to both the water bucket and the spray bottle to increase the lubrication as well as help float away any abrasive material that had been worked loose. A variety of sanding blocks were used on the the flatter panels (different sizes and hardness) but most of the Ferrari required using the palm of my hand to avoid the paper from gouging the finish. The lower sections of the door skins were sanded with Meguiar's 1500 grit finishing disks with a Meguiar's interface pad.
Final sanding was carried out on a Meguiar's G110v2 Dual Action Polisher with 3000 grit finishing disks and a foam interface pad. Any areas were too curved for machine sanded were final sanded by hand using Meguiar's 3000 grit sanding sheets.
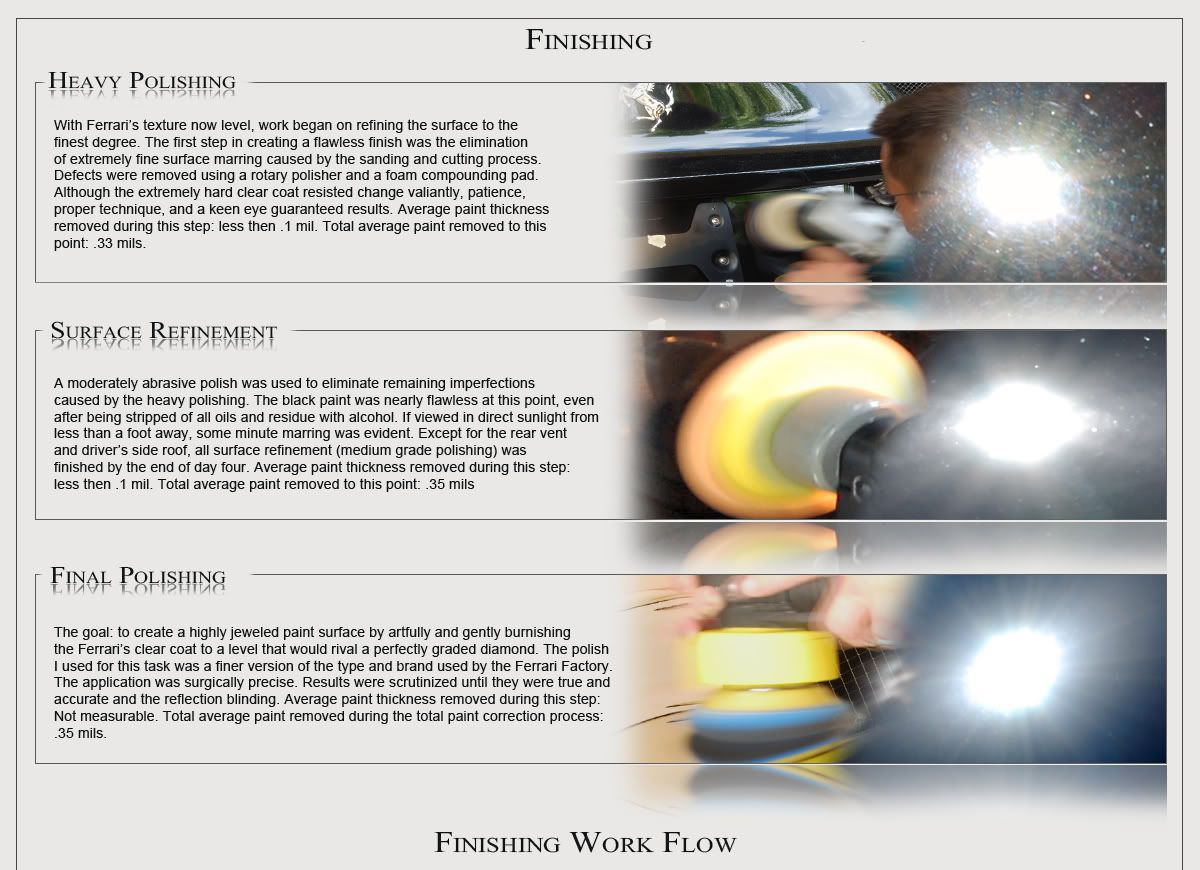
The initial step in compounding the paint was to use Meguiar's M105 Ultra Cut Compound on a Meguiar's So1o Burgundy Wool Pad. The hard paint required 3-4 passes (in most areas) to fully remove sanding marks and texture. Several pads were used and they were brushed after each section. After cutting with the wool pad I had some fairly noticeable polishing marks. Meguiar's M105 was once again used, only this time with a Meguiar's Soft Buff 2.0 Foam Cutting Pad. All of this work was carried out a section at a time. Both a Meguiar's 3.5 Inch backing plate and Meguia'rs excellent So1o Backing plate were used depending on the size of the pad.
The last two polishing steps were carried out using a dual action polisher. The first step was Menzerna PO83 Super Intensive Polish using Lake Country Tangerine H20 low profile pads. The finishing polishing step was carried out with Black Classic Flat Polishing Pads and a beta polish.
One of my fears in this detail was the number of towels I would have to go through, from wiping away sanding residue, to wiping off the final polish, to removing the last layer of wax. I had bought a bundle General Purpose Microfiber Towels (36) and it was the best choice I made. These towels do not mark paint (like other budget minded towels) and having a fresh on on hand for any task was great.
After polishing, cotton swabs and Optimum Power Clean were used to remove anything and stubborn residue. The final protection came from Blackfire's Wet Ice over Fire combination kit, which includes the Blackfire Wet Diamond All Paint Protection and Blackfire Midnight Sun #24 Carnauba Wax. Two coats of Wet Diamond were applied with a dual action polisher and Lake Country Gold foam pad. The wax was applied and removed wet using a foam applicator.
Blackfire Tire Gel was used on the tires, applied carefully. The wheels and brake calipers were coated with Wheel Wax. The wheel arches were dressed with Meguiar's Hyperdressing, which was applied to the towel before application to avoid any spray getting near the absorbent carbon-ceramic brakes. All of the glass was cleaned with Glass Science Rain Clear including the engine cover. The trunk and engine was wiped down with Optimum No-Rinse, and all rubber trim was protected with Wurth's Rubber Stick. Finally the exhaust tips were polished with Optimum Metal Polish.
The Ferrari 458 Italia was originally washed with Blackfire Gloss Shampoo using an Australian Sheepskin Wash Mitt. For subsequent cleaning I used Dawn to help strip any residual polishing oils from the paint to aid in the inspection. Since the paint was going to get sanded, and never got more then dusty only one wash bucket (with prerequisite Grit-Guard) was used. I used a total of 4 Big Blue III Drying Towels over the 5 day detail.
The paint was clayed using Blackfire's Poly Clay II and the associated Blackfire Clay Lubricant. After claying I used a sample of Aquartz IronX do remove any rust fall out.
The wheels and brake calipers were cleaned with P21s Wheel Gel. The wheel wells, tires, exhaust tips, and weather stripping was cleaned with Optimum Power Clean. I also used the Eimann Fabrik Wheel Woolies for the wheels, brake calipers, and many other tasks (cleaning the front vents, door jambs, etc).
Before leveling the paint I used Meguiar's Masking Tape to mask off any edges and tape up any vents. Because many areas were re taped multiple times (as needed) I ended up using a full roll of the 3/4" tape and almost a full roll of the 1.5" tape
All of the sanding was done using Meguiar's Professional sanding products. First the Ferrari was sanded with by hand using 1500 Unigrit paper. the sanded in a cross hatch pattern with 2000 grit.
Prior to use the sanding papers were allowed to soak in a bucket for at least 15 minutes to soften them. I added a couple drops of Optimum No Rinse to both the water bucket and the spray bottle to increase the lubrication as well as help float away any abrasive material that had been worked loose. A variety of sanding blocks were used on the the flatter panels (different sizes and hardness) but most of the Ferrari required using the palm of my hand to avoid the paper from gouging the finish. The lower sections of the door skins were sanded with Meguiar's 1500 grit finishing disks with a Meguiar's interface pad.
Final sanding was carried out on a Meguiar's G110v2 Dual Action Polisher with 3000 grit finishing disks and a foam interface pad. Any areas were too curved for machine sanded were final sanded by hand using Meguiar's 3000 grit sanding sheets.
The initial step in compounding the paint was to use Meguiar's M105 Ultra Cut Compound on a Meguiar's So1o Burgundy Wool Pad. The hard paint required 3-4 passes (in most areas) to fully remove sanding marks and texture. Several pads were used and they were brushed after each section. After cutting with the wool pad I had some fairly noticeable polishing marks. Meguiar's M105 was once again used, only this time with a Meguiar's Soft Buff 2.0 Foam Cutting Pad. All of this work was carried out a section at a time. Both a Meguiar's 3.5 Inch backing plate and Meguia'rs excellent So1o Backing plate were used depending on the size of the pad.
The last two polishing steps were carried out using a dual action polisher. The first step was Menzerna PO83 Super Intensive Polish using Lake Country Tangerine H20 low profile pads. The finishing polishing step was carried out with Black Classic Flat Polishing Pads and a beta polish.
One of my fears in this detail was the number of towels I would have to go through, from wiping away sanding residue, to wiping off the final polish, to removing the last layer of wax. I had bought a bundle General Purpose Microfiber Towels (36) and it was the best choice I made. These towels do not mark paint (like other budget minded towels) and having a fresh on on hand for any task was great.
After polishing, cotton swabs and Optimum Power Clean were used to remove anything and stubborn residue. The final protection came from Blackfire's Wet Ice over Fire combination kit, which includes the Blackfire Wet Diamond All Paint Protection and Blackfire Midnight Sun #24 Carnauba Wax. Two coats of Wet Diamond were applied with a dual action polisher and Lake Country Gold foam pad. The wax was applied and removed wet using a foam applicator.
Blackfire Tire Gel was used on the tires, applied carefully. The wheels and brake calipers were coated with Wheel Wax. The wheel arches were dressed with Meguiar's Hyperdressing, which was applied to the towel before application to avoid any spray getting near the absorbent carbon-ceramic brakes. All of the glass was cleaned with Glass Science Rain Clear including the engine cover. The trunk and engine was wiped down with Optimum No-Rinse, and all rubber trim was protected with Wurth's Rubber Stick. Finally the exhaust tips were polished with Optimum Metal Polish.

 02-02-11, 09:31 AM
#7

This may be one of the most amazing write-ups I've ever seen. I have to admit I'm a little shocked such a high-end car can look so bad coming from the factory. You guys did an amazing job!
Trending Topics
02-02-11, 09:49 AM
#9
Lexus Fanatic
Join Date: Dec 2005
Location: Los Angeles/Vancouver
Posts: 6,231
Likes: 0
Received 0 Likes
on
0 Posts
wow amazing results and detail of process
thanks for sharing
was it you that did this job?
kudos
i cant believe ferrari would let a paint job this bad to leave the factory
thanks for sharing
was it you that did this job?
kudos
i cant believe ferrari would let a paint job this bad to leave the factory
 02-02-11, 10:13 AM
#11
Former Sponsor
Thread Starter
Join Date: Nov 2009
Location: FL
Posts: 209
Likes: 0
Received 0 Likes
on
0 Posts
Thank you!
I agree!
LOL, the write up was nearly as much work as the car, to be honest!
Thank you. The quality of paint on the newest batch of 458's has improved slightly, but I agree.
Thank you!
Thanks for the compliments. Yes that is my ugly face in the pictures doing the work.
Thank you!
02-02-11, 10:28 AM
#12
Lexus Fanatic

Beautiful job. I can't imagine spending that much time wetsanding such an expensive new car. It is a shame such an expensive rare car like a 458 came from the factory with such a poor finish in need of so much work. I hope Ferrari/the Dealer were going to reimburse the owner in some way for all the work that needed to be done. That orange peel was worse then most regular cars I have seen/detailed and totally unacceptable for a new Ferrari.

