Help with etched water spots!!
 06-28-13, 11:52 AM
#1
Driver
Thread Starter

Join Date: Jan 2012
Location: GA
Posts: 109
Likes: 0
Received 0 Likes
on
0 Posts
So I followed the guides at autogeek and some of the valuable info i read from this forum, but I still can't manage to take these damn water spots off. I first used 205 to see if it would make the spots go away. It didn't. I tried the more abrasive 105 with surbuf pads on level 5 of my da polisher followed by level 6 and it was still remaining. I really have no idea what to do now other than to get someone to sand it
For some background info, I got this 2008 SGM es350 a year and a half ago and completely overlooked the water spots because I really didn't care back then. Now it's getting annoying.
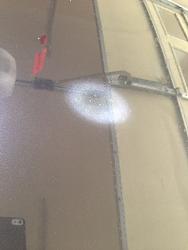
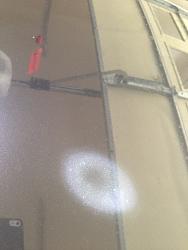
Here are some pics of the water spots. It's only located on my trunk and roof.
The following pictures were taken after 3 passes of the 105 with Clean surbuf pad
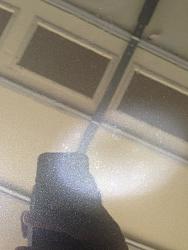
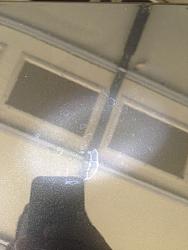
The image below is how the spots look without the flashlight
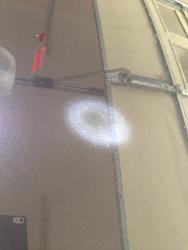
Same exact same spot with the flashlight is shown below.
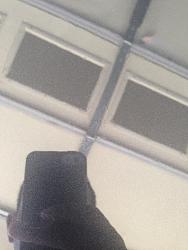
The following pictures show how my roof looks. I didn't do the roof yet, so this can be the standard picture.
For some background info, I got this 2008 SGM es350 a year and a half ago and completely overlooked the water spots because I really didn't care back then. Now it's getting annoying.
Here are some pics of the water spots. It's only located on my trunk and roof.
The following pictures were taken after 3 passes of the 105 with Clean surbuf pad

The image below is how the spots look without the flashlight

Same exact same spot with the flashlight is shown below.

The following pictures show how my roof looks. I didn't do the roof yet, so this can be the standard picture.


Last edited by jacobjohn; 06-28-13 at 02:07 PM.
 06-28-13, 12:03 PM
#2
Hi Jacobjohn...
First off - I do not see any pics on your first post, maybe you can try to add them again.
Second, can you please provide some insight as to your technique you are using when buffing?
-Are you using slow arm speed? I mean SLOW... 1-2" per second?
-Are you using low, moderate, or heavy pressure?
-Are you sure your pad is spinning while you are buffing? (a trick to be sure is to mark your backing plate with a sharpie so you can see it rotating while you are working... if you are using too much pressure, or are contacting a complex surface, the pad my stop rotating in which case you will not see the results you desire).
-What size pads are you using?
-What machine are you using?
-How big is your working area? Typical working area is about 24"x24" but for heavier defects, you may want to reduce this working area to maximize your cutting power.
-How many passes are you doing over each section? (ie 4 passes - 2 horizontal and 2 vertical)
Any information regarding your process may help us determine what might be prohibiting you from seeing good results. M105 is a VERY aggressive compound that should be able to tackle most any job when using the right tools and most importantly the right technique.
**I personally would be very hesitant about sanding OEM paint as it is very thin, proceed with extreme caution, and obtain a digital paint thickness gauge before heading down this path**
06-28-13, 12:43 PM
#3
Driver
Thread Starter
Join Date: Jan 2012
Location: GA
Posts: 109
Likes: 0
Received 0 Likes
on
0 Posts
Hi Jacobjohn...
First off - I do not see any pics on your first post, maybe you can try to add them again.
Second, can you please provide some insight as to your technique you are using when buffing?
-Are you using slow arm speed? I mean SLOW... 1-2" per second?
-Are you using low, moderate, or heavy pressure?
-Are you sure your pad is spinning while you are buffing? (a trick to be sure is to mark your backing plate with a sharpie so you can see it rotating while you are working... if you are using too much pressure, or are contacting a complex surface, the pad my stop rotating in which case you will not see the results you desire).
-What size pads are you using?
-What machine are you using?
-How big is your working area? Typical working area is about 24"x24" but for heavier defects, you may want to reduce this working area to maximize your cutting power.
-How many passes are you doing over each section? (ie 4 passes - 2 horizontal and 2 vertical)
Any information regarding your process may help us determine what might be prohibiting you from seeing good results. M105 is a VERY aggressive compound that should be able to tackle most any job when using the right tools and most importantly the right technique.
**I personally would be very hesitant about sanding OEM paint as it is very thin, proceed with extreme caution, and obtain a digital paint thickness gauge before heading down this path**
First off - I do not see any pics on your first post, maybe you can try to add them again.
Second, can you please provide some insight as to your technique you are using when buffing?
-Are you using slow arm speed? I mean SLOW... 1-2" per second?
-Are you using low, moderate, or heavy pressure?
-Are you sure your pad is spinning while you are buffing? (a trick to be sure is to mark your backing plate with a sharpie so you can see it rotating while you are working... if you are using too much pressure, or are contacting a complex surface, the pad my stop rotating in which case you will not see the results you desire).
-What size pads are you using?
-What machine are you using?
-How big is your working area? Typical working area is about 24"x24" but for heavier defects, you may want to reduce this working area to maximize your cutting power.
-How many passes are you doing over each section? (ie 4 passes - 2 horizontal and 2 vertical)
Any information regarding your process may help us determine what might be prohibiting you from seeing good results. M105 is a VERY aggressive compound that should be able to tackle most any job when using the right tools and most importantly the right technique.
**I personally would be very hesitant about sanding OEM paint as it is very thin, proceed with extreme caution, and obtain a digital paint thickness gauge before heading down this path**
As for my technique, definitely used slow arm speed, which I went about 1" per second. The directions on the 105 said to do 2-3 passes with medium pressure and 2-3 passes with light pressure, so I did 3 of each (6 passes in all) (I actually did use the marker technique to make sure the pad was still spinning!).
As for the machine, I wasn't able to afford a griot or anything, but I did use the harbor freight 6" DA polisher. With 5.7 amps, i thought it was plenty powerful to do the job. Here's the specs of the polisher http://www.harborfreight.com/6-varia...her-69924.html
I read the reviews for this polisher at autogeek and the majority of the people say its just a little below par from the name brands like griot and porter cable, so I just went with it.
As for the working space, I split my trunk into 3 equal lengths, so probably around 15'x15'?
Still can't figure out why its not going away though. Its very frustrating. It does look remarkably better than the roof of my car, but there are quite a few spots remaining.
06-28-13, 01:54 PM
#4
Thanks for the reply zmc! I completely forgot to upload the pictures. It should be there now!
As for my technique, definitely used slow arm speed, which I went about 1" per second. The directions on the 105 said to do 2-3 passes with medium pressure and 2-3 passes with light pressure, so I did 3 of each (6 passes in all) (I actually did use the marker technique to make sure the pad was still spinning!).
As for the machine, I wasn't able to afford a griot or anything, but I did use the harbor freight 6" DA polisher. With 5.7 amps, i thought it was plenty powerful to do the job. Here's the specs of the polisher http://www.harborfreight.com/6-varia...her-69924.html
I read the reviews for this polisher at autogeek and the majority of the people say its just a little below par from the name brands like griot and porter cable, so I just went with it.
As for the working space, I split my trunk into 3 equal lengths, so probably around 15'x15'?
Still can't figure out why its not going away though. Its very frustrating. It does look remarkably better than the roof of my car, but there are quite a few spots remaining.
Unfortunately I do not know much about the harbor freight machine, but I do know that technique makes more of a difference than the tool. It seems like you are on the right path, so keep it up!
Keep us posted on your results!
-Zach
06-28-13, 02:05 PM
#5
Driver
Thread Starter
Join Date: Jan 2012
Location: GA
Posts: 109
Likes: 0
Received 0 Likes
on
0 Posts
Thanks so much for the help zmc! I will definitely try this out tomorrow. The compound does dry up quickly so I will try the QD this time around! Hopefully tomorrow I will post up a spotless trunk and roof pic!!
06-28-13, 03:49 PM
#6
If, by chance, you happen to have Meguiar's D300 microfiber cutting compound, I have found that mixing it with M105 allows for a very long work time and very little drying up/dusting... I rarely use M105 by itself after finding this combo... just another thought.

Trending Topics
06-30-13, 06:08 PM
#8
I work with 105 all the time. It's a great compound, but don't expect it to work miracles.
I've done multiple stage corrections where 105 didn't fully eliminate deep water spots (Usually orange pad with Flex). Depending how deep the etching is, even doing the same section twice (4 passes each time) will not make it go away. This is why it's important to wash bird dropping right away.
If you have tried the 105 route and didn't achieve results after properly polishing the etchings, you need to ask yourself, what's more important, living with the etching, or removing more clearcoat to make it better or to completely remove it? It's never a win-win situation when it comes to polishing, you either remove more clear and make the paint flawless, or leave more clear and live with these minor imperfections.
06-30-13, 06:45 PM
#9
Pole Position

I once got a bad streak coming out the gas tank. Two different shops said that it got under the coating...I always wondered how that was possible.
Thinking through it, it is probably not possible. Most likely it is chemically bonded or etched into the surface. Maybe this is what they meant?
Careful as I screwed the clearcoat up in this area which forced me to pay someone to reshoot the CC in that area.
Thinking through it, it is probably not possible. Most likely it is chemically bonded or etched into the surface. Maybe this is what they meant?
Careful as I screwed the clearcoat up in this area which forced me to pay someone to reshoot the CC in that area.

Thread
Thread Starter
Forum
Replies
Last Post