When you click on links to various merchants on this site and make a purchase, this can result in this site earning a commission. Affiliate programs and affiliations include, but are not limited to, the eBay Partner Network.
Didn't really do much but I connected the remote cable today and installed velcro on the LOC. Getting things ready little by little. Also ordered some wire ferrules to try and make a clean install for the wires that will go to the amp and sub.
Location where the amp will sit. Measured and cut the first portion of the power wire and i will do a small bracket for the fuse holder to sit on the bolt thread where i marked in blue. Wire loomed and taped the cable for an oem look. Also bridged the subwoofer for a 4 ohm impedance to the amp to achieve 300 watts rms.
I had a little garage time this weekend and worked on some "out of car" prep for my eventual sub replacement.
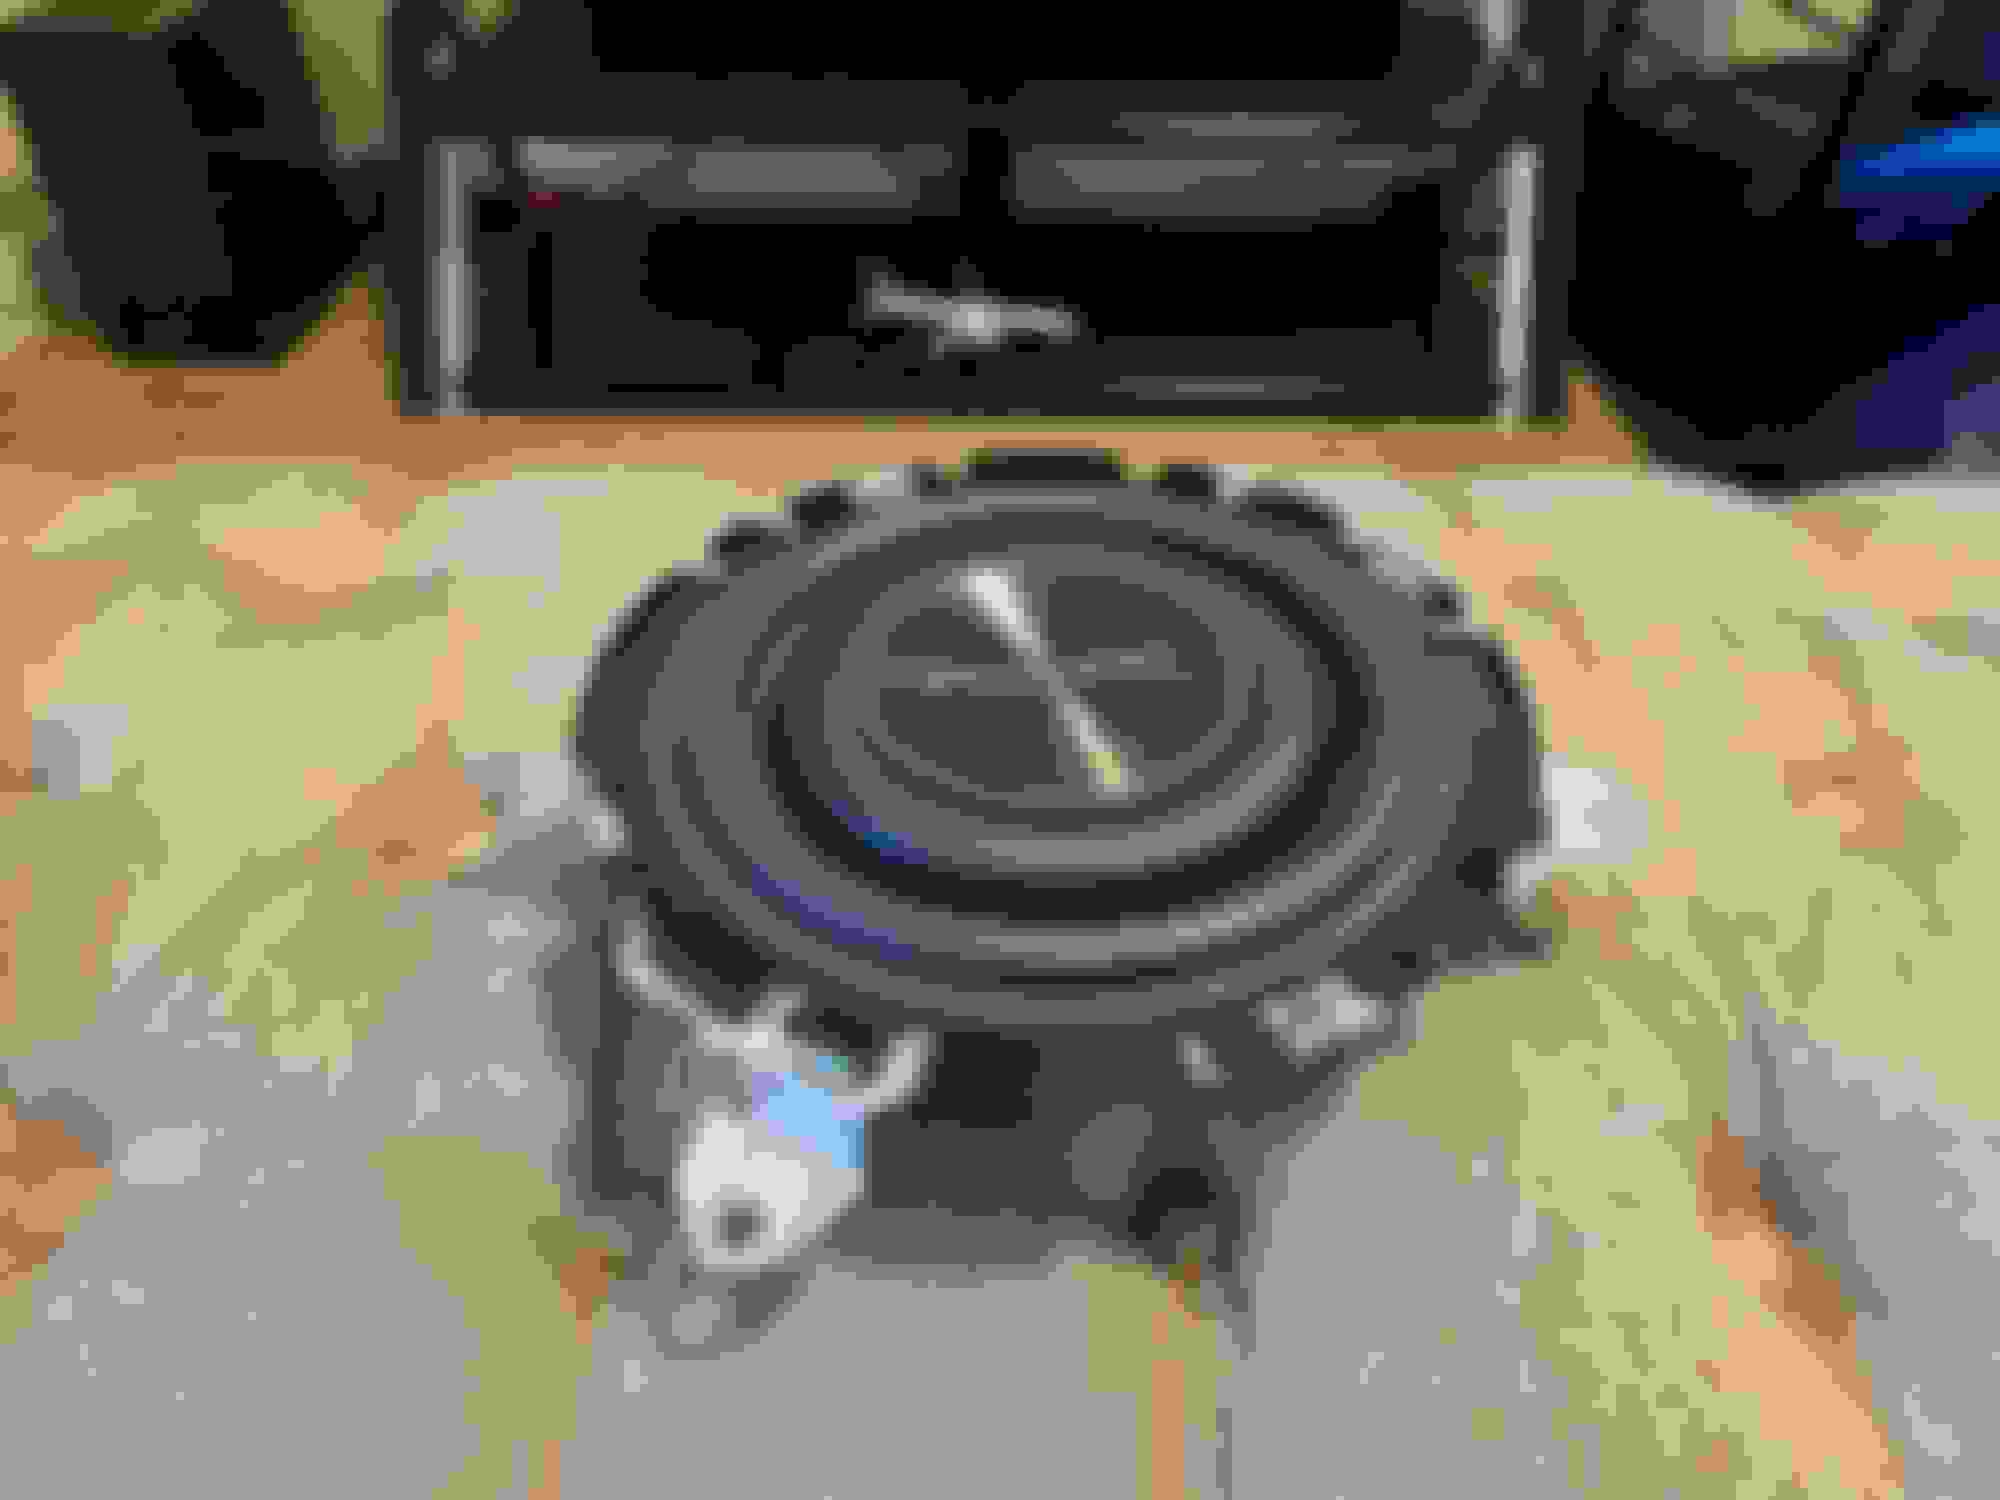
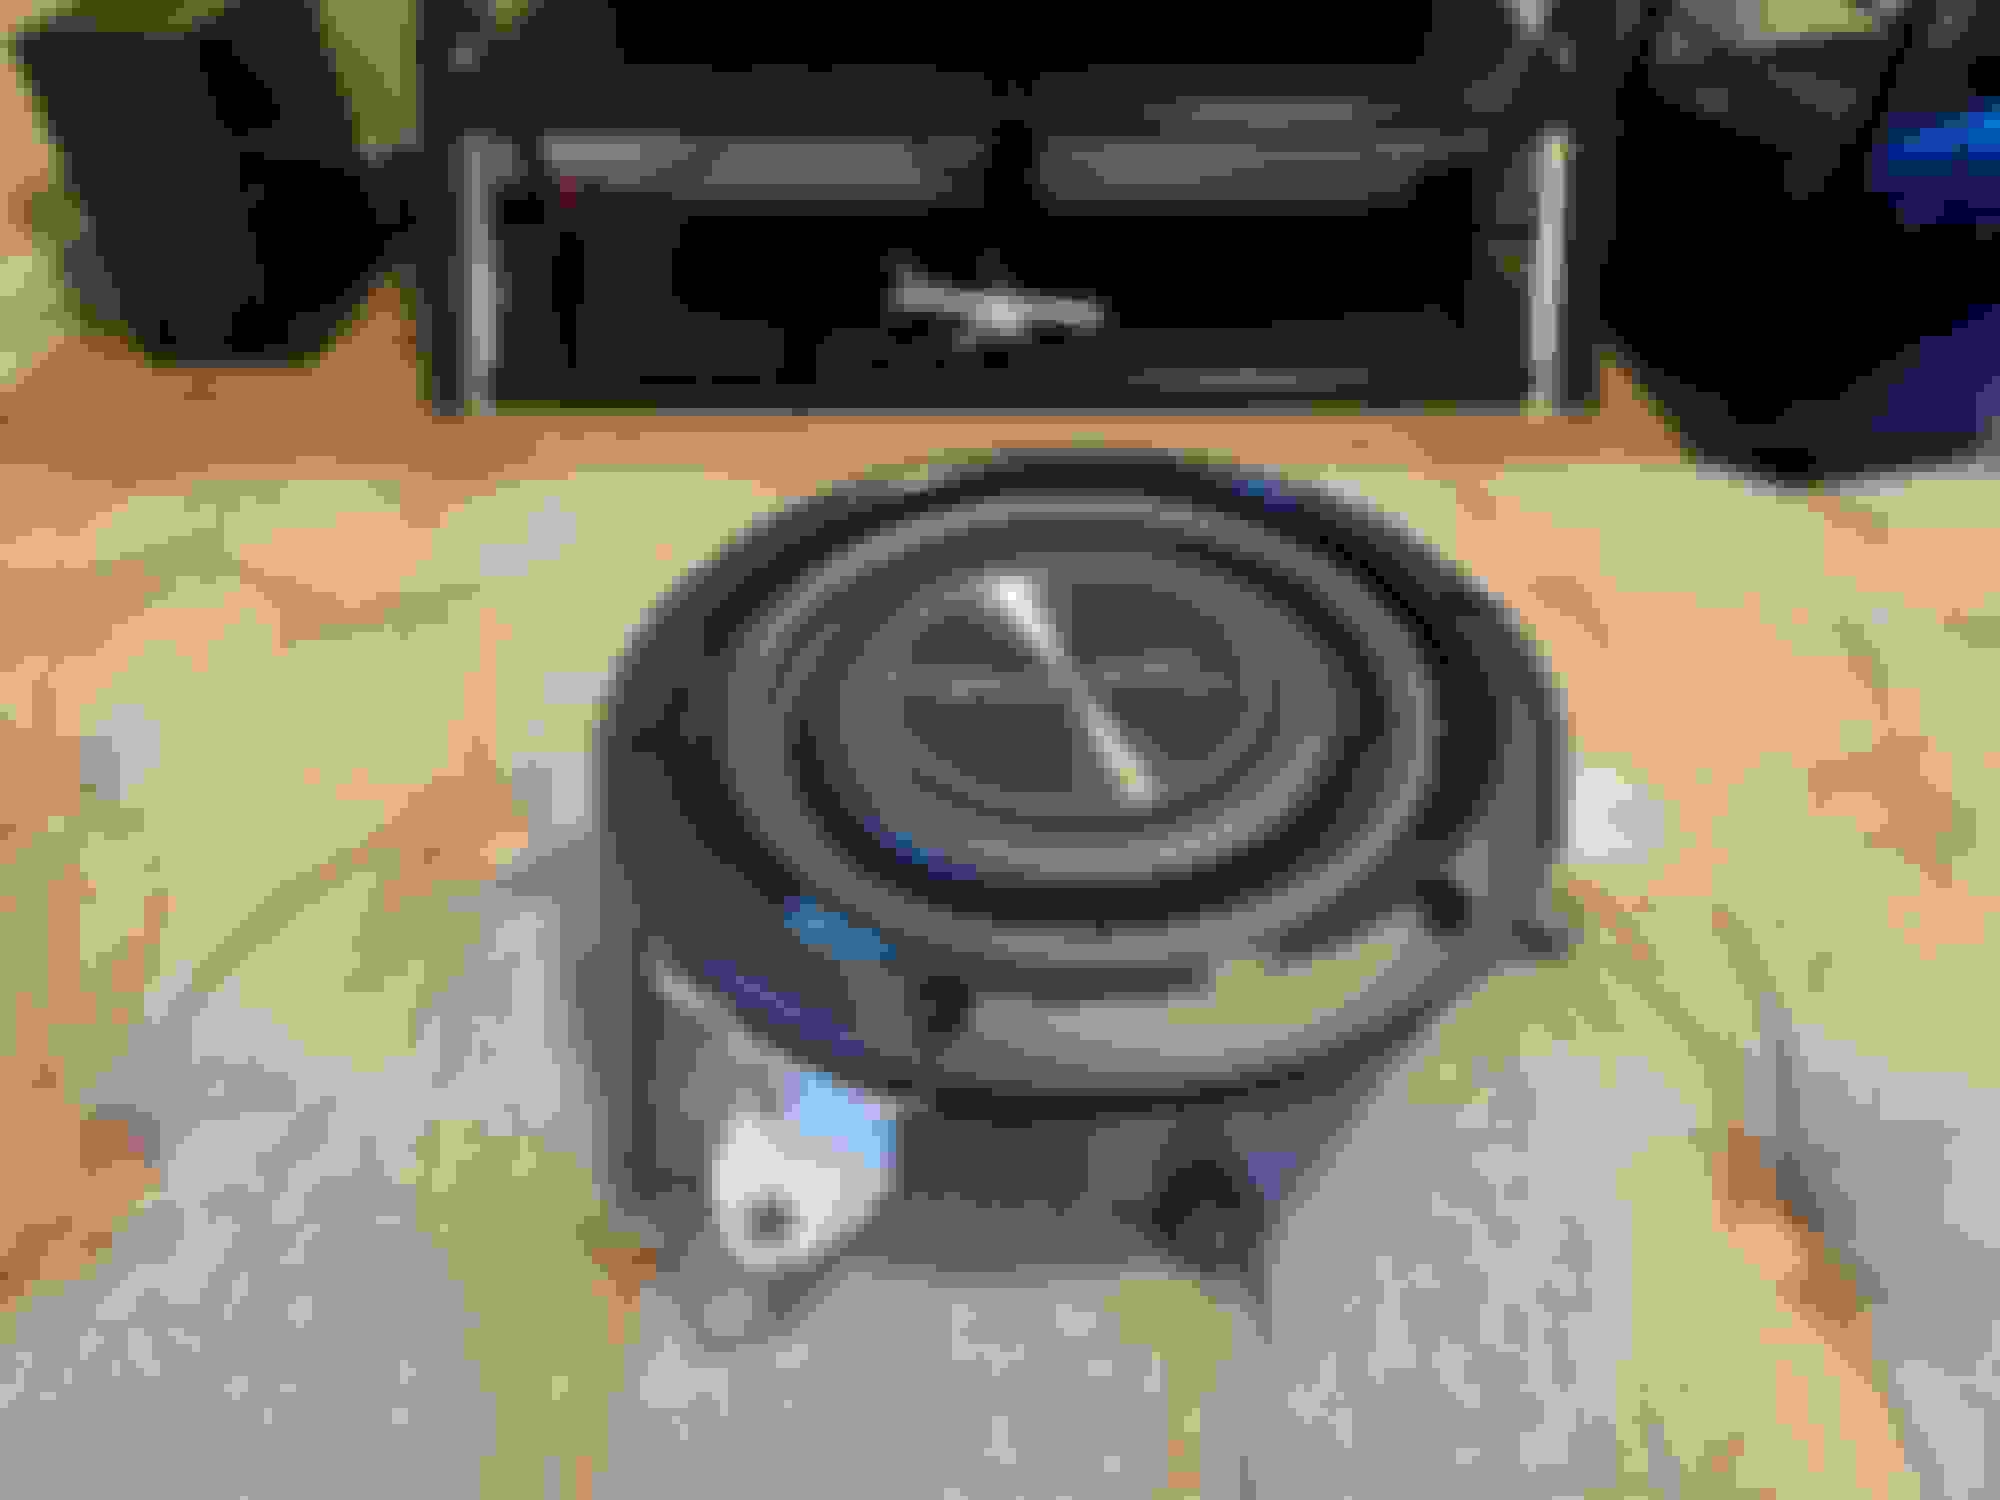
I got a junkyard OEM speaker and tore it apart like OP. I went with a different approach to using the OEM frame to top mount my sub. Looks like it should work, at least as far as bolting right up to the original location. I thought I'd need a 1/4" speaker extension ring for the project but turns out I did not. I was able to securely fasten the RF sub to the modified factory speaker frame and get full speaker gasket contact. Height looks good and should not create any interference with the deck cover. Now, how it functions might be a different story...............
Took a few pics to share:
Last edited by ljerr2; 03-19-23 at 03:14 PM.
Reason: add more info
I had a little garage time this weekend and worked on some "out of car" prep for my eventual sub replacement.
I got a junkyard OEM speaker and tore it apart like OP. I went with a different approach to using the OEM frame to top mount my sub. Looks like it should work, at least as far as bolting right up to the original location. I thought I'd need a 1/4" speaker extension ring for the project but turns out I did not. I was able to securely fasten the RF sub to the modified factory speaker frame and get full speaker gasket contact. Height looks good and should not create any interference with the deck cover. Now, how it functions might be a different story...............
Took a few pics to share:
This looks really clean ! What sub is it ? And i see you left the plug from the oem connection, is it going to connect there ?
I haven't posted cause I've been so busy but in the next couple days I should be mounting the sub finally onto the bracket.
This looks really clean ! What sub is it ? And i see you left the plug from the oem connection, is it going to connect there ?
I haven't posted cause I've been so busy but in the next couple days I should be mounting the sub finally onto the bracket.
Thanks - trying to go for an original equipment look and wanted the upgrade to have no immediately visible evidence of mods. That's why I'm going this route first instead of a box in the trunk. Hoping for decent results.
The sub is a Rockford Fosgate shallow mount and it has a decently high qts, so I understand it should be good for an infinite baffle setup, even though RF doesn't advertise it as such as far as I know. I've had this sub in small, sealed box applications before and was pretty happy with it. Going to power it with a Audio Control 1.300 amp and hope to hide it in the driver side cubby in the trunk, behind the wheel well. Hope it fits, but I have the amp already anyway.
As far as the factory speaker receptacle on the factory housing, I am not re-using it. I will be wiring direct to the new sub.
Looking forward to your updates and pics.
Last edited by ljerr2; 03-19-23 at 08:04 PM.
Reason: typo
So I took the bracket to a local metal fab shop and they perfectly and evenly took out the upper lip. The bracket now perfectly fits underneath the subwoofer so the subwoofer now sits on top of the bracket which is how I wanted it. And I plan on drilling 6 holes to match the ones on the sub faceplate so I can use it. I think it'll look nicer that way in my head even though it won't be visible lol.
Ahhh...........I was thinking you were going to mount your sub under the bracket, but that is basically what I did, too. However, I left the bottom plastic part of the bracket in hopes that it'll still fit to help support the sub on the rear deck and also provide the "air seal" between the sub and the trunk space. I use the term "air seal" loosely.
Ahhh...........I was thinking you were going to mount your sub under the bracket, but that is basically what I did, too. However, I left the bottom plastic part of the bracket in hopes that it'll still fit to help support the sub on the rear deck and also provide the "air seal" between the sub and the trunk space. I use the term "air seal" loosely.
That's another good way to do it as well. I will be putting underneath the rubber seal I bought all around the bracket for that "air-tight seal" as well.
How is your progress going ? Next im going to drill out the 6 holes to finish mounting it.
No real progress will be made until maybe this weekend and some more prep work - gain mount, test fit amp location, etc. My timeline is probably looking at at least a month out to get to the testing stage. You?
No real progress will be made until maybe this weekend and some more prep work - gain mount, test fit amp location, etc. My timeline is probably looking at at least a month out to get to the testing stage. You?
Same as well give or take. Just lack of time cause i already have all the parts. Going to finish mounting the sub and then find a day to start routing the power wire. Then maybe take a day or two off work to finish replacing the subwoofer and testing the system before buttoning all up and reporting back.
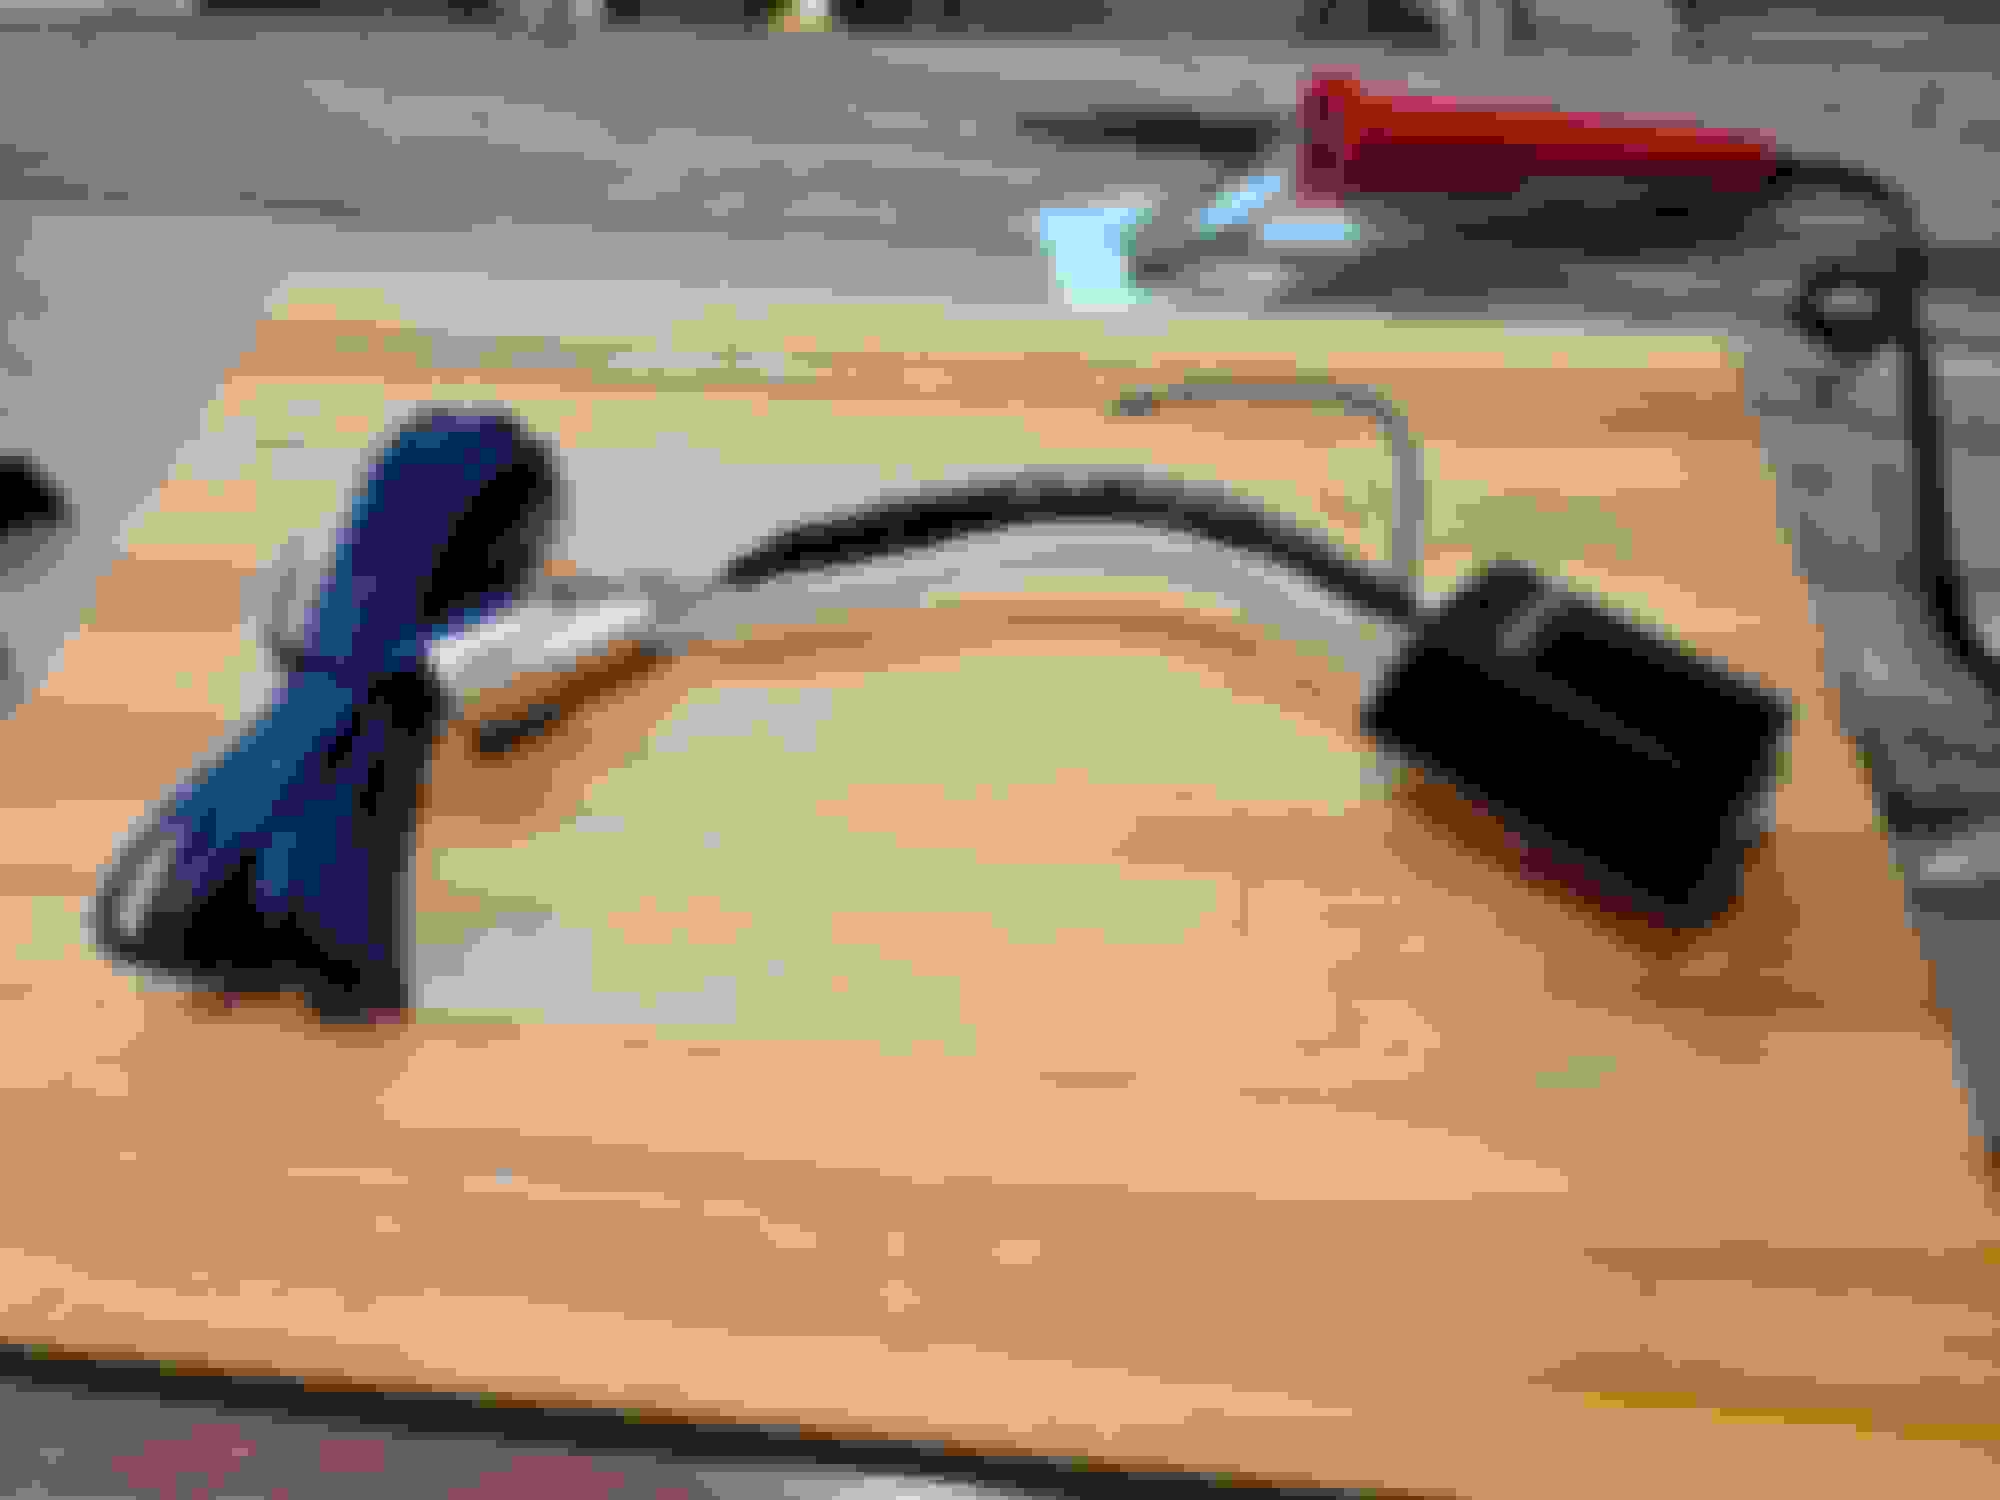
wired the sub itself but that's about it tonight. Decided to add an OEM-type connector to hook it up to the amp outputs. Also pictured is the interface harness I plan to use to tap the signal at the OEM amp. I'm going to grab a full-range signal and the OEM sub signal to sum at my AC amp. This harness will allow me to not have to cut into my OEM wires at the amp (which I believe are probably going to be aluminum).
wired the sub itself but that's about it tonight. Decided to add an OEM-type connector to hook it up to the amp outputs. Also pictured is the interface harness I plan to use to tap the signal at the OEM amp. I'm going to grab a full-range signal and the OEM sub signal to sum at my AC amp. This harness will allow me to not have to cut into my OEM wires at the amp (which I believe are probably going to be aluminum).
This is very interesting. How did you get ahold of the 2 plastic connectors to make that "T" harness ?
I hope the way I'm doing mine, which is also plug and play, works well for the mids and highs and some lows. I'm grabbing the signal directly from the subwoofer connector harness and into the line out converter directly.
 03-13-23, 09:33 PM