
CCColtsicehockey (Formerly WReuroR) 2008 USB Build
 08-17-23, 08:26 AM
#16
More and more parts have been coming in as well.
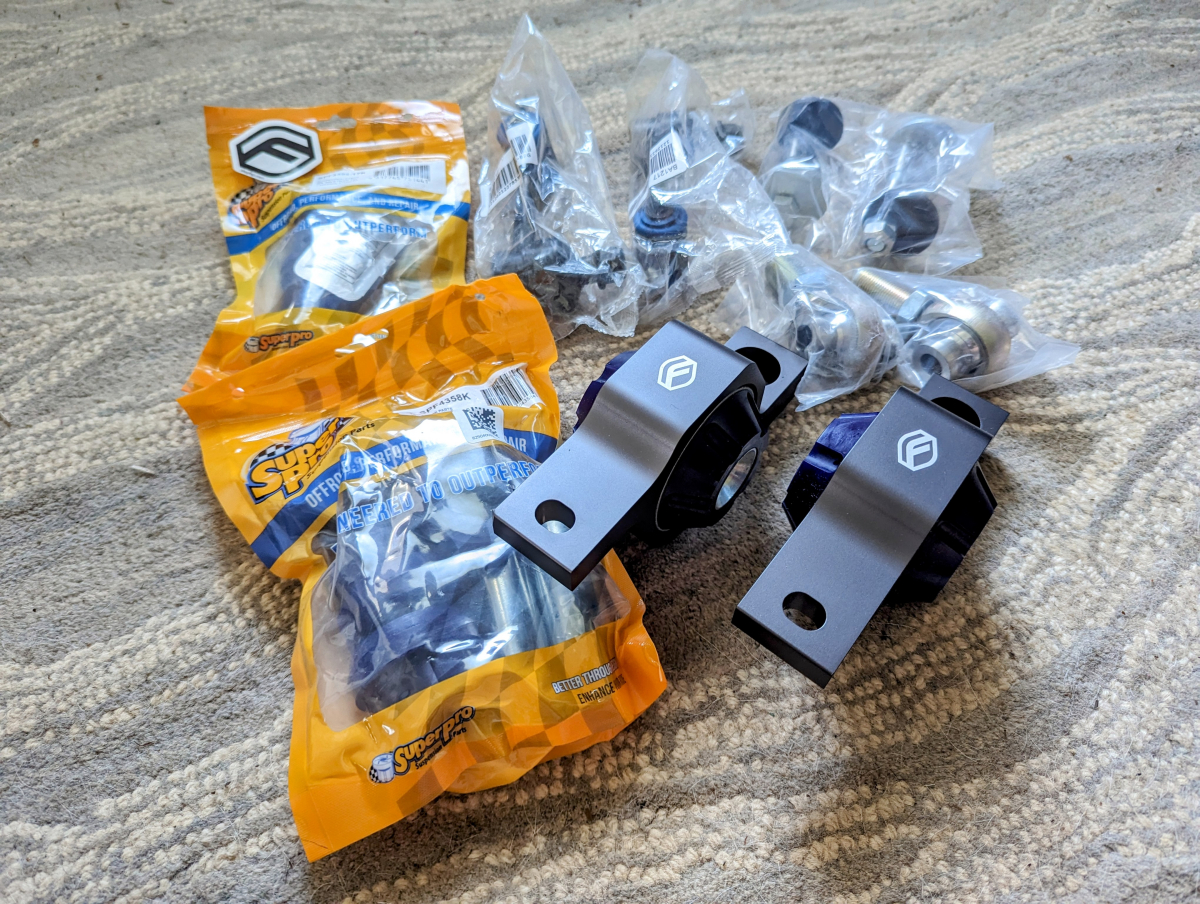
Order both front and rear poly bushing for the front lower control arms. New endlinks, sway bar bushings, as well as all the hardware on the rear lower control arms that is rusted. I will get the lower control arms themselves cleaned up and recoated.
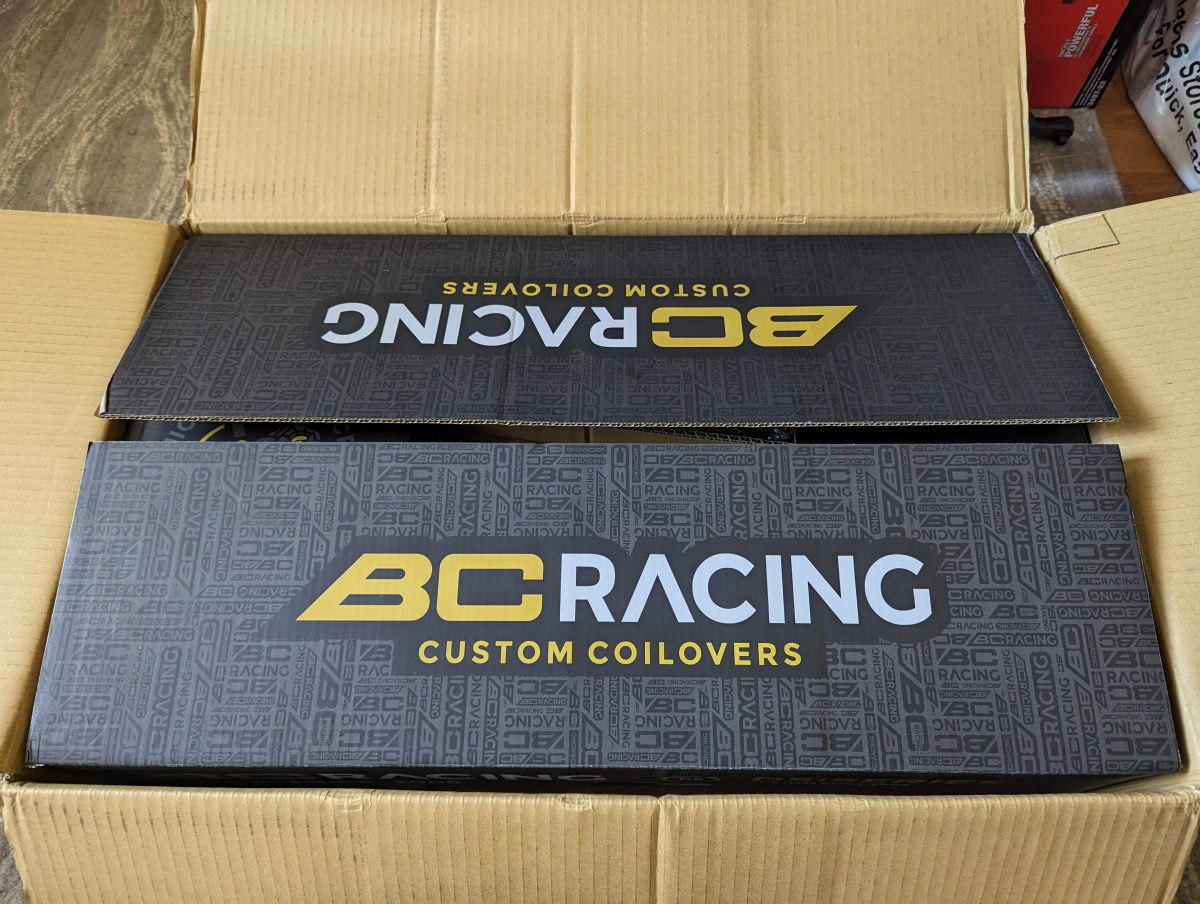
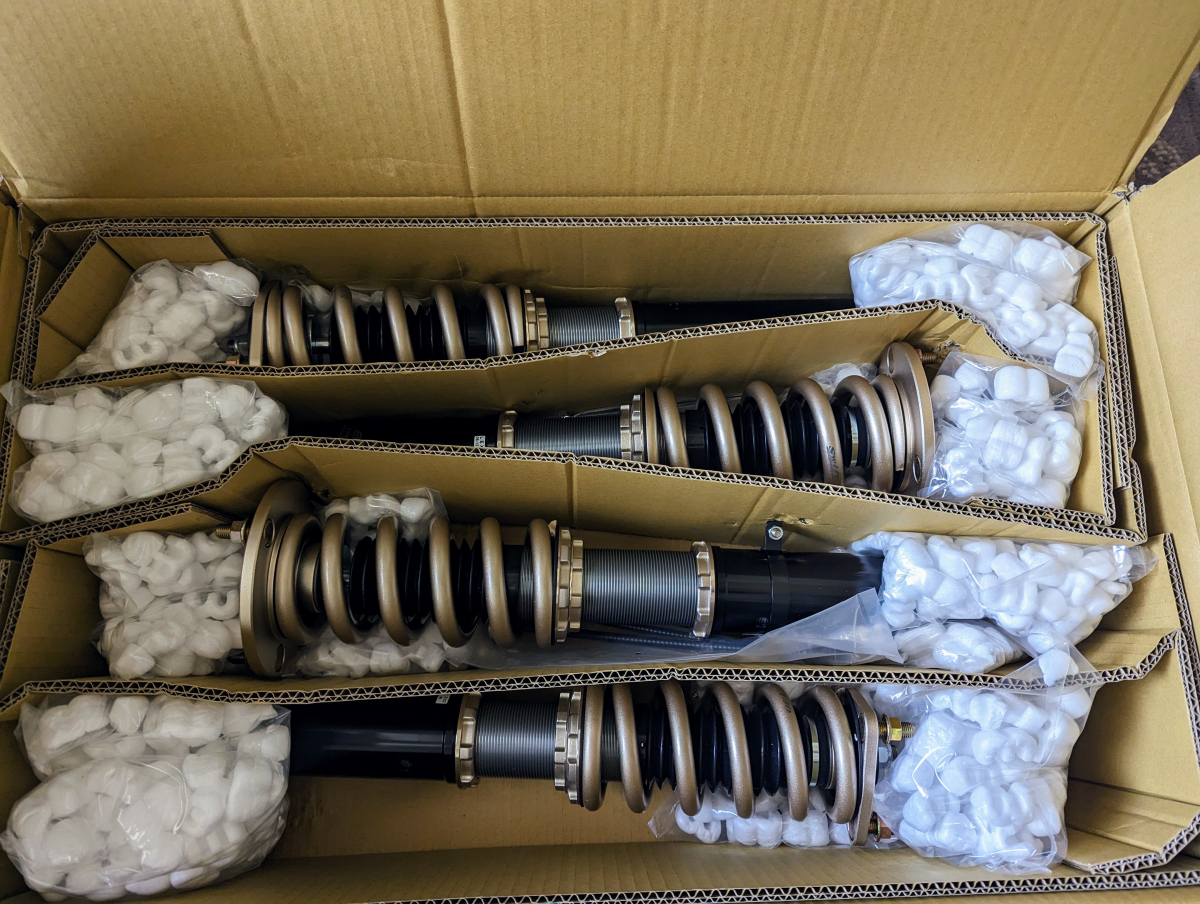
My BC Racing DS Coilovers finally showed up as well.


Order both front and rear poly bushing for the front lower control arms. New endlinks, sway bar bushings, as well as all the hardware on the rear lower control arms that is rusted. I will get the lower control arms themselves cleaned up and recoated.
My BC Racing DS Coilovers finally showed up as well.

 08-19-23, 05:44 AM
#18
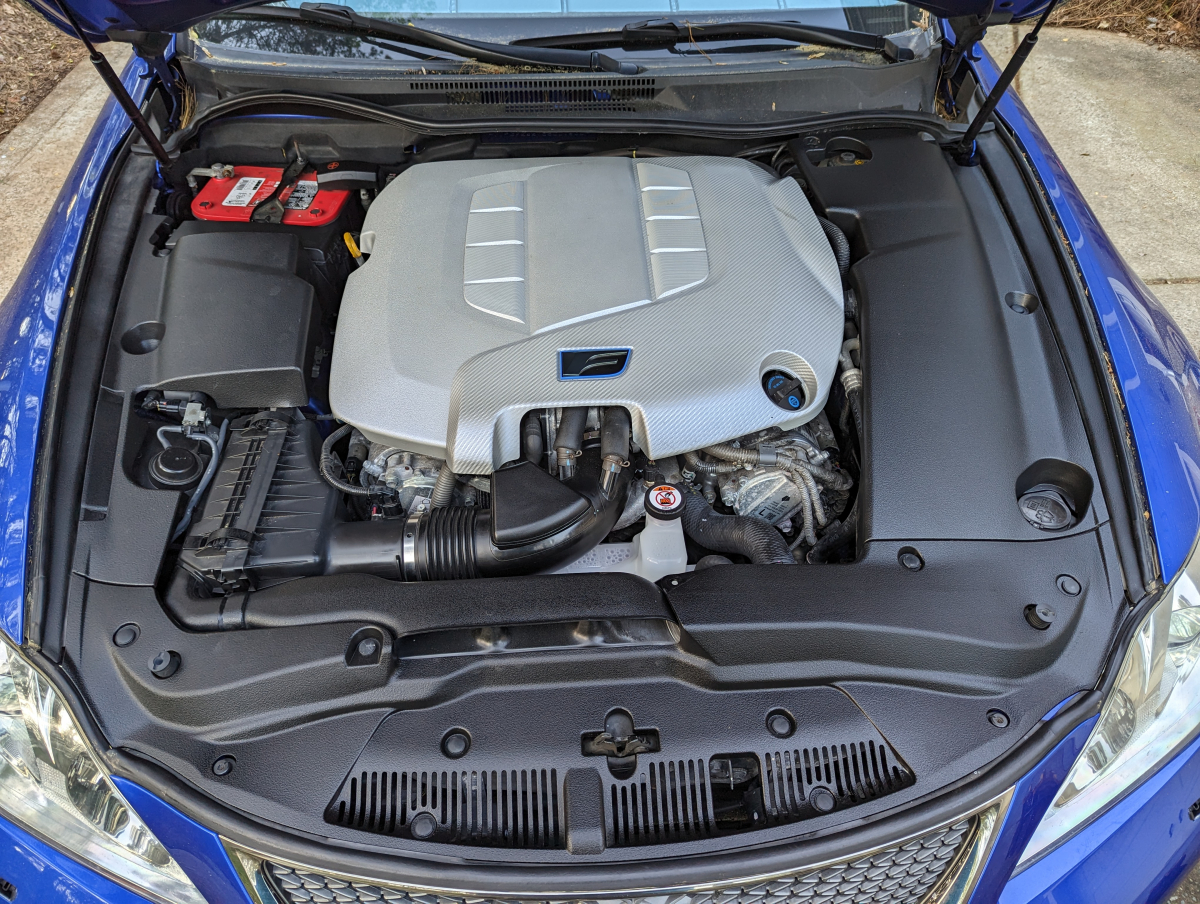
This is the coating I used on the engine panels.
When I installed the new battery this past weekend I wiped the dust off them but they were still good deep black.
The following users liked this post:
ChpEng (08-19-23)
08-19-23, 07:56 PM
#19
Tech Info Resource

iTrader: (2)
We did this on race bikes in the 80's, but we used safety wire, not zip ties.
If you want to make a really nice repair, watch this:
If you want to make a really nice repair, watch this:
The following 2 users liked this post by lobuxracer:
CCColtsicehockey (08-21-23),
ChpEng (08-22-23)
08-21-23, 06:19 AM
#20
We did this on race bikes in the 80's, but we used safety wire, not zip ties.
If you want to make a really nice repair, watch this:
https://www.youtube.com/watch?v=yjr5LT6uUGs
If you want to make a really nice repair, watch this:
https://www.youtube.com/watch?v=yjr5LT6uUGs
08-21-23, 06:45 AM
#21
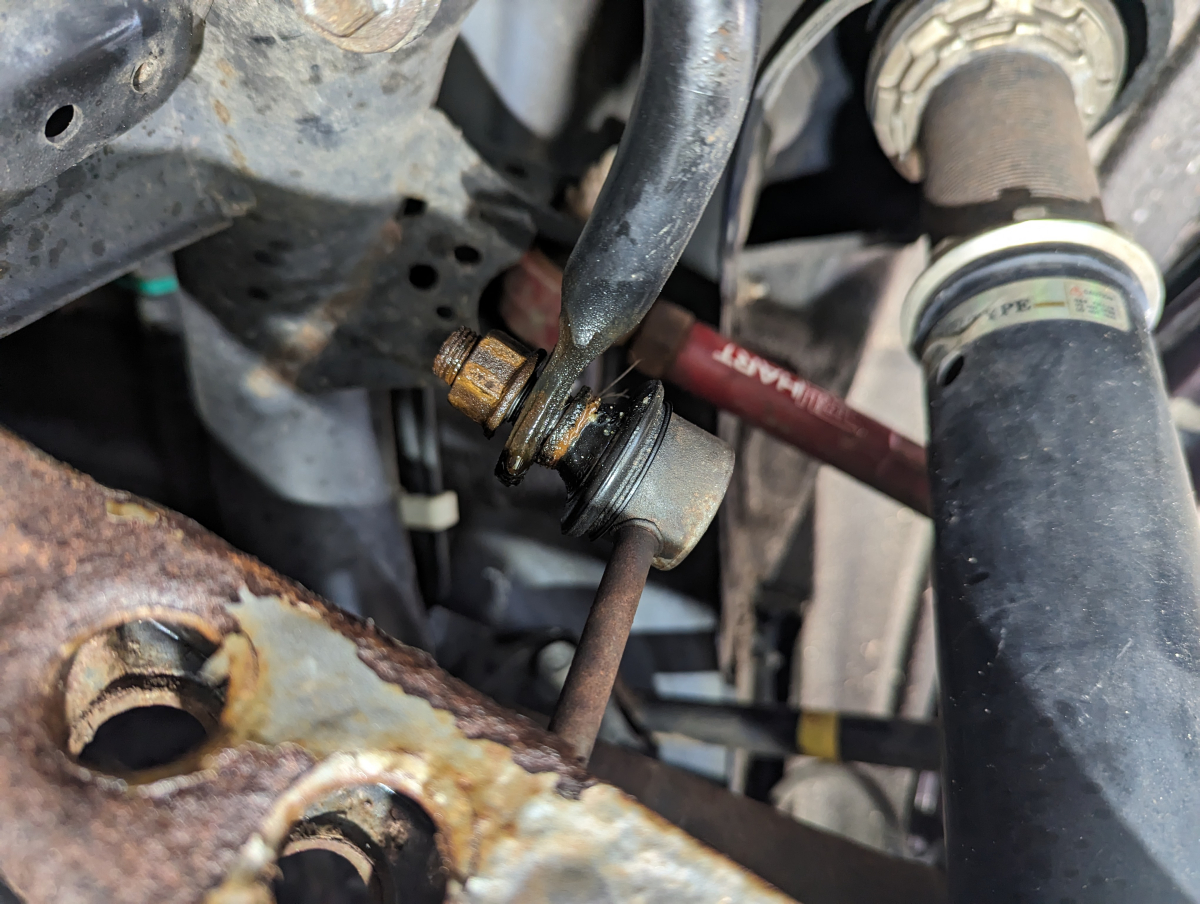
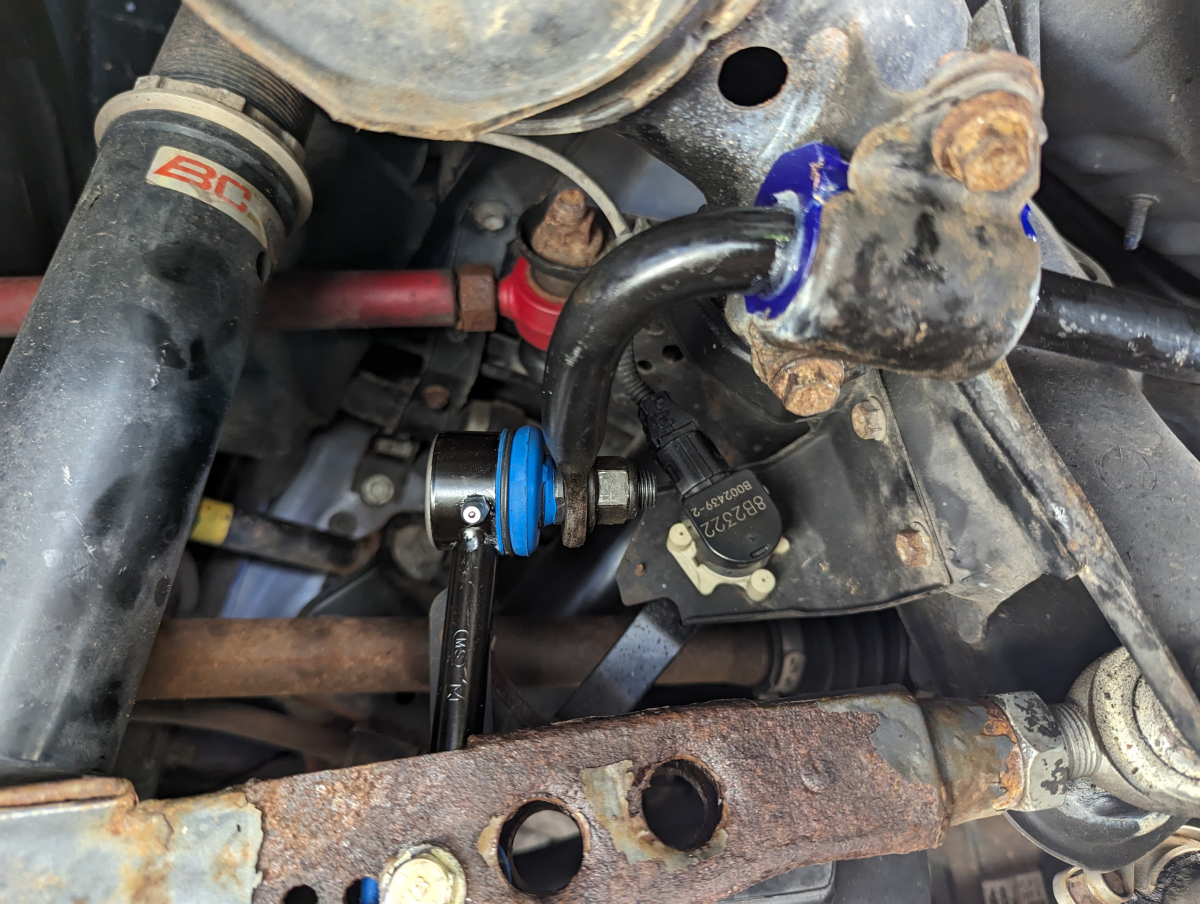
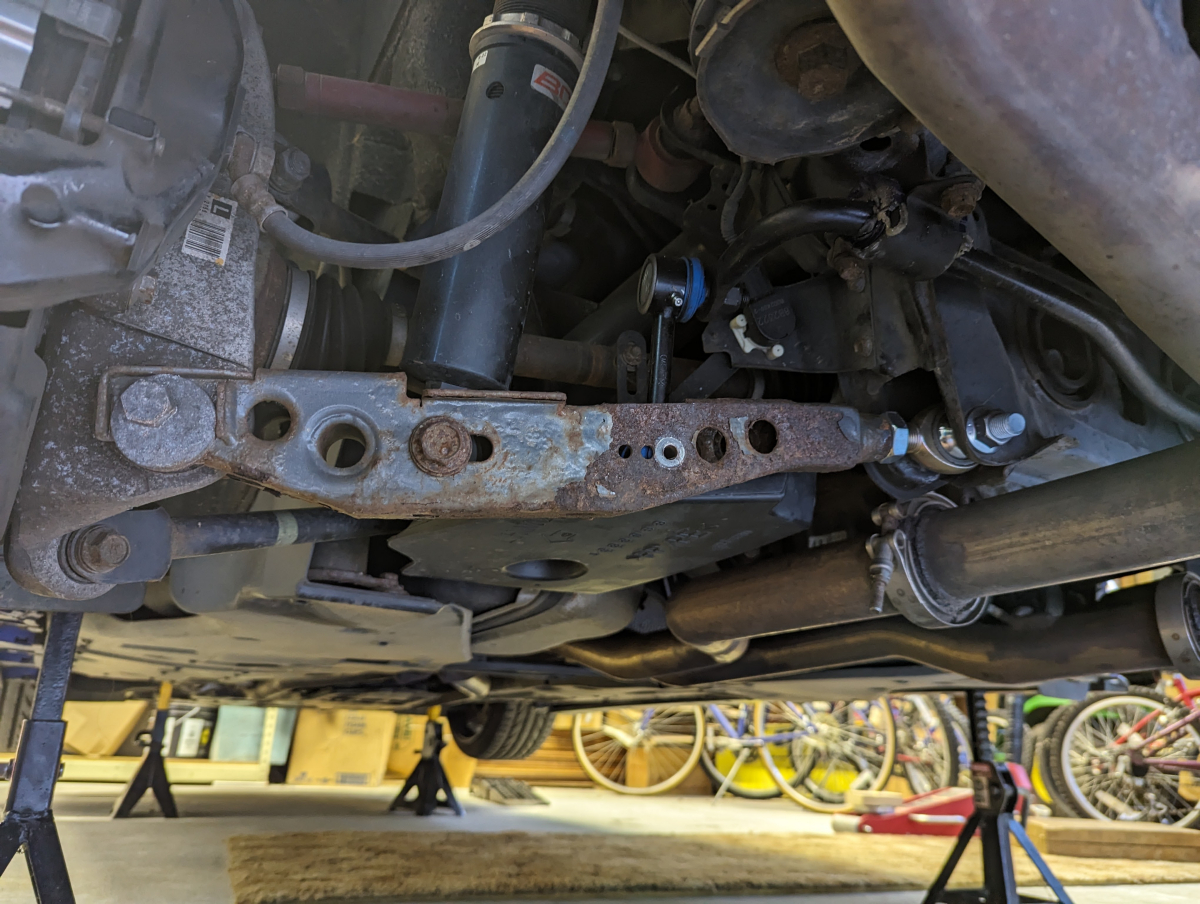
Tackled some more work on the car this weekend. I am still chasing the noise I have from the rear. So far verified the torq on everything on the rear end passenger side where the noise was and that didn't solve anything. The end links were badly rusted when I was under the car and seemed to have some excessive play so I figured they were a good easy starting point.
The rust was bad enough that even with soaking in pb blaster for an hour I couldn't fully get the nut off. I didn't have a way to get a wire wheel in the area as that might have helped clean the threads up better. I wasn't looking to reuse them anyways so I went a different route.
Remove the entire sway bar

The bottom bushing had seen better days. I could move it freely with my fingers without even putting a bolt in it. I thought I had found my problem
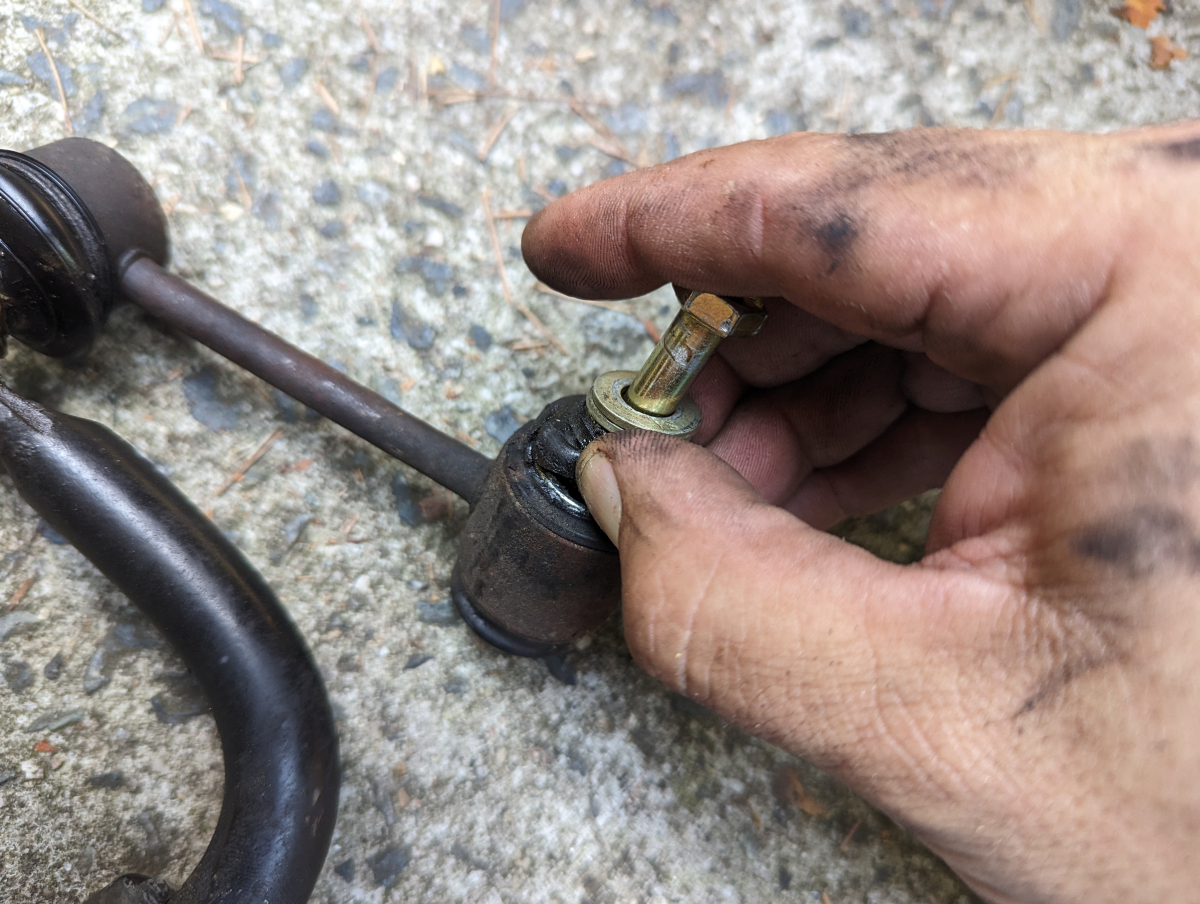
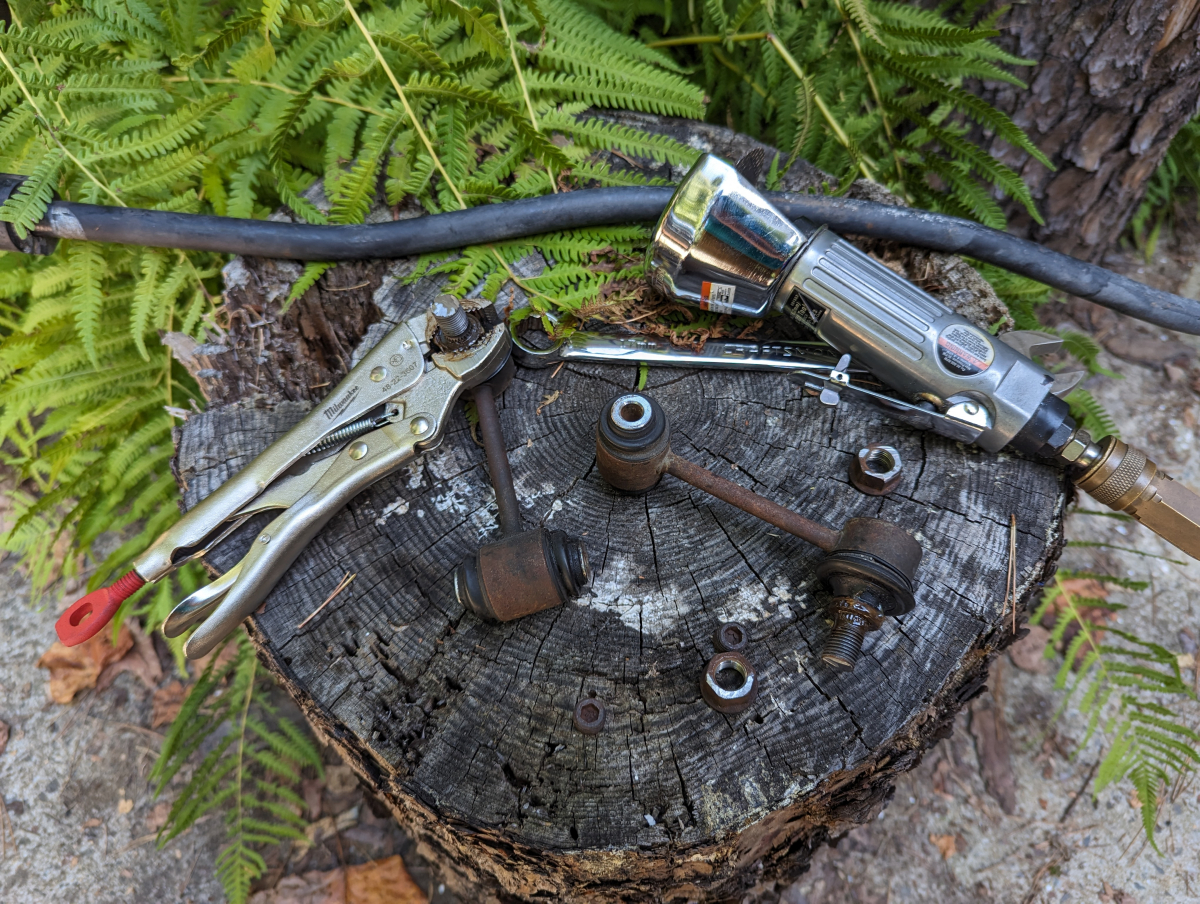
Ended up using a cut off wheel to cut the bolts to get rid of the end links
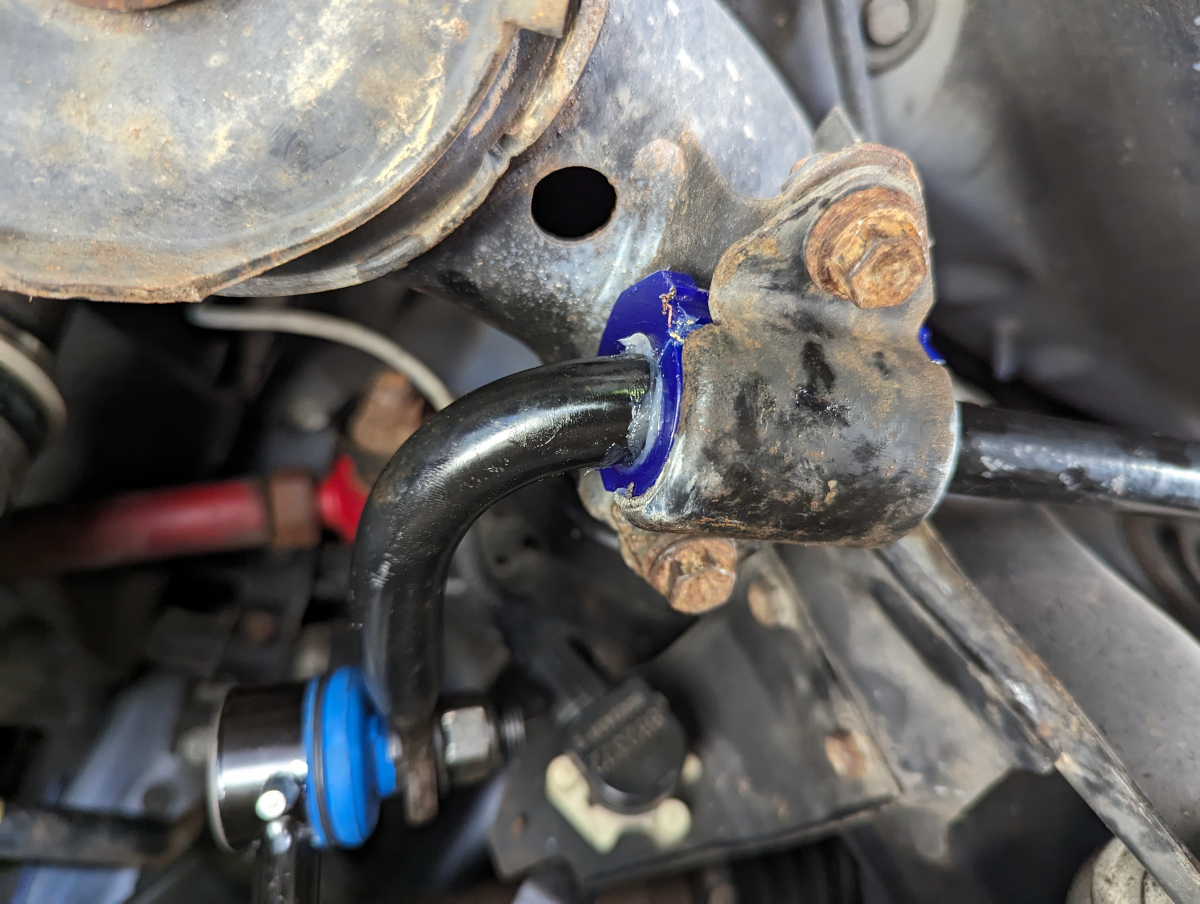
New endlinks and poly sway bushings from Figs

New end links and bushings installed.
This unfortunately ended up not being my noise and after a 15min drive it was still there. Oddly enough each time I jack the car up the first few minutes there is no noise.
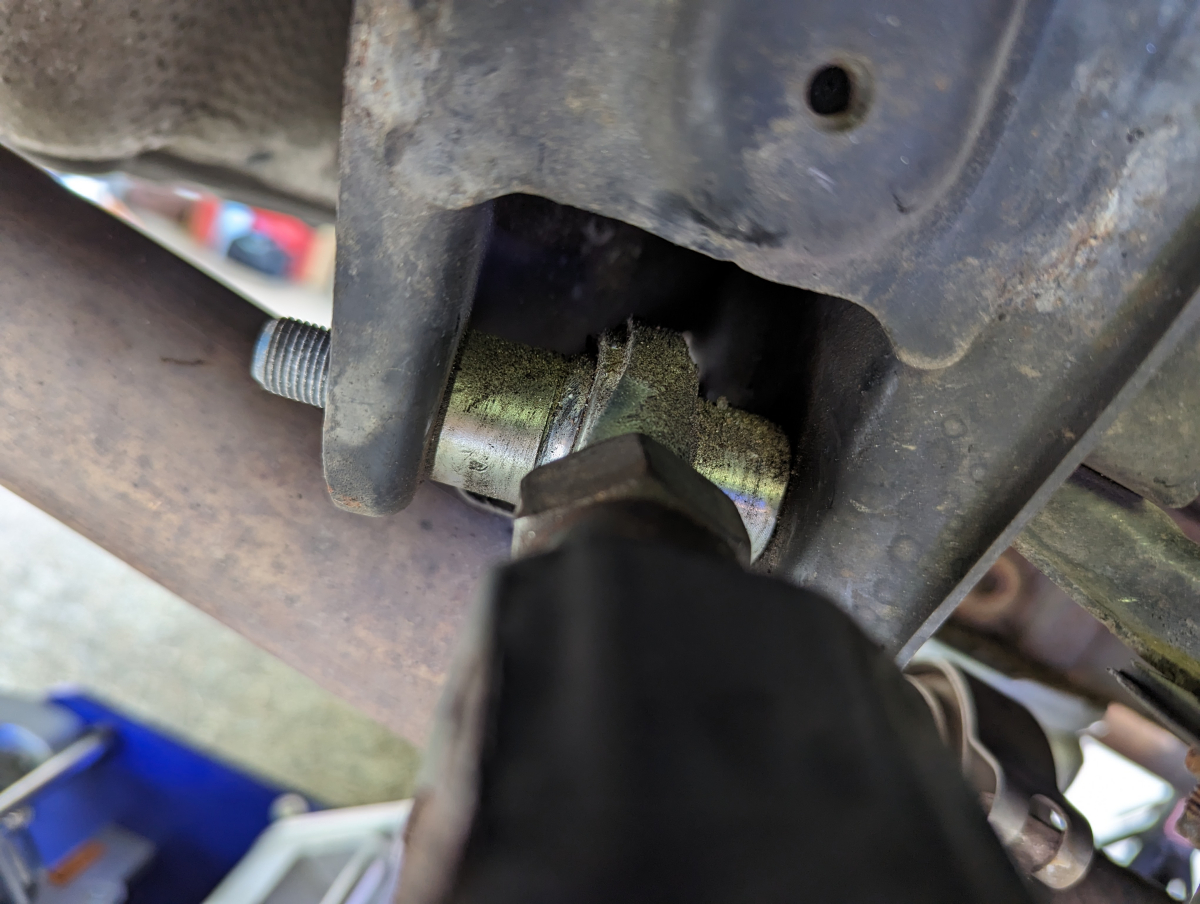
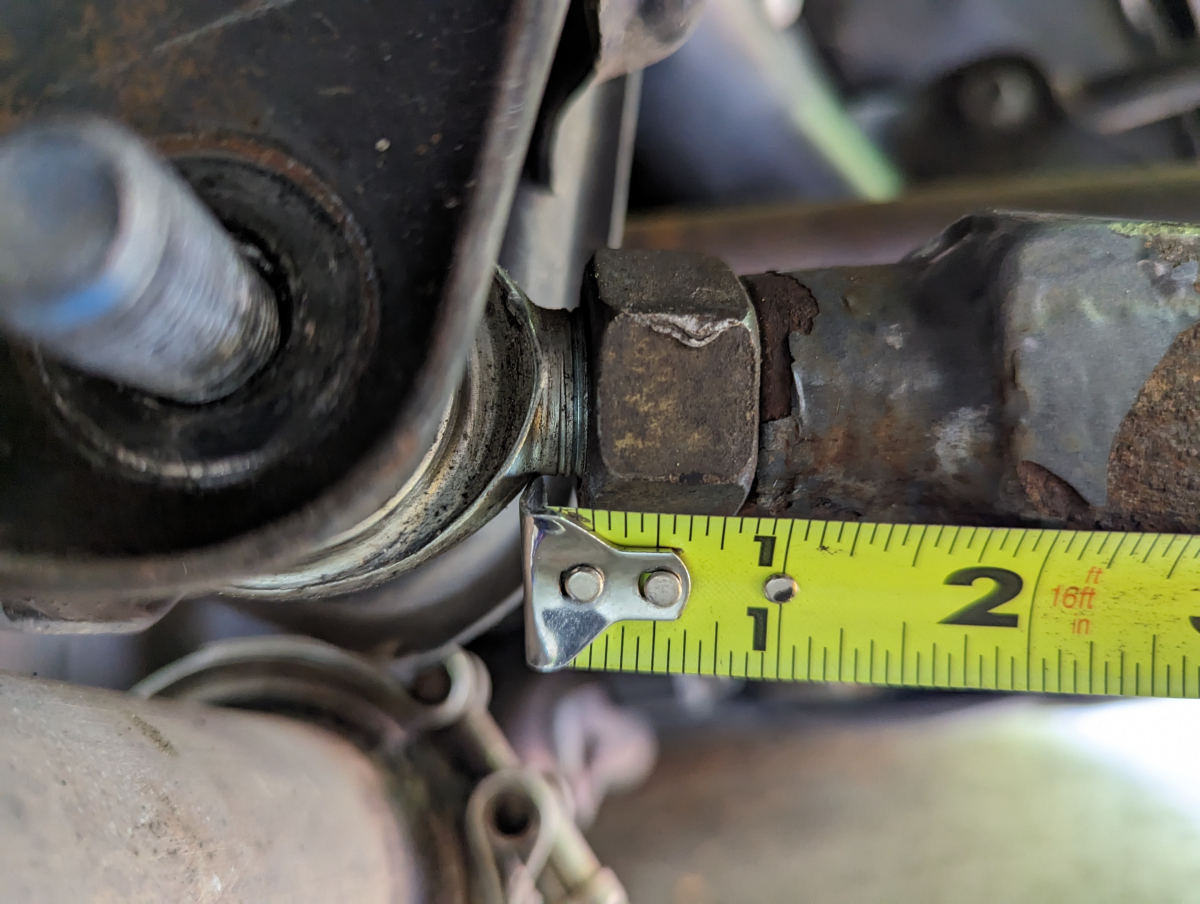
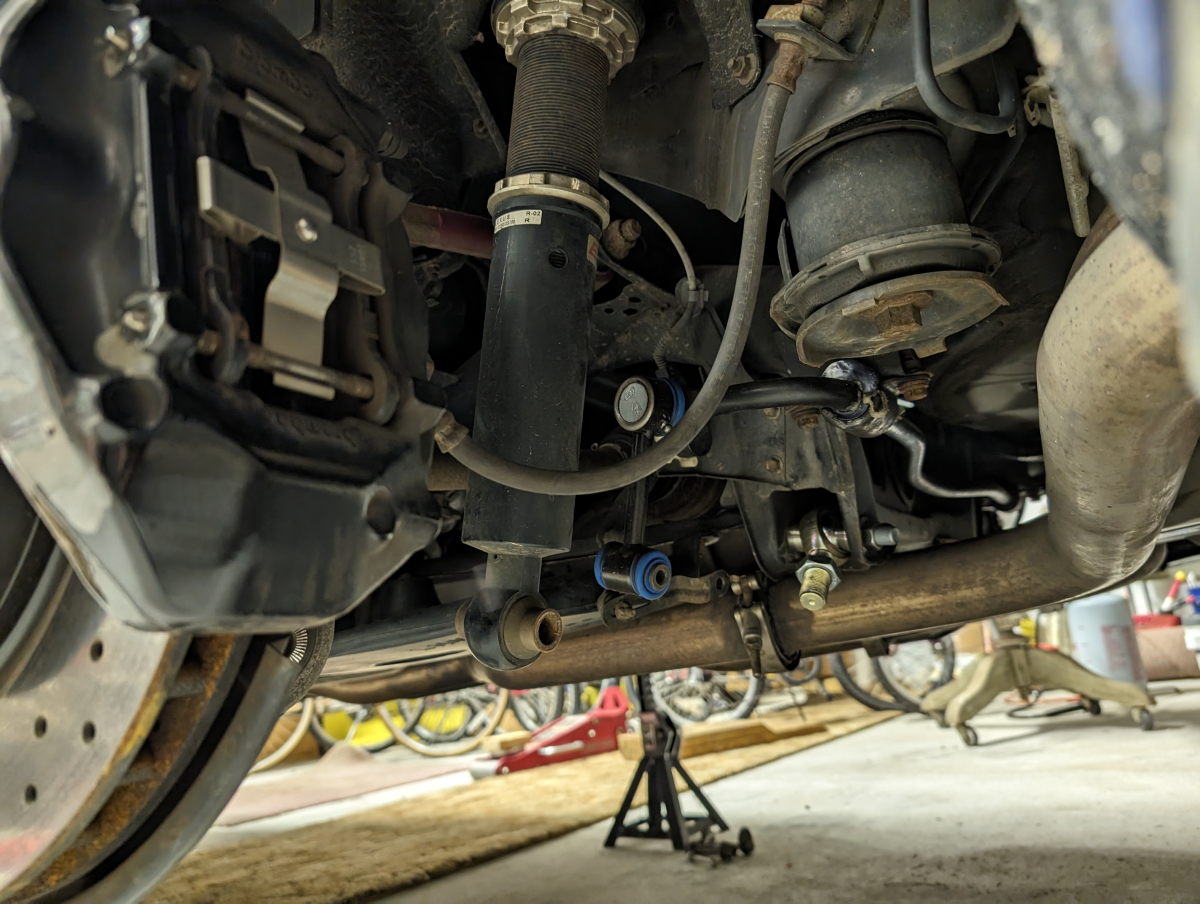
Next up was the rear LCA heim joint. Previously noted on a trip last year I had one of these snap. I got very lucky, met some cool people, and had them replaced at a dirt track shop in VA. The one we ended up having to cut the bolt as no matter how much pb blaster or heat was applied it would not come off.
New Heim that was installed during my trip last year
Took a rough measurement to get it close to the same and not affect my alignment that much. Although I will still get one in the coming weeks.
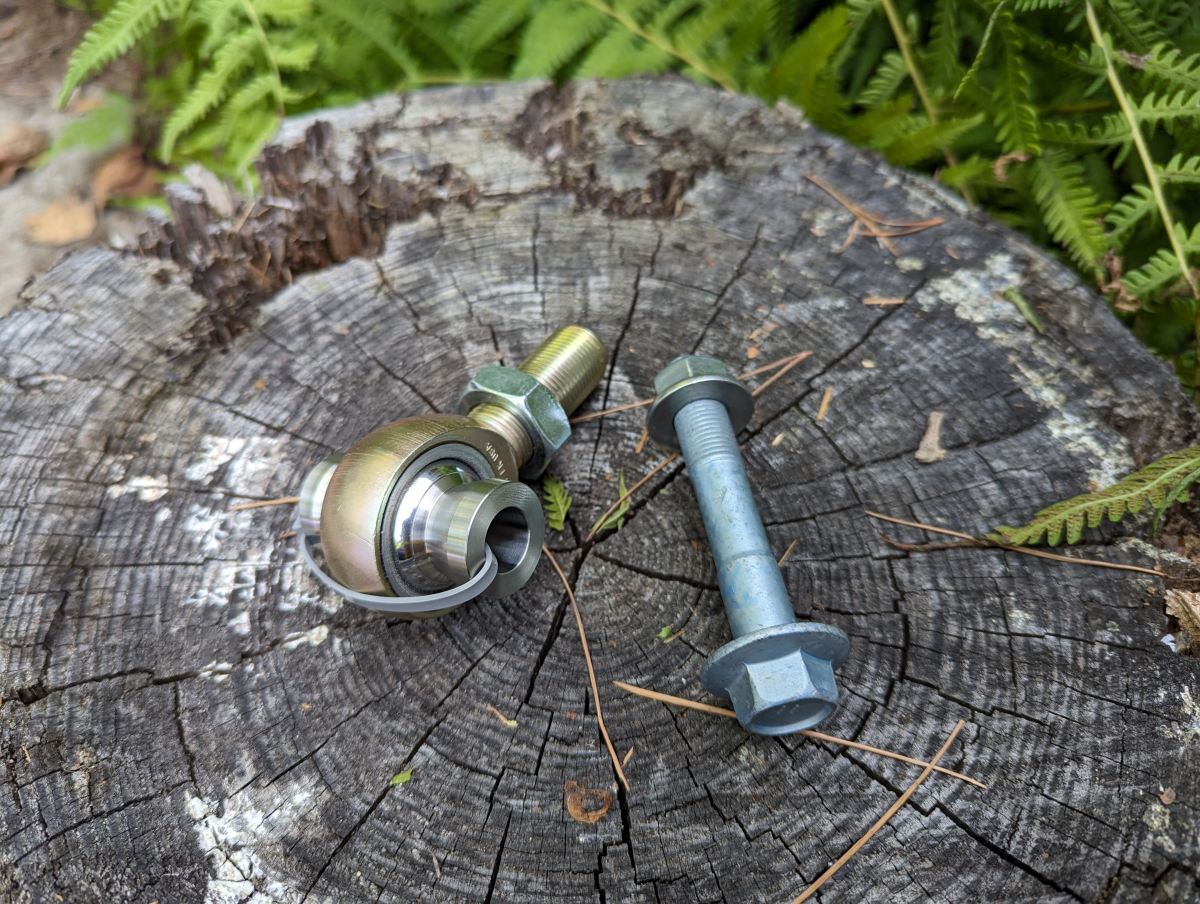
New factory bolt and fresh heim joint and standoffs from Figs
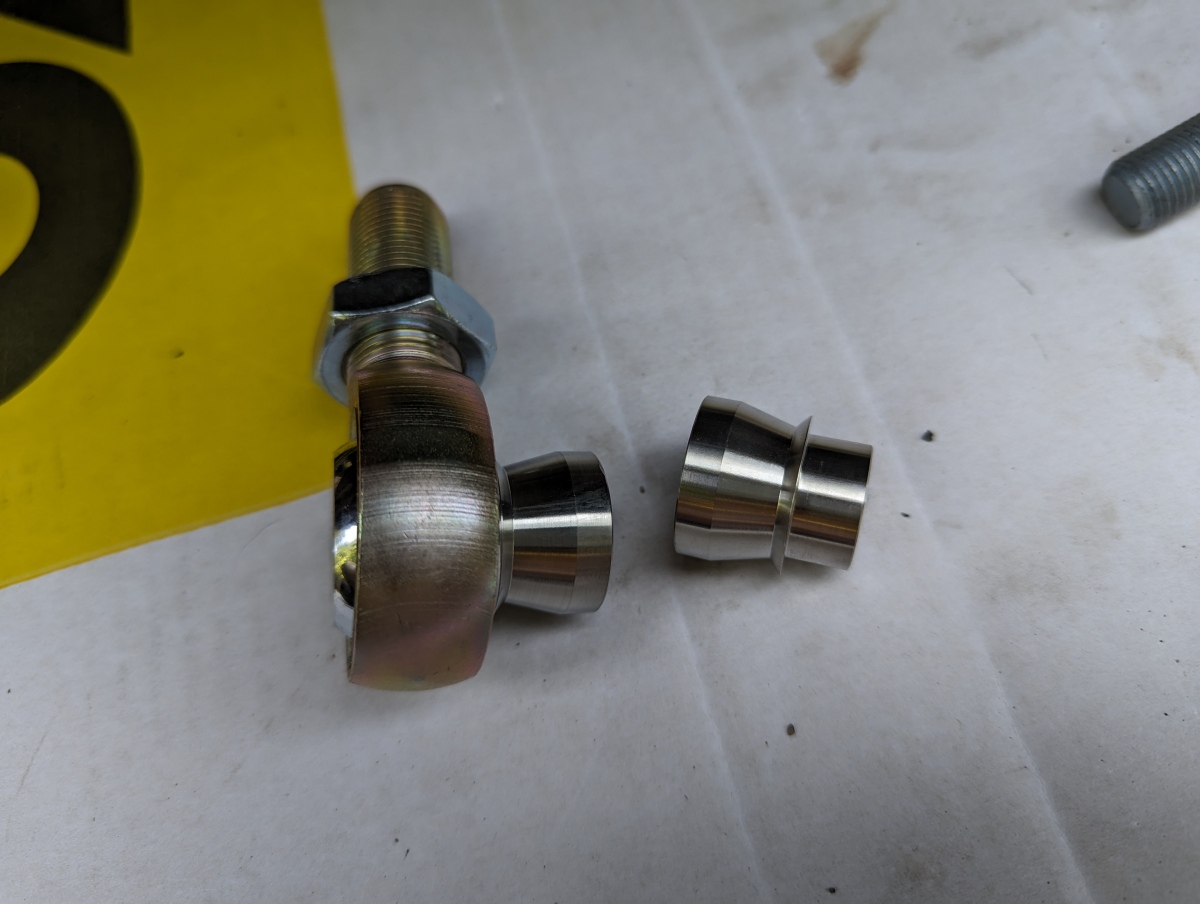
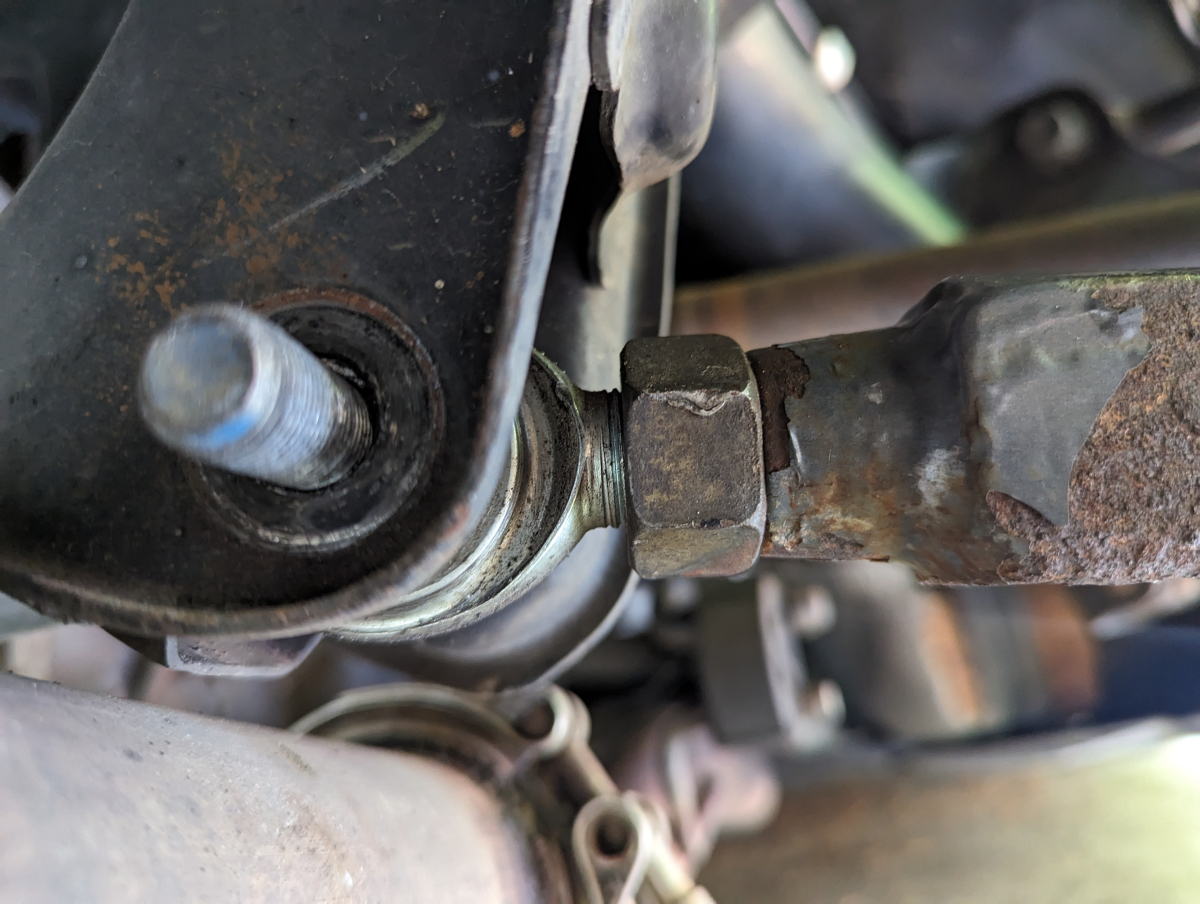
It was at the point of disassembly that I noticed the real issue. The standoffs that had been used didn't fit the bolt used perfectly. It was good enough to have gotten me through my trip but I likely should have replace this right away when I got back home close to a rear ago. The standoffs also seems to be of a fairly soft metal and had started to deform. The shop did say they rebuilt their dirt track setups fairly frequently so likely they didn't care about it.
Notice the difference in thickness of the top of the OEM bolt vs the one that had been on the car. Not even close. Everything fits together perfectly now.

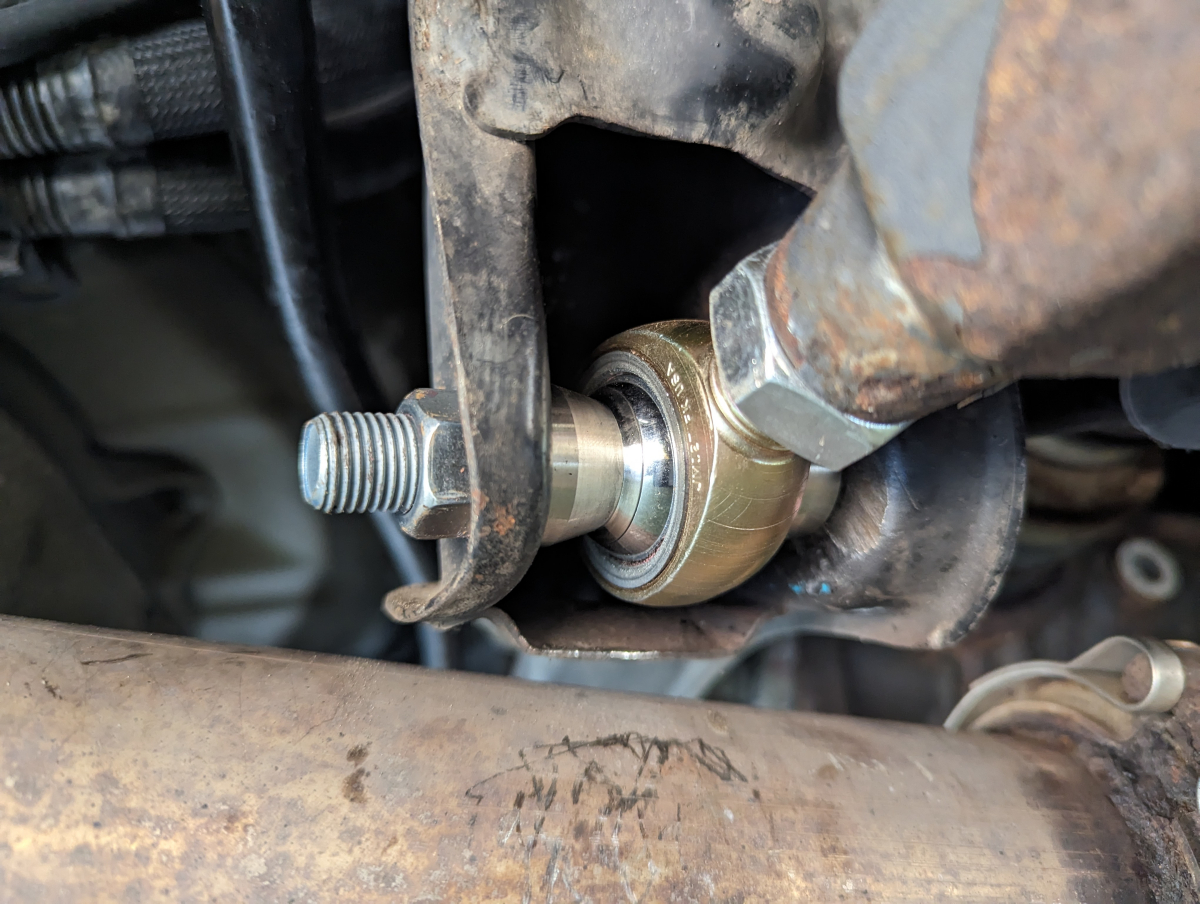
All back together.
After a 20min drive I am pretty sure the noise is gone. I won't know for sure without a little more driving this week but hopefully that is the end of this problem.
Here is a picture of the old hardware. I will likely still keep this and toss it in the trunk spare tire compartment in the event of an issue with one on the car as any spare would be better than none.

While doing these installs I ended up finding another problem. It seems at some point my Figs Mega Arms have bent. Not exactly sure how this would have happened but I am not sure I really want to wait around and see if it gets any worse.
The bend

How it should look
The rust was bad enough that even with soaking in pb blaster for an hour I couldn't fully get the nut off. I didn't have a way to get a wire wheel in the area as that might have helped clean the threads up better. I wasn't looking to reuse them anyways so I went a different route.
Remove the entire sway bar
The bottom bushing had seen better days. I could move it freely with my fingers without even putting a bolt in it. I thought I had found my problem
Ended up using a cut off wheel to cut the bolts to get rid of the end links
New endlinks and poly sway bushings from Figs
New end links and bushings installed.
This unfortunately ended up not being my noise and after a 15min drive it was still there. Oddly enough each time I jack the car up the first few minutes there is no noise.
Next up was the rear LCA heim joint. Previously noted on a trip last year I had one of these snap. I got very lucky, met some cool people, and had them replaced at a dirt track shop in VA. The one we ended up having to cut the bolt as no matter how much pb blaster or heat was applied it would not come off.
New Heim that was installed during my trip last year
Took a rough measurement to get it close to the same and not affect my alignment that much. Although I will still get one in the coming weeks.
New factory bolt and fresh heim joint and standoffs from Figs
It was at the point of disassembly that I noticed the real issue. The standoffs that had been used didn't fit the bolt used perfectly. It was good enough to have gotten me through my trip but I likely should have replace this right away when I got back home close to a rear ago. The standoffs also seems to be of a fairly soft metal and had started to deform. The shop did say they rebuilt their dirt track setups fairly frequently so likely they didn't care about it.
Notice the difference in thickness of the top of the OEM bolt vs the one that had been on the car. Not even close. Everything fits together perfectly now.
All back together.
After a 20min drive I am pretty sure the noise is gone. I won't know for sure without a little more driving this week but hopefully that is the end of this problem.
Here is a picture of the old hardware. I will likely still keep this and toss it in the trunk spare tire compartment in the event of an issue with one on the car as any spare would be better than none.
While doing these installs I ended up finding another problem. It seems at some point my Figs Mega Arms have bent. Not exactly sure how this would have happened but I am not sure I really want to wait around and see if it gets any worse.
The bend
How it should look
08-22-23, 12:58 PM
#22
Tech Info Resource
iTrader: (2)
Just another quick video on plastic repairs. Pretty clever too.
https://www.youtube.com/shorts/tBzXNqqtZ84
https://www.youtube.com/shorts/tBzXNqqtZ84
The following users liked this post:
CCColtsicehockey (08-23-23)
08-30-23, 03:48 PM
#23
Radio Upgrade
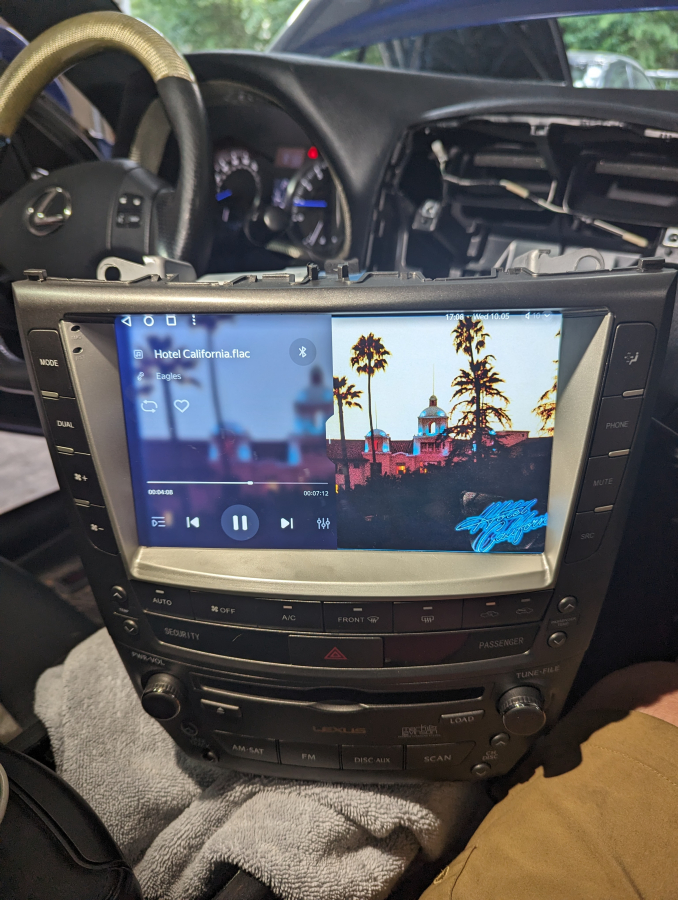
The touch screen on the radio had died before I had bought the car back. I was using a Bluetooth adapter for audio so this really wasn't a huge problem other than I no longer had full control over the fans for the AC. Otherwise thankfully pretty much everything else could be controlled. This is partly why it wasn't a huge priority either. I wanted updated tech in the car though. I was originally going to go with the Grom Vline V2 until a friend had installed an Android Radio with great success. It was then I found out that the setup as far as the 2nd Gen IS Android Radios is about as seamless looking as they get with a factory looking faceplate better than pretty much every other car they are offered for out there. At least in my opinion.
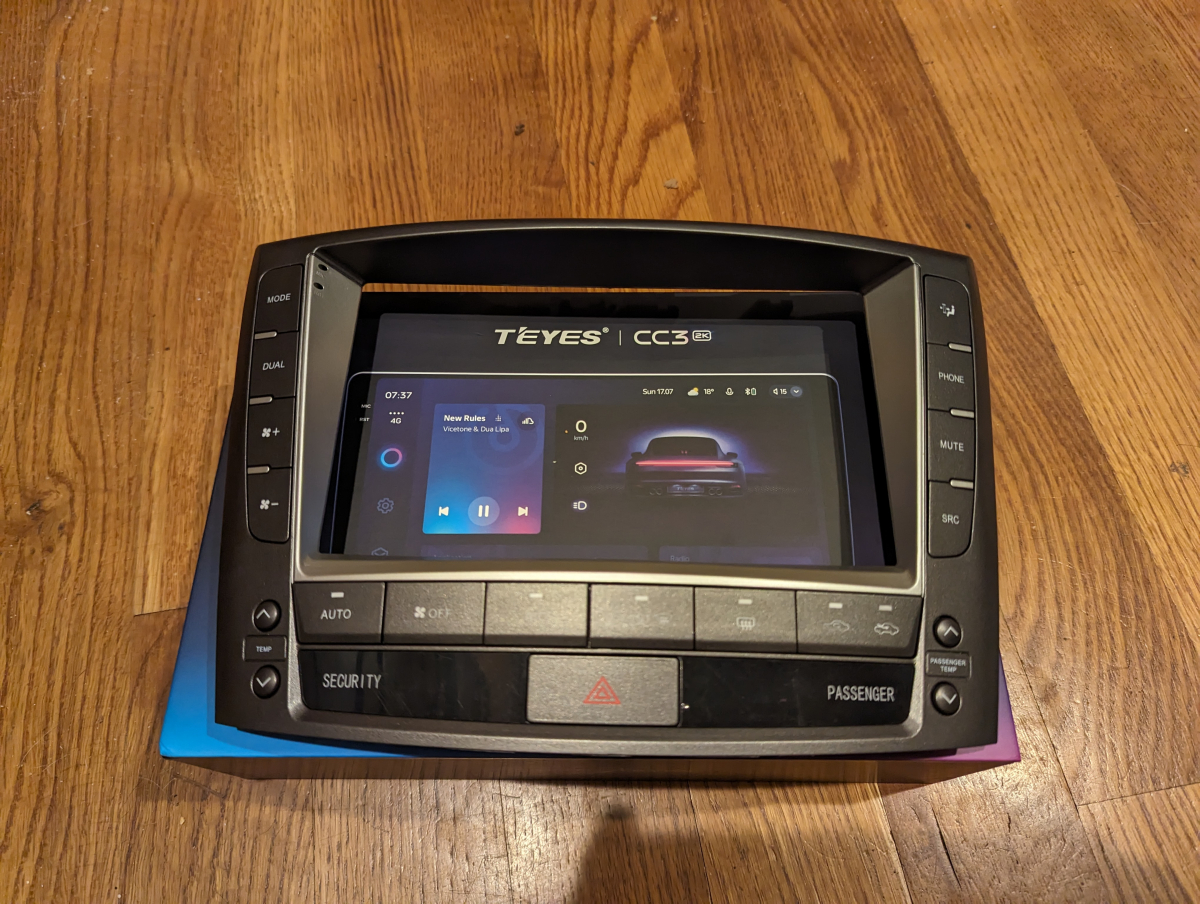
I researched them for a while and settled on the Teyes CC3 2k. Teyes has done more on the software side than any of the other companies out there and it shows when using it on how much of a finished product it really is.
The radio comes packaged well and the quality of the unit is top notch hardware wise.


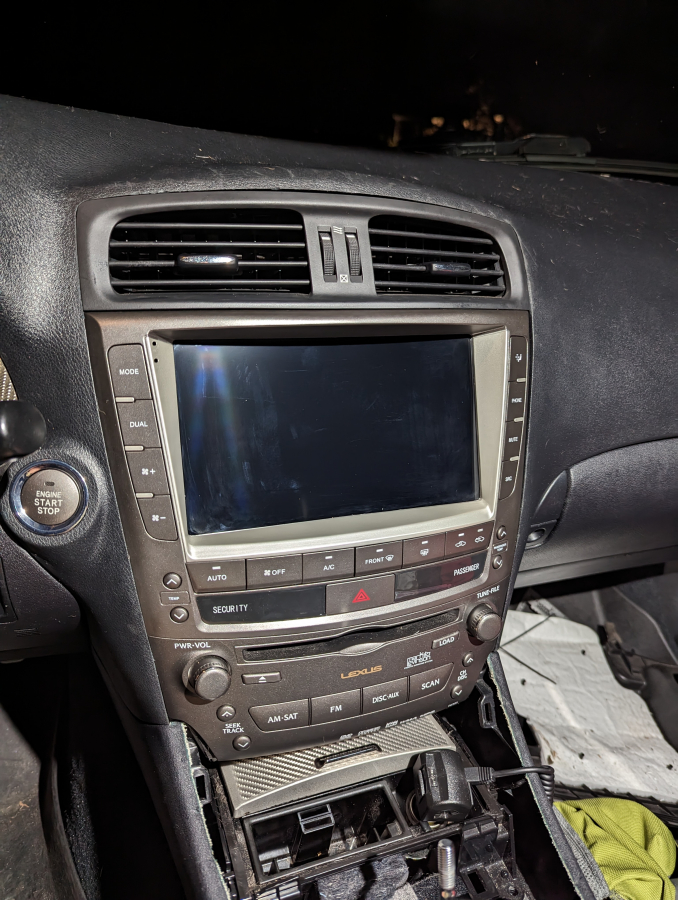
The faceplate that looks like the 2010+ interiors is the reason for finally going with one of these units.
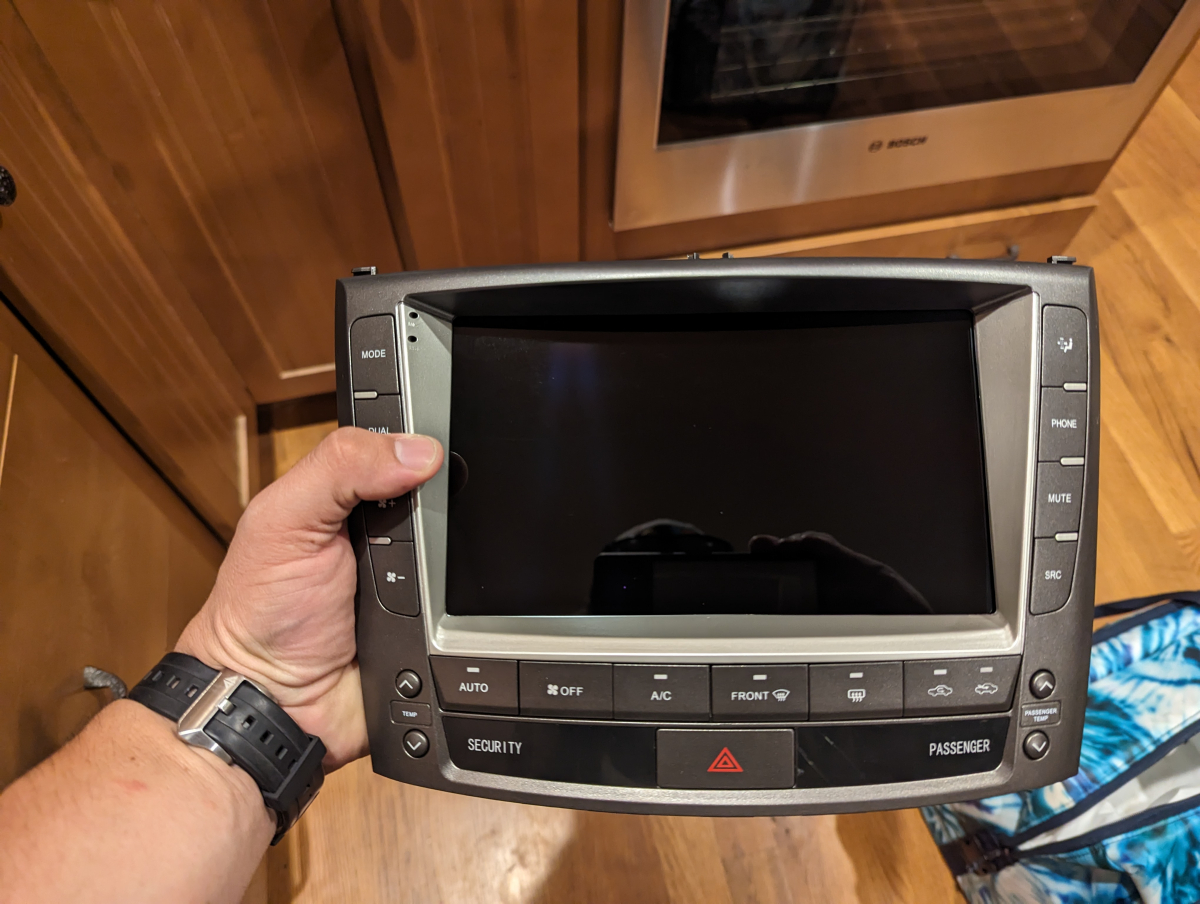
Before shot
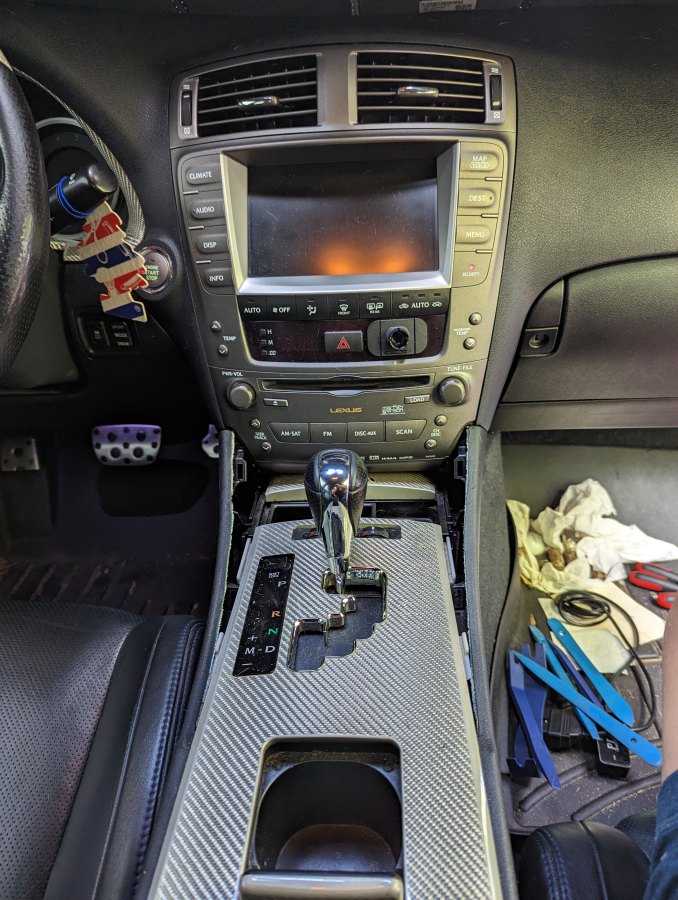
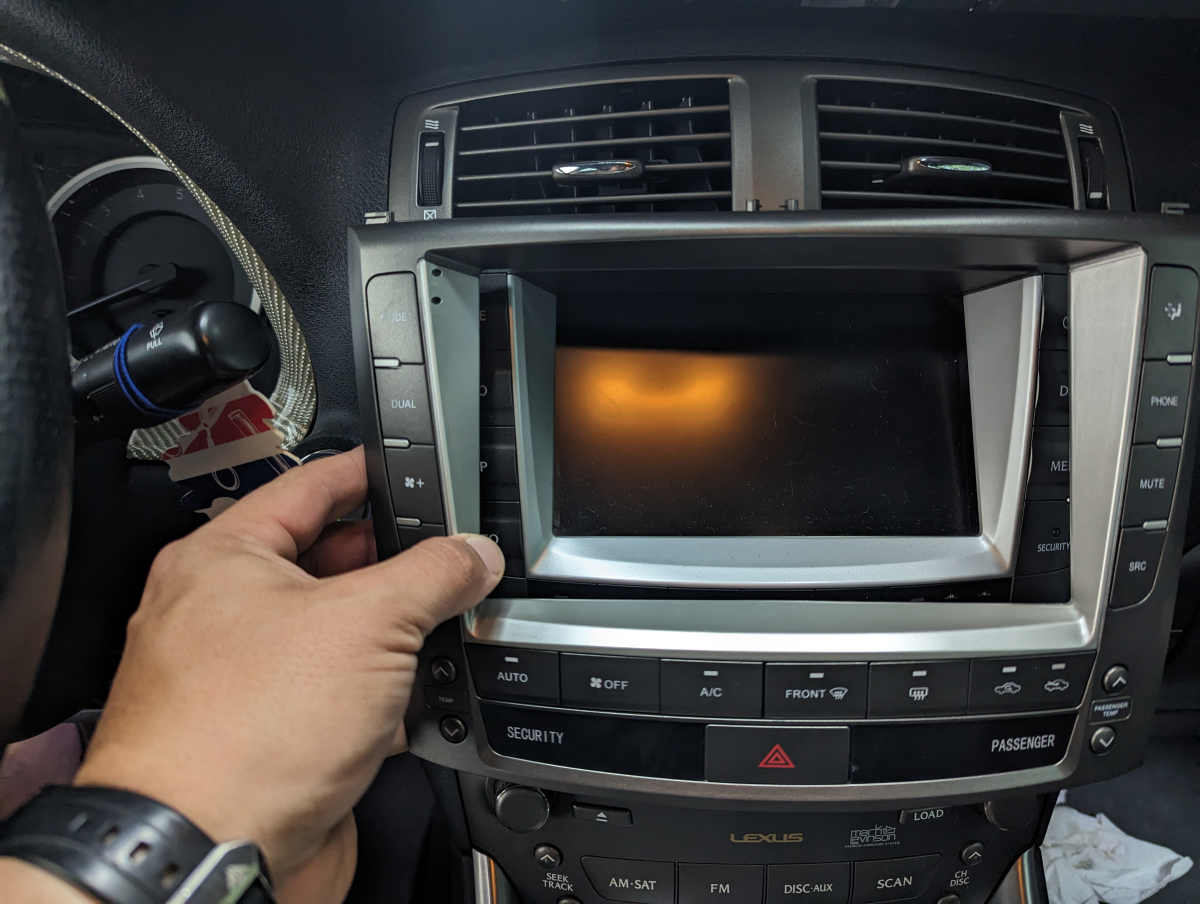
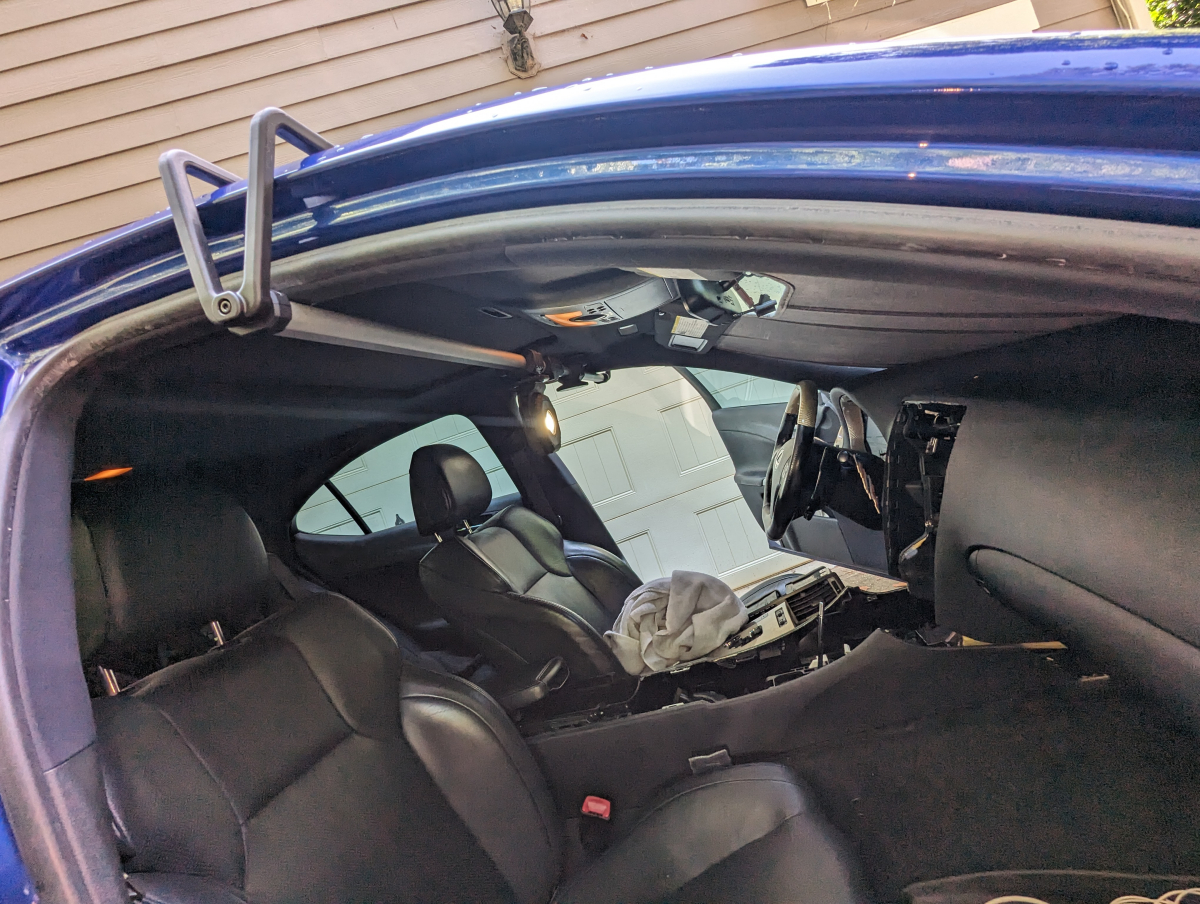
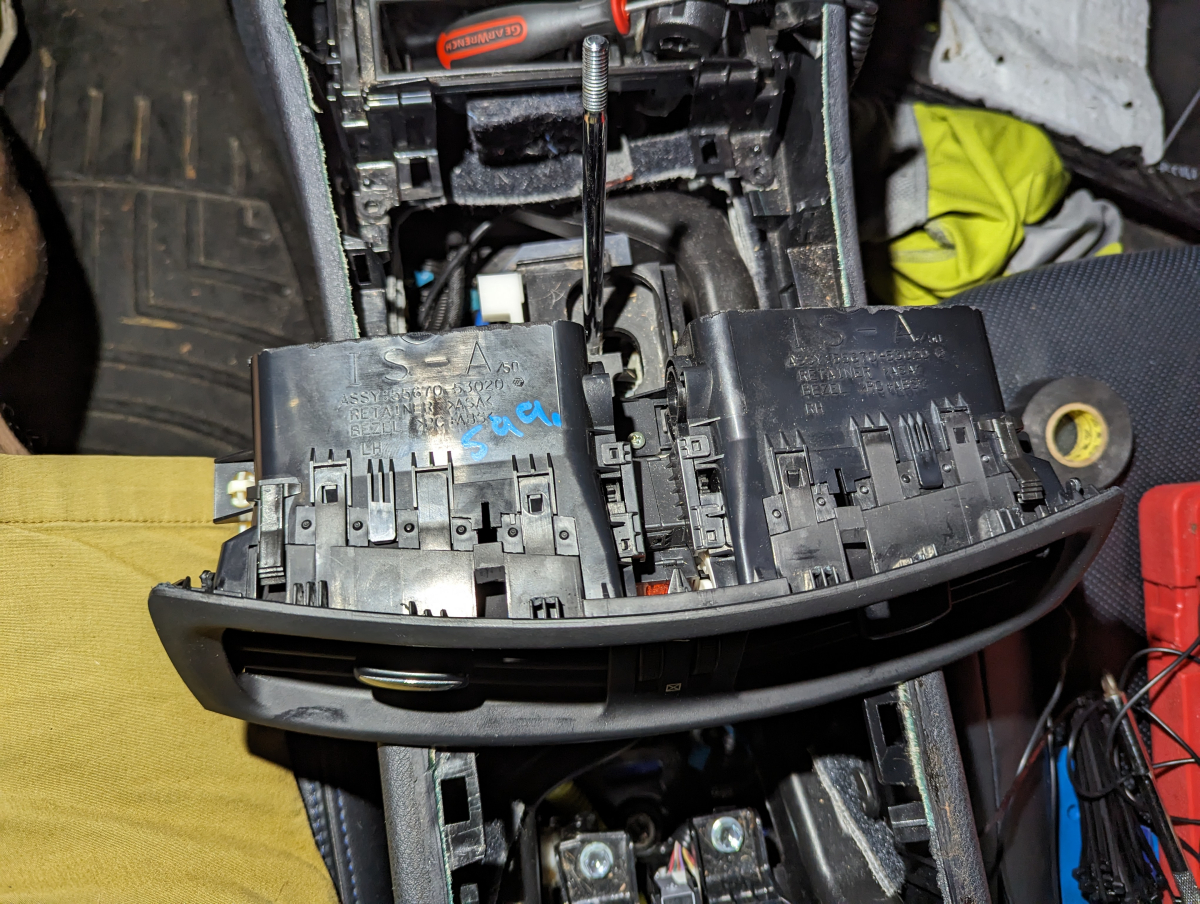
Everything out. Besides getting the air vent out things in the ISF radio wise come out very easily. I have had to fight other cars before to get the radio to come out.

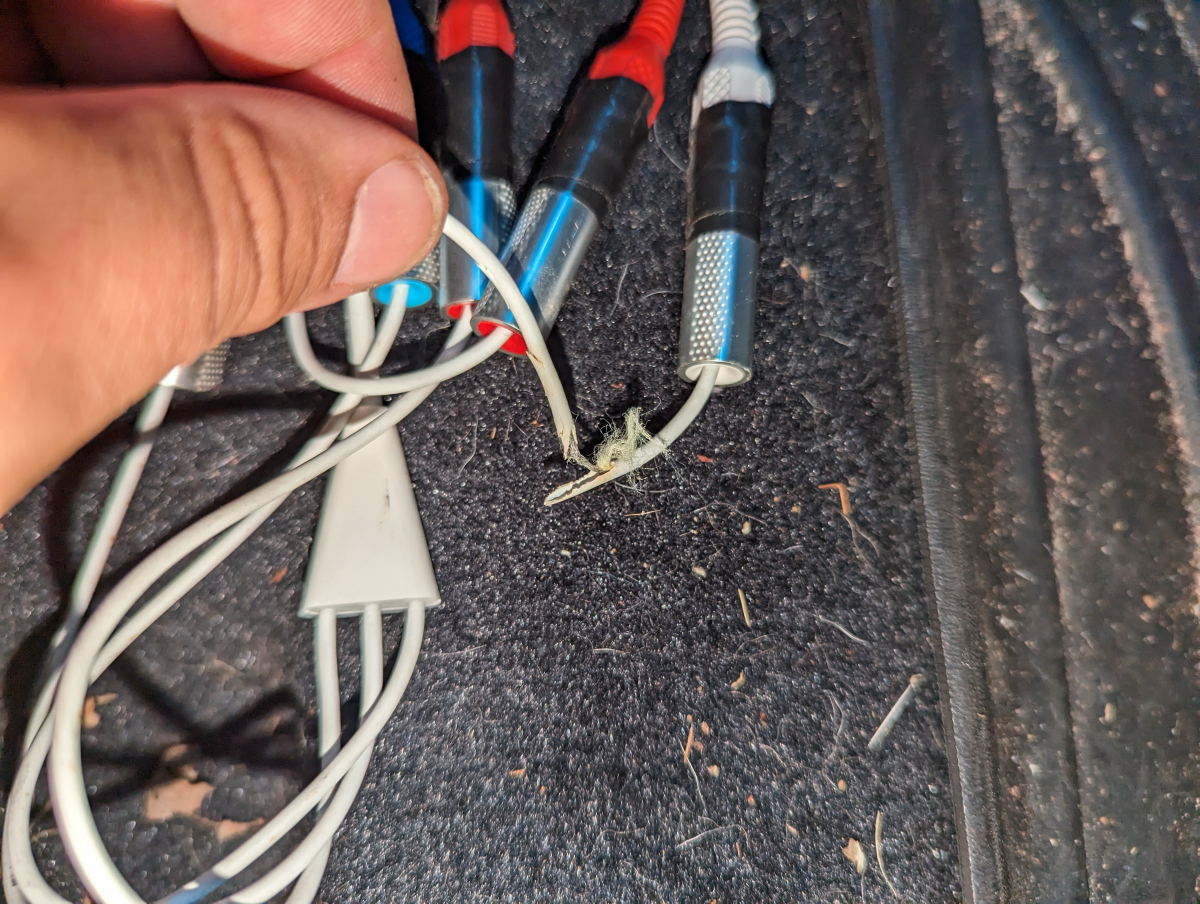
While removing the radio I also had to remove the old VAIS Tech Media Linq Video Ipod adapter I had installed years ago.
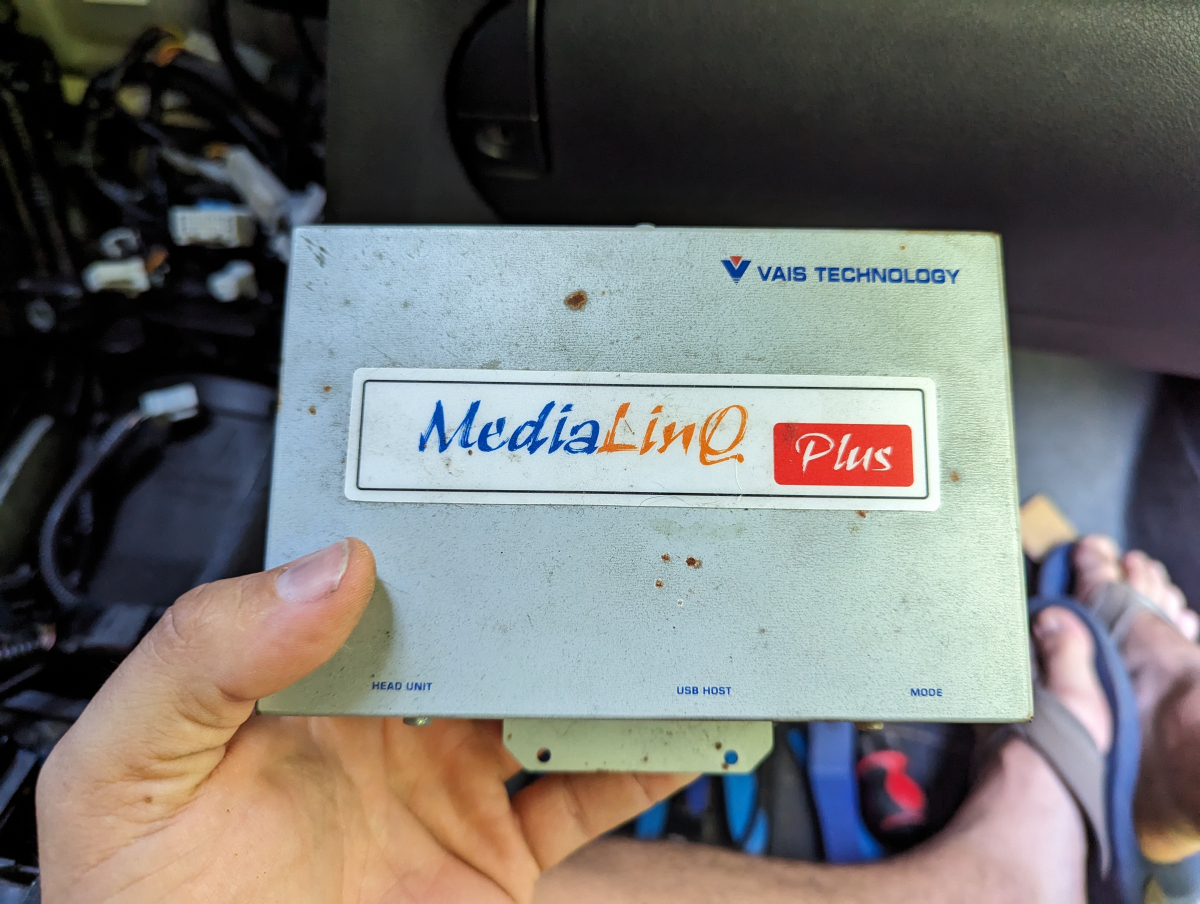
The unit display had stopped working correctly about a year before I had gotten rid of the car. I never dug into why very much. Turns out I had not secured the video cables well enough and one got cut by the seat slides.

Not long before starting this project, I bought this new Icon hood light setup. It also works very well in the interior.
Assembling the radio
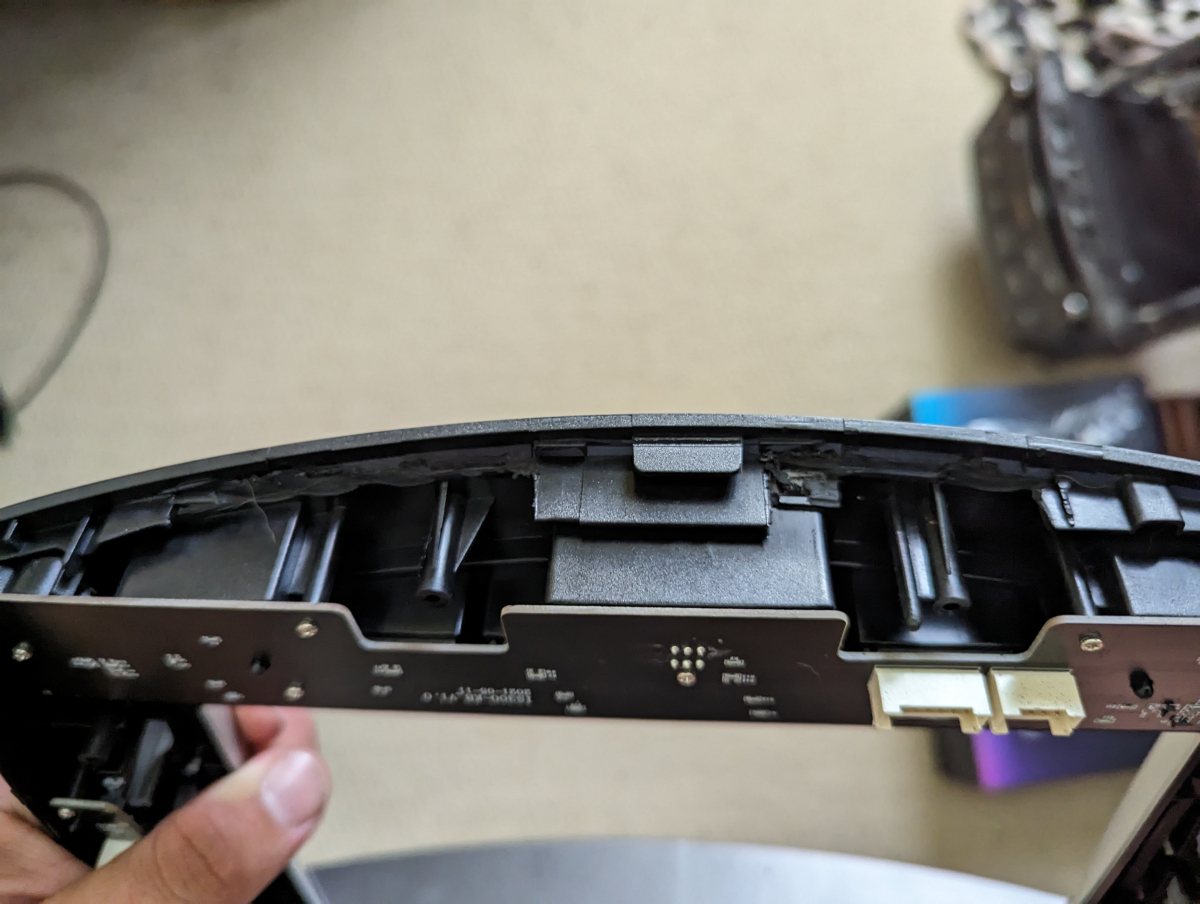
The top of the factory radio gets removed the bottom stays

The bottom of the new face plate though is designed to fit a 2010+

You have to cut it out like this to make it fit the 2009 and older bottom unit

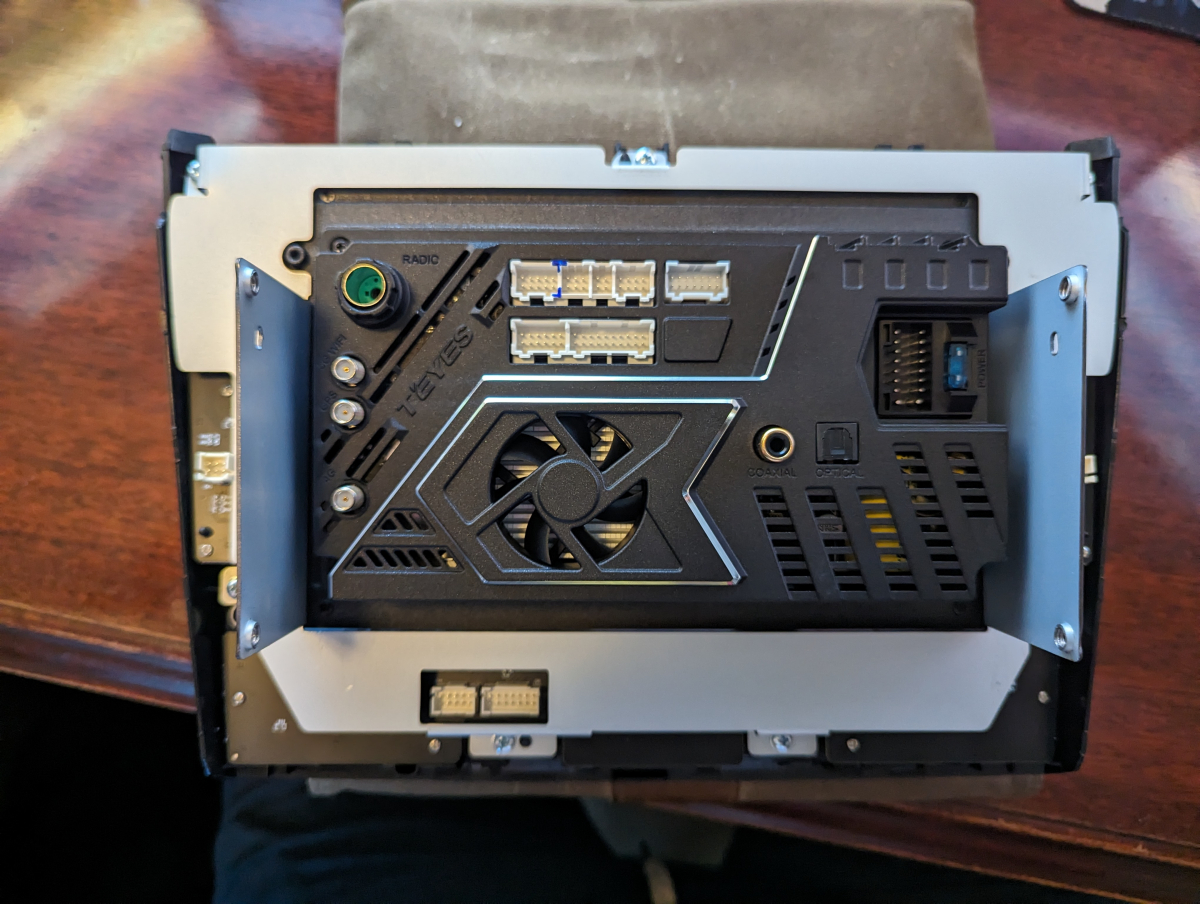
The radio is held to face plate with these white tabs. They only give you 6 screws though and you need 11.


3mm screws fit perfectly. This happens to be the smallest size they also sell at Lowe's or else I would have ended up needing to order something.

Once the tablet/radio is attached to the face plate you can then frame that allows you to mount it to the factory radio mount.

The touch screen on the radio had died before I had bought the car back. I was using a Bluetooth adapter for audio so this really wasn't a huge problem other than I no longer had full control over the fans for the AC. Otherwise thankfully pretty much everything else could be controlled. This is partly why it wasn't a huge priority either. I wanted updated tech in the car though. I was originally going to go with the Grom Vline V2 until a friend had installed an Android Radio with great success. It was then I found out that the setup as far as the 2nd Gen IS Android Radios is about as seamless looking as they get with a factory looking faceplate better than pretty much every other car they are offered for out there. At least in my opinion.
I researched them for a while and settled on the Teyes CC3 2k. Teyes has done more on the software side than any of the other companies out there and it shows when using it on how much of a finished product it really is.
The radio comes packaged well and the quality of the unit is top notch hardware wise.
The faceplate that looks like the 2010+ interiors is the reason for finally going with one of these units.
Before shot
Everything out. Besides getting the air vent out things in the ISF radio wise come out very easily. I have had to fight other cars before to get the radio to come out.
While removing the radio I also had to remove the old VAIS Tech Media Linq Video Ipod adapter I had installed years ago.
The unit display had stopped working correctly about a year before I had gotten rid of the car. I never dug into why very much. Turns out I had not secured the video cables well enough and one got cut by the seat slides.
Not long before starting this project, I bought this new Icon hood light setup. It also works very well in the interior.
Assembling the radio
The top of the factory radio gets removed the bottom stays
The bottom of the new face plate though is designed to fit a 2010+
You have to cut it out like this to make it fit the 2009 and older bottom unit
The radio is held to face plate with these white tabs. They only give you 6 screws though and you need 11.
3mm screws fit perfectly. This happens to be the smallest size they also sell at Lowe's or else I would have ended up needing to order something.
Once the tablet/radio is attached to the face plate you can then frame that allows you to mount it to the factory radio mount.
08-30-23, 03:49 PM
#24
Radio Harness
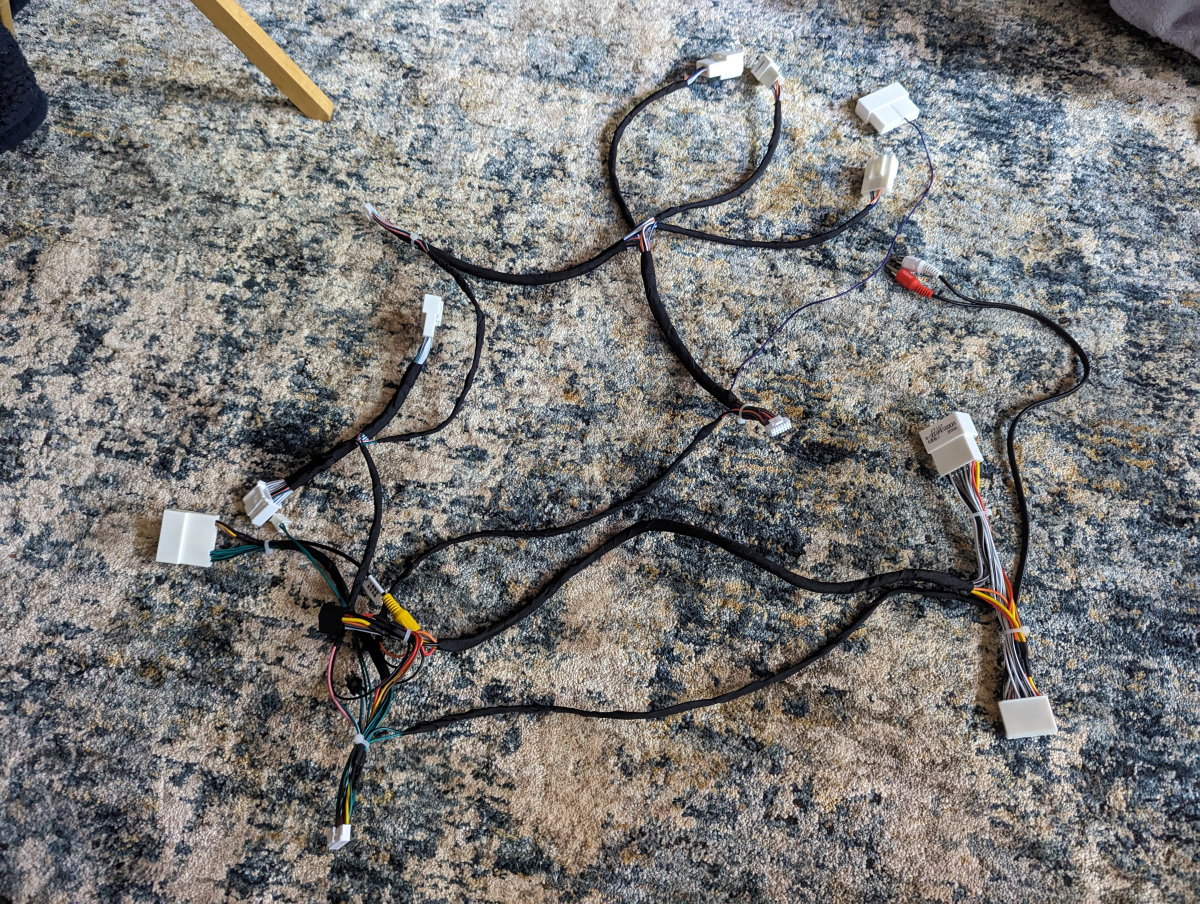
The harnesses that come are not that neat and there are a few.

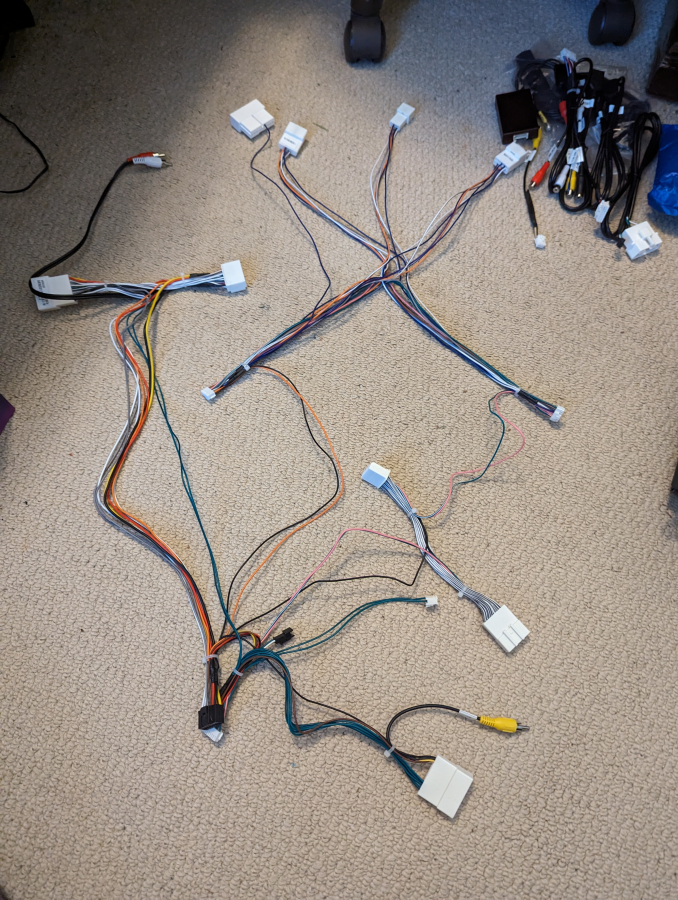
I wanted to make it neater so got some tesa tape

This will do much better
Install
Test power up
Need to make to select these canbus settings for the radio to be able to control the AC and function correctly with the steering wheel controls.

Test fit. You need 2010+ air vents to make this radio work as well
At night the LEDs match pretty well for the buttons.

At this point I had not found a good set of vents I wanted at a reasonable price so I kind of waited on finishing this project and driving around with the car torn apart for the last month. During this time I found several additional pieces to help finish the project easier. Once those all came in I finally went about finishing this project.
Apparently, at some point, I had a critter in the car. Thankfully they didn't damage anything.

Back to those pieces that made things nicer on the install. Enfig Car Stereo sells 3d printed mic setups that install in the OEM locations. https://shop.enfigcarstereo.com/product/enfig-mic-toy1/

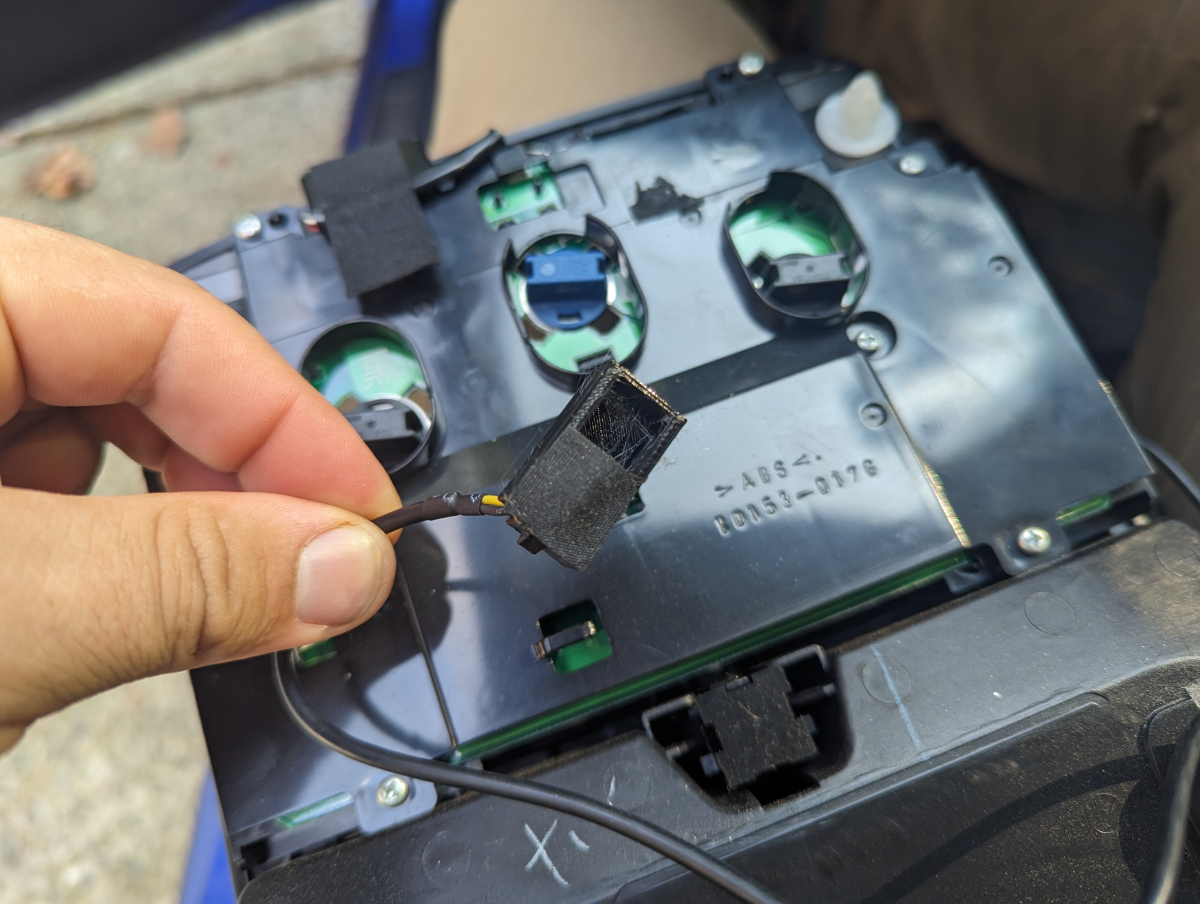

Fits like a glove. So well in fact I think you would destroy the mic trying to remove it.

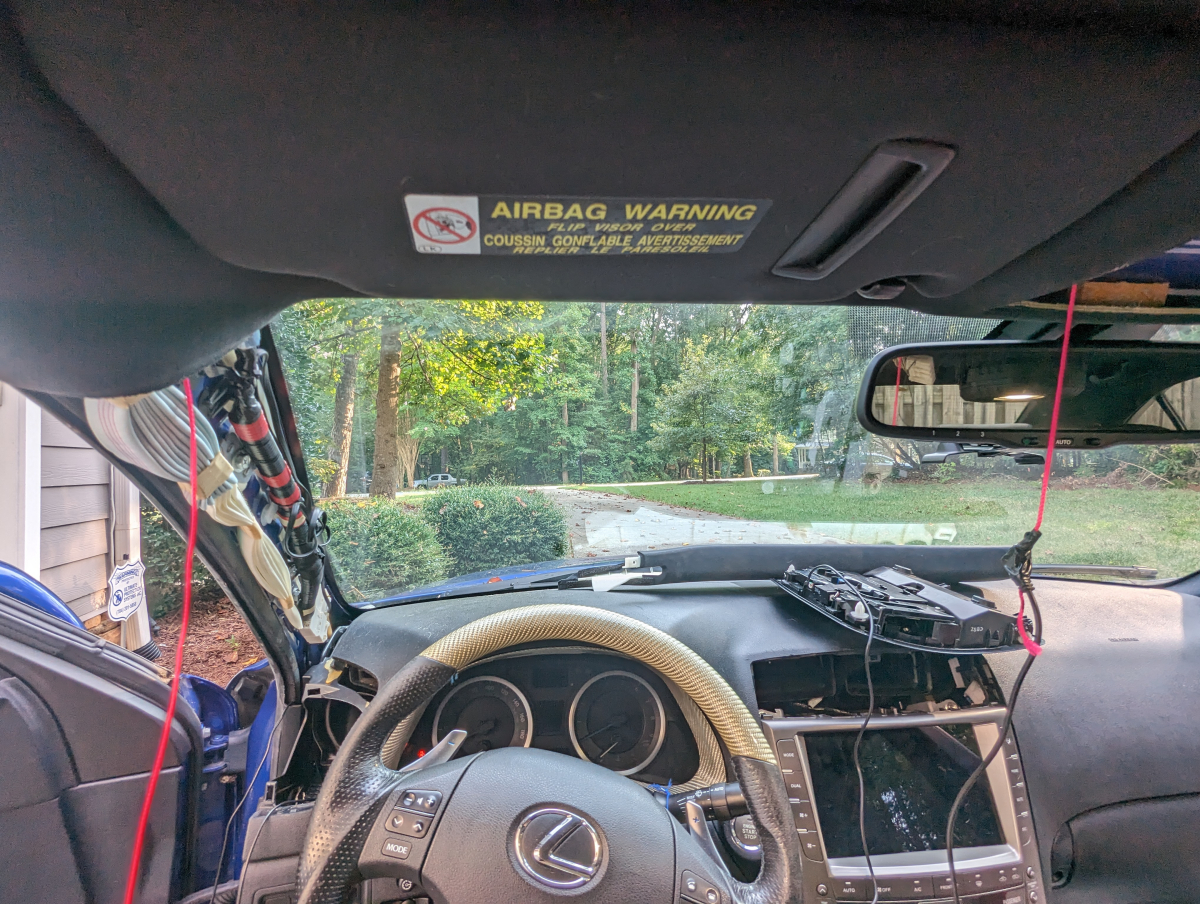
Routing the mic cable through the roof
Not pictured is the adapter I bought so that the factory GPS antenna can be used vs an after market one. I got it here. https://www.discountcarstereo.com/HFC-SMA.html
To make the 2010+ vents fit 2009 and older you have to cut them. It is about 3/4in by the time you are all said and done.

The harnesses that come are not that neat and there are a few.
I wanted to make it neater so got some tesa tape
This will do much better
Install
Test power up
Need to make to select these canbus settings for the radio to be able to control the AC and function correctly with the steering wheel controls.
Test fit. You need 2010+ air vents to make this radio work as well
At night the LEDs match pretty well for the buttons.
At this point I had not found a good set of vents I wanted at a reasonable price so I kind of waited on finishing this project and driving around with the car torn apart for the last month. During this time I found several additional pieces to help finish the project easier. Once those all came in I finally went about finishing this project.
Apparently, at some point, I had a critter in the car. Thankfully they didn't damage anything.
Back to those pieces that made things nicer on the install. Enfig Car Stereo sells 3d printed mic setups that install in the OEM locations. https://shop.enfigcarstereo.com/product/enfig-mic-toy1/
Fits like a glove. So well in fact I think you would destroy the mic trying to remove it.
Routing the mic cable through the roof
Not pictured is the adapter I bought so that the factory GPS antenna can be used vs an after market one. I got it here. https://www.discountcarstereo.com/HFC-SMA.html
To make the 2010+ vents fit 2009 and older you have to cut them. It is about 3/4in by the time you are all said and done.
08-30-23, 03:49 PM
#25
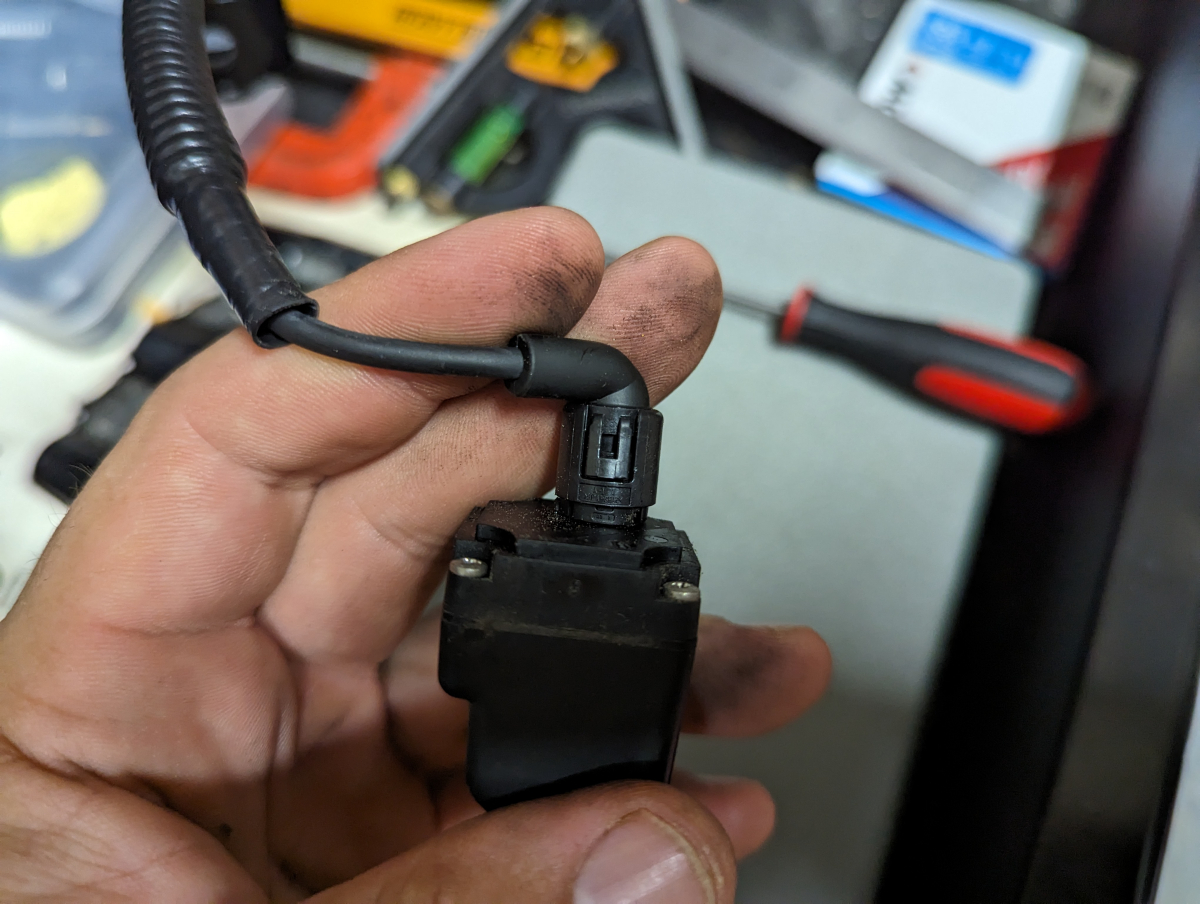
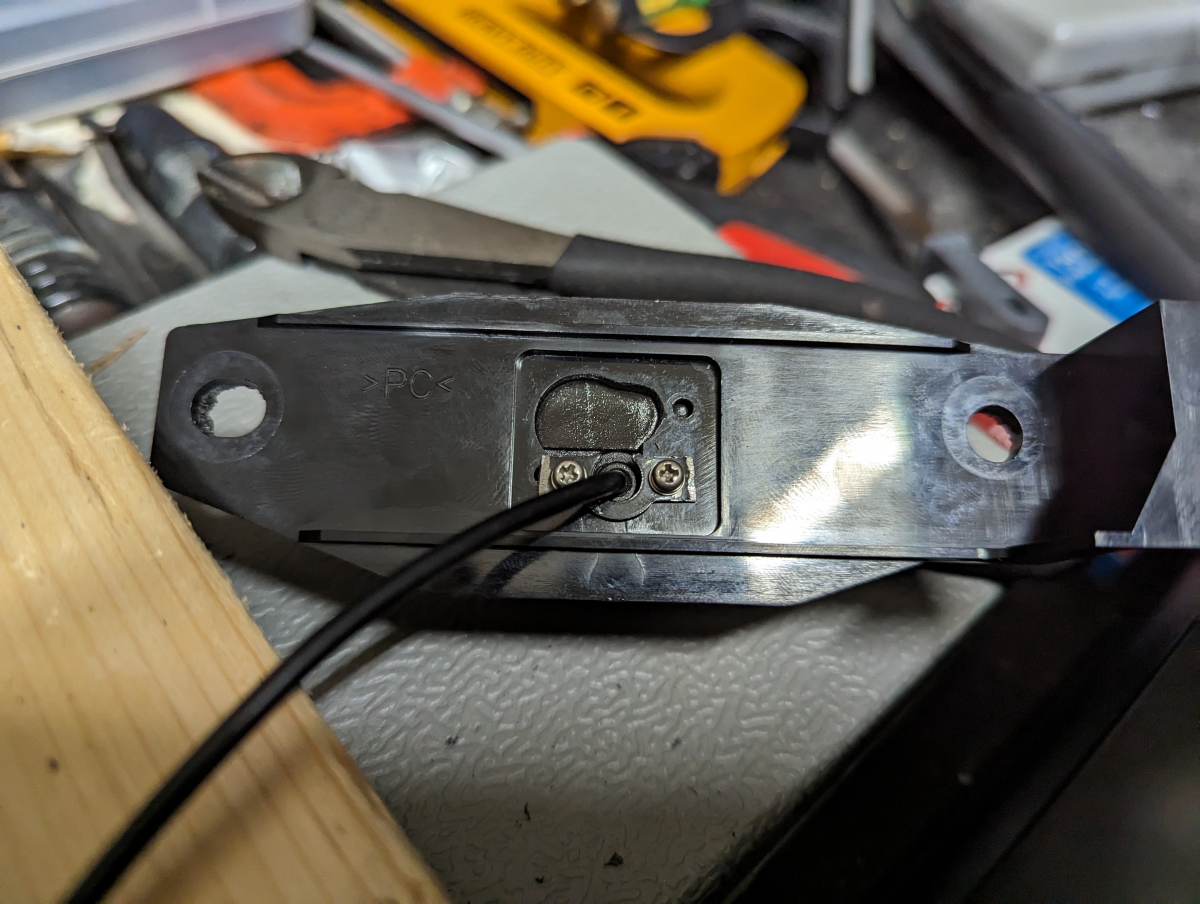
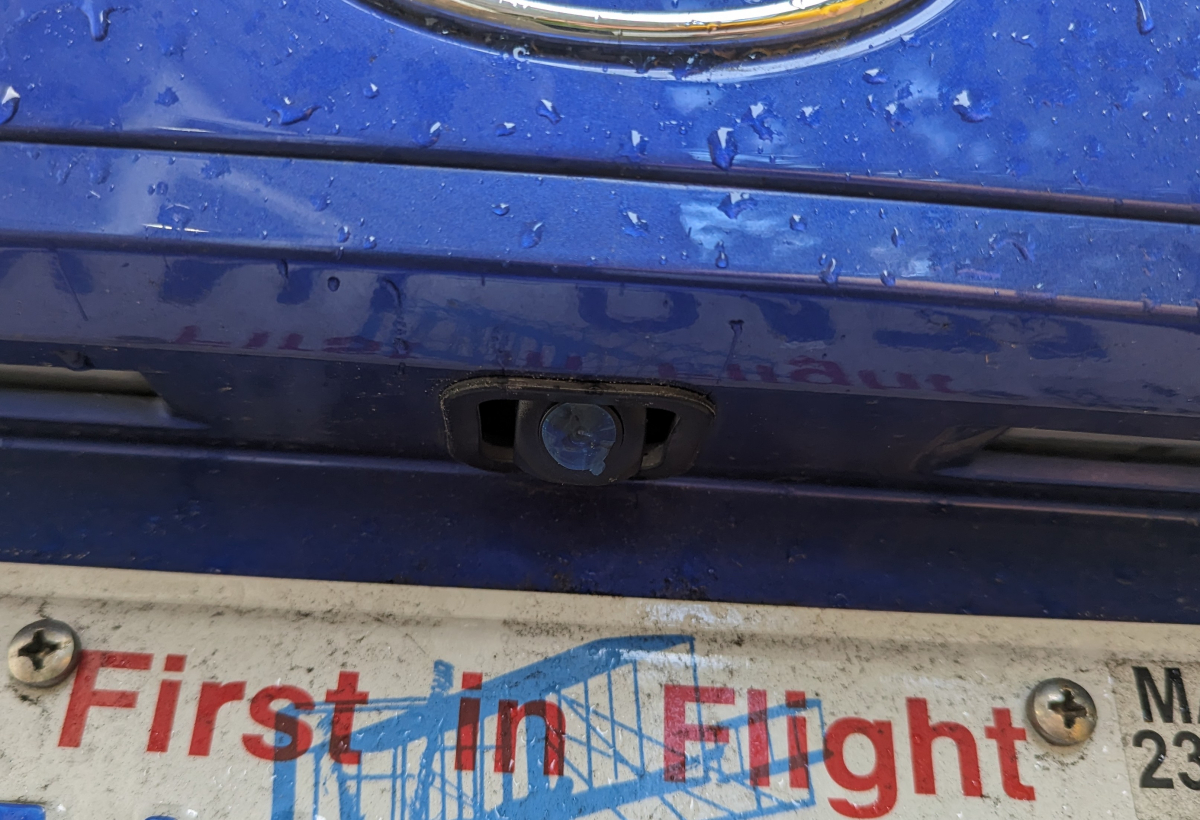
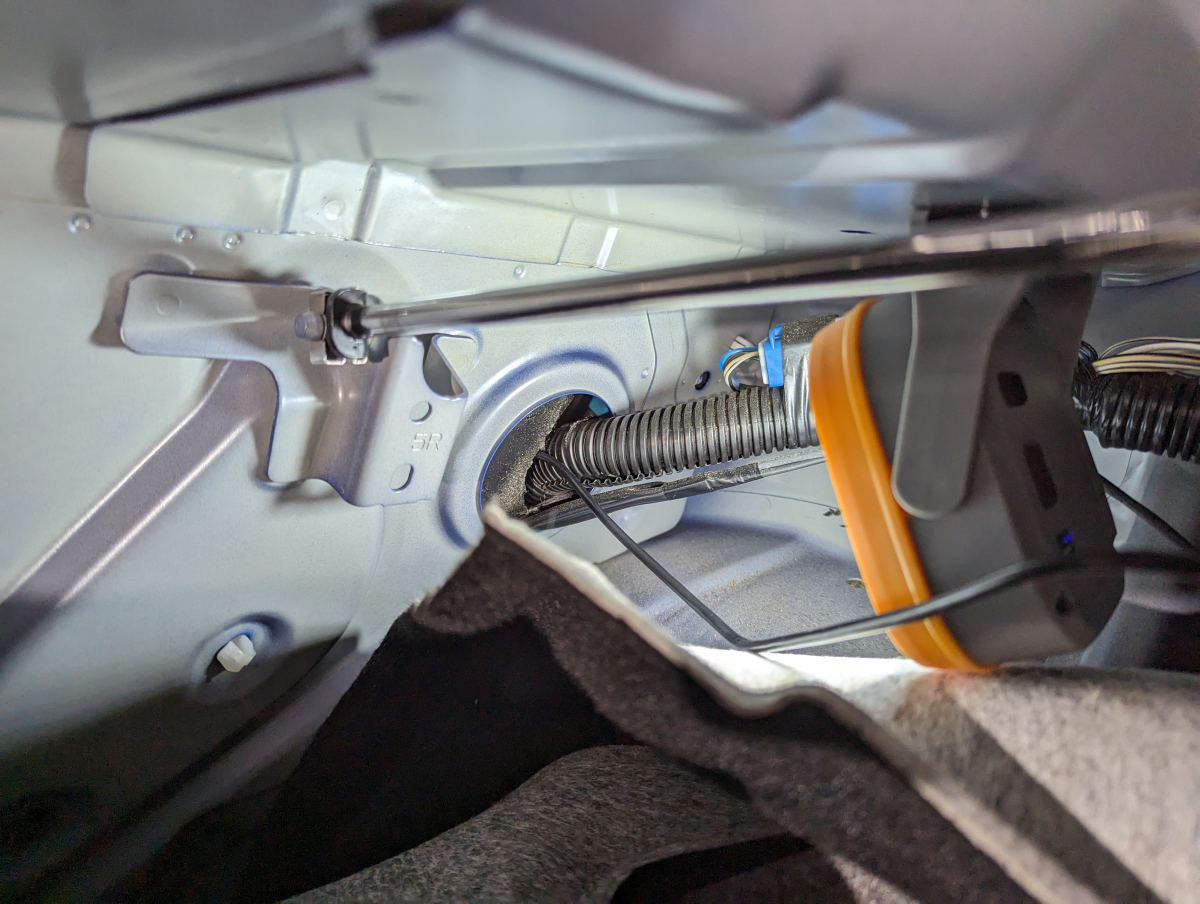
The last piece was to run the new reverse camera as the factory one can't be used since it is 5V.
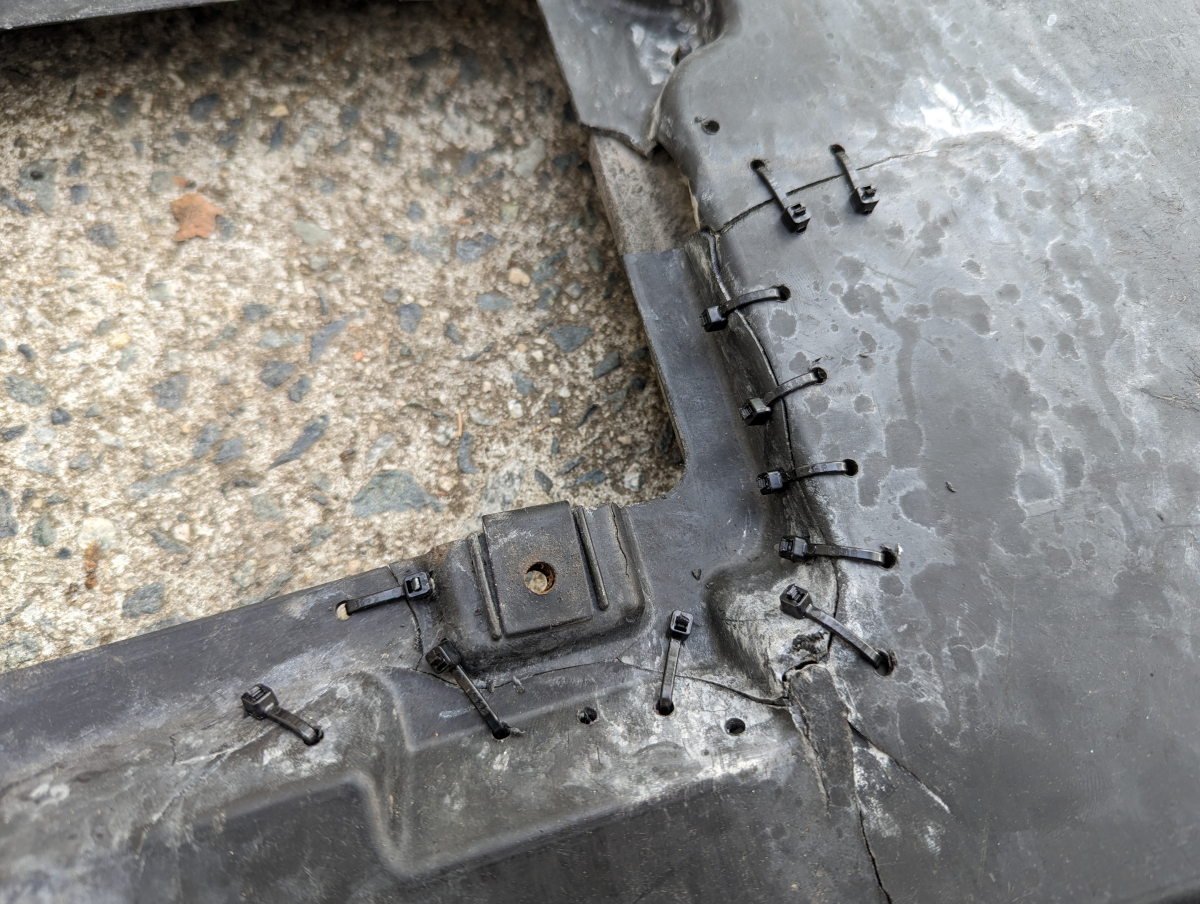
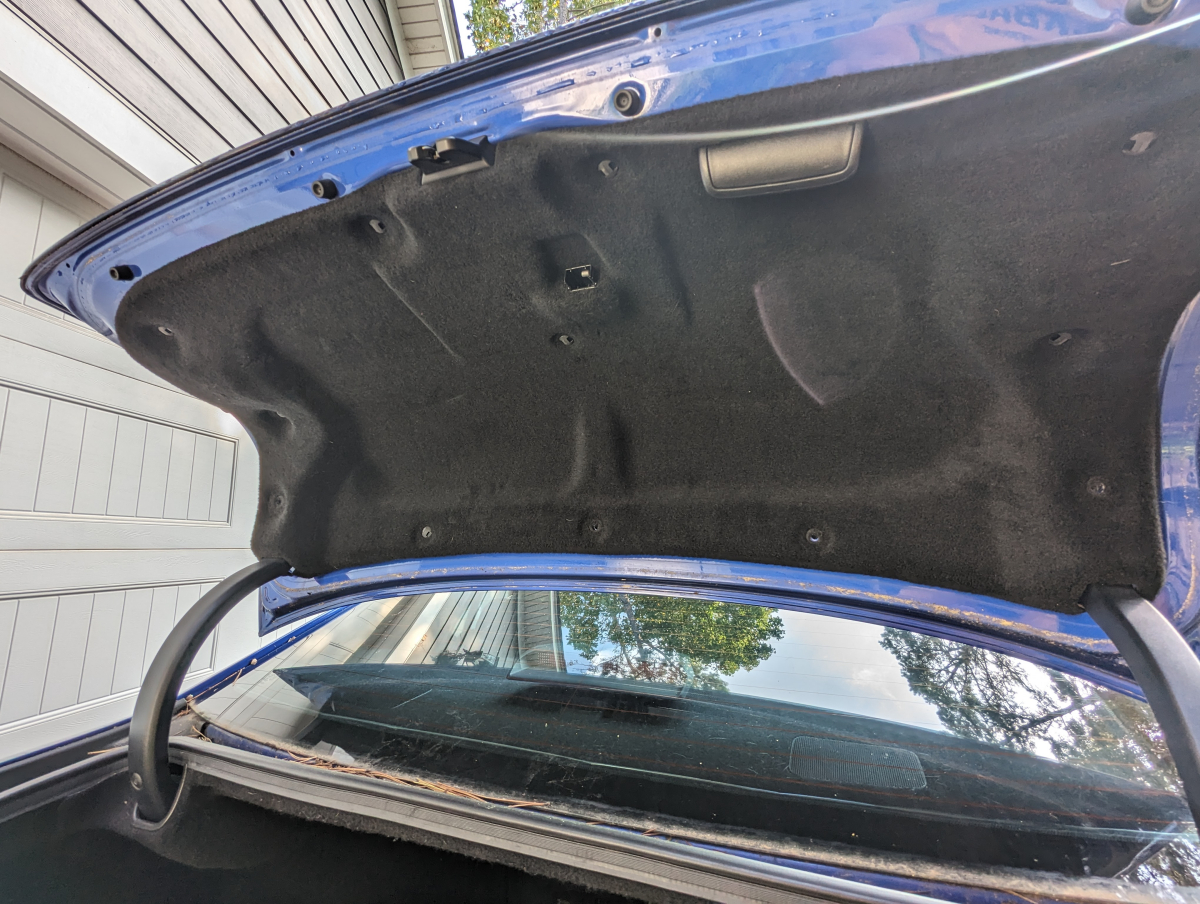
There are a ton of clips holding on the trunk lid liner
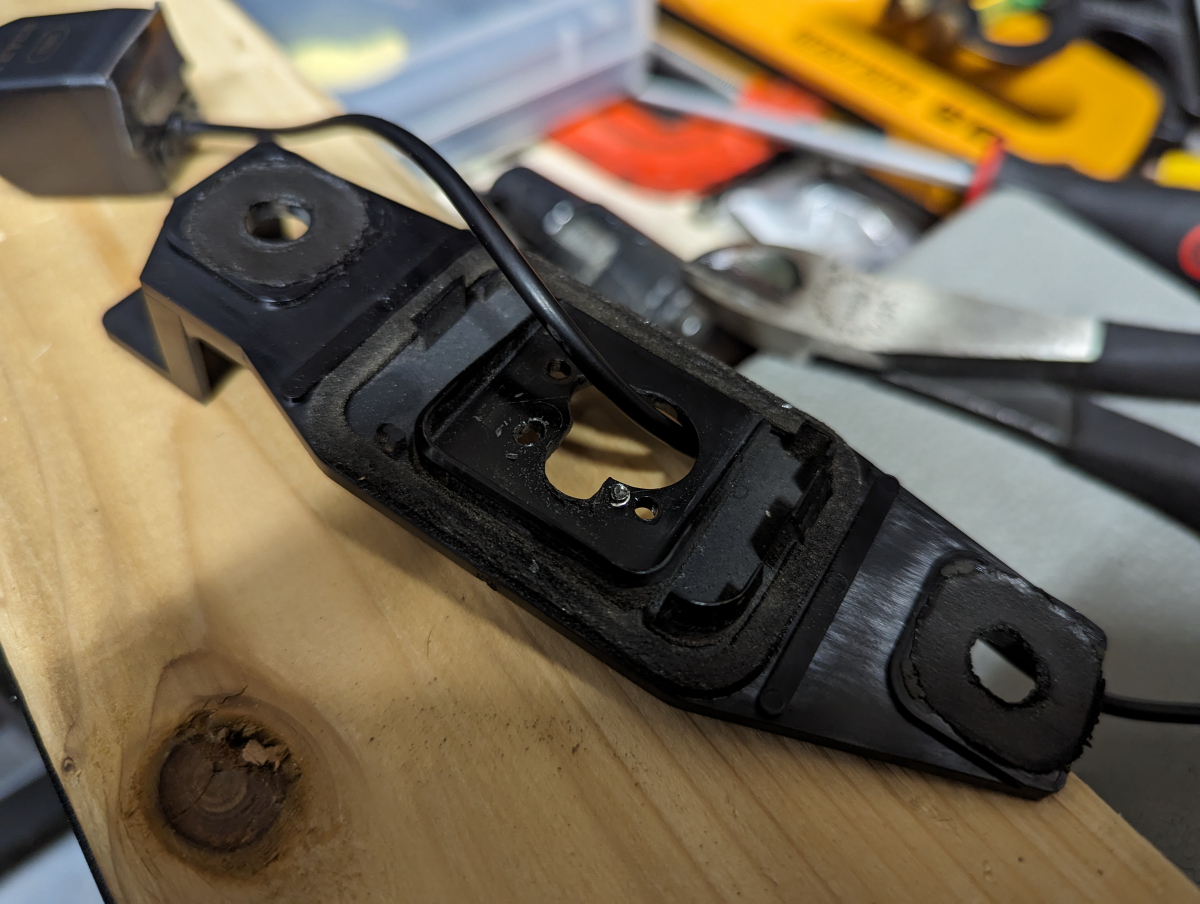
You then have to remove this metal plate to get to the camera.
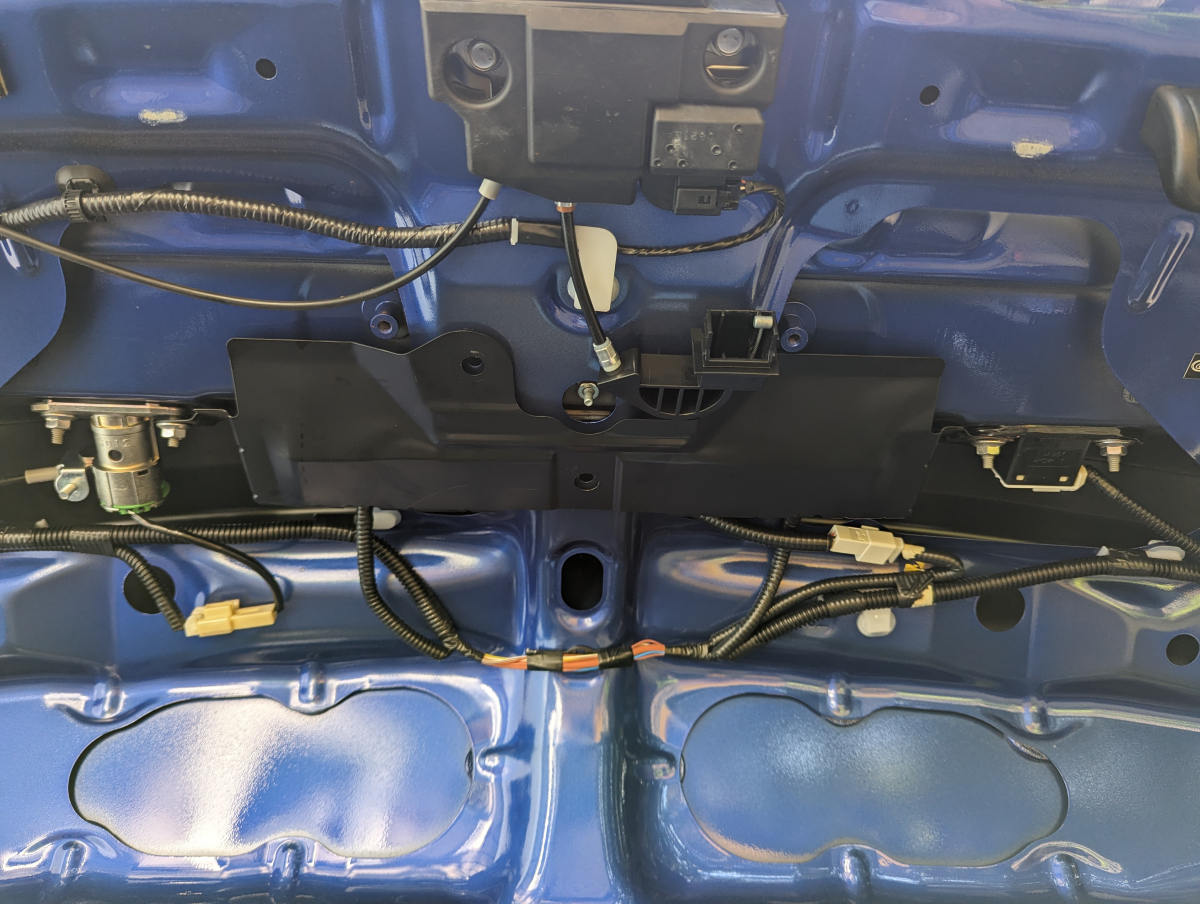
The wire harness for the camera completely disconnects so you can remove it from the bracket. This is great as I modified the bracket to mount the new camera.
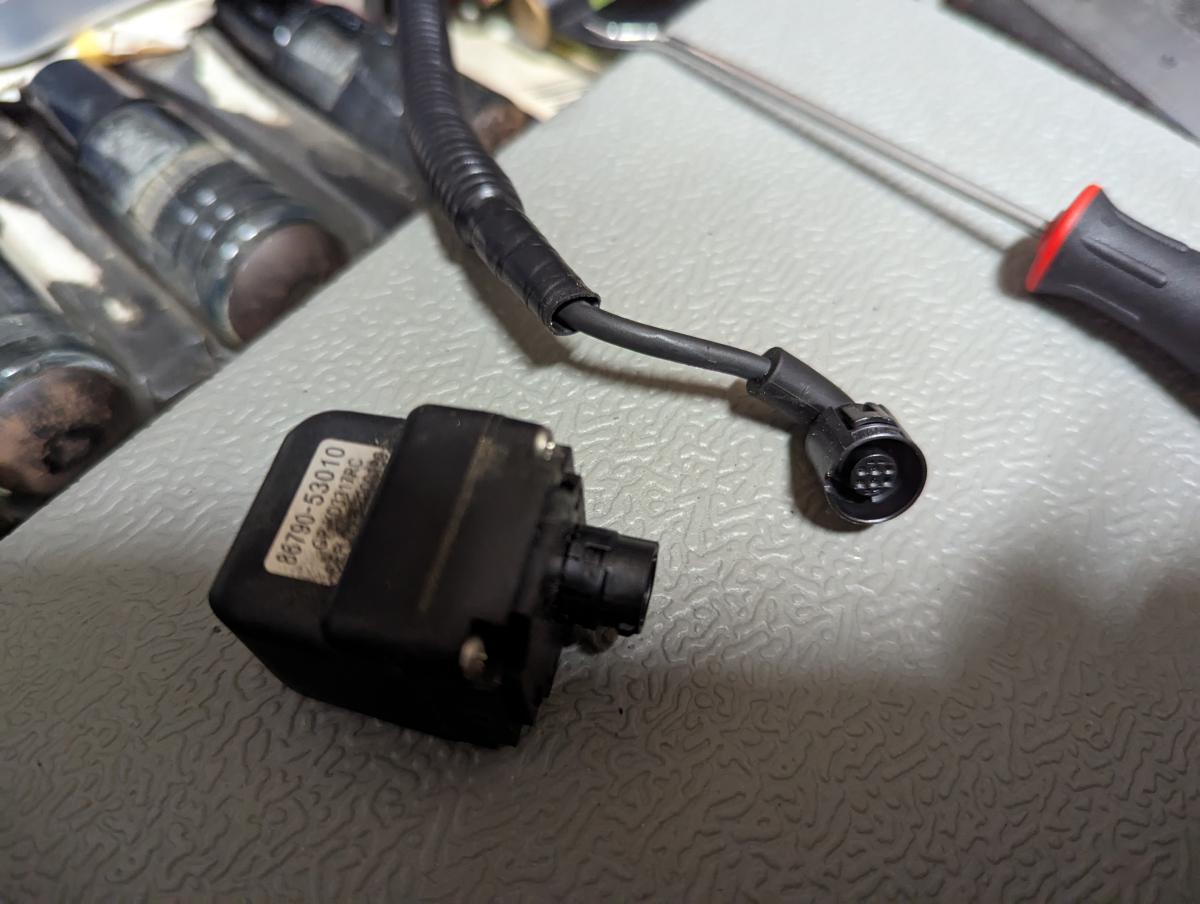
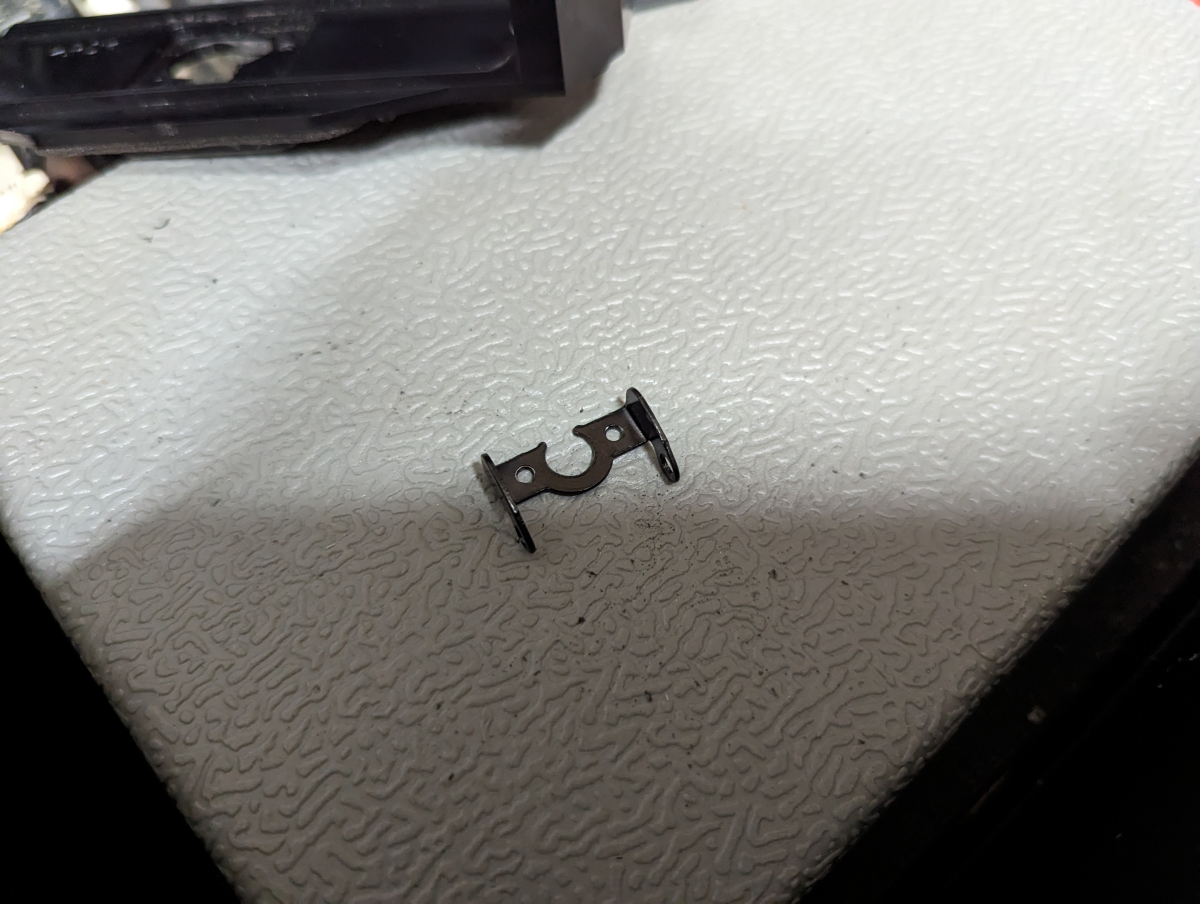
The camera came with its own metal mount. I was not going to use it. But I did steal a piece of it to use as a backing plate for the screws.

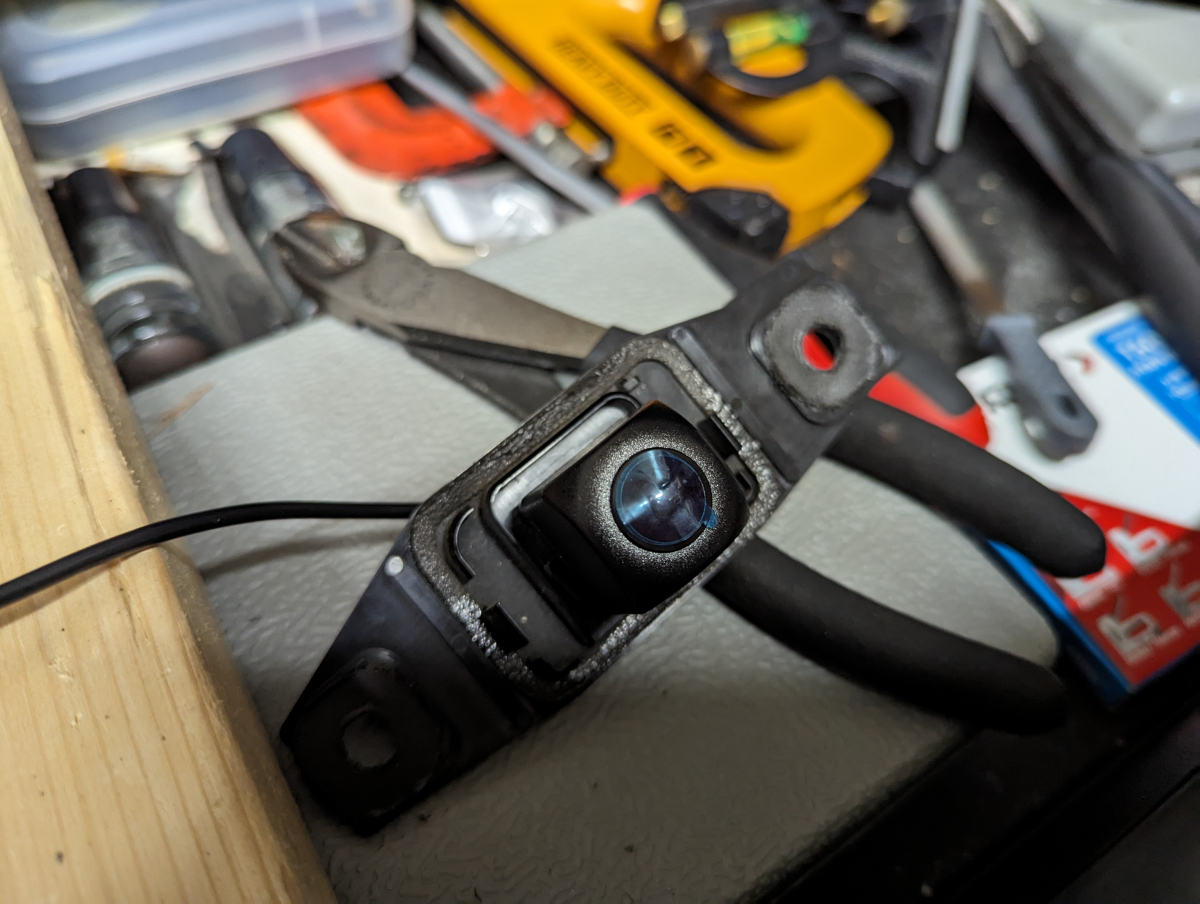
It was getting dark but I wanted to finish it.

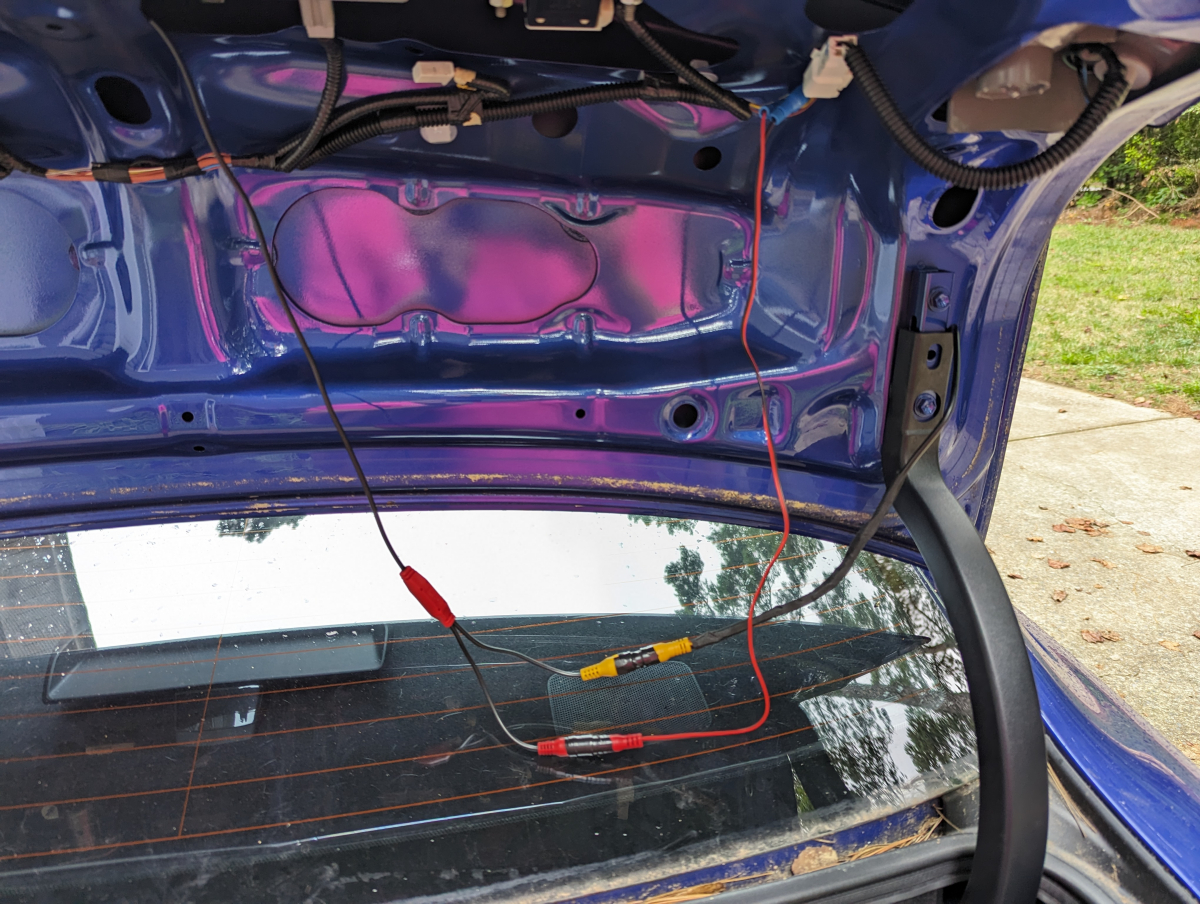
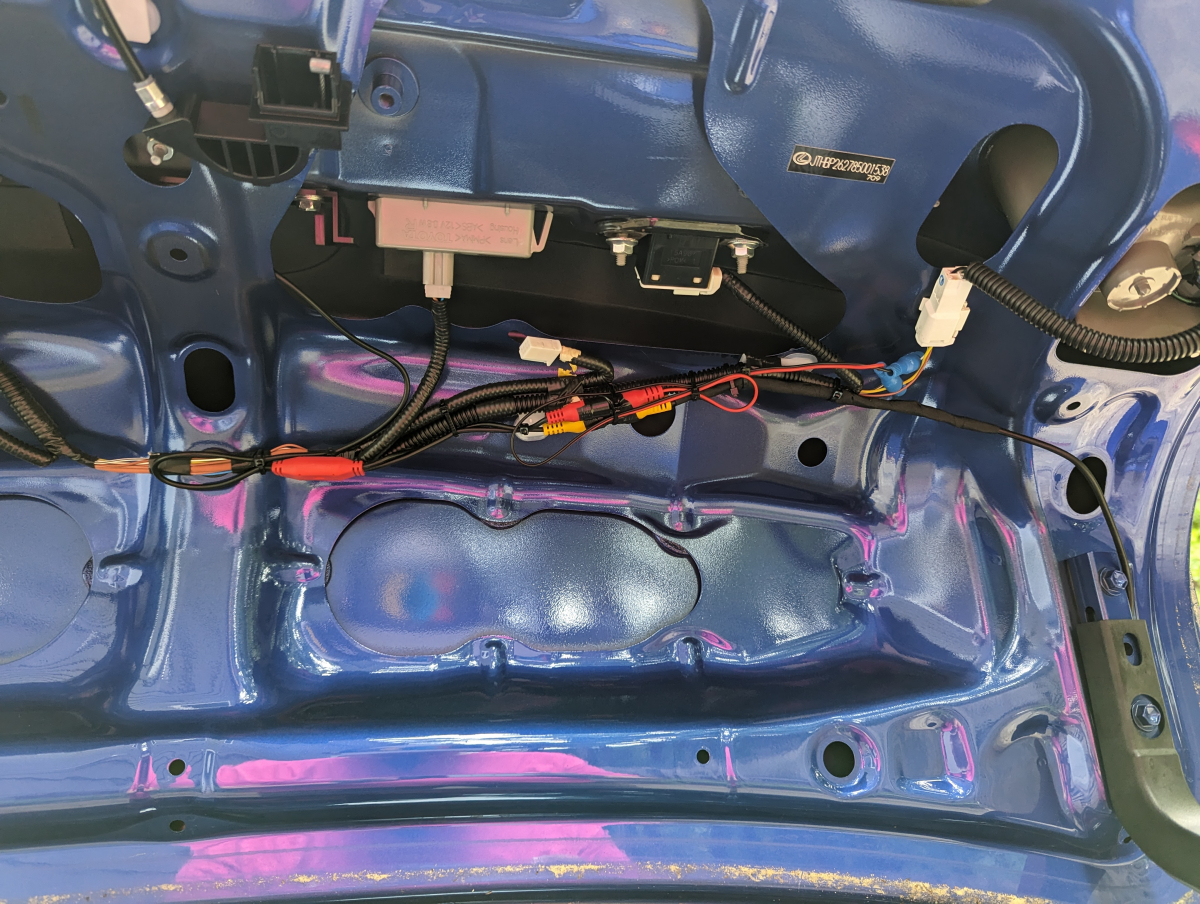
The wire runs easily down the passenger side of the car.
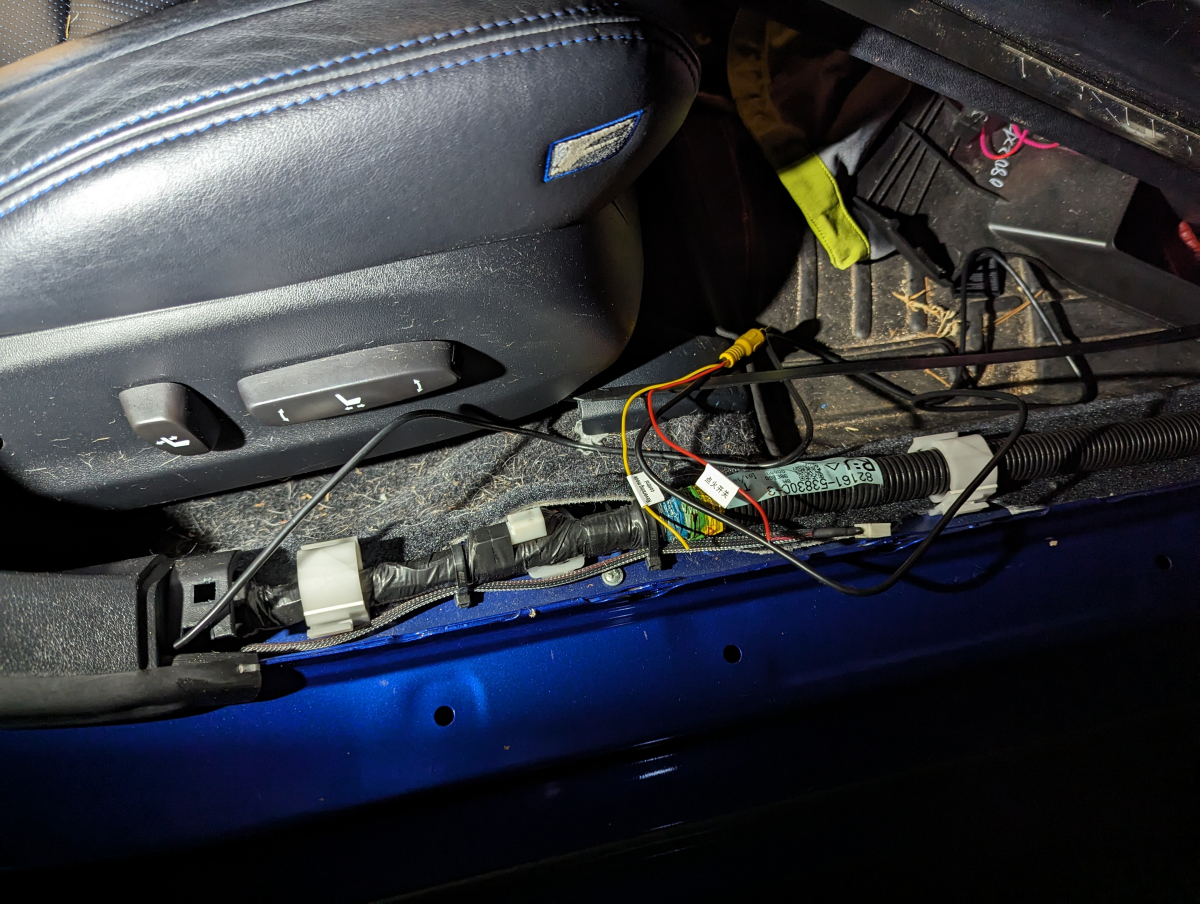
My Posi Taps didn't arrive on time so ended up having to finish it the next day.

Always remember to tape connections
I had been having fitment depth issues with the radio and the dash.
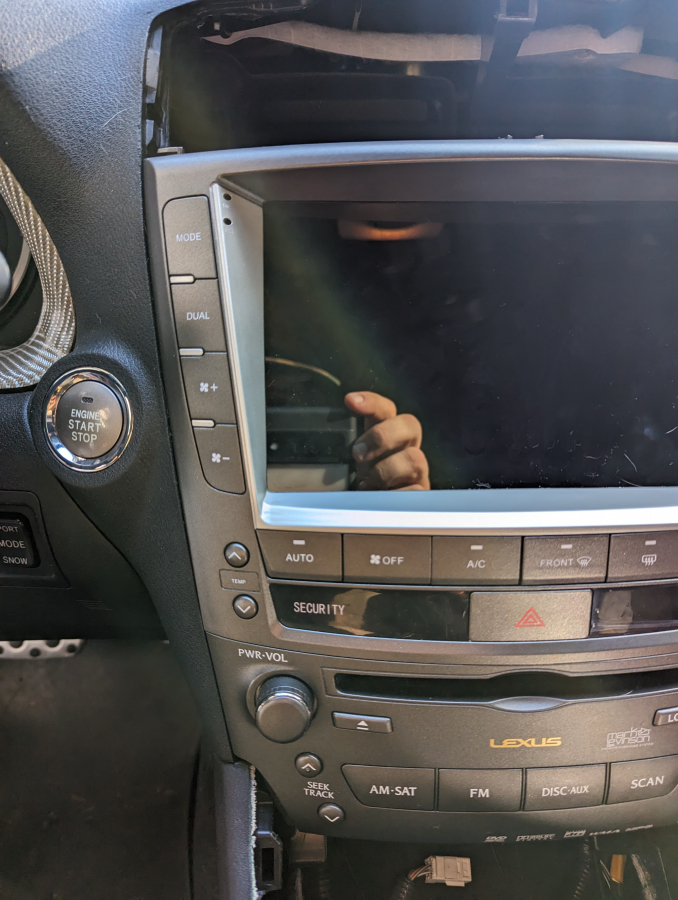
When I put it back together this time I added to washers.
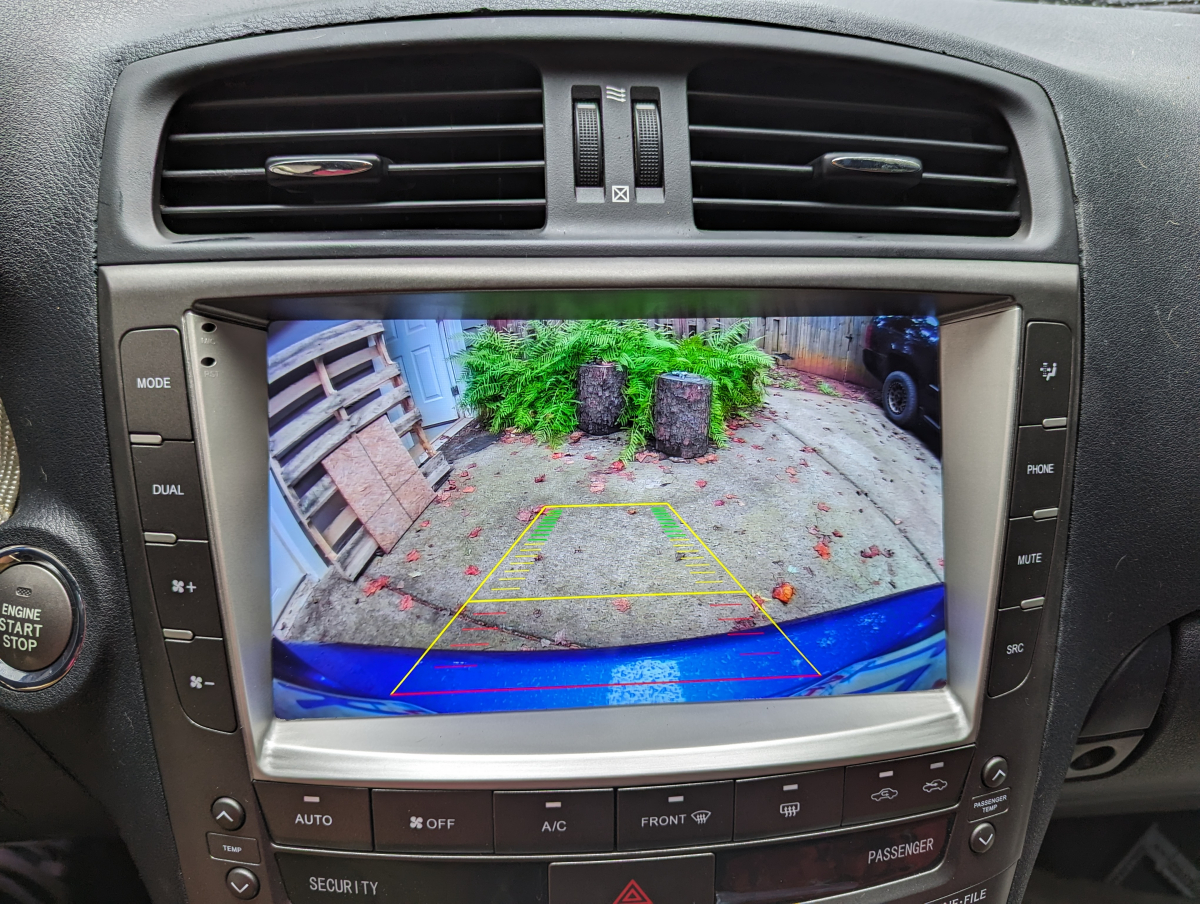
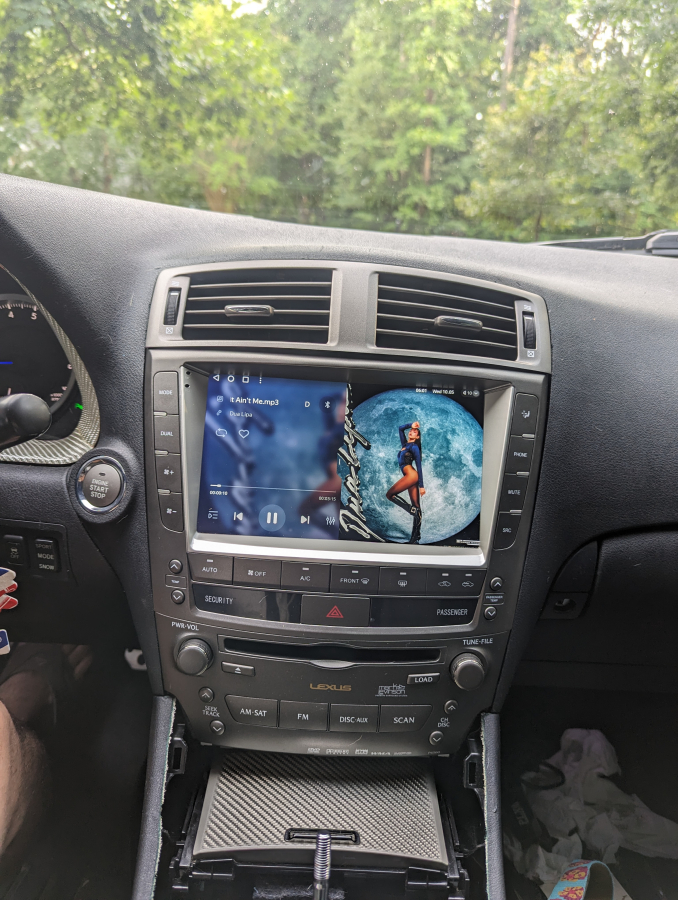
So with it all back together here is a before and after. I think it really updated the car and makes it feel much newer.
There are a ton of clips holding on the trunk lid liner
You then have to remove this metal plate to get to the camera.
The wire harness for the camera completely disconnects so you can remove it from the bracket. This is great as I modified the bracket to mount the new camera.
The camera came with its own metal mount. I was not going to use it. But I did steal a piece of it to use as a backing plate for the screws.
It was getting dark but I wanted to finish it.
The wire runs easily down the passenger side of the car.
My Posi Taps didn't arrive on time so ended up having to finish it the next day.
Always remember to tape connections
I had been having fitment depth issues with the radio and the dash.
When I put it back together this time I added to washers.
So with it all back together here is a before and after. I think it really updated the car and makes it feel much newer.
The following 2 users liked this post by CCColtsicehockey:
BS ISF (08-31-23),
caymandive (09-08-23)
09-17-23, 08:08 PM
#26
This is the coating I used on the engine panels. https://www.amazon.com/gp/product/B0...e?ie=UTF8&th=1
When I installed the new battery this past weekend I wiped the dust off them but they were still good deep black.
When I installed the new battery this past weekend I wiped the dust off them but they were still good deep black.
The following users liked this post:
CCColtsicehockey (09-18-23)
11-07-23, 03:26 PM
#28
I finally got around to getting some of the parts installed over the last couple of weeks. I noticed a while back while fixing my clicking noise what appeared to be a bend in my Figs MEGA Arms. I reached out to Figs about this and they offered to fix them for a small price and recoat them.
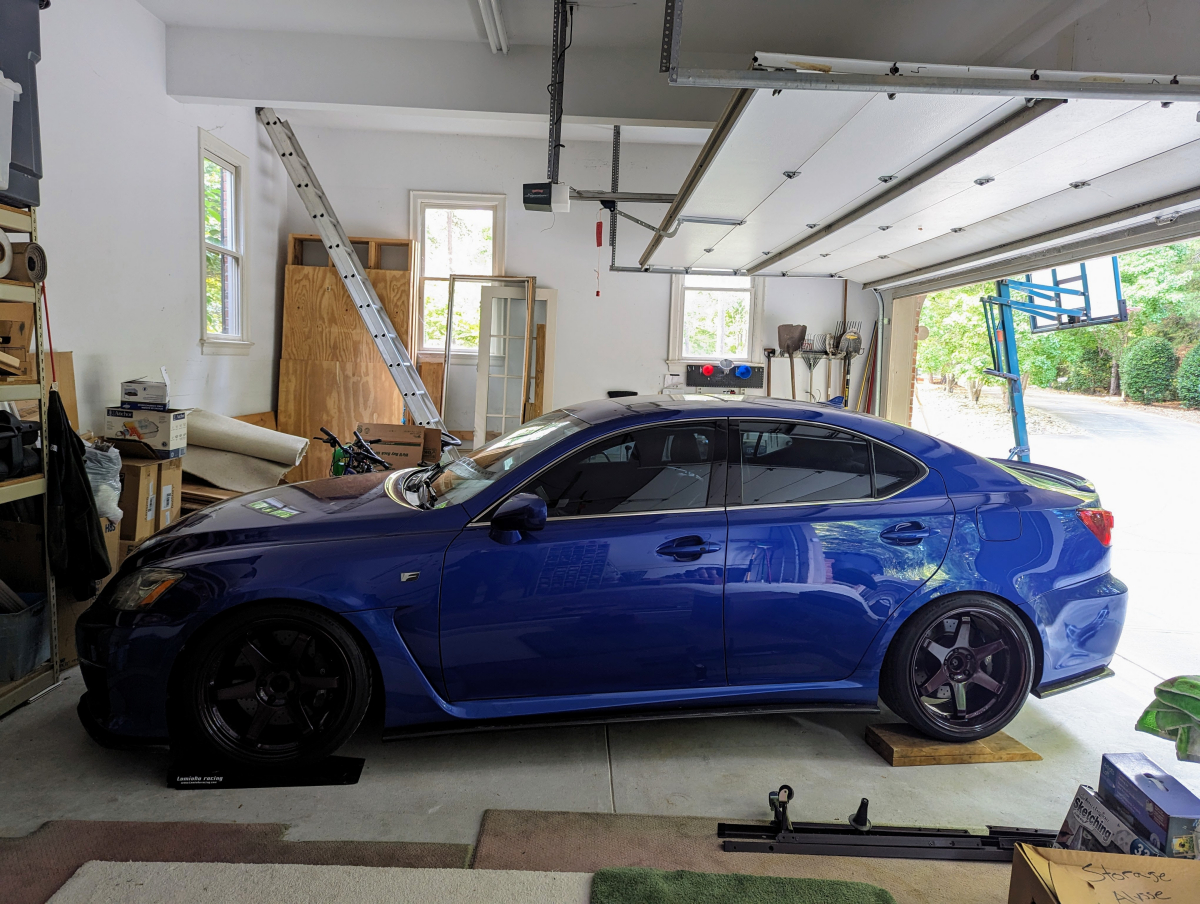
My garage is currently full and I don't have the desire to leave the cars that are in the garage out of it overnight for a longer project. I took the car up to my Dad's to use his garage.
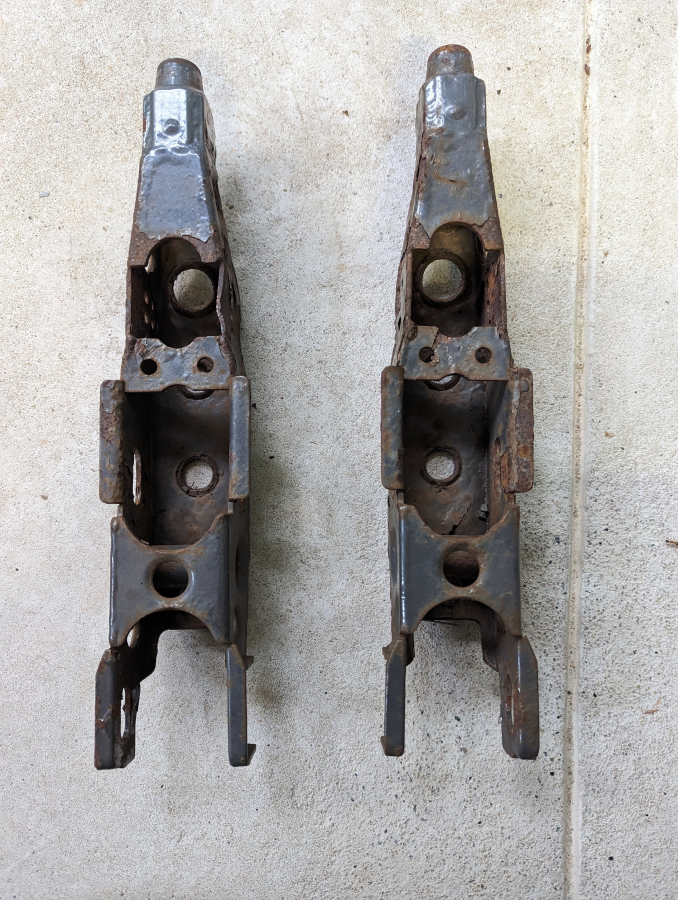
The arms are in pretty rough shape
They came out though with not really any fight despite the condition
You can see the small bend on the left one. They have since added reinforcement to this area which is what they were going to do to mine. I shipped them out to them with a planned 2 week turn around time.
A few weeks later I had some time so went back up and pulled the coilovers as well. This was the first larger install I had done with multiple power tools besides my large impact. What a difference it makes in speed of getting things apart.

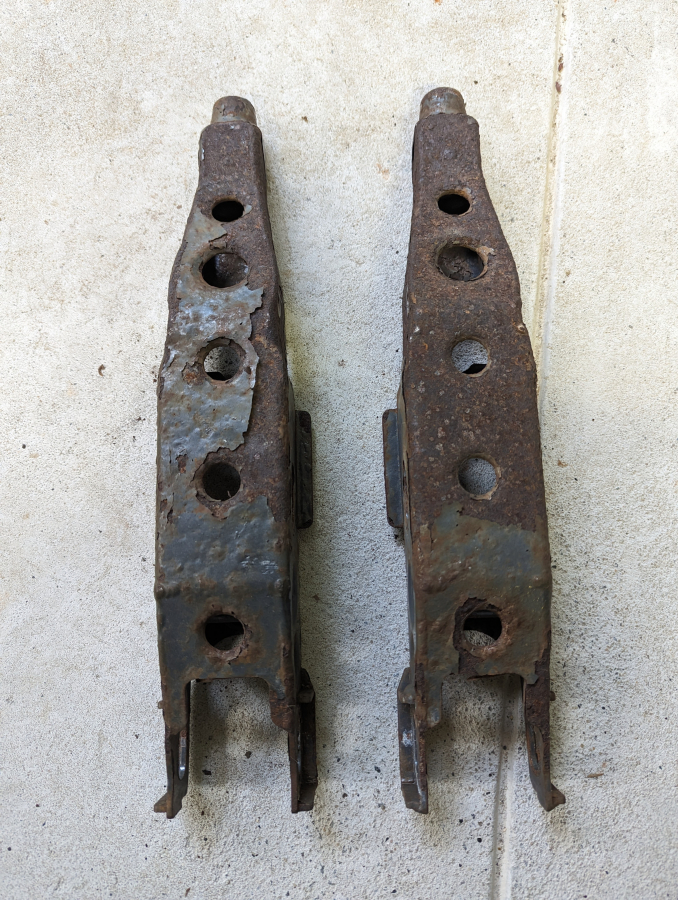
They were well past it with 100k miles on them.


Not great but not terrible

They do look a bit worse when next to the replacements

Back to the Figs MEGA Arms. When they arrived they were in much worse condition than they had expected from the pictures. Figs graciously offered me a great deal on a replacement set of arms. They didn't have to do this as the condition was out of their control despite the bend which I had mentioned new version has reinforcement in this area. It speaks to the great customer service they provide though by doing this.

They next day I got back at it and brought a helper along
I put the rears in first as well as the new Figs MEGA Arms

I had also bought all new hardware from Lexus for the reassembly so as not to use any of the old rusted ones.

Fronts were up next. They were super easy.

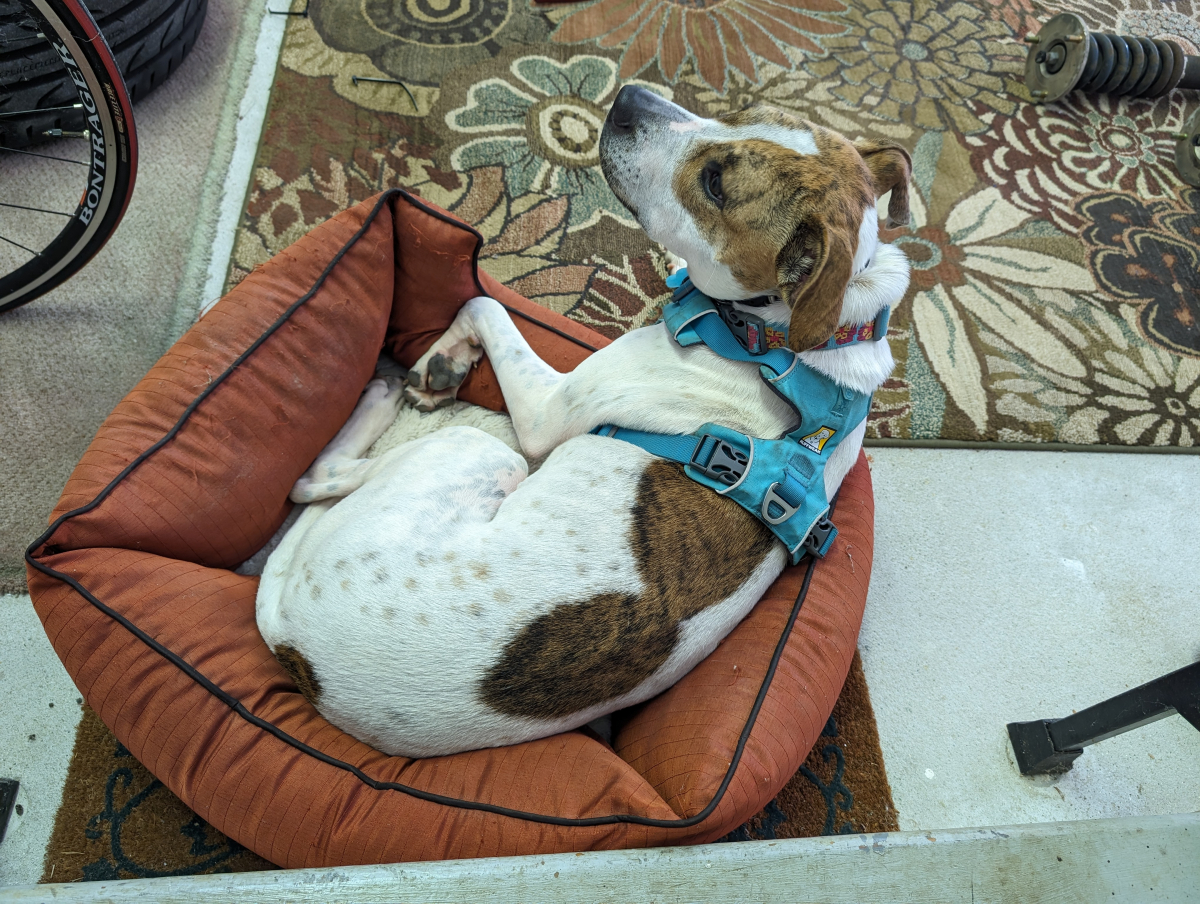
My helper then requested to be relocated to the sun. She obviously wasn't doing much helping.

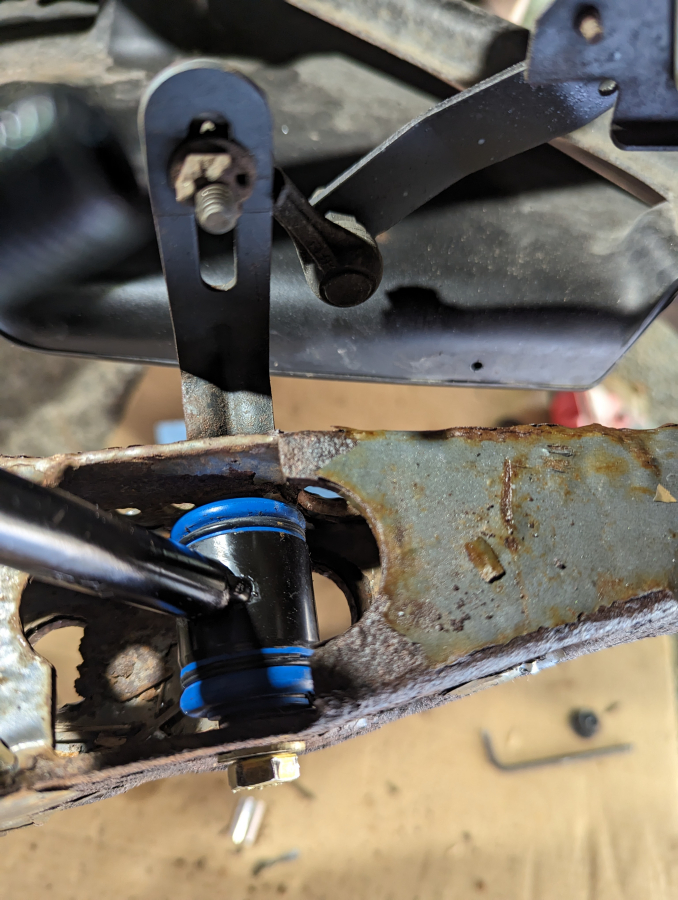
Once the fronts were in I replaced the worn rear LCA bushings

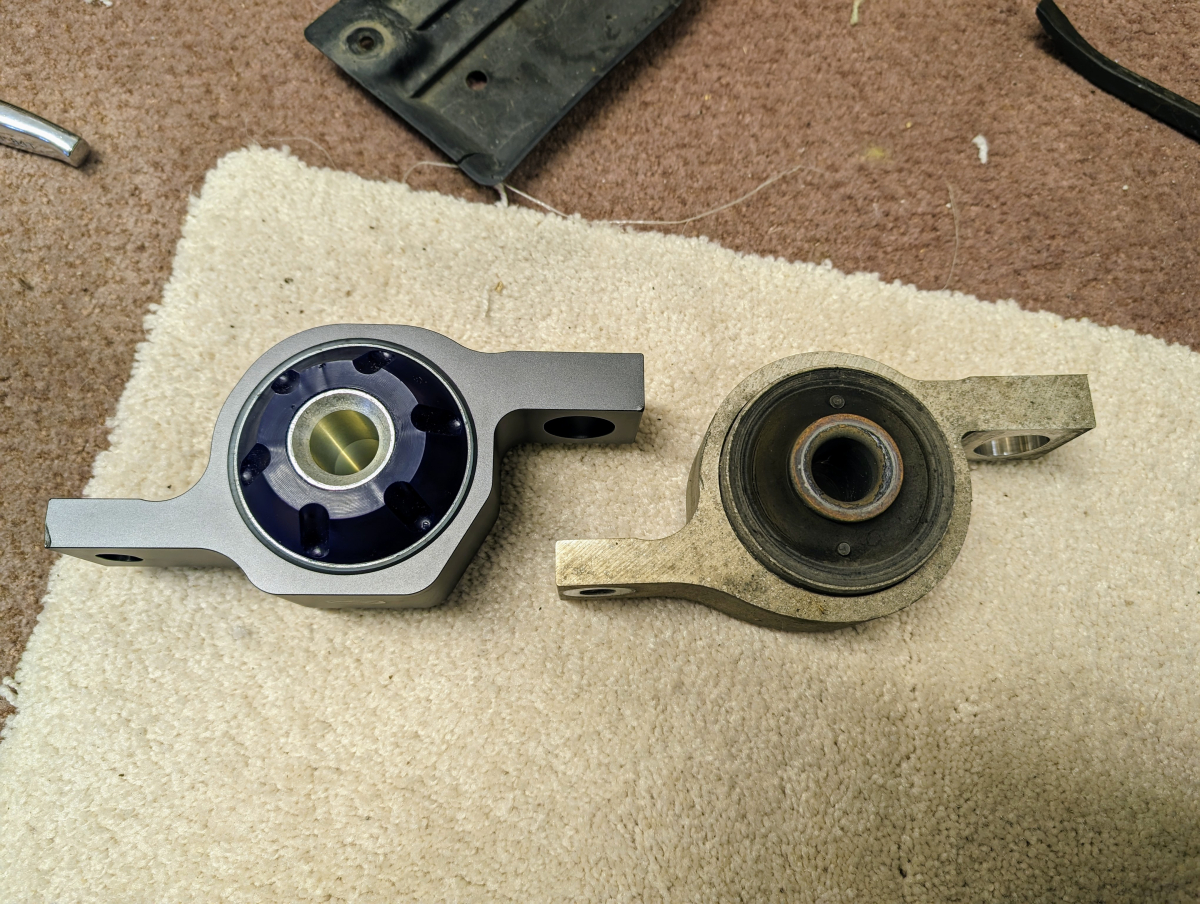
They look good. It is too bad you never really see them.
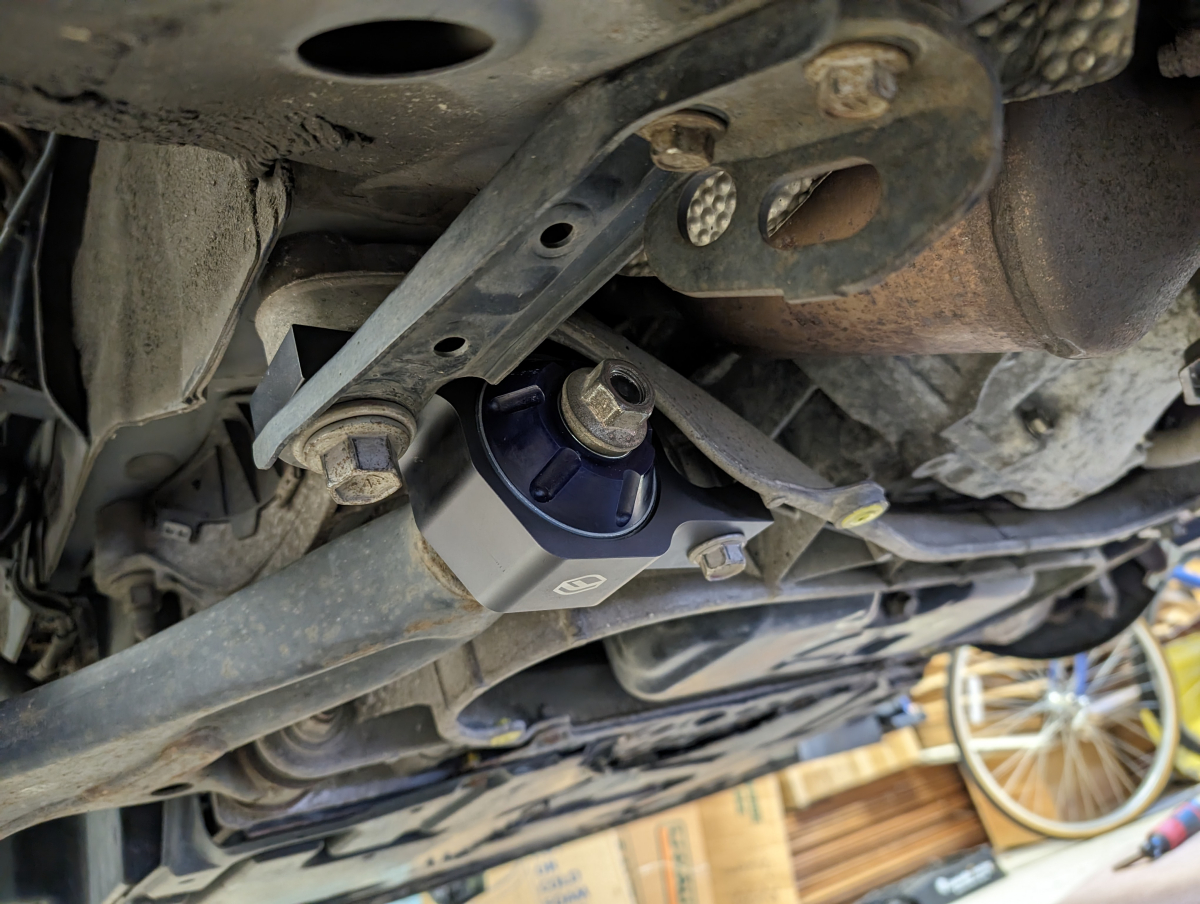
I guessed wrong on the first height setting.
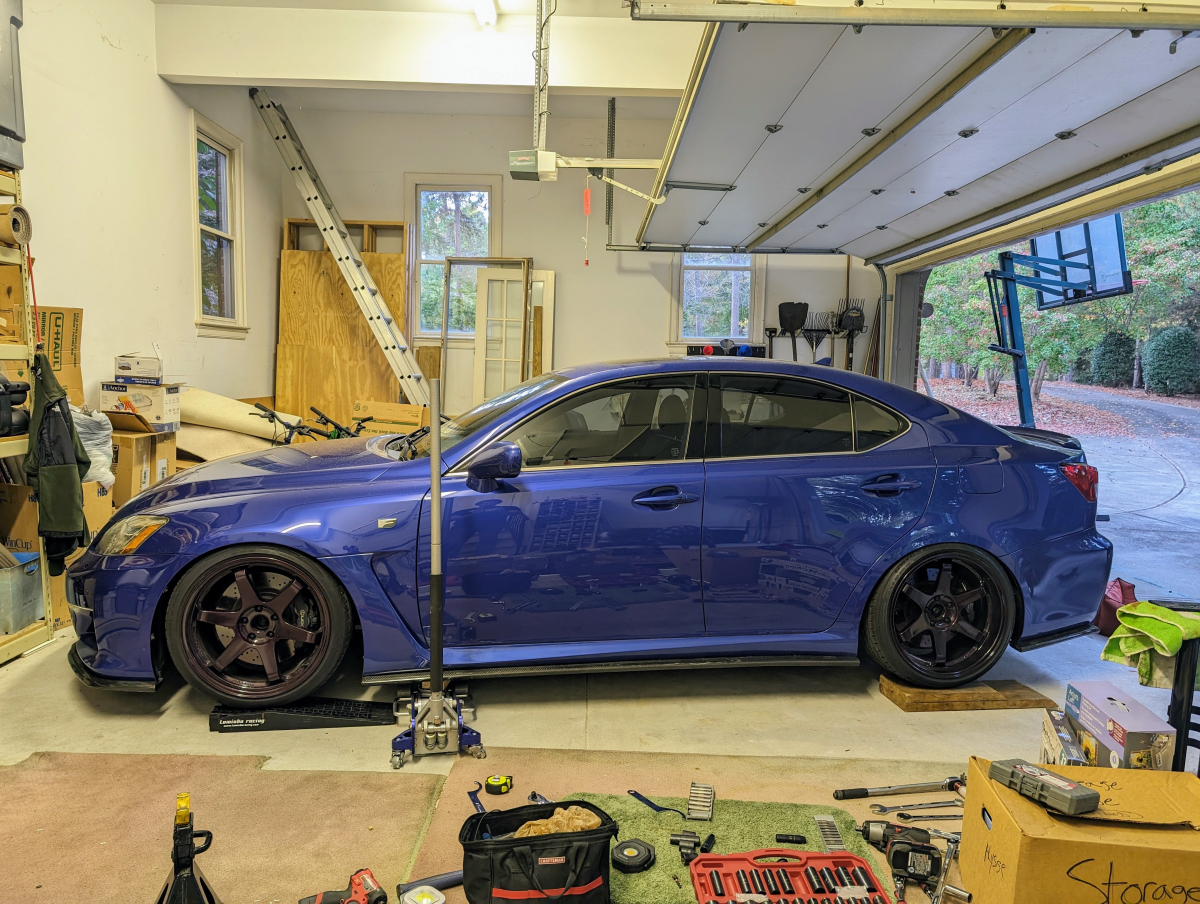
Much better after the second attempt
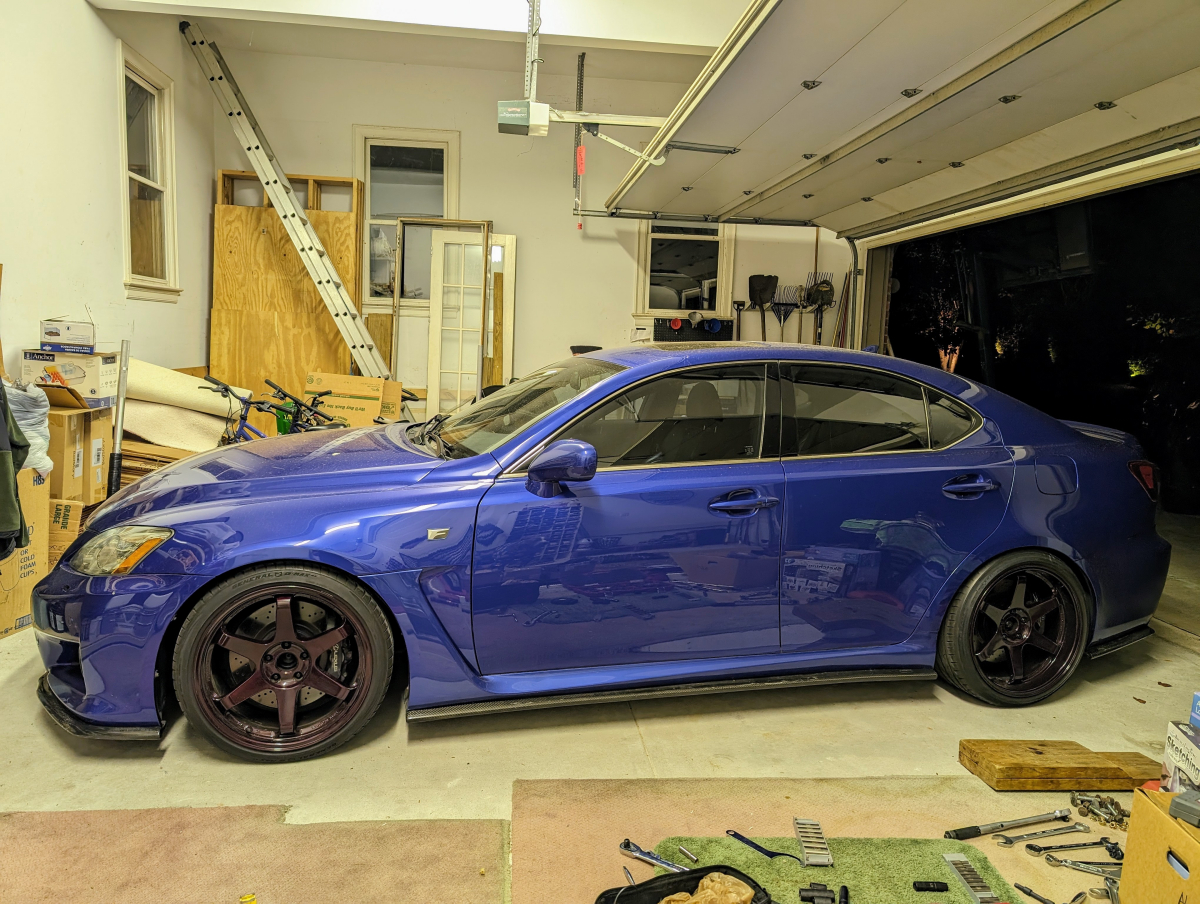
Finally was able to get it aligned today

My garage is currently full and I don't have the desire to leave the cars that are in the garage out of it overnight for a longer project. I took the car up to my Dad's to use his garage.
The arms are in pretty rough shape
They came out though with not really any fight despite the condition
You can see the small bend on the left one. They have since added reinforcement to this area which is what they were going to do to mine. I shipped them out to them with a planned 2 week turn around time.
A few weeks later I had some time so went back up and pulled the coilovers as well. This was the first larger install I had done with multiple power tools besides my large impact. What a difference it makes in speed of getting things apart.
They were well past it with 100k miles on them.
Not great but not terrible
They do look a bit worse when next to the replacements
Back to the Figs MEGA Arms. When they arrived they were in much worse condition than they had expected from the pictures. Figs graciously offered me a great deal on a replacement set of arms. They didn't have to do this as the condition was out of their control despite the bend which I had mentioned new version has reinforcement in this area. It speaks to the great customer service they provide though by doing this.
They next day I got back at it and brought a helper along
I put the rears in first as well as the new Figs MEGA Arms
I had also bought all new hardware from Lexus for the reassembly so as not to use any of the old rusted ones.
Fronts were up next. They were super easy.
My helper then requested to be relocated to the sun. She obviously wasn't doing much helping.
Once the fronts were in I replaced the worn rear LCA bushings
They look good. It is too bad you never really see them.
I guessed wrong on the first height setting.
Much better after the second attempt
Finally was able to get it aligned today
The following 5 users liked this post by CCColtsicehockey:
agtuning (11-08-23),
ChpEng (11-07-23),
iH8RICERZ (11-15-23),
inovashn (11-08-23),
lobuxracer (11-07-23)
The following users liked this post:
CCColtsicehockey (11-16-23)

Thread
Thread Starter
Forum
Replies
Last Post
Vooduguru
ES - 1st to 4th Gen (1990-2006)
14
03-24-08 07:39 PM