My Shine Auto Project Build Thread


 09-02-09, 10:02 AM
#302
Urgent Help Needed:
My fog is held only by one bolt/screw to the rear since the mounting tab for the side on inside the bumper is too short. Both fogs are currently flopping around
Does anyone know what bolt/screw size fits in that side tab? I am planning to screw it in and use a large washer to reach the bumper's tab
My fog is held only by one bolt/screw to the rear since the mounting tab for the side on inside the bumper is too short. Both fogs are currently flopping around
Does anyone know what bolt/screw size fits in that side tab? I am planning to screw it in and use a large washer to reach the bumper's tab
09-02-09, 10:46 AM
#303
Urgent Help Needed:
My fog is held only by one bolt/screw to the rear since the mounting tab for the side on inside the bumper is too short. Both fogs are currently flopping around
Does anyone know what bolt/screw size fits in that side tab? I am planning to screw it in and use a large washer to reach the bumper's tab
My fog is held only by one bolt/screw to the rear since the mounting tab for the side on inside the bumper is too short. Both fogs are currently flopping around
Does anyone know what bolt/screw size fits in that side tab? I am planning to screw it in and use a large washer to reach the bumper's tab


 09-04-09, 12:57 AM
#309
So I thought everything was well until the area the area around my driver side headlight/highbeams got screwed up. For some mysterious reason, unknown to this very minute, the clear coat in the immediate area somehow shrunk up and turned into the crinkly matte finish.
The finish on the area was fine before the bumper was on the car. It was fine when we picked up the car and when we picked it up, me and CrazySC300 scrutinized it and didn't see it. The same goes when I brought the car over to Chrispy's house. So somehow abruptly it got messed up while curing.
So I figured I needed some other work done anyways, I went back to Makito Nakai from Seven Apple Body Works / Shine, to take care of all of it for me.
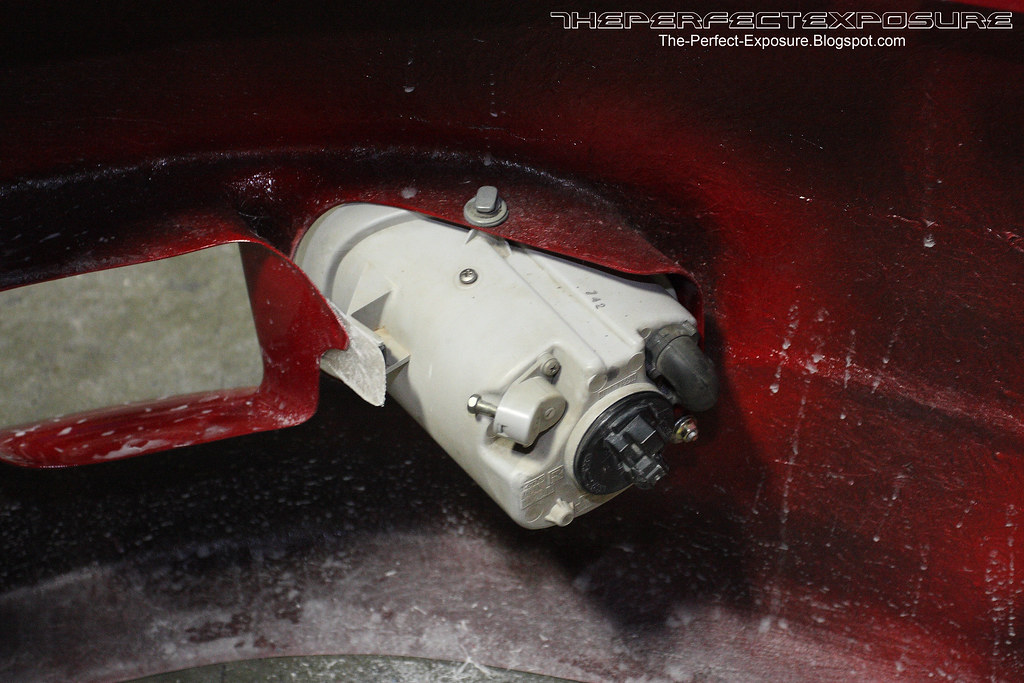
1. My fogs are flopping around since it is only held by 2 bolts instead of three due to the tabs being too short. They needed to be securely mounted asap before it becomes a road debris
2. Where the fender and bumper meets, my bumper jammed into the fender after I scraped the bumper a few times and the paint on the bumper got slightly damaged.
3. In the driver side highbeams where the clearcoat defect was, there were some fitment issues with my highbeam. There is a gap and the curvature of the opening is somewhat irregular so some shaving could improve it.
4. There isn't enough paint in gaps of between the sideskirts and the body panel, which made the gaps appear to be more apparent.
5. Rear license plate is mounted with a screws so it can be made more secure with rivet screw holes.
6. Hood spoiler needed to be refinished
While being busy working as a production manager, Makito was nice enough to spare some time to multi-tasked to help me out. Now that is definitely customer service, especially when many of my problems had nothing to do with the kit.
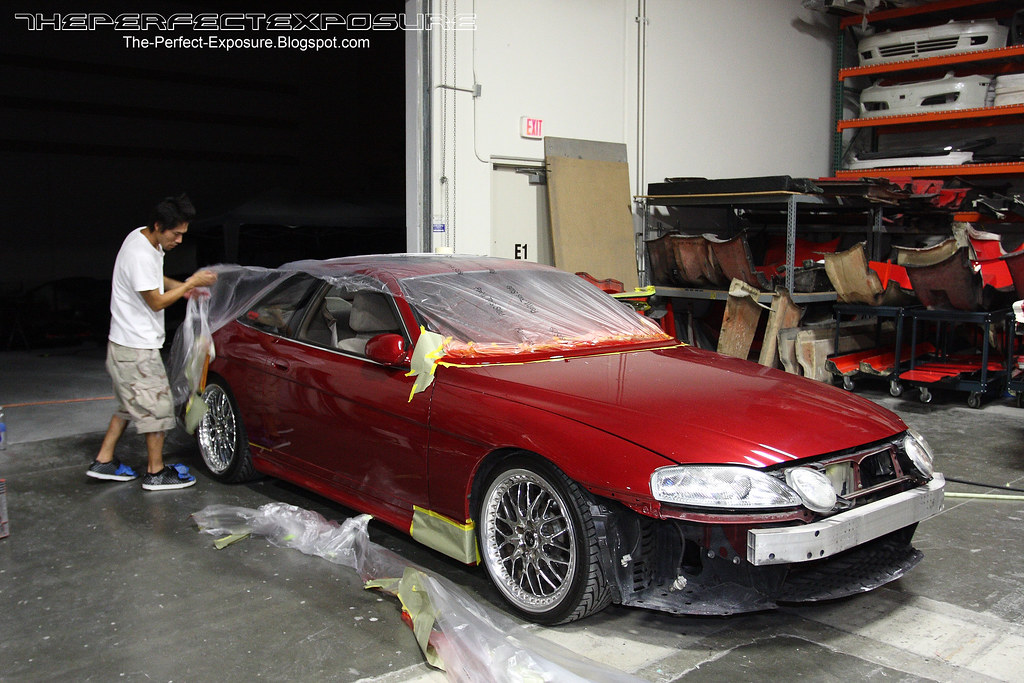
Here are some pictures from throughout the day
All wrapped up with slits cut up to expose the hood spoiler and side skirt gaps.


The bumper getting worked on. The defective clearcoat and basecoat got sanded off around the driver side highbeam area. Same goes for the paint on the side that was caused by ineptitude with driving lowered cars.

A tab was retrofitted on to properly mount the fogs. It will be later be trimmed. I never said or expected the kit to be perfect.
Bumper getting touched up and blended in the paint booth

After many many hours later
Oddly, the clear coat cured really weird again in that area for some mysterious reason in that area despite being sanded down and re-sprayed the base coat, pearl coat, and clear coat. It seems as if the primer or basecoat is absorbing the clear and causing it to slightly shrink. Who the heck knows why. We'll wet sand and polish it in a couple of days after it is cured.
So while Makito was working on the car, I lurked around the facilities to snap up some pictures.
Ahhh, SC bumpers waiting to be boxed up and shipped out

More SC bumpers fresh out of the mold in the back waiting to get worked on.

Now this is one of the most coveted items in the building. The mold for the kit! It was stashed in the back corner.

So yea, mad props and special thanks to Makito and Ken for awesome customer service!
The finish on the area was fine before the bumper was on the car. It was fine when we picked up the car and when we picked it up, me and CrazySC300 scrutinized it and didn't see it. The same goes when I brought the car over to Chrispy's house. So somehow abruptly it got messed up while curing.
So I figured I needed some other work done anyways, I went back to Makito Nakai from Seven Apple Body Works / Shine, to take care of all of it for me.
1. My fogs are flopping around since it is only held by 2 bolts instead of three due to the tabs being too short. They needed to be securely mounted asap before it becomes a road debris
2. Where the fender and bumper meets, my bumper jammed into the fender after I scraped the bumper a few times and the paint on the bumper got slightly damaged.
3. In the driver side highbeams where the clearcoat defect was, there were some fitment issues with my highbeam. There is a gap and the curvature of the opening is somewhat irregular so some shaving could improve it.
4. There isn't enough paint in gaps of between the sideskirts and the body panel, which made the gaps appear to be more apparent.
5. Rear license plate is mounted with a screws so it can be made more secure with rivet screw holes.
6. Hood spoiler needed to be refinished
While being busy working as a production manager, Makito was nice enough to spare some time to multi-tasked to help me out. Now that is definitely customer service, especially when many of my problems had nothing to do with the kit.
Here are some pictures from throughout the day
All wrapped up with slits cut up to expose the hood spoiler and side skirt gaps.
The bumper getting worked on. The defective clearcoat and basecoat got sanded off around the driver side highbeam area. Same goes for the paint on the side that was caused by ineptitude with driving lowered cars.
A tab was retrofitted on to properly mount the fogs. It will be later be trimmed. I never said or expected the kit to be perfect.
Bumper getting touched up and blended in the paint booth
After many many hours later
Oddly, the clear coat cured really weird again in that area for some mysterious reason in that area despite being sanded down and re-sprayed the base coat, pearl coat, and clear coat. It seems as if the primer or basecoat is absorbing the clear and causing it to slightly shrink. Who the heck knows why. We'll wet sand and polish it in a couple of days after it is cured.
So while Makito was working on the car, I lurked around the facilities to snap up some pictures.
Ahhh, SC bumpers waiting to be boxed up and shipped out
More SC bumpers fresh out of the mold in the back waiting to get worked on.
Now this is one of the most coveted items in the building. The mold for the kit! It was stashed in the back corner.
So yea, mad props and special thanks to Makito and Ken for awesome customer service!
Last edited by xknowonex; 09-04-09 at 01:30 AM.
09-04-09, 01:17 AM
#311
Shine does everything in house: Making molds, making kits, sell them directly, and bodywork.
He is actually quite well known within the Mazda, Supra, and 350z community.
Last edited by xknowonex; 09-04-09 at 01:27 AM.
09-04-09, 08:39 AM
#314
Wait... so the question comes to mind, how much would all the work actually cost someone who's not dealing with Shine directly like you are... like for example someone out of state who can't just drive back and forth to Shine Seven Apple, etc.
Without reviewing (so if I get the number wrong then oh well) I thought I read somewhere in earlier posts that your savings was around $400ish-$500ish compared to a genuine Auto Couture kit... but then it seems like there was more work that needed to be done after that guesstimate. Makes me wonder if it's worth it either way, you know? Does one pay $400-500 more (or whatever the number was) for genuine with supposedly better fitment, or $400-500 less for the Shine kit, which you might or might not have to make a few "after" visits to the body shop to get just right?
I'm not taking sides here, just working out the pros/cons.
09-04-09, 09:35 AM
#315
Lexus Test Driver
iTrader: (12)
Join Date: Aug 2008
Location: CA
Posts: 1,203
Likes: 0
Received 0 Likes
on
0 Posts
Wait... so the question comes to mind, how much would all the work actually cost someone who's not dealing with Shine directly like you are... like for example someone out of state who can't just drive back and forth to Shine Seven Apple, etc.
Without reviewing (so if I get the number wrong then oh well) I thought I read somewhere in earlier posts that your savings was around $400ish-$500ish compared to a genuine Auto Couture kit... but then it seems like there was more work that needed to be done after that guesstimate. Makes me wonder if it's worth it either way, you know? Does one pay $400-500 more (or whatever the number was) for genuine with supposedly better fitment, or $400-500 less for the Shine kit, which you might or might not have to make a few "after" visits to the body shop to get just right?
I'm not taking sides here, just working out the pros/cons.
Without reviewing (so if I get the number wrong then oh well) I thought I read somewhere in earlier posts that your savings was around $400ish-$500ish compared to a genuine Auto Couture kit... but then it seems like there was more work that needed to be done after that guesstimate. Makes me wonder if it's worth it either way, you know? Does one pay $400-500 more (or whatever the number was) for genuine with supposedly better fitment, or $400-500 less for the Shine kit, which you might or might not have to make a few "after" visits to the body shop to get just right?
I'm not taking sides here, just working out the pros/cons.
