project:Soarer
 09-10-12, 07:41 PM
#361
 09-12-12, 04:19 AM
#362
so, a few weeks ago i had a bright idea for a short shifter. so i hacked up my sc300 shifter. but before that i did a comparo. this is the one for my mk3 r154 supra tranny on the left.
so then i began hacking away. then i find out there is a rubber lining inside the damn shifter. so after all morning hot-footing around because of this cluster **** i found myself in.
got my finished product.
had to put a scred through it to secure it so no pop off during driving. looks like ****. but idk. when i get my shifter boot hopefully that will cover the weld/surgery up.
09-12-12, 04:23 AM
#363
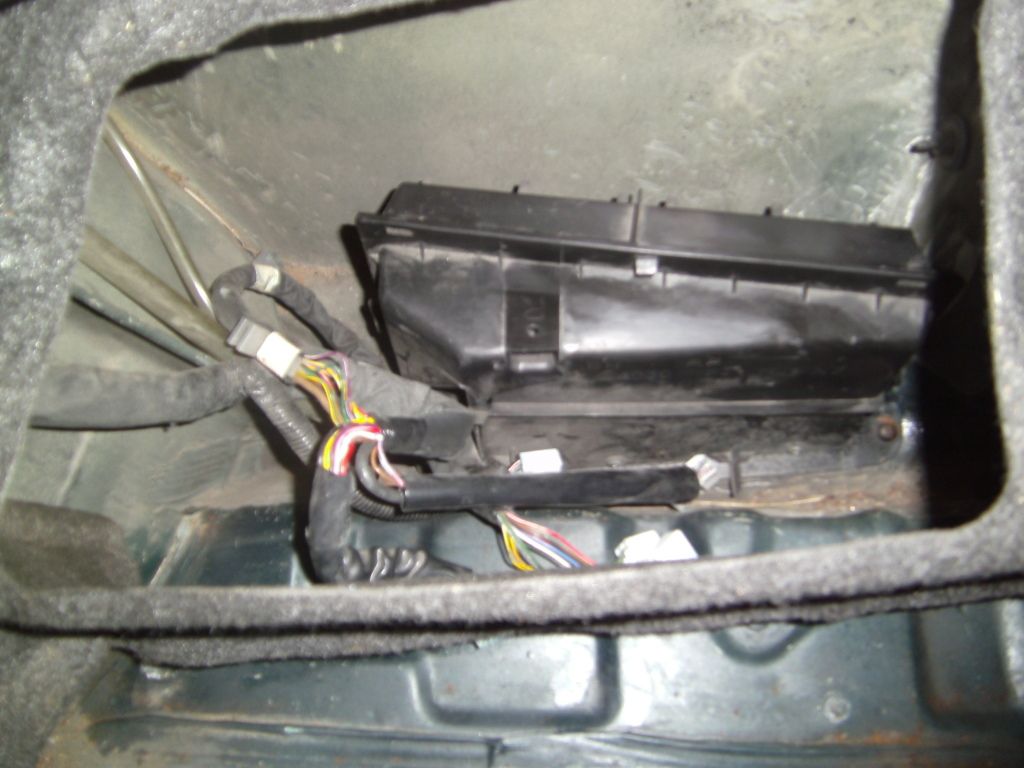
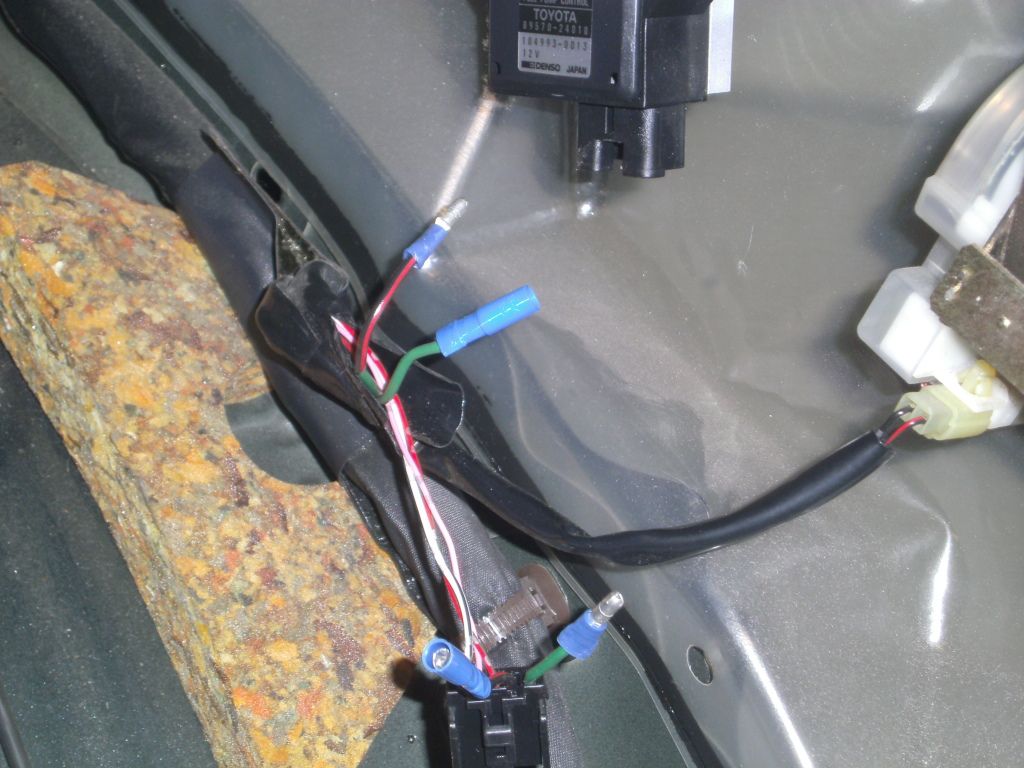
so since ive had this car, there has been a cluster **** of wires underneath my ds plastic panel. they were attached to this dial box. after 2 years of not sure what the hell they went to, i finally pulled them and removed them.
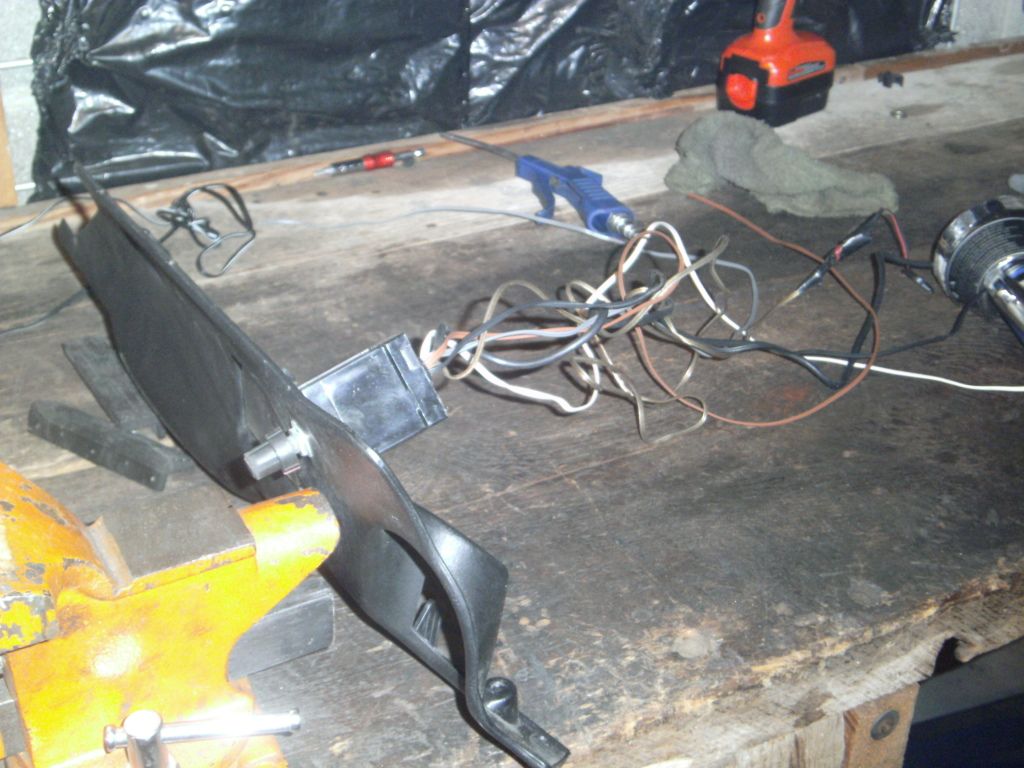
they looked like speaker wires. but come to find out, they were attached to the sensors for my ancient radar/jammer system. the connections looked like **** anyway. so shouldn't be missed (weight reduction!!)
they looked like speaker wires. but come to find out, they were attached to the sensors for my ancient radar/jammer system. the connections looked like **** anyway. so shouldn't be missed (weight reduction!!)
09-12-12, 04:25 AM
#364
and yesterday finishing up my ac lines install. ordered a new evap core. this whole ac system has been a pain in my pecker.
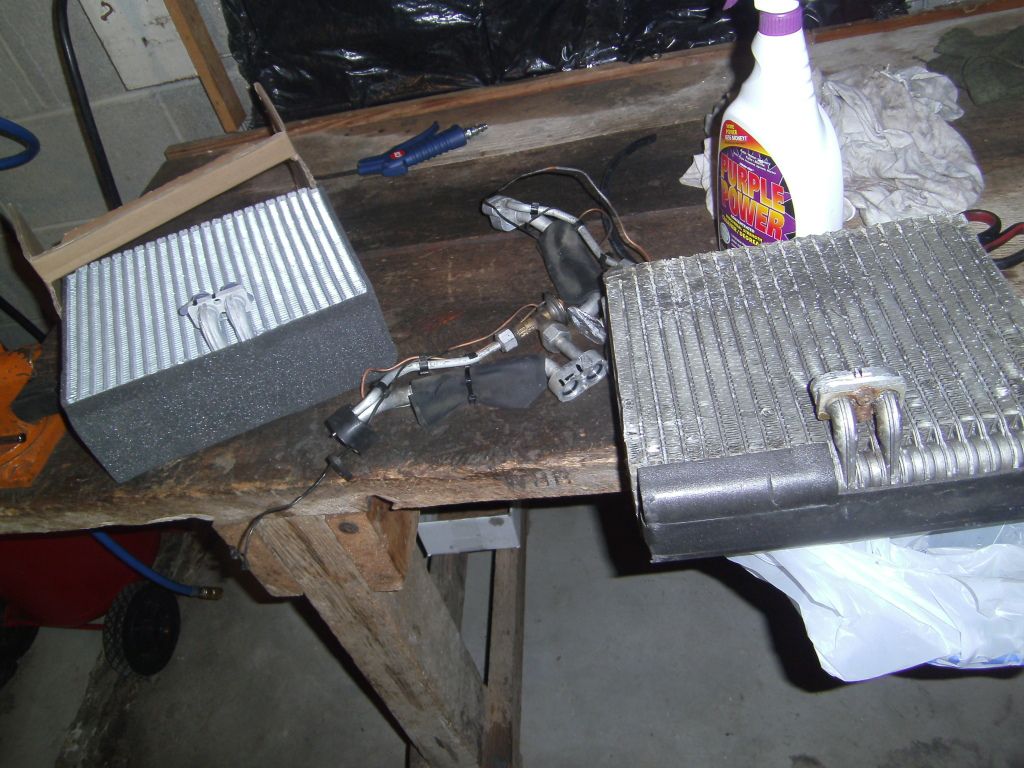
but luckily i have all the lines buttoned up. now for just a leak test, then fill with freon and enjoy the cold.
but luckily i have all the lines buttoned up. now for just a leak test, then fill with freon and enjoy the cold.
09-12-12, 06:48 AM
#366

how lean is lean? and is it lean when you're boosting, or just cruising around?
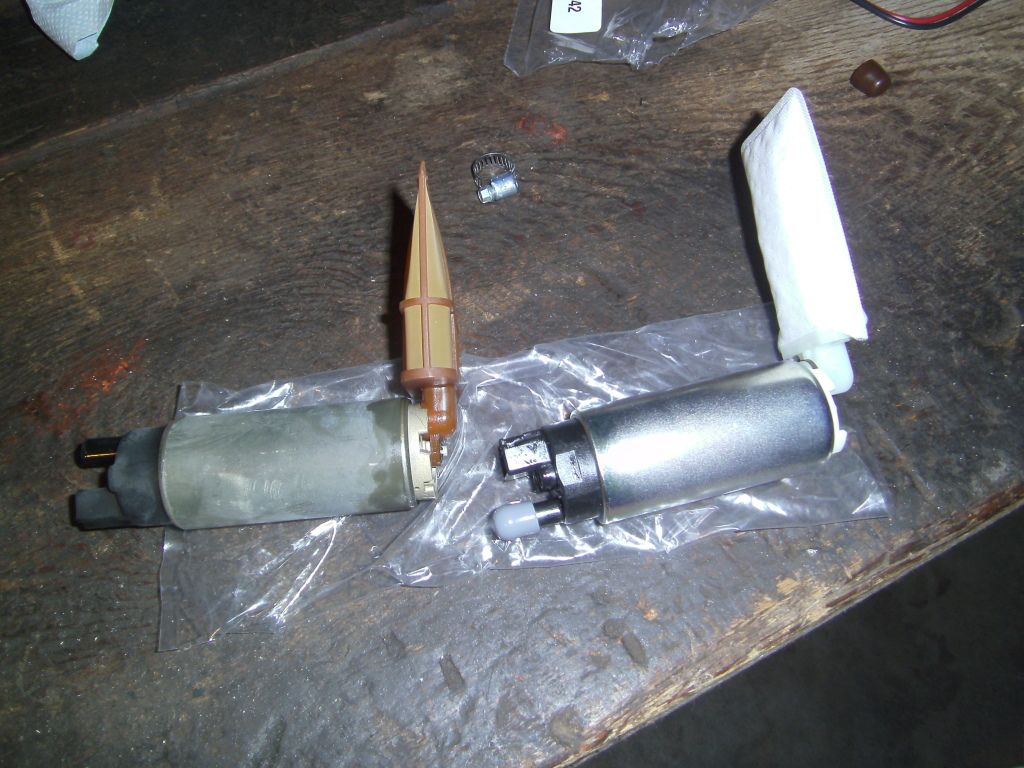
a walbro pump isnt much better than the stock sc400 pump BTW, and the stock FPR is fine too. but i'm guessing you will see these things for yourself when you install all of them when they come in...
a walbro pump isnt much better than the stock sc400 pump BTW, and the stock FPR is fine too. but i'm guessing you will see these things for yourself when you install all of them when they come in...
11-17-12, 07:03 PM
#368
so, a few days ago i ordered a wally. and it got here in no time..
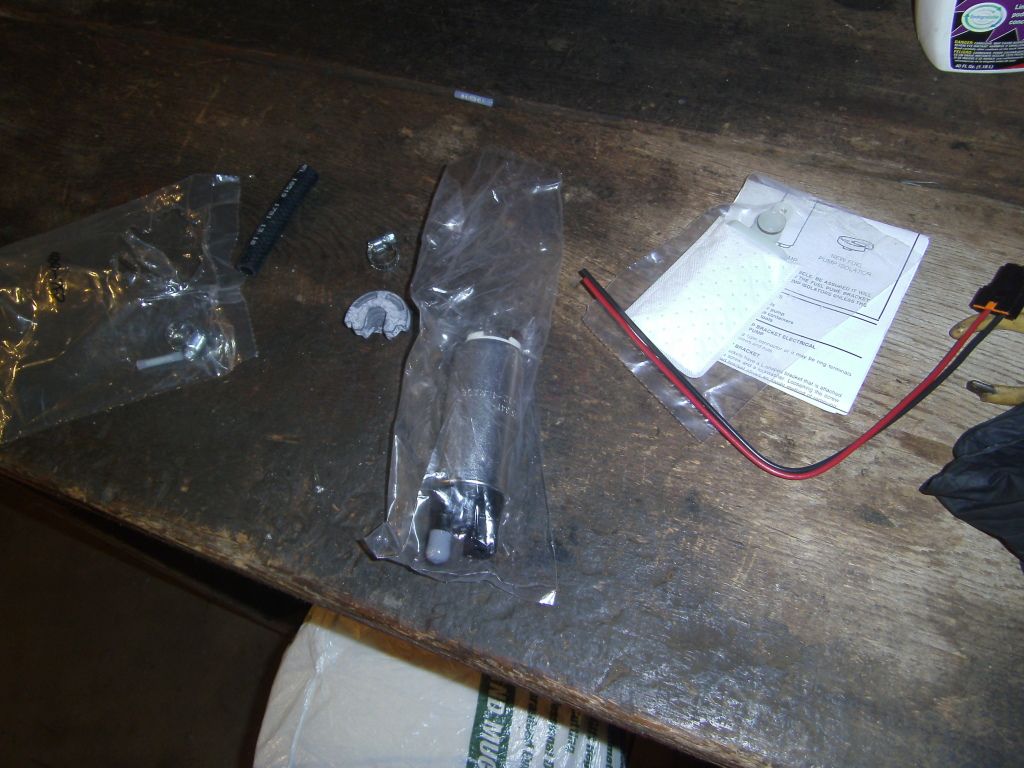
removing and installing this was actually a snap and actually enjoyable. But heres a side by side with the stock v8 one.
and for when i feel like running a 12v mod and when i don't
hopefully this keeps both sides of the isle happy.
removing and installing this was actually a snap and actually enjoyable. But heres a side by side with the stock v8 one.
and for when i feel like running a 12v mod and when i don't
hopefully this keeps both sides of the isle happy.
11-17-12, 08:12 PM
#369
so, been a while, this 3 car **** is very time consuming. alright let's begin.
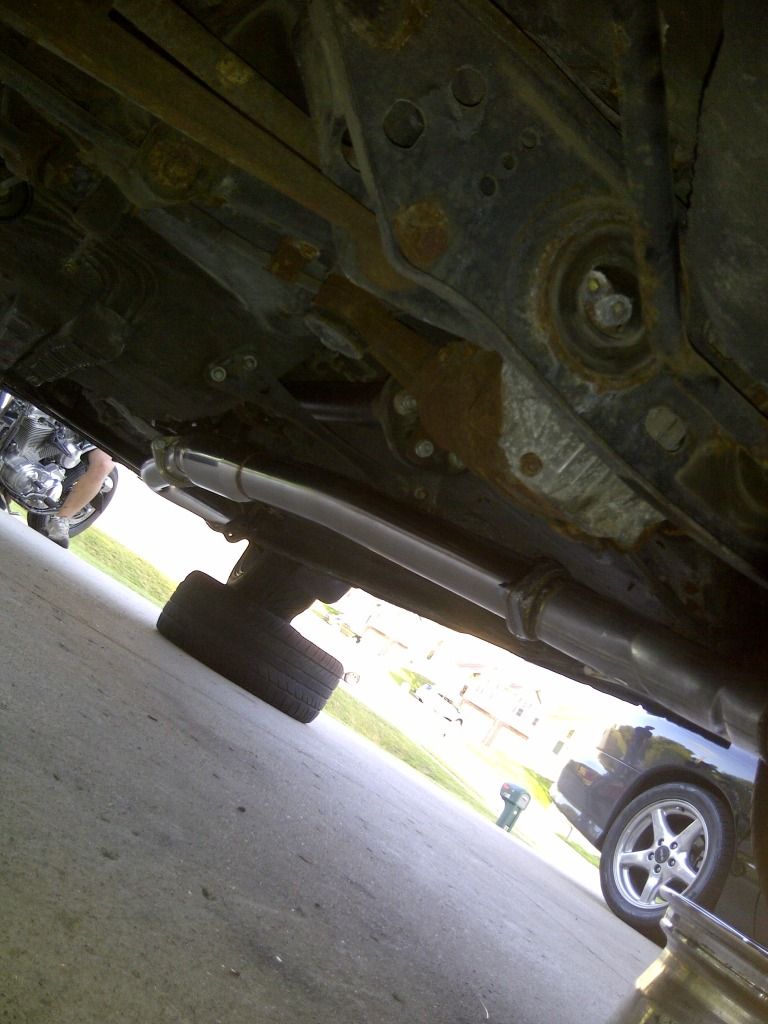
so tackling one of the most difficult and still ongoing projects of this swap. the damn exhaust. i got a 240sx one and planned to hack it up to make it work.
i was happy with the results i gotten on my own 240 i wanted to mimic the non raspy serious tone i was going to get on my 1j. This was a cluster ****. luckily my buddy matt is an expert welder. so i coin this a "matt-exhaust"
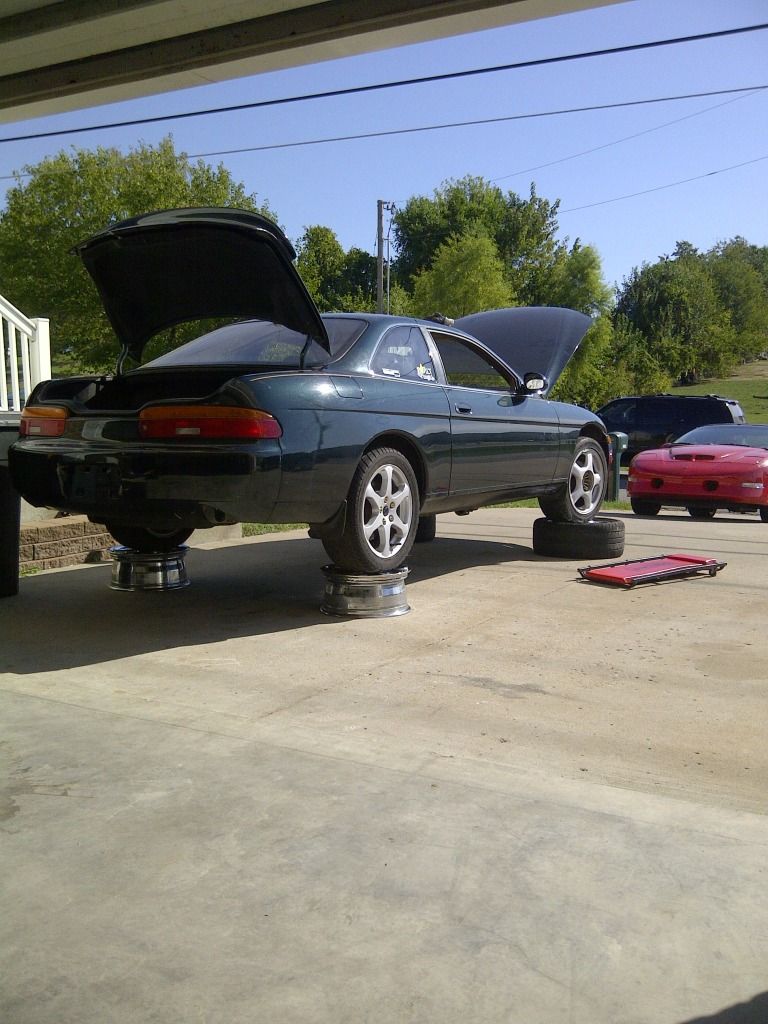
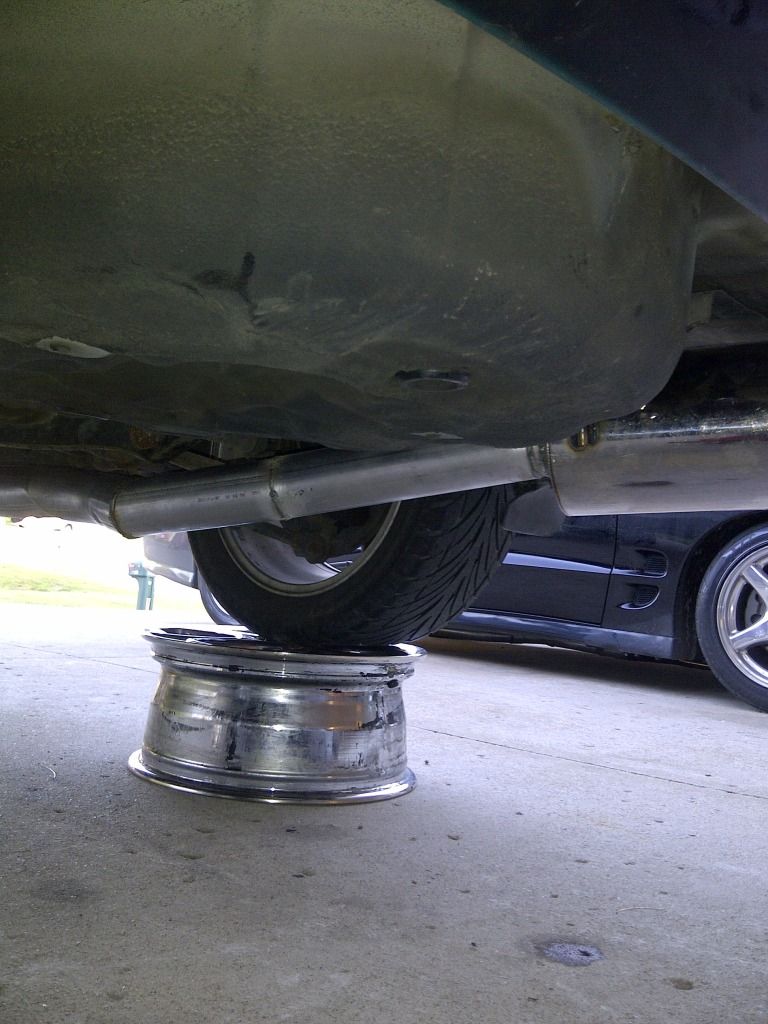
the jackstands
took about 2 weekends and finally he/we got something that resembles a complete exhaust.
http://i1062.photobucket.com/albums/...psdadad8bd.jpg
the end result was good. but since then weve had to revise the pipe after the dp and iam probably going to have to go to the exhaust shop for a finalk tweek. But all in all the exhuast i wound up going open dump. and full 3". has a good tone and sounds excellent when you get on it.
so tackling one of the most difficult and still ongoing projects of this swap. the damn exhaust. i got a 240sx one and planned to hack it up to make it work.
i was happy with the results i gotten on my own 240 i wanted to mimic the non raspy serious tone i was going to get on my 1j. This was a cluster ****. luckily my buddy matt is an expert welder. so i coin this a "matt-exhaust"
the jackstands
took about 2 weekends and finally he/we got something that resembles a complete exhaust.
http://i1062.photobucket.com/albums/...psdadad8bd.jpg
the end result was good. but since then weve had to revise the pipe after the dp and iam probably going to have to go to the exhaust shop for a finalk tweek. But all in all the exhuast i wound up going open dump. and full 3". has a good tone and sounds excellent when you get on it.
11-17-12, 08:17 PM
#370
LEAN BACK!!!
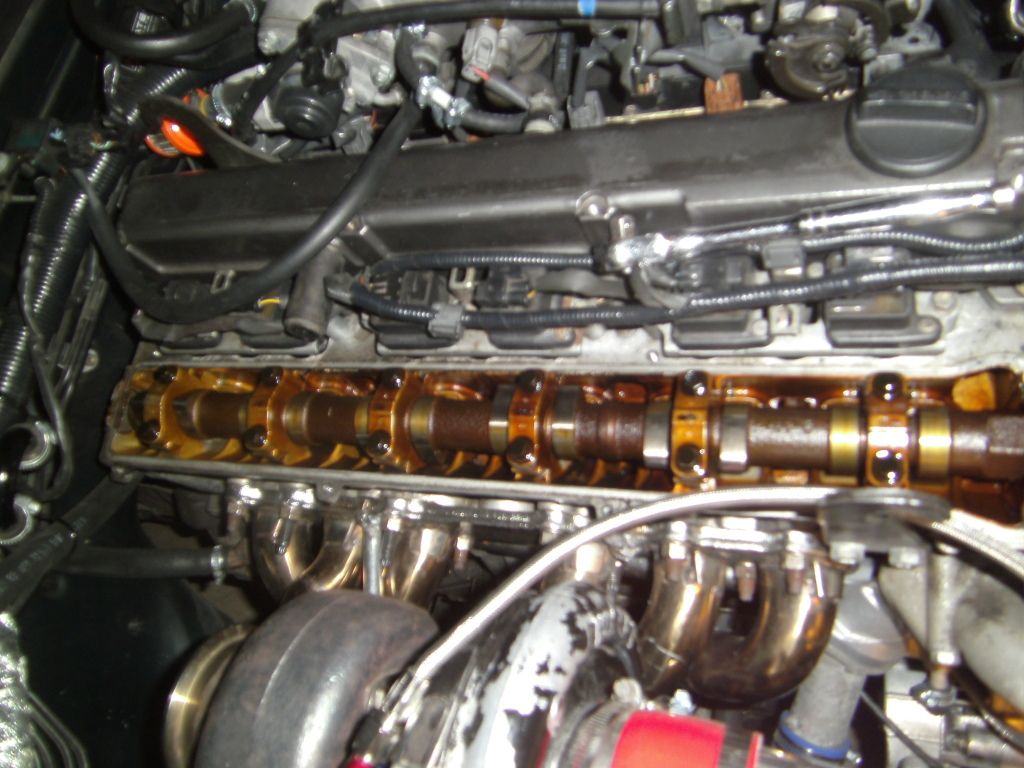
so trying to figure out why the hell my car was leaning bad(like 21afr) in idle??
after some deliberation. i decided id check the turbo gasket, for a leak.
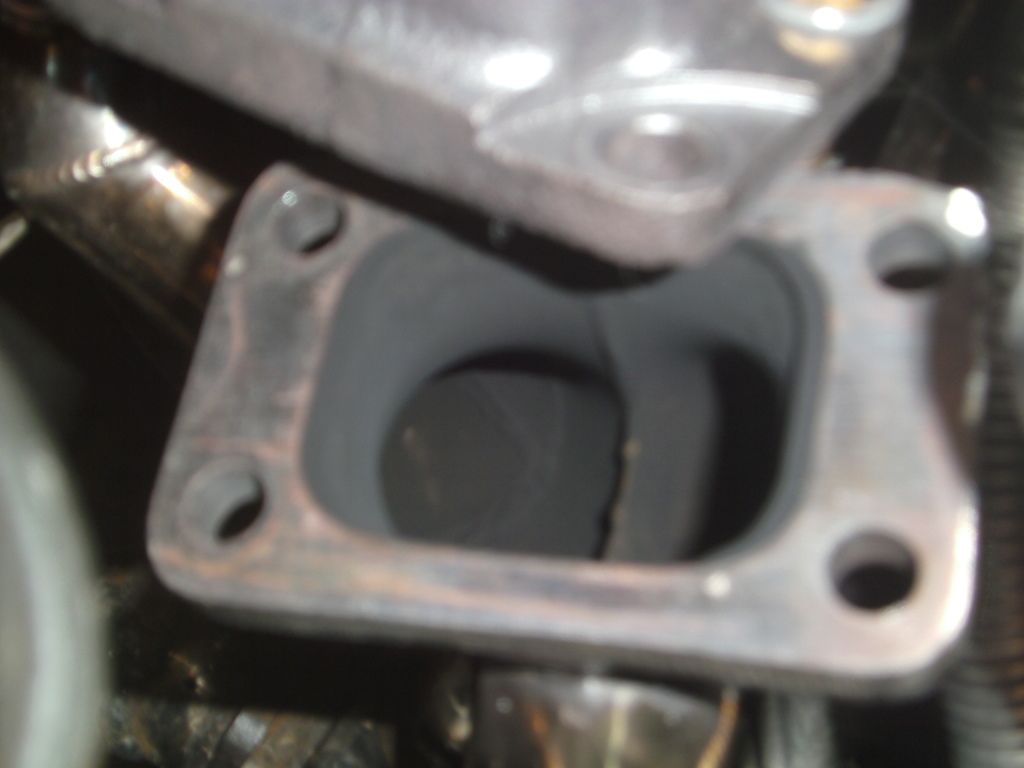
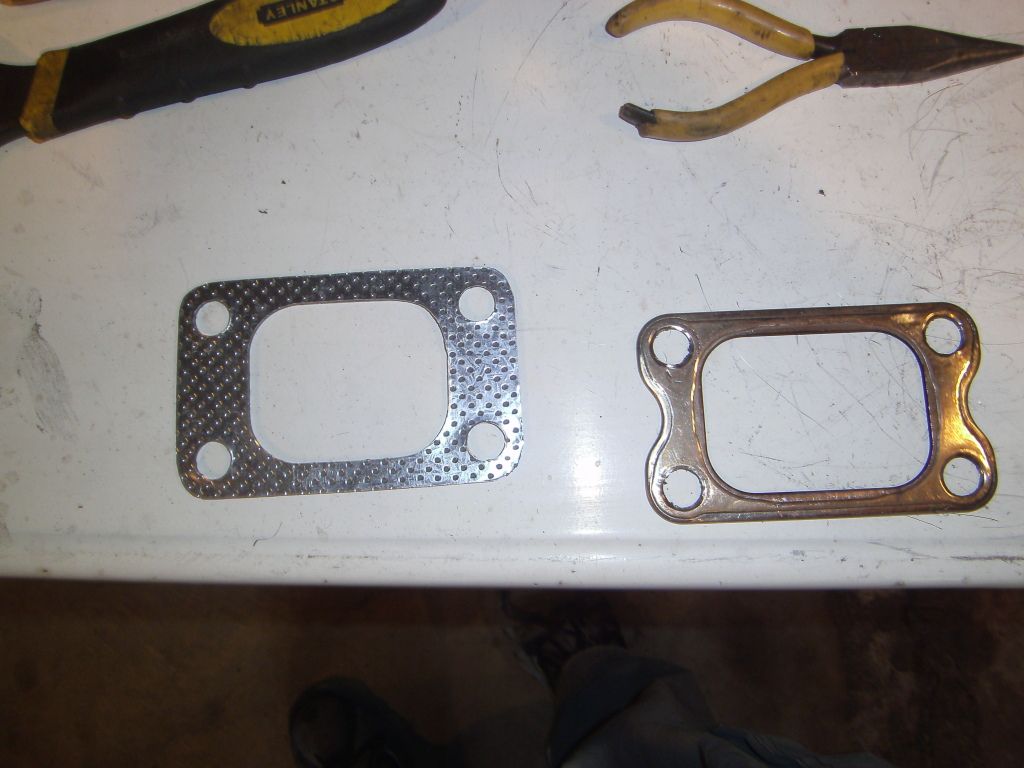
well dosen't look like a problem there.
let's "try" to adjust the cas.
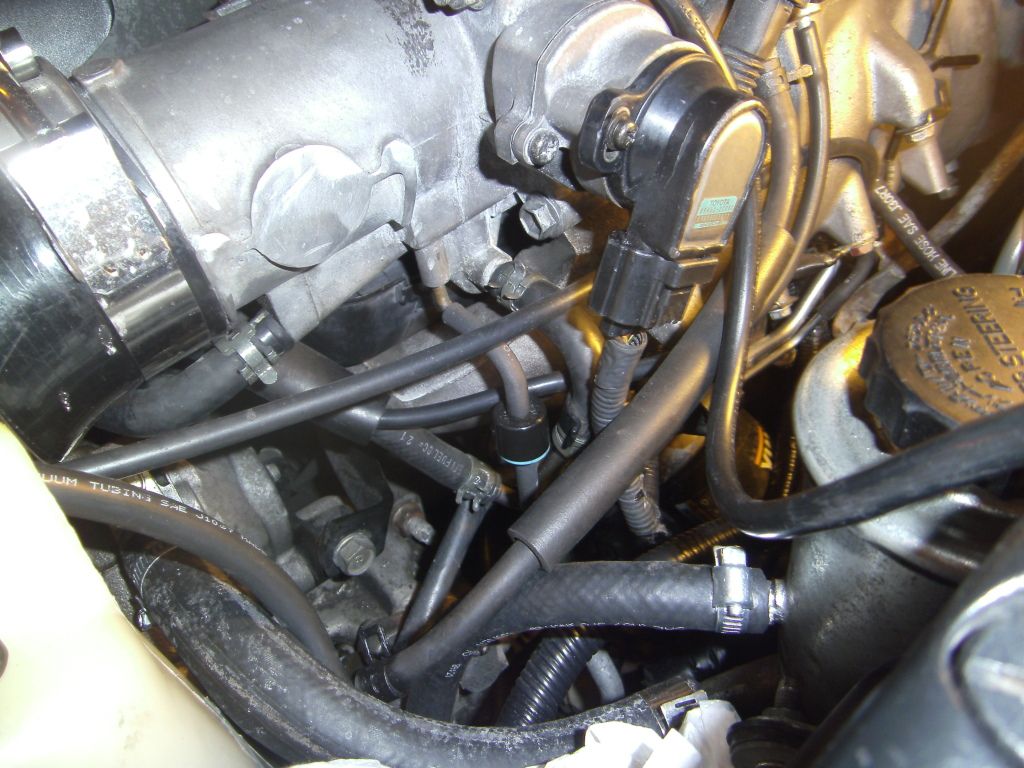
nope, how about checking for vacuam leaks??
so trying to figure out why the hell my car was leaning bad(like 21afr) in idle??
after some deliberation. i decided id check the turbo gasket, for a leak.
well dosen't look like a problem there.
let's "try" to adjust the cas.
nope, how about checking for vacuam leaks??
11-20-12, 10:18 PM
#371
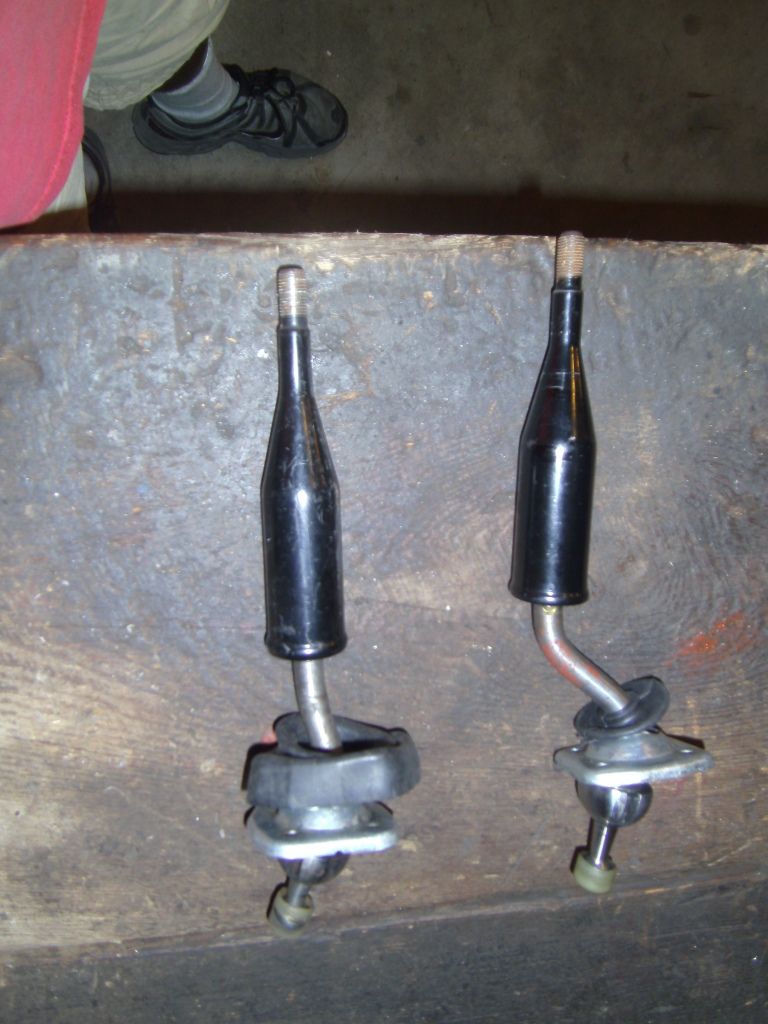
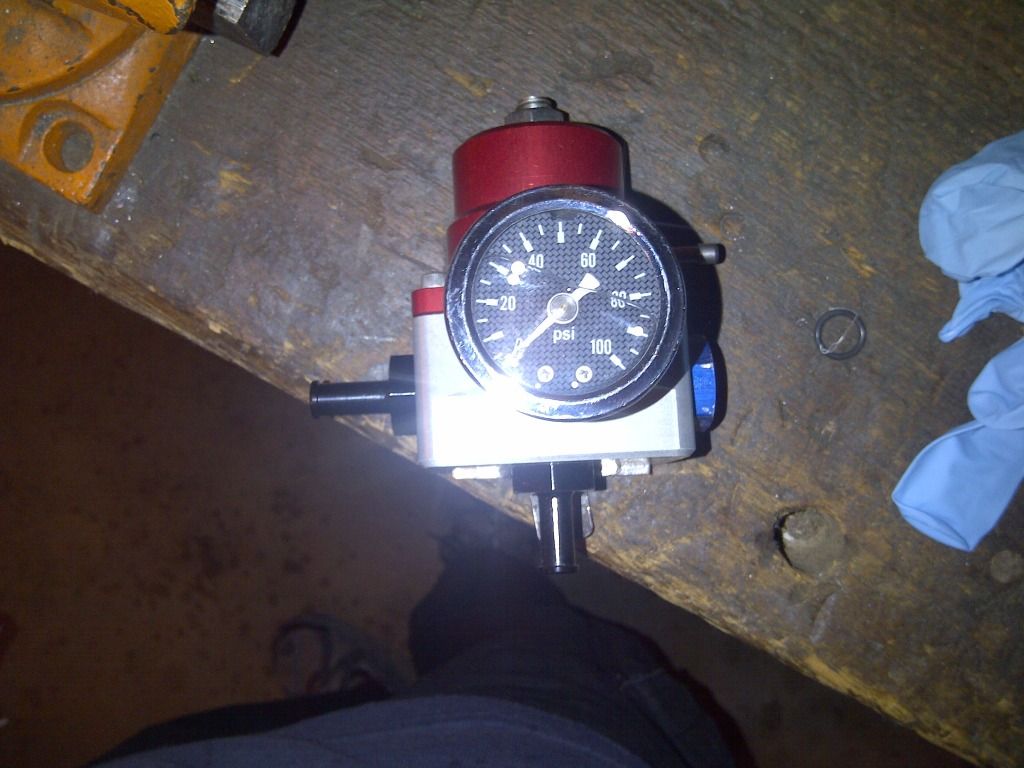
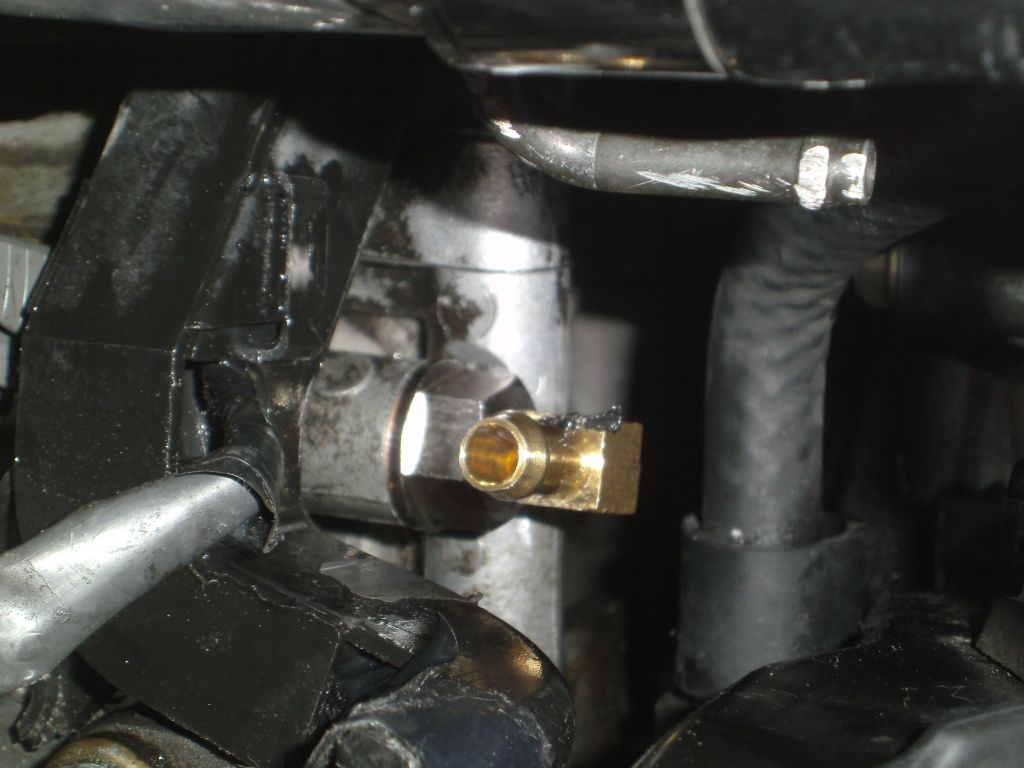
no dice. so my next (and later on the fix). would be the fpr. i snagged a legit aeromotive a1000 for a good deal. so i had to pick up the 5/16 bung's seeing as switching to a bigger braided line for like a foot or 2 made no real sense.
so save coin,time, and hassle let's keep it rubber.
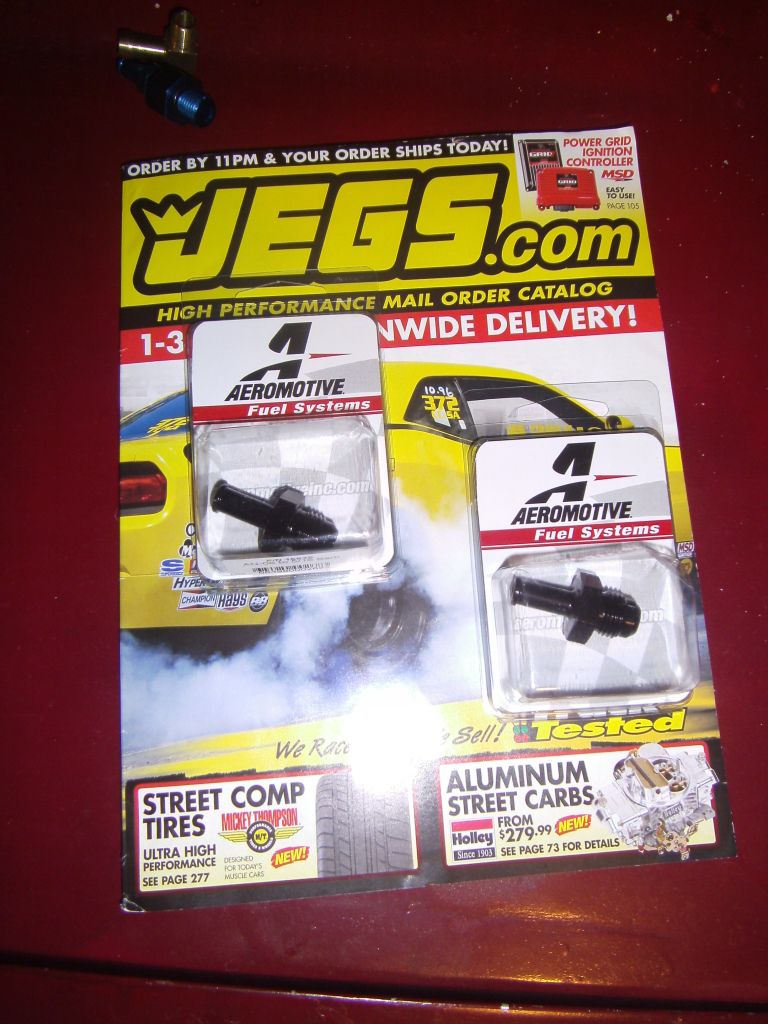
but, these ****ers were $25 each. so there goes the so so cheap theory.
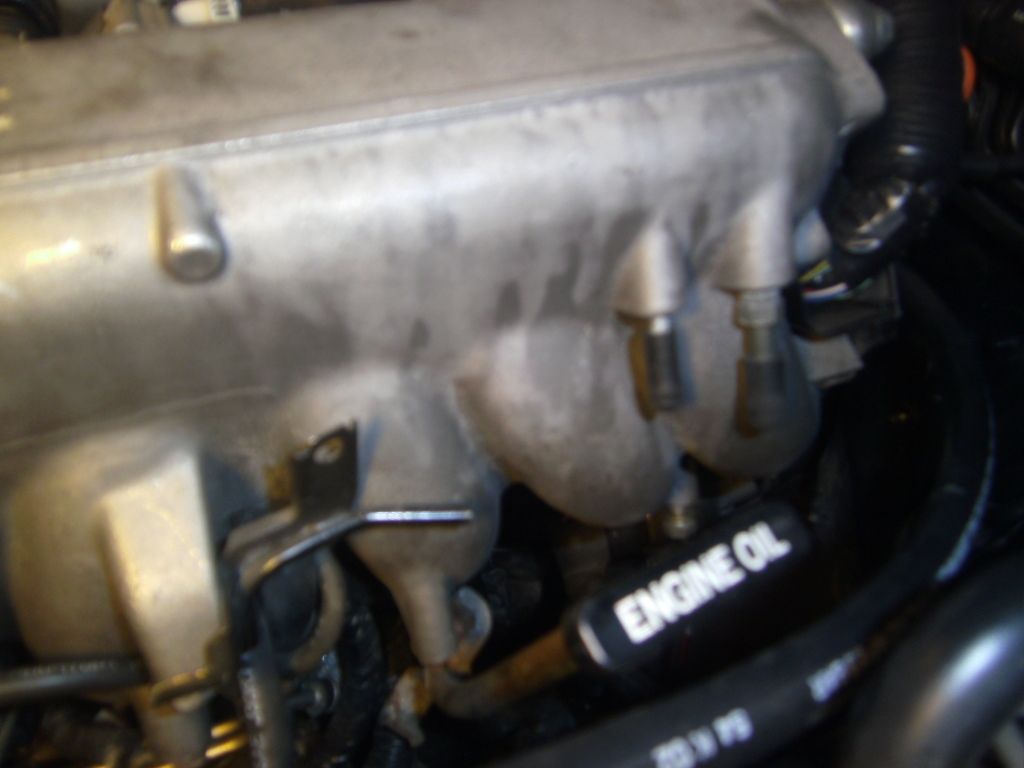
well thinking i got some tissue sucked up in the valve cover vent. so i removed it to inspect it. looks clean and 0 old gunk in there.
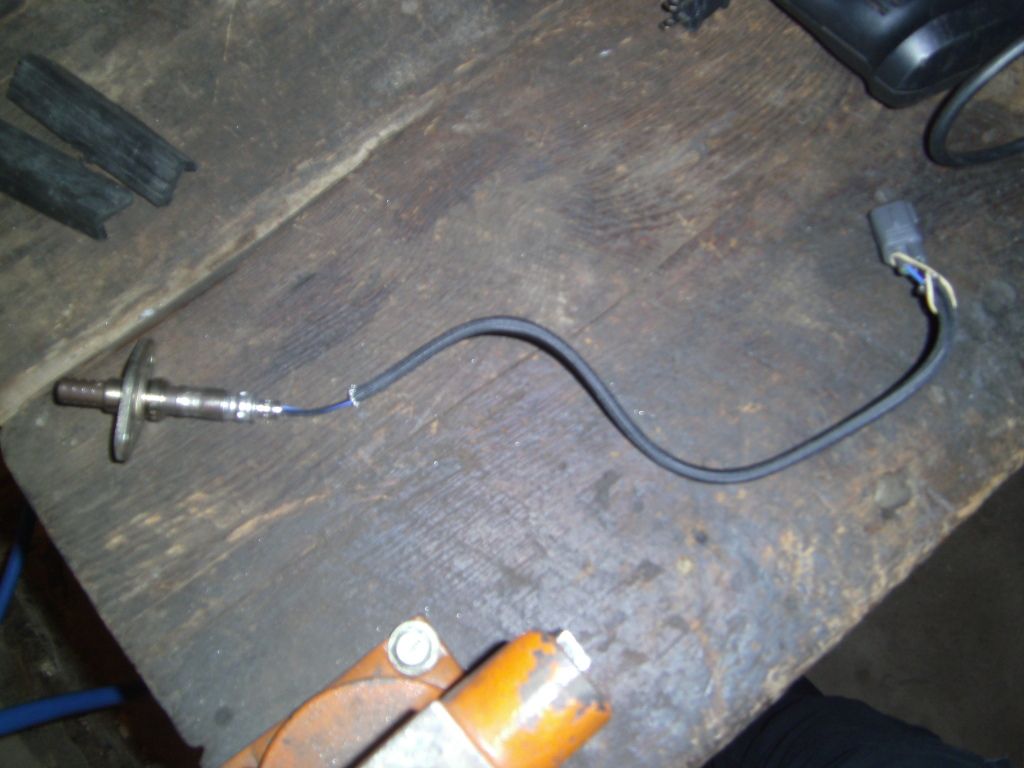
and now i got a new oem o2 sensor off line on the cheap.
so save coin,time, and hassle let's keep it rubber.
but, these ****ers were $25 each. so there goes the so so cheap theory.
well thinking i got some tissue sucked up in the valve cover vent. so i removed it to inspect it. looks clean and 0 old gunk in there.
and now i got a new oem o2 sensor off line on the cheap.
11-20-12, 10:27 PM
#372
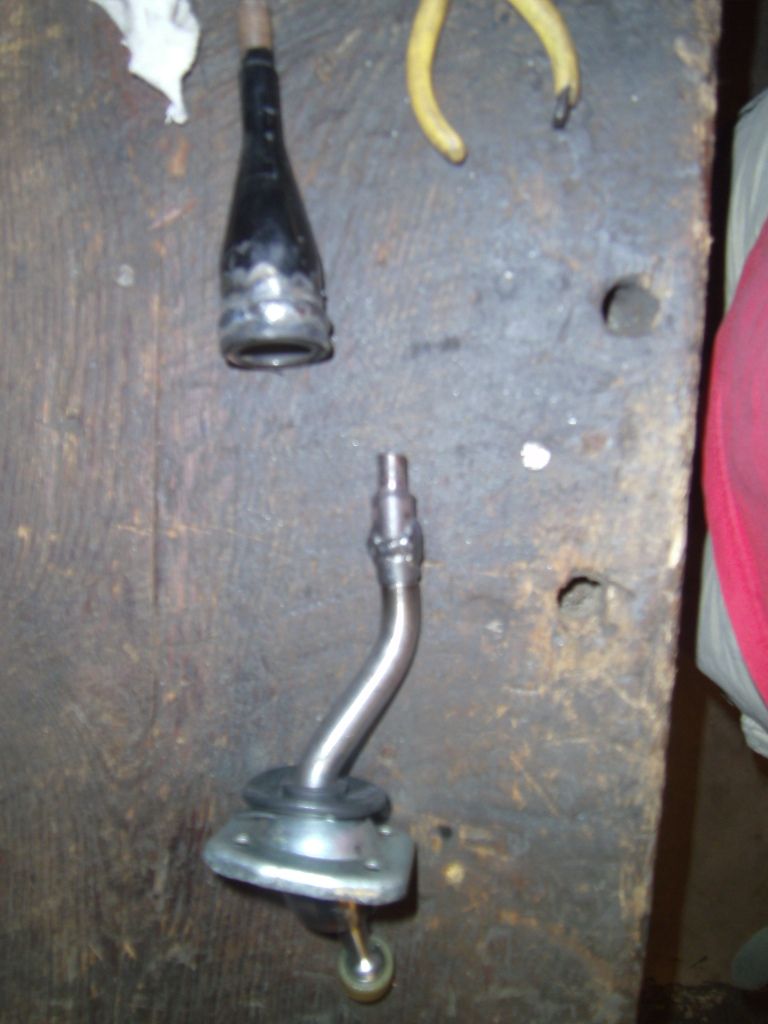
so next up was to macguyver a mount for the fpr unit. didn't come with one and even the one it usually comes with wouldn't had sufficed. took me an hr to drill through this with my weak *** drill. then another hr with my buddys cordless drill.
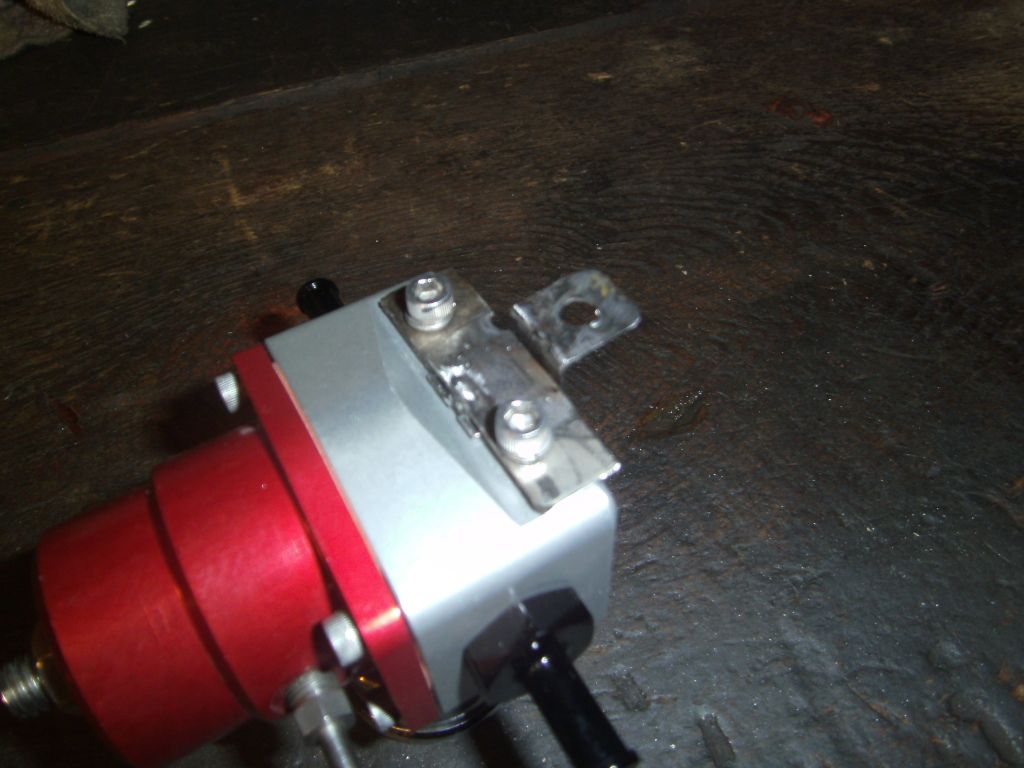
so after a 2nd redux, this is how it's supposted to look.
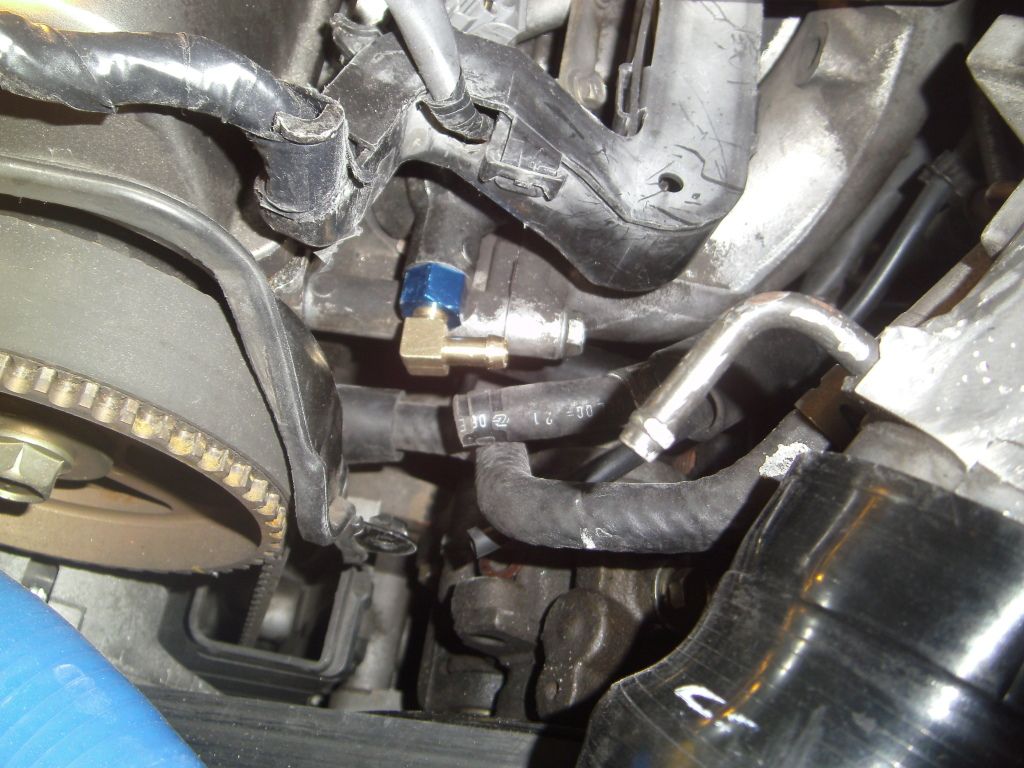
so since i have a aftermarket unit, it's time to get rid of the stocker piece of c. so finding a m12x1.25 into a 5/16 type bung is almost impossible.
found this cheapo sucker on ebay for 20 beans.
and violia!!
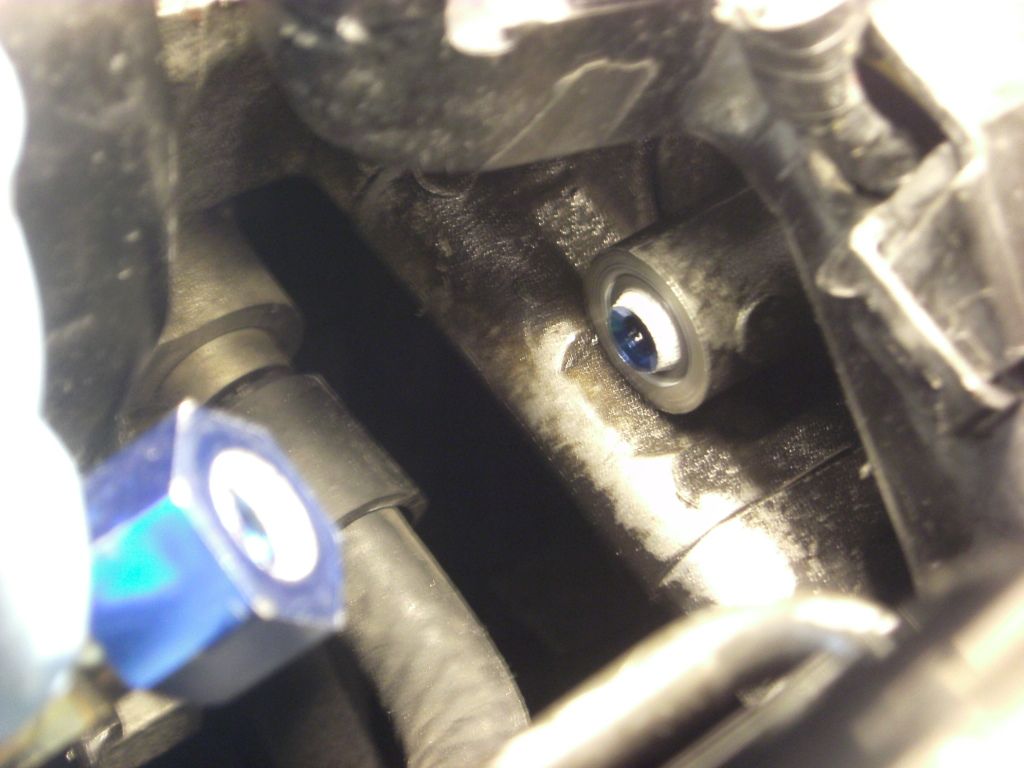
the threads did come out easily, thank goodness. so after chopping around locally. by buddy austin linked me another more/real metal unit.
so after a 2nd redux, this is how it's supposted to look.
so since i have a aftermarket unit, it's time to get rid of the stocker piece of c. so finding a m12x1.25 into a 5/16 type bung is almost impossible.
found this cheapo sucker on ebay for 20 beans.
and violia!!
the threads did come out easily, thank goodness. so after chopping around locally. by buddy austin linked me another more/real metal unit.
11-20-12, 10:45 PM
#373
so i picked up these babies, making fittiment easier.

and picked up some capilars from autozone for less than $160.00 for the pair.

also picked up some front and rear slotted/drilled rotors with ceramic brake pads.
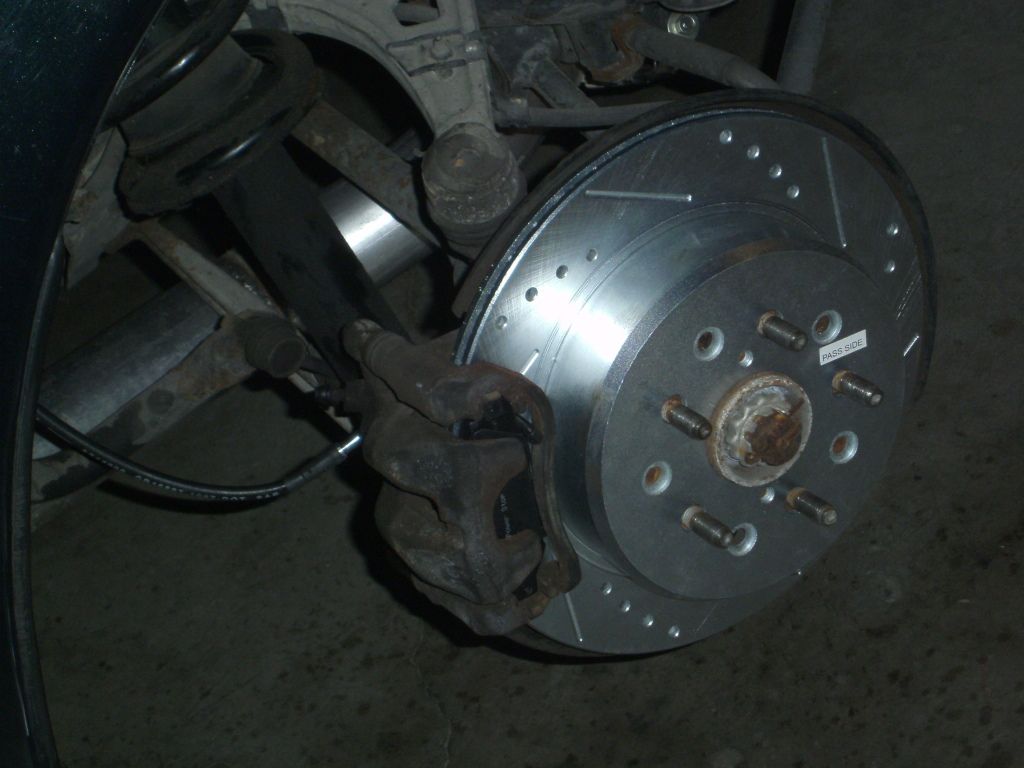
i had to do this 2x. now when putting the front rotors on you need to get ALL OF THE DUST SHIELD off each of the wheel hubs.
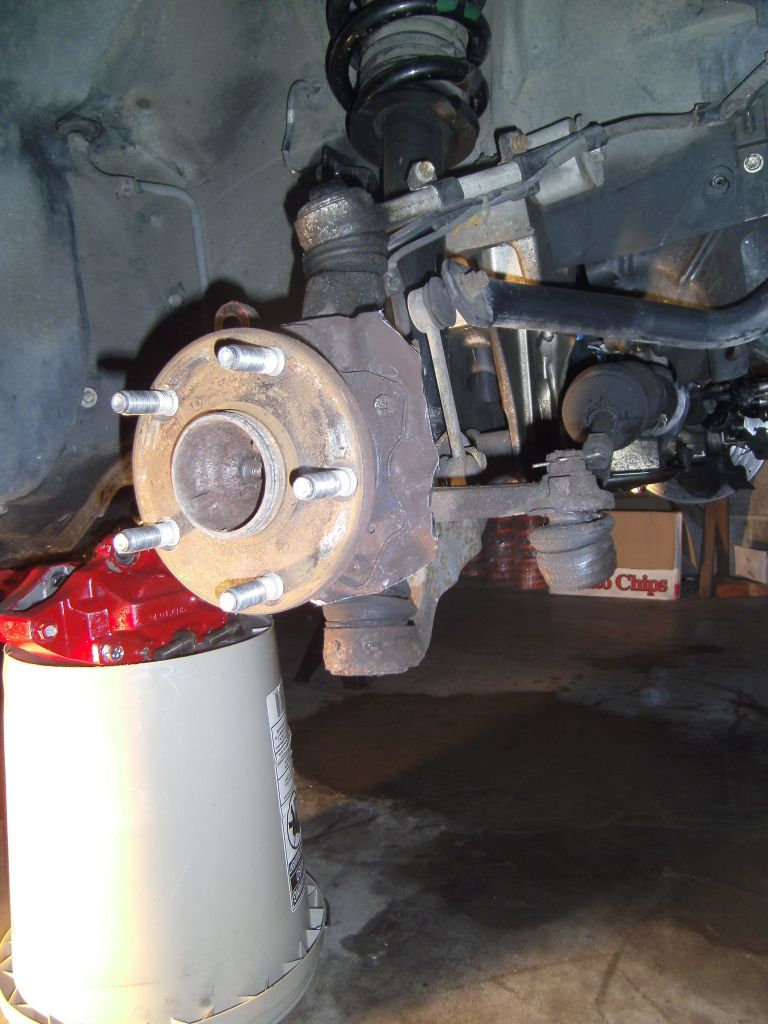
like so.
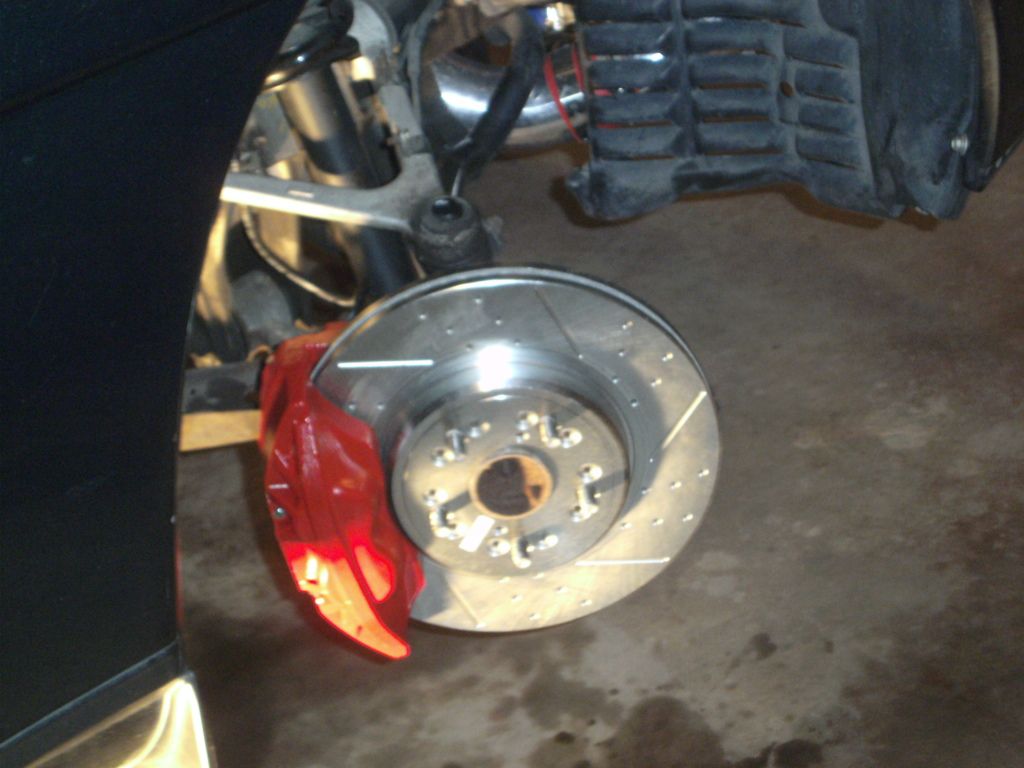
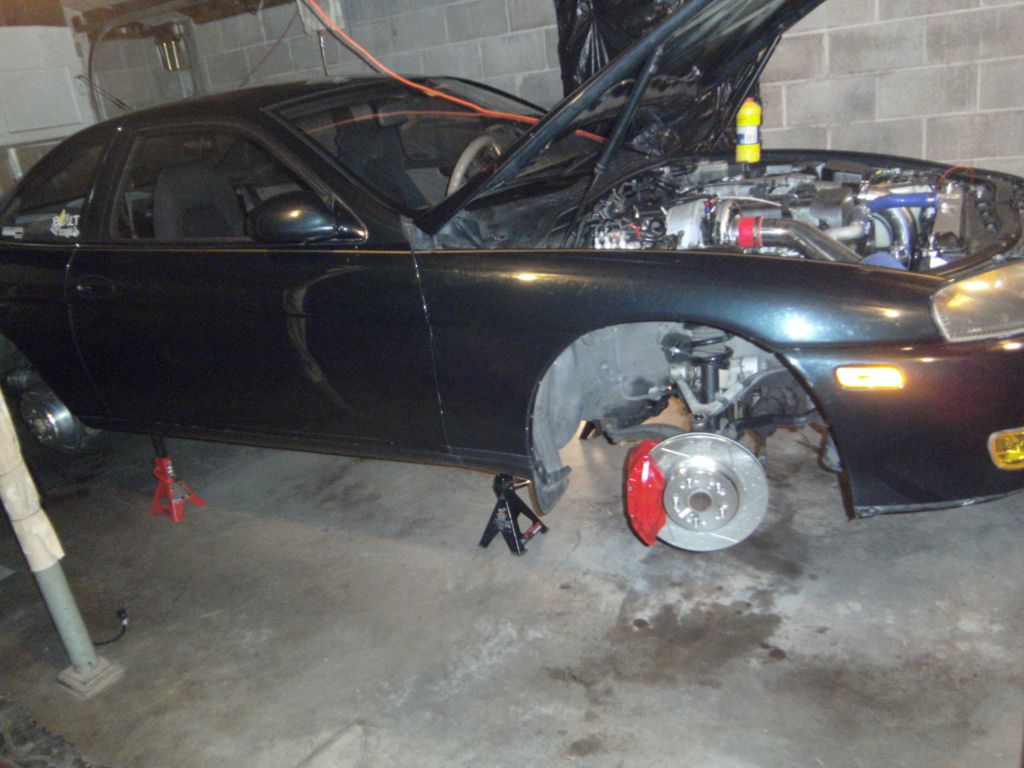
and don't forget to double (thin) washer the top bolts(on each side). when mounting the front ls400 capilars, To clear the rotors.
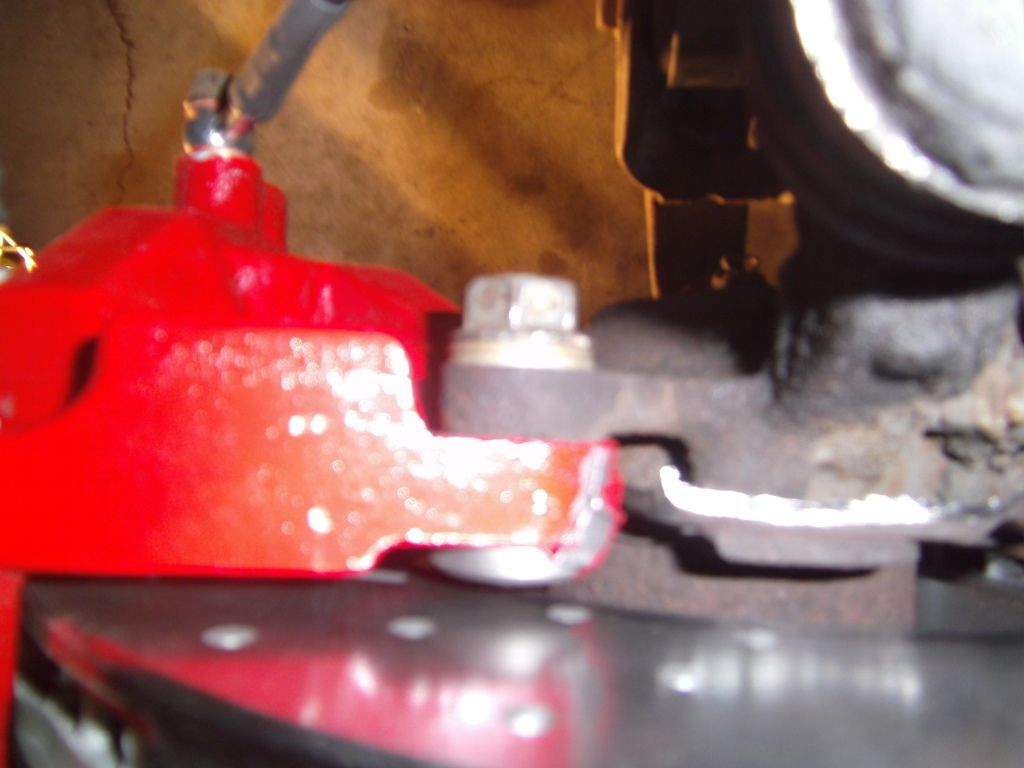
don't forget to thourghly bleed the brakes after. and you are done!!
and picked up some capilars from autozone for less than $160.00 for the pair.
also picked up some front and rear slotted/drilled rotors with ceramic brake pads.
i had to do this 2x. now when putting the front rotors on you need to get ALL OF THE DUST SHIELD off each of the wheel hubs.
like so.
and don't forget to double (thin) washer the top bolts(on each side). when mounting the front ls400 capilars, To clear the rotors.
don't forget to thourghly bleed the brakes after. and you are done!!
11-20-12, 10:52 PM
#374
and heres the wiring part of it. i got a 7" touch screen and the wiring debacle begins now.
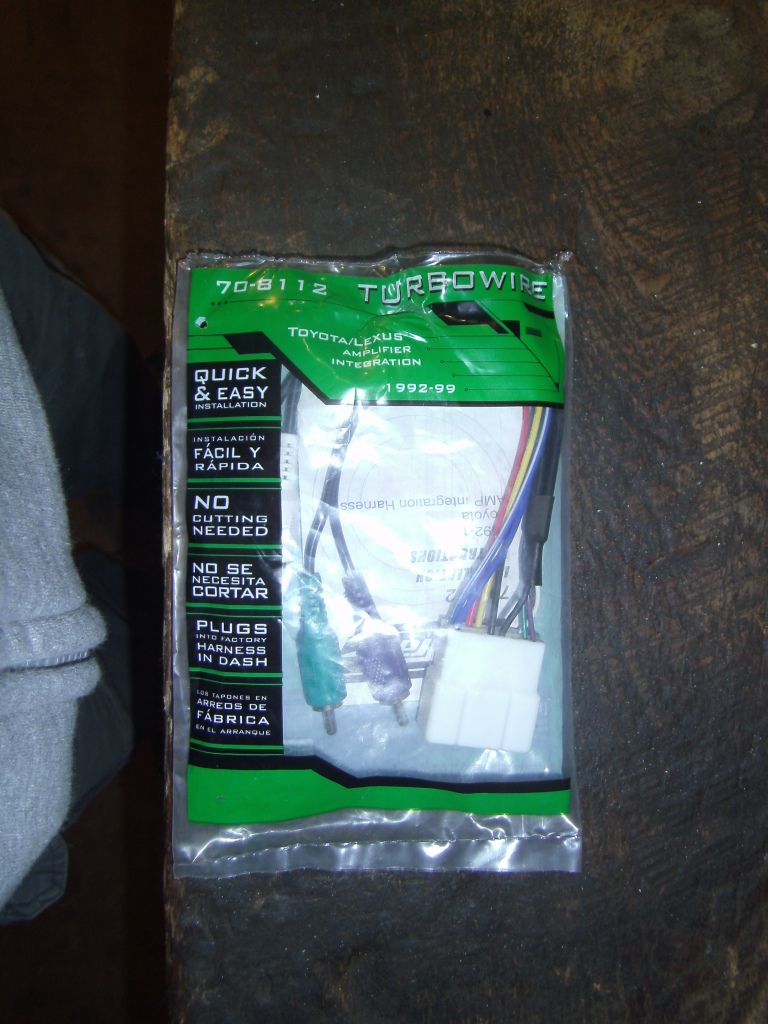
$20.00 apparently i need this because my sc400 has a amp and i don't need to wire each indivual speaker??
and heres what it looks like wired up
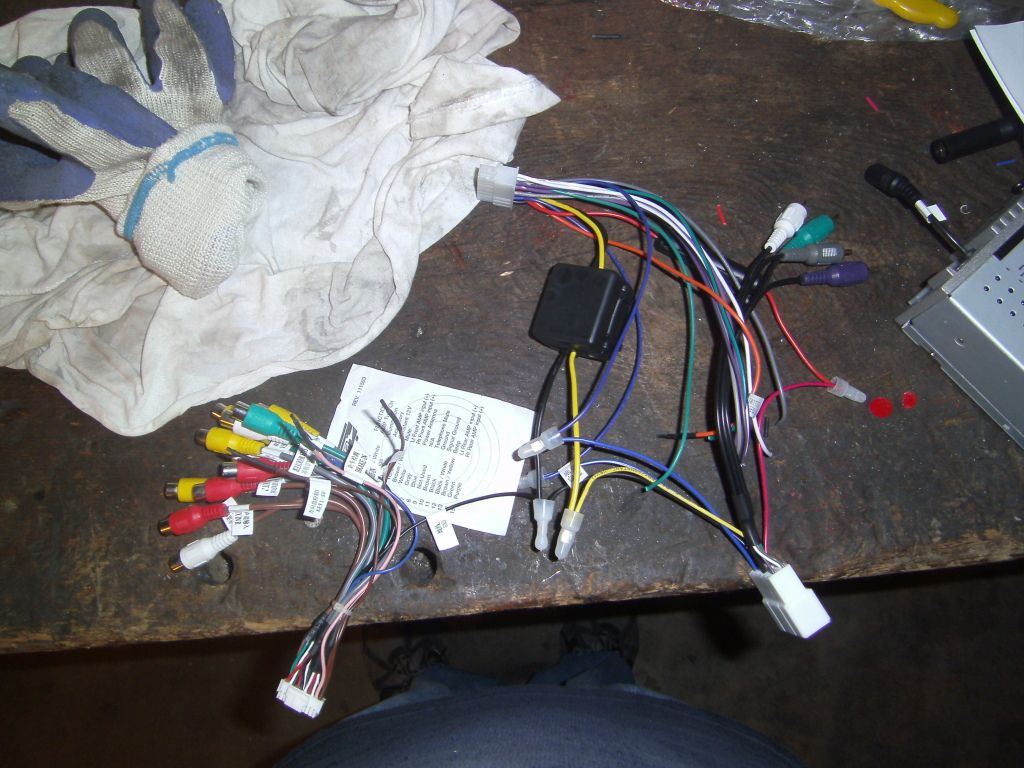
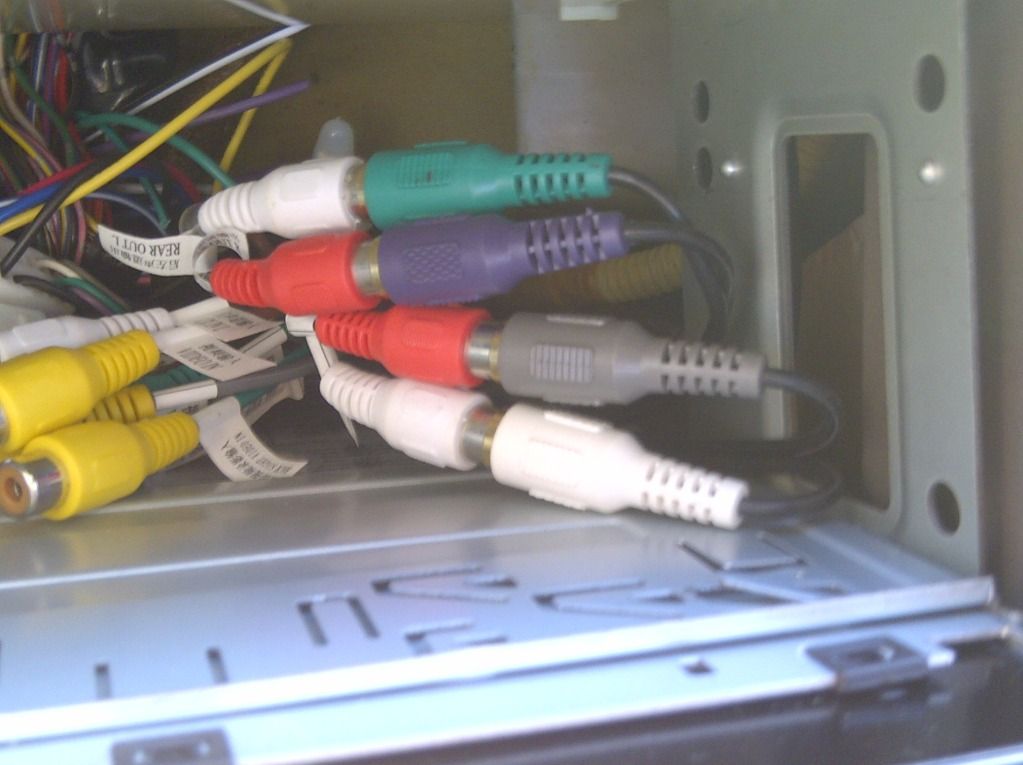
so either my amp is out or something isn't connected right. everything seems to work cept the sound. and my ant dosen't comes up like when i had my stock system. so wth gives???
$20.00 apparently i need this because my sc400 has a amp and i don't need to wire each indivual speaker??
and heres what it looks like wired up
so either my amp is out or something isn't connected right. everything seems to work cept the sound. and my ant dosen't comes up like when i had my stock system. so wth gives???