
1992Lexus.. Complete build thread with pictures and links!
 12-19-11, 01:43 PM
#301
1JZ Single SC400
Thread Starter
iTrader: (59)
Join Date: Jan 2009
Location: Alabama, Roll Tide!
Posts: 8,518
Likes: 0
Received 15 Likes
on
12 Posts
I know it seems that I have jumped around, but I cant go much further without cams or clutch yet. I might go ahead and order the clutch next week, the cams are still showing out of stock on the BC website. Lastly, the 1995 SC alternator is out, so I have to buy another one of them also, when it rains it pours.. I did manage to install a new fuel pump in the BMW and get it going this past weekend. :-)
I was also going to remove the cluster and do the resistor mod with several pictures in details, but it wont clear my steering wheel, its in the up and in position all the way, this will have to wait.. sorry
If you have been following my thread, I need a question answered... Do I need to send off the wiring harness to Dr.Tweak or can I extend the harness myself to reach the standalone, or does this even have to be touched if going with a standalone? The one I will be buying is from Driftmotion and will come with a patch harness, please someone enlighten me, before I go any further.... In lamin terms
Last edited by 1JZPWRD; 12-19-11 at 01:48 PM.
 12-20-11, 04:08 PM
#302
1JZ Single SC400
Thread Starter
iTrader: (59)
Join Date: Jan 2009
Location: Alabama, Roll Tide!
Posts: 8,518
Likes: 0
Received 15 Likes
on
12 Posts
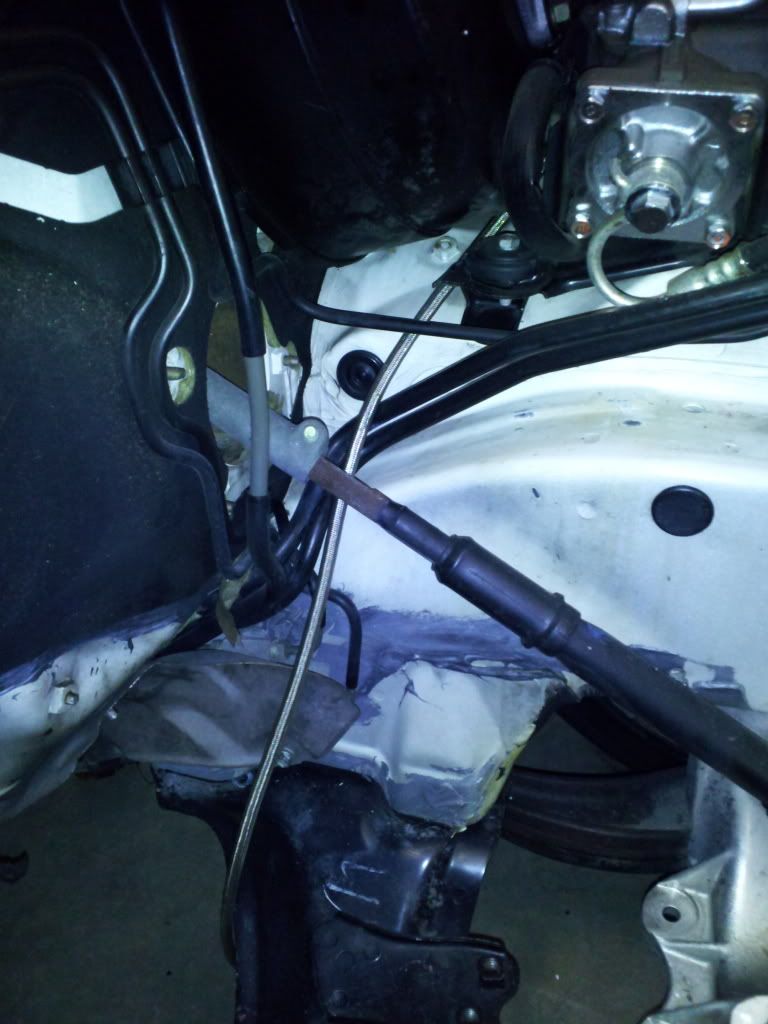
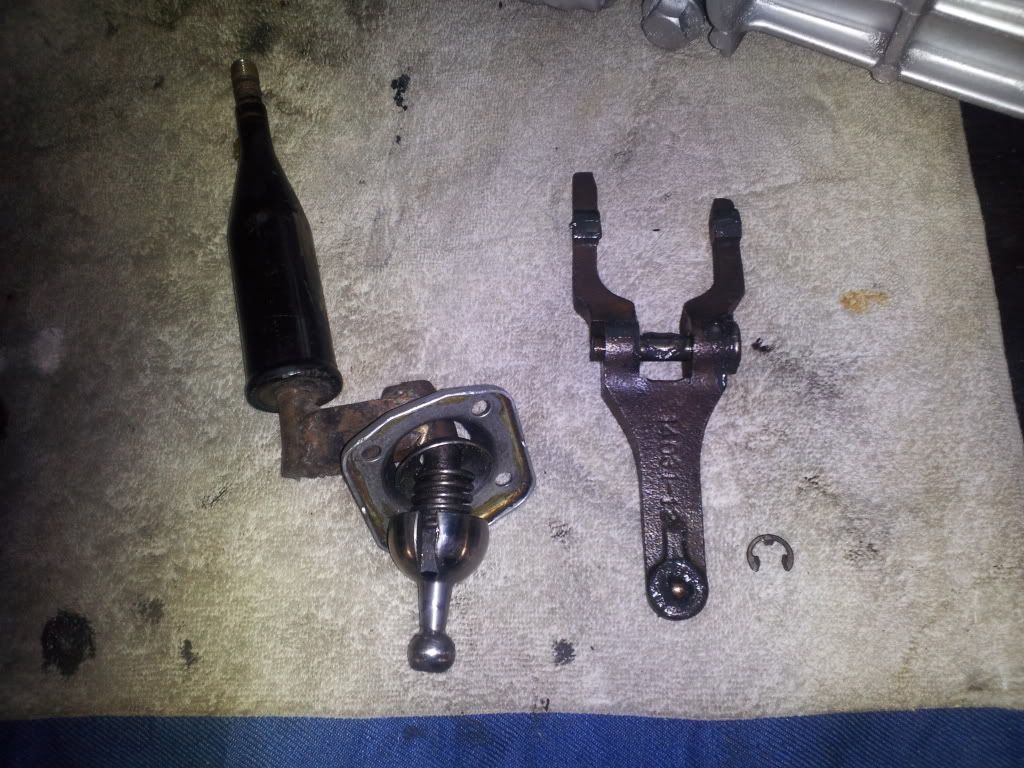
Ran the SS clutch line this afternoon, and reinstalled the clutch slave cylinder... I chose to run the line behind everything. Once the motor is in I will ziptie it back out of the way completely.
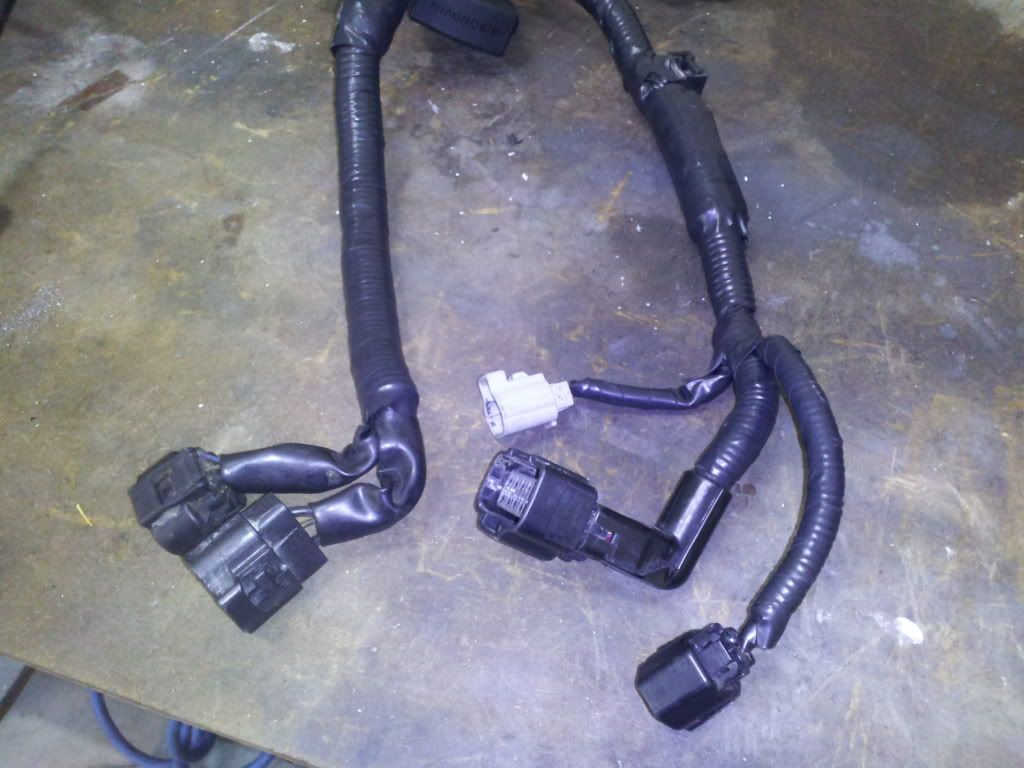
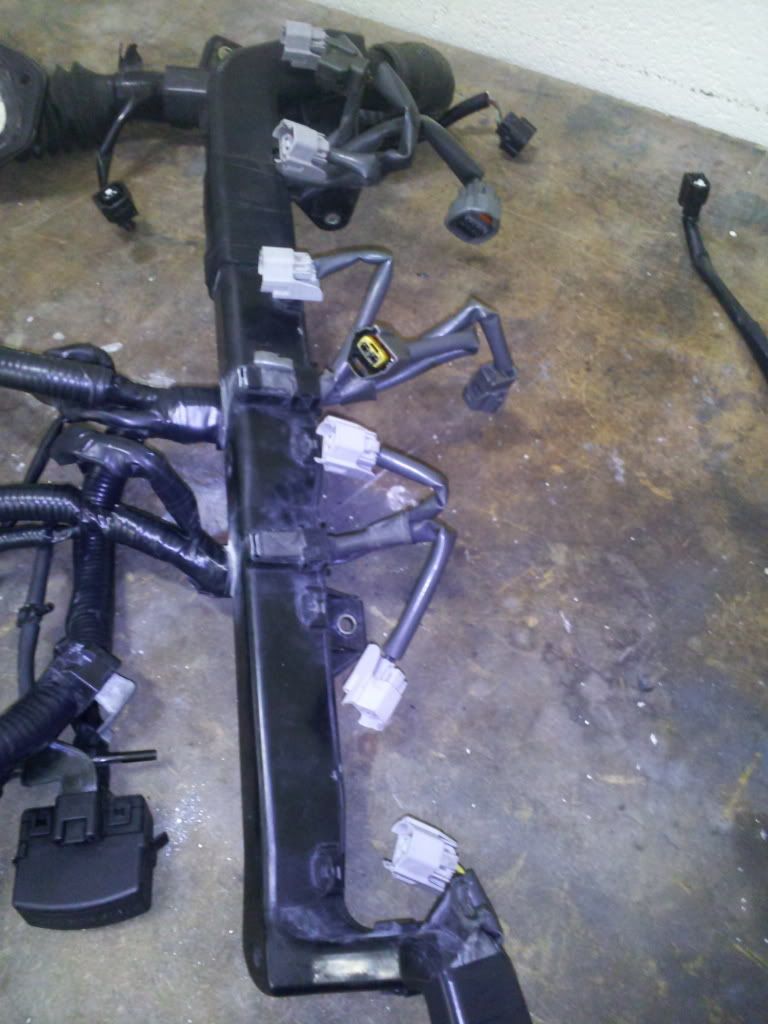
I also started taping up some of the wiring. I used three roles of electrical tape and still wasnt enough. The harness had some new plugs installed already for the injectors, and for the coils. I am in need of some guidance of the wiring and which plugs needs to be extended. I believe its the ones in the last picture. Tomorrow I will clean out each plug with some brake cleaner or soemthing and dry them out with some compressed air.
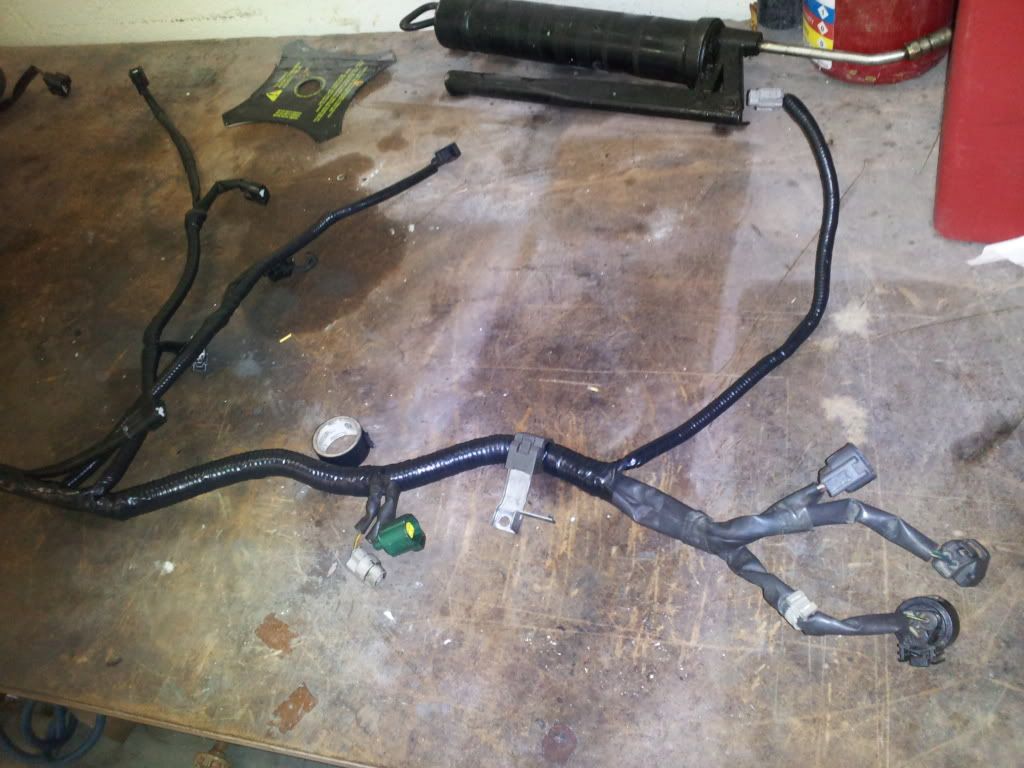
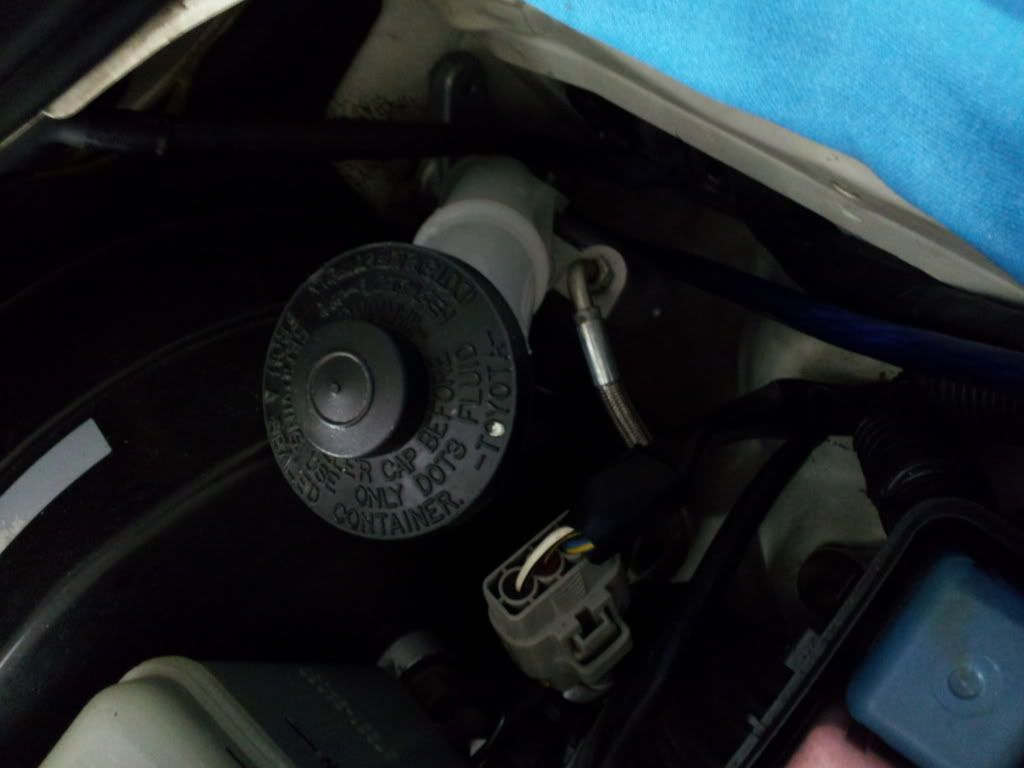
I really need some guidance on the power steering lines.. I believe I have figured it out but I need to confirm.. Looking in front of the car on the pwer steering rack, the line on the left goes to the power steering pump on the bottom. This is the one that usually needs to be customed fit correct? Secondly, the line on the right of the rack needs to go the top of the reservoir, correct? This completes the loop?
I will also be rigging up something tomorrow for the fuel lines, and try and find a fuel regulator at the local CBI race store. Can anyone tell me what size fuel line thread is for the main feed? The size of the OEM regulator on the block?
I also started taping up some of the wiring. I used three roles of electrical tape and still wasnt enough. The harness had some new plugs installed already for the injectors, and for the coils. I am in need of some guidance of the wiring and which plugs needs to be extended. I believe its the ones in the last picture. Tomorrow I will clean out each plug with some brake cleaner or soemthing and dry them out with some compressed air.
I really need some guidance on the power steering lines.. I believe I have figured it out but I need to confirm.. Looking in front of the car on the pwer steering rack, the line on the left goes to the power steering pump on the bottom. This is the one that usually needs to be customed fit correct? Secondly, the line on the right of the rack needs to go the top of the reservoir, correct? This completes the loop?
I will also be rigging up something tomorrow for the fuel lines, and try and find a fuel regulator at the local CBI race store. Can anyone tell me what size fuel line thread is for the main feed? The size of the OEM regulator on the block?
Last edited by 1JZPWRD; 12-20-11 at 04:15 PM.
12-21-11, 01:04 PM
#305
1JZ Single SC400
Thread Starter
iTrader: (59)
Join Date: Jan 2009
Location: Alabama, Roll Tide!
Posts: 8,518
Likes: 0
Received 15 Likes
on
12 Posts
Yes, those are exactly what I need. Everyone usually orders them straight from BC, even though they are prolly showing to have them. I am trying to eliminate the middle man. They are still out of stock today. I finally figured out my power steering lines.. here is a drawing of what I have concluded.
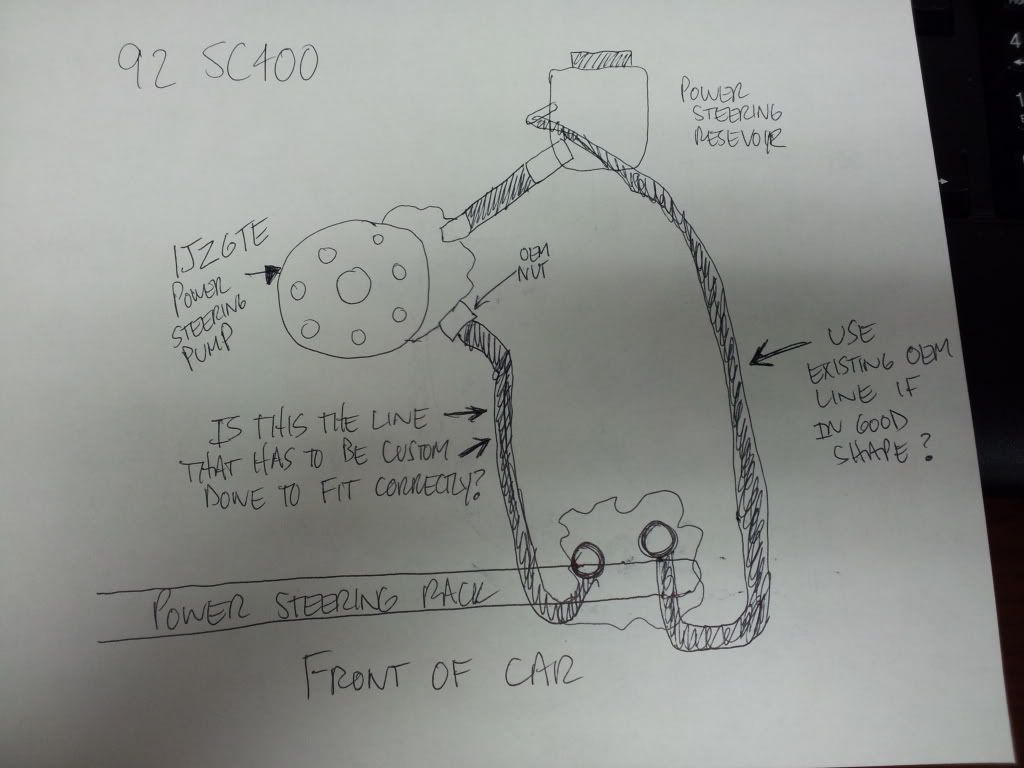
This is the correct route, but I have ended reusing my factory lines. I went to the local CBI store and they couldnt nor get the 17mm fittings that I needed. My OEM never gave me any trouble, and will reuse them. Here is what they look taking from the car...
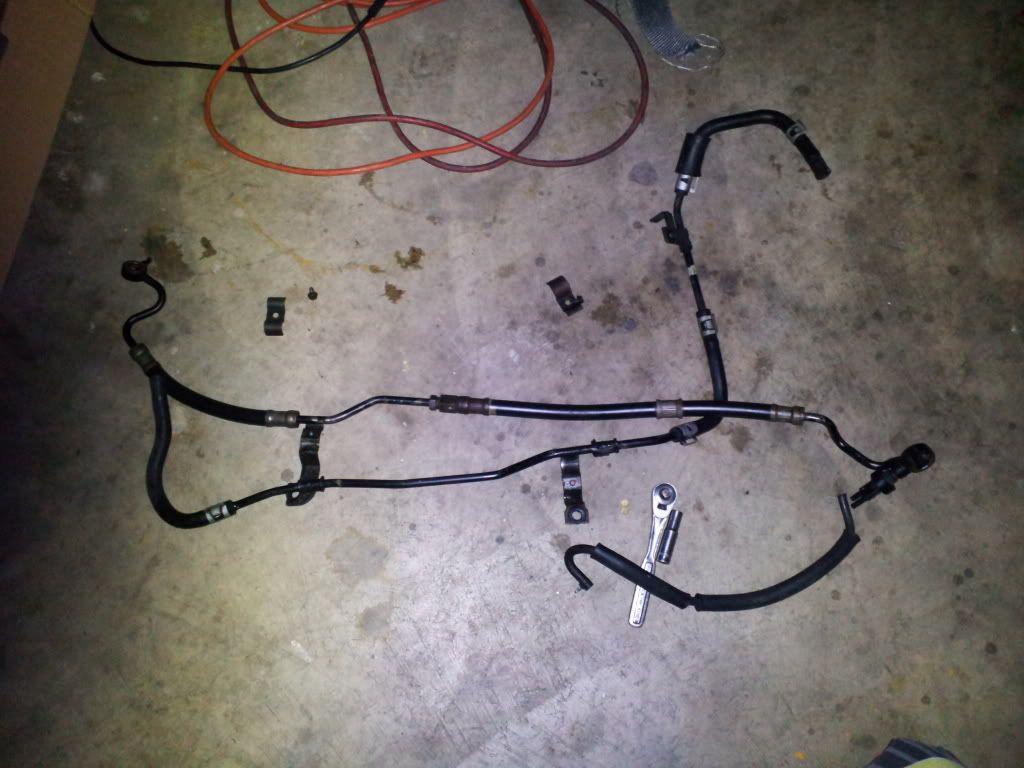
This is the left high pressure side removed, while the return line still intact...
This is both removed... Make sure you use the hole for the black tab to stay in place while tighening them down..
The return side broken down, remove the factory hose and make sure you replace with high pressure power steering lines, not heater hose...
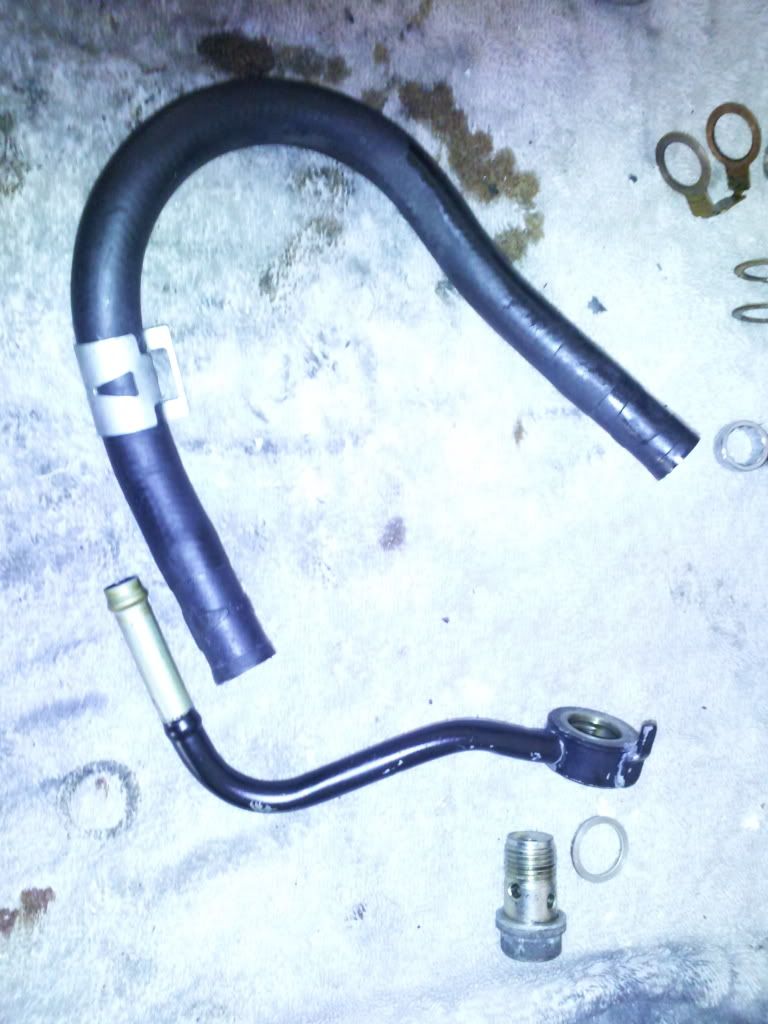
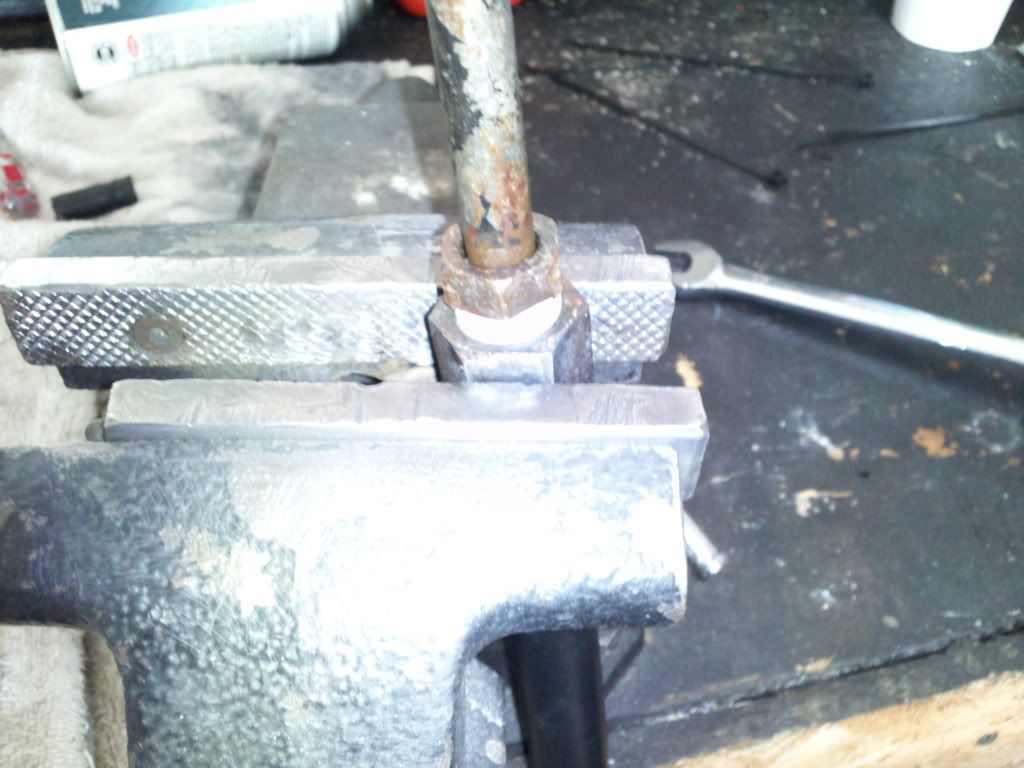
Once you have the high pressure side out of car, place in vise, and take a 17mm and remove the cebter section apart, now two sections. Use wrap to assure seal is good.

Back together, I believe this is the only piece I didnt paint.. :-) tighten down pretty snug. alot pressure goes through here folks...
Together...

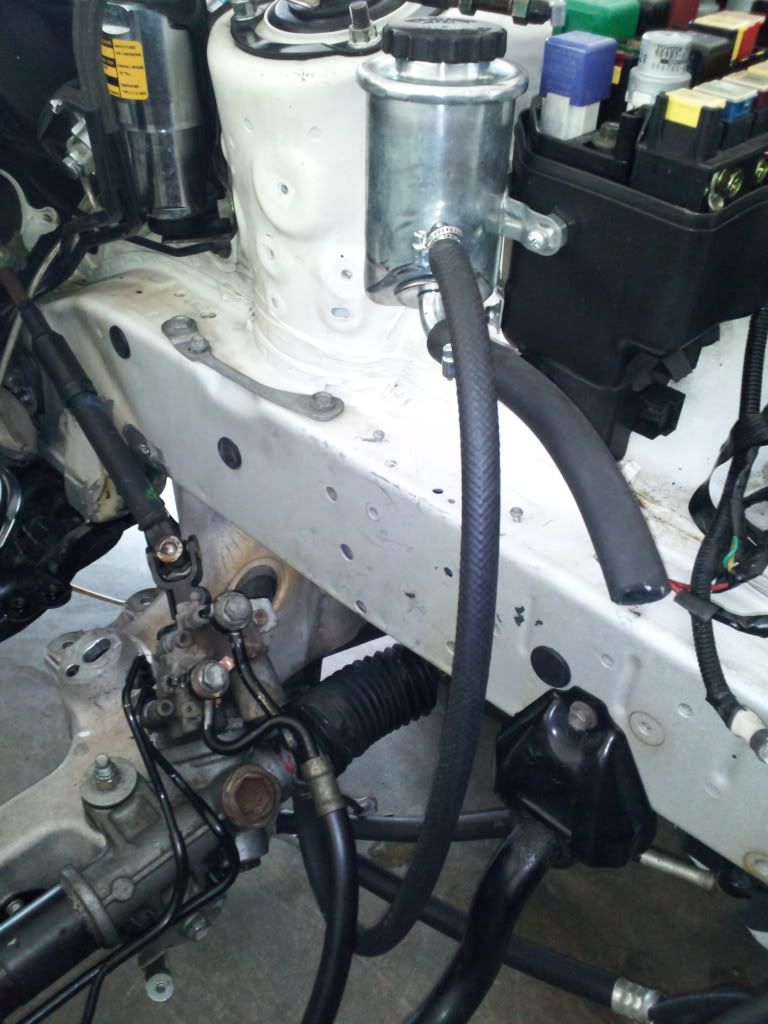
Both lines back into place and tighten down snug, remember to use the black tab to hold line in place.. Both bolts are the same length and diameter, and remember to use new orings for the seal. On these fittings, use them on both sides, crushed washers!
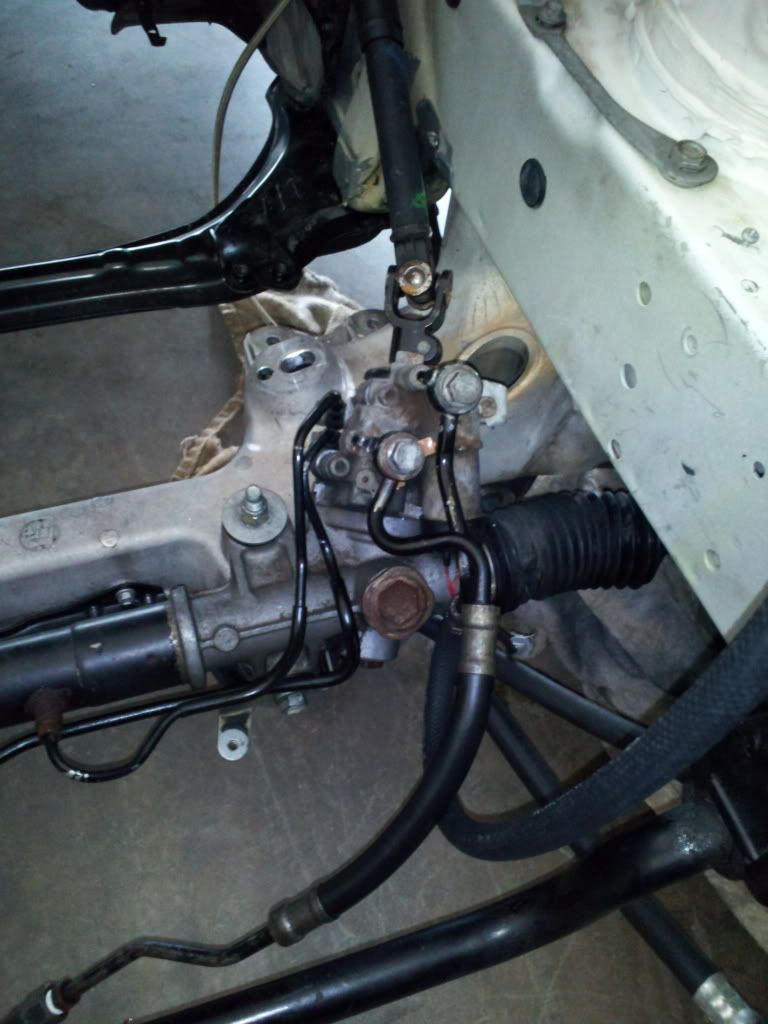
The return line ran is ran, cut this one to 29 inches, this made sure it didnt hit the sway bar and left plenty of room for the other ac lines and pressure side.
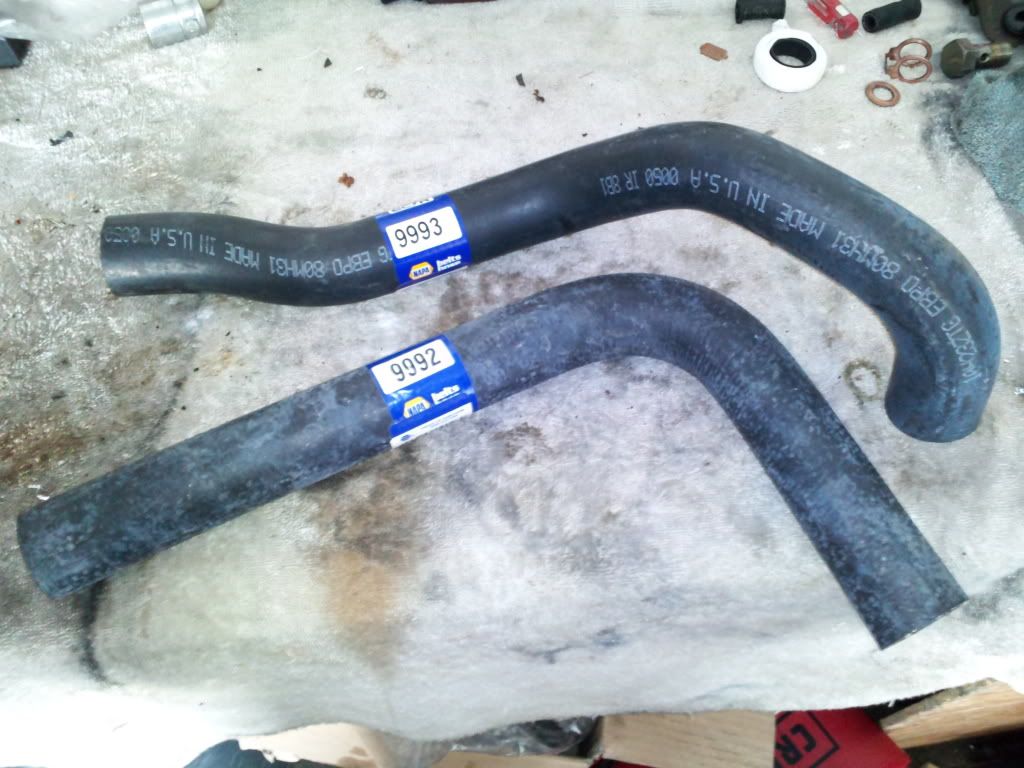
My TT radiator hoses came in from NAPA, they were special ordered. The number is still on the sticker and are Gates brand. They were 14.88 each. Not a bad price..
I will be working on the fuel lines tonight and get started on the extended wiring harness. Wish me luck and yes I will be taking several pictures of how the progress goes...
This is the correct route, but I have ended reusing my factory lines. I went to the local CBI store and they couldnt nor get the 17mm fittings that I needed. My OEM never gave me any trouble, and will reuse them. Here is what they look taking from the car...
This is the left high pressure side removed, while the return line still intact...
This is both removed... Make sure you use the hole for the black tab to stay in place while tighening them down..
The return side broken down, remove the factory hose and make sure you replace with high pressure power steering lines, not heater hose...
Once you have the high pressure side out of car, place in vise, and take a 17mm and remove the cebter section apart, now two sections. Use wrap to assure seal is good.
Back together, I believe this is the only piece I didnt paint.. :-) tighten down pretty snug. alot pressure goes through here folks...
Together...
Both lines back into place and tighten down snug, remember to use the black tab to hold line in place.. Both bolts are the same length and diameter, and remember to use new orings for the seal. On these fittings, use them on both sides, crushed washers!
The return line ran is ran, cut this one to 29 inches, this made sure it didnt hit the sway bar and left plenty of room for the other ac lines and pressure side.
My TT radiator hoses came in from NAPA, they were special ordered. The number is still on the sticker and are Gates brand. They were 14.88 each. Not a bad price..
I will be working on the fuel lines tonight and get started on the extended wiring harness. Wish me luck and yes I will be taking several pictures of how the progress goes...
12-21-11, 08:14 PM
#306
1JZ Single SC400
Thread Starter
iTrader: (59)
Join Date: Jan 2009
Location: Alabama, Roll Tide!
Posts: 8,518
Likes: 0
Received 15 Likes
on
12 Posts
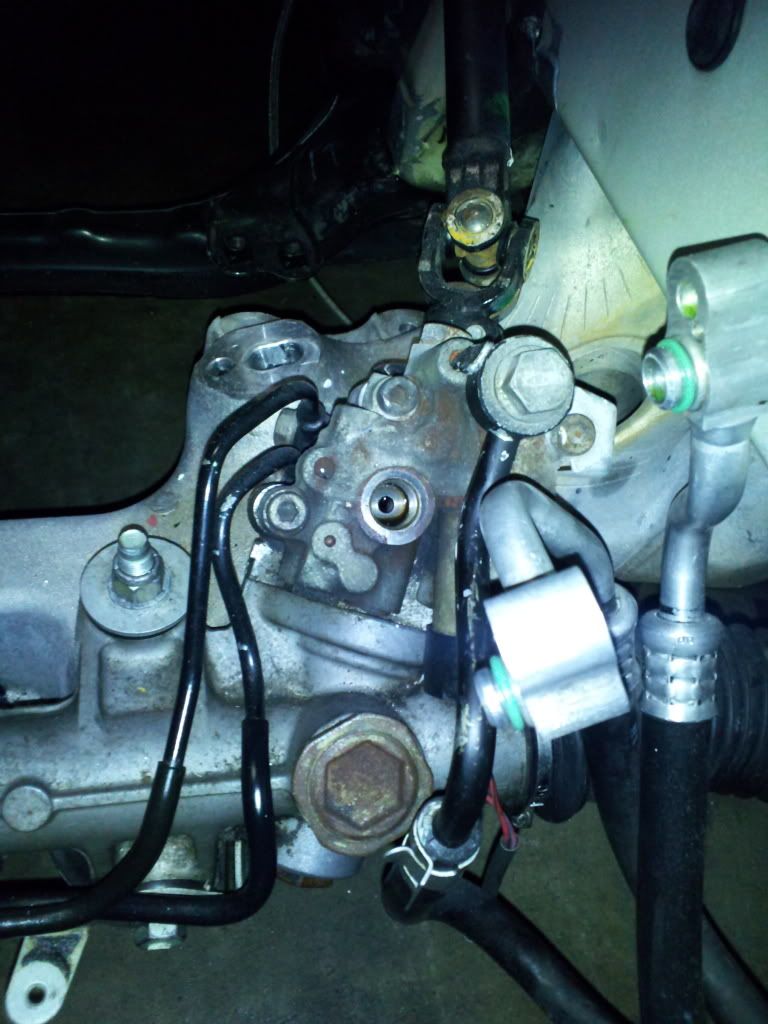
I lowered the motor in a few hours ago, and found out that the power steering will clear with no radical bends in it whatsover. Furthering the discussion about the power steering lines, on one of the stock oem ends, it has a place where two vacuum lines are coming out. I have done some research and people say that these need to be blocked off by a cap. They also say that if you do this, it will cause the idle to go down more when you turn the wheels. I would rather run these lines to the intake body somehow to avoid that. Can anyone concur on this?
The stock fuel line will also not fit the stock fuel regulator on the block. The return line for fuel will fit perfect with the stock 1JZ one. Just use a new clamp on the end. This will have to be made or one bought from drift motion. I still need to decide where to mount the fuel pressure regulator, in the front or back, I have seen both. I am thinking back now due to the space allowed for clearance.
After looking deeper, I may have to cut the flange off of the turbo and weld a 90 degree coupling on it. I think clearance will become an issue. By cutting the original flange off, this will clear even more room along the wall where the strut mount bolts too. Now also would be the time to run the boost controller through the opening of the firewall. Once the wiring is extended, and re installed, I can then run the remainder of the vacuum lines. I need to buy a few tees for the AEM wideband, fuel pressure regualtor, wastegate, and boost gauge. All of the factory lines plugged in directly to the stock OEM plugs in the car. Sweet.. Of course not the ECU cause I sold it ..
I wanted to pass more information about the SC400 swap with a 1JZ. If someone could chime and answer these questions, it would be great..
I am also thinking about making a block off plate for the IAV and using a small filter in its place. I need some recommendations on this and will the car run without getting it tuned. I need to be able to get it to the shop first to get it tuned. I hate to borrow a car hauler.
12-22-11, 04:38 AM
#307
Lead Lap
iTrader: (1)

Join Date: Nov 2009
Location: TN
Posts: 666
Likes: 0
Received 0 Likes
on
0 Posts
I would check with the eBay seller and make sure they havent had these cams before the backorder. Who knows you may get lucky. Build is looking good I'm ready to see the motor in there for good!
12-22-11, 12:01 PM
#309
1JZ Single SC400
Thread Starter
iTrader: (59)
Join Date: Jan 2009
Location: Alabama, Roll Tide!
Posts: 8,518
Likes: 0
Received 15 Likes
on
12 Posts
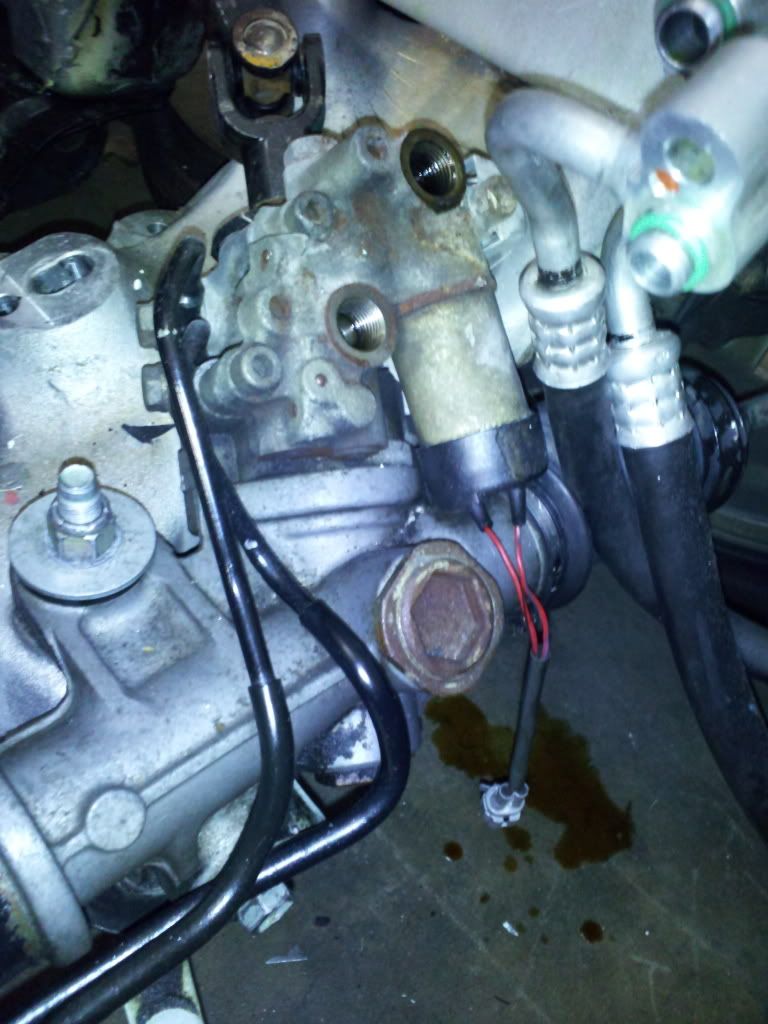
The fuel pressure feed is the thing with the plastic cab on it located on the intake side of the block behind the oil filter. The stock SC400 feed fuel rail will NOT fit into this. DM sells the hose for this to connect. Its around 70 or so. The return line will work perfect with the stock 1jz. Its the same size. More about the return, its the line that is on the premade bracket under the intake, its also bolted up in place by 2 (10)mm bolts. About the feed line you might be able to grind the flange threaded part off and use clamps with a new fuel line and some custom fittings. I think it will be cheaper to order the fuel line premade from DM. I hope this makes better sense. Fixing to get started on the wiring harness.
12-23-11, 09:01 AM
#310
1JZ Single SC400
Thread Starter
iTrader: (59)
Join Date: Jan 2009
Location: Alabama, Roll Tide!
Posts: 8,518
Likes: 0
Received 15 Likes
on
12 Posts
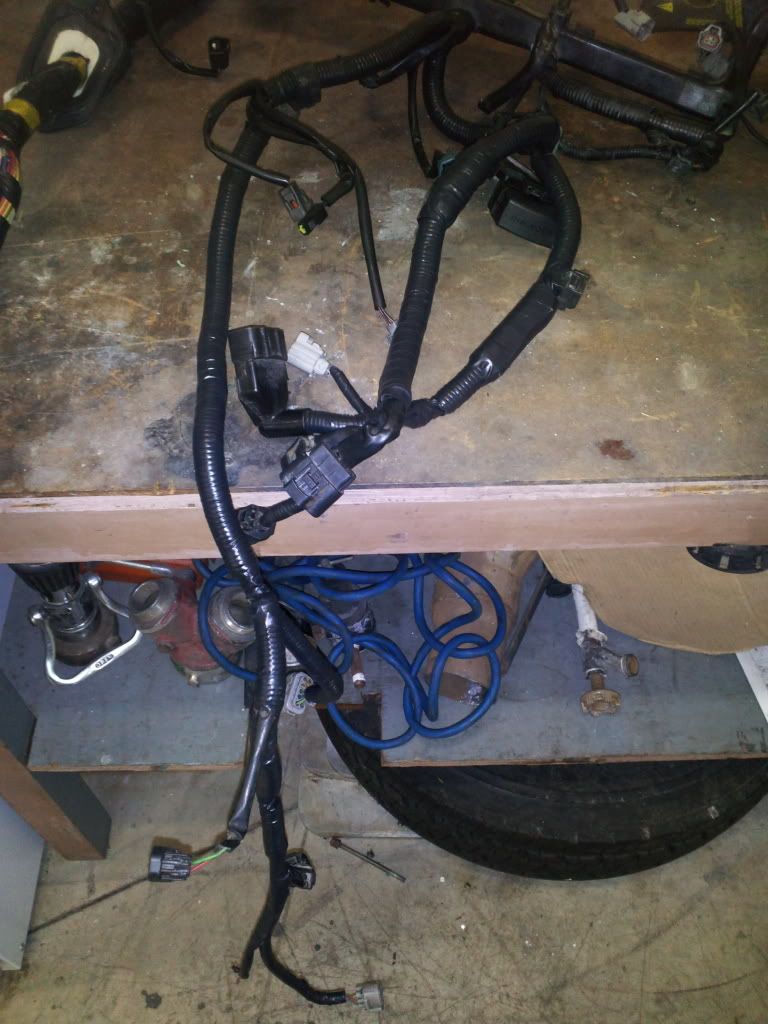
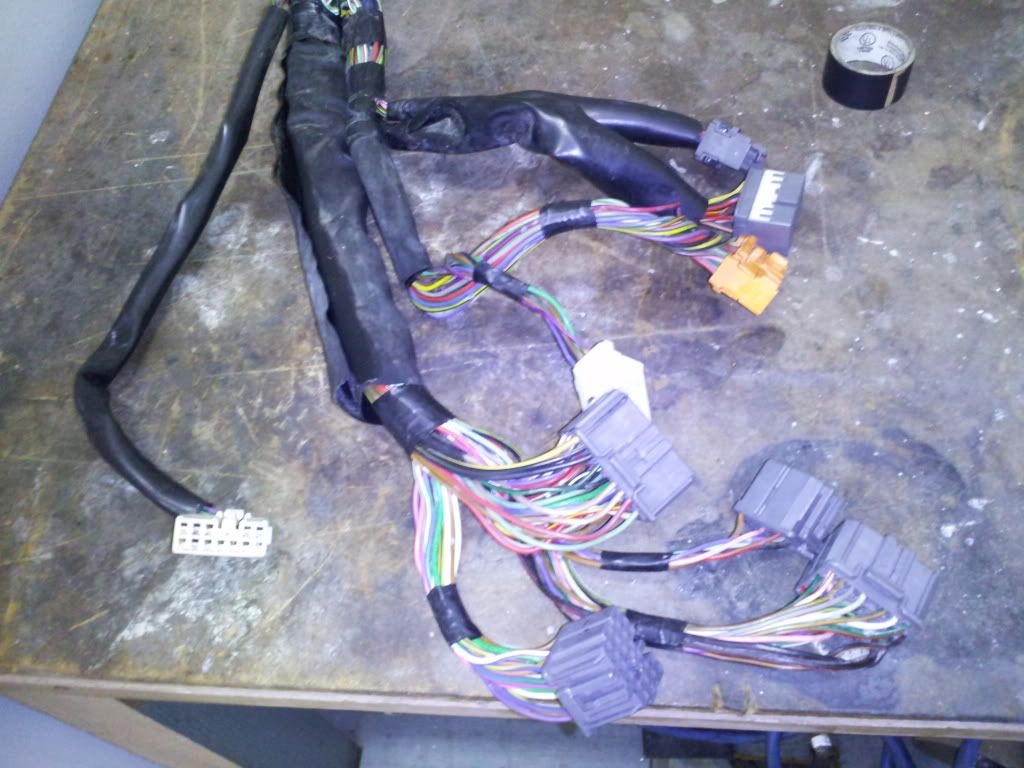
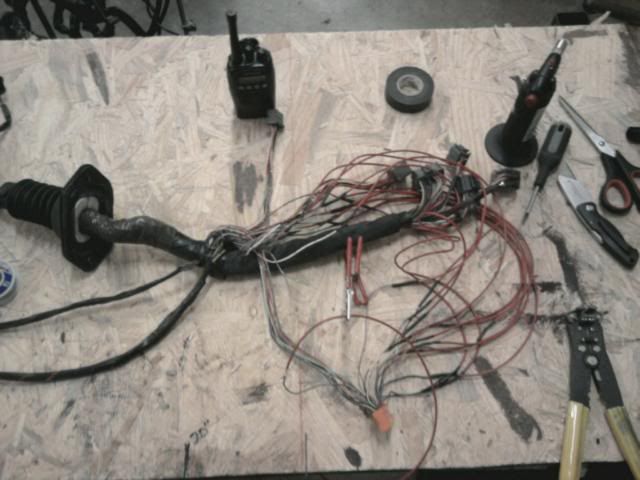
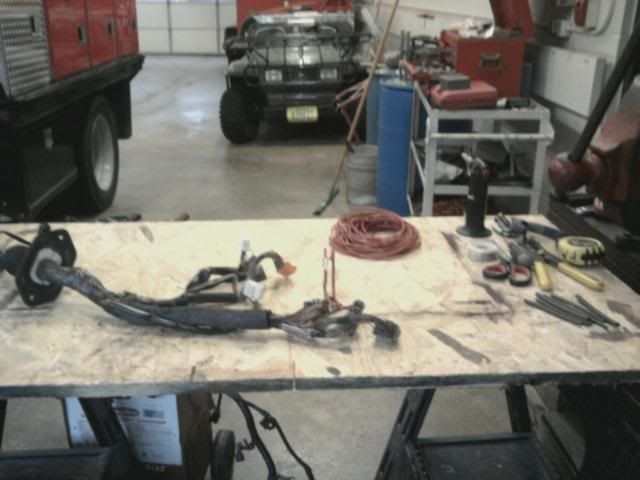
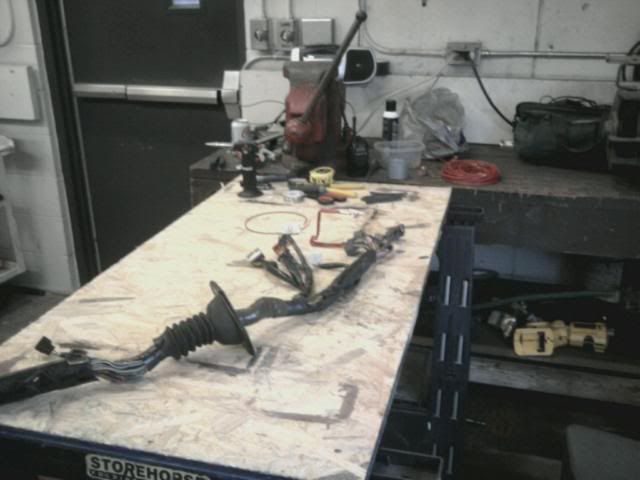
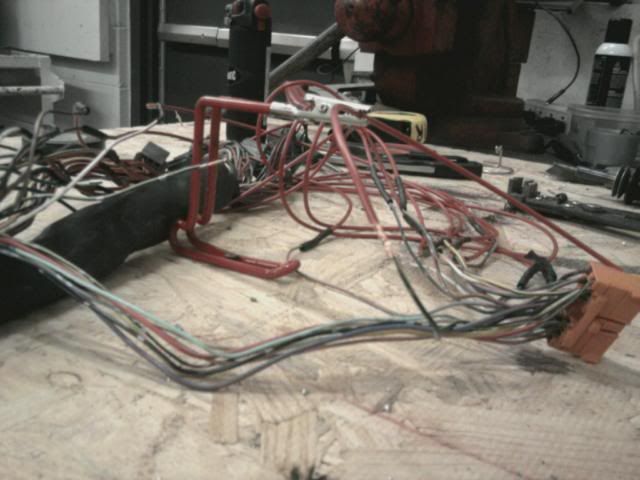
Here is the wiring mess.. A sheet of 4x8 sheet of plywood and 2 garbage cans upside down works wonders in the fire station bay for wiring the harness. I will include the additional wiring by this thread also.. I wanted to do the major ones first.
I first moved and trimmed the rubber piece so I could turn it around and be able to mount it in place once the wiring is ran.
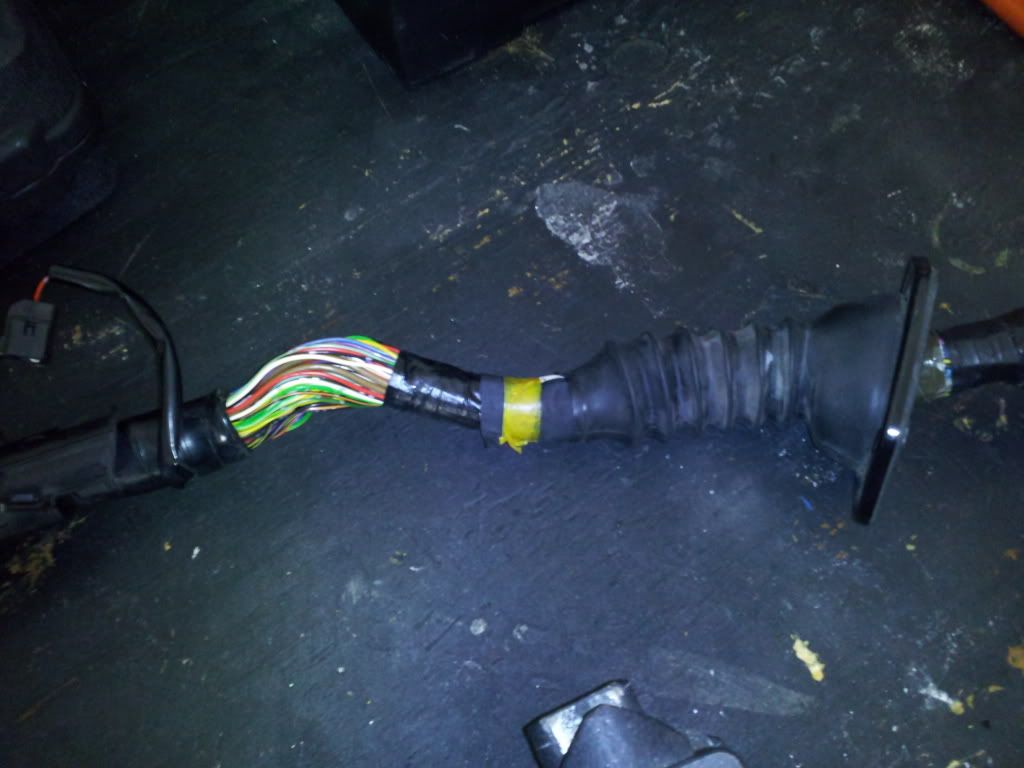
Here is some the nasty wiring.. Most of the harness wiring is 22 gauge, the wire I bought is 18 gauge. I dont think it will hurt. Make sure you only cut ONE WIRE AT A TIME. Then proceed to do all the soldering and cutting. I also used heat shrink to assure it will not be any trouble...
Here is the info on the additional wiring for the SC400 ONLY!!!
Section 2: Wiring
-Extend the 5 body harness plugs blah blah blah you have heard it before. I extended mine 24" and that is a bit much, i would say 18-20" would be good and still leave a good amount of slack.
-Extend the plugs in the engine bay to reach the power steering rack, and the heater control valve if needed.
-Use the body plug for the alternator, wrap the one on the engine harness with electrical tape and tie it out of the way.
-Move the blue and yellow wire on the white female body side plug to the female orange body( i think it is IK24) side plug so that when the 1jz side body plug with the blue/yellow wire is inserted the blue/yellow wires connect. This will get the Check engine light working.
-To make your temp gauge work, ground pin 24 on the same white plug on the body side(IK2). It is a brown/black wire between a pink and a black wire. I t-tapped into the brown/black wire and used the body ground behind the kick panel.
-There are two thicker black/orange wires on the larger gray plug coming from the engine that supply power to the igniter and injectors. You will need to find a good "switched" 12V source to power these, as they don't recieve any power from the sc400 body. I broke out the multimeter and found an unused by the 1jz pin that had a good 12v switched signal and spliced these two into it.
-I had to do the 12V mod at the fuel pump ECU to get the car to start. There are two thicker wires at the fuel pump ECU, (1)Green and (1)Black/Red14 GA. Cut these 2 and connect them. Insulate them well. The thread for this is here: https://www.clublexus.com/forums/per...tures-faq.html
I currently have the 12 volt done, but by the order of QuickSC, he has said to undo, can someone confirm the reason why? He is out of town on business, and I don't want to bother him..
I first moved and trimmed the rubber piece so I could turn it around and be able to mount it in place once the wiring is ran.
Here is some the nasty wiring.. Most of the harness wiring is 22 gauge, the wire I bought is 18 gauge. I dont think it will hurt. Make sure you only cut ONE WIRE AT A TIME. Then proceed to do all the soldering and cutting. I also used heat shrink to assure it will not be any trouble...
Here is the info on the additional wiring for the SC400 ONLY!!!
Section 2: Wiring
-Extend the 5 body harness plugs blah blah blah you have heard it before. I extended mine 24" and that is a bit much, i would say 18-20" would be good and still leave a good amount of slack.
-Extend the plugs in the engine bay to reach the power steering rack, and the heater control valve if needed.
-Use the body plug for the alternator, wrap the one on the engine harness with electrical tape and tie it out of the way.
-Move the blue and yellow wire on the white female body side plug to the female orange body( i think it is IK24) side plug so that when the 1jz side body plug with the blue/yellow wire is inserted the blue/yellow wires connect. This will get the Check engine light working.
-To make your temp gauge work, ground pin 24 on the same white plug on the body side(IK2). It is a brown/black wire between a pink and a black wire. I t-tapped into the brown/black wire and used the body ground behind the kick panel.
-There are two thicker black/orange wires on the larger gray plug coming from the engine that supply power to the igniter and injectors. You will need to find a good "switched" 12V source to power these, as they don't recieve any power from the sc400 body. I broke out the multimeter and found an unused by the 1jz pin that had a good 12v switched signal and spliced these two into it.
-I had to do the 12V mod at the fuel pump ECU to get the car to start. There are two thicker wires at the fuel pump ECU, (1)Green and (1)Black/Red14 GA. Cut these 2 and connect them. Insulate them well. The thread for this is here: https://www.clublexus.com/forums/per...tures-faq.html
I currently have the 12 volt done, but by the order of QuickSC, he has said to undo, can someone confirm the reason why? He is out of town on business, and I don't want to bother him..
12-23-11, 09:07 AM
#311
1JZ Single SC400
Thread Starter
iTrader: (59)
Join Date: Jan 2009
Location: Alabama, Roll Tide!
Posts: 8,518
Likes: 0
Received 15 Likes
on
12 Posts
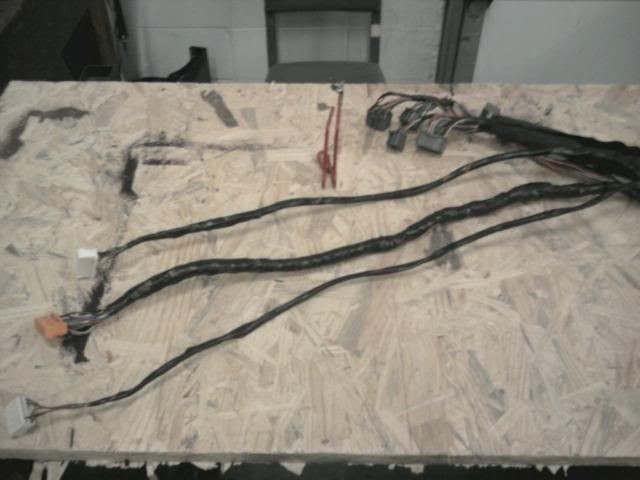
Something to add, I failed to mention.. When you start cutting the harness, do not cut all the wires in the same place, this will cause a huge ball of crap and trying to move it around will be a pain in the neck. I chose to start cutting the harness after the section of wiring has bridged off the main set of wires. That way I can still use the correct color of wires before and after the extension. I chose to extend my wires by 20 inches, this has been determined to be sufficient. 24 inches seemed a bit much.. Will keep everyone posted on the wiring.. stay tuned..


 lol
12-23-11, 11:50 AM
lol
12-23-11, 11:50 AM
#314
1JZ Single SC400
Thread Starter
iTrader: (59)
Join Date: Jan 2009
Location: Alabama, Roll Tide!
Posts: 8,518
Likes: 0
Received 15 Likes
on
12 Posts
Thanks man for the parts. I have been looking for the plate forever and a day. I just hung up with the guy again from the body shop. He has had these bumpers and pieces for over a month now. Followed up with on every wednesday. Says the same thing we will try and get them out by this weekend. Heard that for the last time. He was rude on the phone and said he cant stop working on a insurance claim of over 10k to work on my bumpers. I told him that wasn't our agreement and if I needed them quicker to come get them. Well I did. One is ready and the other needs a little work. So back to the drawing board on the paint now. This sucks.
If you want something done and done right, do it yourself, is now what I am led to believe.
If you want something done and done right, do it yourself, is now what I am led to believe.