
1992Lexus.. Complete build thread with pictures and links!
 12-31-11, 11:10 AM
#346
1JZ Single SC400
Thread Starter
iTrader: (59)
Join Date: Jan 2009
Location: Alabama, Roll Tide!
Posts: 8,518
Likes: 0
Received 15 Likes
on
12 Posts
More progress today..
Installed the wiring for good through the firewall. Had to do some grunting, but we made it through.
Extended the heater control valve wiring. Forgot to do that...
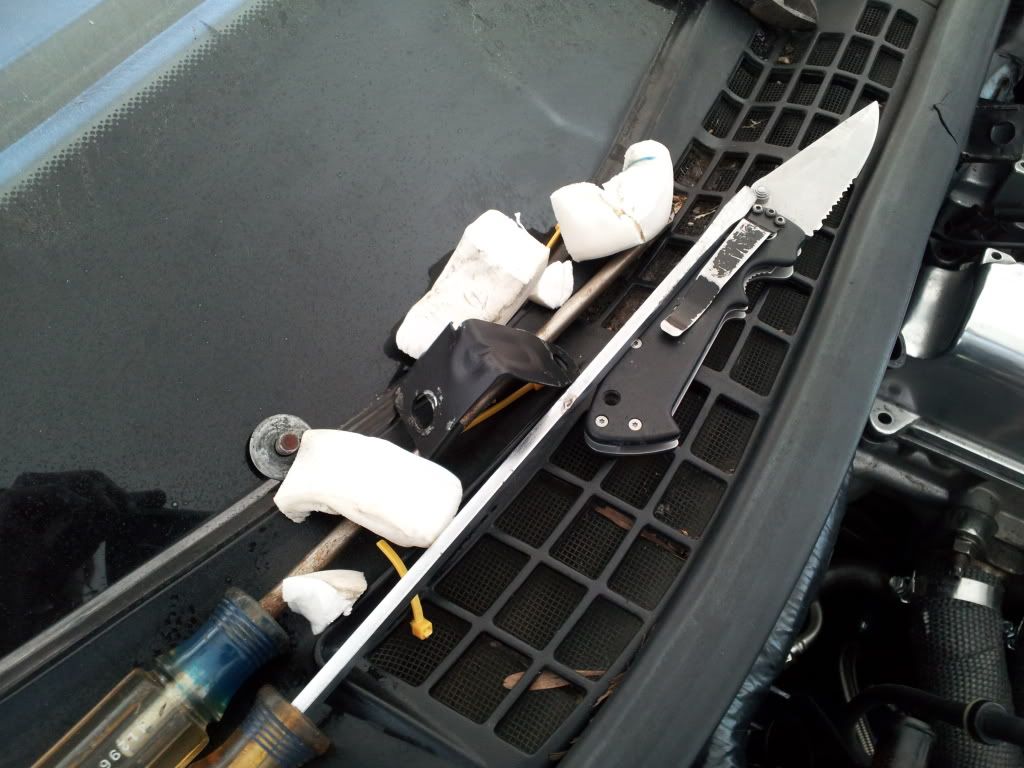
Still couldnt get the rubber connector over the wiring, so we ended up cutting the Styrofoam white crap out with a knife and a screwdriver..
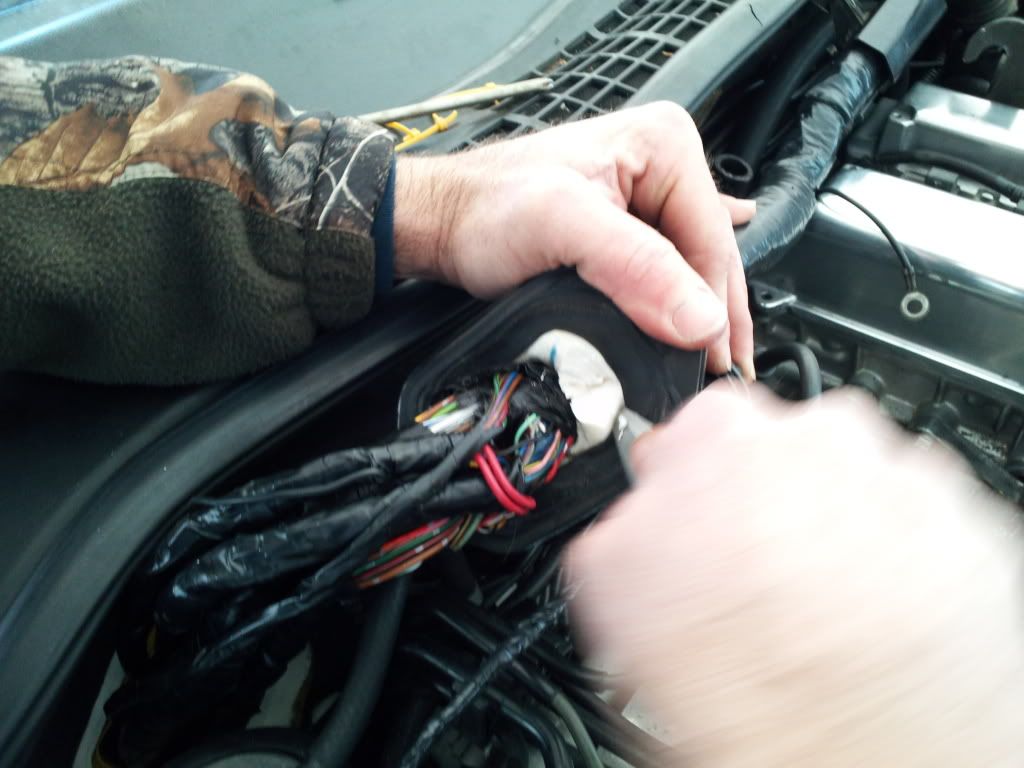
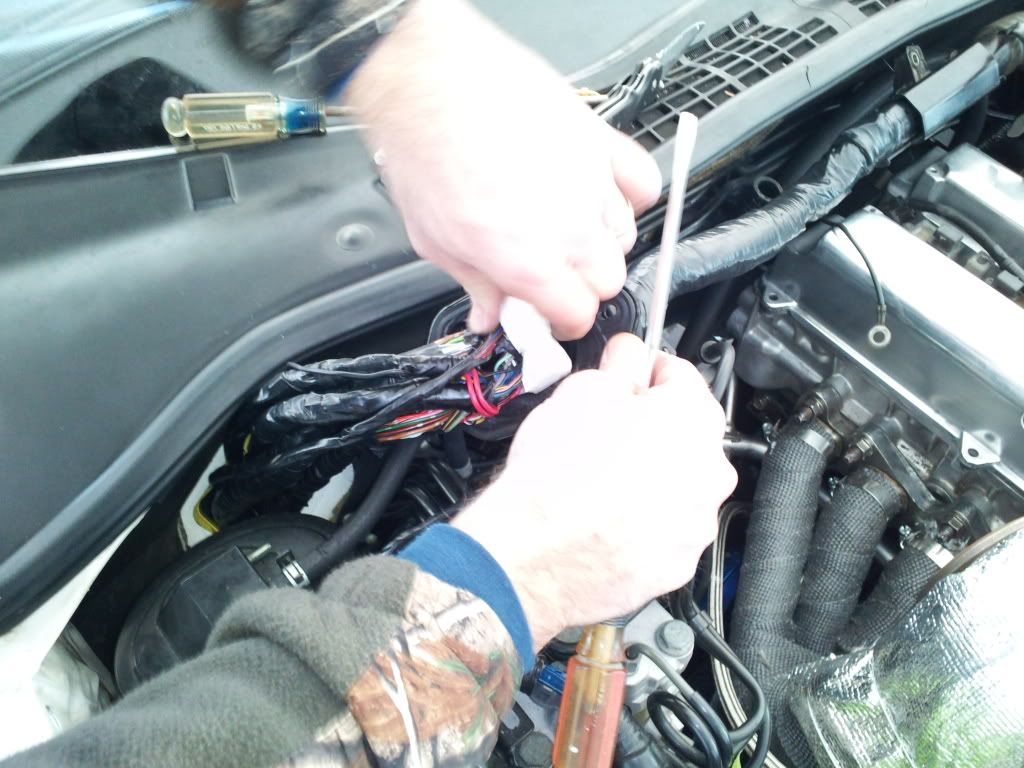
made the wires come through and started plugging in while my buddy finished the pushing them through..

These are the power as stated before in the thread, and the ground wire...
Through the firewall, and make sure the metal seal is turned the right way before placement..
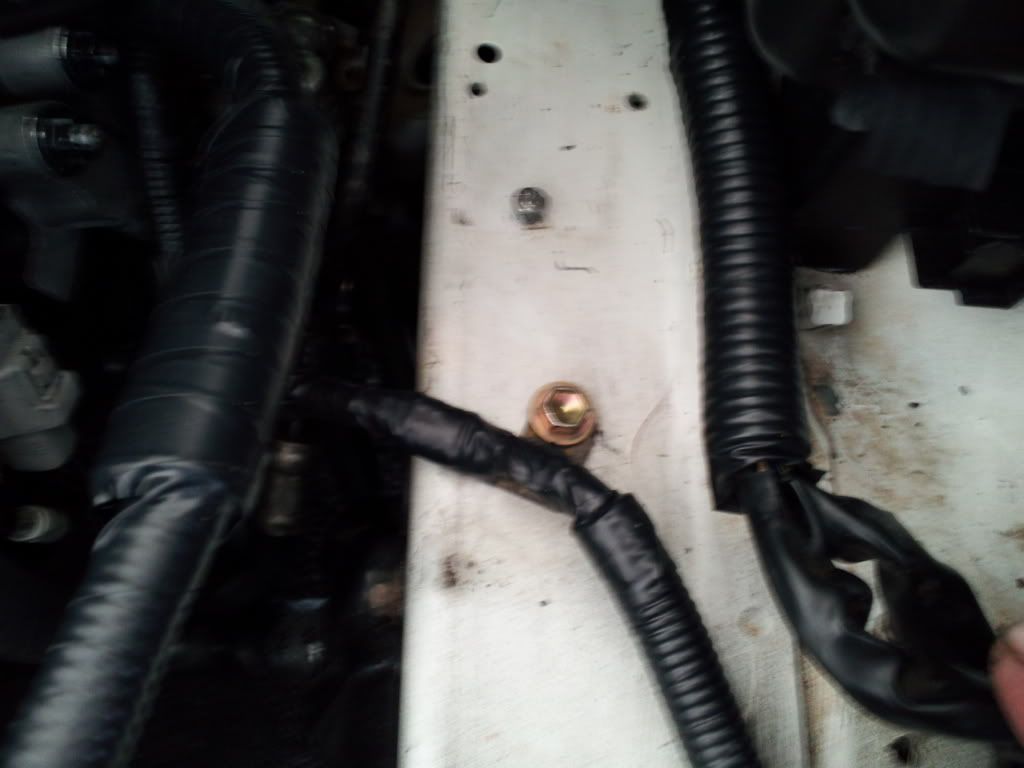
Wired the ground wire and the plastic tab for the wiring harness on the fire wall..
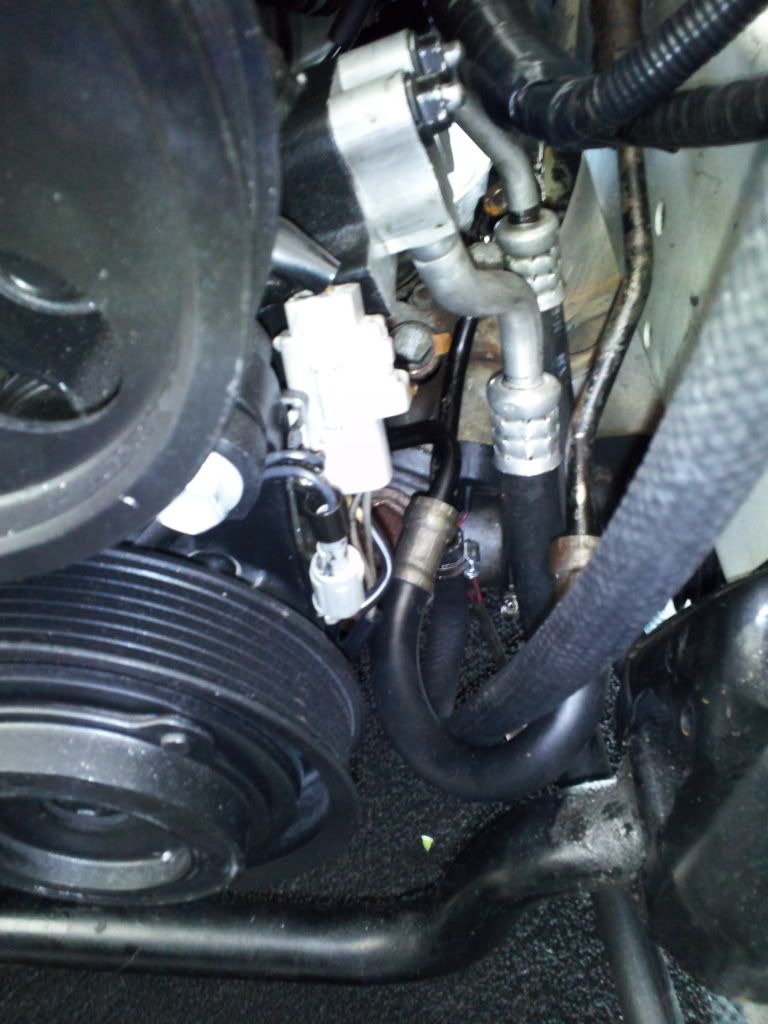
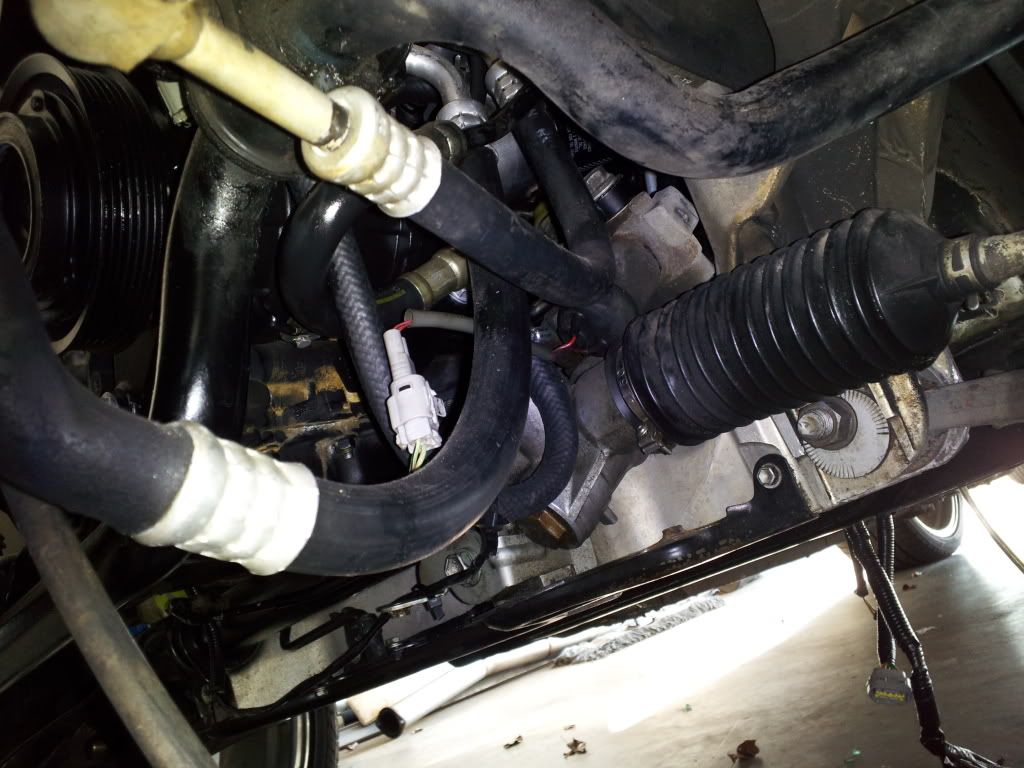
Bolted the AC lines, fit perfect in there..
Screwed in the ground that harness and finished taping it up real good, before the battery tray goes in...
Installed the ignitor three plugs and put the wires behind the oem bracket in white...
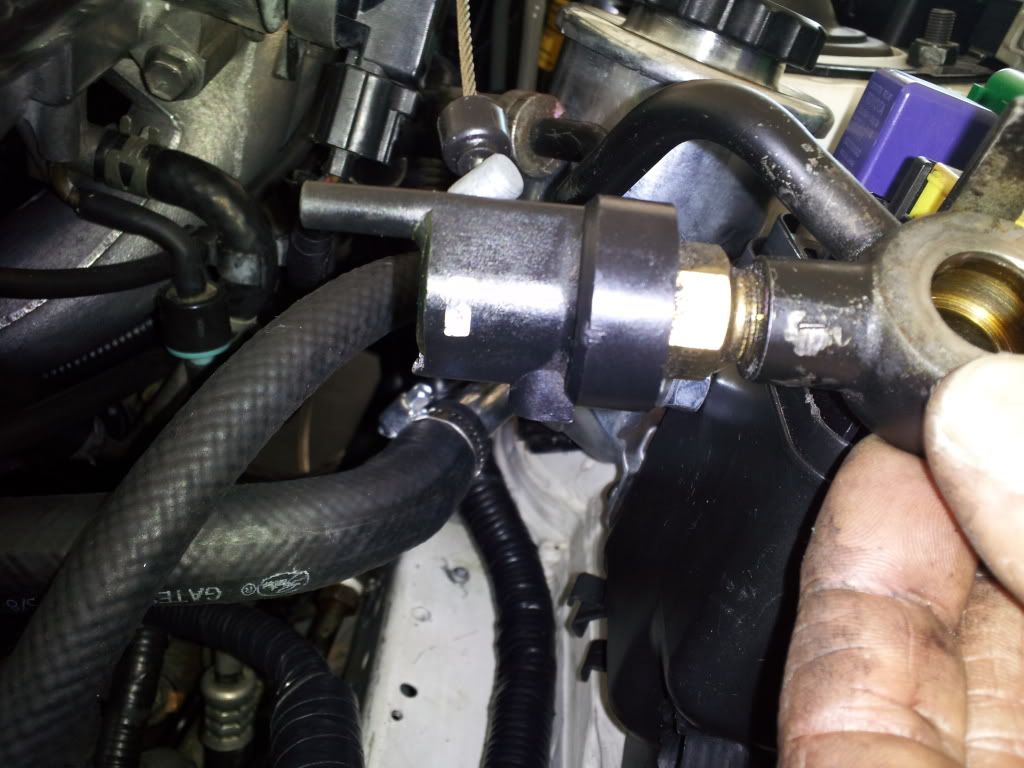
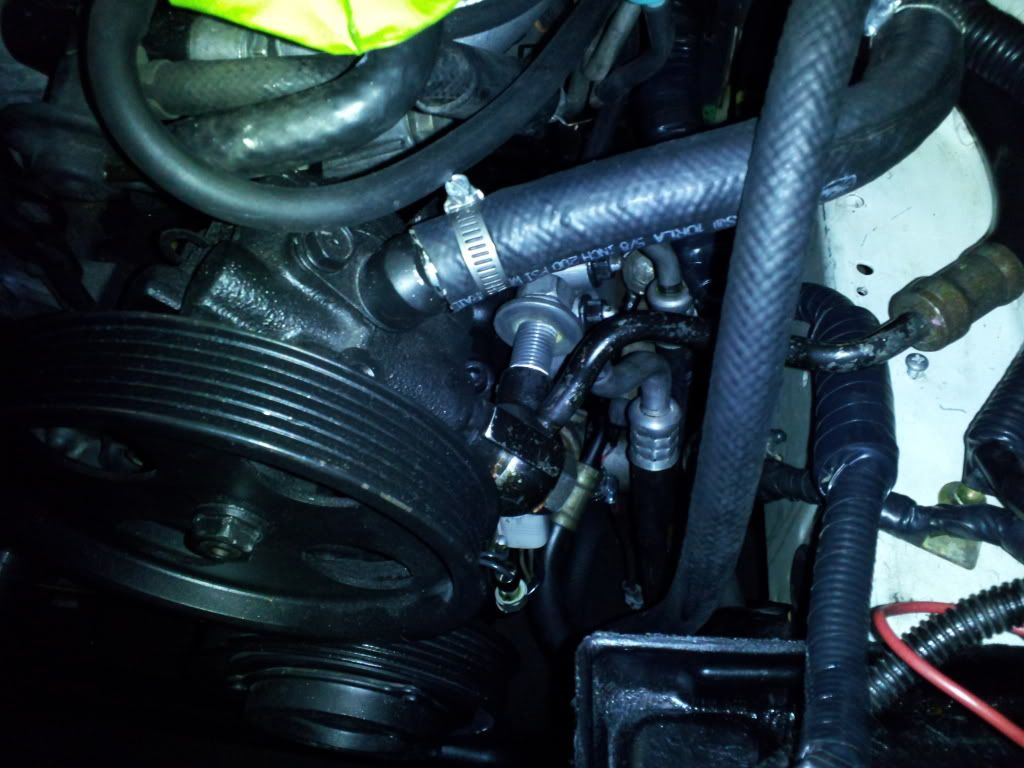
Went to install the power steering line and one of the vacuum line plastic pieces broke... CRAP! Is this necessary anyway? Need to know before I continue..
Installed the heater hoses, and the power steering line return put in place..
Battery tray in and secured..
Installed the wiring for good through the firewall. Had to do some grunting, but we made it through.
Extended the heater control valve wiring. Forgot to do that...
Still couldnt get the rubber connector over the wiring, so we ended up cutting the Styrofoam white crap out with a knife and a screwdriver..
made the wires come through and started plugging in while my buddy finished the pushing them through..
These are the power as stated before in the thread, and the ground wire...
Through the firewall, and make sure the metal seal is turned the right way before placement..
Wired the ground wire and the plastic tab for the wiring harness on the fire wall..
Bolted the AC lines, fit perfect in there..
Screwed in the ground that harness and finished taping it up real good, before the battery tray goes in...
Installed the ignitor three plugs and put the wires behind the oem bracket in white...
Went to install the power steering line and one of the vacuum line plastic pieces broke... CRAP! Is this necessary anyway? Need to know before I continue..
Installed the heater hoses, and the power steering line return put in place..
Battery tray in and secured..
Last edited by 1JZPWRD; 01-01-12 at 09:28 AM.
 01-01-12, 09:38 AM
#347
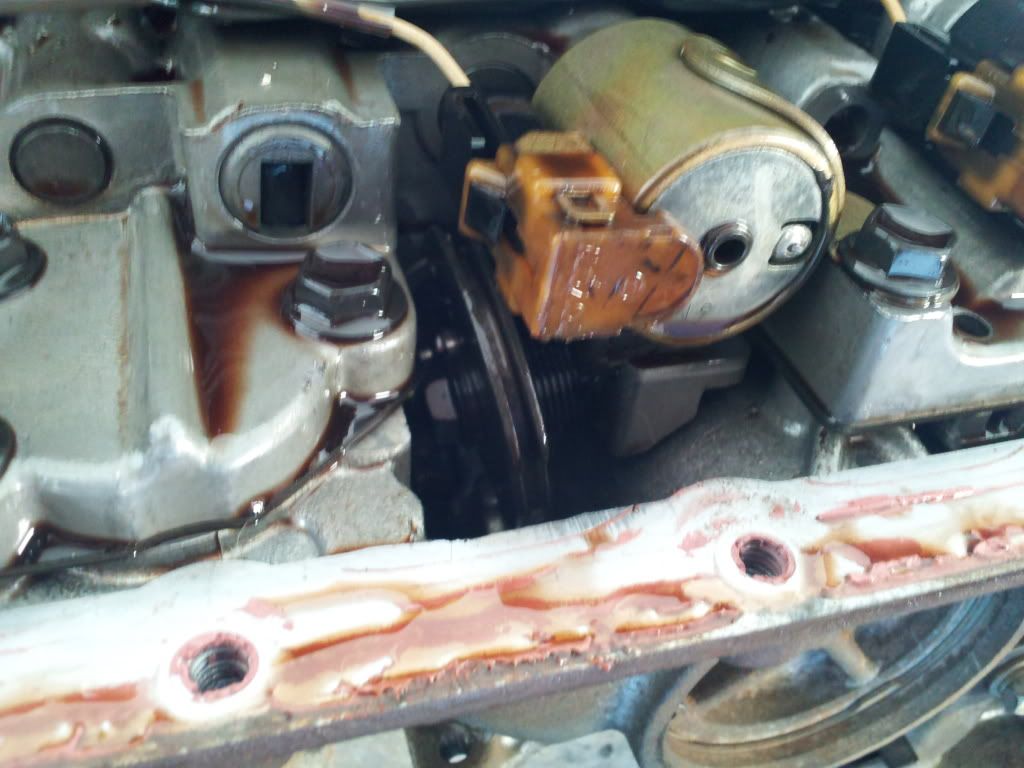
The air control valve broke on an LS400 I had as well, all it does is keep the engine RPM's up when the power steering pump is experiencing load. I just capped it off on the pump and didn't notice a difference. Plus they tend to fail and cause power steering fluid to enter engine through the vacuum lines.
Very nice build by the way!
Very nice build by the way!
Last edited by Scotty; 01-01-12 at 09:54 AM.
01-01-12, 09:49 AM
#348
1JZ Single SC400
Thread Starter
iTrader: (59)
Join Date: Jan 2009
Location: Alabama, Roll Tide!
Posts: 8,518
Likes: 0
Received 15 Likes
on
12 Posts
Thanks Scotty, it is a work in progress. After I posted these pictures, I went back out to the garage and removed that piece completely, and screwed in another one in its place. The bolt that I used is too long, but no one will ever see it sitting above the ac compressor. I also used teflon tape wrapped twice to assure no leaks. I wont know for sure until the car is running and all the air is bled out. I will post what I did tomorrow. The results you mentioned also was the same that I found to be exactly. Just kept the rpms up when under a load or turned all the way.. I can use the accelerator to help cure this problem. :-)
Thank you for the compliments. I think people are tired of the pictures, and want a dyno chart and some Youtube videos. :- 0
I want my thread to help the DIY on the swap for the SC400.. So many for the 300's!
I still have to figure out how to run the oil lines for the oil catch form the valve covers. I am debating on welding some fittings and running steel braided or using rubber hoses for now. I think the look of the steel braided will look better, just dont exactly where to mount the can itself. I was thinking on the radiator shroud somewhere next to the battery.
Last edited by 1JZPWRD; 01-01-12 at 09:52 AM.
01-01-12, 05:40 PM
#351
1JZ Single SC400
Thread Starter
iTrader: (59)
Join Date: Jan 2009
Location: Alabama, Roll Tide!
Posts: 8,518
Likes: 0
Received 15 Likes
on
12 Posts
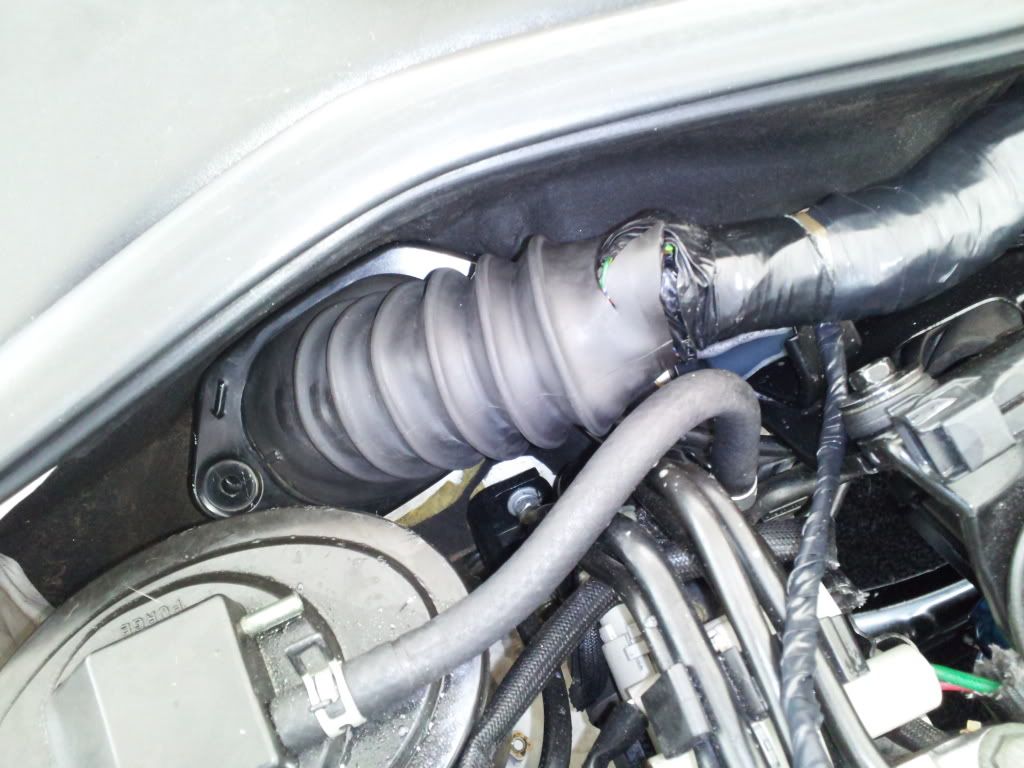
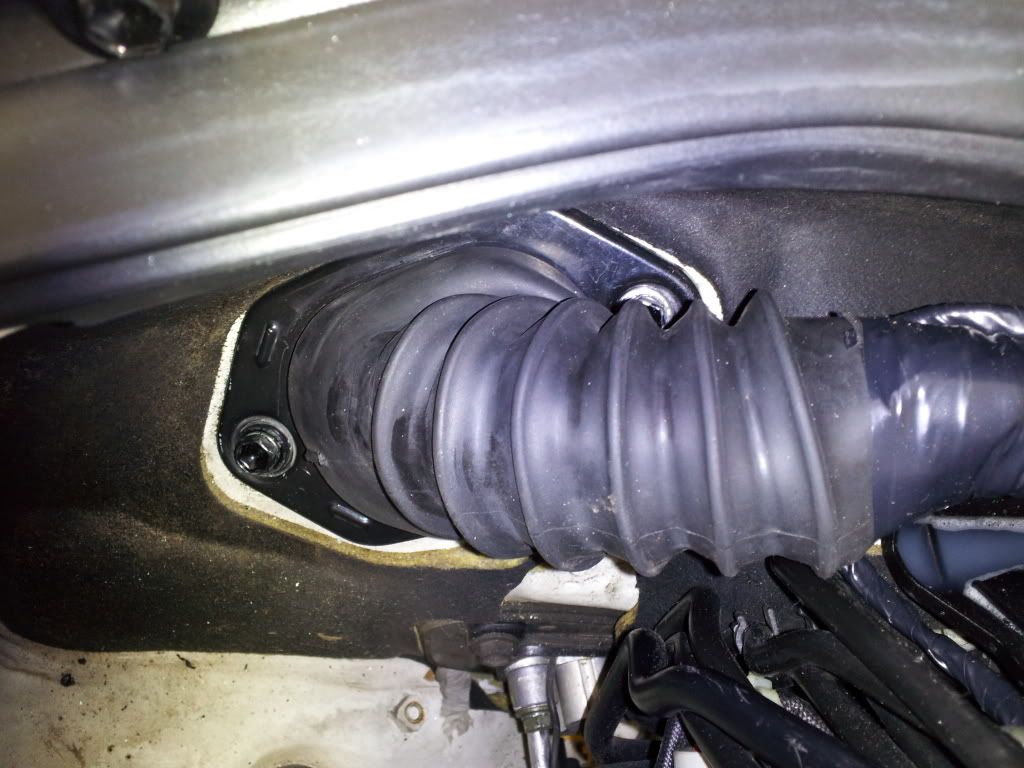
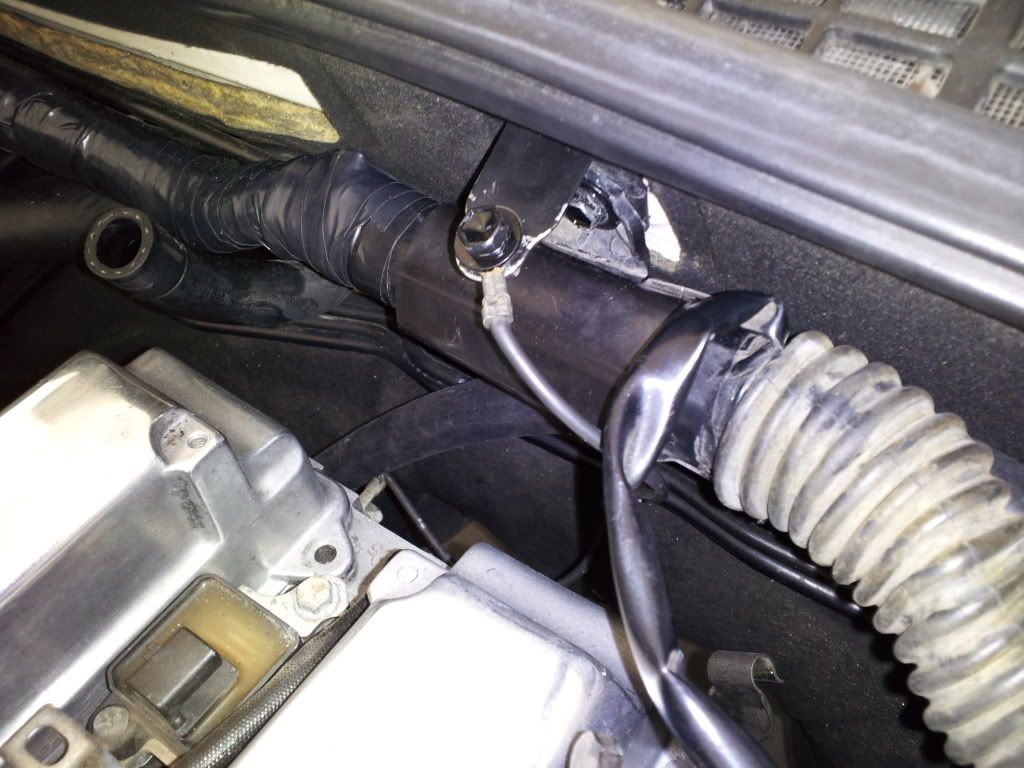
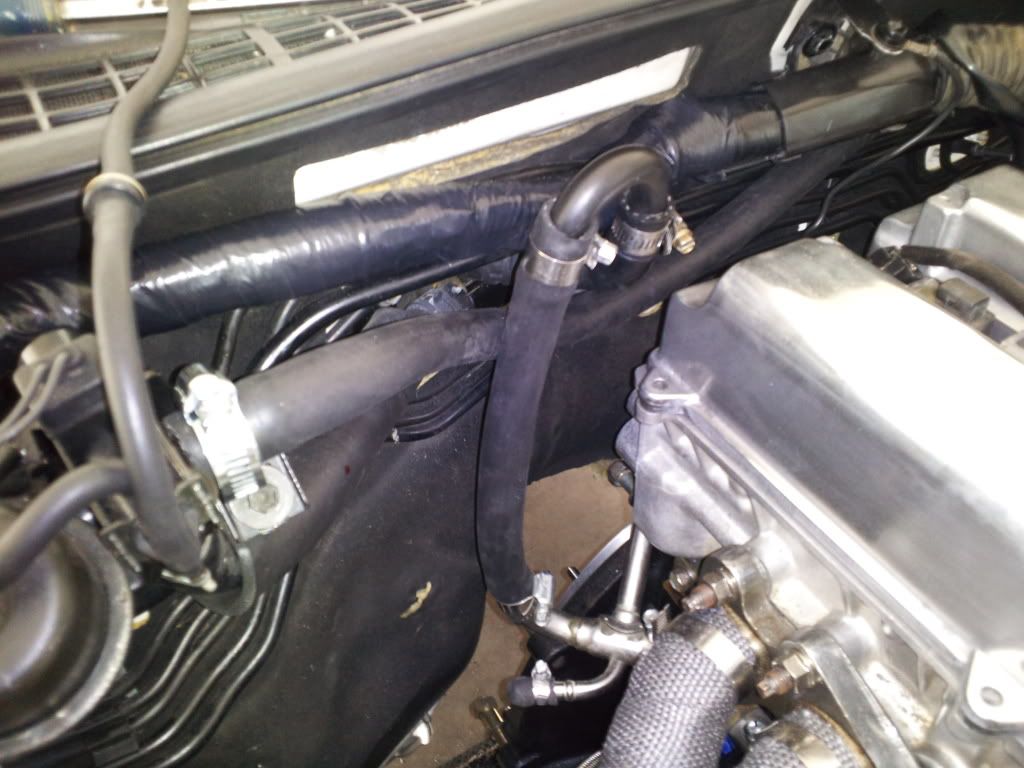
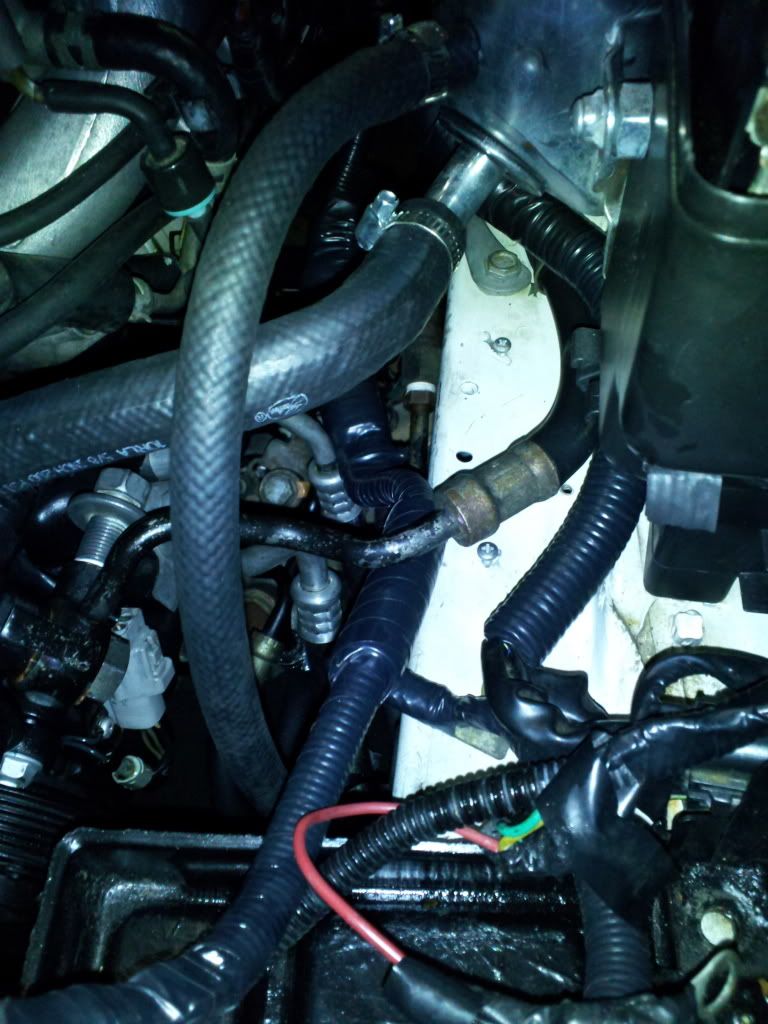
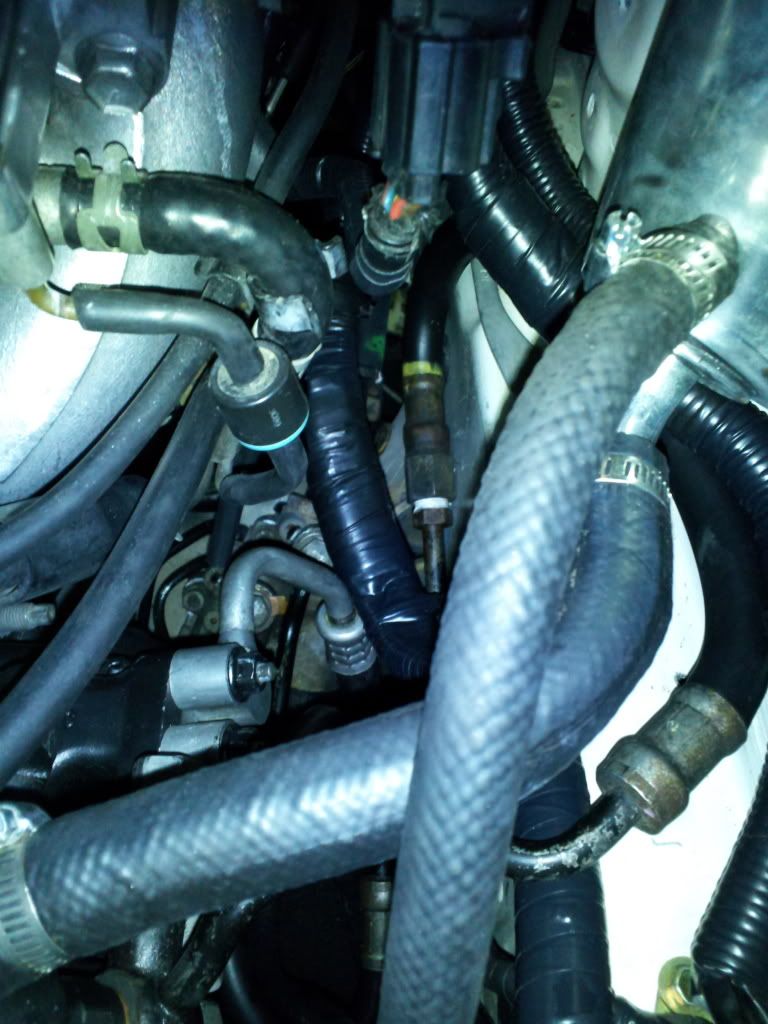
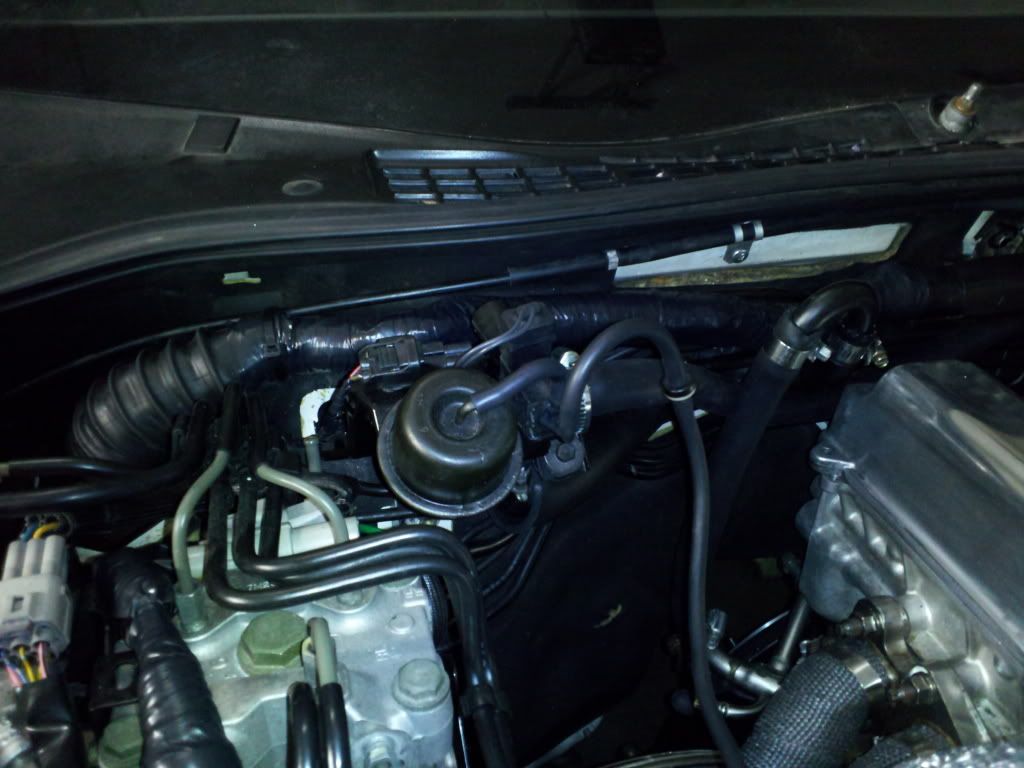
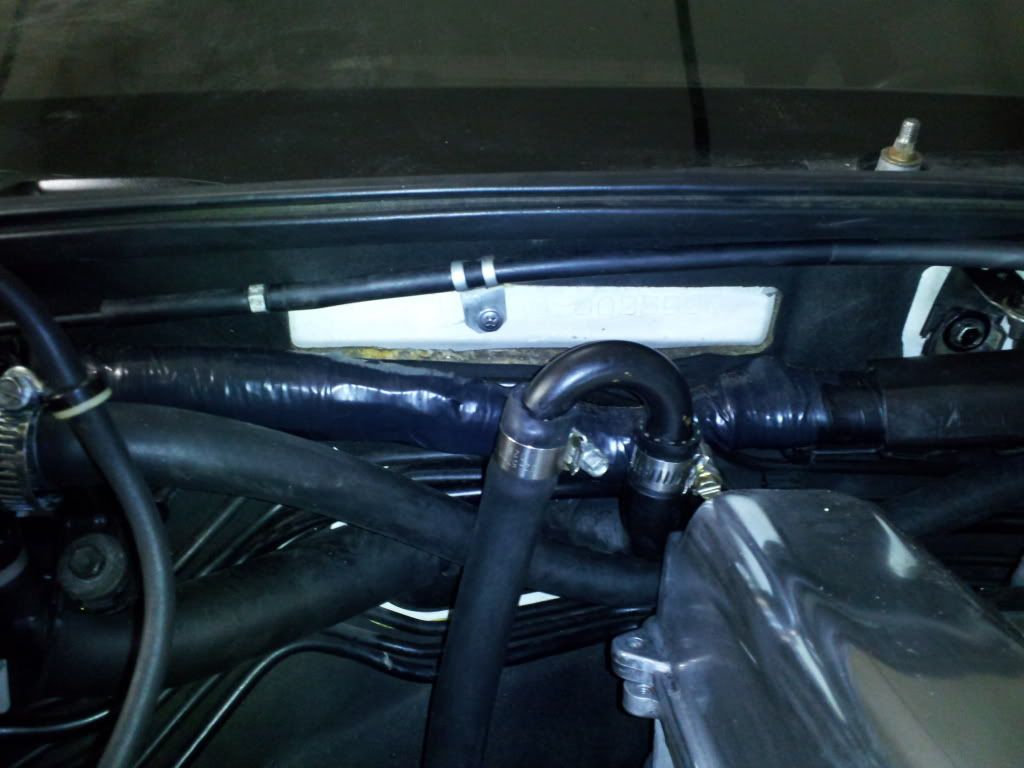
NO problem, It is pretty straight forward. The one on the right side rear of the block, closet to firewall, run it back across the other side of the motor to the bottom port of the heater control valve assembly. The stock rubber hose coming out of the firewall closet to the motor, run it straight down to the 1JZ port. This is the one that is a u shaped pipe in the top. The last 1JZ port is the small nipple on the bottom, cap this off, no longer needs. I posted the measurements in the thread and where to run them. Also look at the drawing. If you need more help, just post up or call me at 205-482-5533.. Be glad to help..
01-02-12, 12:48 PM
#352
1JZ Single SC400
Thread Starter
iTrader: (59)
Join Date: Jan 2009
Location: Alabama, Roll Tide!
Posts: 8,518
Likes: 0
Received 15 Likes
on
12 Posts
I posted a thread about the catch can.. I want some input on this, about the type of lines, location, and how to run it on MY setup..
https://www.clublexus.com/forums/per...ml#post6918767
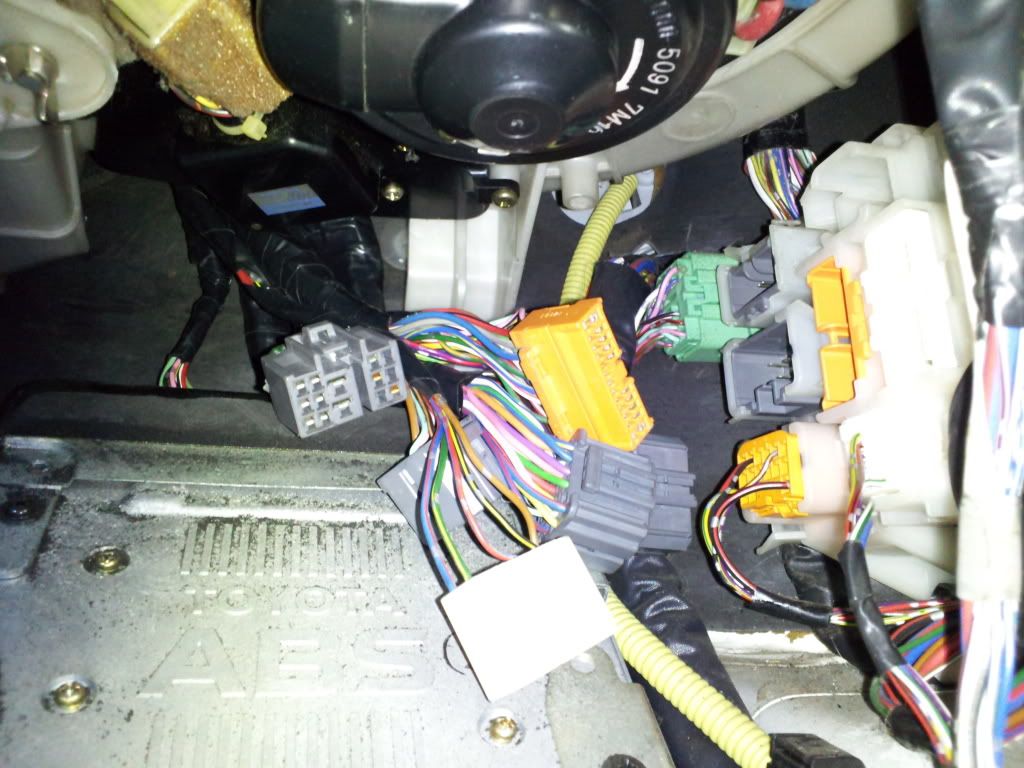
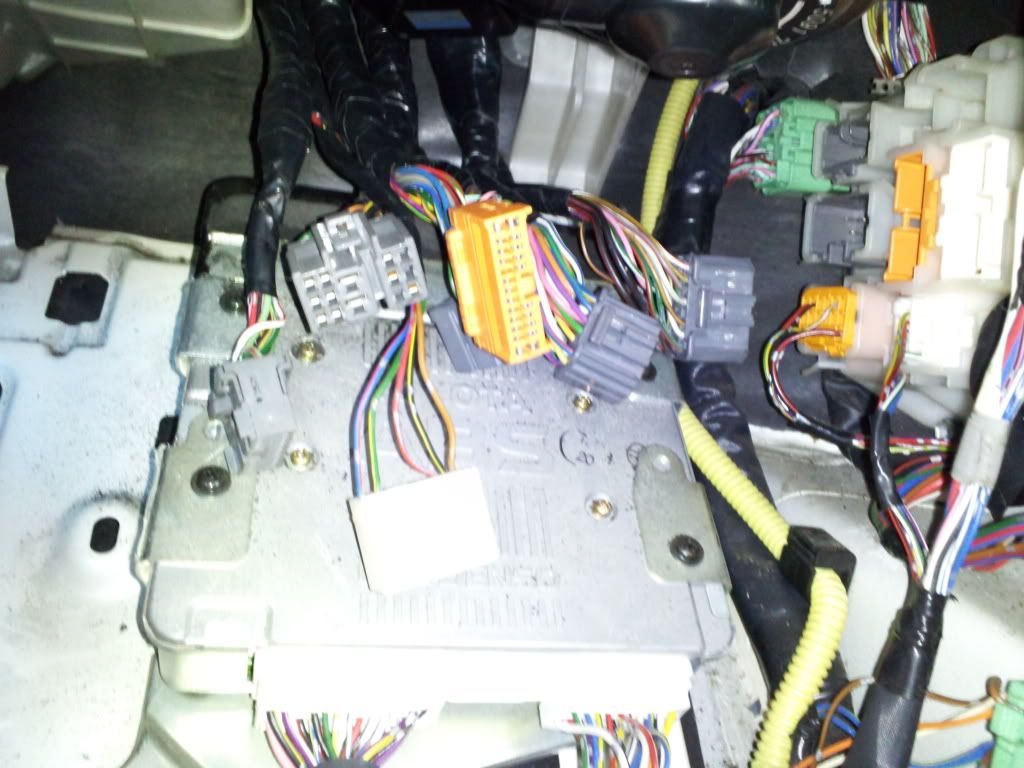
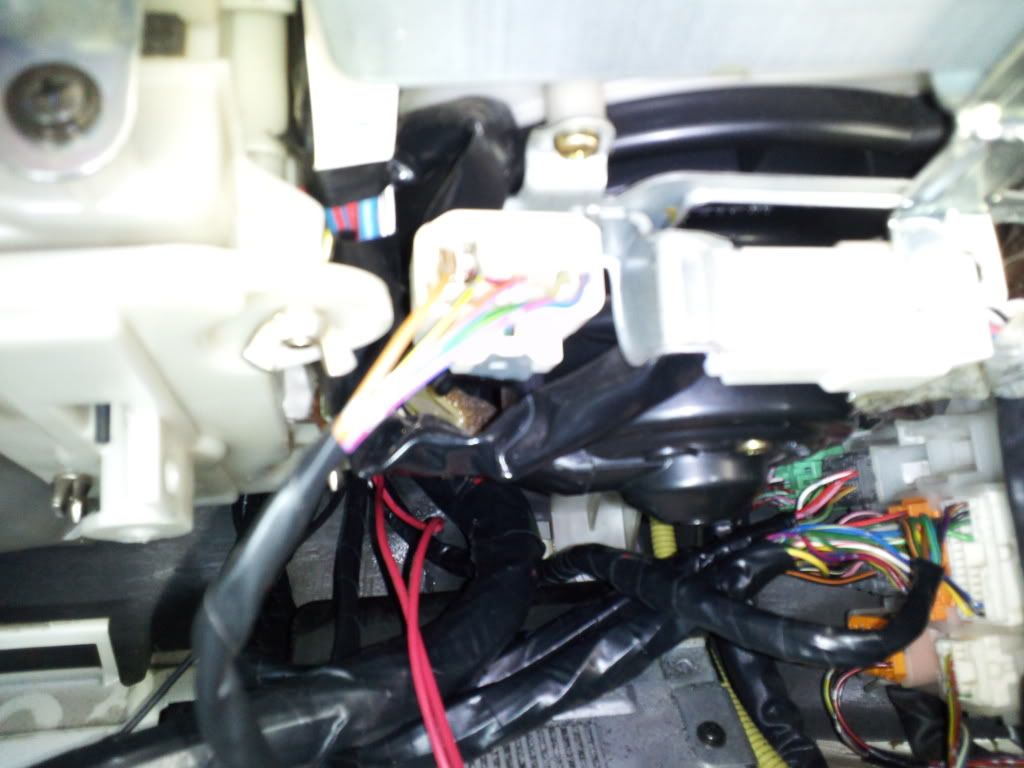
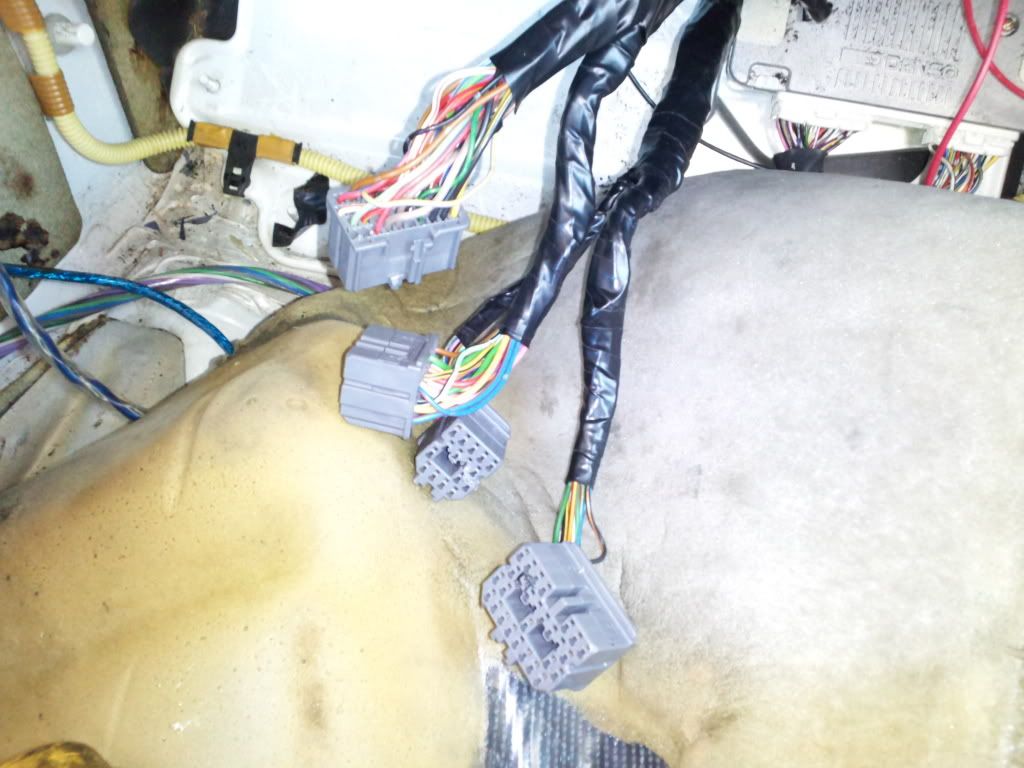
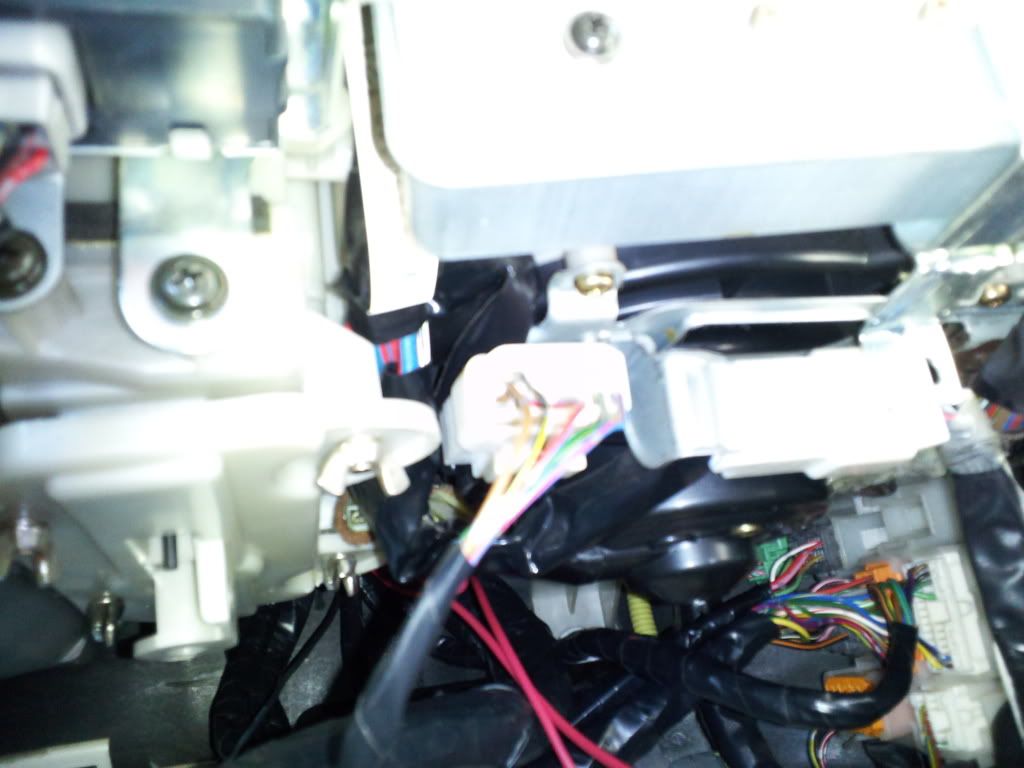
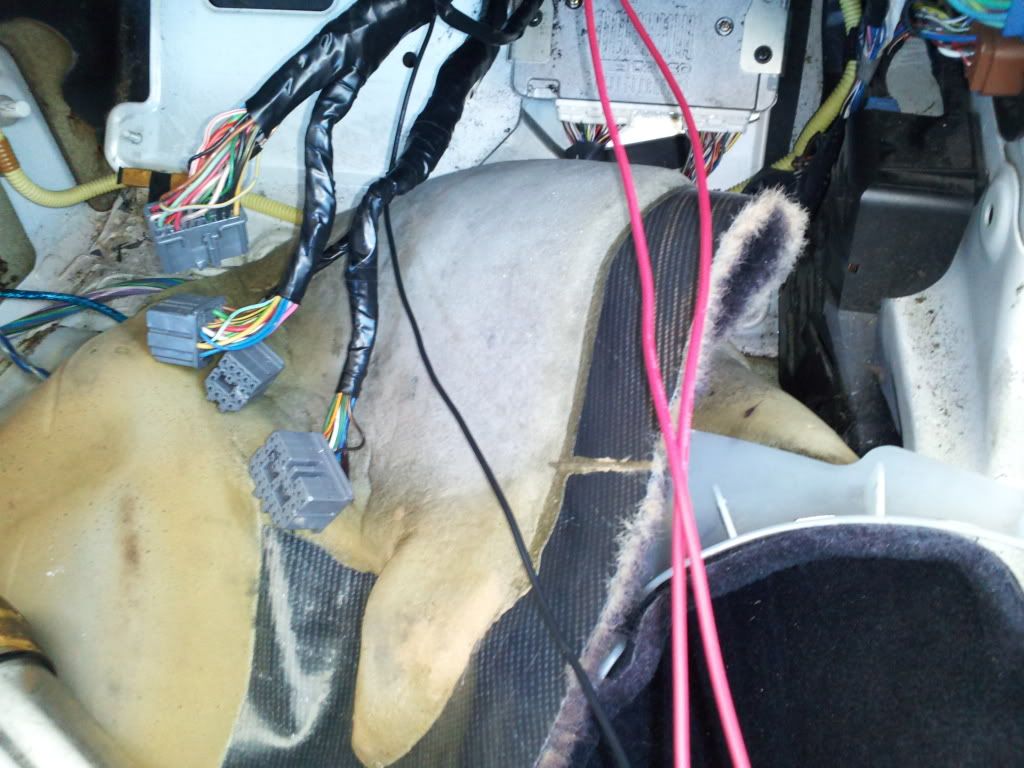
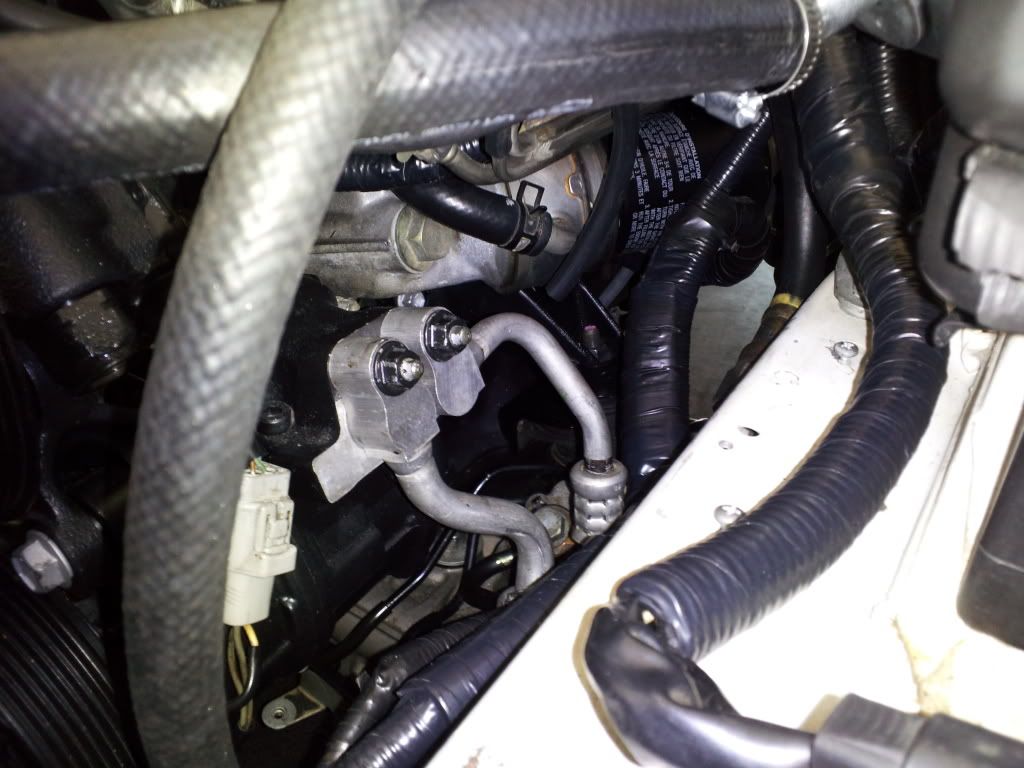
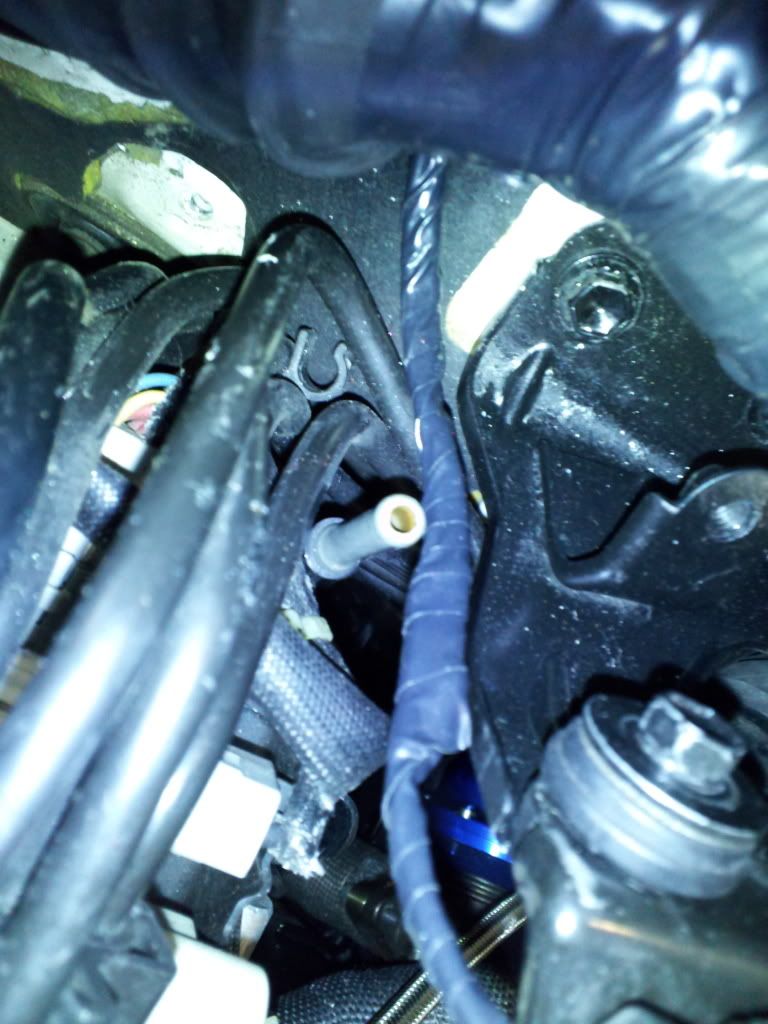
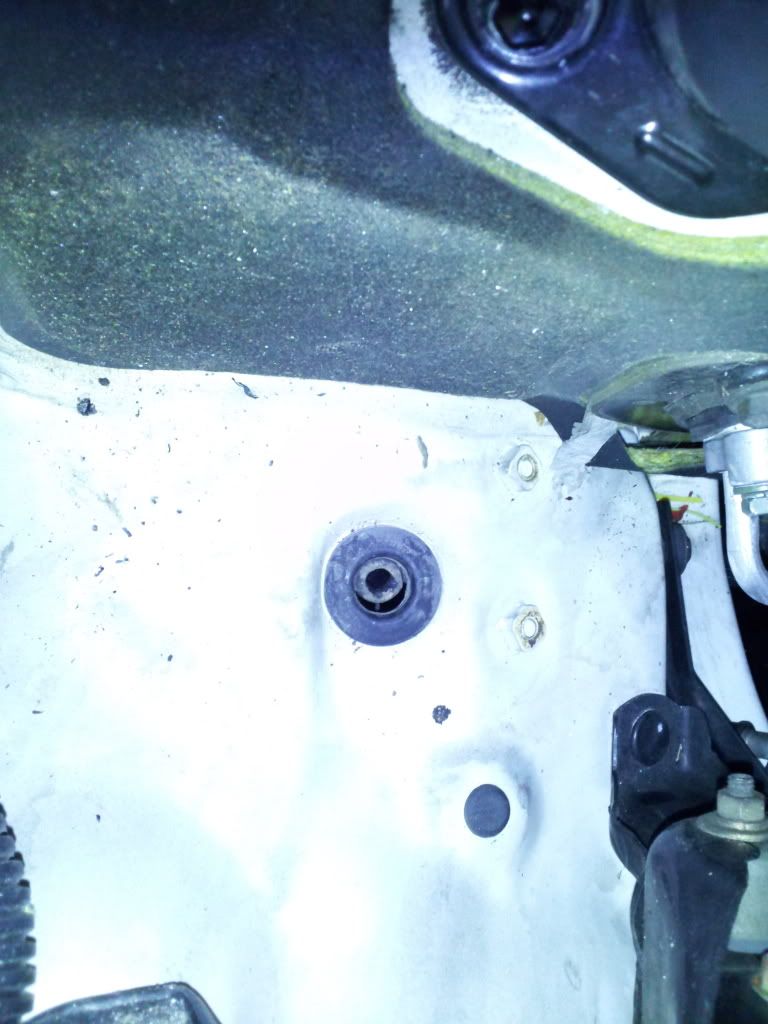
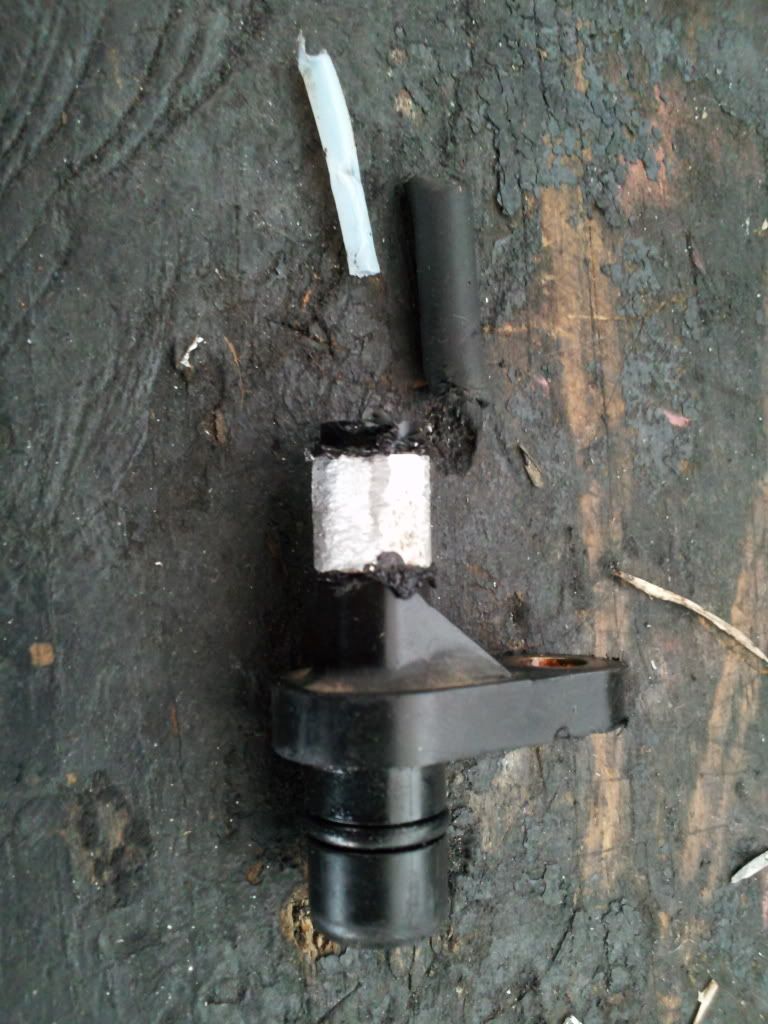
Here are the pictures that Megamax requested. Nothing done today, just too busy, but I have time to do this posting.. :-)
I hope these are better and make better since...
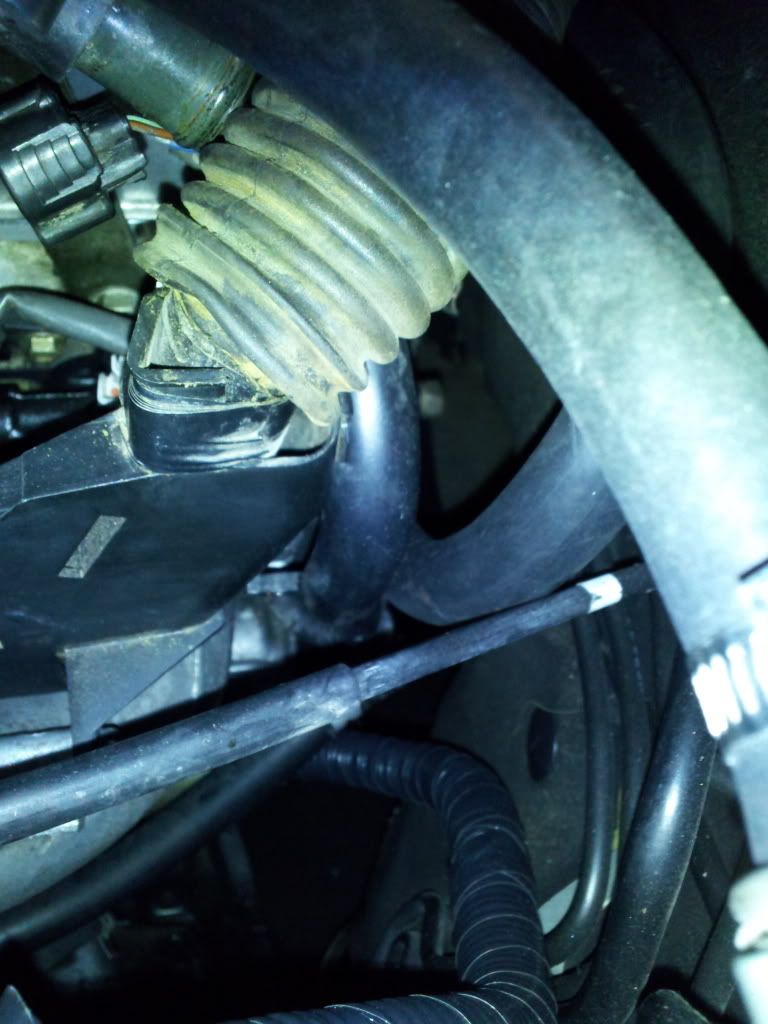
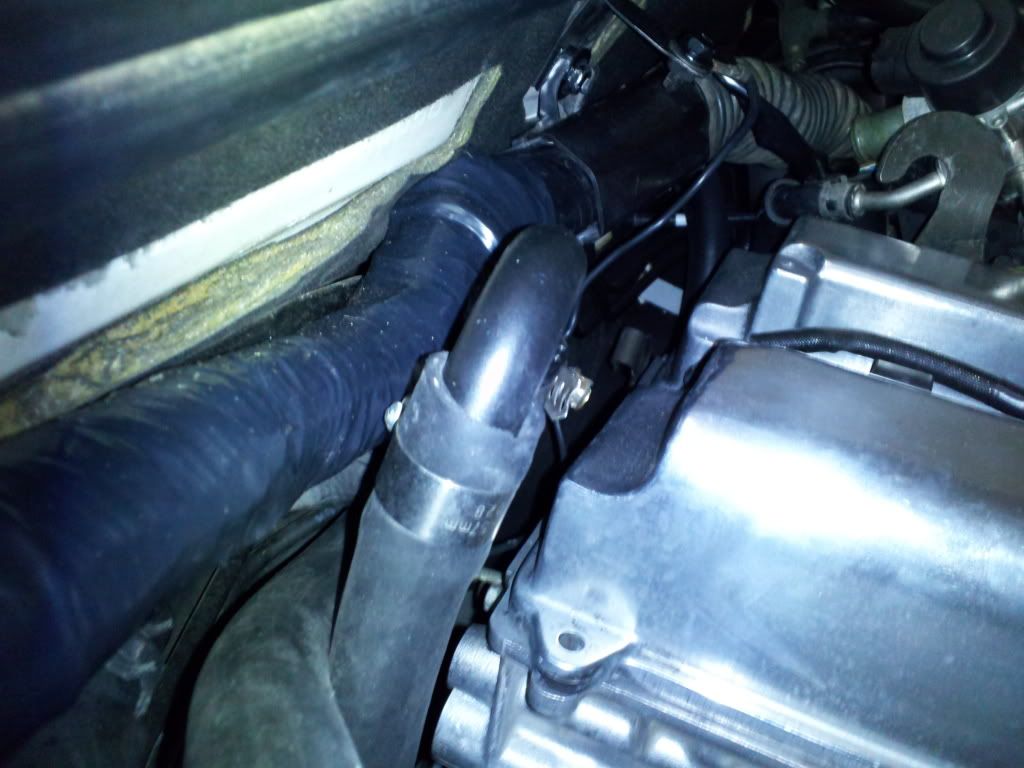
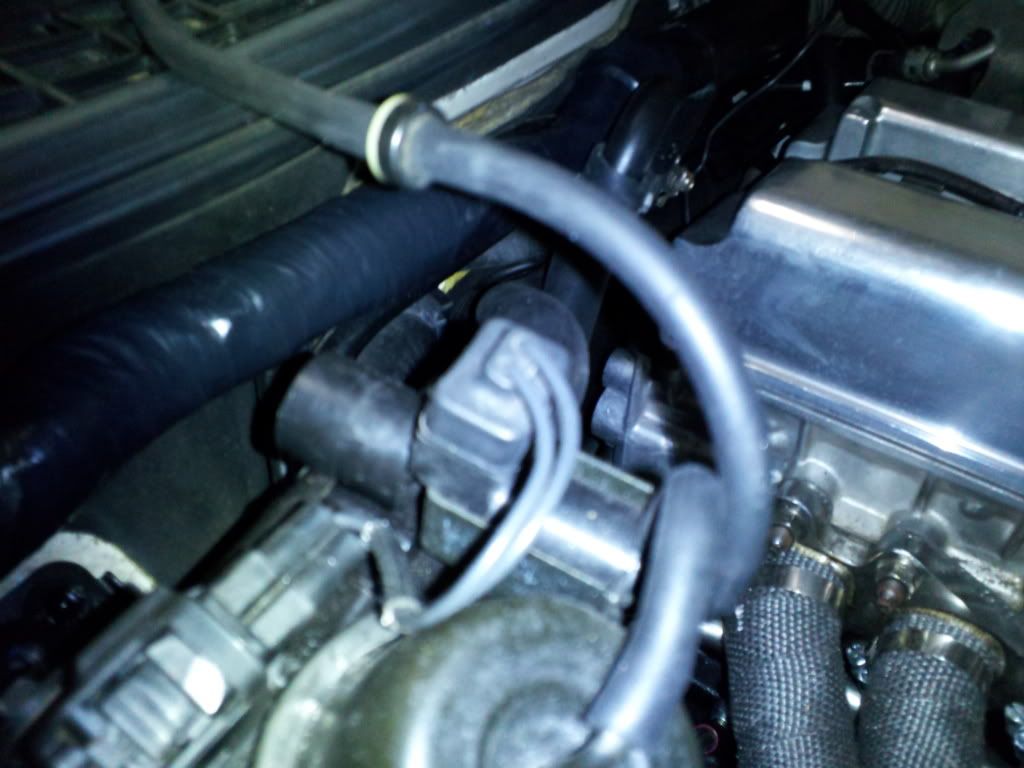
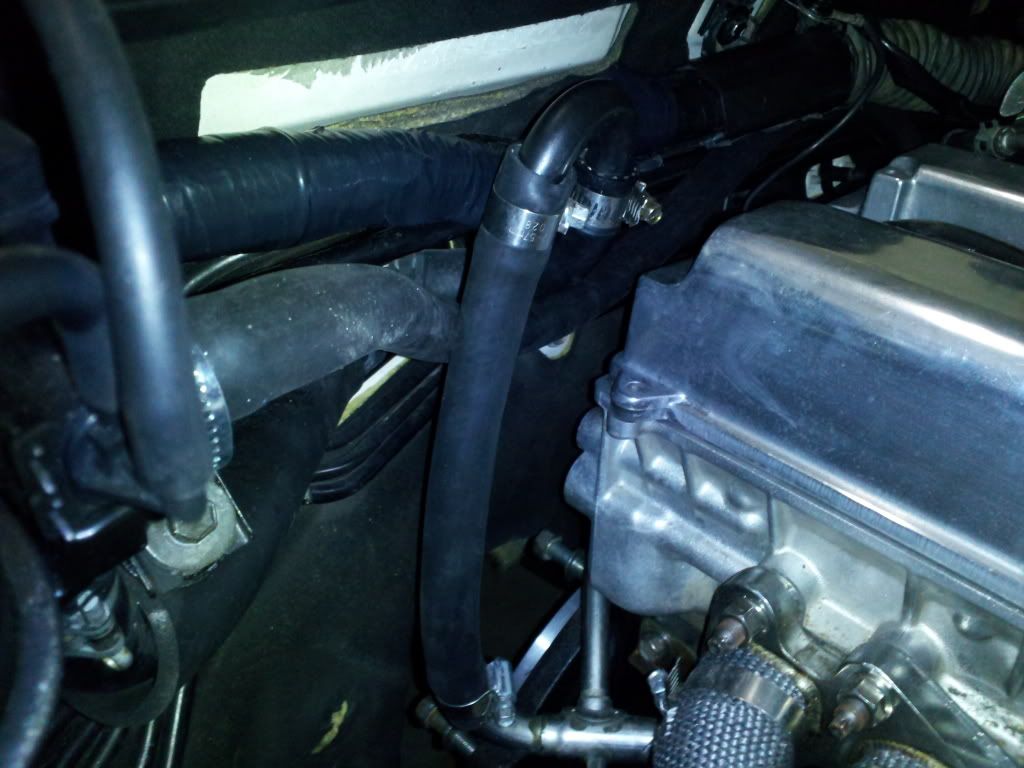
If you need some from under the car near the rack and pinion, lmk.. Be glad to help out... Mark
https://www.clublexus.com/forums/per...ml#post6918767
Here are the pictures that Megamax requested. Nothing done today, just too busy, but I have time to do this posting.. :-)
I hope these are better and make better since...
If you need some from under the car near the rack and pinion, lmk.. Be glad to help out... Mark
01-06-12, 06:43 PM
#353
1JZ Single SC400
Thread Starter
iTrader: (59)
Join Date: Jan 2009
Location: Alabama, Roll Tide!
Posts: 8,518
Likes: 0
Received 15 Likes
on
12 Posts
A little more progress the last few days.
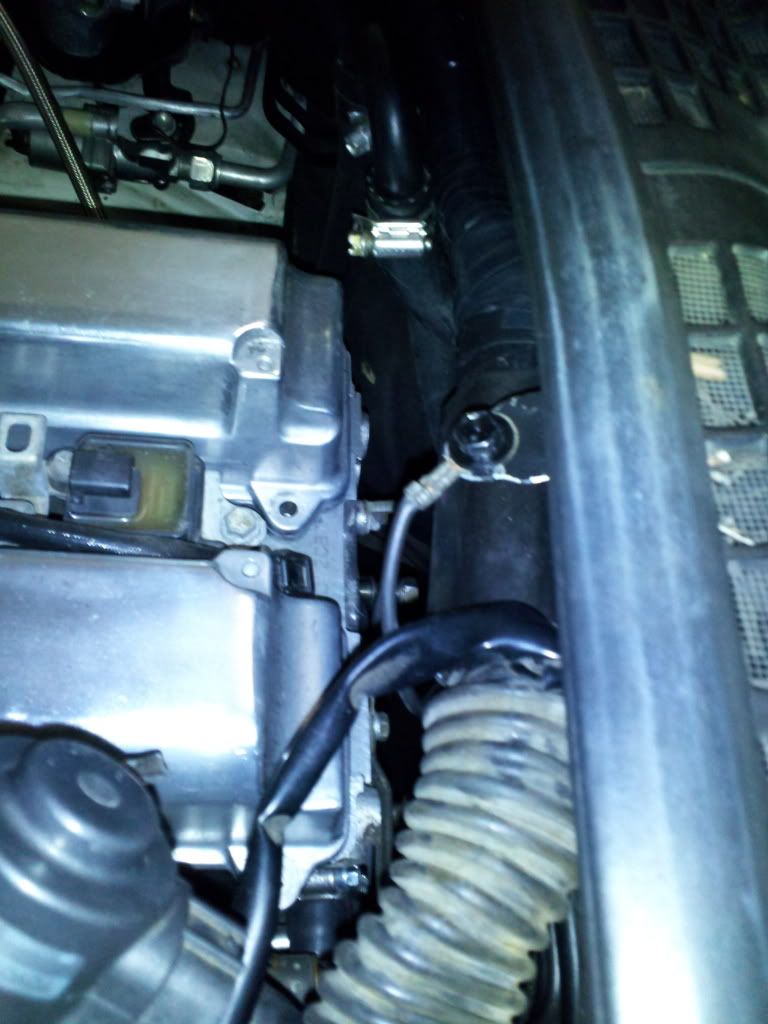
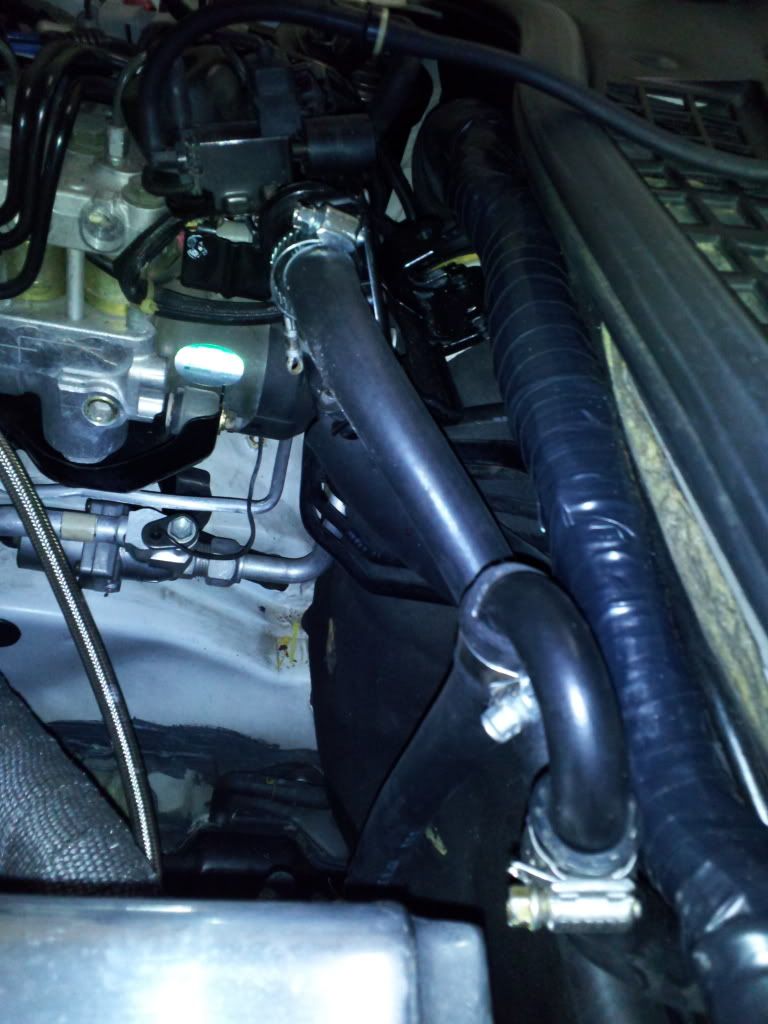
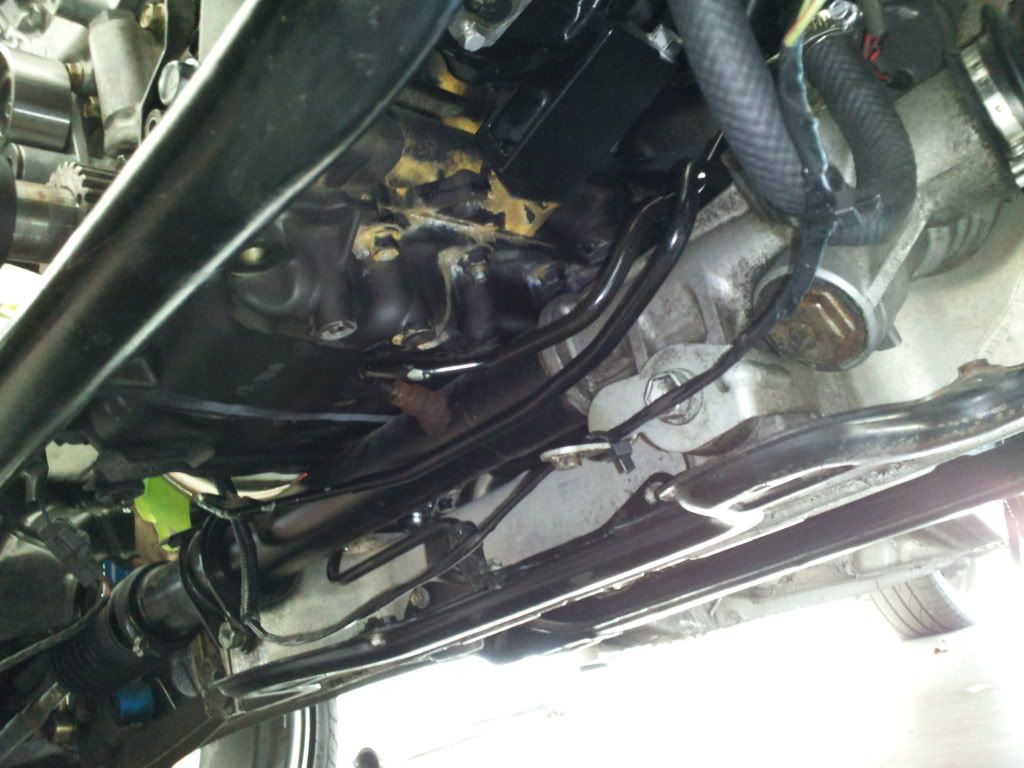
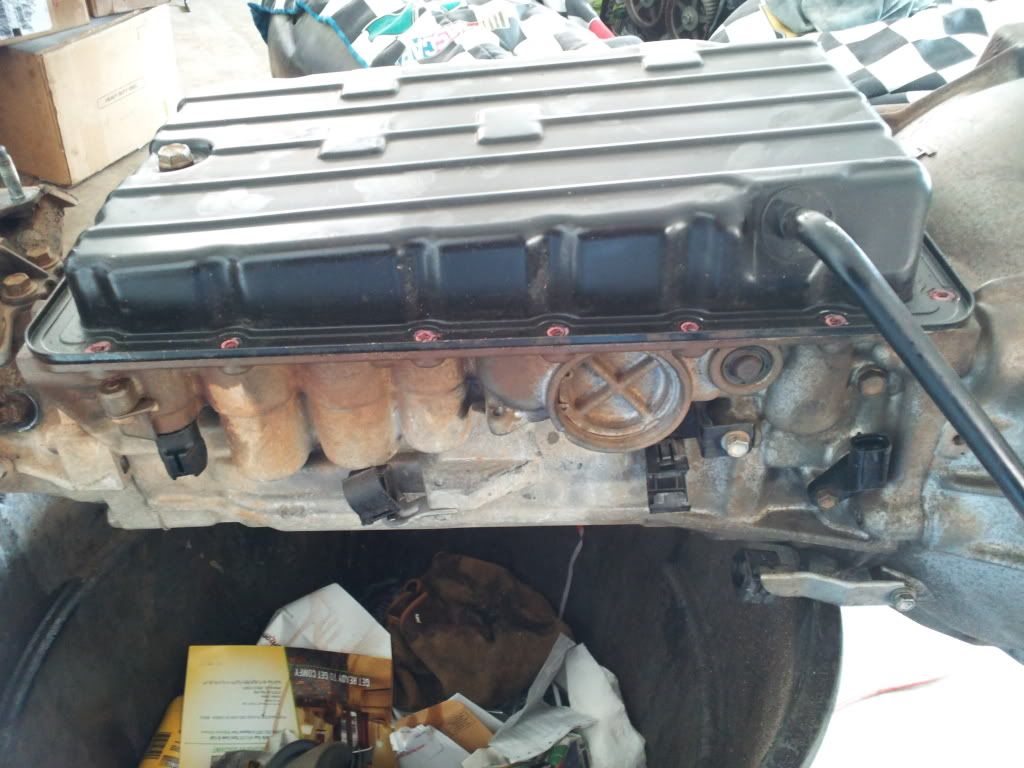
Removed the charcoal canister to mount the new oil catch can..this is held in by three 10mm bolts
Once this is complete removed, you need to tie these together by a fuel type line and place a universal inline fuel filter. This will eliminate the smell of gas through the hottest days and in the cabin.
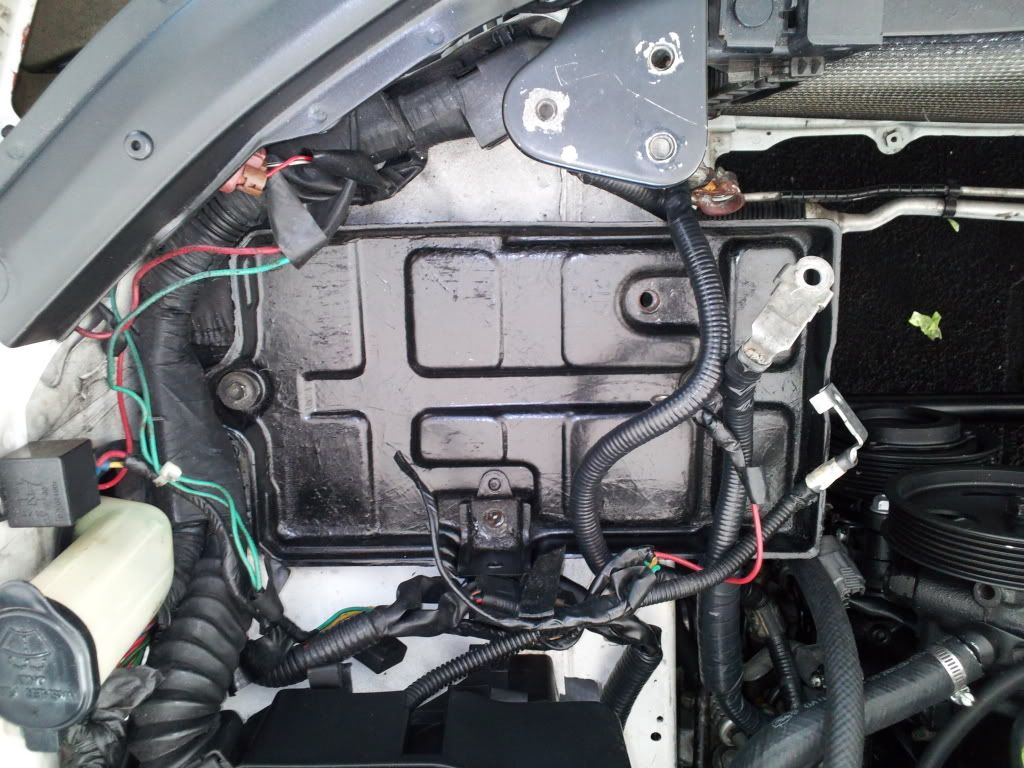
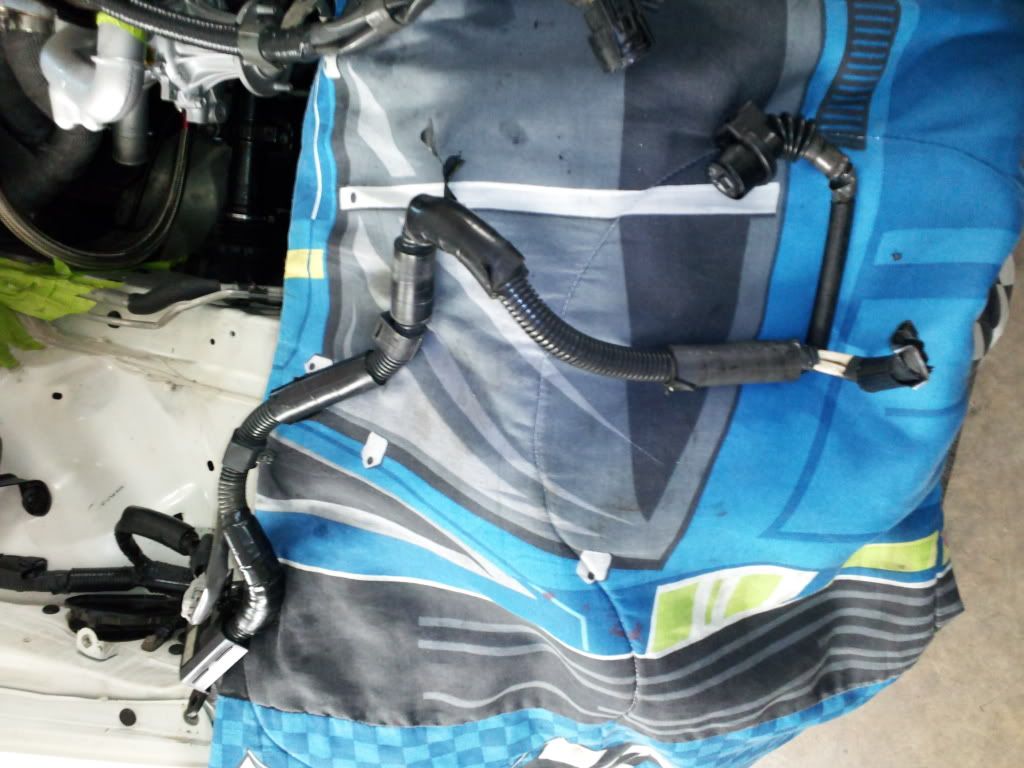
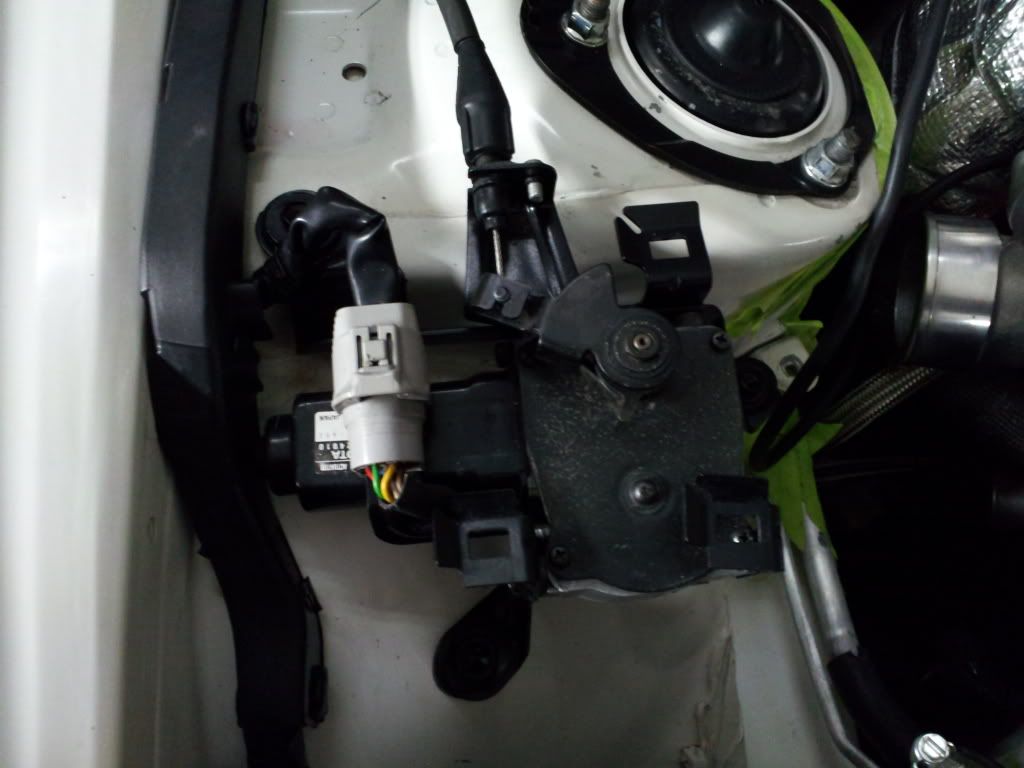
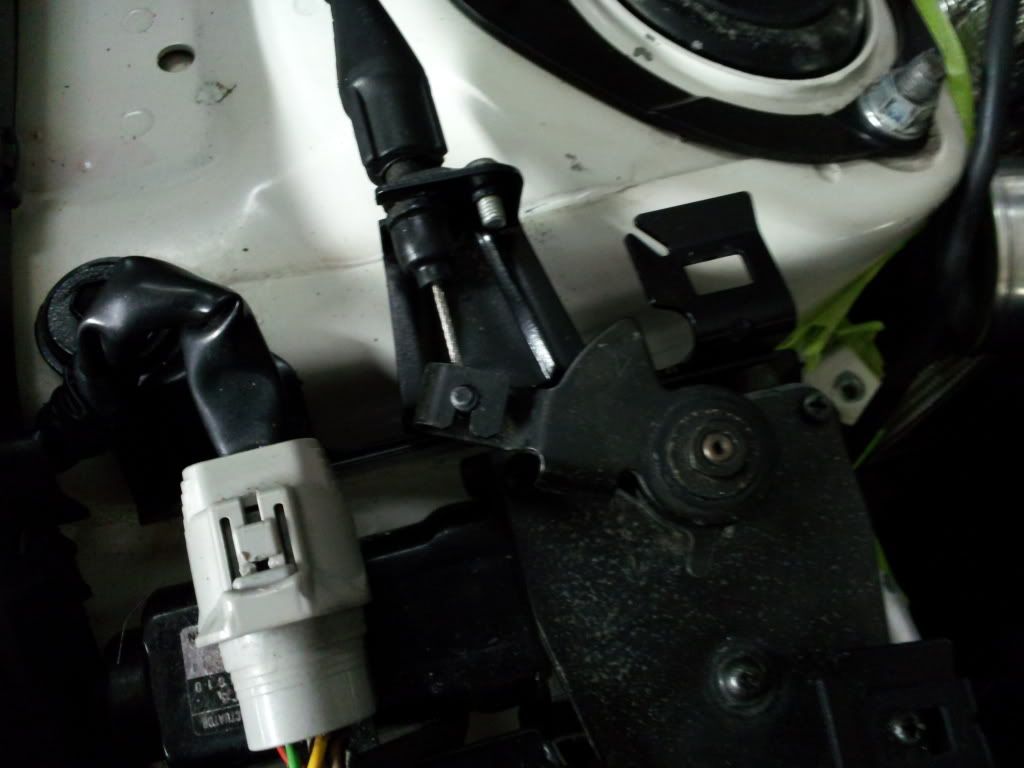
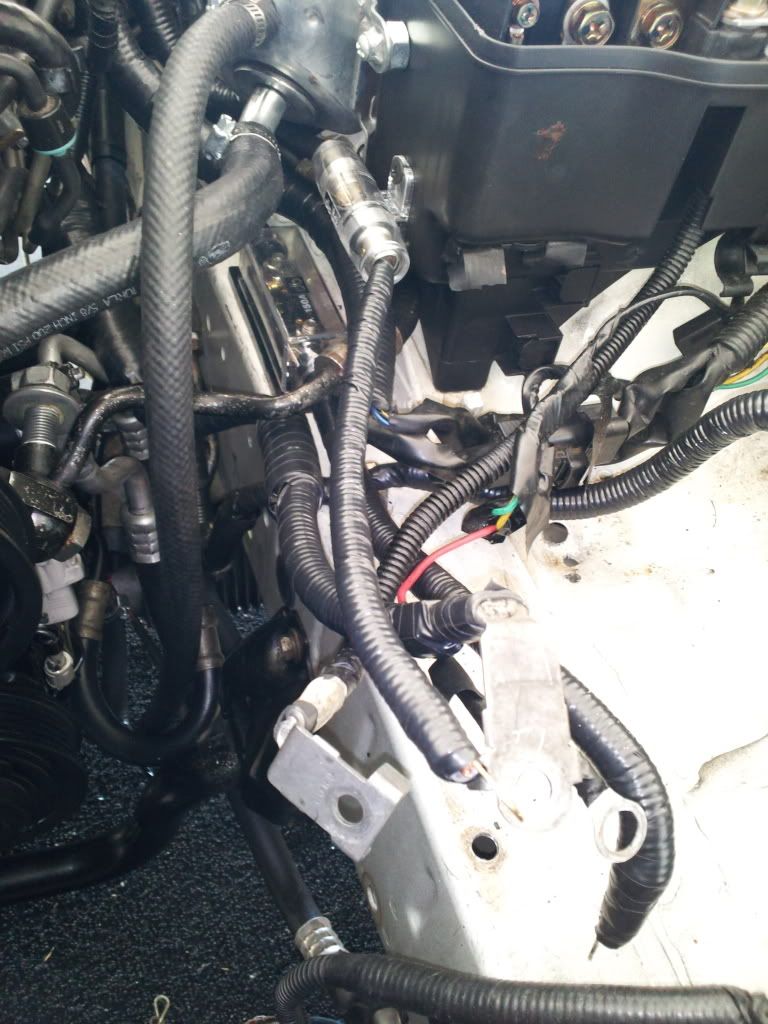
Well I thought I was done with the wiring, found out you have to extend the plug that ties in your rack and pinion. I extended mine 12 inches and was plenty, then zip tied it to the rack and one hose. Just tie it back out of the way behind the alternator. Its the fartherest plug on the right. The other three plugs left over just tie them out of the way.
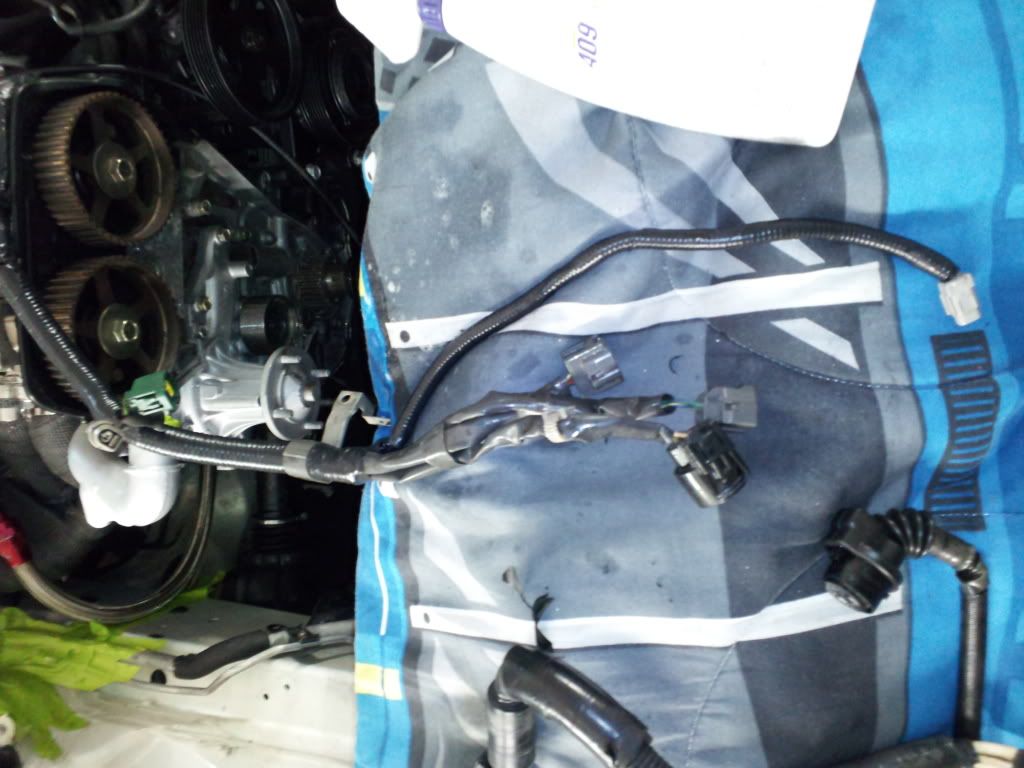
How is extended it..
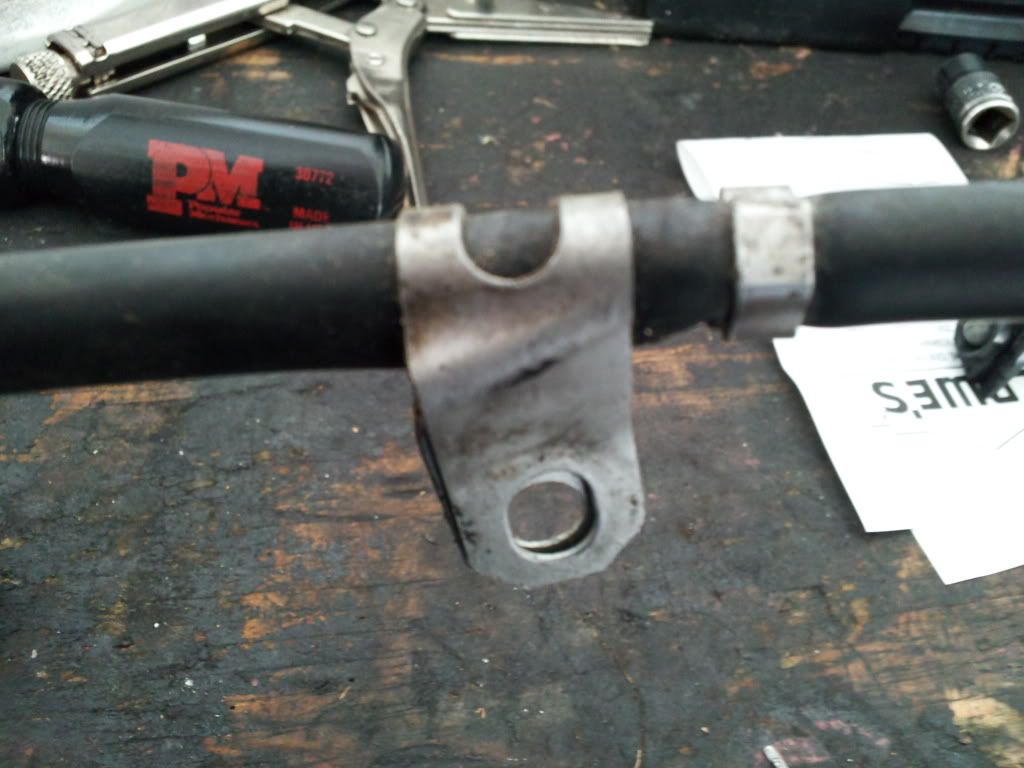
This is how I tied it under the car after the extension of the one plug to the rack.
Next up is the information that you need to know. You have to reuse the stock wiring on the passenger side coming from the fender. This supplies power to the alternator, thus the reason to tie the other three out of the way on the 1JZ harness. In other words use the stock 400 wiring for the alternator. Use this bolt location to hold the wiring in place. I went ahead and retaped it up for a better appearance.
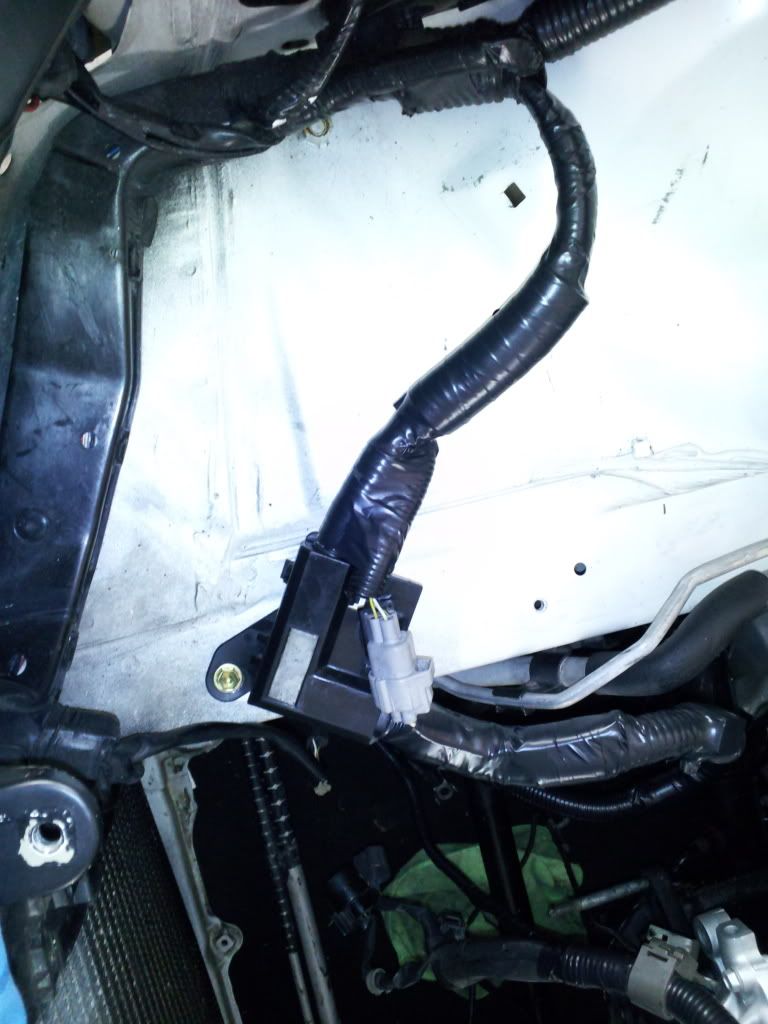
Once this was wired and zip tied, I went to the passenger side and tied in the ground wire to the frame. This look like a very good secure spot..
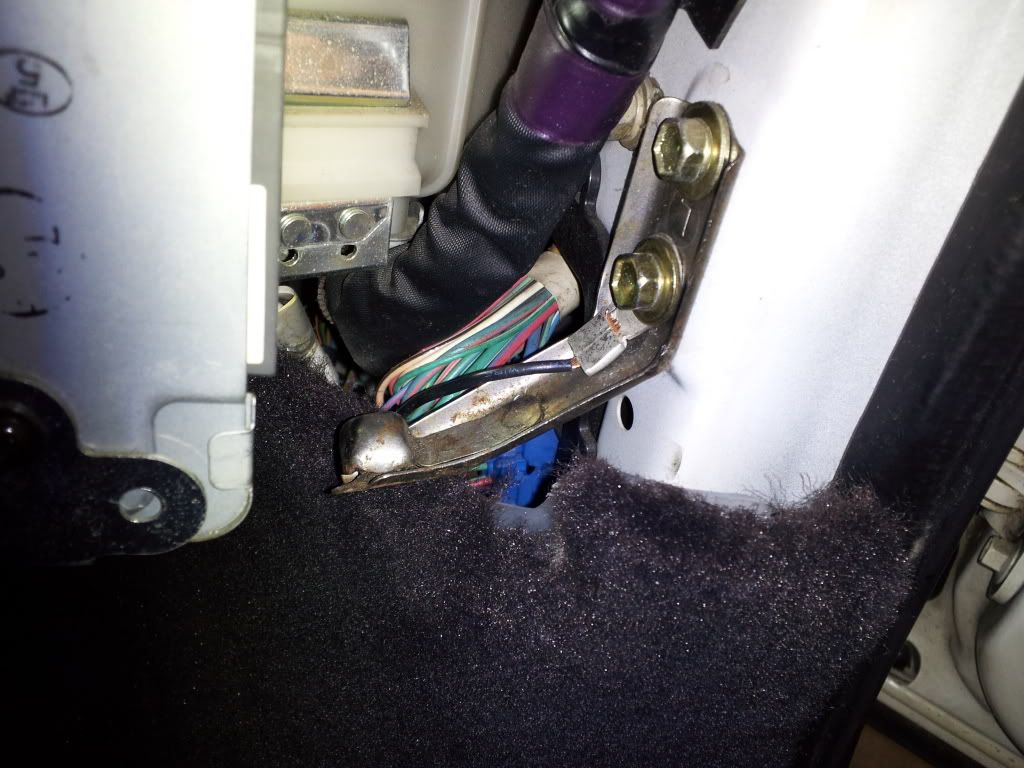
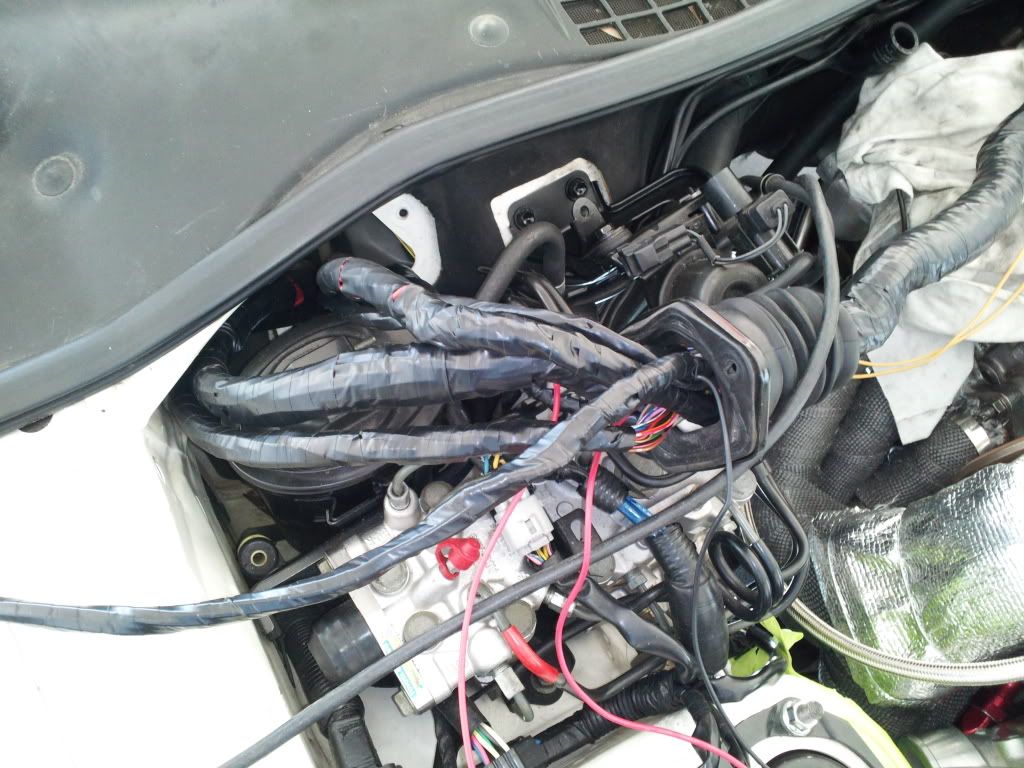
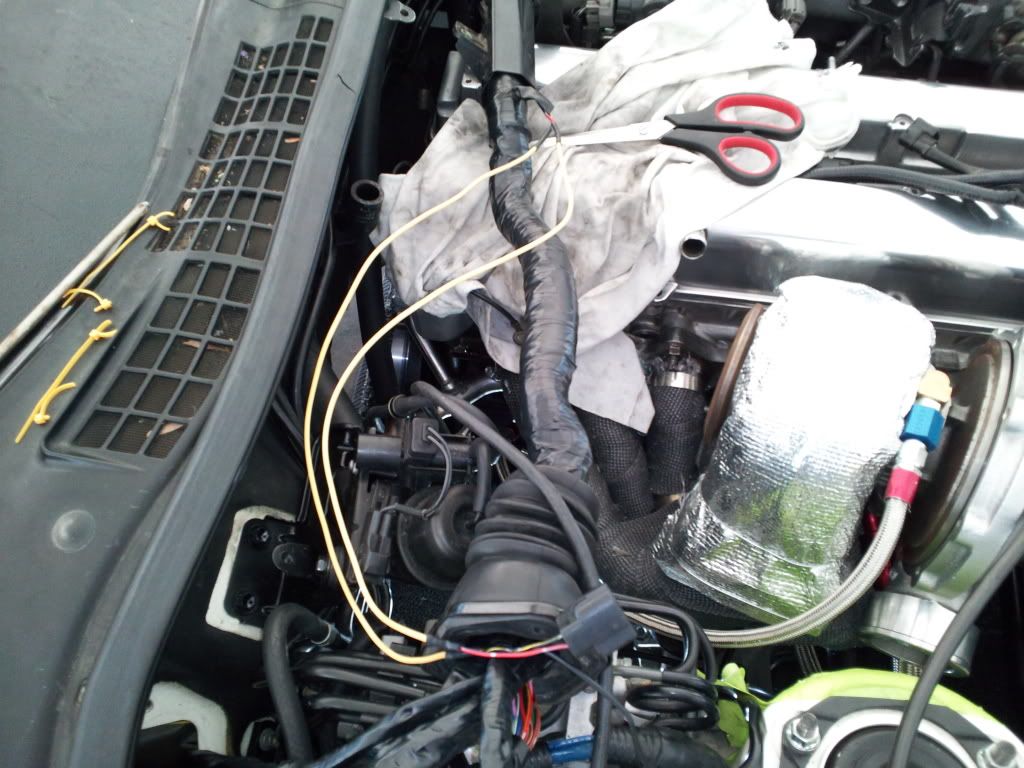
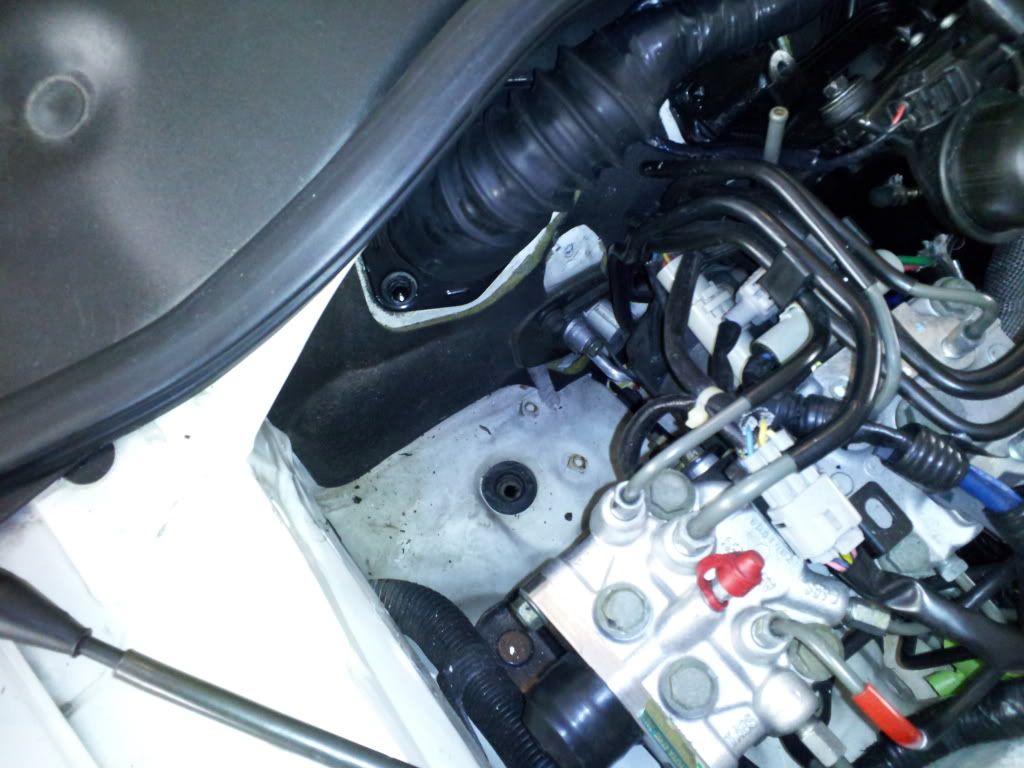
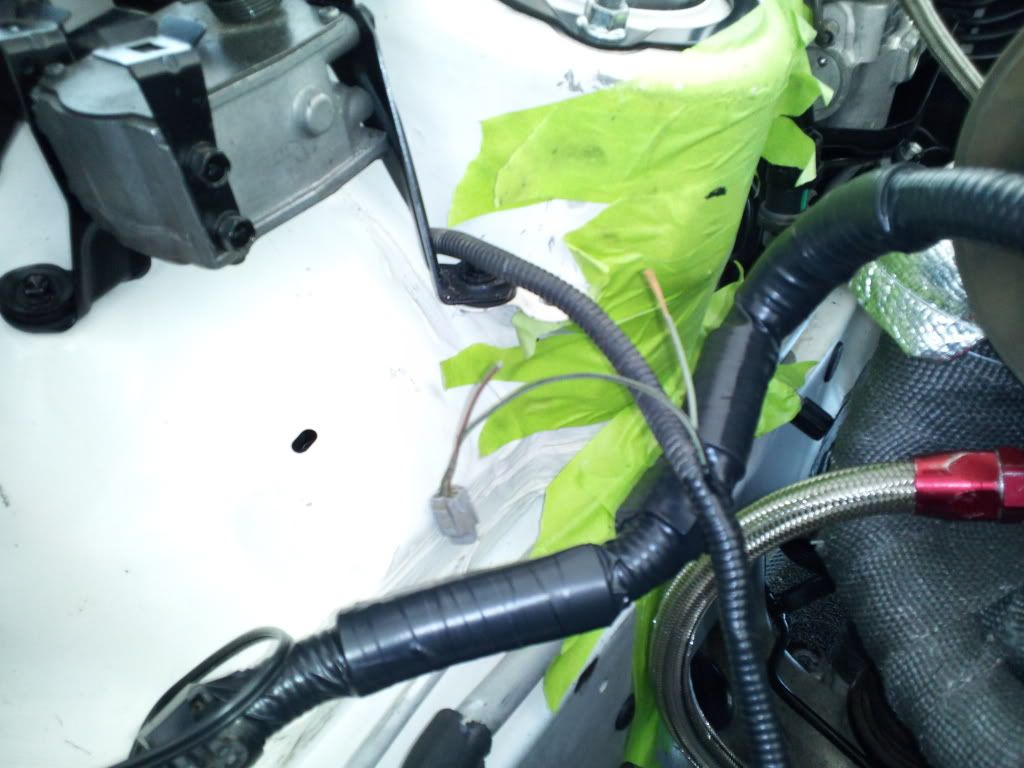
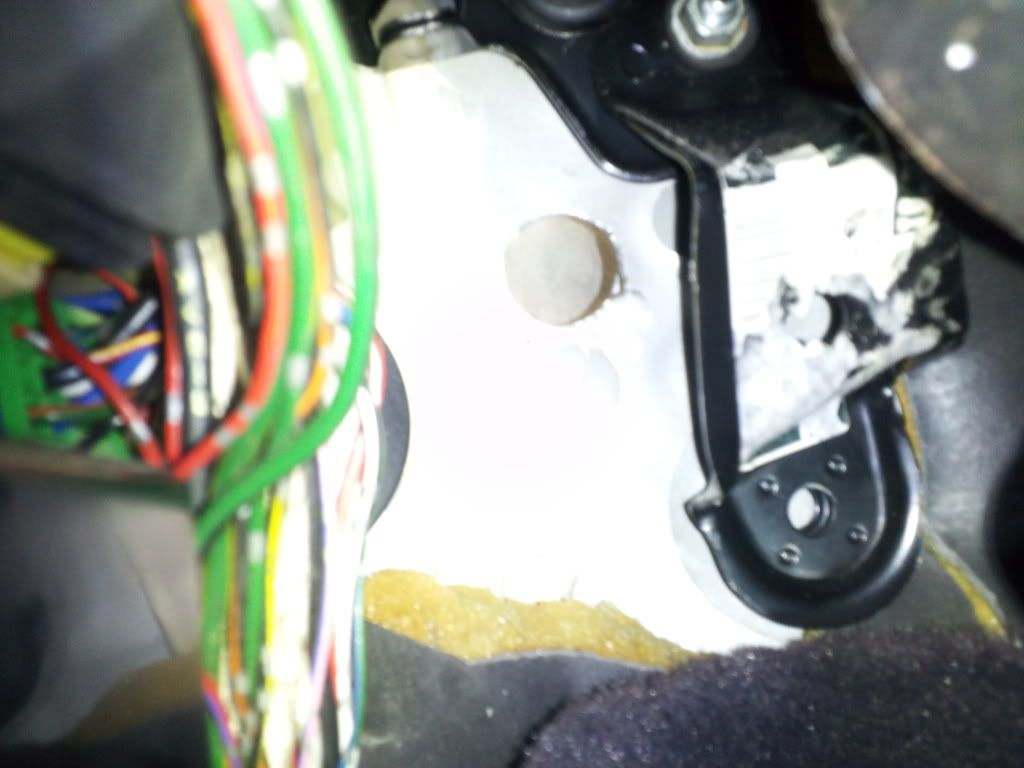
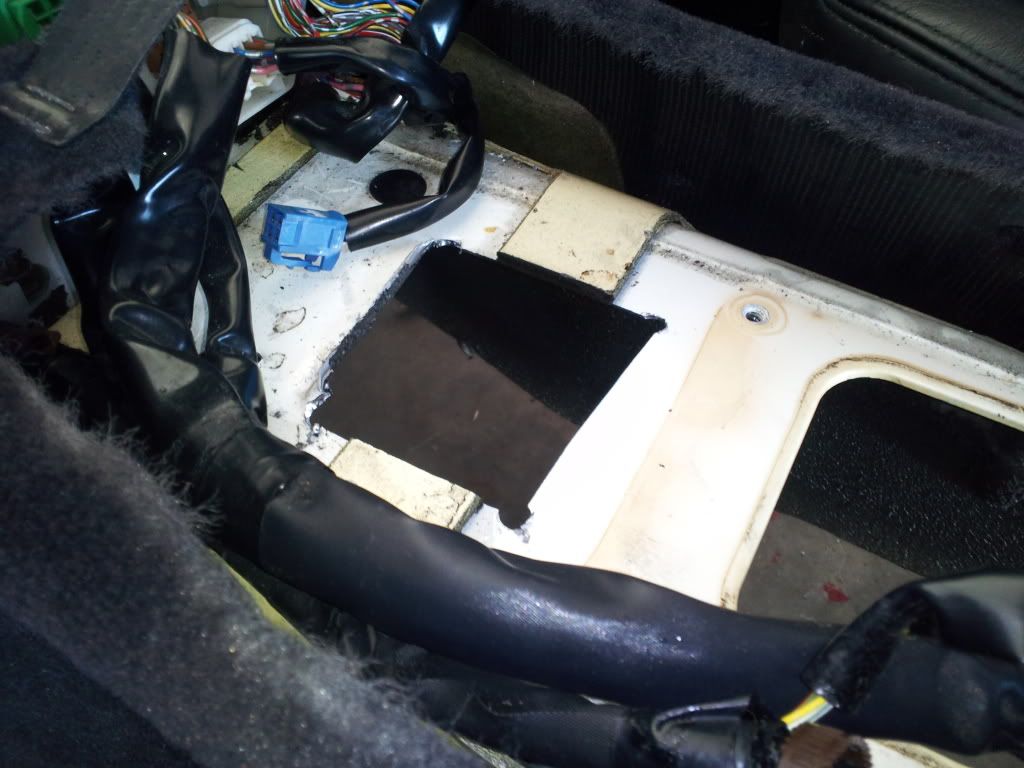
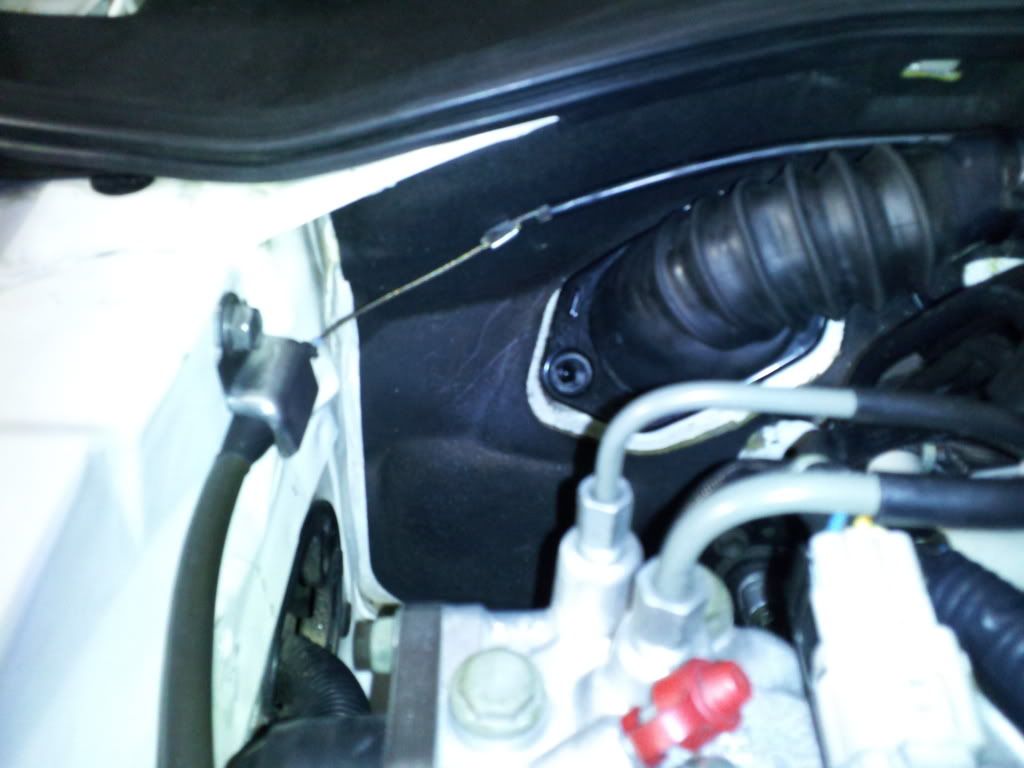
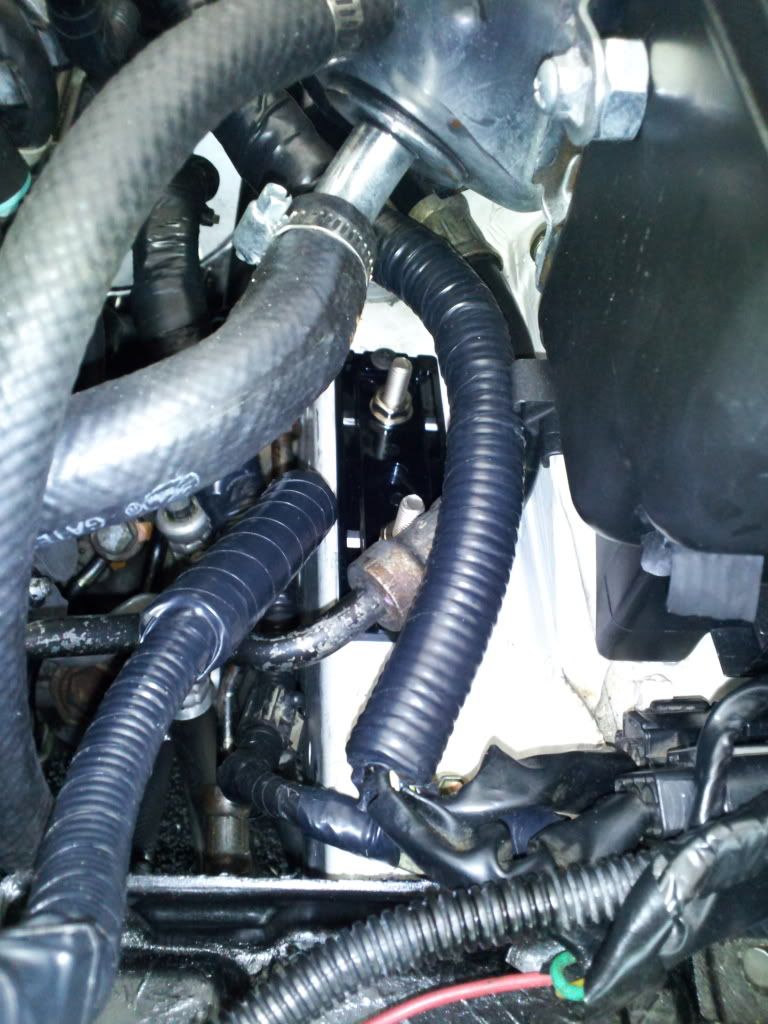
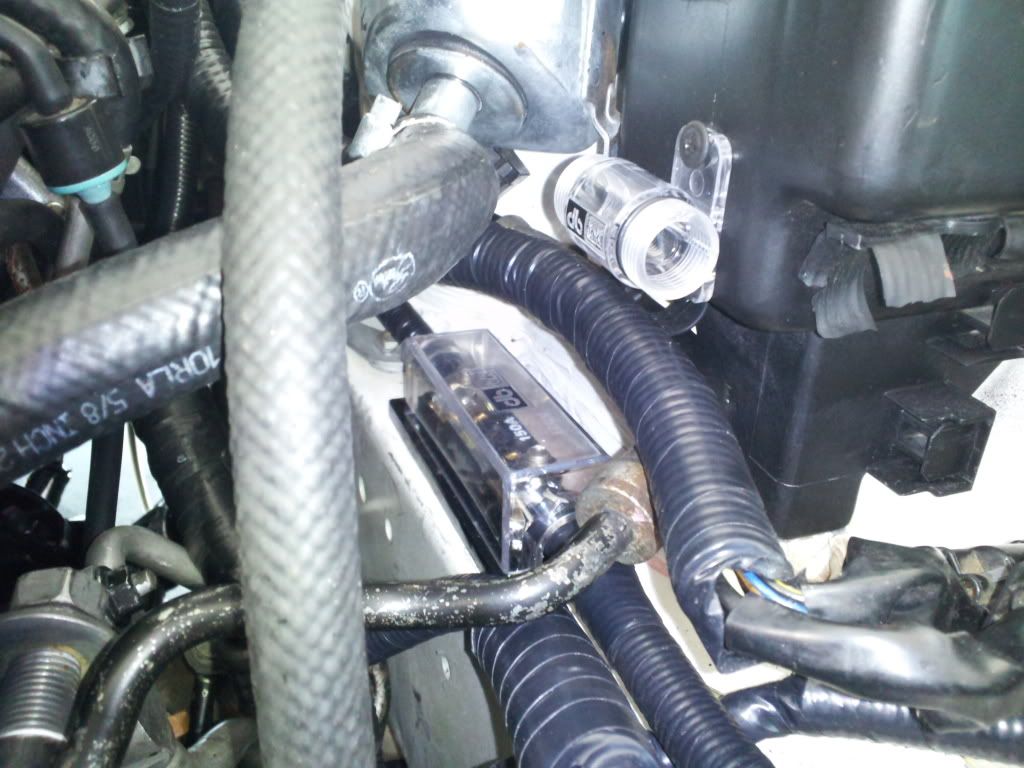
Next up was cutting a perfect hole to allow the vacuum hoses and the 4 gauge amplifier wires to come through the firewall on the driver side.
Grabbed the 12 volt wires from the other side and ran to the driver side. I need to tie these in once I power this thing up. These are for the ignitor and the coils. Need to go to a 12 volt switched supply somewhere in the driver side kick panel.
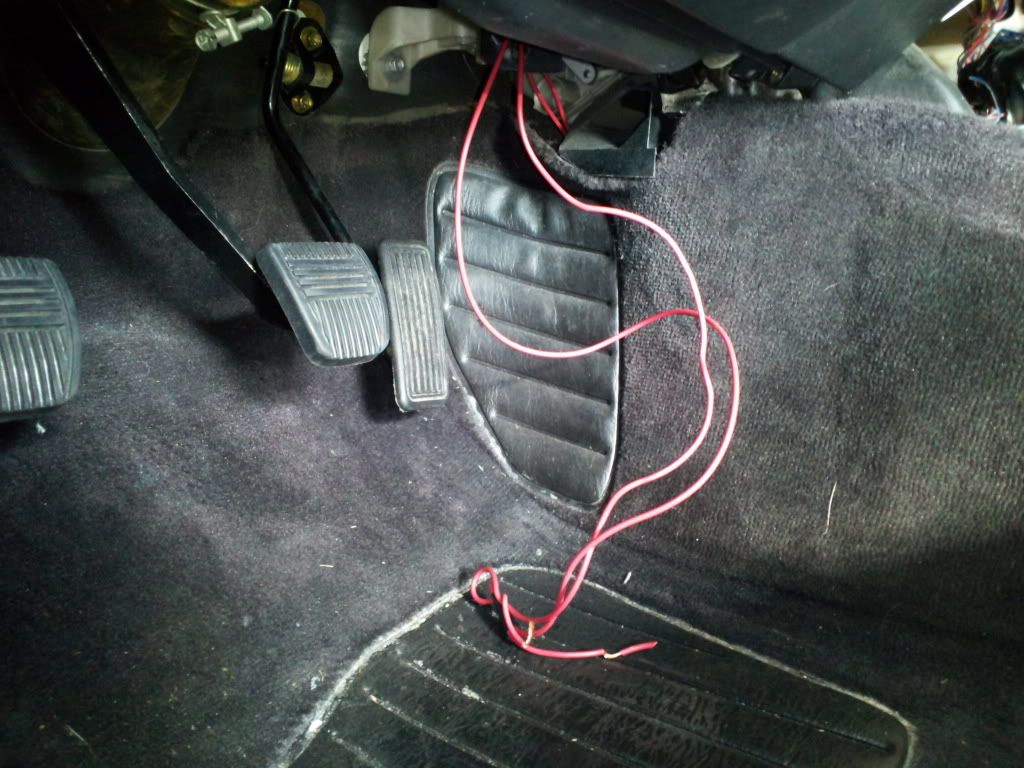
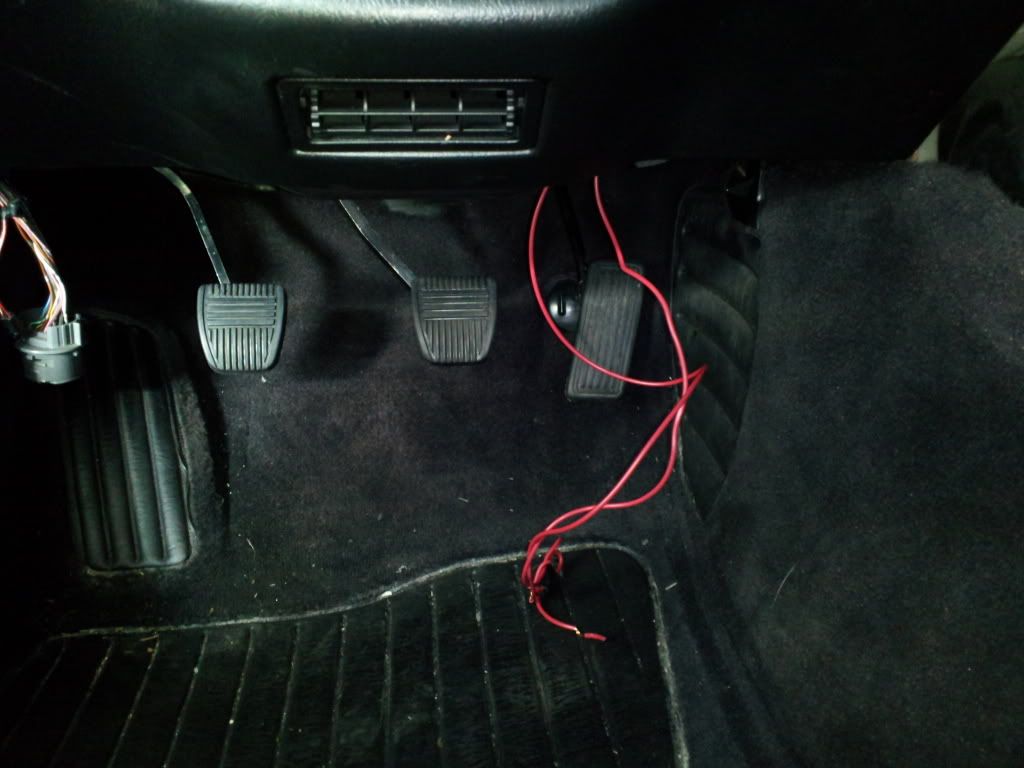
Pictures of the pedals and the wiring again.. I know... its boring..
The last thing was measured the tranny from the bellhousing and cut a hole in the tunnel. Its about 3 inches wide by 3 inches in length. I measured twice and cut once. I will see where the 2 inch extension places the shifter. If I dont like the shifter placement in the car, I will have it extended again to suit my needs. Once fitted and l like the placement, I will make an aluminum piece to cover all the holes and gaps. I also will dynamat the tunnel housing also to help keep the heat out. I hope I can do this without taking the carpet out.
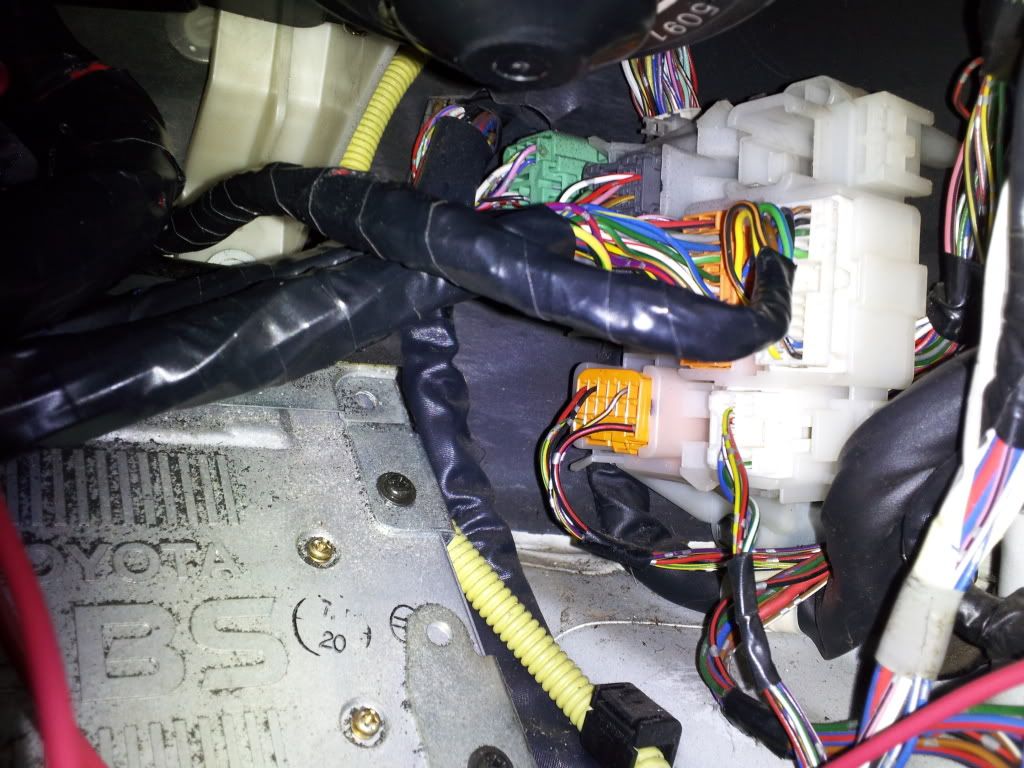
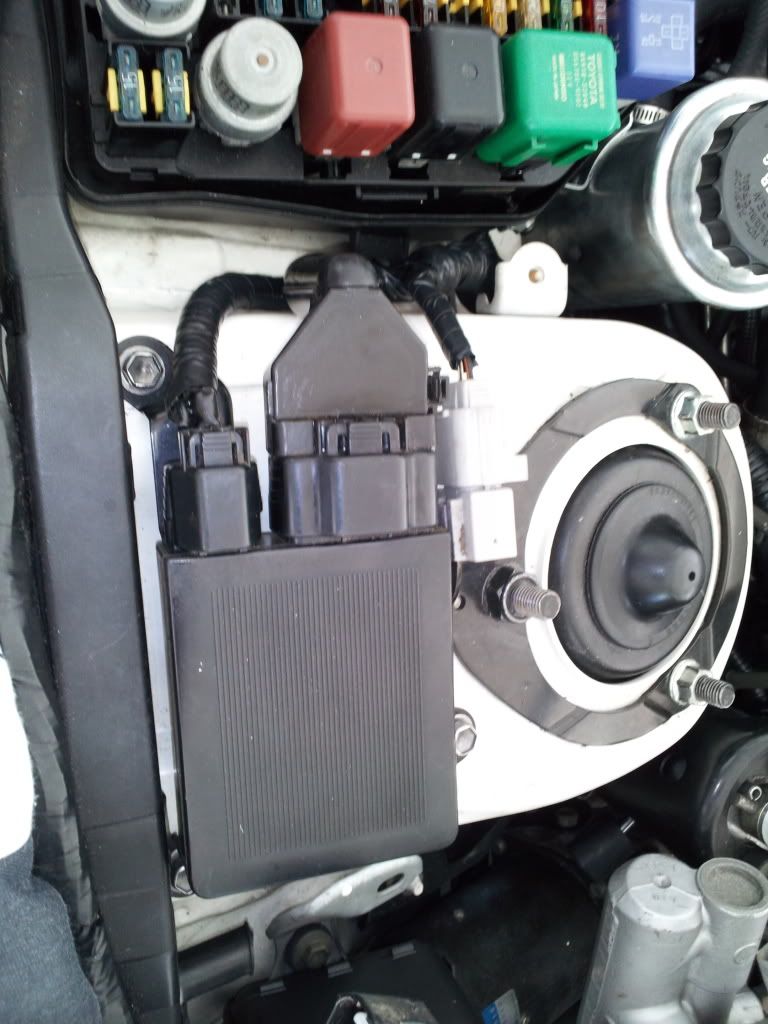
I also resecured the 2 boxes in the driver side under the dash. What a pain to get them back in place and plugged in. I hope they dont rattle.
Removed the charcoal canister to mount the new oil catch can..this is held in by three 10mm bolts
Once this is complete removed, you need to tie these together by a fuel type line and place a universal inline fuel filter. This will eliminate the smell of gas through the hottest days and in the cabin.
Well I thought I was done with the wiring, found out you have to extend the plug that ties in your rack and pinion. I extended mine 12 inches and was plenty, then zip tied it to the rack and one hose. Just tie it back out of the way behind the alternator. Its the fartherest plug on the right. The other three plugs left over just tie them out of the way.
How is extended it..
This is how I tied it under the car after the extension of the one plug to the rack.
Next up is the information that you need to know. You have to reuse the stock wiring on the passenger side coming from the fender. This supplies power to the alternator, thus the reason to tie the other three out of the way on the 1JZ harness. In other words use the stock 400 wiring for the alternator. Use this bolt location to hold the wiring in place. I went ahead and retaped it up for a better appearance.
Once this was wired and zip tied, I went to the passenger side and tied in the ground wire to the frame. This look like a very good secure spot..
Next up was cutting a perfect hole to allow the vacuum hoses and the 4 gauge amplifier wires to come through the firewall on the driver side.
Grabbed the 12 volt wires from the other side and ran to the driver side. I need to tie these in once I power this thing up. These are for the ignitor and the coils. Need to go to a 12 volt switched supply somewhere in the driver side kick panel.
Pictures of the pedals and the wiring again.. I know... its boring..
The last thing was measured the tranny from the bellhousing and cut a hole in the tunnel. Its about 3 inches wide by 3 inches in length. I measured twice and cut once. I will see where the 2 inch extension places the shifter. If I dont like the shifter placement in the car, I will have it extended again to suit my needs. Once fitted and l like the placement, I will make an aluminum piece to cover all the holes and gaps. I also will dynamat the tunnel housing also to help keep the heat out. I hope I can do this without taking the carpet out.
I also resecured the 2 boxes in the driver side under the dash. What a pain to get them back in place and plugged in. I hope they dont rattle.
Last edited by 1JZPWRD; 01-06-12 at 06:47 PM.
01-08-12, 01:45 PM
#354
1JZ Single SC400
Thread Starter
iTrader: (59)
Join Date: Jan 2009
Location: Alabama, Roll Tide!
Posts: 8,518
Likes: 0
Received 15 Likes
on
12 Posts
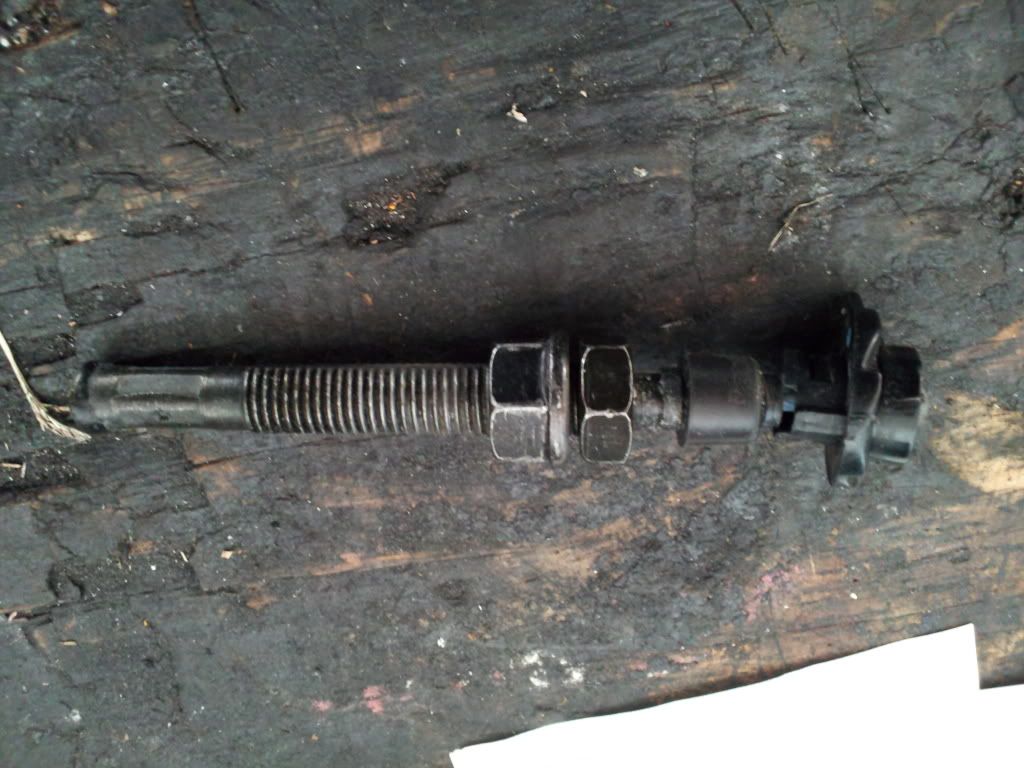
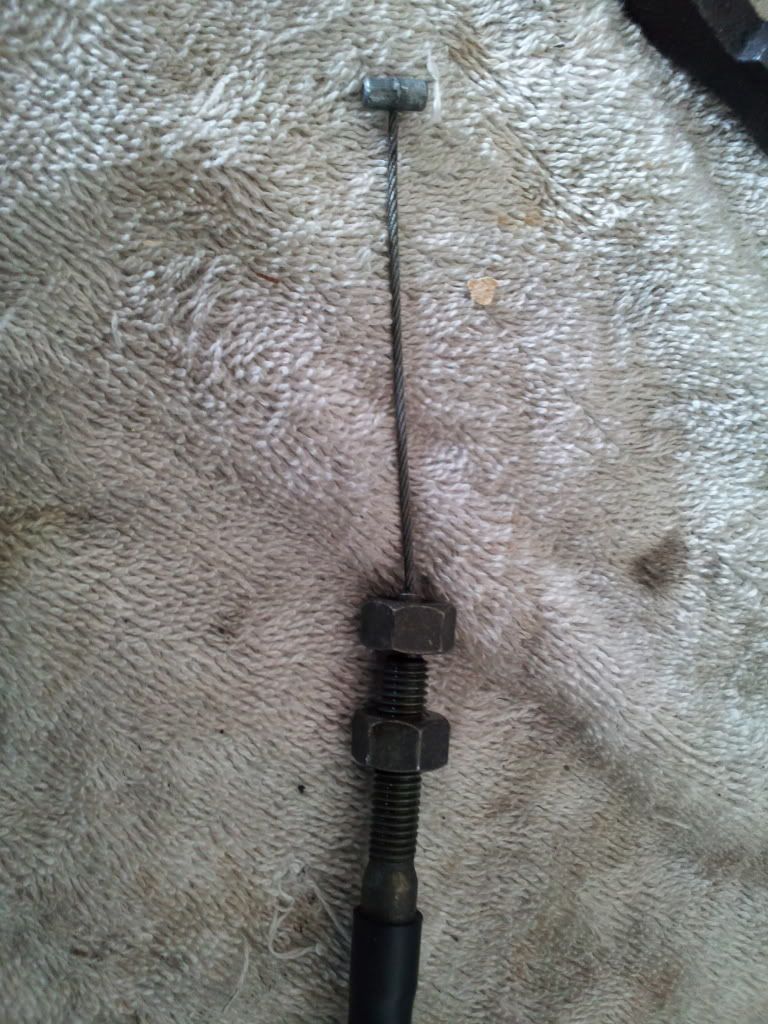
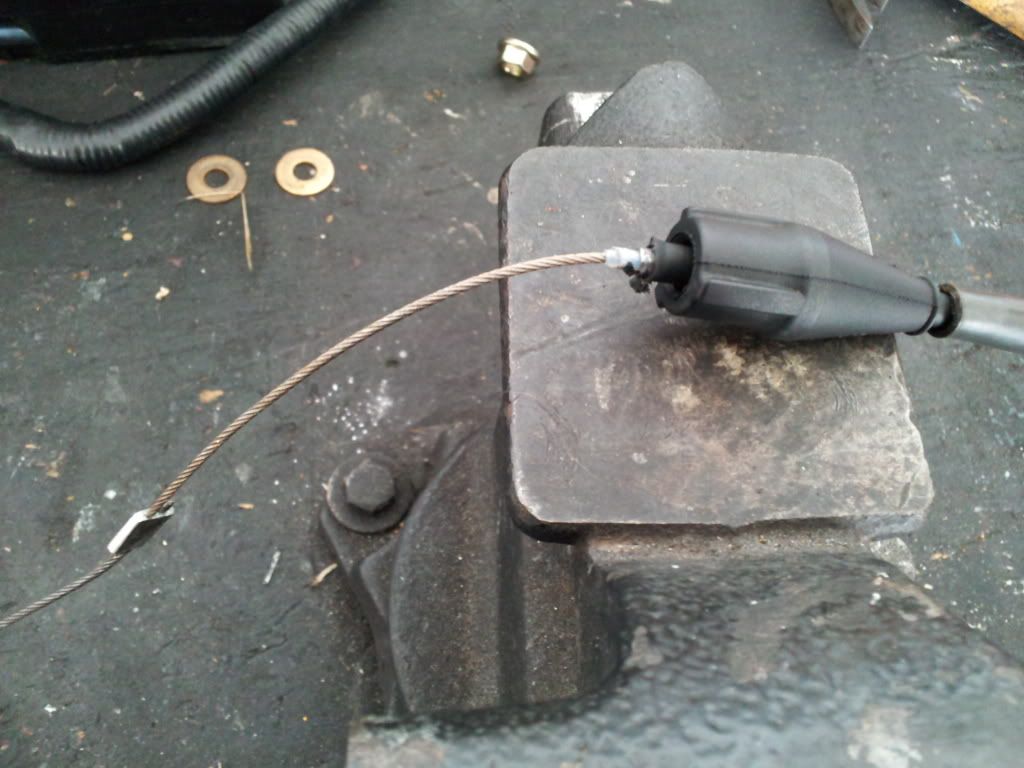
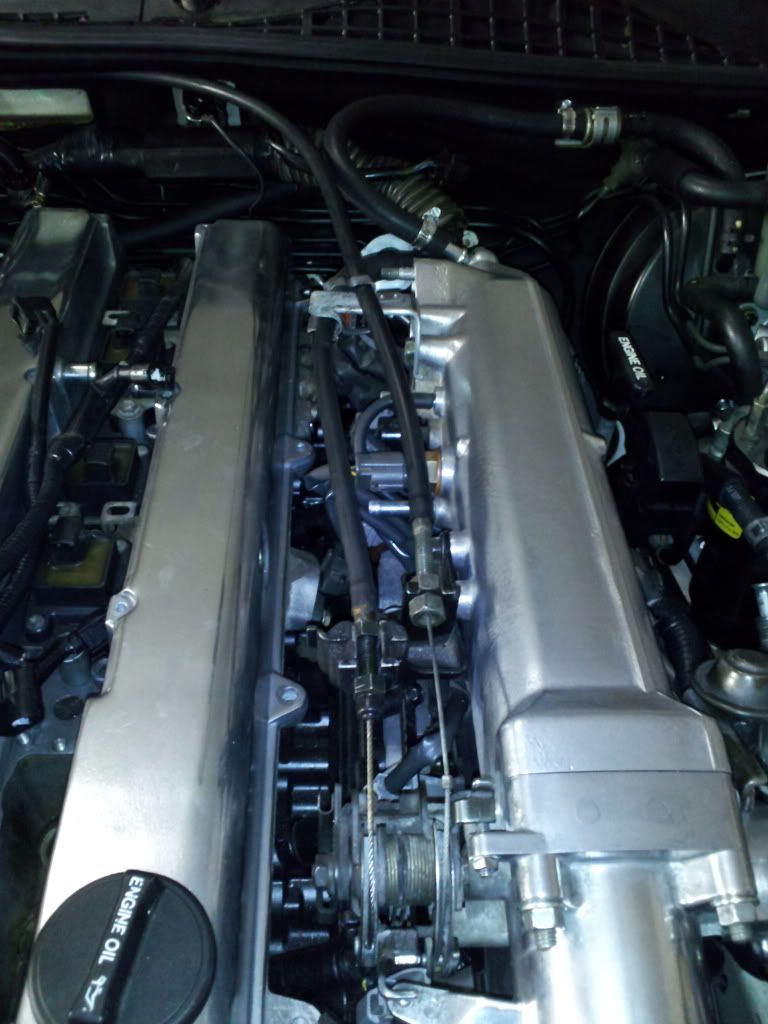
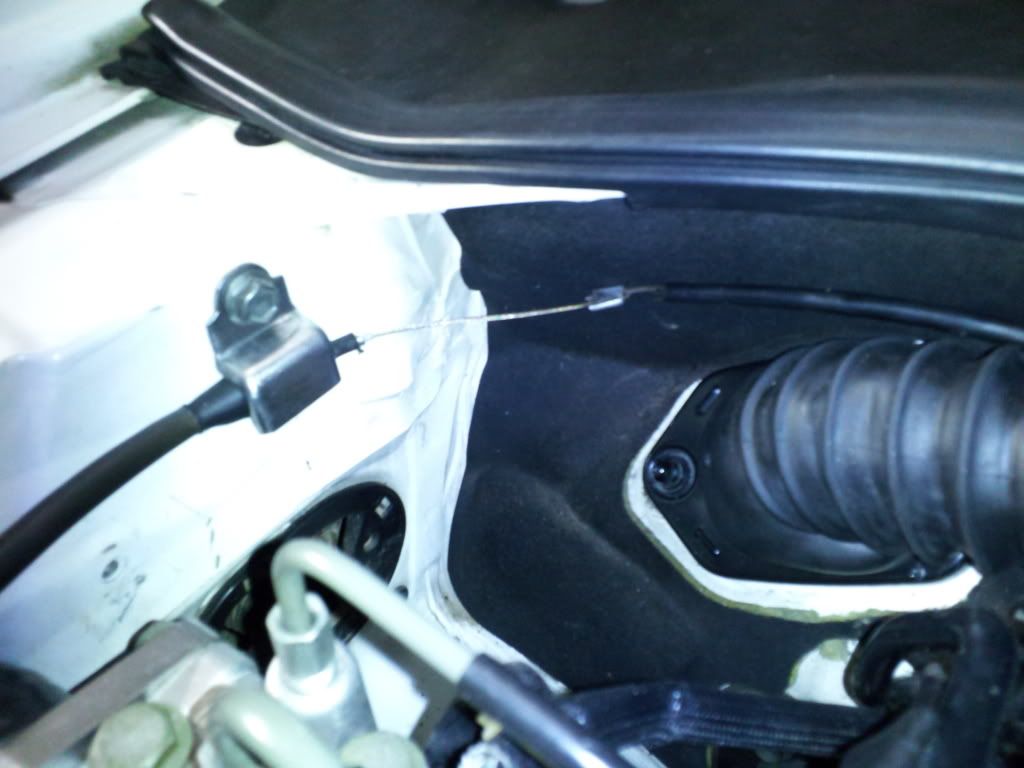
Made me the cruise cable today using the stock one and the one from the 1JZ auto tranny. Figured no one wanted it, so I used the cable. Here is some pictures along the way. You get the idea of how I done it. If you have any questions, just ask. I will going to do a DIY, but most people usually doesnt use the cruise. I am different and I want everything to work.
01-08-12, 02:01 PM
#355
Ok, and I'm certainly not the one to push the issue of haste, but..
WTF 1992 Lexus? Start this thing, right now.
You are going to be awful sore, when you find out that things go haywire on the first startup, and all that pretty stuff is going to have to be undressed again.
If I get a startup video before you, then something is going too leisurely . I'm talking about two days until mine is done. This is after 1.3 years of a basic engine swap!!!
01-08-12, 02:22 PM
#356
Lead Lap
iTrader: (3)
Join Date: May 2008
Location: Misawa,Japan or Deployed
Posts: 455
Likes: 0
Received 0 Likes
on
0 Posts
Made me the cruise cable today using the stock one and the one from the 1JZ auto tranny. Figured no one wanted it, so I used the cable. Here is some pictures along the way. You get the idea of how I done it. If you have any questions, just ask. I will going to do a DIY, but most people usually doesnt use the cruise. I am different and I want everything to work.
01-08-12, 03:39 PM
#357
1JZ Single SC400
Thread Starter
iTrader: (59)
Join Date: Jan 2009
Location: Alabama, Roll Tide!
Posts: 8,518
Likes: 0
Received 15 Likes
on
12 Posts
Ok, and I'm certainly not the one to push the issue of haste, but..
WTF 1992 Lexus? Start this thing, right now.
You are going to be awful sore, when you find out that things go haywire on the first startup, and all that pretty stuff is going to have to be undressed again.
If I get a startup video before you, then something is going too leisurely . I'm talking about two days until mine is done. This is after 1.3 years of a basic engine swap!!!
WTF 1992 Lexus? Start this thing, right now.
You are going to be awful sore, when you find out that things go haywire on the first startup, and all that pretty stuff is going to have to be undressed again.
If I get a startup video before you, then something is going too leisurely . I'm talking about two days until mine is done. This is after 1.3 years of a basic engine swap!!!
You will beat me to the startup, but in the end, I will be more happier due to the length of anticipation and knwoing the progress of the build.
01-08-12, 03:42 PM
#358
1JZ Single SC400
Thread Starter
iTrader: (59)
Join Date: Jan 2009
Location: Alabama, Roll Tide!
Posts: 8,518
Likes: 0
Received 15 Likes
on
12 Posts
I did a 1100 mile one way trip with my cruise control sitting in the trunk(JHOT gave me the cruise box and cable) , while there I decided I was putting it in no matter how I had to do it. Works like a champ. General precaution that really woke me up was don't use it when its raining. On a decent climb in the mountains it boosted up to maintain and set me sideways.
More progress will be coming as parts arrive.
01-14-12, 09:02 PM
#359
1JZ Single SC400
Thread Starter
iTrader: (59)
Join Date: Jan 2009
Location: Alabama, Roll Tide!
Posts: 8,518
Likes: 0
Received 15 Likes
on
12 Posts
My fuel pressure regulator came in the mail today along with the tranny mount. The tranny mount is one I already had. WTF? Now I need some clarity on which crossmember for the tranny support I need? I bought this one from a W58. All the research I done, I thought this one would work, but the holes dont line up, its the same as the one for my 400 I already had.
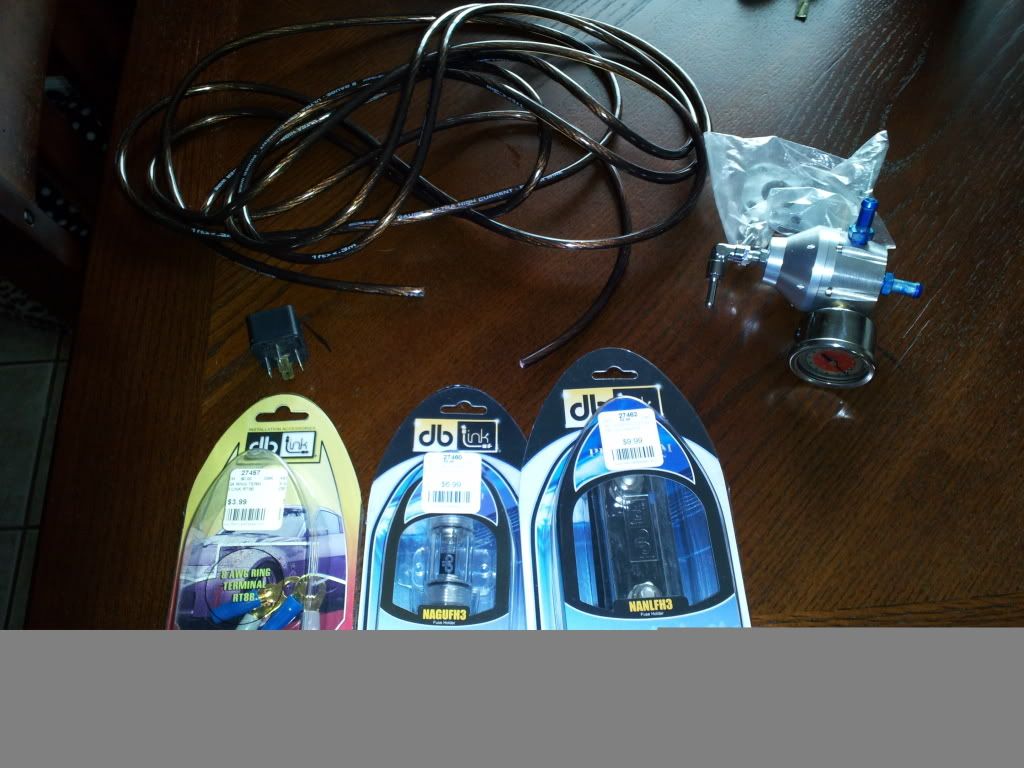
I bought some 10 gauge wire, connectors, and a relay today to run my fuel pump 12 volt constant mod. I only tooks a few pictures. I also made a custome bracket for the fuel pressure regulator. It turned out good, I think..
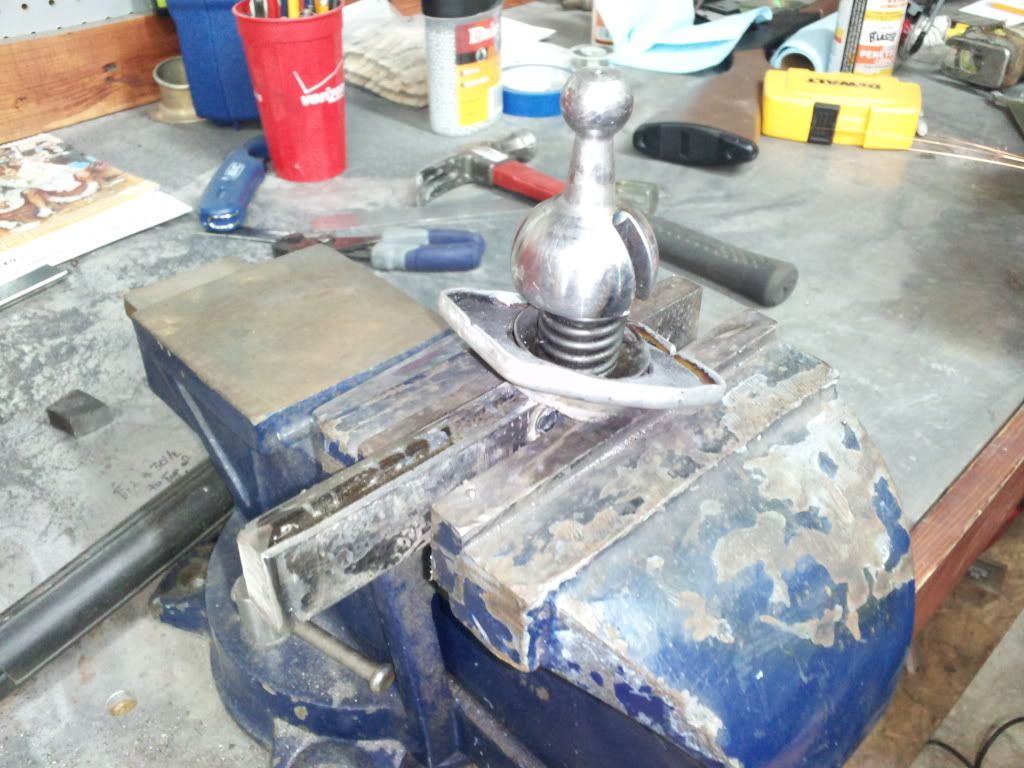
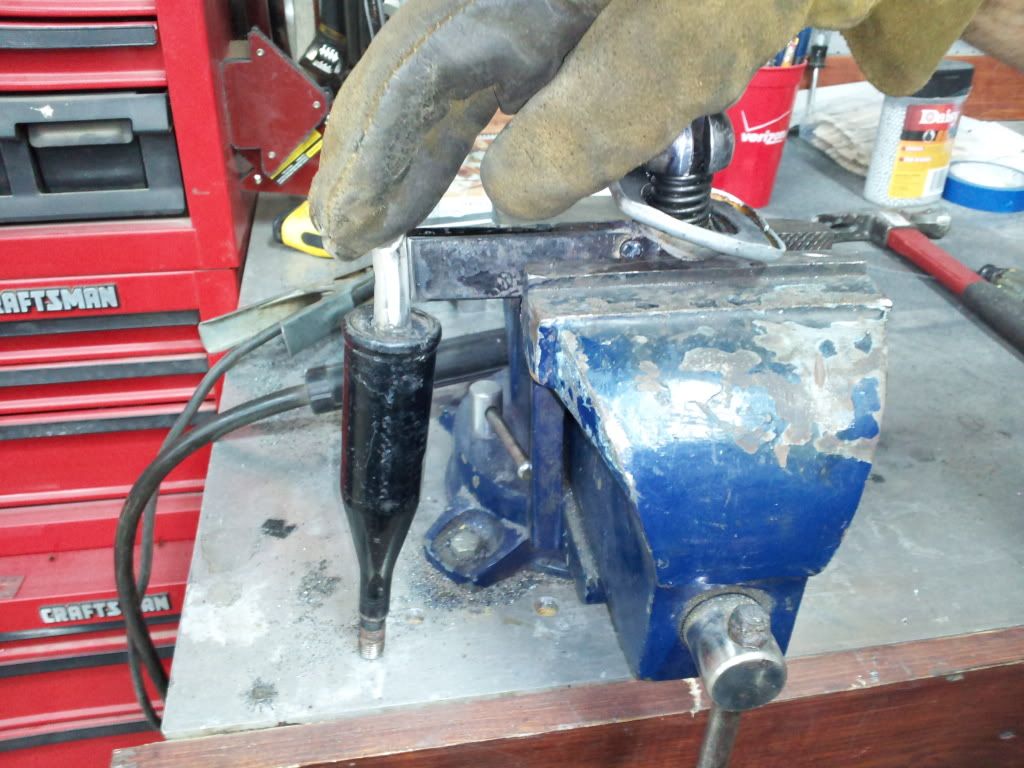
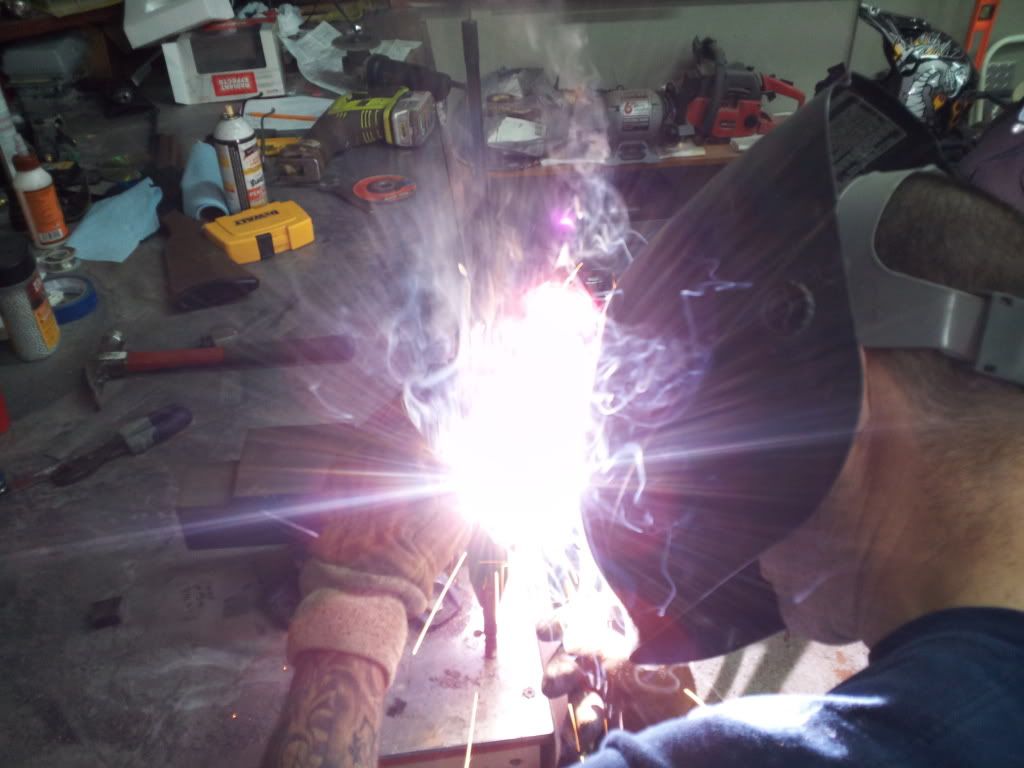
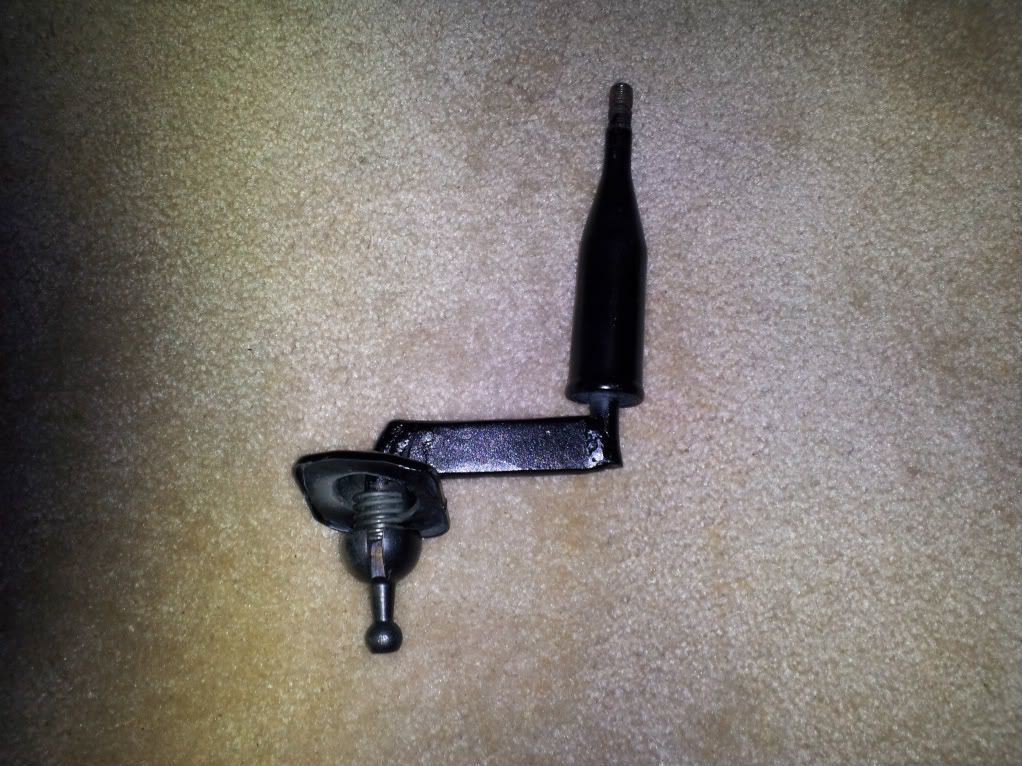
I also had my shifter extended again. Exactly 4 inches... My buddy is a good welder, and he did an awesome job on it.
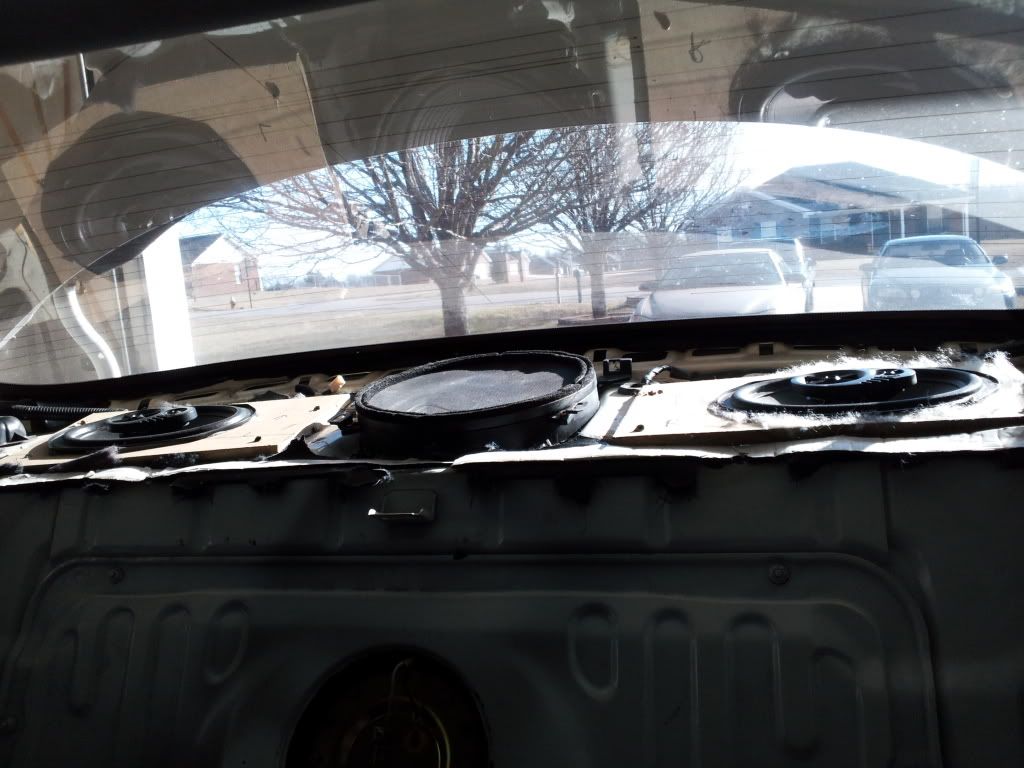
Put my 10 inch factory sub back in...Yes those are 6x9's by JL Audio in the rear also...
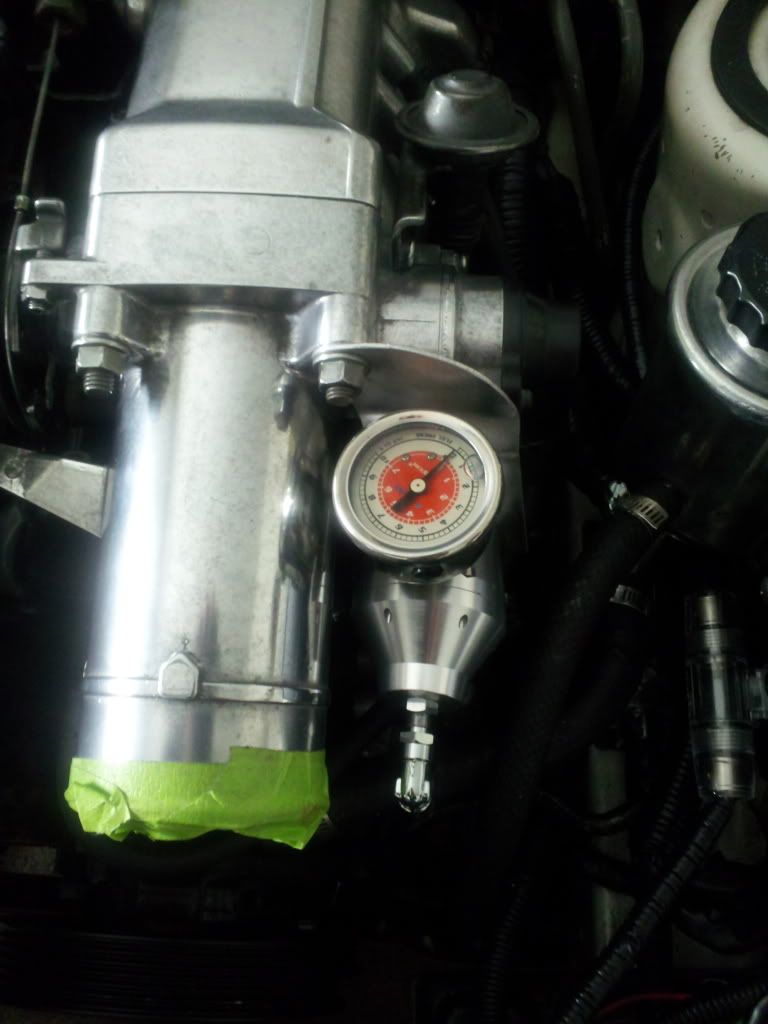

Will make a bracket tomorrow for the map sensor. The barrel fuse holder is for the fuel pump and the flat blade type is for the amps in the rear.. 150 amp fuse...
I bought some 10 gauge wire, connectors, and a relay today to run my fuel pump 12 volt constant mod. I only tooks a few pictures. I also made a custome bracket for the fuel pressure regulator. It turned out good, I think..
I also had my shifter extended again. Exactly 4 inches... My buddy is a good welder, and he did an awesome job on it.
Put my 10 inch factory sub back in...Yes those are 6x9's by JL Audio in the rear also...
Will make a bracket tomorrow for the map sensor. The barrel fuse holder is for the fuel pump and the flat blade type is for the amps in the rear.. 150 amp fuse...
Last edited by 1JZPWRD; 01-14-12 at 09:08 PM.
01-15-12, 05:04 PM
#360
Lexus Test Driver
iTrader: (44)
Join Date: Jan 2007
Location: Maryland /Germantown
Posts: 5,139
Likes: 0
Received 7 Likes
on
7 Posts
If you are running the stoc fuel rail just keep the stock fuel pressure regulator it works fine for 5XXrwhp atleast i have used the 2jzge one at 5XXrwhp.
If you wanna go aftermarket, you must buy a real nice one because that's one thing you don't want to fail because you will have to do it all over again.
Nice it's coming along!!!
tia
If you wanna go aftermarket, you must buy a real nice one because that's one thing you don't want to fail because you will have to do it all over again.
Nice it's coming along!!!
tia