[Build] Chris's SC300 Drift Car
 02-24-12 | 11:19 PM
#17

Thread Starter
Pit Crew
Joined: Jan 2008
Posts: 112
Likes: 1
From: Nevada
Ahhhh damn... Well video editing is kind of lame... I better get everything right in one take from now on. I got a Video DIY coming tomorrow. Its funny cause I suck at being in front of a camera...  Ill also add some pics of the finished product and some new updates...
@WRD4chano: Theres not a ton of things you can do... UZmotor, LSx motor swap, and 1J/2JZ-GTE. Im going the 2J route. As far as the specifics I like to stay focused on one task at a time so I can get things done. I should be talking about the motor setup and what not sometime around the middle or the end of March.
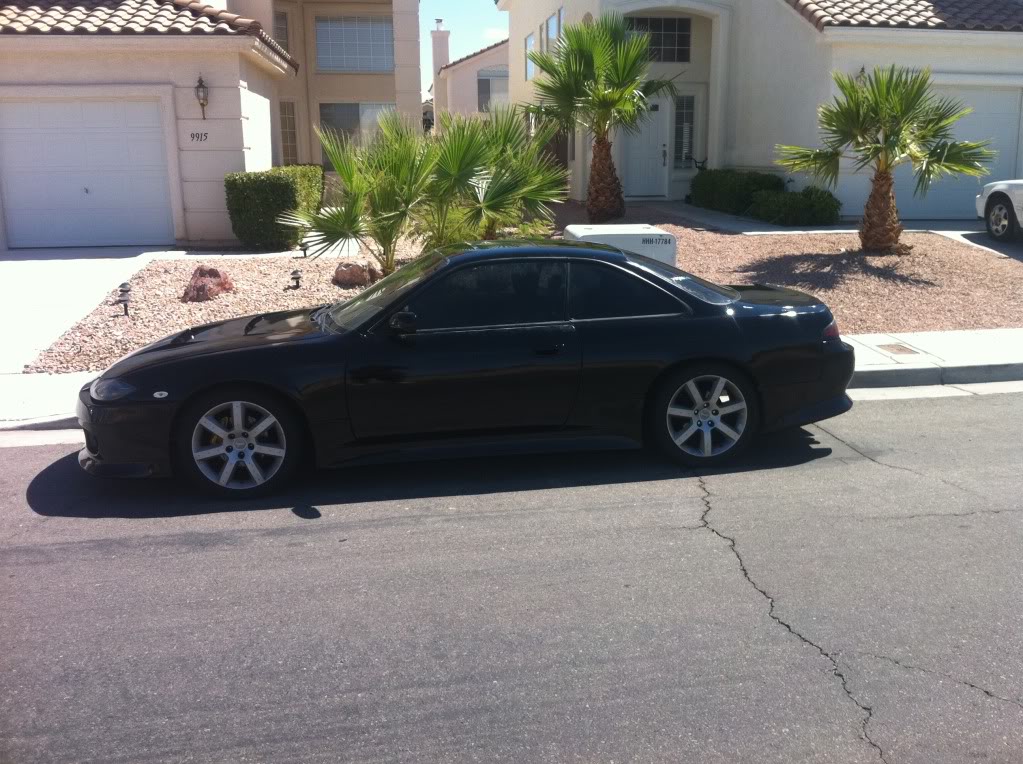
Oh and for that guy that asked about the 240 it looks like A$$ so im going to show you what it used to look like before I downed it. Im sure ill work on it when I get bored. Thats my girlfriends car lol
Kind of cool update tomorrow...
Ill also add some pics of the finished product and some new updates...@WRD4chano: Theres not a ton of things you can do... UZmotor, LSx motor swap, and 1J/2JZ-GTE. Im going the 2J route. As far as the specifics I like to stay focused on one task at a time so I can get things done. I should be talking about the motor setup and what not sometime around the middle or the end of March.
Oh and for that guy that asked about the 240 it looks like A$$ so im going to show you what it used to look like before I downed it. Im sure ill work on it when I get bored. Thats my girlfriends car lol
Kind of cool update tomorrow...
02-25-12 | 11:15 AM
#18
Thread Starter
Pit Crew
Joined: Jan 2008
Posts: 112
Likes: 1
From: Nevada
February 25,2012
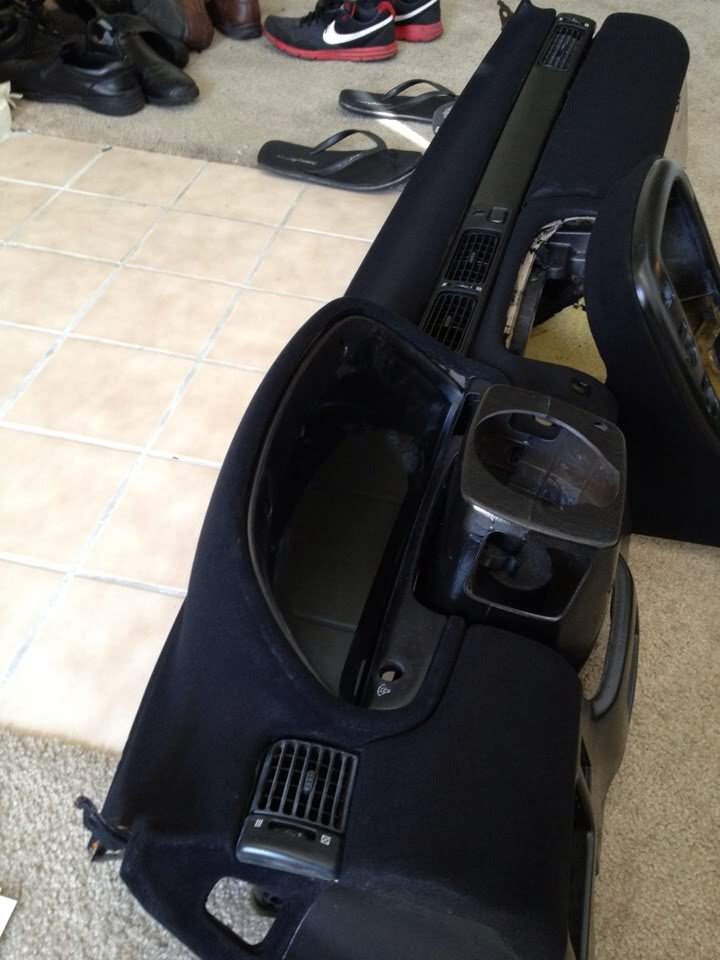
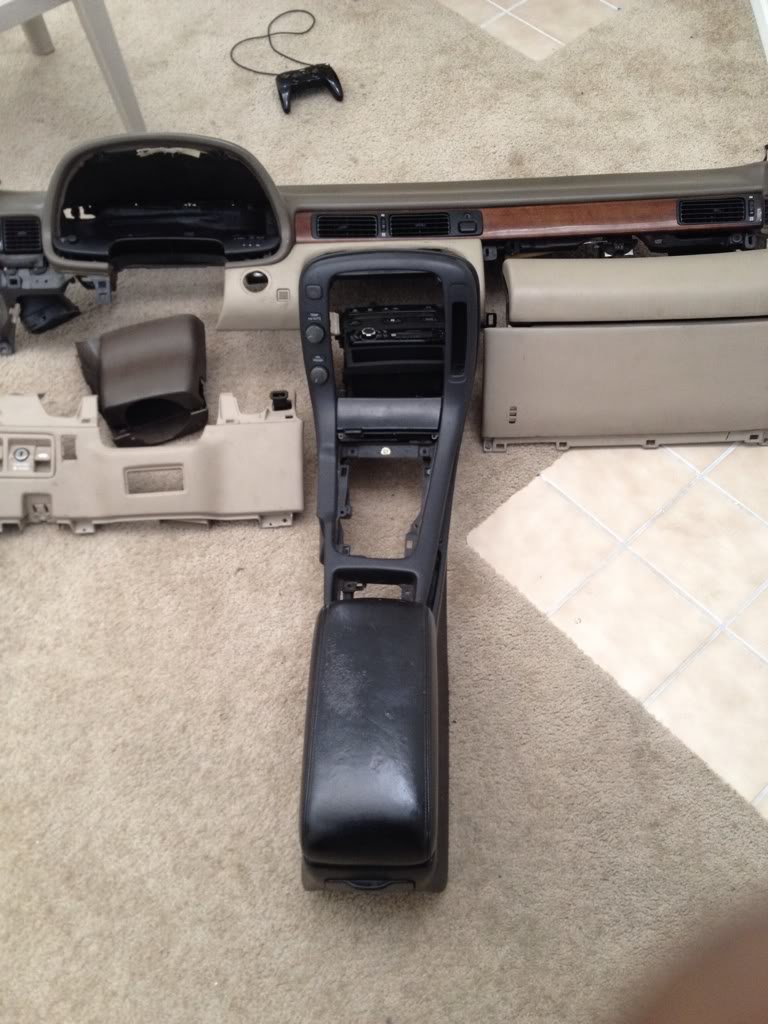
Who knew I sucked so bad a painting... D: even if it was rattle canned...hahahah Anyway mini update until the shop opens up... I tried my hand at painting some interior parts satin black out of a rattle can... I imagine you know how these turned out so If you have these pieces in black Id like to buy em from you in case the project/plan falls through. (The plan being to put a million coats on it and then wet sand and buff it out...!)
Anyway this is going to be all of the interior that I will be keeping in the car:
* Top half of the dash
* Center console
* Center console garnish
* Steering column covers
* Glove box
* Armrest box and all garnish in between lol
This basically...
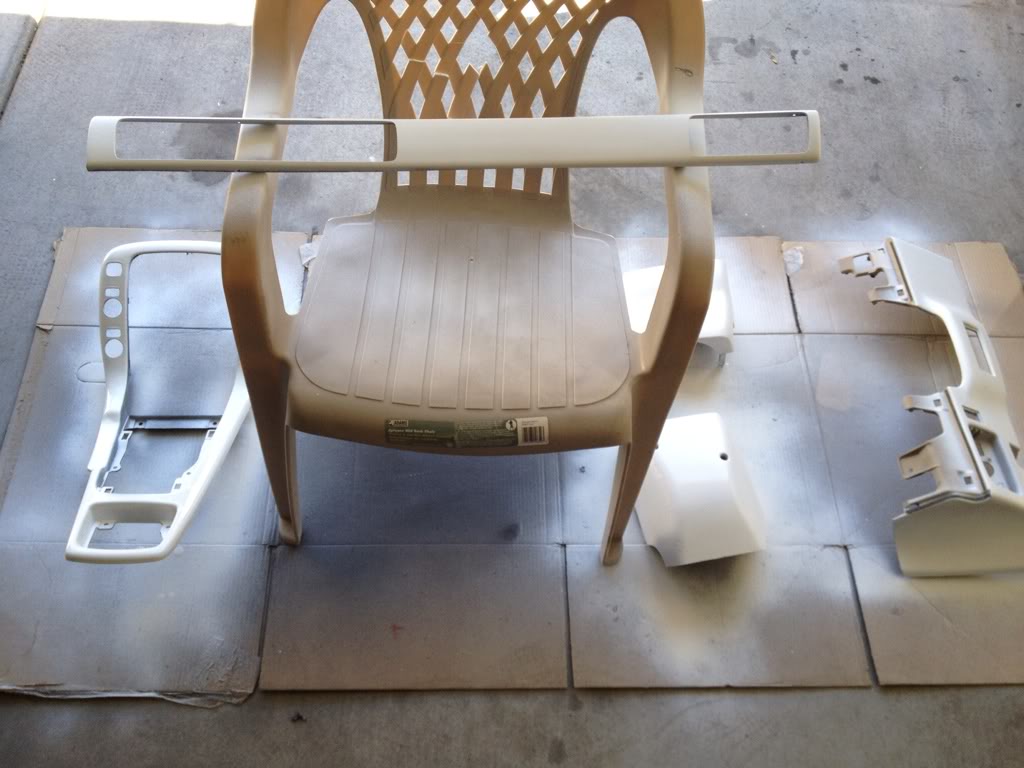
Here's the half-way point of the wood grain and some other bits being primered... WARNING: I SUCK AT THIS so there probably wont be a DIY lol
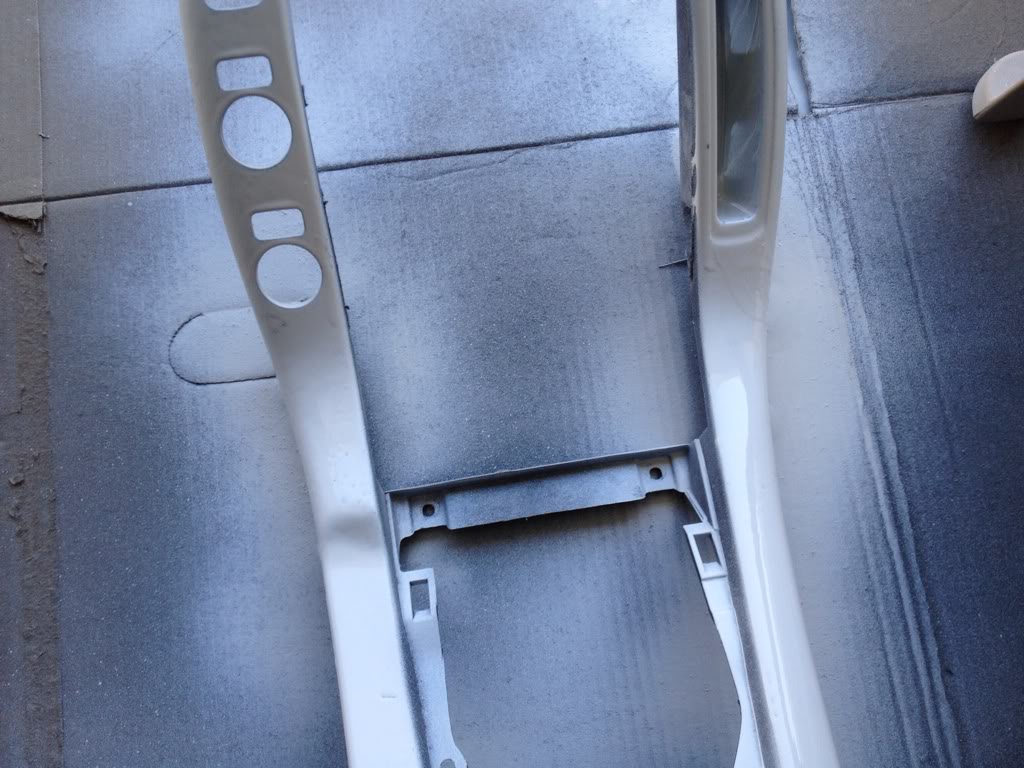
Ill probably show the finished product in like 7 days or so and in between ill show yall and maybe do a DIY for flocking dashes if I dont **** that up too lol
The kind of cool update is coming later on in the afternoon! Catch yall later!
Who knew I sucked so bad a painting... D: even if it was rattle canned...hahahah Anyway mini update until the shop opens up... I tried my hand at painting some interior parts satin black out of a rattle can... I imagine you know how these turned out so If you have these pieces in black Id like to buy em from you in case the project/plan falls through. (The plan being to put a million coats on it and then wet sand and buff it out...!)
Anyway this is going to be all of the interior that I will be keeping in the car:
* Top half of the dash
* Center console
* Center console garnish
* Steering column covers
* Glove box
* Armrest box and all garnish in between lol
This basically...
Here's the half-way point of the wood grain and some other bits being primered... WARNING: I SUCK AT THIS so there probably wont be a DIY lol
Ill probably show the finished product in like 7 days or so and in between ill show yall and maybe do a DIY for flocking dashes if I dont **** that up too lol
The kind of cool update is coming later on in the afternoon! Catch yall later!
03-02-12 | 12:25 PM
#19
Thread Starter
Pit Crew
Joined: Jan 2008
Posts: 112
Likes: 1
From: Nevada
March 2, 2012
I recently dropped the car off at the famous fab shop "Get Nutz Labs" out here in Vegas run by Formula D/XDC driver Forrest ****. The car will be getting a full Formula D spec rollcage and some other baller odds and ends done to the chassis. But for the time being I have to do all the little things to get me there and I hope to have it all taken care of and ready for the cage sometime in the middle/end of March. On to the work!
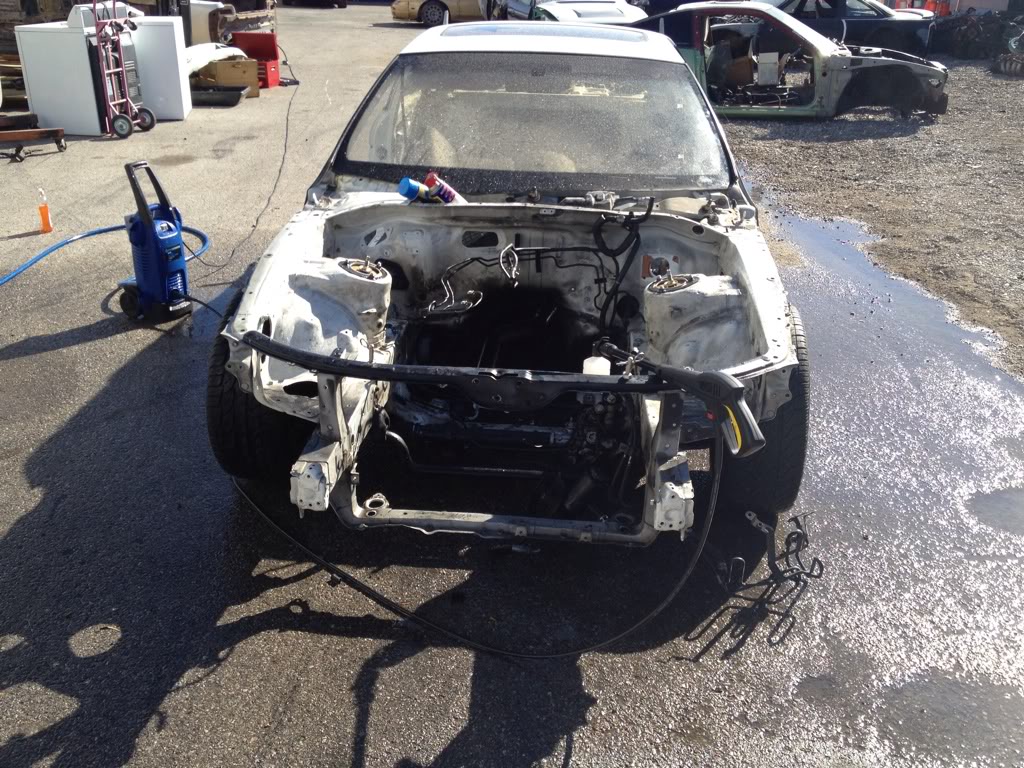
Here is the car as I am preparing to remove the engine. For a few months before officially starting the build I had been slowly stripping it out and removing the harness only to run into a few snags here and there. First one was removing the HP fuel line. I rounded the bolt so I had to cut it :[
Next I thought after letting the automatic tranny drain for a few days would have got all the ATF out. I was WRONG! Make sure that you cut the driveshaft and use it as a plug (if you are converting to manual, or get the car really high and have someone catch all the fluid. That torque converter holds a ton of ATF!!!! >:[ )
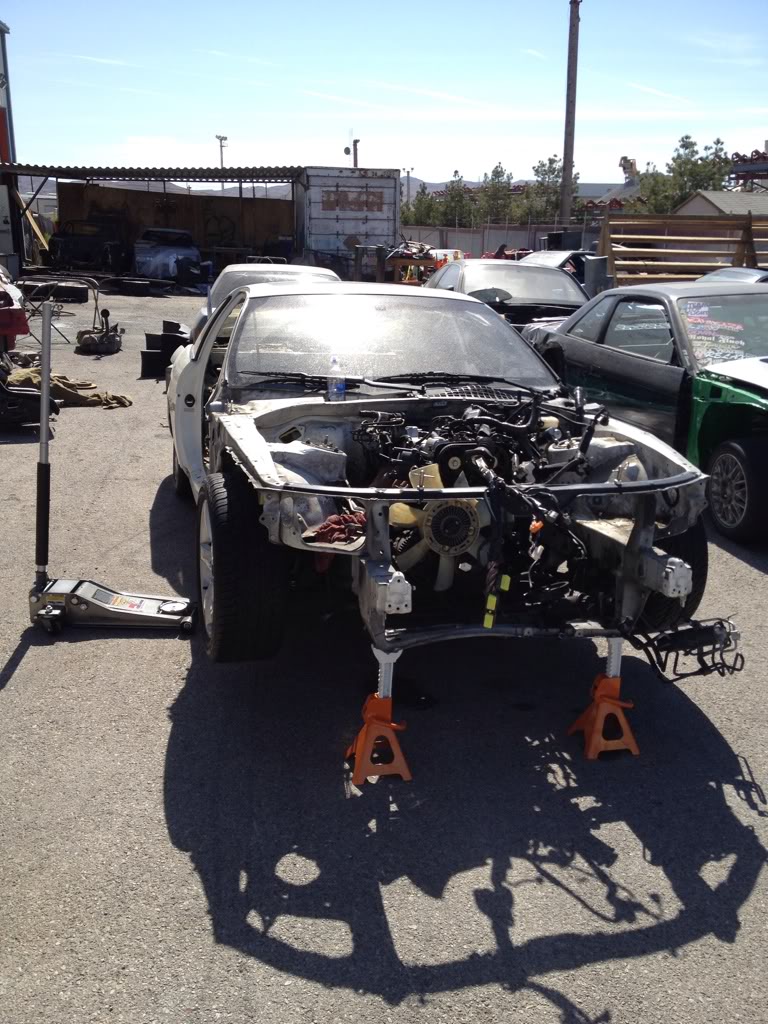
I got the motor out with maximum mess so I spent a lot of today cleaning up and helping move some of the cars around so I dont have any really cool updates coming for at least a few days. ( Work and waiting on stuff to arrive )
I do know for sure in the next few days I will be stripping out the remainder of the harness and removing the sound deadening and start prepping the car for the cage and paint. I think I picked a pretty cool color combo so you want to be around when I get to that! Oh I have some pretty cool tech coming up soon for my solution to dealing with a dead steering column!
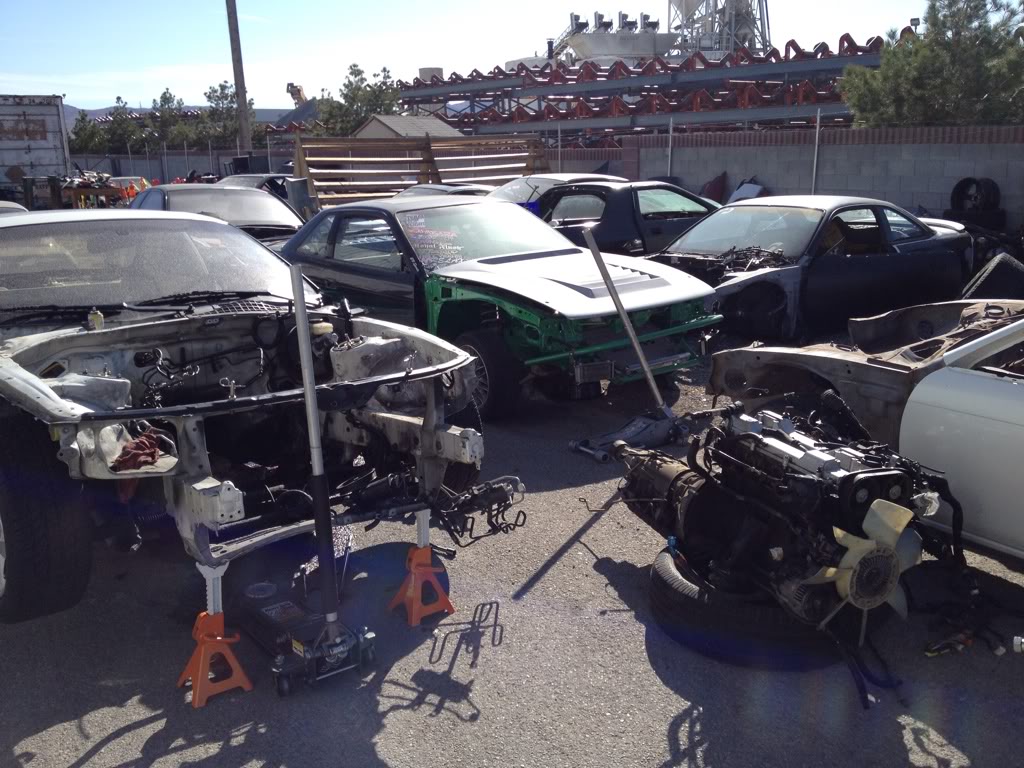
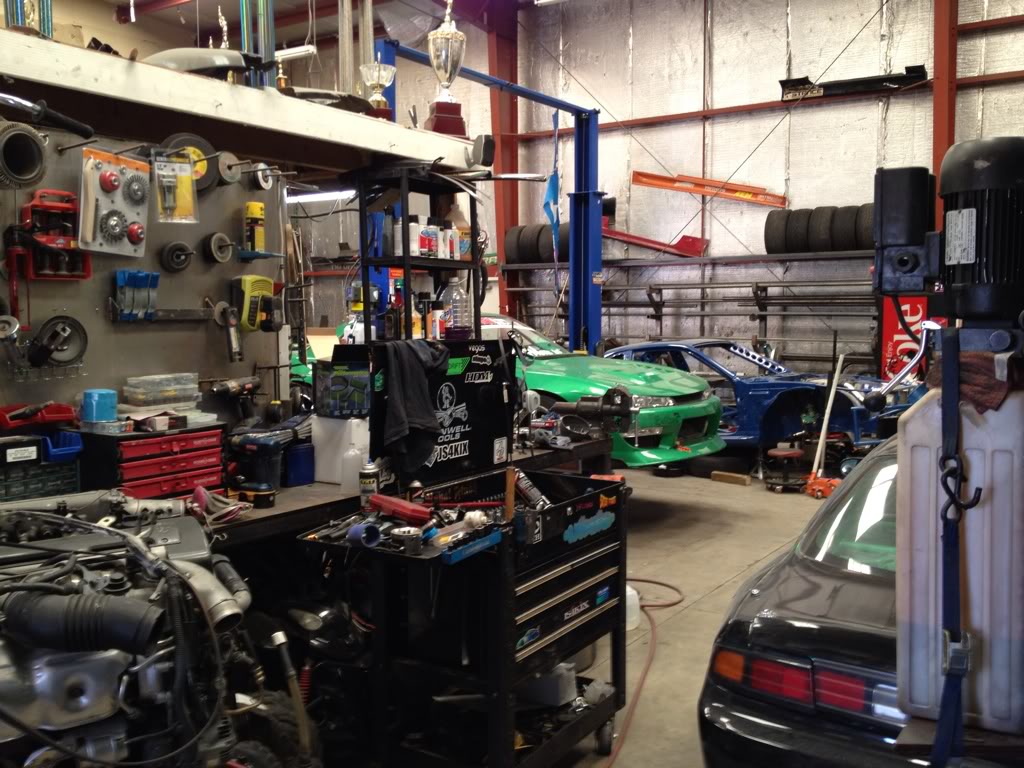
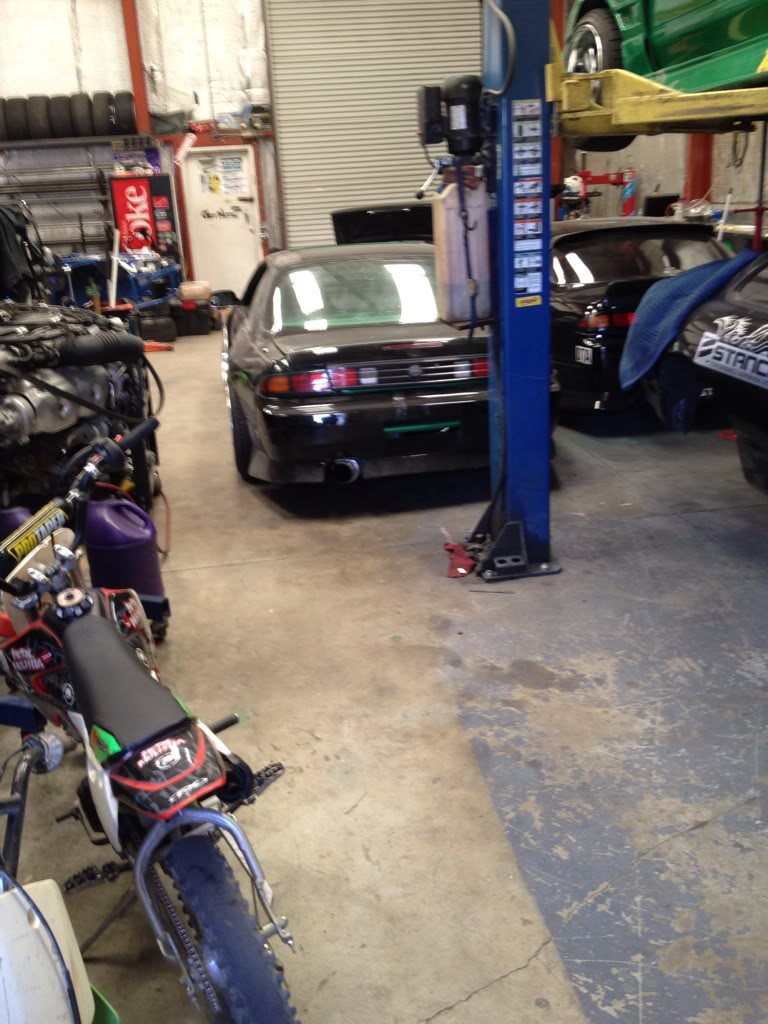
Here's a couple of pics of the shop and what kind of work they put out! I think they make some of the most baller drift cars on the West coast and definitely the world comparable to Japanese tuners. I hope my car comes out pretty cool too ;] If you are interested they do have a web site.
http://www.getnutslab.com/
Here's a little video of what goes down on the daily lol
<iframe width="560" height="315" src="http://www.youtube.com/embed/te_ZQ0m6qpM" frameborder="0" allowfullscreen></iframe>
I recently dropped the car off at the famous fab shop "Get Nutz Labs" out here in Vegas run by Formula D/XDC driver Forrest ****. The car will be getting a full Formula D spec rollcage and some other baller odds and ends done to the chassis. But for the time being I have to do all the little things to get me there and I hope to have it all taken care of and ready for the cage sometime in the middle/end of March. On to the work!
Here is the car as I am preparing to remove the engine. For a few months before officially starting the build I had been slowly stripping it out and removing the harness only to run into a few snags here and there. First one was removing the HP fuel line. I rounded the bolt so I had to cut it :[
Next I thought after letting the automatic tranny drain for a few days would have got all the ATF out. I was WRONG! Make sure that you cut the driveshaft and use it as a plug (if you are converting to manual, or get the car really high and have someone catch all the fluid. That torque converter holds a ton of ATF!!!! >:[ )
I got the motor out with maximum mess so I spent a lot of today cleaning up and helping move some of the cars around so I dont have any really cool updates coming for at least a few days. ( Work and waiting on stuff to arrive )
I do know for sure in the next few days I will be stripping out the remainder of the harness and removing the sound deadening and start prepping the car for the cage and paint. I think I picked a pretty cool color combo so you want to be around when I get to that! Oh I have some pretty cool tech coming up soon for my solution to dealing with a dead steering column!
Here's a couple of pics of the shop and what kind of work they put out! I think they make some of the most baller drift cars on the West coast and definitely the world comparable to Japanese tuners. I hope my car comes out pretty cool too ;] If you are interested they do have a web site.
http://www.getnutslab.com/
Here's a little video of what goes down on the daily lol
<iframe width="560" height="315" src="http://www.youtube.com/embed/te_ZQ0m6qpM" frameborder="0" allowfullscreen></iframe>
Last edited by DriftChris; 03-02-12 at 03:31 PM.
 03-02-12 | 04:26 PM
#23

Driver
Joined: Nov 2007
Posts: 130
Likes: 0
From: hawaii
awesome build! how is forrest doing? Havent seen him for a bit since he moved up to the mainland. if you get a chance to....tell him jensen from hawaii said whats up. maybe ill ship up my sc one day and we can sample at his shop.
killer build dude!
killer build dude!
03-02-12 | 10:58 PM
#25
Driver
Joined: Nov 2007
Posts: 130
Likes: 0
From: hawaii
sorry if I am thread jacking.
how are the parts selection (aftermarket and stock) in your area? Must be so nice to build a car where free shipping is offered and parts aren't that far away (I assume). Looking forward to progress updates!
how are the parts selection (aftermarket and stock) in your area? Must be so nice to build a car where free shipping is offered and parts aren't that far away (I assume). Looking forward to progress updates!
03-03-12 | 11:12 PM
#26
Thread Starter
Pit Crew
Joined: Jan 2008
Posts: 112
Likes: 1
From: Nevada
Speaking of parts once I get the car cleaned and some more parts have arrived Ill have something more to contribute. I have something arriving on Tuesday that ill do a DIY video on. I might start doing video updates here and there too.
Oh! and I didnt get the chance to go to the shop but ill see Forrest tomorrow afternoon. I should be cleaning up my mess and add some more pics and info of the teardown and some of the prep work for the cage... Stay tuned!!!
Last edited by DriftChris; 03-03-12 at 11:38 PM.
03-04-12 | 11:57 PM
#27
Thread Starter
Pit Crew
Joined: Jan 2008
Posts: 112
Likes: 1
From: Nevada
March 3, 2012
Man... Im just setting down in bed after a long *** day hahaha! I put in a lot of work and had some fun in between.
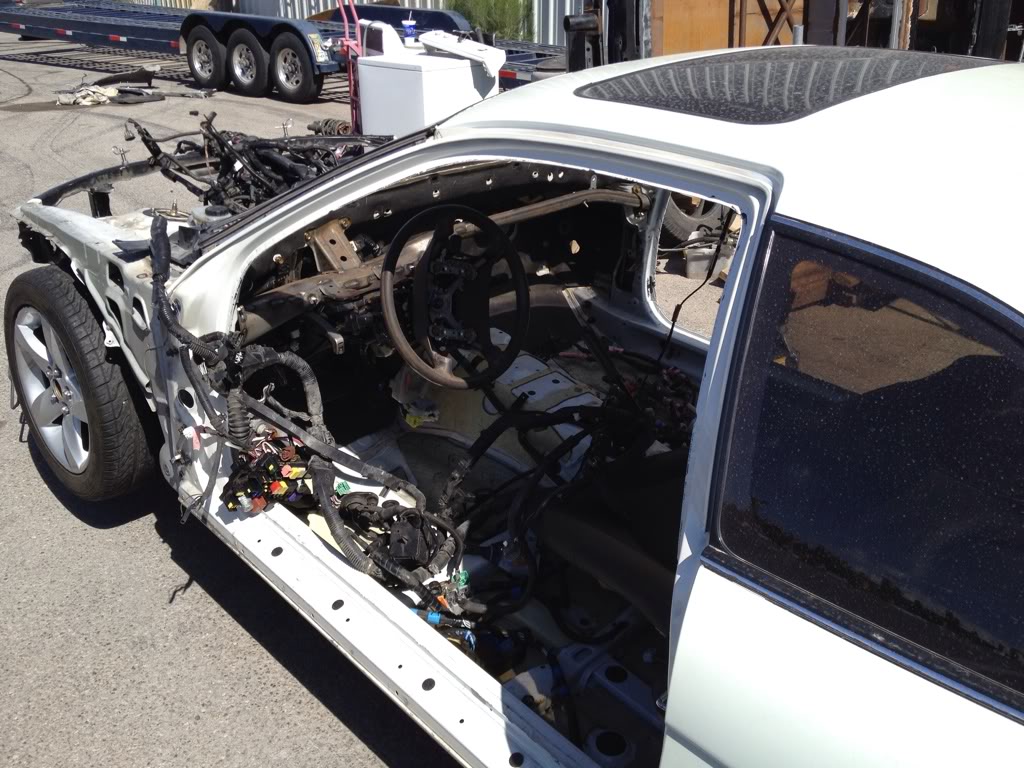
I picked up a cheap pressure washer and some hose at my local Harbor Freight for a good price so I can start cleaning out the engine bay. I spent a good hour spraying it down with Dawn dish soap and the 1500psi water. It got it kind of clean but theres still a lot of tough stains that need to be brushed and cleaned by hand but it did a good job!
Didnt come out too bad with cold water and dish soap, brake clean and WD40 hahaha But Ill be getting some simple green for the fender wells and under the car once I get the front sub frame off and get the car in the air.

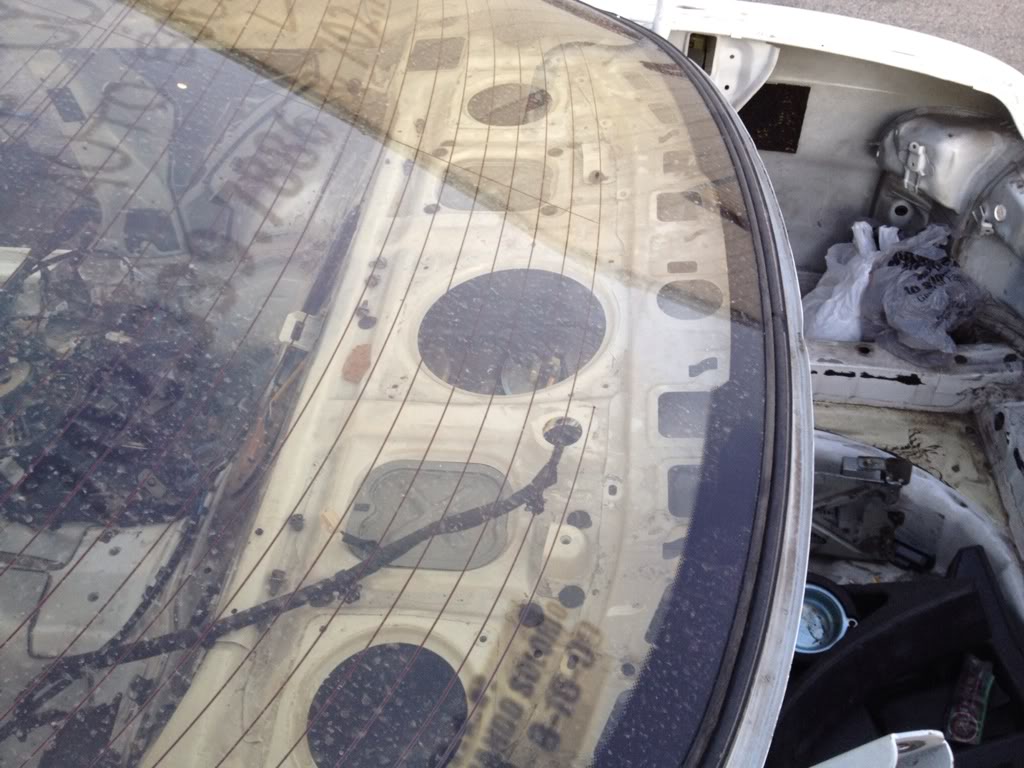
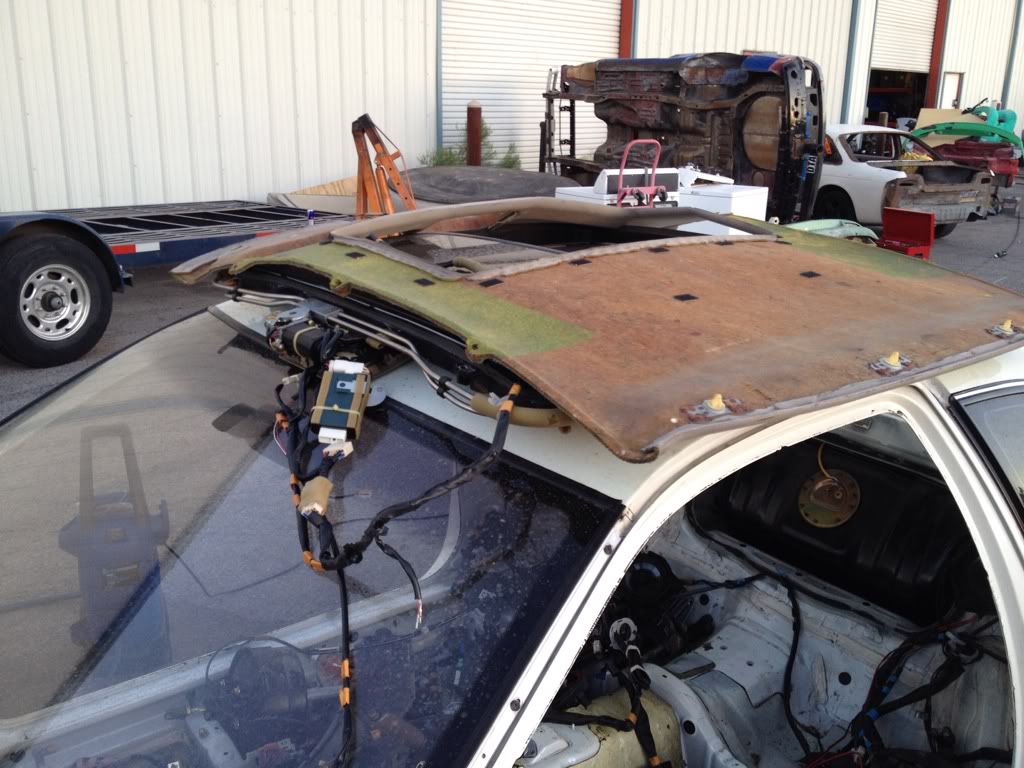
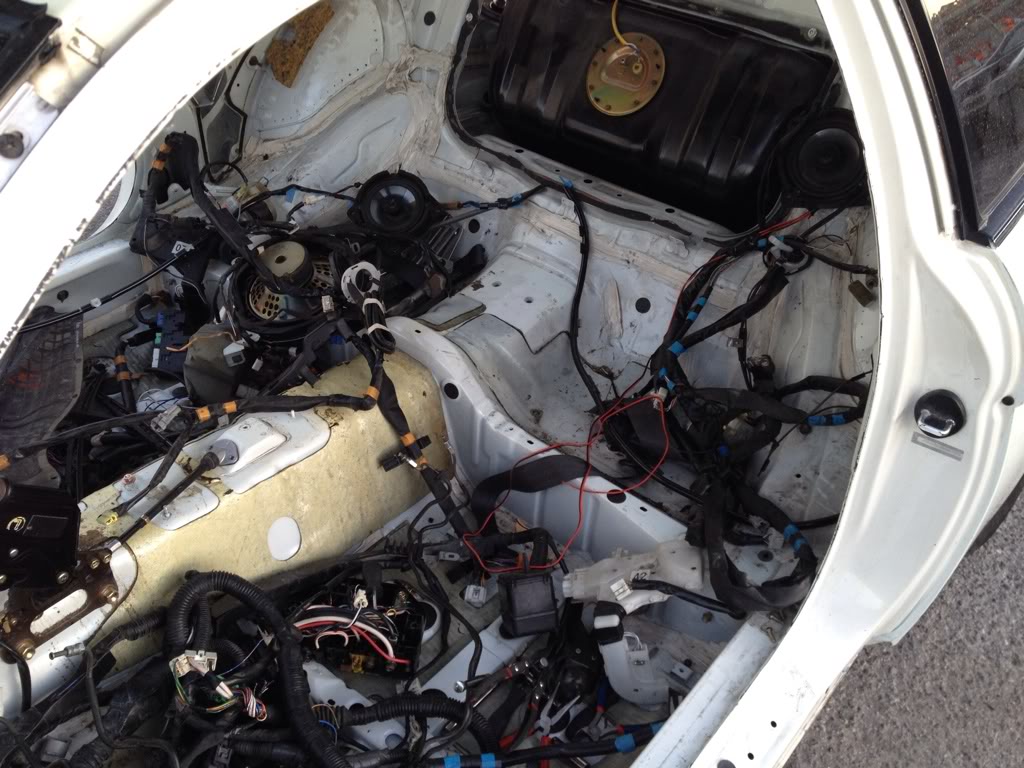
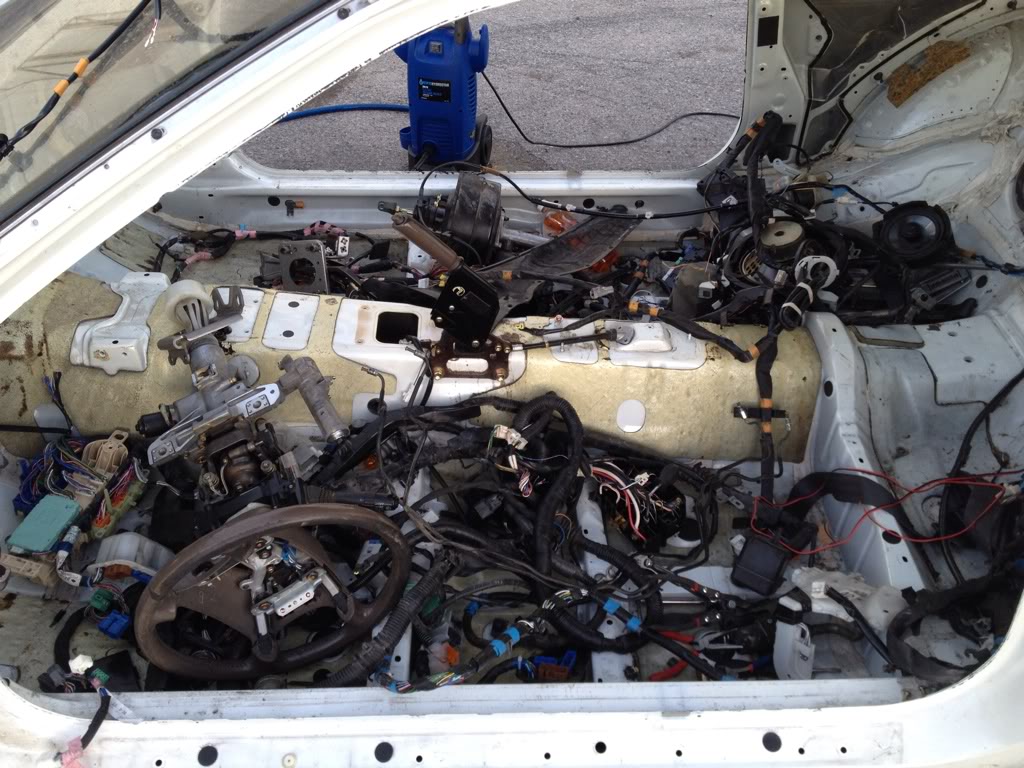
While everything was soaking I took some time to strip out the rest of the harness and remove everything from the inside of the car: Steering column, Sun roof, all of the wiring and the rear deck speakers which left me with this mess. I wish I had a scale to see how much all of this crap weighs...
Theres also this ugly rug type of deal that sits on the fire wall that you can just pull off and thats more weight that isnt needed also lol

Here and there we had some arrivals so I took a break to watch some sampling of the Drift cars... even Josh Herron showed up! KEEP DRIFTING FUN OR ELSE!!!
(Looks like we cant embed videos? Here are the links to my photobucket...)
http://s777.photobucket.com/albums/y...t=f643ae9f.mp4
http://s777.photobucket.com/albums/y...t=7ce5d275.mp4
I have one more that ill probably put up on twitter once I rearrange the orientation... I had my phone upside down some how...
All and all it was a fun and productive day! I should have rode along in the 1JZ S14 though... eh next time I guess... Ill be finishing off all of the stripping and the prep on Tuesday. Ill see yall then!
Man... Im just setting down in bed after a long *** day hahaha! I put in a lot of work and had some fun in between.
I picked up a cheap pressure washer and some hose at my local Harbor Freight for a good price so I can start cleaning out the engine bay. I spent a good hour spraying it down with Dawn dish soap and the 1500psi water. It got it kind of clean but theres still a lot of tough stains that need to be brushed and cleaned by hand but it did a good job!
Didnt come out too bad with cold water and dish soap, brake clean and WD40 hahaha But Ill be getting some simple green for the fender wells and under the car once I get the front sub frame off and get the car in the air.
While everything was soaking I took some time to strip out the rest of the harness and remove everything from the inside of the car: Steering column, Sun roof, all of the wiring and the rear deck speakers which left me with this mess. I wish I had a scale to see how much all of this crap weighs...
Theres also this ugly rug type of deal that sits on the fire wall that you can just pull off and thats more weight that isnt needed also lol
Here and there we had some arrivals so I took a break to watch some sampling of the Drift cars... even Josh Herron showed up! KEEP DRIFTING FUN OR ELSE!!!
(Looks like we cant embed videos? Here are the links to my photobucket...)
http://s777.photobucket.com/albums/y...t=f643ae9f.mp4
http://s777.photobucket.com/albums/y...t=7ce5d275.mp4
I have one more that ill probably put up on twitter once I rearrange the orientation... I had my phone upside down some how...
All and all it was a fun and productive day! I should have rode along in the 1JZ S14 though... eh next time I guess... Ill be finishing off all of the stripping and the prep on Tuesday. Ill see yall then!
03-06-12 | 07:30 PM
#28
Thread Starter
Pit Crew
Joined: Jan 2008
Posts: 112
Likes: 1
From: Nevada
March 6, 2012
ITS about time! My flocking kit from DonJer came in today! I wasted no time flocking my dash up! I tested it on a few small parts to get the technique down and its pretty easy. Easy enough I will add a DIY to the build.
First you need the kit from the link above:
* 1 1lb bag of Rayon-Suede fibers.
* 1 paint brush or a paint roller.
* 1 8oz can of the adhesive
* and 1 "mini flocker"
Flock... I wonder if everyone else except is less juvenile than I am hahaha
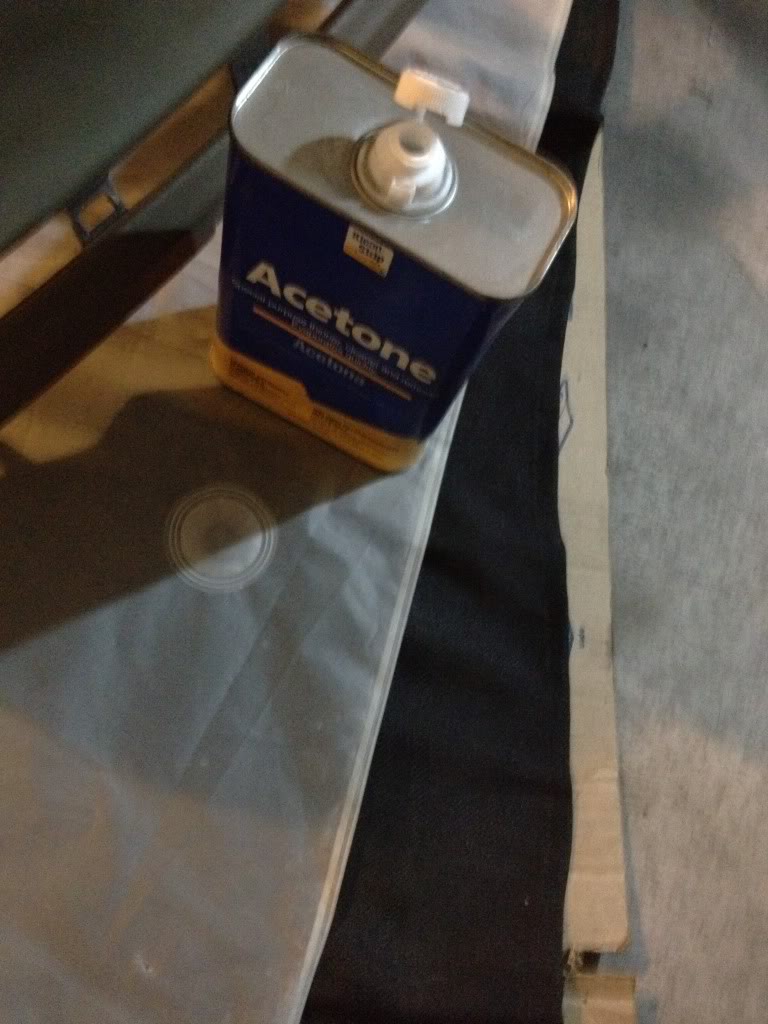
First I cleaned the parts down with acetone, really they just have to be clean in general so I supposed you could use soap and water. I wanted to try and dry out the leather a little bit.
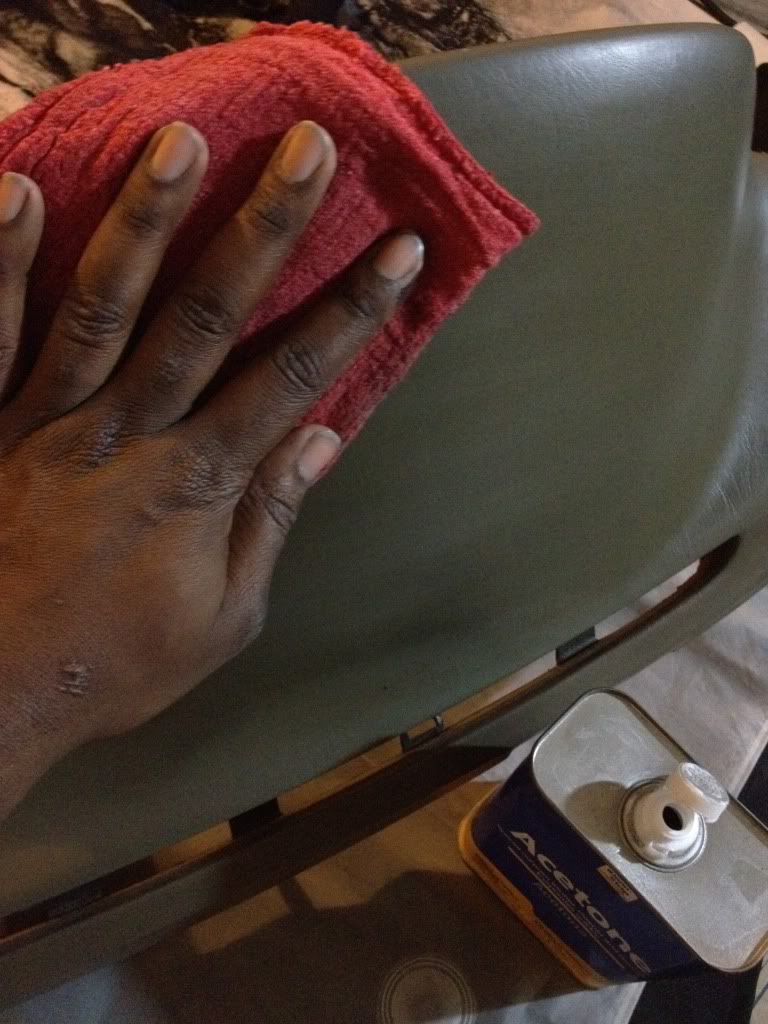
Then I scuffed it down a bit with a scuff pad thats easily found at any hardware or auto store.

Afterward you apply the adhesive. Its supposed to lose its adhesion and stop being tacky after like 10 to 15 minutes or so. That means move flocking fast!
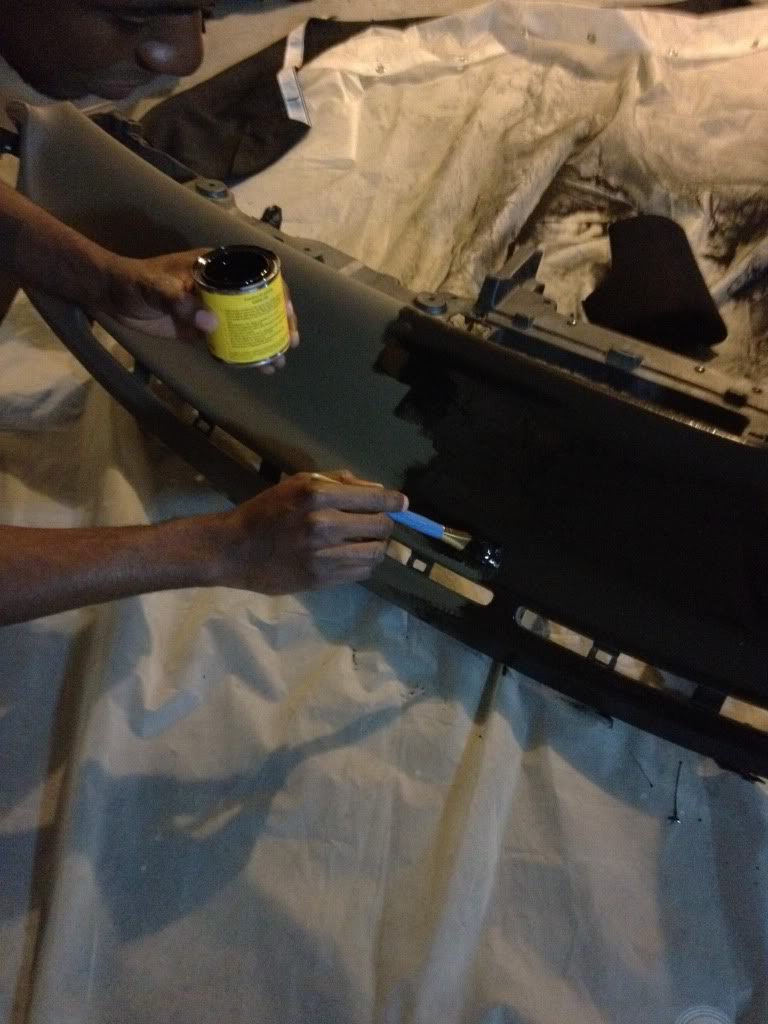
This is probably a two man job or even 3 if youre doing it in the dark like me because next is the best part! Flocking pumping! You load the tube with about half way with the fiber and start pumping... er em... flocking...
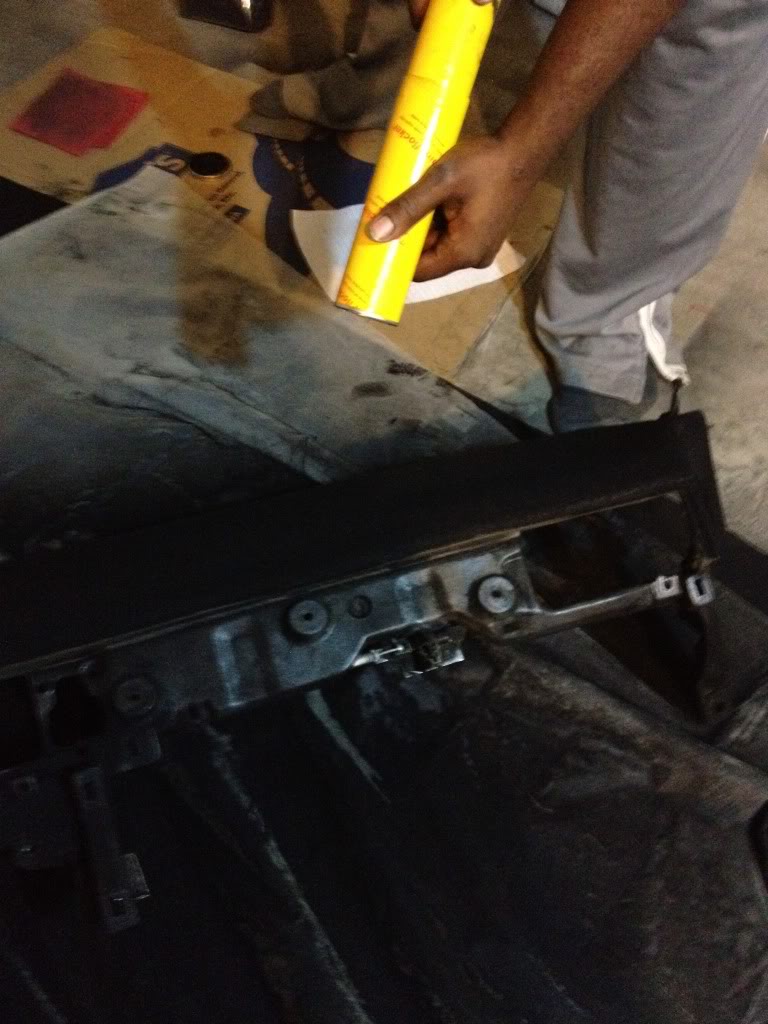
... and last but not least admire your work and let it sit. I dont believe you are supposed to handle it at least for 8 - 15 hours or so. It says over night sooo...
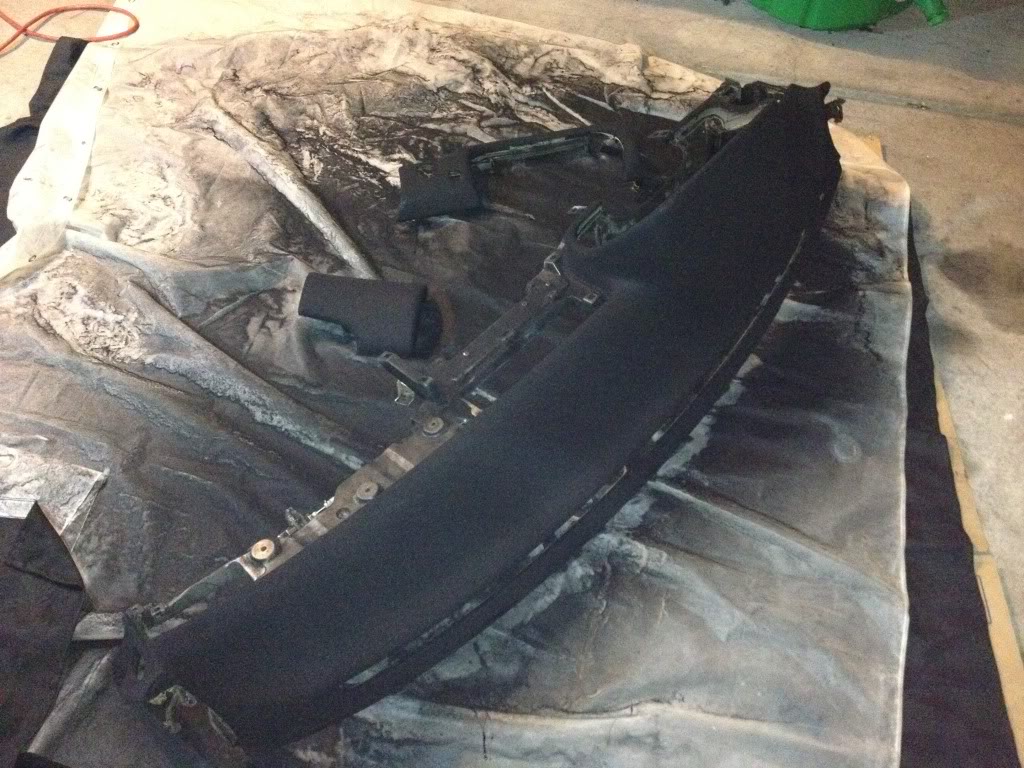
Ill take better pictures of the finish after I can handle it so stick around... After I finish the part that goes around the transmission tunnel Im heading back to the shop to get cranking at removing the sound deadening and prepping for some of the fab work. Ill have a mini update coming in the next few days then it will be the interesting stuff I promise!!! lol
ITS about time! My flocking kit from DonJer came in today! I wasted no time flocking my dash up! I tested it on a few small parts to get the technique down and its pretty easy. Easy enough I will add a DIY to the build.
First you need the kit from the link above:
* 1 1lb bag of Rayon-Suede fibers.
* 1 paint brush or a paint roller.
* 1 8oz can of the adhesive
* and 1 "mini flocker"
Flock... I wonder if everyone else except is less juvenile than I am hahaha
First I cleaned the parts down with acetone, really they just have to be clean in general so I supposed you could use soap and water. I wanted to try and dry out the leather a little bit.
Then I scuffed it down a bit with a scuff pad thats easily found at any hardware or auto store.
Afterward you apply the adhesive. Its supposed to lose its adhesion and stop being tacky after like 10 to 15 minutes or so. That means move flocking fast!
This is probably a two man job or even 3 if youre doing it in the dark like me because next is the best part! Flocking pumping! You load the tube with about half way with the fiber and start pumping... er em... flocking...
... and last but not least admire your work and let it sit. I dont believe you are supposed to handle it at least for 8 - 15 hours or so. It says over night sooo...
Ill take better pictures of the finish after I can handle it so stick around... After I finish the part that goes around the transmission tunnel Im heading back to the shop to get cranking at removing the sound deadening and prepping for some of the fab work. Ill have a mini update coming in the next few days then it will be the interesting stuff I promise!!! lol
03-07-12 | 08:04 AM
#29
Thread Starter
Pit Crew
Joined: Jan 2008
Posts: 112
Likes: 1
From: Nevada
I was going to post again one more time last night but I was so tired after that ordeal lol
Well it looks like today I have to get all of the seam sealer out of the car too and get cranking on prep for fabrication and paint. I might even try my hand at stitch welding the car where I am removing the seam sealer for added rigidity.
March 7, 2012
Mini DIY for those of you who have never removed sound deadening... EASY!!!...
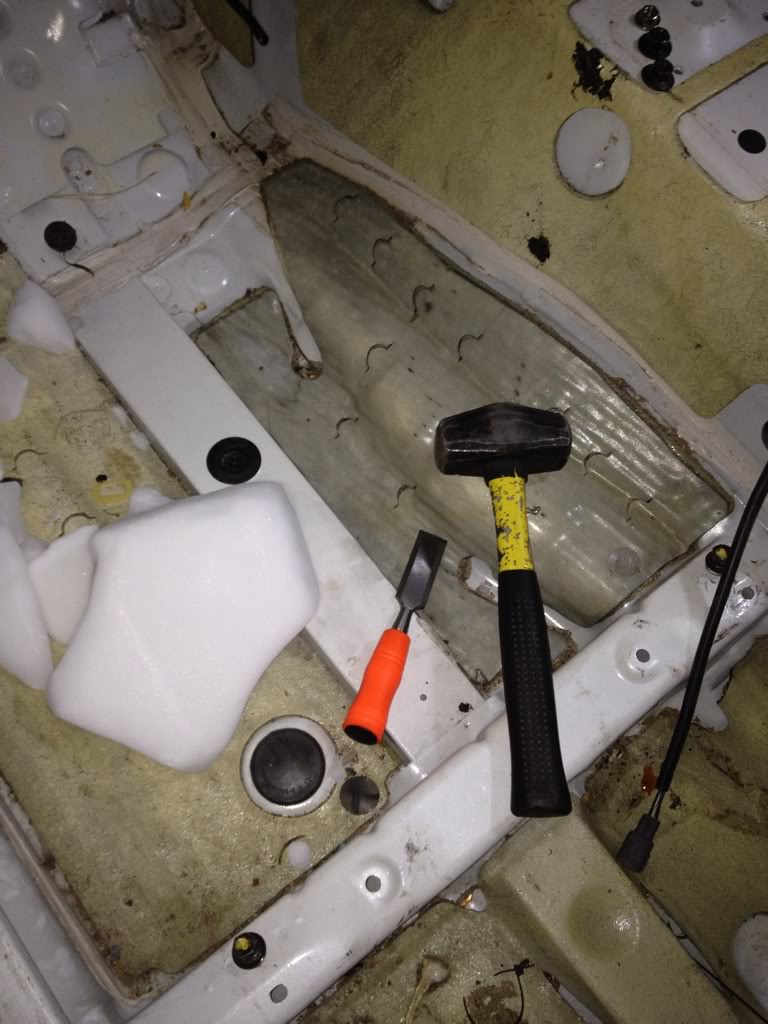
All you need is a hammer and a chisel and some dry ice. I got about 25 lbs of dry ice but lucky for me it was 40 degrees out when I was working on it so I had a lot left over. You can get away with about 20lbs.
All you have to do is spread the dry ice out on the sound deadening and leave it for a few minutes until you hear cracking and popping which is the adhesive freezing and lifting from the metal. Whack at it with the hammer and use the chisel to get under it to pull it up. Our cars its double layered so it comes out basically in 1 piece if you hit it with your purse...
The seam sealer should be pretty easy too I hear its just a chisel and a heat gun... Ill let you know later. Well now I guess officially all the lame updates are over and now I can focus on the more important stuff... Performance!!! Ill probably do suspension for the remainder of this month and do all the motor work and what not next month. So ill let you know soon... The updates might drop off a bit...
Well it looks like today I have to get all of the seam sealer out of the car too and get cranking on prep for fabrication and paint. I might even try my hand at stitch welding the car where I am removing the seam sealer for added rigidity.
March 7, 2012
Mini DIY for those of you who have never removed sound deadening... EASY!!!...
All you need is a hammer and a chisel and some dry ice. I got about 25 lbs of dry ice but lucky for me it was 40 degrees out when I was working on it so I had a lot left over. You can get away with about 20lbs.
All you have to do is spread the dry ice out on the sound deadening and leave it for a few minutes until you hear cracking and popping which is the adhesive freezing and lifting from the metal. Whack at it with the hammer and use the chisel to get under it to pull it up. Our cars its double layered so it comes out basically in 1 piece if you hit it with your purse...
The seam sealer should be pretty easy too I hear its just a chisel and a heat gun... Ill let you know later. Well now I guess officially all the lame updates are over and now I can focus on the more important stuff... Performance!!! Ill probably do suspension for the remainder of this month and do all the motor work and what not next month. So ill let you know soon... The updates might drop off a bit...