Aussie JDM twin turbo '92 Soarer, sort of build thread

 03-24-12, 03:44 PM
#19
Rookie
Thread Starter

Join Date: Mar 2012
Location: qld
Posts: 73
Likes: 0
Received 0 Likes
on
0 Posts
A guy in Melbourne, Australia named Kurt, I got in touch with him through Soarer Central
Here's the big thread on the intakes:
http://soarercentral.com/sc-forum/me...tml?1326621578
The forum software for that site is ghetto it's a long thread but there's no page numbers you just have to hit Next at the bottom when you have read each page
Here's the big thread on the intakes:
http://soarercentral.com/sc-forum/me...tml?1326621578
The forum software for that site is ghetto it's a long thread but there's no page numbers you just have to hit Next at the bottom when you have read each page
03-31-12, 11:51 PM
#20
Rookie
Thread Starter
Join Date: Mar 2012
Location: qld
Posts: 73
Likes: 0
Received 0 Likes
on
0 Posts
My Plastidip arrived during the week... It hasn't taken off in Australia yet so there are hardly any suppliers, and its quite expensive to ship being an aerosol (dangerous goods act) so it cost me near $50 for one can. Ouch.
I had a spare afternoon so I hit the mismatched gold window trim and I really like the results. I am worried about this product not being very durable, but its not in a place that will get much wear & tear and at the moment it looks really nice and fresh. It's a nice looking finish, if it lasts
I was really thorough with the masking as you can see, which is good because there was random black flecks of rubber **** everywhere when I was done.
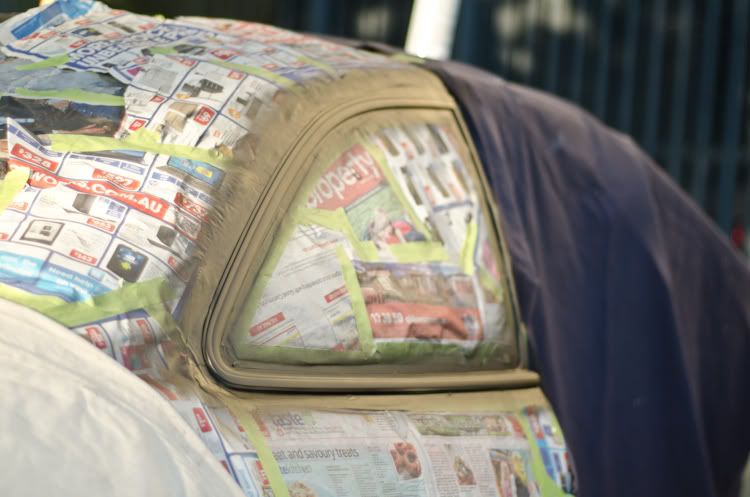
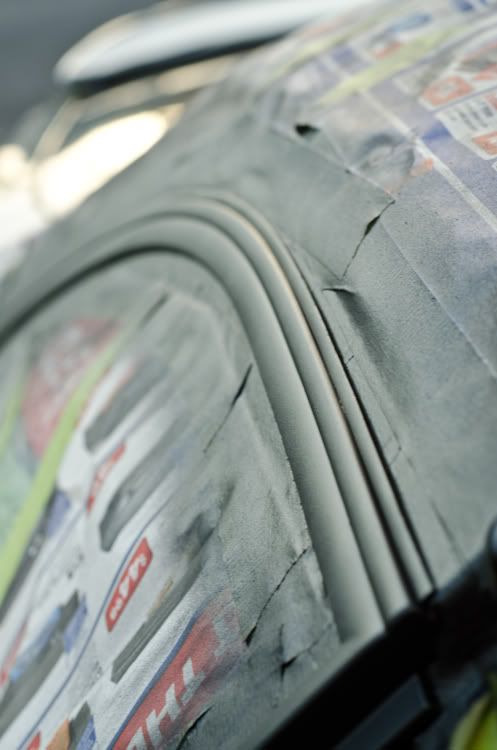
And the final result:
Nothing major but it looks like brand new trim and it's not ugly out of place gold chrome. LOL.
I'm tempted to go and hit some more window trim as its a 20 year old car, there's chips and fade all over the place and then two windows with beautiful thick black trim. So I might
I had a spare afternoon so I hit the mismatched gold window trim and I really like the results. I am worried about this product not being very durable, but its not in a place that will get much wear & tear and at the moment it looks really nice and fresh. It's a nice looking finish, if it lasts
I was really thorough with the masking as you can see, which is good because there was random black flecks of rubber **** everywhere when I was done.
And the final result:
Nothing major but it looks like brand new trim and it's not ugly out of place gold chrome. LOL.
I'm tempted to go and hit some more window trim as its a 20 year old car, there's chips and fade all over the place and then two windows with beautiful thick black trim. So I might
 04-01-12, 04:58 AM
#23
Rookie
Thread Starter
Join Date: Mar 2012
Location: qld
Posts: 73
Likes: 0
Received 0 Likes
on
0 Posts
You mean whoever dyno'd that 
Like I said, I may have misremembered it but I linked the thread go read for yourself
The stock intakes and dumps are very restrictive, I dont find it very hard to believe that swapping to 3" dumps and twin 3" intakes would change things substantially
Edit: I went and read the thread again (it's linked above) and it does say that power gain from dumps + twin intakes
Last edited by davierogue; 04-01-12 at 08:40 AM.
04-05-12, 02:41 PM
#25
Rookie
Thread Starter
Join Date: Mar 2012
Location: qld
Posts: 73
Likes: 0
Received 0 Likes
on
0 Posts
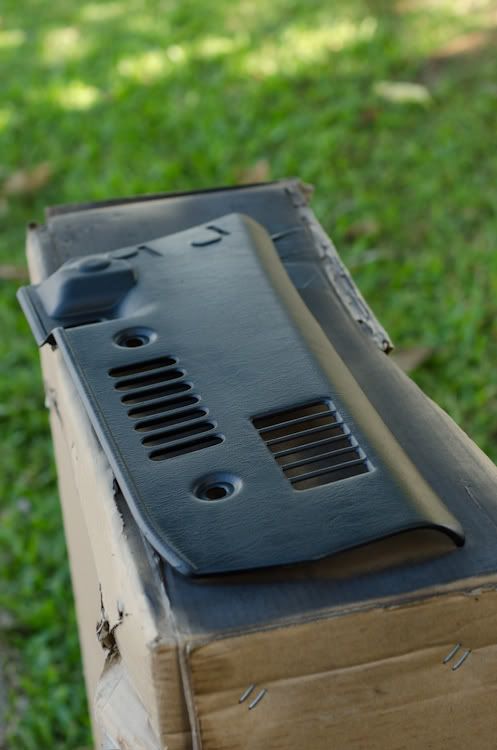
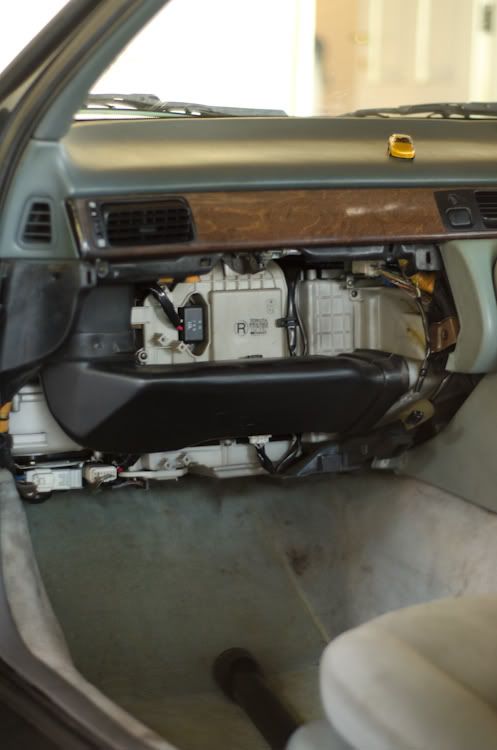
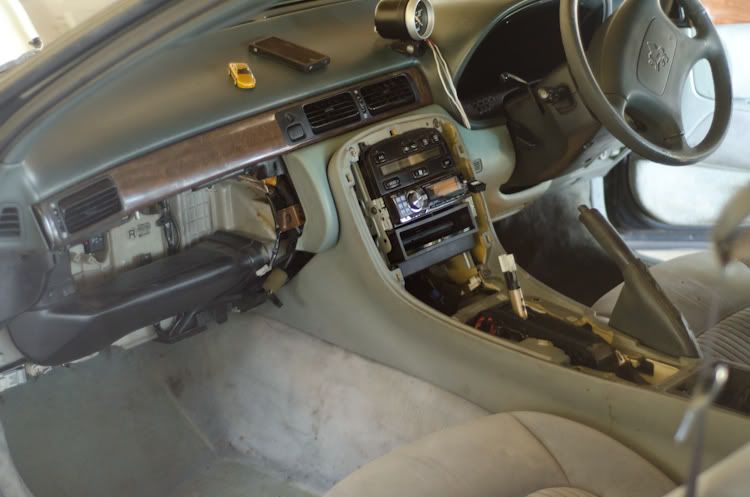
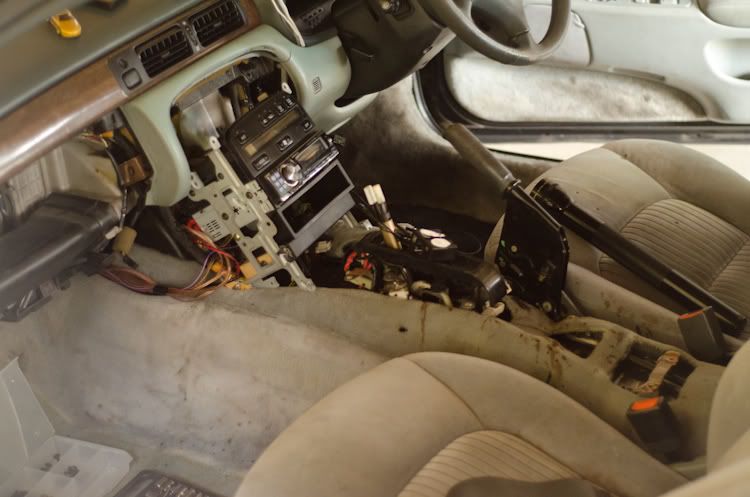
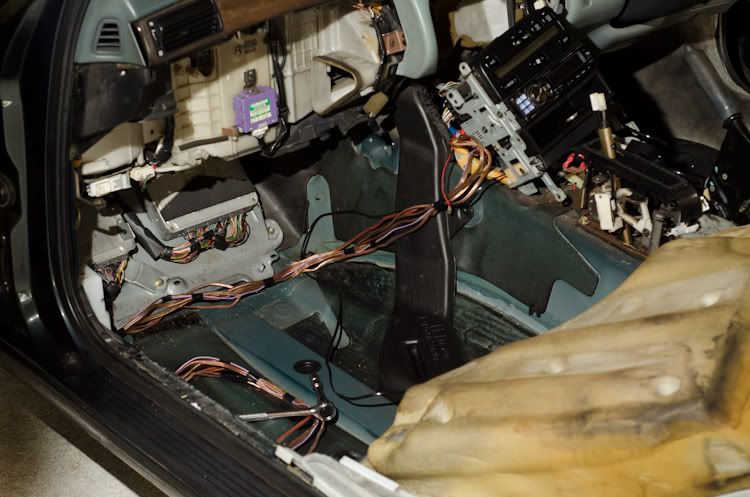
I picked up a Greddy Emanage Blue and some 440cc injectors just in time to do the installation over the easter weekend. I had to strip the glovebox, part of the air conditioning pipe and some carpet since the ECU is located under the carpet in the passenger footwell, so while I was at it I figured I'd continue with the black interior conversion that I started 2-3 years ago and got lazy with 
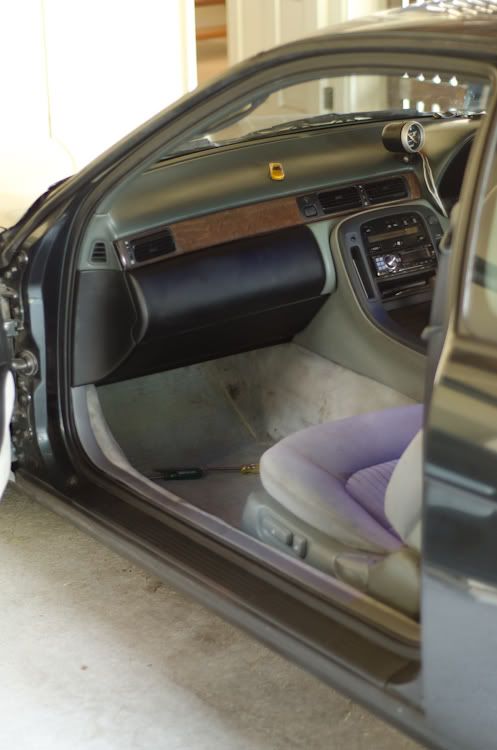
I pulled the glove gox and footwell kick panel out, they are already blacked with vinyl/plastic dye but I gave the kick panel another spray since it, like, gets kicked and ****
Once that was out I also removed this big black AC pipe, it's only one screw and not really necessary to remove but gives you a bunch more space to play around in
And then pulled the shifter / surround and entire centre console pieces, both of them, to get rid of the minty fresh spruce light green **** in exchange for some black
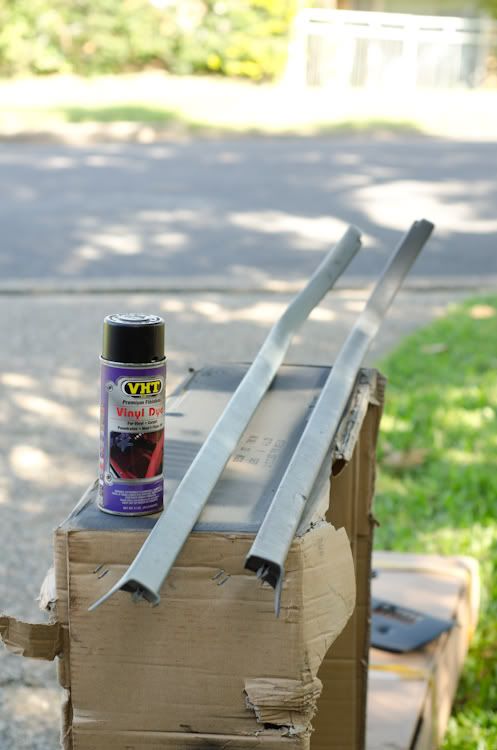
I went to pull up the carpet and the edge pieces that came out also got a hit with VHT vinyl & plastic dye... nice subtle product placement if anyone from VHT is reading please feel free to sponsor me
I pulled the passenger seat too, it's only 5 bolts and took like 3 minutes, and gave me so much more room to work with
And then once the light faded last night this is where I was at, ready to start cutting, shutting and splicing wires into the ECU
I pulled the glove gox and footwell kick panel out, they are already blacked with vinyl/plastic dye but I gave the kick panel another spray since it, like, gets kicked and ****
Once that was out I also removed this big black AC pipe, it's only one screw and not really necessary to remove but gives you a bunch more space to play around in
And then pulled the shifter / surround and entire centre console pieces, both of them, to get rid of the minty fresh spruce light green **** in exchange for some black
I went to pull up the carpet and the edge pieces that came out also got a hit with VHT vinyl & plastic dye... nice subtle product placement if anyone from VHT is reading please feel free to sponsor me
I pulled the passenger seat too, it's only 5 bolts and took like 3 minutes, and gave me so much more room to work with
And then once the light faded last night this is where I was at, ready to start cutting, shutting and splicing wires into the ECU
04-05-12, 03:15 PM
#26
Lead Lap
iTrader: (2)
Join Date: Oct 2005
Location: Austin,Tx
Posts: 638
Likes: 0
Received 0 Likes
on
0 Posts
I need to do a lot of the same things to my car. Like I have grey carpet so I need to dye it black. Good job on all of the work so far. Looks like it will turn out nice!
04-10-12, 10:41 PM
#27
Rookie
Thread Starter
Join Date: Mar 2012
Location: qld
Posts: 73
Likes: 0
Received 0 Likes
on
0 Posts
Took the front side fender off to fix the ****ing terrible clear coat that was (wasn't) on it, it was flaking off like fish scales basically. The plan is to continue prepping the surface for vinyl wrap. The clear coat is so bad in some places that the vinyl would show the terrible texture through it, and possibly not even stick.
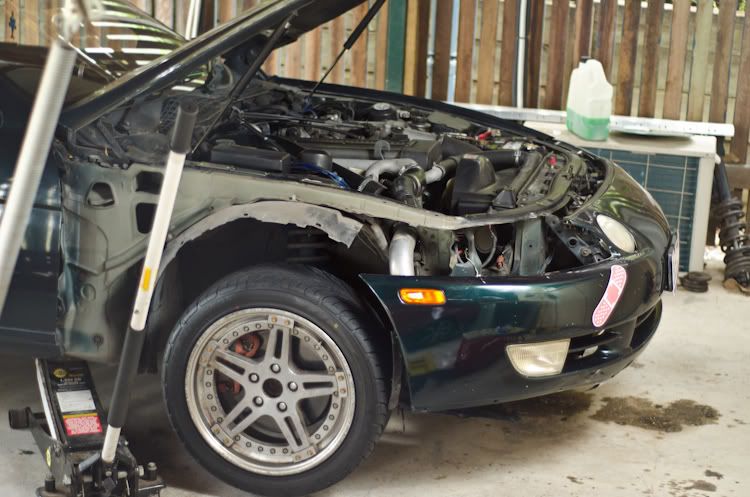
Pulled the guard off which was a b1tch of a job because I did it without removing the bumper but probably saved time in the long run doing it this way, as I needed it back on the road by tonight

My dodgy rattle can spray job yeah it has orange peel but for the low cost and speed I did the job, its ok, and orange peel isn't a big enough texture for it to be a problem for adhering vinyl wrap. I just needed a nice clean firm enamel surface to bond with.
...
and.....
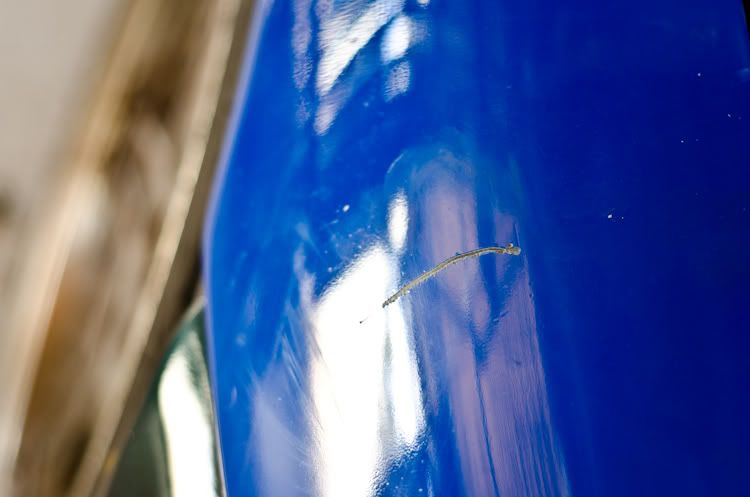
Panel had been on less than 2 minutes and the light stand toppled over somehow, and took a huge god damn scratch out of the soft paint. Great. It's almost back to bare metal! Going to have to putty that sucker and re-prime / re-paint just that section. It's a massive scratch but a small enough section of painting that I can do it on the car. Luckily.
More to come later
Pulled the guard off which was a b1tch of a job because I did it without removing the bumper but probably saved time in the long run doing it this way, as I needed it back on the road by tonight
My dodgy rattle can spray job
yeah it has orange peel but for the low cost and speed I did the job, its ok, and orange peel isn't a big enough texture for it to be a problem for adhering vinyl wrap. I just needed a nice clean firm enamel surface to bond with....
and.....
Panel had been on less than 2 minutes and the light stand toppled over somehow, and took a huge god damn scratch out of the soft paint. Great. It's almost back to bare metal! Going to have to putty that sucker and re-prime / re-paint just that section. It's a massive scratch but a small enough section of painting that I can do it on the car. Luckily.
More to come later
04-10-12, 11:03 PM
#28
Rookie

Join Date: Mar 2012
Location: Washington
Posts: 59
Likes: 0
Received 0 Likes
on
0 Posts
this car is sick 
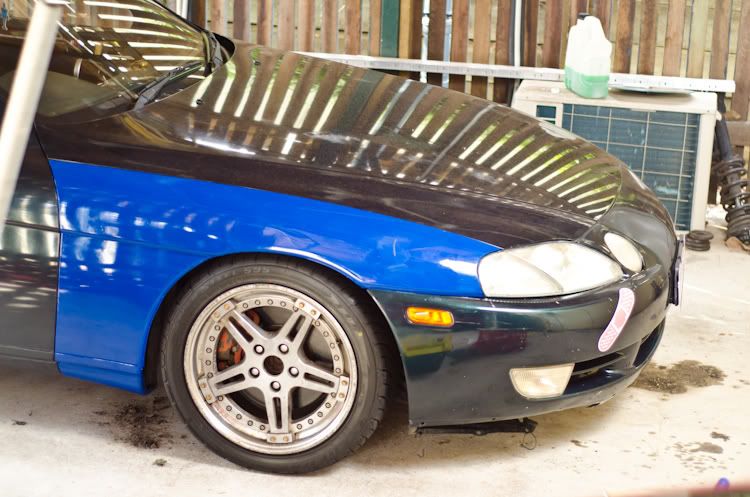
he only two things i could see are the rims and that ugly intercooler but thats just me
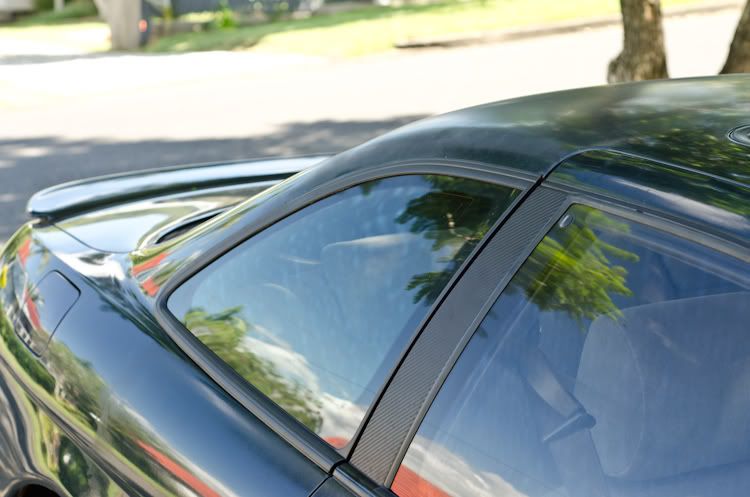
i thought the vinal wraped b pillar would look tacky but turned out nicelu good job so far get so BBS LM reps overall sick car
t\
he only two things i could see are the rims and that ugly intercooler but thats just me
i thought the vinal wraped b pillar would look tacky but turned out nicelu
good job so far get so BBS LM reps overall sick cart\
04-10-12, 11:27 PM
#30
Rookie
Thread Starter
Join Date: Mar 2012
Location: qld
Posts: 73
Likes: 0
Received 0 Likes
on
0 Posts
Also I need to come up with a better gauge mount system as it's getting another 1-2 gauges and that old Autometer one gives me the ****s since it's ugly so it's getting replaced too