Aussie JDM twin turbo '92 Soarer, sort of build thread
 03-21-12 | 03:47 AM
#1

Thread Starter
Rookie
Joined: Mar 2012
Posts: 73
Likes: 0
From: qld
I've had this for maybe 3-4 years now, but it's been off the road gathering dust for about about 18 months. I'm currently throwing some parts at it and thought I'd make a thread since the factory twin turbos might interest some people on here, being a mostly American forum.
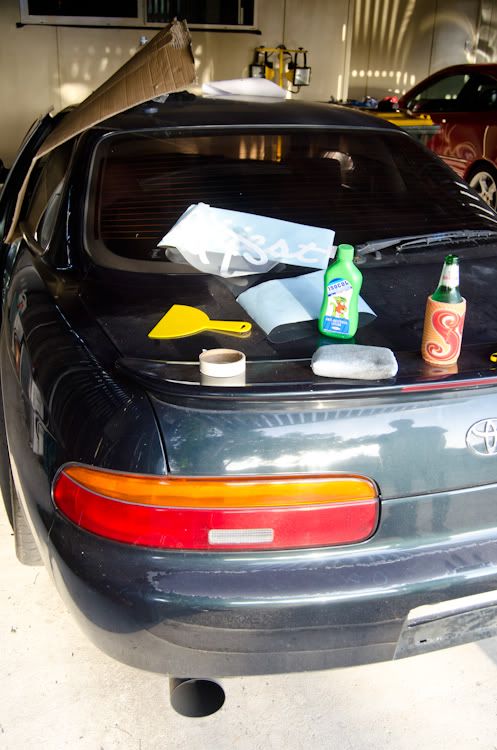
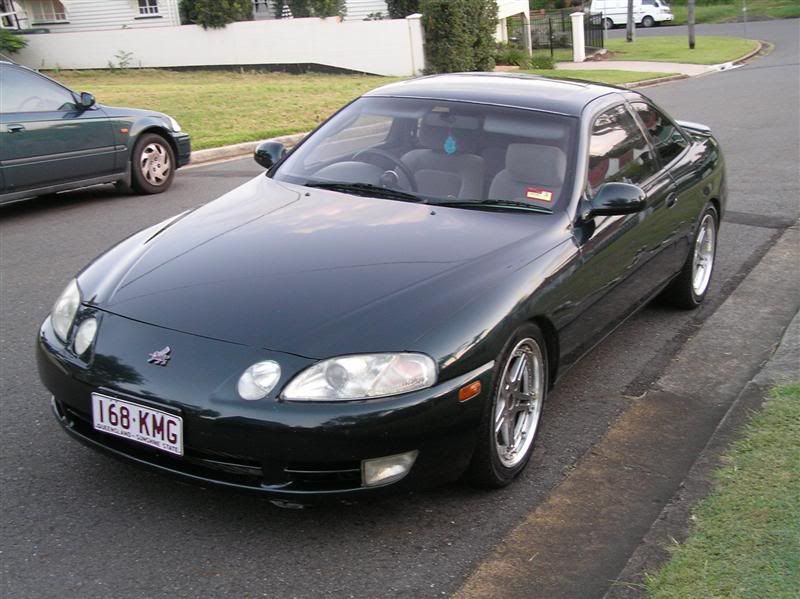
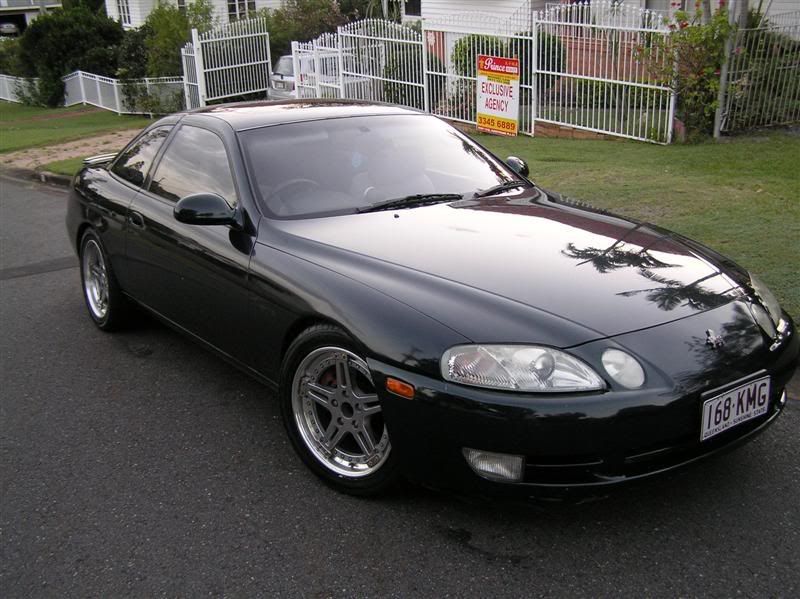
I have a few pics from when it was detailed not long before I took it off the road:
The paint is actually in quite bad condition with hardly any clear coat on any panels. The headlights are very yellowed out unless I hit them frequently with some coarse polish, and they come up like new for a couple of months.
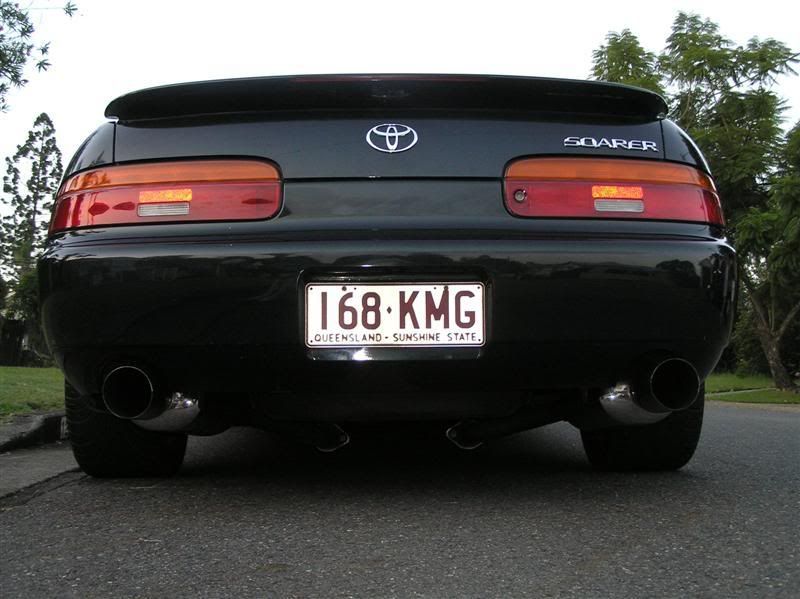
The exhaust was a 2.5" Fujitsubo cat-back (currently changed) with a really nice note. 275 width tires in the rear give it a nice fat *** too.
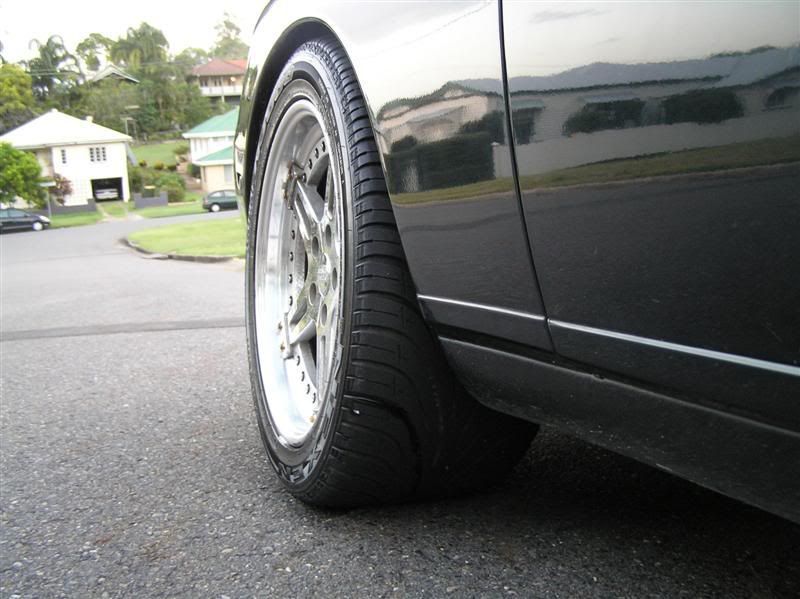
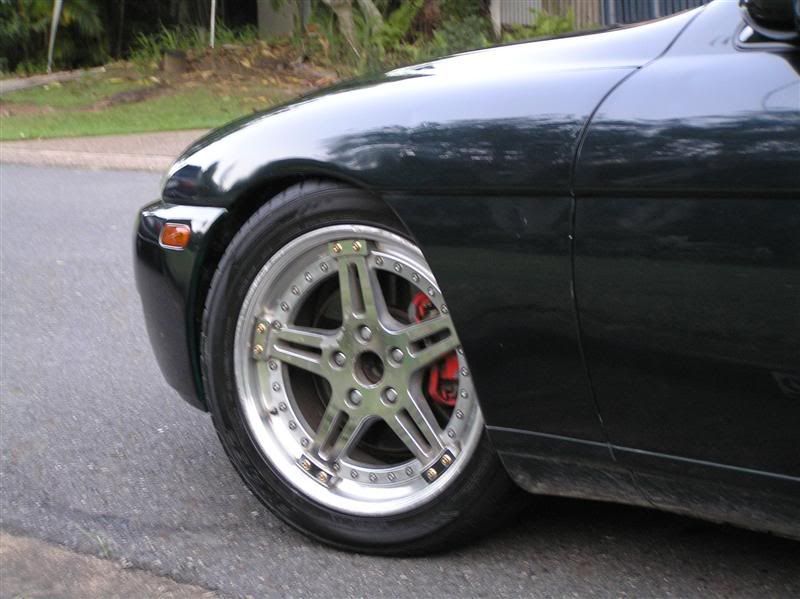
No idea what the wheels are, they were on teh car when imported from Japan, but they weigh next to nothing and are a decent composite wheel so I've kept them, but I'll be changing them soon as the style is pretty damn dated by now and they are flaking pretty badly from weather.
Can see an example of the flaking finish here but also the ride height thanks to KYB shock/spring combo.
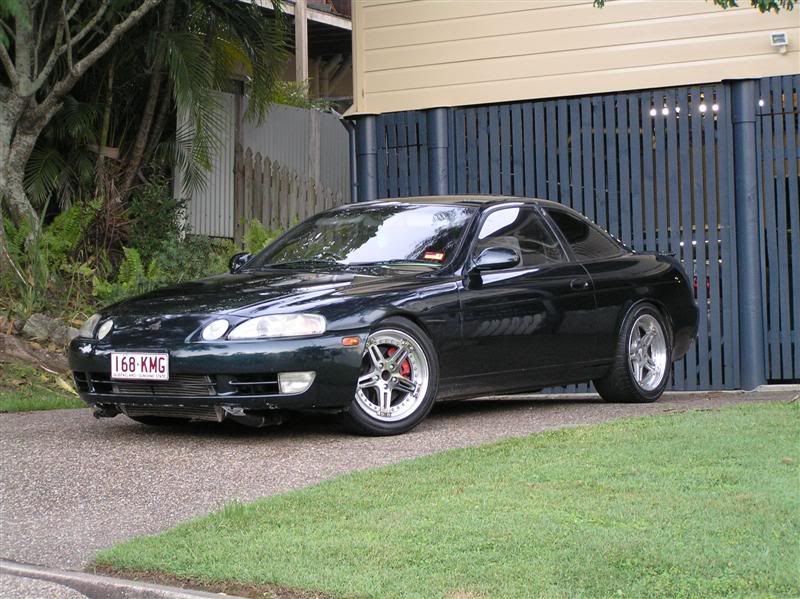
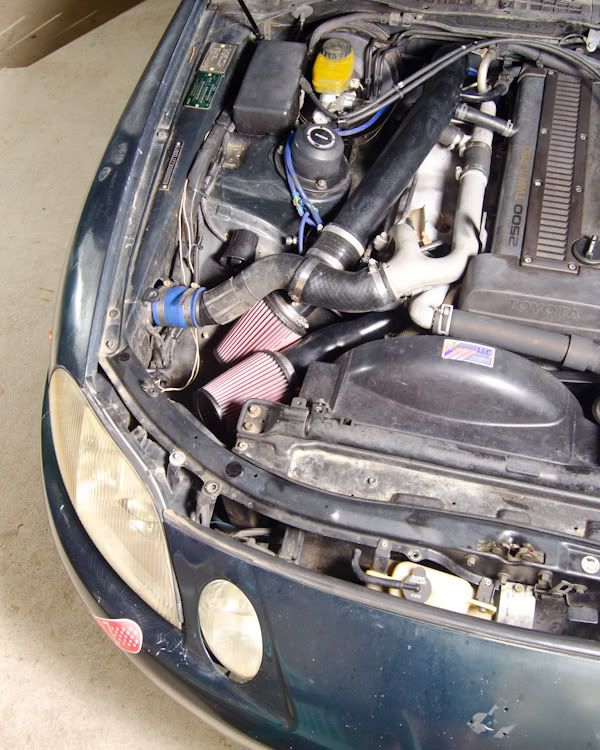
This pic shows how low its sitting (on 17s) and the rake angle, which has obviously caused the cooler to get hit on a whole bunch of crap and the factory lip is long gone thanks to being smashed one too many times.
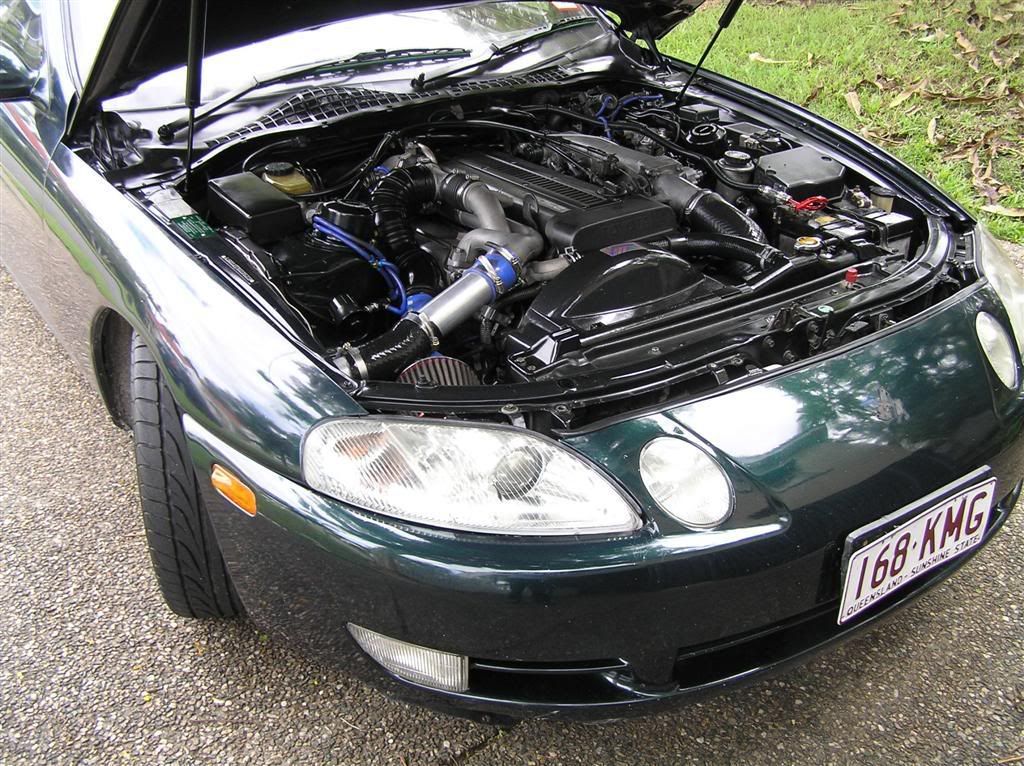
Poor angle, but the engine bay is kind of neat in this pic so thought I'd share. Can see the blue lines from the manual T-piece boost controller, running 14 PSI as there's a boost cut programmed in at 14.7 PSI (I'll be getting around this soon)
And then I took it off the road for a while, and its currently in a workshop and hopefully things get interesting now.
Just in the last week or two I've been doing basic stuff
1) new tyres, fluids, wiper blades, etc.... these were the tires on the last change

Bit stupid on the camber (and the right foot ), probably some toe issues too. Gotta get a super alignment done soon
2) replaced both side 3/4 windows, one was cracked from vandalism and I replaced the other to keep a matching pair so when it goes in for a tint there'll be less hassle. I got some with gold trim around so that will be plasti-dipped soon. (pics later I guess?)
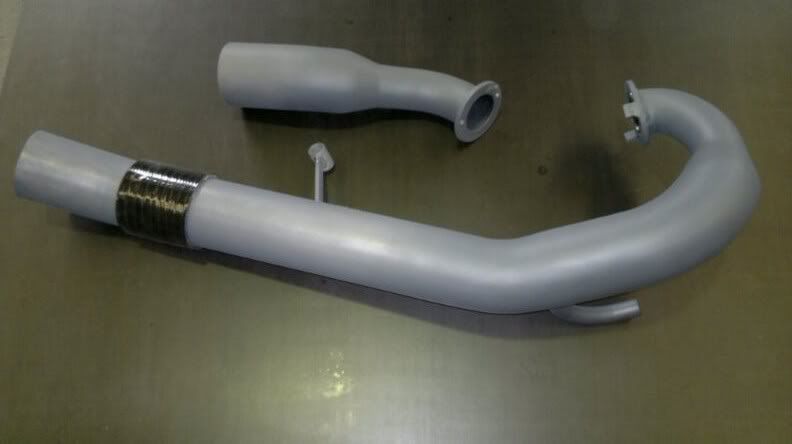
3) cat-back exhaust is now a full 2.5" with a 200cpi cat converter and 2.5" dump pipes from the stock turbos. Riding low over speedbumps chewed the **** out of the original cat converter, there were many lols had when we got it onto the hoist and saw this:

sorry for the big pic
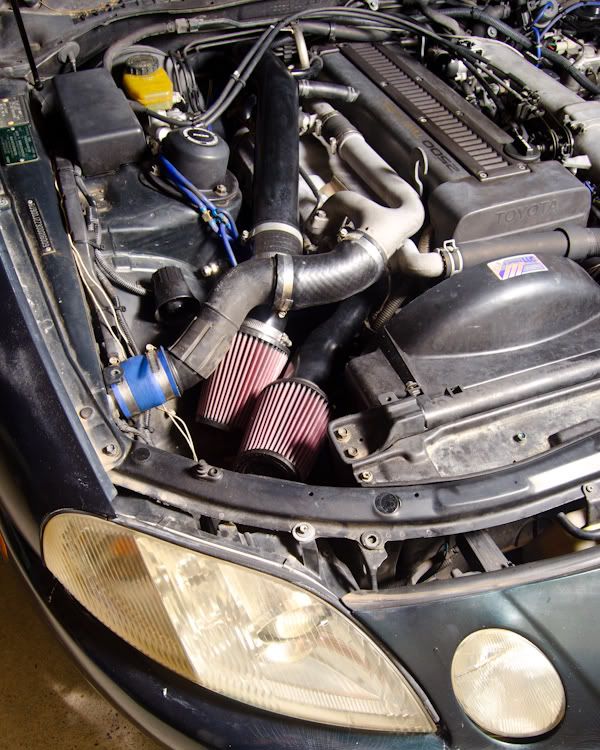
4) intercooler got a new mount position much higher, as can be seen in this old pic it was way too low and kept scraping on things
No current pic yet, but its much more discreet now which is good because Australian police dont like modified cars too much. I should have painted it black just for sneakyness, I'll probably do that next time the bumper is off
5) Switched from the single pod style air filter to a twin 3" hi flow intake setup with a pair of K&N filters:
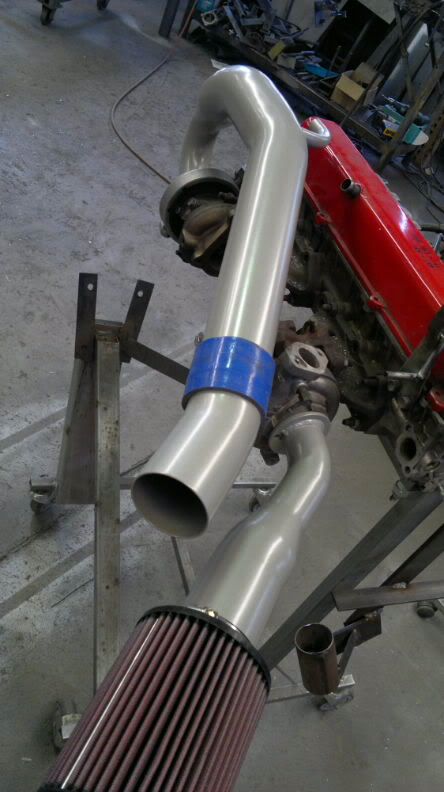
I got them powdercoated black though, this isn't my pic but its the same hiflow intake from the same builder, and the same K&N filters:
And thats where I'm up to at the moment. I've got a wish list as long as my arm, but not sure where to go with it just yet.
It needs an ECU and a tune, but there's an open-dyno day at a local workshop in a couple of weeks I'm going to wait until after that so I have a "before tune" power figure
Needs wheels and suspension, can't decide whether BC Racing coilovers or, here's a fun idea, the factory airbag suspension from a UZZ31 JDM Soarer... and some BMW replica wheels, possibly a Vertex / vertex copy kit, but lets not get carried away with what might happen. Just gotta wait and see
Hope this was interesting to some people, any specific questions or whatever about the japanese TT Soarer I'd be happy to try answering
I have a few pics from when it was detailed not long before I took it off the road:
The paint is actually in quite bad condition with hardly any clear coat on any panels. The headlights are very yellowed out unless I hit them frequently with some coarse polish, and they come up like new for a couple of months.
The exhaust was a 2.5" Fujitsubo cat-back (currently changed) with a really nice note. 275 width tires in the rear give it a nice fat *** too.
No idea what the wheels are, they were on teh car when imported from Japan, but they weigh next to nothing and are a decent composite wheel so I've kept them, but I'll be changing them soon as the style is pretty damn dated by now and they are flaking pretty badly from weather.
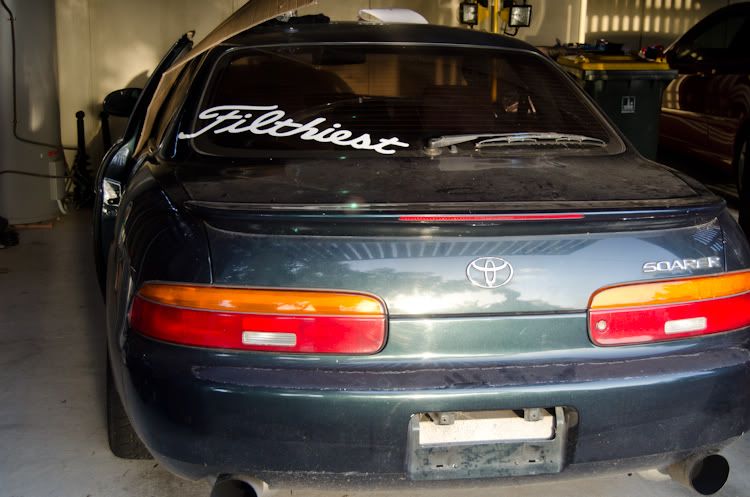
Can see an example of the flaking finish here
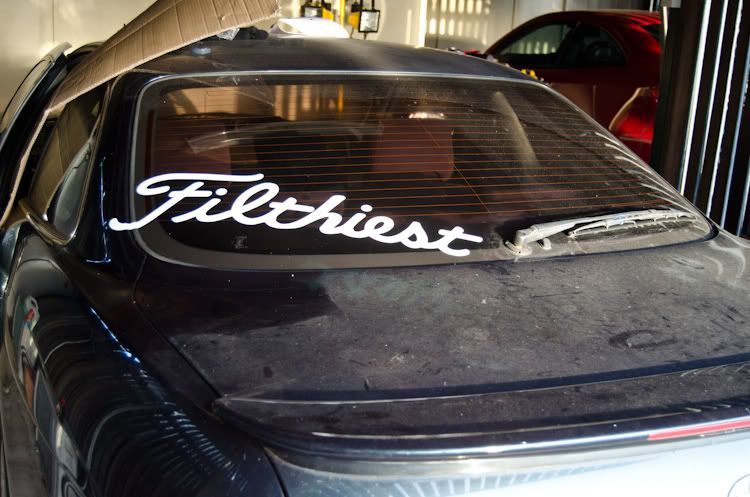
but also the ride height thanks to KYB shock/spring combo.This pic shows how low its sitting (on 17s) and the rake angle, which has obviously caused the cooler to get hit on a whole bunch of crap and the factory lip is long gone thanks to being smashed one too many times.
Poor angle, but the engine bay is kind of neat in this pic so thought I'd share. Can see the blue lines from the manual T-piece boost controller, running 14 PSI as there's a boost cut programmed in at 14.7 PSI (I'll be getting around this soon)
And then I took it off the road for a while, and its currently in a workshop and hopefully things get interesting now.
Just in the last week or two I've been doing basic stuff
1) new tyres, fluids, wiper blades, etc.... these were the tires on the last change
Bit stupid on the camber (and the right foot
), probably some toe issues too. Gotta get a super alignment done soon2) replaced both side 3/4 windows, one was cracked from vandalism and I replaced the other to keep a matching pair so when it goes in for a tint there'll be less hassle. I got some with gold trim around so that will be plasti-dipped soon. (pics later I guess?)
3) cat-back exhaust is now a full 2.5" with a 200cpi cat converter and 2.5" dump pipes from the stock turbos. Riding low over speedbumps chewed the **** out of the original cat converter, there were many lols had when we got it onto the hoist and saw this:

sorry for the big pic
4) intercooler got a new mount position much higher, as can be seen in this old pic it was way too low and kept scraping on things
No current pic yet, but its much more discreet now which is good because Australian police dont like modified cars too much. I should have painted it black just for sneakyness, I'll probably do that next time the bumper is off
5) Switched from the single pod style air filter to a twin 3" hi flow intake setup with a pair of K&N filters:
I got them powdercoated black though, this isn't my pic but its the same hiflow intake from the same builder, and the same K&N filters:
And thats where I'm up to at the moment. I've got a wish list as long as my arm, but not sure where to go with it just yet.
It needs an ECU and a tune, but there's an open-dyno day at a local workshop in a couple of weeks I'm going to wait until after that so I have a "before tune" power figure
Needs wheels and suspension, can't decide whether BC Racing coilovers or, here's a fun idea, the factory airbag suspension from a UZZ31 JDM Soarer... and some BMW replica wheels, possibly a Vertex / vertex copy kit, but lets not get carried away with what might happen. Just gotta wait and see
Hope this was interesting to some people, any specific questions or whatever about the japanese TT Soarer I'd be happy to try answering
 03-21-12 | 08:47 AM
#3

Racer
Joined: Apr 2006
Posts: 1,348
Likes: 46
From: Toronto, Ontario
Looks good so far. 
You've peaked my interest with the intake pipes. I've been following the thread on Soarer Cental; eager to see what kind of gains these bring for you. I thought my stock cat was beat from scraping... definitely gave me a laugh when I saw the pic of yours! Just wondering, which ECU will you be going with?
You've peaked my interest with the intake pipes. I've been following the thread on Soarer Cental; eager to see what kind of gains these bring for you. I thought my stock cat was beat from scraping... definitely gave me a laugh when I saw the pic of yours! Just wondering, which ECU will you be going with?

 03-21-12 | 01:22 PM
#6
Thread Starter
Rookie
Joined: Mar 2012
Posts: 73
Likes: 0
From: qld
 I really wanted to get the safety certificate and registration on Friday, looks like its going to be Monday though :/ But as I'm sure you know, it's a pretty good rule of thumb to double or triple how long you think your car is going to be in a workshop
Looks good so far.
You've peaked my interest with the intake pipes. I've been following the thread on Soarer Cental; eager to see what kind of gains these bring for you. I thought my stock cat was beat from scraping... definitely gave me a laugh when I saw the pic of yours! Just wondering, which ECU will you be going with?
You've peaked my interest with the intake pipes. I've been following the thread on Soarer Cental; eager to see what kind of gains these bring for you. I thought my stock cat was beat from scraping... definitely gave me a laugh when I saw the pic of yours! Just wondering, which ECU will you be going with?

So badass.
Trending Topics
03-22-12 | 01:25 AM
#8
Thread Starter
Rookie
Joined: Mar 2012
Posts: 73
Likes: 0
From: qld
Good news, should be picking the car up in the morning and if I dont get faffed around by the safety inspection guy then I'll be rolling the streets in time for the weekend 
Means I can get some random things done here and there to get it cleaned up, post some updated pics for reference, etc.
Fun times, I'm so excited
Means I can get some random things done here and there to get it cleaned up, post some updated pics for reference, etc.
Fun times, I'm so excited
03-23-12 | 04:59 PM
#9
Thread Starter
Rookie
Joined: Mar 2012
Posts: 73
Likes: 0
From: qld
Picked up the car yesterday with the new dumps, replaced ECU, and dual intakes fitted. The intakes are loud as *****. Also the dose noise is really loud and will take some getting used to (might be an Aussie term, it's the loud release of intake pressure, sounds like a loud pigeon noise but it's the pod filters not a blow off valve)
I didn't have time for te pre-registration safety inspection but that's happening this morning. Hopefully he's not an ******* about my modifications
I didn't have time for te pre-registration safety inspection but that's happening this morning. Hopefully he's not an ******* about my modifications
03-23-12 | 11:14 PM
#11
Thread Starter
Rookie
Joined: Mar 2012
Posts: 73
Likes: 0
From: qld
It's a completely different noise, from a different mechanical component
"Dose" (as Australians call it for some reason) is from the intake, I even get two noises in harmony as the twin intakes are different lengths so its like two different notes to the sound
not sure if I like it yet but it's there and it's staying so whatever
03-23-12 | 11:18 PM
#12
Thread Starter
Rookie
Joined: Mar 2012
Posts: 73
Likes: 0
From: qld
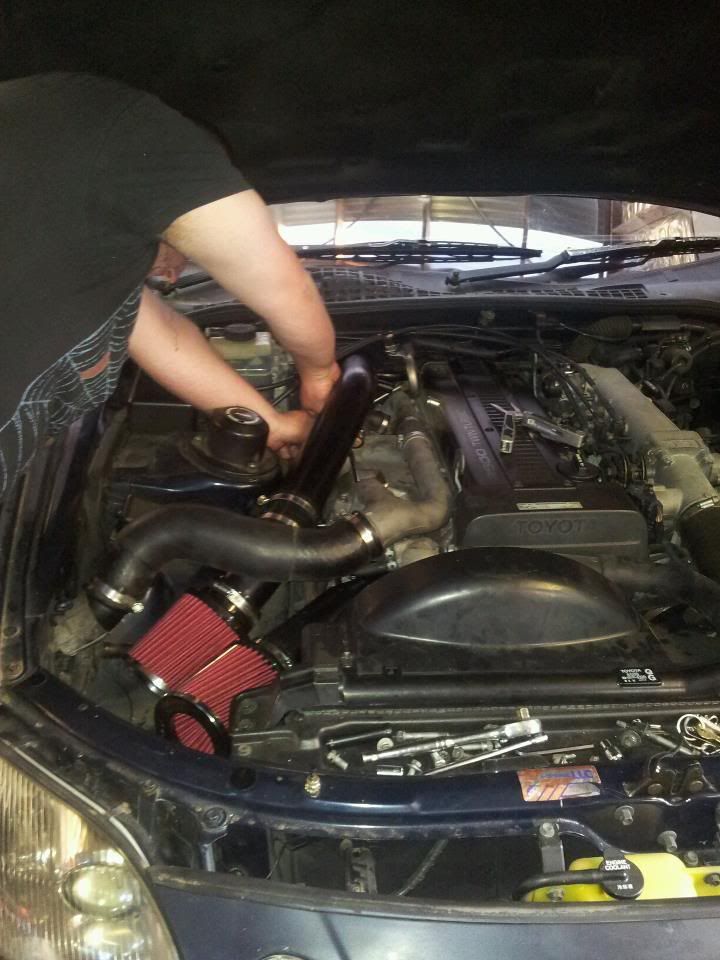
So yeah, anyway. I got the car back yesterday. Pics of the intakes on my car:
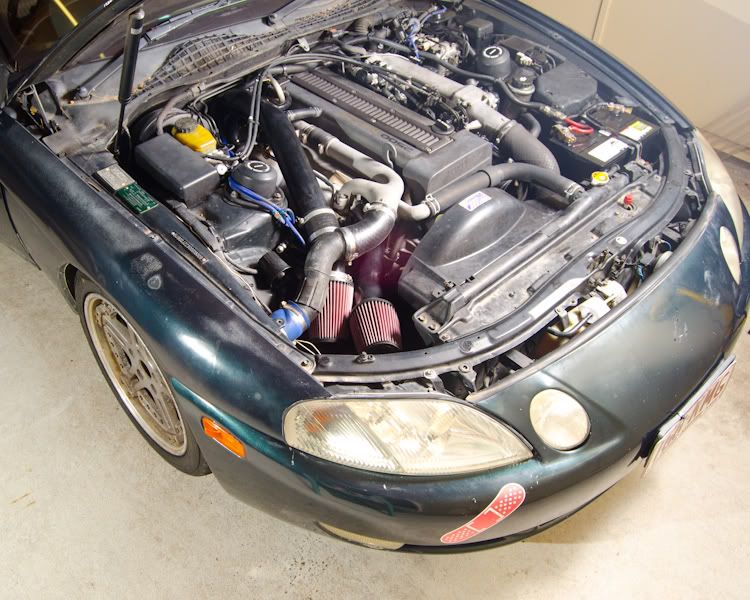
Added a little Band-Aid for my front bumper crack
Yeah my engine bay is full of dust and crap in the corners, call the cops
Added a little Band-Aid for my front bumper crack
Yeah my engine bay is full of dust and crap in the corners, call the cops
03-23-12 | 11:38 PM
#13
Thread Starter
Rookie
Joined: Mar 2012
Posts: 73
Likes: 0
From: qld
I wanted to try my hand at carbon wrapping some parts, so I acquired all the necessary **** and went to town on that bad boy. Vinyl is Oracal CF, apart from that you need some rubbing alcohol and a craft knife, and a squeegee to smooth it out with (felt edge is best, I couldn't find one on short notice but they are mad easy to order online). Some applications you'll need a heat gun but for this basic stuff I didn't find I needed it. More complex shapes you definitely will
Just did the B-pillars so far.
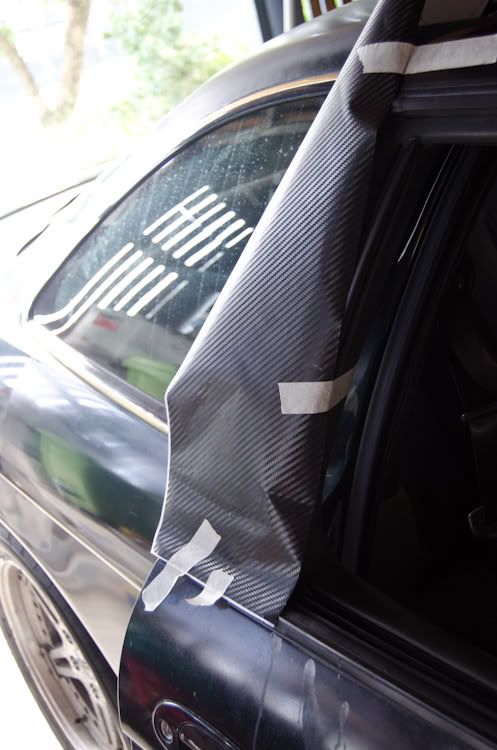
Get it cut into a rough shape and loosely tape it on just for now. I was kind of **** about what direction the fibers were going in, doesn't mean you have to be too.
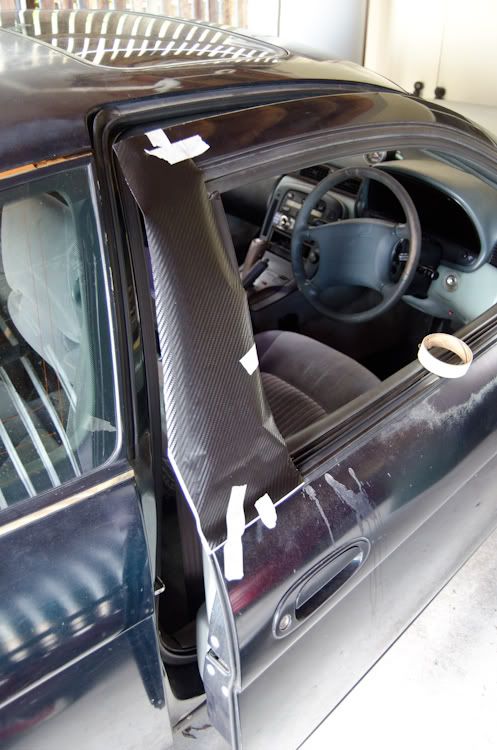
Trimmed up a little more and had it lined up nicely.
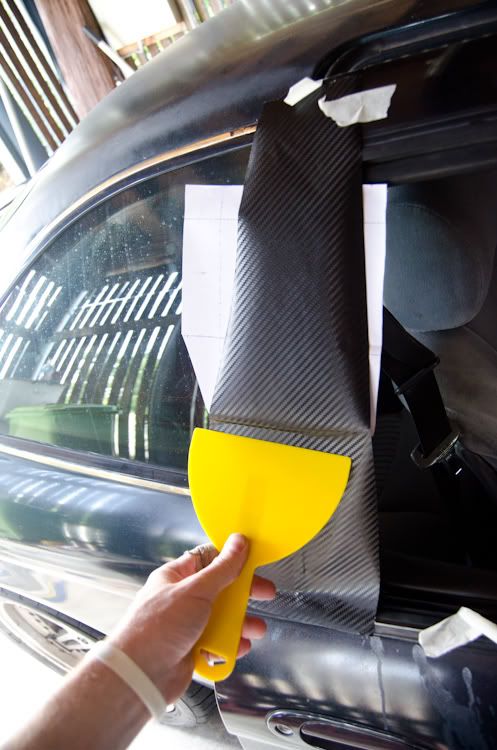
Crunch time, peel an edge and start there. Some application tutorials say to peel the whole backing and lay it down, but even though I've never done vinyl wraps I've always found with other stuff I've done that you can peel just half and it makes the un-peeled section more manageable, rather than sticking to your hand / random **** / folding back and sticking to itself. Smooth out from the center and once you're good on that half, peel the rest and slick that down in one smooth motion as in the pic above and you'll get the whole main section done... then you just gotta trim with the exacto knife and pull / stretch the edges around and stick them.
Not bad. It's my first time applying automotive vinyl and if I didn't tell you, you wouldn't know it wasn't done by a pro
Just did the B-pillars so far.
Get it cut into a rough shape and loosely tape it on just for now. I was kind of **** about what direction the fibers were going in, doesn't mean you have to be too.
Trimmed up a little more and had it lined up nicely.
Crunch time, peel an edge and start there. Some application tutorials say to peel the whole backing and lay it down, but even though I've never done vinyl wraps I've always found with other stuff I've done that you can peel just half and it makes the un-peeled section more manageable, rather than sticking to your hand / random **** / folding back and sticking to itself. Smooth out from the center and once you're good on that half, peel the rest and slick that down in one smooth motion as in the pic above and you'll get the whole main section done... then you just gotta trim with the exacto knife and pull / stretch the edges around and stick them.
Not bad. It's my first time applying automotive vinyl and if I didn't tell you, you wouldn't know it wasn't done by a pro
Last edited by davierogue; 03-23-12 at 11:41 PM.