8052JZ's NA-T Build
 12-22-13, 07:55 AM
#451

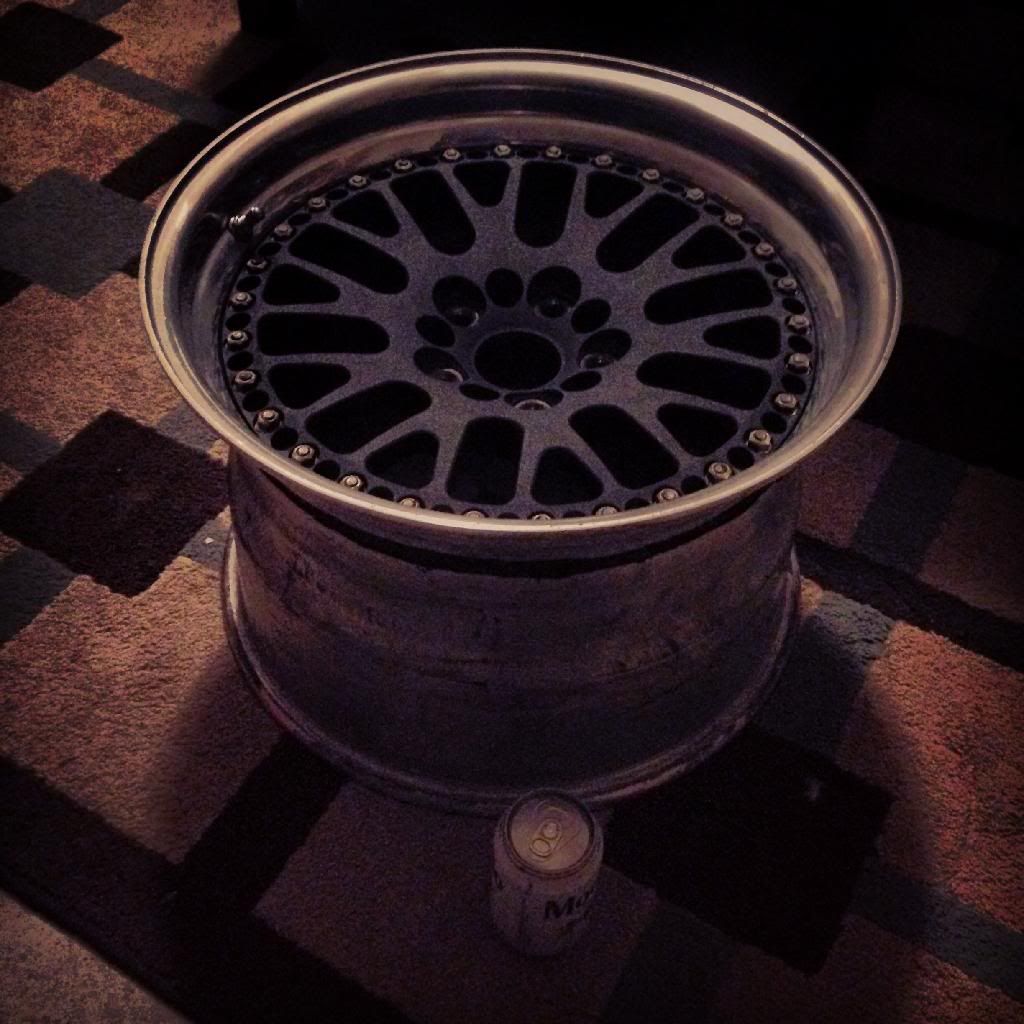
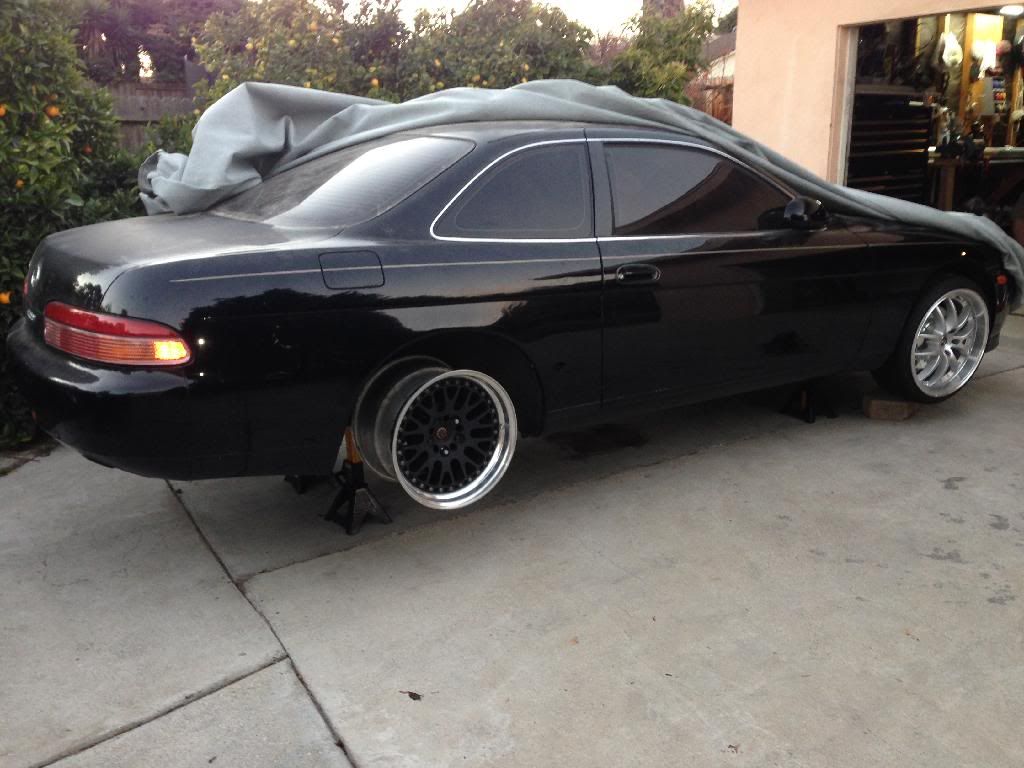
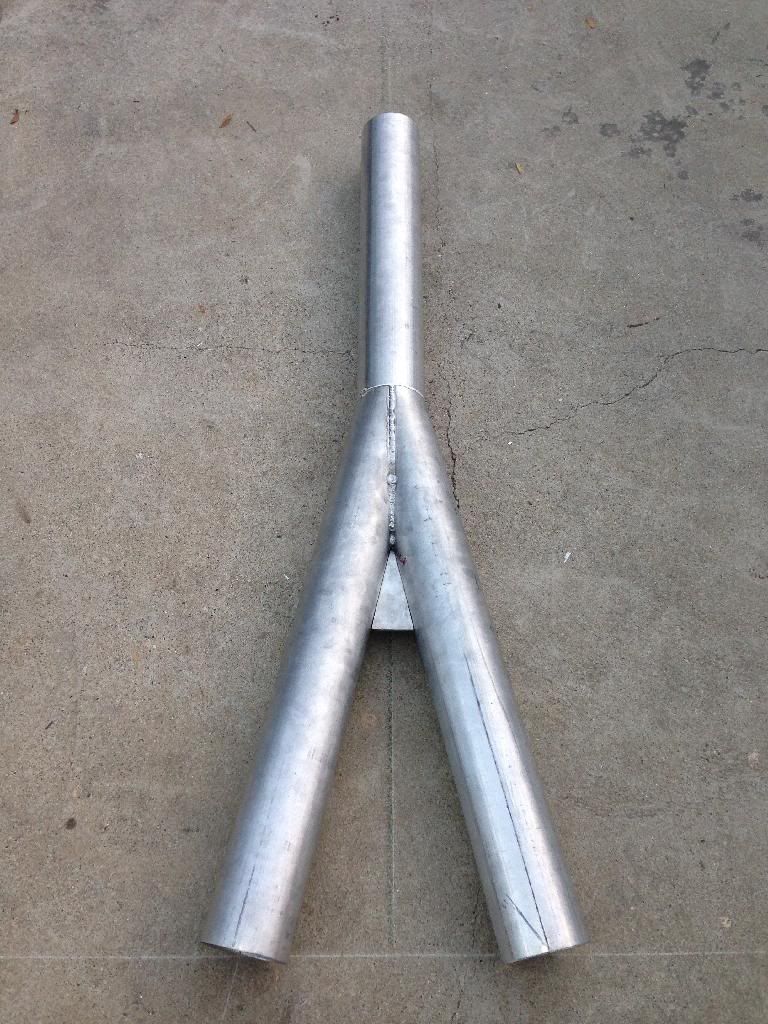
I was able to get a few things done yesterday. Test fit the ccw classics with only an inch to spare. Also got the aluminum 4" merge made up and welded. Pics of merge will be posted later so I can explain how we did it for anyone else that wants to do the same.


 12-23-13, 08:55 AM
#452
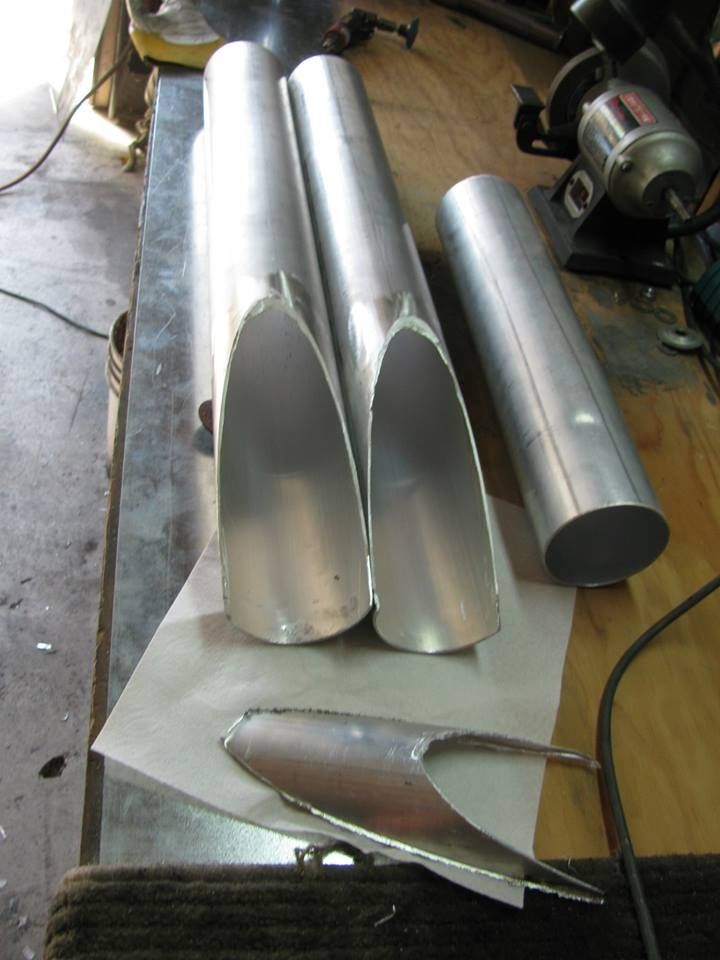
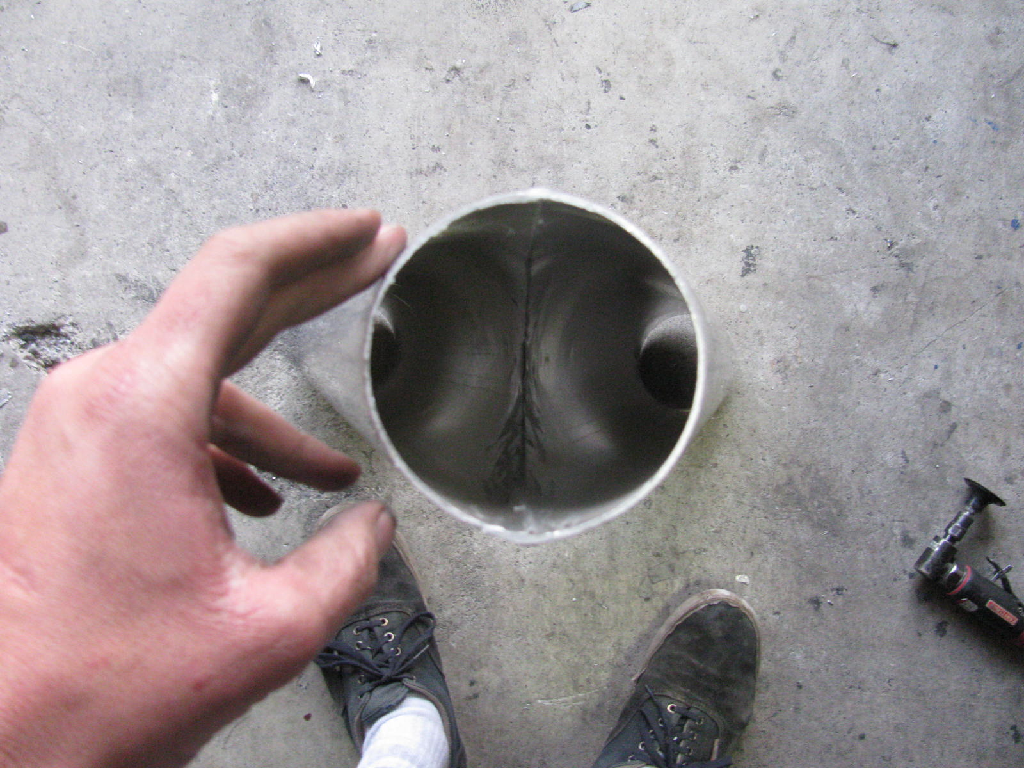
LONG POST but what ever... Here is how we did the merge pipe.
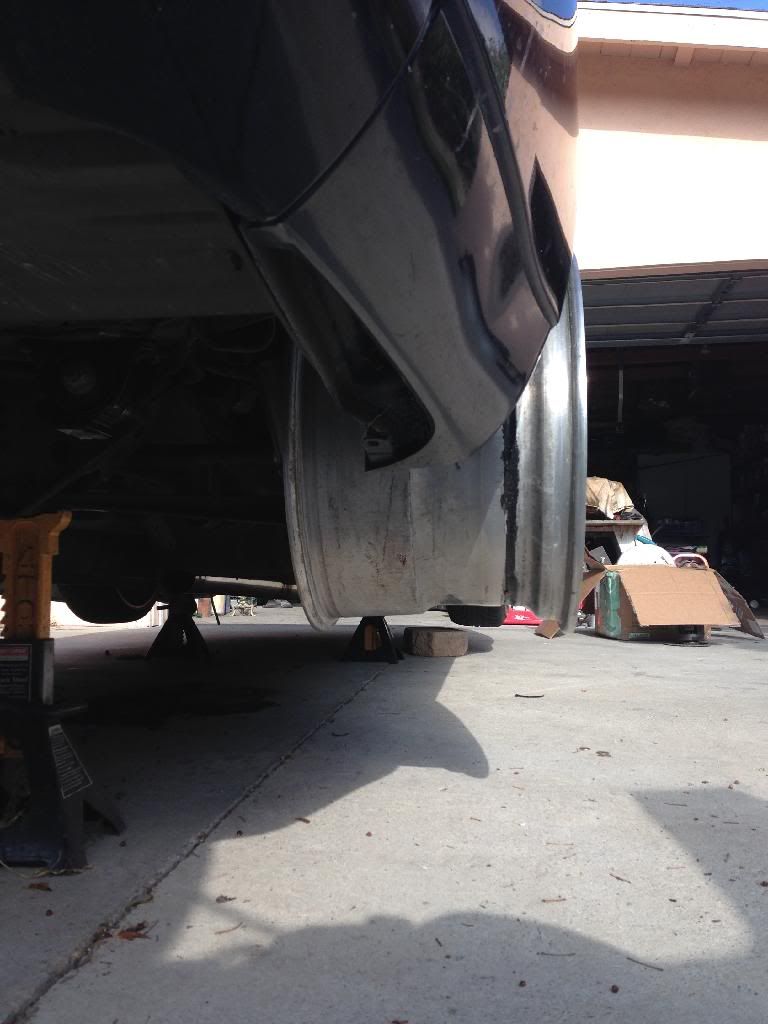
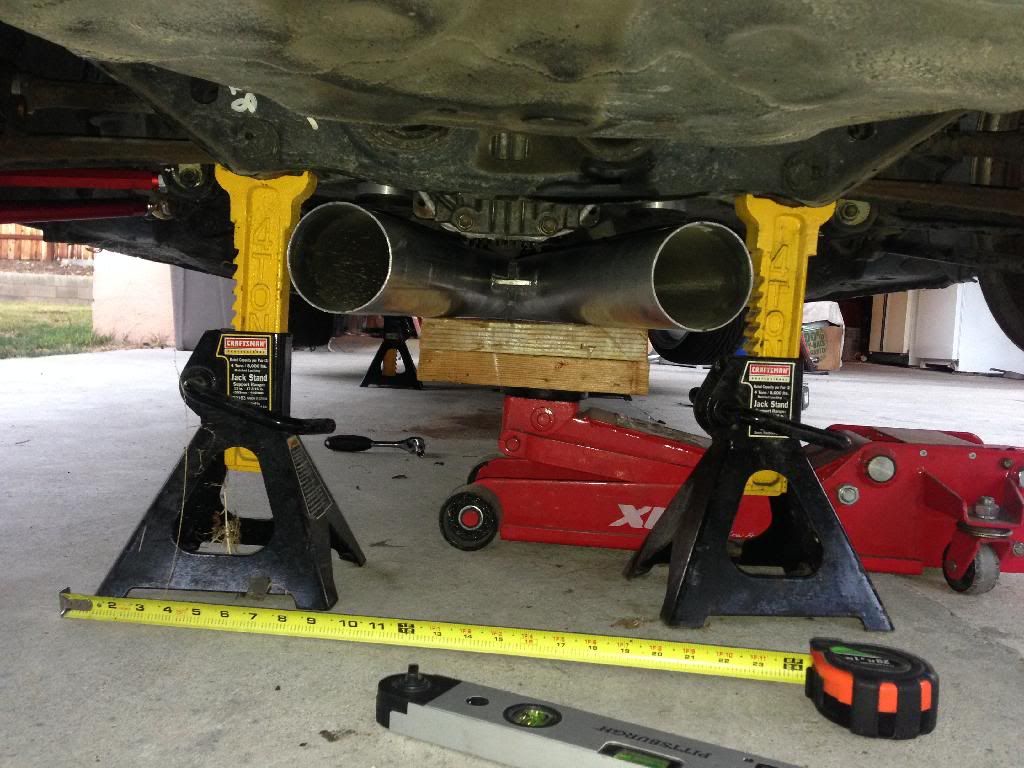
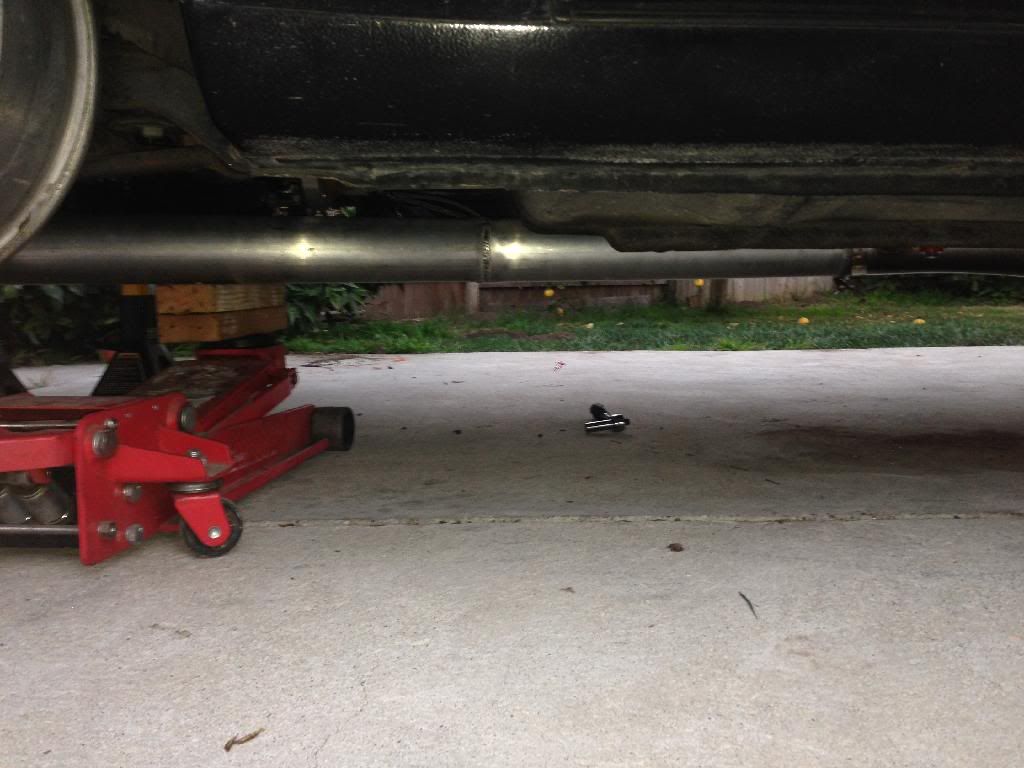
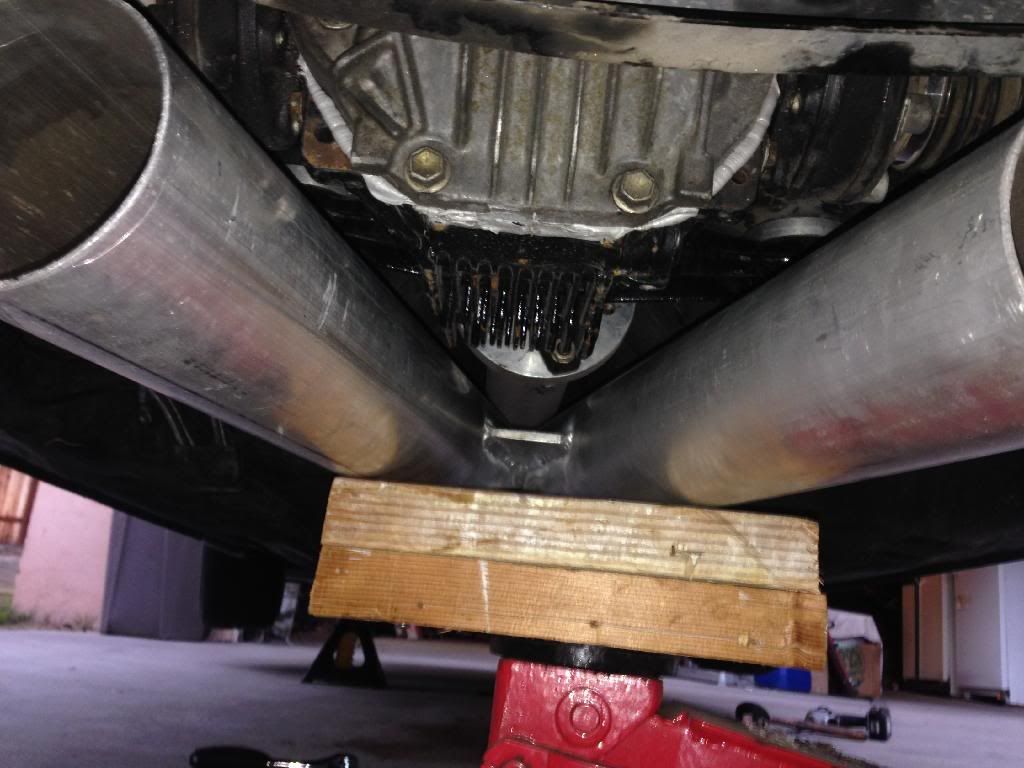
First things first, sense I have the jack stands on the lower control arm. It was a perfect spot to start sense I wanted the end of the pipe to be inside of those to jack stands. Measured to be 18”. Than we measured the distance from the end of the mid pipe to the end of the sub frame which is 3ft I believe.
-Now that we got the basic measurements, we proceeded to draw it out the driveway so we have a template to work with and to make sure everything will align properly. After drawing it out on the driveway, we ended up with a “T”. The 3-4ft is going to be the center line so we measured 9” to one side and 9” to the other side to make the 18” measurement centered. Sense we are working with a 4” pipe we took 2” off the 9” on both sides making is 7” on both side from the center line. This will be the mark for the center of the 4” pipe. The length of the two pipes that will be merged was cut at about 22” or so we also have to place a mark on the center line for that 22” staring at the top of the “T” down 22”. Than we connected the dots to make a triangle which now will give us the angle we want the two pipes to be at. Ended up to be 25.8. Than we divided that by 2 to get 12.9. That’s the angle we set the chop saw too.
Now that we got the saw set to the angle we want, we need to mark the center lines of the pipe. Best way to do this is to get the circumference of the 4” pipe and divide that by 2 and that will give you the center line for both ends of the pipe. WE used a piece of paper to wrap around the pipe. Than draw the line with a straight edge along the length of the pipe. Yay time to cut!
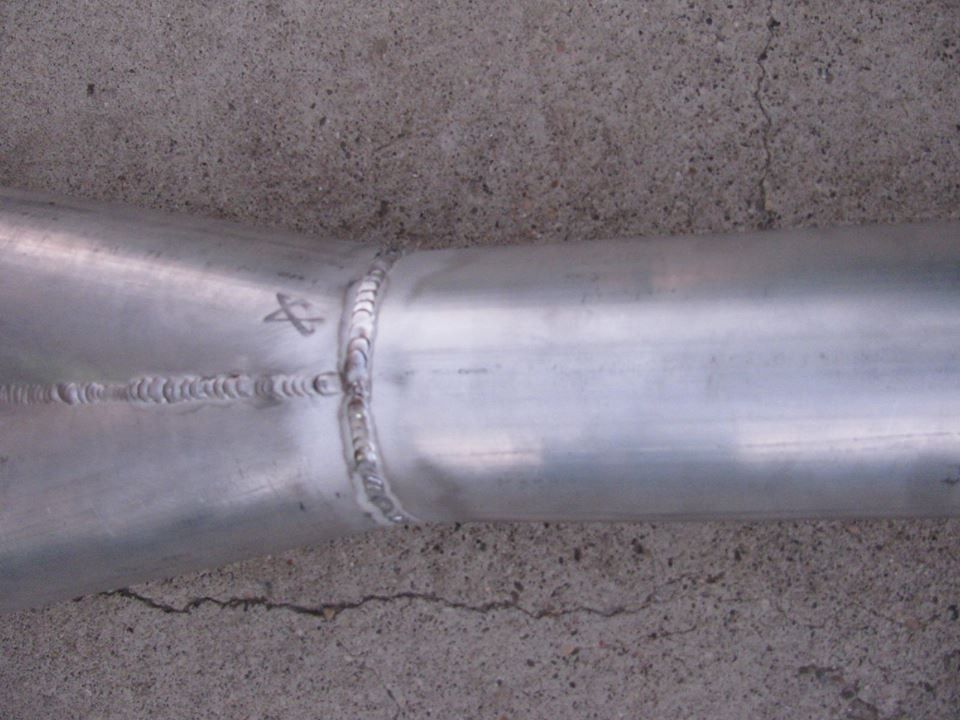
The over when cutting the pipe, make sure the pipe center lines are straight up and down and with the saw blade at the end of the pipes center line. Than cut! Clean burs, place pipes on your template with the center lines of the pipe on the 7” marks and make sure your angle is correct! Than weld! After the merge is completely welded, you will need to cut the end of the merge so it makes a perfect 4” OD for the single pipe coming off the mid pipe. Do the basic measuring for that length of the pipe and weld to the merge.
This is what we ended up with I’m sure the measurements are not spot on sense I'm going off by memory but you get the idea of how its done. Worked out perfectly!
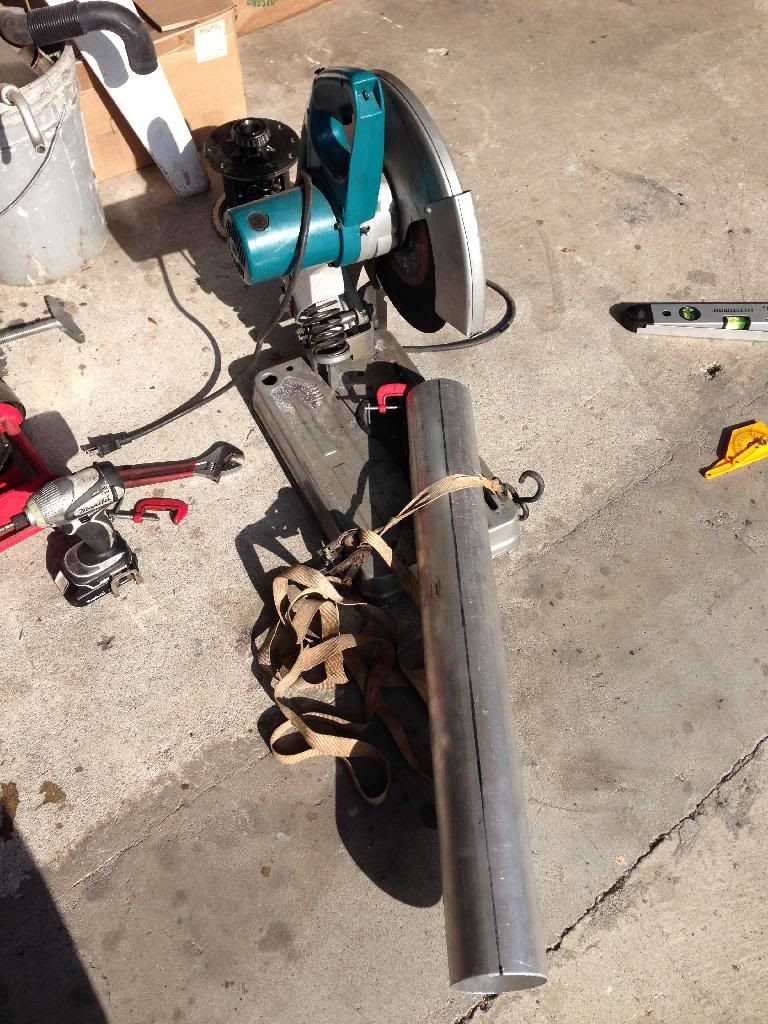
We rigged up the saw like this lol kinda funny but it held in place and didn't move one bit.
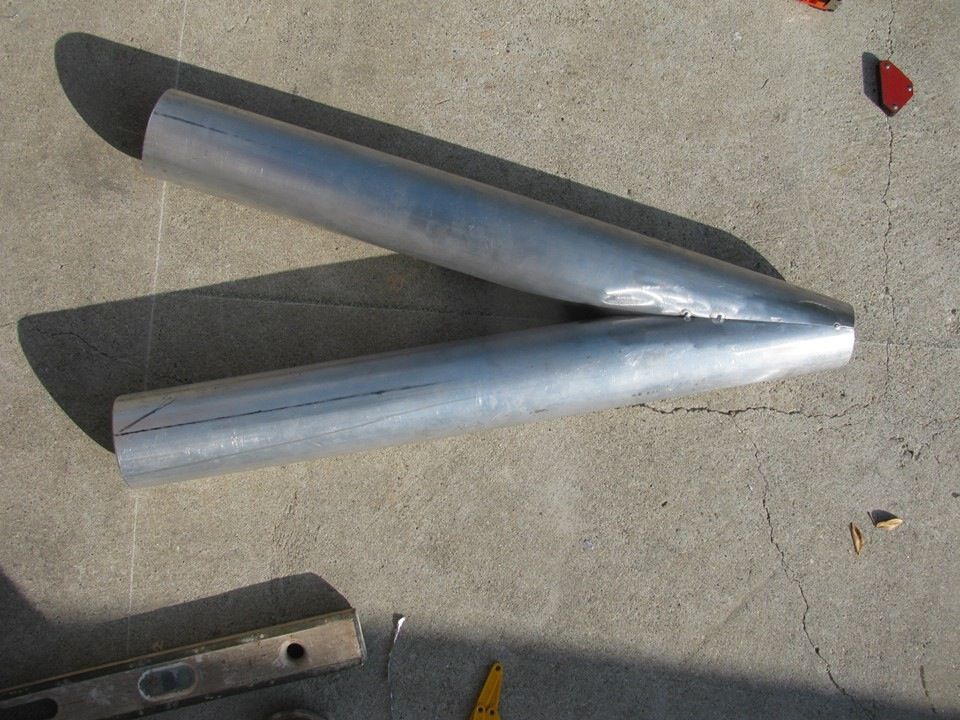
You Can almost see the Marks on the driveway we used
First things first, sense I have the jack stands on the lower control arm. It was a perfect spot to start sense I wanted the end of the pipe to be inside of those to jack stands. Measured to be 18”. Than we measured the distance from the end of the mid pipe to the end of the sub frame which is 3ft I believe.
-Now that we got the basic measurements, we proceeded to draw it out the driveway so we have a template to work with and to make sure everything will align properly. After drawing it out on the driveway, we ended up with a “T”. The 3-4ft is going to be the center line so we measured 9” to one side and 9” to the other side to make the 18” measurement centered. Sense we are working with a 4” pipe we took 2” off the 9” on both sides making is 7” on both side from the center line. This will be the mark for the center of the 4” pipe. The length of the two pipes that will be merged was cut at about 22” or so we also have to place a mark on the center line for that 22” staring at the top of the “T” down 22”. Than we connected the dots to make a triangle which now will give us the angle we want the two pipes to be at. Ended up to be 25.8. Than we divided that by 2 to get 12.9. That’s the angle we set the chop saw too.
Now that we got the saw set to the angle we want, we need to mark the center lines of the pipe. Best way to do this is to get the circumference of the 4” pipe and divide that by 2 and that will give you the center line for both ends of the pipe. WE used a piece of paper to wrap around the pipe. Than draw the line with a straight edge along the length of the pipe. Yay time to cut!
The over when cutting the pipe, make sure the pipe center lines are straight up and down and with the saw blade at the end of the pipes center line. Than cut! Clean burs, place pipes on your template with the center lines of the pipe on the 7” marks and make sure your angle is correct! Than weld! After the merge is completely welded, you will need to cut the end of the merge so it makes a perfect 4” OD for the single pipe coming off the mid pipe. Do the basic measuring for that length of the pipe and weld to the merge.
This is what we ended up with I’m sure the measurements are not spot on sense I'm going off by memory but you get the idea of how its done. Worked out perfectly!
We rigged up the saw like this lol kinda funny but it held in place and didn't move one bit.


You Can almost see the Marks on the driveway we used


 01-02-14, 08:13 AM
#453
Happy New Year CL! Hope everyone had a good 2013! And I want to say thanks to all that have helped me in this long *** build with advise and suggestions through out. May 2014 even better!
Been trying to get the car to run but no such luck. After talking with a few members, turns out that the ignition settings for the VVTI setup were not set correctly in the v2 software. Ali was able to correct them but I haven't been able to load the new map to see what happens. So well see in the next few days or this weekend.
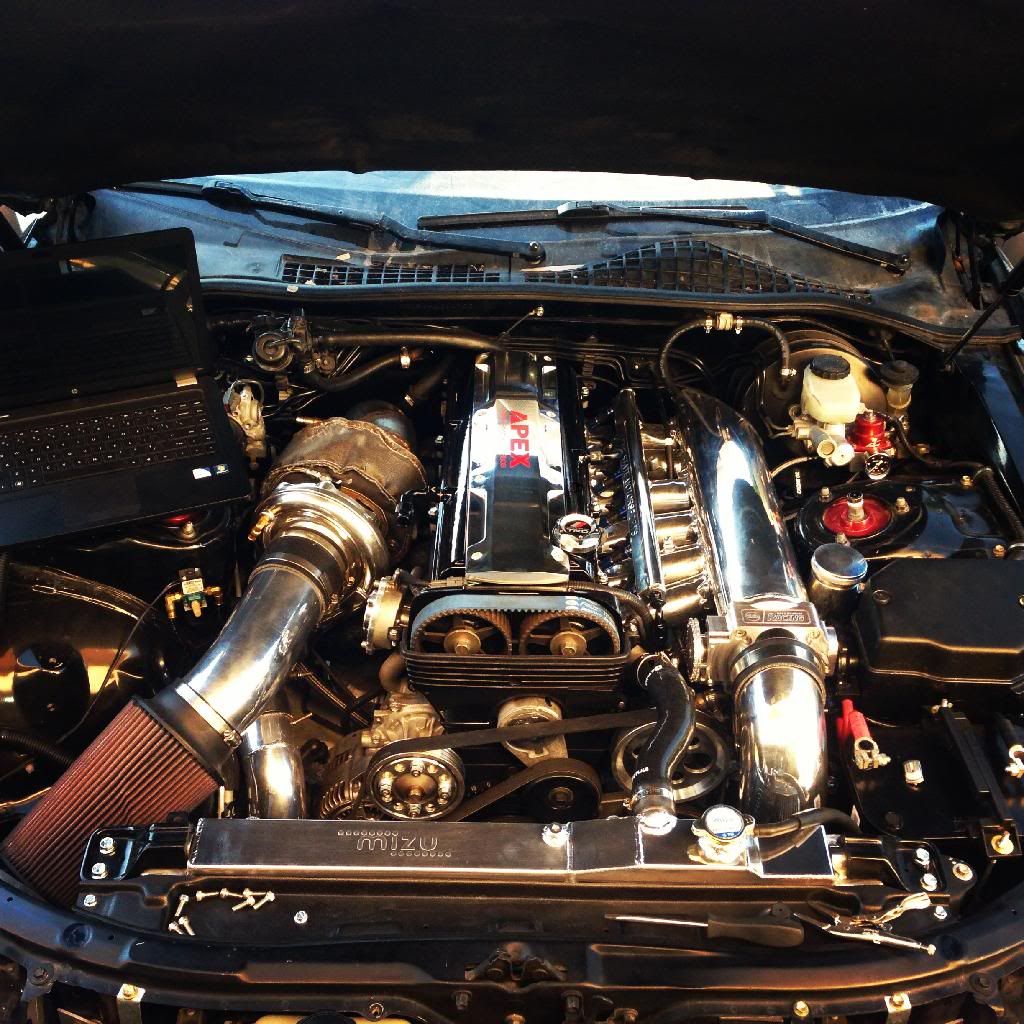
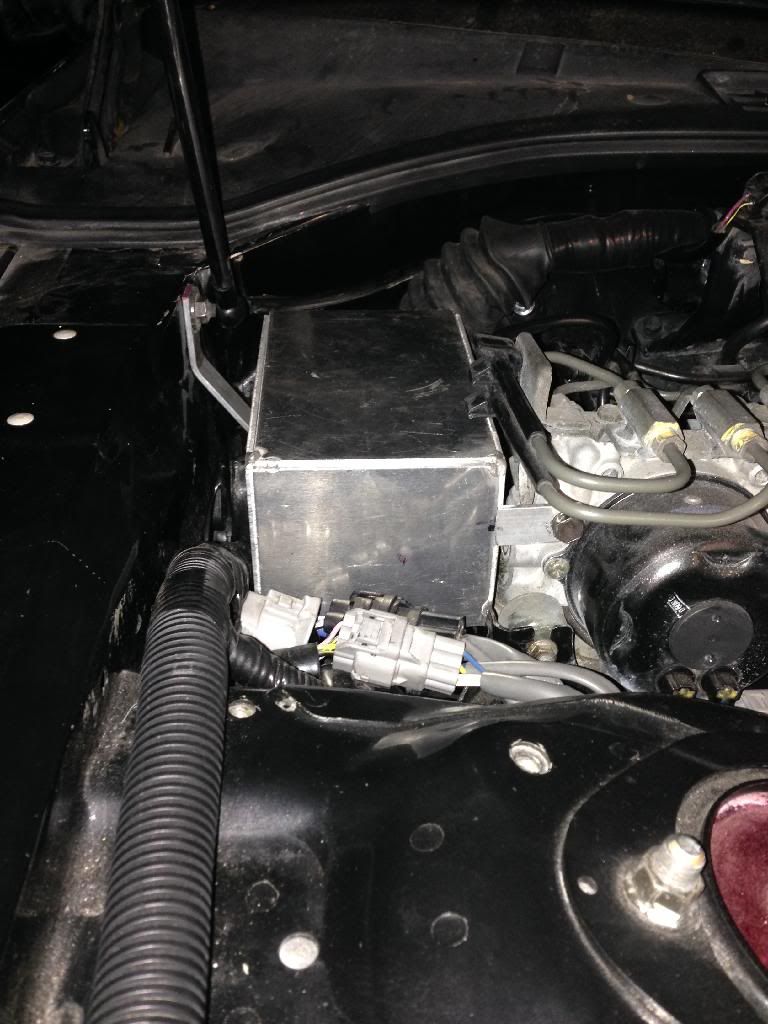
Current pic of the bay. Still waiting on the catch and i should be all set!
Been trying to get the car to run but no such luck. After talking with a few members, turns out that the ignition settings for the VVTI setup were not set correctly in the v2 software. Ali was able to correct them but I haven't been able to load the new map to see what happens. So well see in the next few days or this weekend.
Current pic of the bay. Still waiting on the catch and i should be all set!

 01-06-14, 08:07 AM
#458
So still no luck on getting her fired up?! I think something with the settings are not right sense all the sensors are reading on the AEM. NO SPARK! checked the plugs and seems like its getting fuel but no spark. Either settings are not right or the vvti wiring is not configured right. although the ignitor and coils are getting 12v?! I'm going to do a continuity test on the wiring to make sure that the wires are going where they are suppose too ignitor and ecu side. Also emailed fsr to see if they can take a look at my cal and crank logs to see if they can see anything that needs to be changed.
But I did get more done.
DP wrapped and sprayed
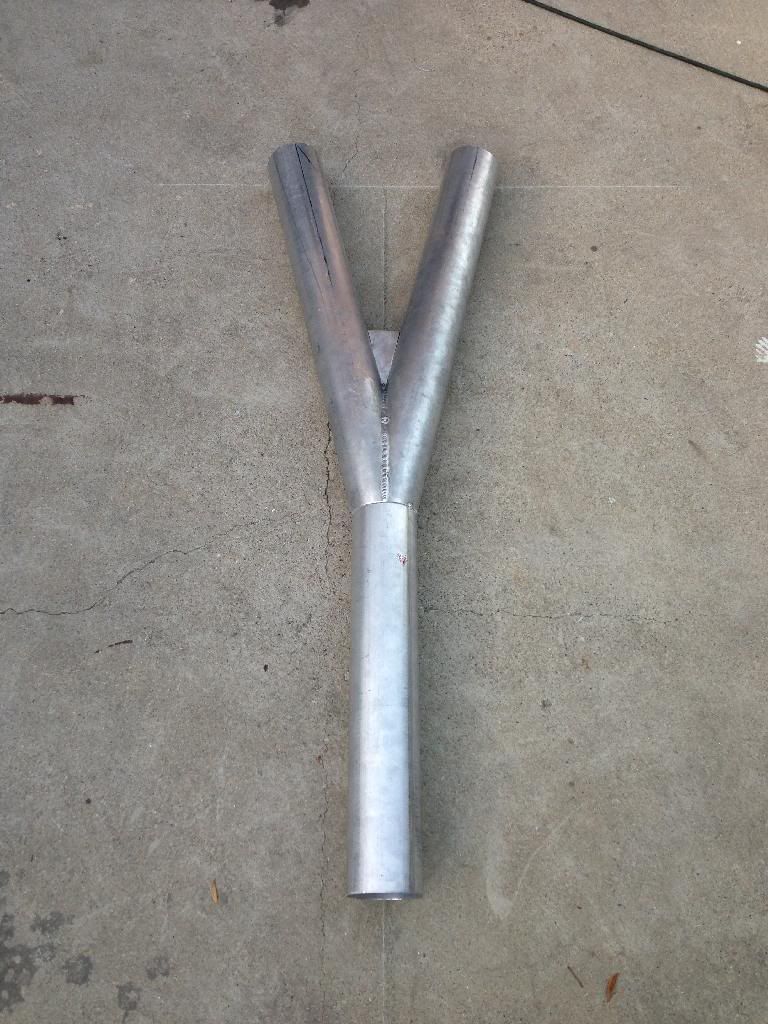
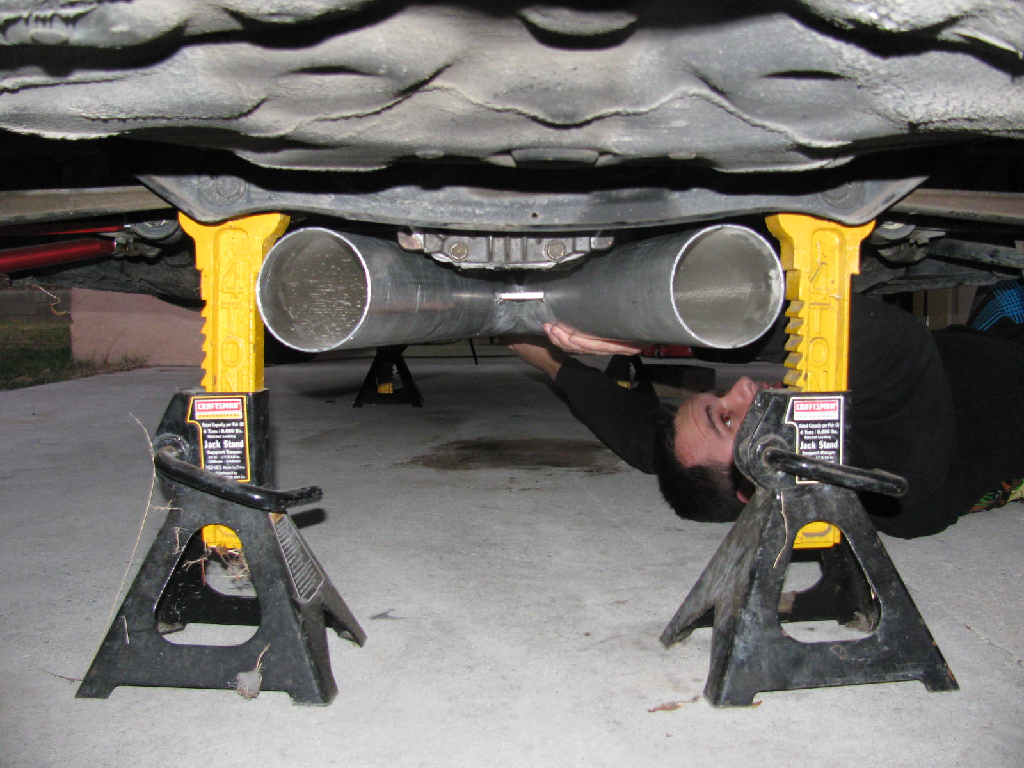
Midepipe finished along with the Y just need to finish the muffler part of the exhaust.
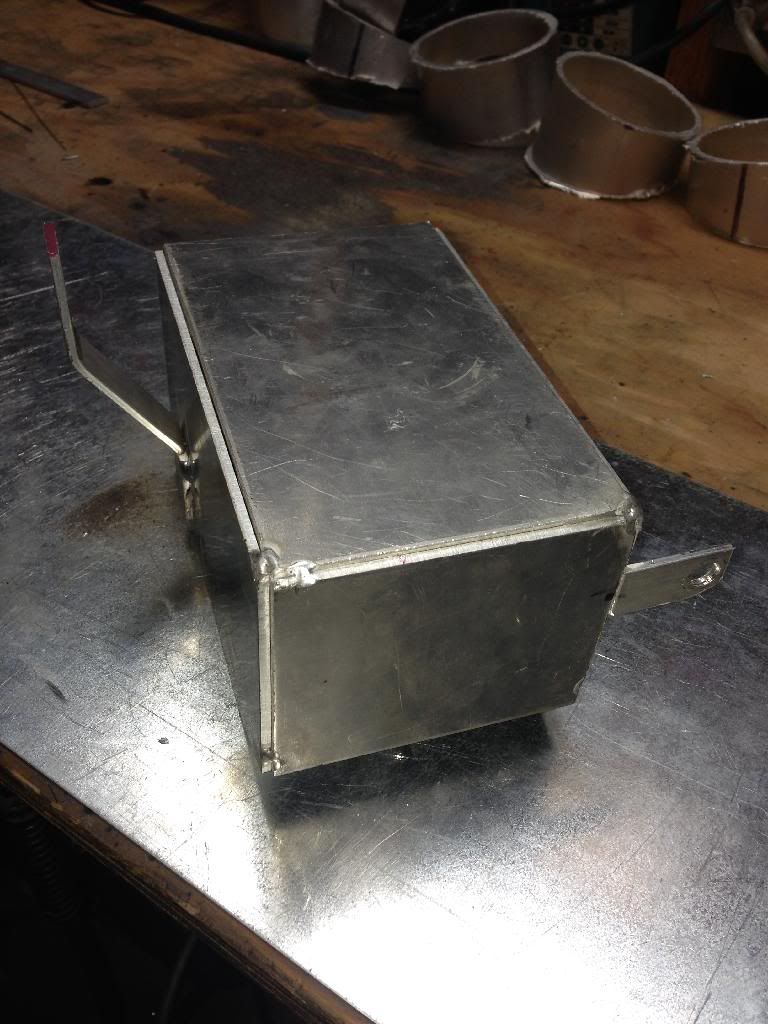
Not taking credit for the catch can that my buddy is making but I was able to test fit and make some mounts so it can be finished hopefully this week.
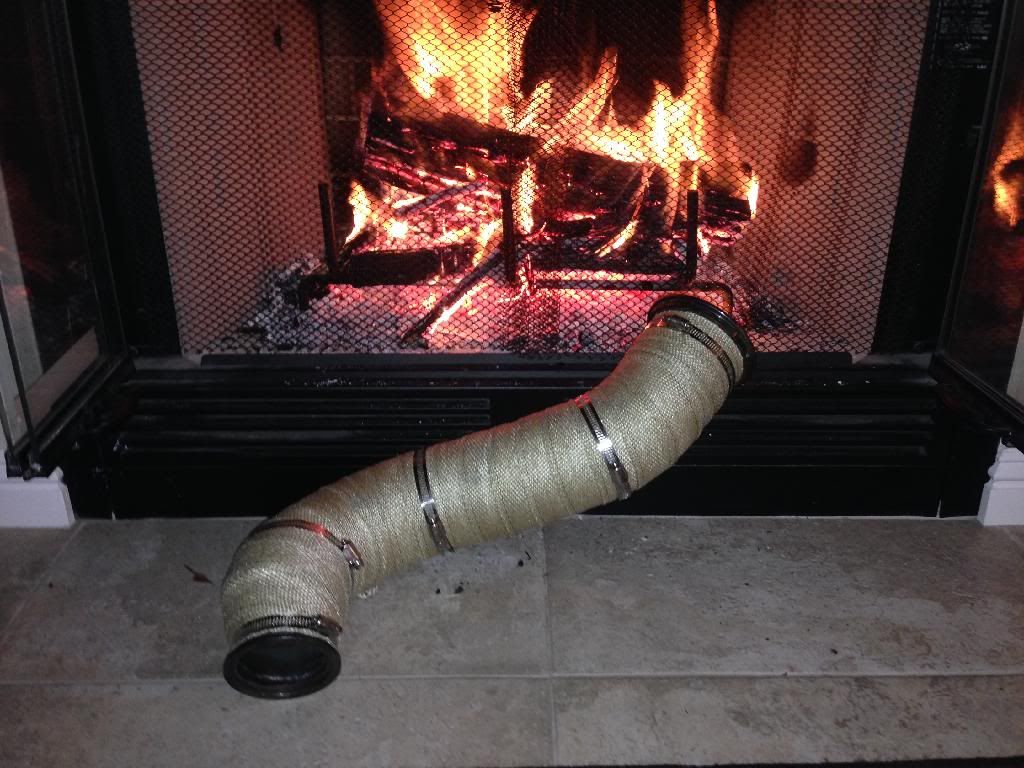
After wrapping i set the DP next to the fire to cure and dry up before spraying. Worked great. I did two coats of the spray.
Exhaust after its bolted on still need to make mounts to hold up the back half.
And Catch Can
But I did get more done.
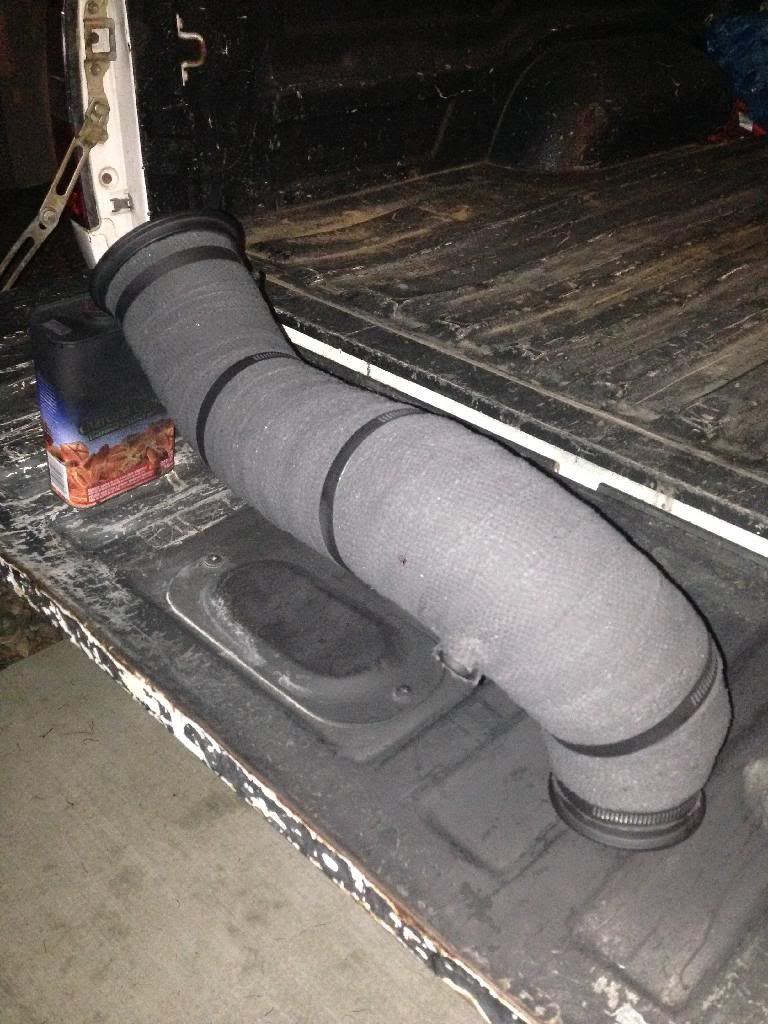
DP wrapped and sprayed
Midepipe finished along with the Y just need to finish the muffler part of the exhaust.
Not taking credit for the catch can that my buddy is making but I was able to test fit and make some mounts so it can be finished hopefully this week.
After wrapping i set the DP next to the fire to cure and dry up before spraying. Worked great. I did two coats of the spray.


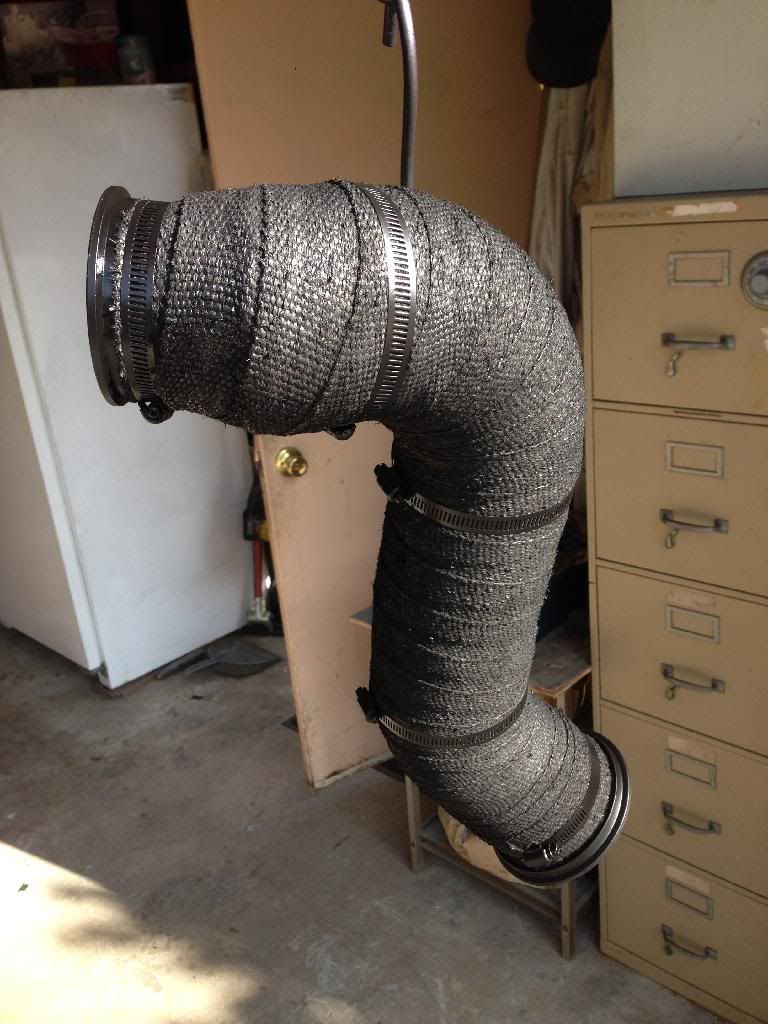
Exhaust after its bolted on still need to make mounts to hold up the back half.


And Catch Can

 01-07-14, 08:40 AM
#459
Well Big Bertha took its first breath last night!! After working out a few things that I came across while troubleshooting why it wouldn't start, she fired right up.
Had a few issues to work out sense it wasn't starting over the last weekend. The ignitors trigger wires for Coils 1-3 to the AEM where in the wrong pins. I forgot that the V2 uses different pins for coils as I had it wired for the V1. While I was at it, I check continuity for the ignition setup to make sure I had the rest of the wires going to the right pins to the ignitor which where all correct. Loaded a fresh map with the correct settings that Gerb and Ali helped put together and she fired up.
Here is a short video I took around 10pm last night. The neighbors were not to happen with the open exhaust lol
 01-07-14, 02:30 PM
#464
1JZ Single SC400
iTrader: (59)
Join Date: Jan 2009
Location: Alabama, Roll Tide!
Posts: 8,518
Likes: 0
Received 15 Likes
on
12 Posts
The build and bay looks amazing man. My mouth dropped when I saw the engine. So thankful you got it to run. It seems everyone has problems with the wiring nowadays. I can't wait to see what it does. I am impressed with it all bro!!!
01-07-14, 03:00 PM
#465
Thank you! Wiring is very tricky but its just a matter of knowing the basics which gerb is covering in his thread! I think everyone should read through it and learn from it when you they get a chance. Its tedious work, but it can help in you in so many ways and save you lots of cash! I took my time on the harness when I re-loomed it and took out any plugs I didn't need and added what I did. Took my time to trace EVERYTHING to make sure I'm working with the right wires. In my case my wiring was correct, but for the AEM v1 ecu not the v2. Which thankfully was an easy fix. Imagine if something wasn't wired right after all the work you put into re-looming your harness and trying to figure out what happen. Maybe that why some people just give up on that aspect of there build.