Project AARP Casino Cruiser - LS400 5spd drift car build


 06-06-13, 08:39 AM
#122
Driver
Thread Starter

2093.85F/1713.15R. So now let's take the following into consideration;
Spare tire 43.4
Driver side muffler 11.1
Passenger side muffler 11.1
Subwoofer 4
Jack & crank handle 5.7
Spare tire bucket & tie down 1.4
Spare tire cushion 1
Long under trunk latch carpeted piece 1.4
Trunk side piece with first aid box 1.9
Trunk side piece with Tool kit 5.7
Trunk lid cover 2.7
-------------------------------------------------88.14
Steering wheel 4.6
Driver side airbag 4
Rad support intake scoop and trim 3.7
Foot parking brake cable 1.9
Proportioning valve and brake lines 3
Aluminum AC elbow 0.9
Center console HVAC duct 1
ABS ECU 2.9
Passenger seat 67
Drivers seat w/ ecu 69.7
TRAC pump 5
ABS Pump 13.6
AC Condenser 9.8
AC Fans 6.6
AC piping 5.8
EGR 2.2
AC Compressor 16.3
Fan clutch 4.3
Auto trans 185.1
Clock spring 0.4
Radio & brackets 6.1
Wheel locks (Box in trunk) 0.3
Intake Box w/ filter 2.9
TRAC cylinder brackets 2.2
DENSO TRAC Cylinder 6.5
Silver TRAC Cylinder 6
TRAC cover 0.3
Fuel pump & cruise control covers 0.4
------------------------------------------------------432.2
Now add back into that second amount the weight for the Recaro's, Alpine head unit, Momo, and manual trans and we have ~ 252.2.
Brings us to 1841.65F/1625.01R = 53.12F/46.88R. Now again that is if we use 55/45. If I had used the 52.5/47.5 I had found on another source I would be so close to 50/50 it would be irrelevant. I also plan to take a bit more weight out of the front of the car. Yes, these numbers are all huge ballparks, and yes there is a good amount of room for error, however what is true is the fact that the total amount I've removed from this car thus far is just around 340.34lbs. That is a slight hair over 75.....
With that said, this car is not a PRO-AM purpose built vehicle. I am not looking to break down the theory of grip into a science, I just want recommendations on spring rates of which I should consider for the car since I am infact removing weight from it, and don't want to **** blood. I don't have access to corner scales or the funds to purchase them
Megan also said that the coilovers can drop 2k in spring rates from and rear without having to be revalved. We're also talking about an inexpensive set of Megan Racing coilovers here not a $6,000 set of Ohlins dual adjustable gravel suspension with hydraulic reservoirs. I am doubting they will make all the difference in the world, I just want to stiffen up the ride and lower the ride height so I don't roll the damn car over.
Last edited by nismo4life; 06-06-13 at 08:46 AM.
06-06-13, 09:42 AM
#123
I'm running the EZ's and they are stiff but not bouncy at all. Even on the stiffest setting they ride really smooth. IMO I would think that the 12/8's would do ok for you, even with the weight difference. Might be worth a try anyway, and then you could always just swap out the springs if it didn't work out.
06-06-13, 07:40 PM
#124
you realize i said weight differential right? If you decrease the weight front and rear then in terms of BALANCE the difference between those weights is the only one that will affect the weight distribution.
you said:
hence the weight differential is ~75-85lbs from stock, and given the massive curb weight of a 1LS, the percentage of mass changed is miniscule.
If the weights removed are more, or the percentages you have are off, it won't matter anyways. Corner balancing a car (what you would want to be doing to set it up) is actually a somewhat exact science, and so the self-admitted "huge ballpark" numbers aren't really very helpful at all.
That being said, if you just put a little extra time and effort into getting the math as close to correct as you can, you can make a substantial difference to the way the car is set up, for less money out of your pocket. Get the car weighed before you decide on spring rates. It doesn't cost much.
you said:
Looking like 115 from the back half, 200 from the front
If the weights removed are more, or the percentages you have are off, it won't matter anyways. Corner balancing a car (what you would want to be doing to set it up) is actually a somewhat exact science, and so the self-admitted "huge ballpark" numbers aren't really very helpful at all.
That being said, if you just put a little extra time and effort into getting the math as close to correct as you can, you can make a substantial difference to the way the car is set up, for less money out of your pocket. Get the car weighed before you decide on spring rates. It doesn't cost much.
06-06-13, 08:11 PM
#125
Driver
Thread Starter
you realize i said weight differential right? If you decrease the weight front and rear then in terms of BALANCE the difference between those weights is the only one that will affect the weight distribution.
you said:
hence the weight differential is ~75-85lbs from stock, and given the massive curb weight of a 1LS, the percentage of mass changed is miniscule.
If the weights removed are more, or the percentages you have are off, it won't matter anyways. Corner balancing a car (what you would want to be doing to set it up) is actually a somewhat exact science, and so the self-admitted "huge ballpark" numbers aren't really very helpful at all.
That being said, if you just put a little extra time and effort into getting the math as close to correct as you can, you can make a substantial difference to the way the car is set up, for less money out of your pocket. Get the car weighed before you decide on spring rates. It doesn't cost much.
you said:
hence the weight differential is ~75-85lbs from stock, and given the massive curb weight of a 1LS, the percentage of mass changed is miniscule.
If the weights removed are more, or the percentages you have are off, it won't matter anyways. Corner balancing a car (what you would want to be doing to set it up) is actually a somewhat exact science, and so the self-admitted "huge ballpark" numbers aren't really very helpful at all.
That being said, if you just put a little extra time and effort into getting the math as close to correct as you can, you can make a substantial difference to the way the car is set up, for less money out of your pocket. Get the car weighed before you decide on spring rates. It doesn't cost much.
As for the weight differential, it was more drastic than I thought with the front losing more. Like I said I'm not done, so we'll see what the final number is.
 06-12-13, 02:54 PM
#128
Driver
Thread Starter
Alright, so I have gotten some work done on the car, and new updates will soon be posted, first however I need youz guys help to figure this out.
Currently trying to figure out the speed sensor issue. Found out the pulses will most likely be different, so this is what I was told;
Find out pulse frequency of KA Speed sensor
Find out pulse frequency of LS400 speedometer
Buy a frequency modulator (http://www.dakotadigital.com/index.c...rod/prd126.htm)
Now, I found the KA speed sensor frequency almost immediately. (he waveform for the s14 vss is well documented in the FSM. The pulse frequency is related to vehicle speed by: speed (mph) = f (Hz) *1.25 (mph/Hz). )
I am having trouble finding the pulse frequency for the Lexus. This is all I have found so far. Clutch O/D Speed sensor and Speed Sensor No.2 both have a resistance of 620ohms. Does anyone have a single clue how to possible get this information or figure this out?!
-
06-13-13, 02:53 AM
#129
if it's not in the FSM (which is surprising) then Try giving the guys at Marlin Crawler a call, they build a lot of rigs with a similar transmission and sell their own VSS conversion for older toyota applications. They may be able to help you out and save you getting out the oscilloscope.
http://www.marlincrawler.com/transfe...eed-sensor-mci
http://www.marlincrawler.com/transfe...eed-sensor-mci
06-13-13, 08:57 PM
#130
Driver
Thread Starter
if it's not in the FSM (which is surprising) then Try giving the guys at Marlin Crawler a call, they build a lot of rigs with a similar transmission and sell their own VSS conversion for older toyota applications. They may be able to help you out and save you getting out the oscilloscope.
http://www.marlincrawler.com/transfe...eed-sensor-mci
http://www.marlincrawler.com/transfe...eed-sensor-mci
06-18-13, 05:57 PM
#132
Driver
Thread Starter
Update #17 6/18/13
Alright, so I've gotten some progress done since the last time I updated this. Here goes!
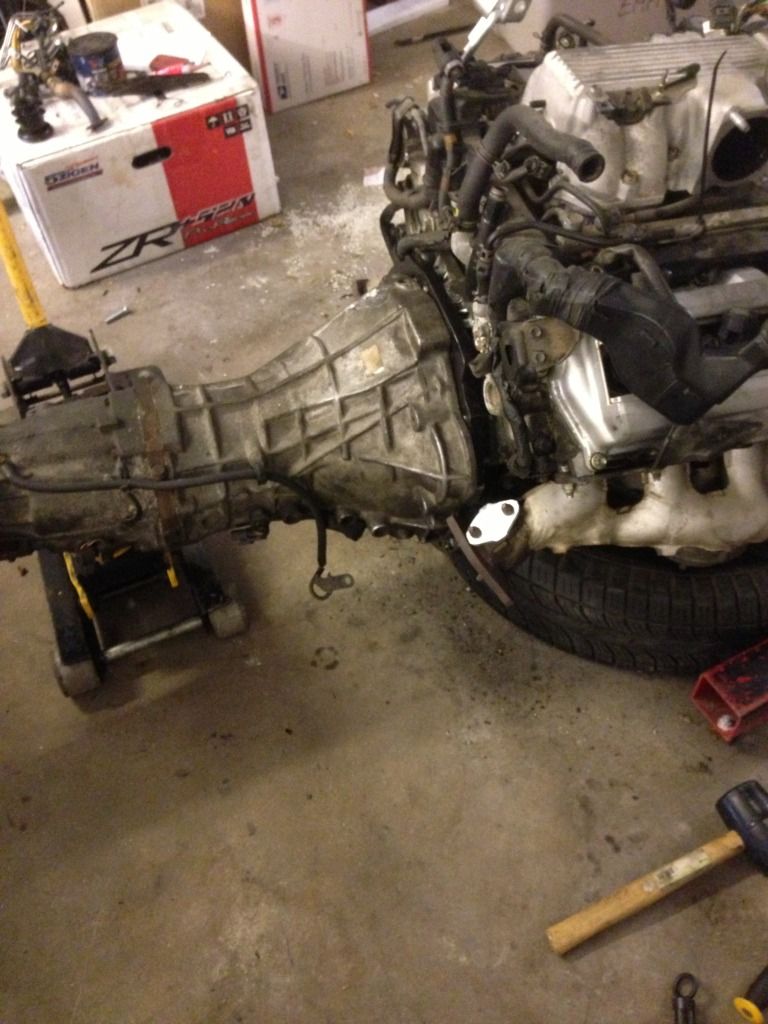
So I started prepping the S14 5spd and when I started cleaning the bell housing I found a nice surprise.....
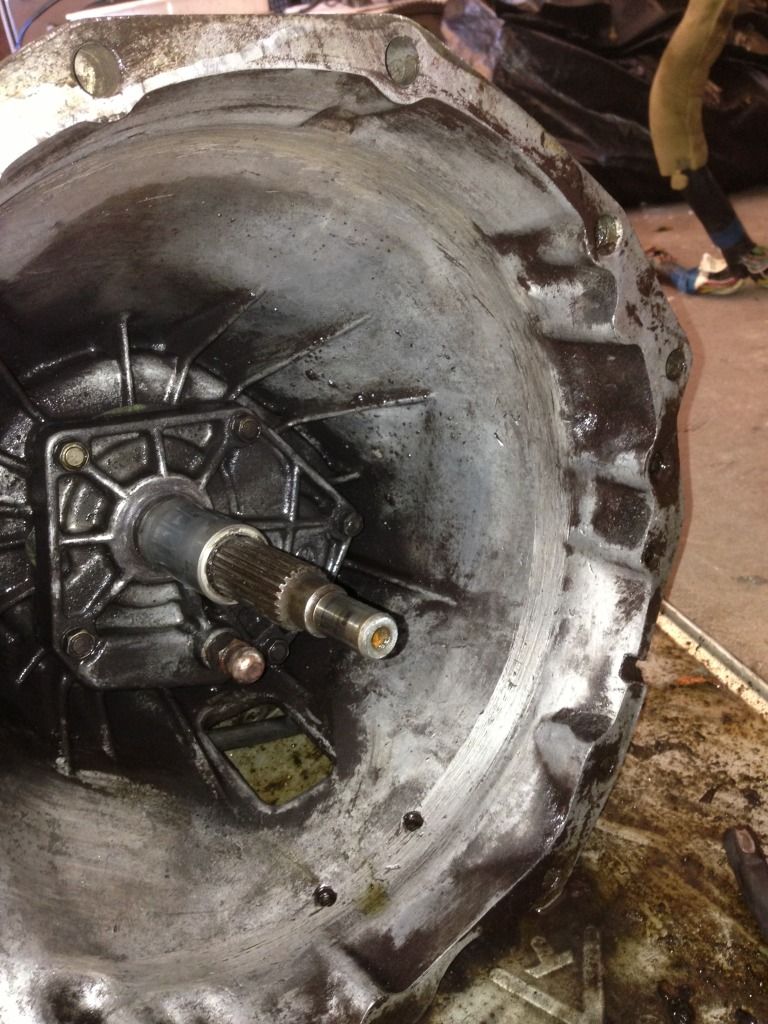
Something clearly exploded in here lol. There was a nice hole filled with jb weld. I used some QuikSteel to patch it better than the previous cripple did.
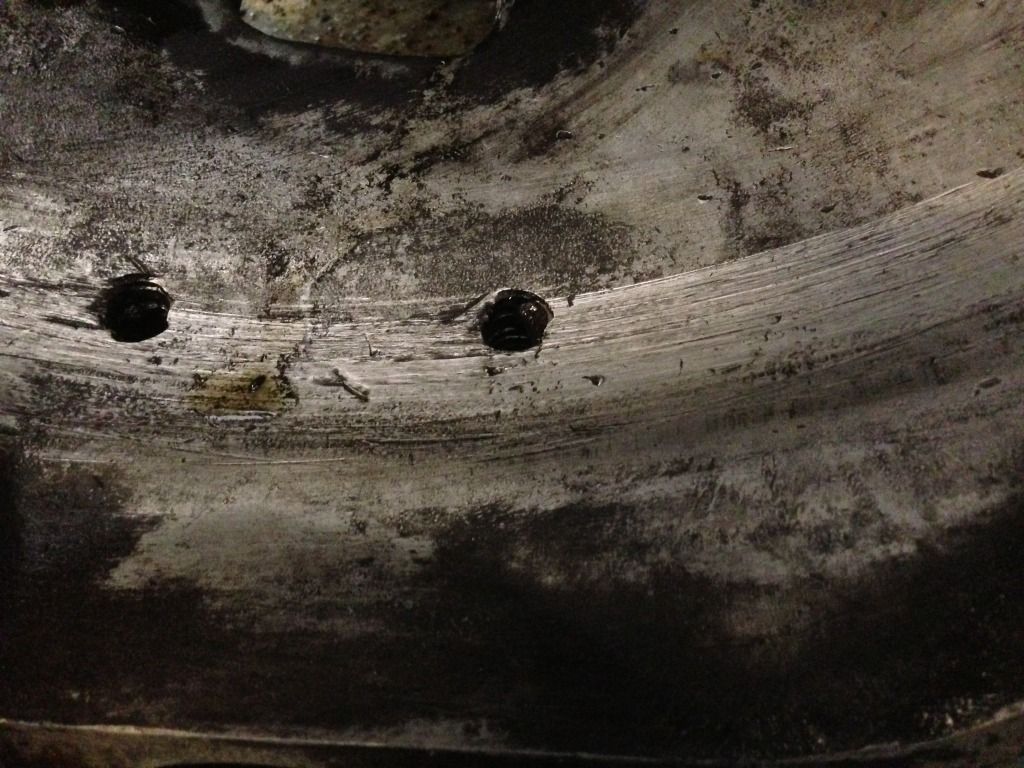
Closer look.
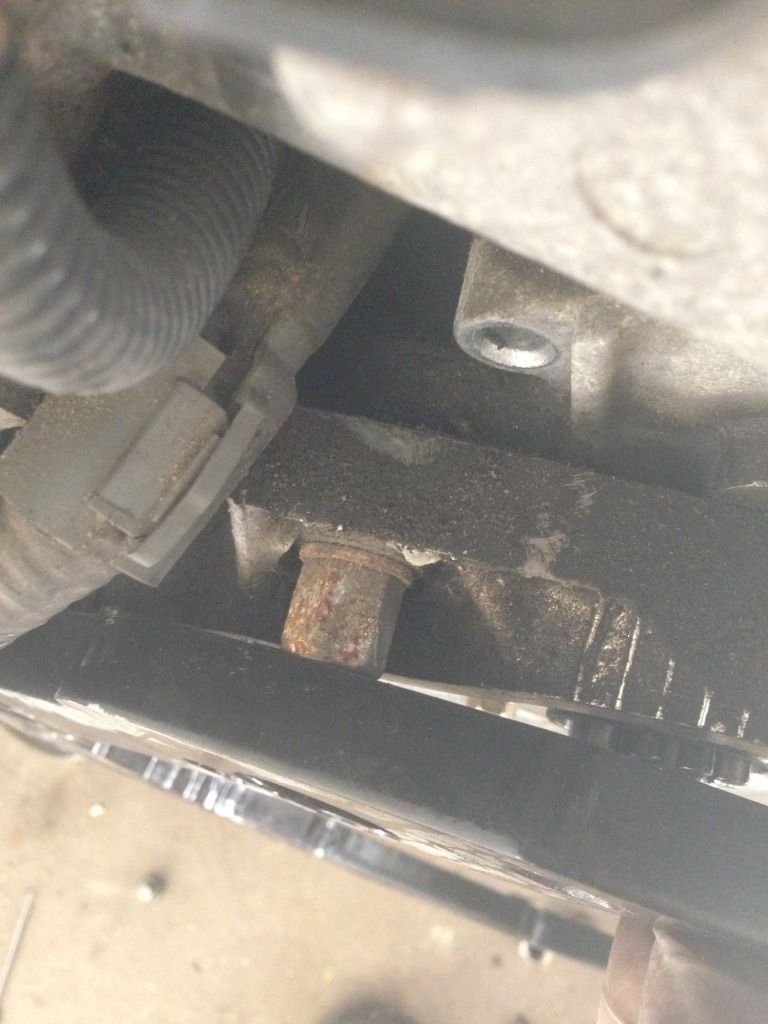
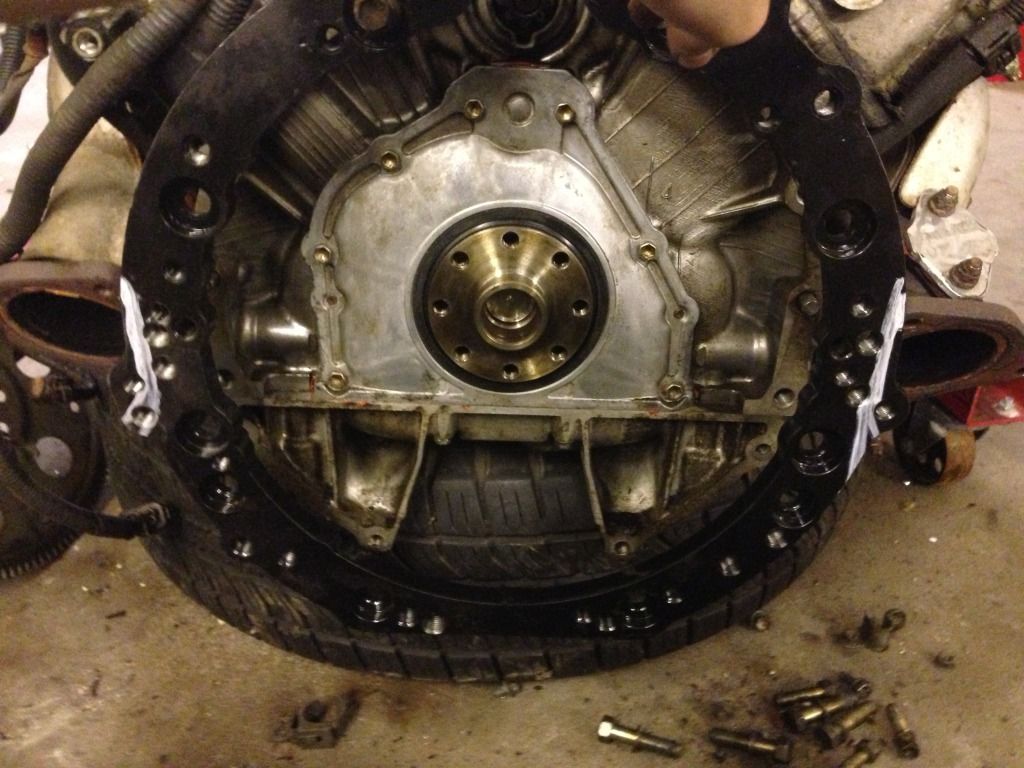
Next I was going to start installing the bell housing adapter and the clutch. Let me just start here by saying that when I received the swap kit, it had 0 instructions. I wouldn't expect it to really, its very logical how everything is installed....yeah..logical. Cut to the chase after stressing because nothing fit right the guy who builds the kits sent me the "instructions" via email. Step 1, shave down the starter bolts. ARE YOU SERIOUS GUY? So by shaving down the starter bolts you can install the bell housing adapter, but should the starter ever fail then you need to remove the: exhaust, driveshaft, drain trans fluid, remove trans, remove bell housing adapter, and then you can start removing the entire intake manifold. Right, I'll just not be a moron and think ahead.
Swap kit builder recommends you shave these down so the plate goes flush.
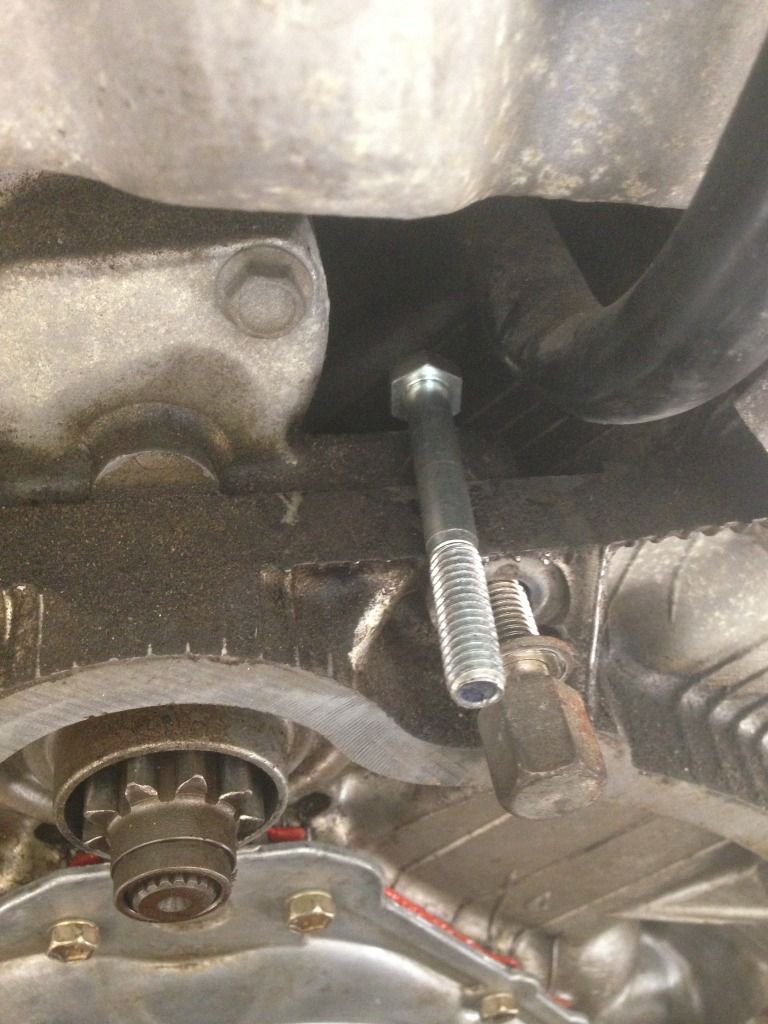
Rod (me) recommends you remove the bolts, and replace them with thinner longer bolts from the other side and use nuts. Future "drink bleach when your starter dies" moment avoided.
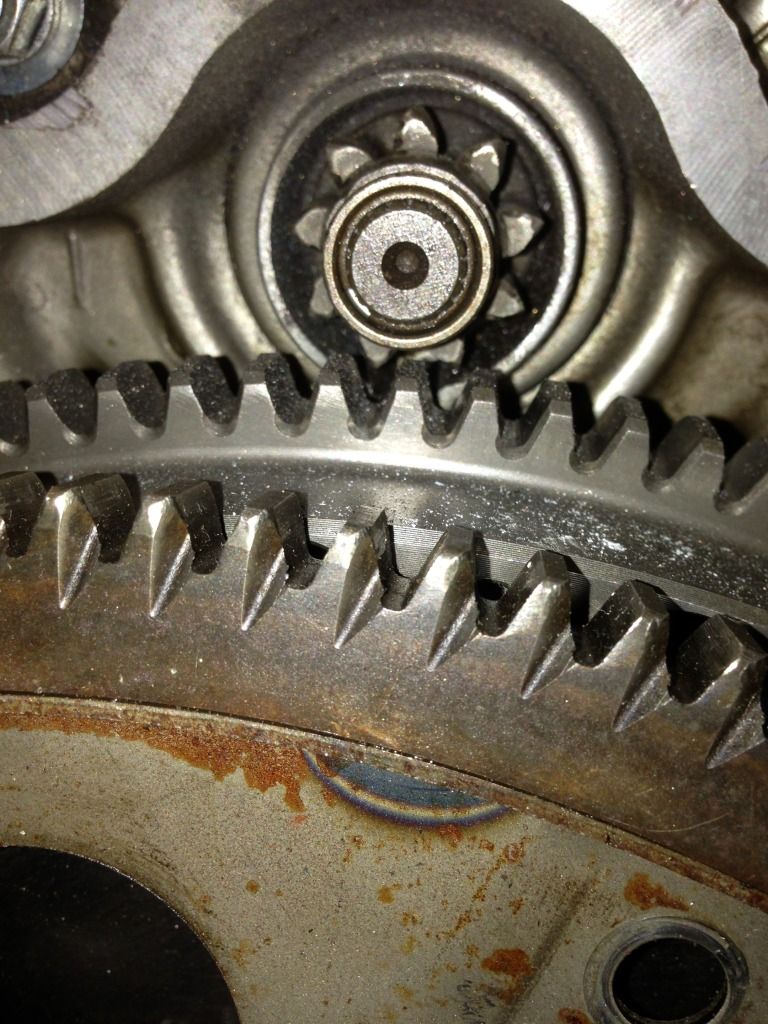
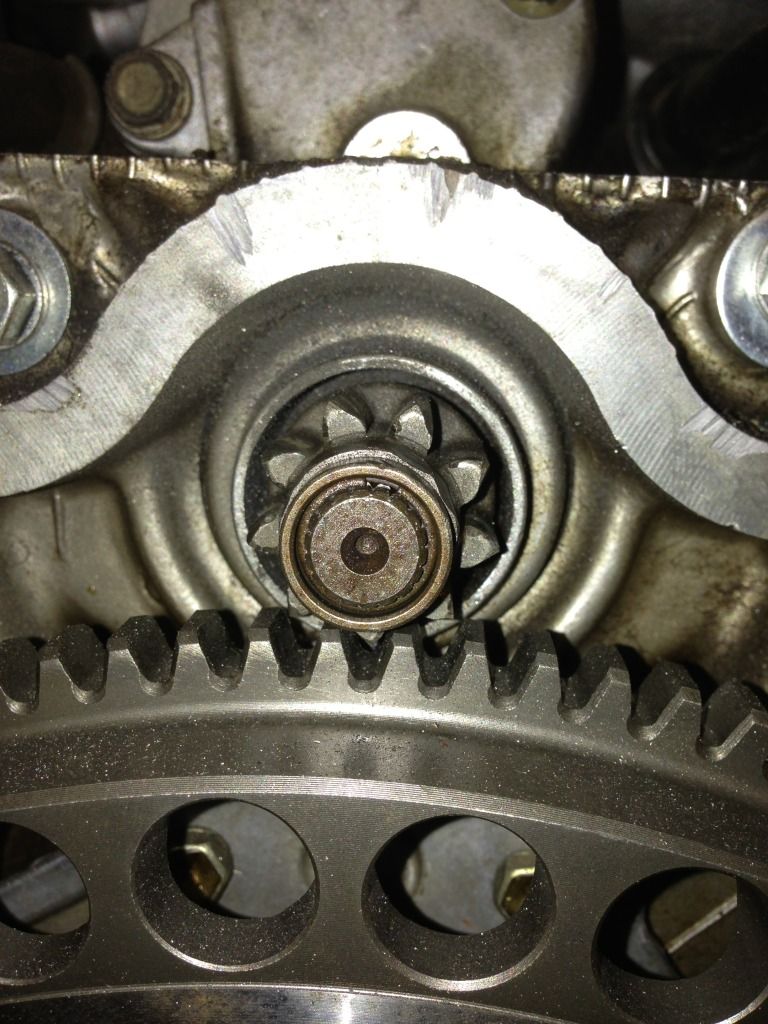
Step 2 was to "Knife" the starter gear. What? I looked and look and couldn't find the term anywhere online. I used my better judgement and figured it out. I realized the flex plate was cut to mesh with the starter gear, and the new flywheel wasn't so I "knifed" the starter gear teeth. Hopefully it works!
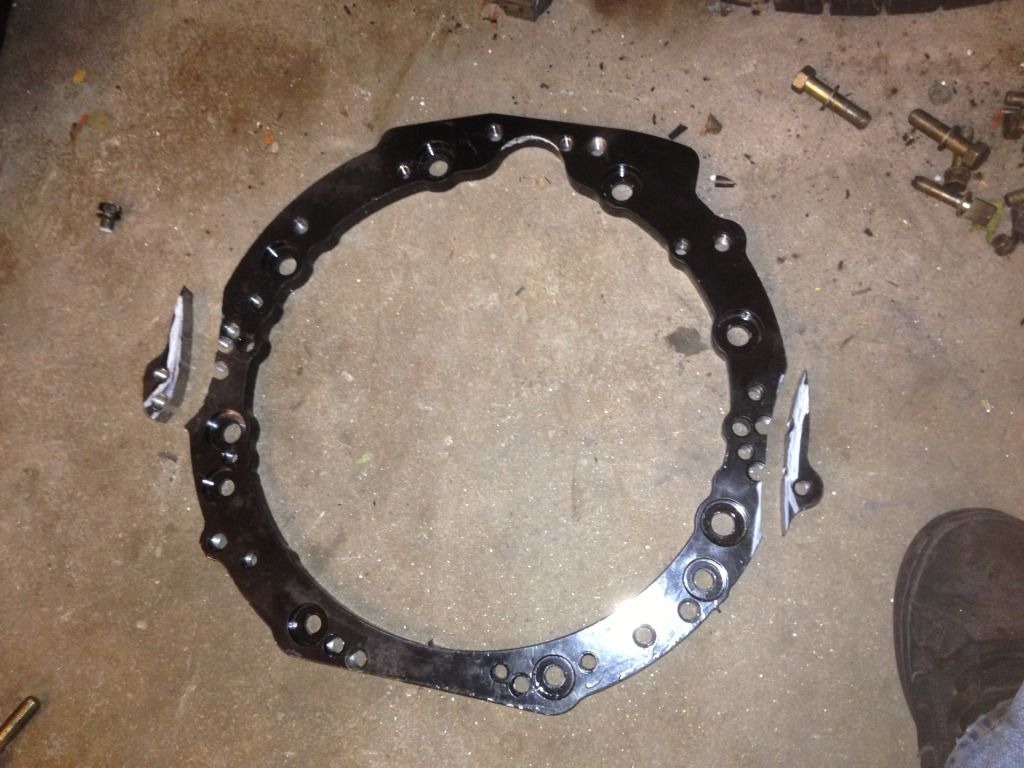
After that, the next step said that I had to "delete the cats" or "cut and reweld the flanges". This is because the adapter plate is too wide. Its designed to bolt on a KA 5spd or a 350Z 6spd, and in all fairness the swap kit isn't for an LS400 specifically so since I don't plan on modifying my manifolds for now, I just cut the plate.

After that I ended up struggling with the transmission for quite a while before I realized the pilot bearing adapter was backwards. Now, in my defense I had it going in the direction that would allow the input shaft to go FURTHEST into the crank. Still baffles me.
Now, while we were trying to trouble shoot what was holding the trans up, my buddy and I went through and removed one component at a time. Thank god we did, because I hadn't realized that the throw out bearing I had received with the kit was tweaked. Essentially, its a stock 240sx TOB with another one cut in half, and welded onto the back of it. It must of been off by a couple of degrees at the most because it would not slide onto the tob guide tube. That is currently what I am waiting on and I was told its in the mail on its way after having been avoided for a week so fingers crossed, otherwise I'm making my own I'm tired of this ****.
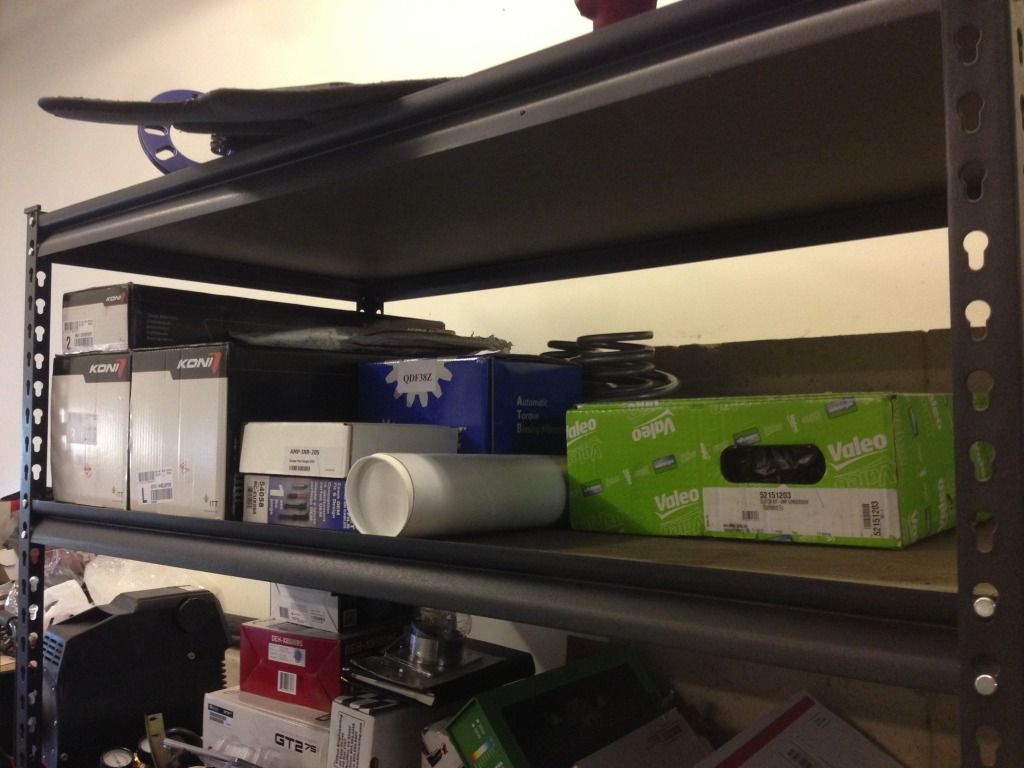
So while I was waiting for over 9 days for a response that a new one had been made and sent out, the clutch on my Mini decided it wanted to **** the bed. The car barely moves now so I started stockpiling parts. It had 132,xxx miles on it so its due for a major overhaul. Wasn't happy about spending the money, but I'm not a fan of doing something twice so I bought everything I wanted to do now. Still need to order a ton of oem hardware and gaskets from Pelican Parts once the Lexus runs and I put the Mini down.
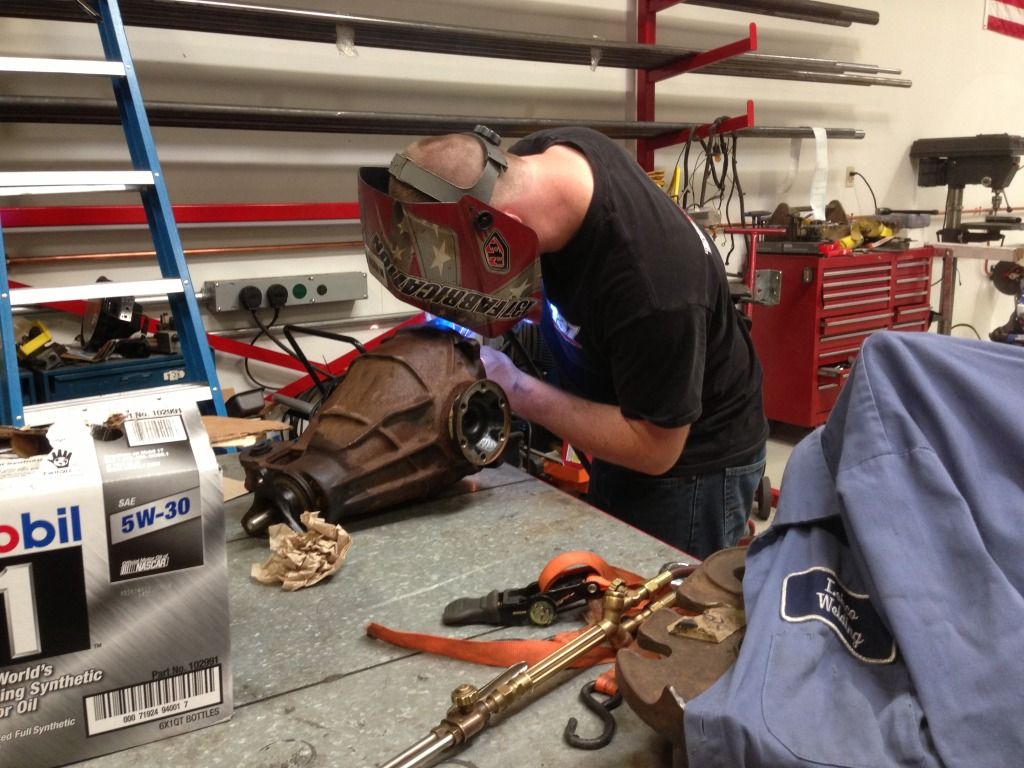
I also managed to get ahold of a local guy who has a fab shop to weld my diff.
In the middle of all of this my brother was working super ****ty hours and asked me to finish putting miles on the motor swap and find any bugs or issues with the car because he was leaving the following week to STPR in upstate Pennsylvania...so I gladly did


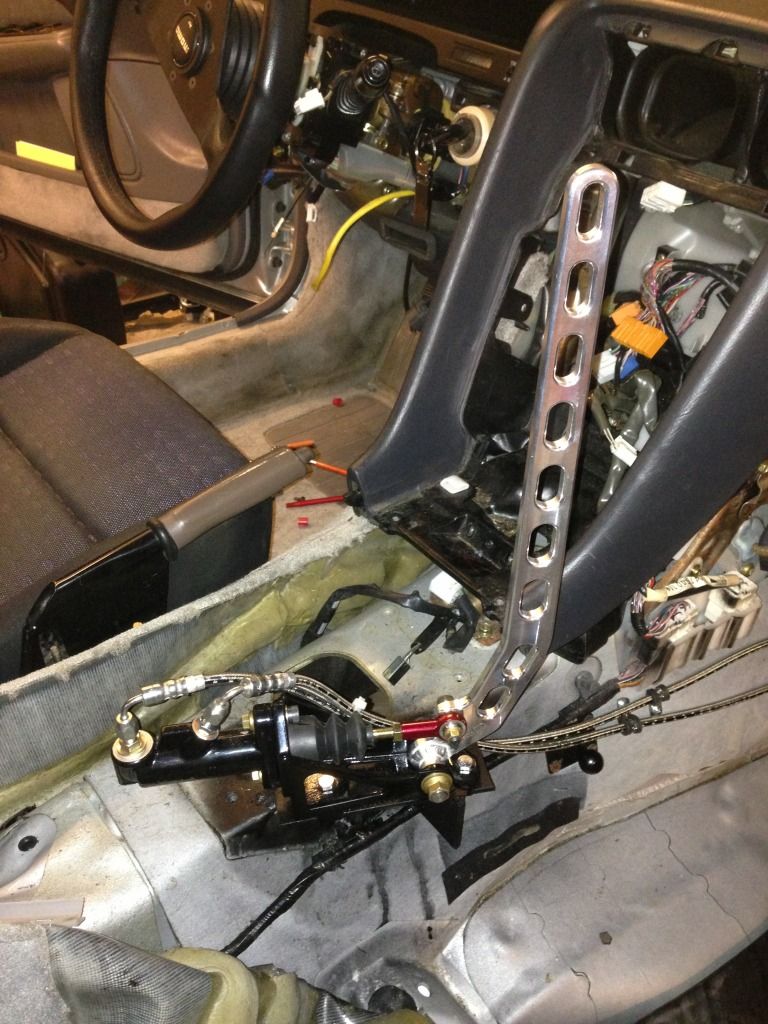
I did manage to install the hydro brake and trim the console & shift cover for it. The photos I have of the full braking system are terrible so I'll retake them tomorrow and post them up, but here is the hydro setup.
Alright, so I've gotten some progress done since the last time I updated this. Here goes!
So I started prepping the S14 5spd and when I started cleaning the bell housing I found a nice surprise.....

Something clearly exploded in here lol. There was a nice hole filled with jb weld. I used some QuikSteel to patch it better than the previous cripple did.
Closer look.

Next I was going to start installing the bell housing adapter and the clutch. Let me just start here by saying that when I received the swap kit, it had 0 instructions. I wouldn't expect it to really, its very logical how everything is installed....yeah..logical. Cut to the chase after stressing because nothing fit right the guy who builds the kits sent me the "instructions" via email. Step 1, shave down the starter bolts. ARE YOU SERIOUS GUY? So by shaving down the starter bolts you can install the bell housing adapter, but should the starter ever fail then you need to remove the: exhaust, driveshaft, drain trans fluid, remove trans, remove bell housing adapter, and then you can start removing the entire intake manifold. Right, I'll just not be a moron and think ahead.
Swap kit builder recommends you shave these down so the plate goes flush.

Rod (me) recommends you remove the bolts, and replace them with thinner longer bolts from the other side and use nuts. Future "drink bleach when your starter dies" moment avoided.

Step 2 was to "Knife" the starter gear. What? I looked and look and couldn't find the term anywhere online. I used my better judgement and figured it out. I realized the flex plate was cut to mesh with the starter gear, and the new flywheel wasn't so I "knifed" the starter gear teeth. Hopefully it works!


After that, the next step said that I had to "delete the cats" or "cut and reweld the flanges". This is because the adapter plate is too wide. Its designed to bolt on a KA 5spd or a 350Z 6spd, and in all fairness the swap kit isn't for an LS400 specifically so since I don't plan on modifying my manifolds for now, I just cut the plate.


After that I ended up struggling with the transmission for quite a while before I realized the pilot bearing adapter was backwards. Now, in my defense I had it going in the direction that would allow the input shaft to go FURTHEST into the crank. Still baffles me.

Now, while we were trying to trouble shoot what was holding the trans up, my buddy and I went through and removed one component at a time. Thank god we did, because I hadn't realized that the throw out bearing I had received with the kit was tweaked. Essentially, its a stock 240sx TOB with another one cut in half, and welded onto the back of it. It must of been off by a couple of degrees at the most because it would not slide onto the tob guide tube. That is currently what I am waiting on and I was told its in the mail on its way after having been avoided for a week so fingers crossed, otherwise I'm making my own I'm tired of this ****.
So while I was waiting for over 9 days for a response that a new one had been made and sent out, the clutch on my Mini decided it wanted to **** the bed. The car barely moves now so I started stockpiling parts. It had 132,xxx miles on it so its due for a major overhaul. Wasn't happy about spending the money, but I'm not a fan of doing something twice so I bought everything I wanted to do now. Still need to order a ton of oem hardware and gaskets from Pelican Parts once the Lexus runs and I put the Mini down.

I also managed to get ahold of a local guy who has a fab shop to weld my diff.

In the middle of all of this my brother was working super ****ty hours and asked me to finish putting miles on the motor swap and find any bugs or issues with the car because he was leaving the following week to STPR in upstate Pennsylvania...so I gladly did


I did manage to install the hydro brake and trim the console & shift cover for it. The photos I have of the full braking system are terrible so I'll retake them tomorrow and post them up, but here is the hydro setup.
 06-18-13, 07:23 PM
#134
Driver
Thread Starter
The B13 has a Neo VVL swap with N1 cams and a few bolt ons. Roughly around 190whp, and when you combine that with the 5.0 final drive it boooooogies.
