
SC530 Drift Build (LSx/T56 Swapped SC300) *Picture Dump*
 04-07-15 | 01:15 PM
#46
Thread Starter
Pole Position
Joined: Sep 2009
Posts: 221
Likes: 5
From: AZ
Thanks! V8 in just about anything seems right to me 
UPDATE!
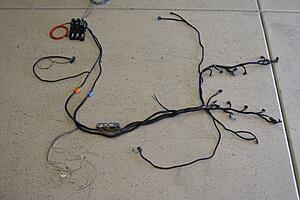
So this is the most up to date progress I have. Engine wiring is about 97.3% finished. Still have to ground the PCM, ground the sensors, ground the OBD2 port, and ground the fuse box relays.
All in all, it came out nice and very simplistic. I utilized the orange and blue plugs from the factory SC harness as well.
Still a lot of wiring work left with wiring lights, brakes, gauges, and the ignition switch. However, the worst and most tedious part is behind me now
UPDATE!
So this is the most up to date progress I have. Engine wiring is about 97.3% finished. Still have to ground the PCM, ground the sensors, ground the OBD2 port, and ground the fuse box relays.
All in all, it came out nice and very simplistic. I utilized the orange and blue plugs from the factory SC harness as well.
Still a lot of wiring work left with wiring lights, brakes, gauges, and the ignition switch. However, the worst and most tedious part is behind me now

 04-08-15 | 04:52 PM
#48
Thread Starter
Pole Position
Joined: Sep 2009
Posts: 221
Likes: 5
From: AZ
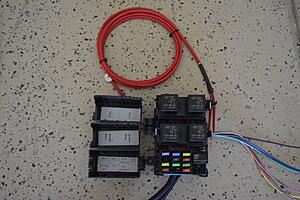
Thanks man! I found this guy on eBay that makes these fuse boxes and custom harnesses for LSx's applications. I was just searching for fuse boxes, came across this, and thought it was perfect.
I don't think you can beat it for $150...
Here's a link to his actual store
http://shop.bp-automotive.com/Premiu...?categoryId=10
I don't think you can beat it for $150...
Here's a link to his actual store
http://shop.bp-automotive.com/Premiu...?categoryId=10
04-12-15 | 08:31 PM
#49
Thread Starter
Pole Position
Joined: Sep 2009
Posts: 221
Likes: 5
From: AZ
UPDATE!
Small one though...
More progress on the wiring harness. Didn't work on the car as much as I wanted too, but I at least made some steps forward to consider the engine harness 100% finished.
Fuse box has been install, ground distribution has been completed for the engine harness, fuse box, and OBD2 connector.
Basically all that's left now is just to install the batter in the rear, do power distribution to the fuse box, alternator, and starter, wire the headlights, wire the gauges, install and wire the fuel pump, and wire the ignition and the wiring will be finished.
This picture is basically as of tonight. The goal for next weekend will be to finish the wiring 100%.
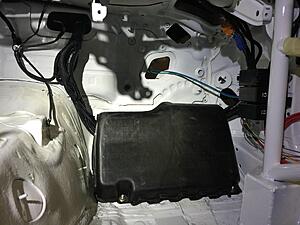
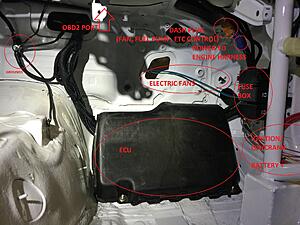
Breakdown of what you're looking at...
Small one though...
More progress on the wiring harness. Didn't work on the car as much as I wanted too, but I at least made some steps forward to consider the engine harness 100% finished.
Fuse box has been install, ground distribution has been completed for the engine harness, fuse box, and OBD2 connector.
Basically all that's left now is just to install the batter in the rear, do power distribution to the fuse box, alternator, and starter, wire the headlights, wire the gauges, install and wire the fuel pump, and wire the ignition and the wiring will be finished.
This picture is basically as of tonight. The goal for next weekend will be to finish the wiring 100%.

Breakdown of what you're looking at...

 04-14-15 | 10:06 AM
#52
Thread Starter
Pole Position
Joined: Sep 2009
Posts: 221
Likes: 5
From: AZ
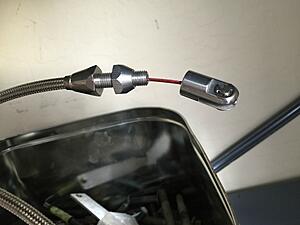
It will consist of the high pressure line, remote bleeder, Willwood master, custom bracket for the master, and custom length rod on the master for the SC pedal.
The Willwood master he uses is the same one he uses on all of the kits he sells. None of which he's ever had any issues with.
04-20-15 | 04:14 PM
#53

Driver School Candidate
Joined: Feb 2013
Posts: 15
Likes: 0
From: Tx
Actually, that's already figured out. Fueled Racing will also have a clutch hydraulics kit that can be purchased with the complete kit or separately on its own.
It will consist of the high pressure line, remote bleeder, Willwood master, custom bracket for the master, and custom length rod on the master for the SC pedal.
The Willwood master he uses is the same one he uses on all of the kits he sells. None of which he's ever had any issues with.
It will consist of the high pressure line, remote bleeder, Willwood master, custom bracket for the master, and custom length rod on the master for the SC pedal.
The Willwood master he uses is the same one he uses on all of the kits he sells. None of which he's ever had any issues with.


 02-19-16 | 11:57 AM
#58
Thread Starter
Pole Position
Joined: Sep 2009
Posts: 221
Likes: 5
From: AZ
UPDATE!!!!!
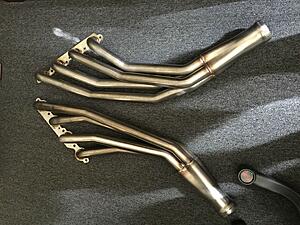
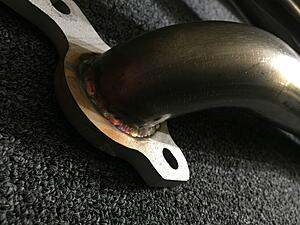
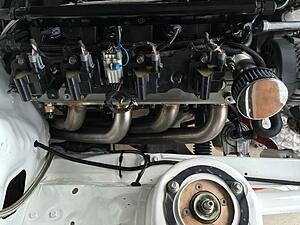
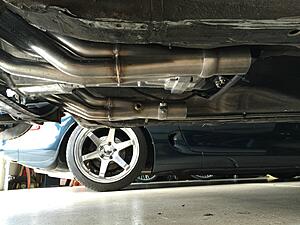
Long story short, there was a major issue with the company Fueled Racing was using to make the bends for the runners on the headers. It took months and outsourcing a new company that was finally able to get it right. So this whole time, I was on standstill not being able to do anything to the car.
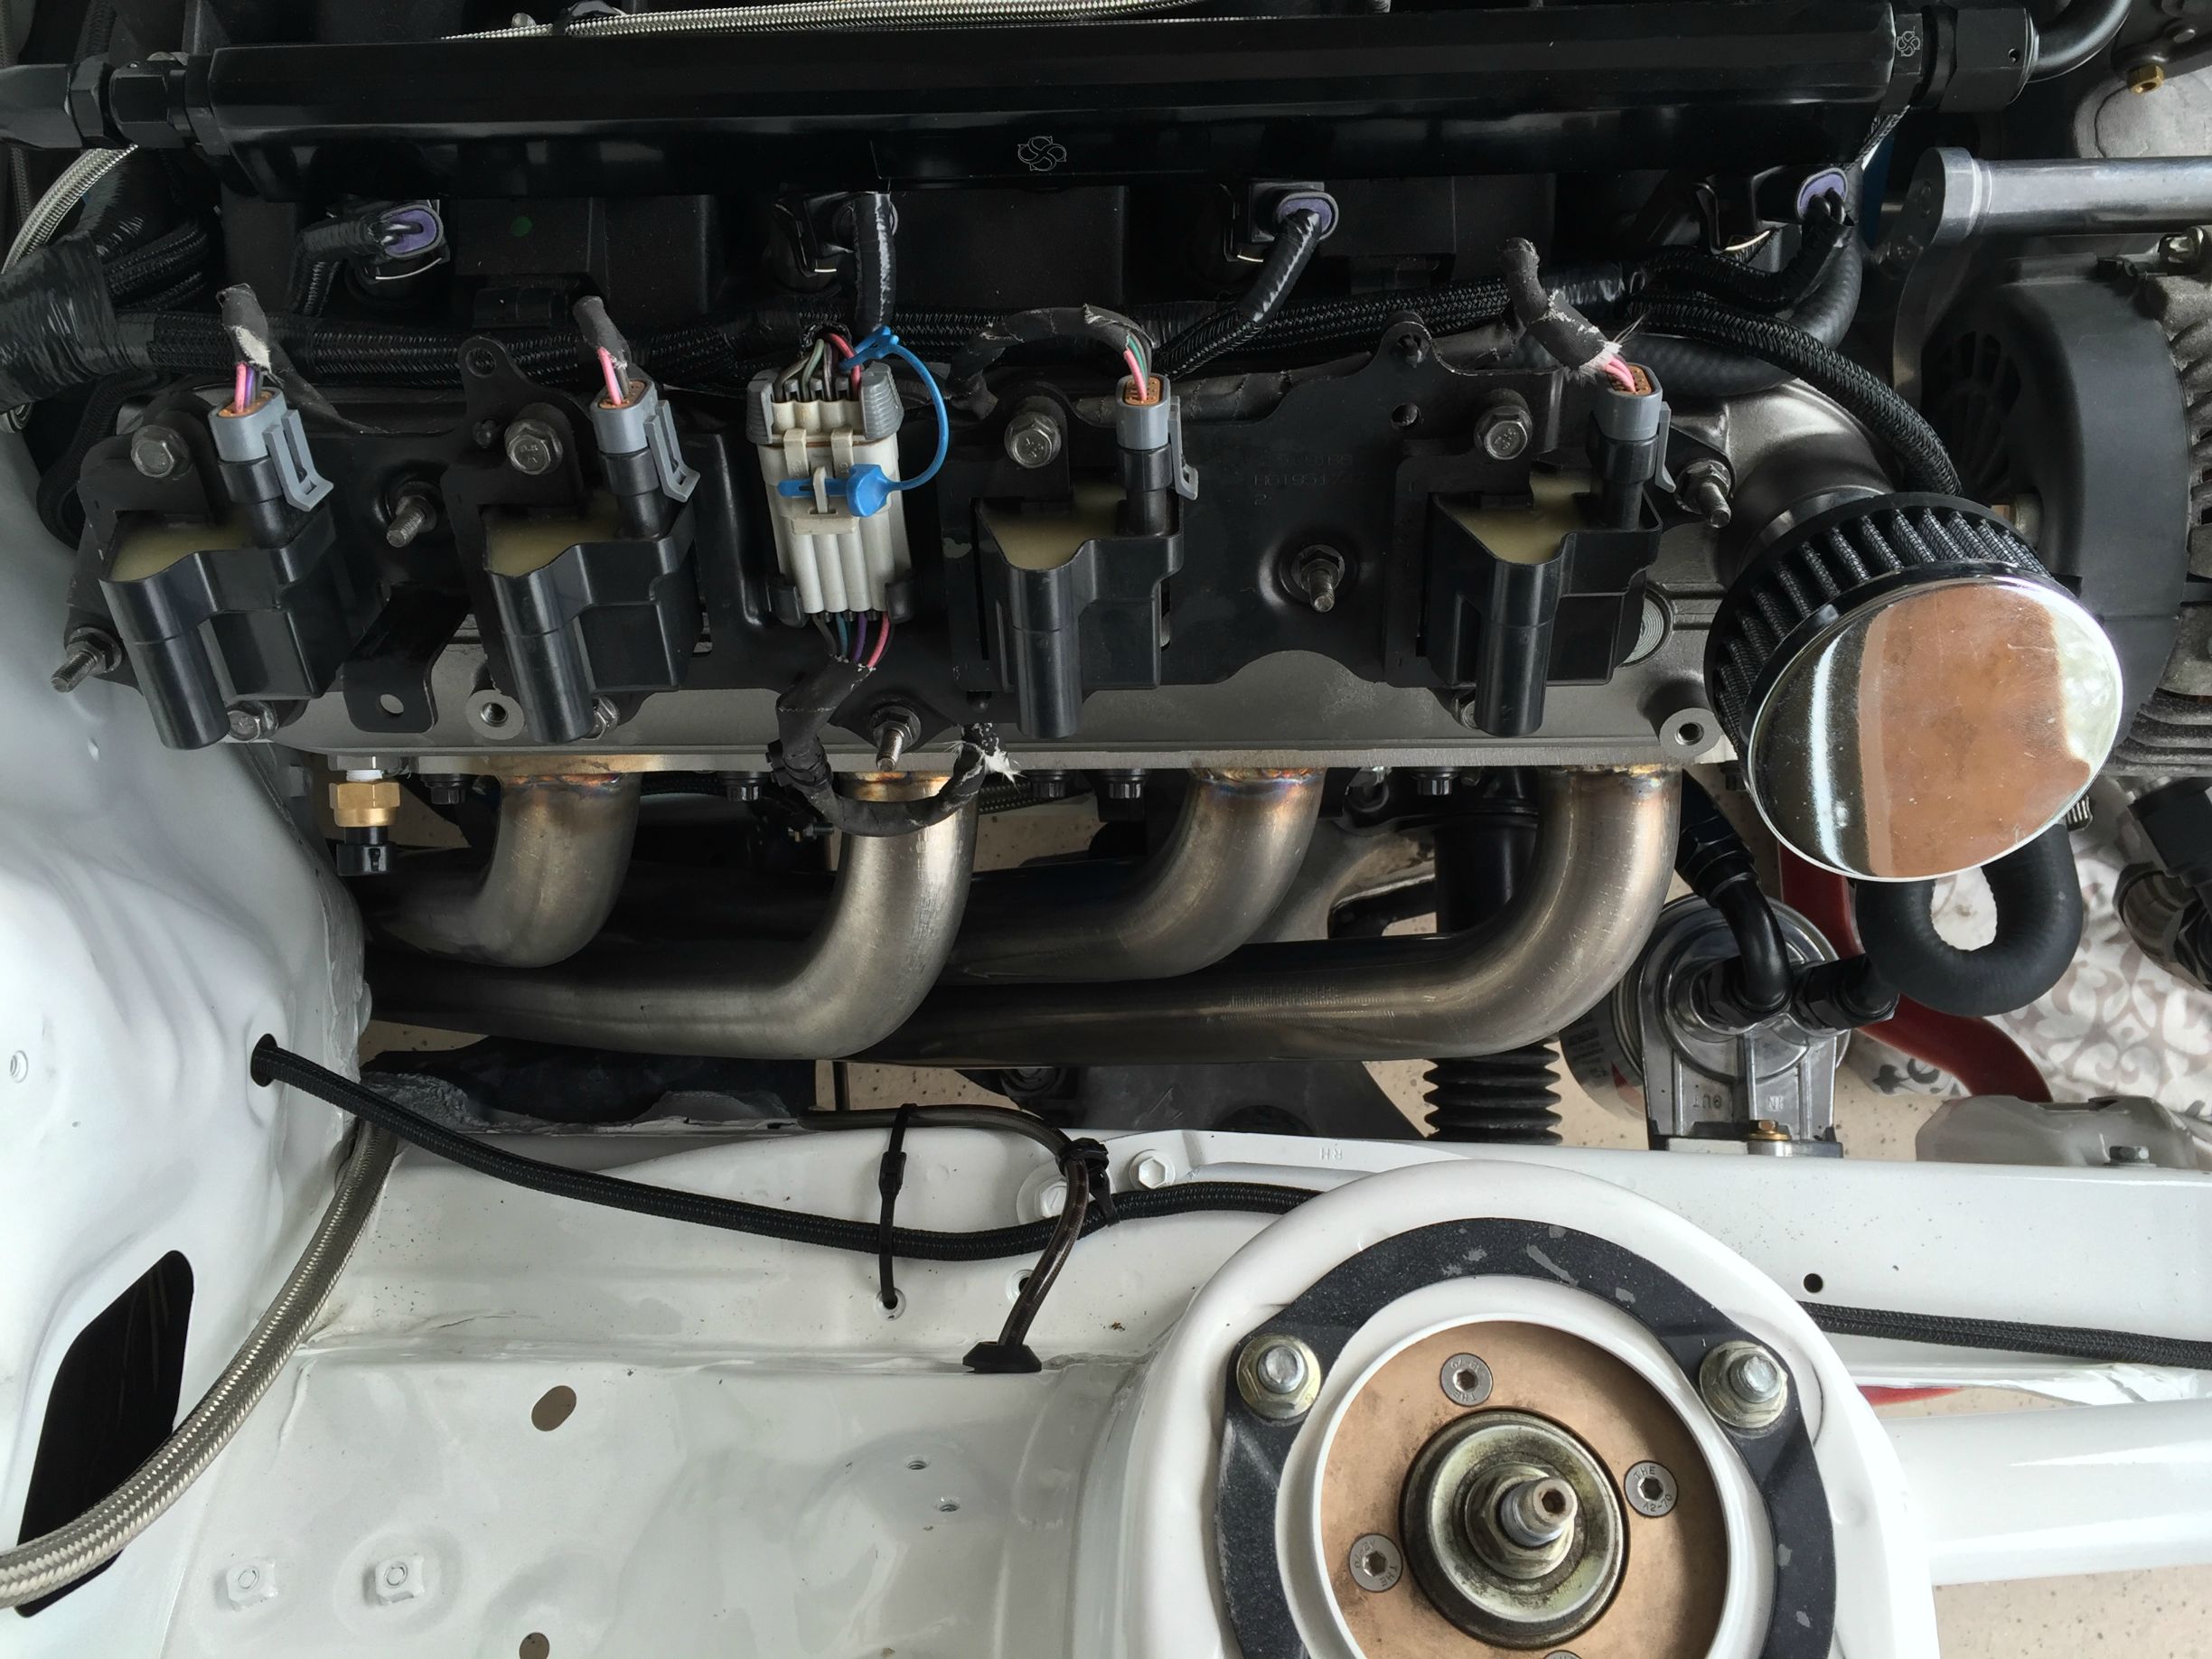
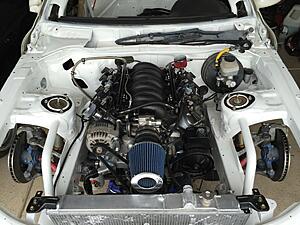
The headers finally came in and started working on all the small stuff that is left to get this thing fired up!
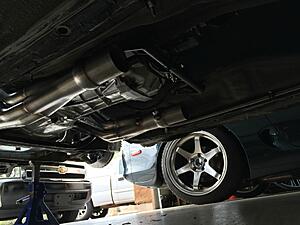
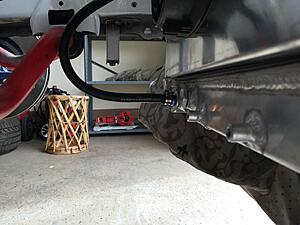
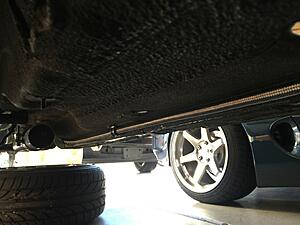
Starting with the headers of course! Made out of 304 stainless and utilizing an oem type exhaust clamp to provide more clearance over a v-band style. As you'll be able to see from the pictures, there's a TON of room between the frame/steering shaft and the headers. I couldn't be happier. They fit like a glove and took all of 10 minutes to install both sides by myself.

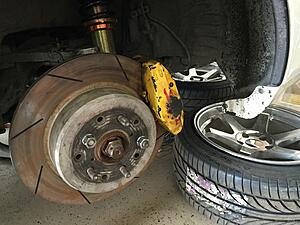
I also ended up throwing on my spare rear TT calipers and rotors. Don't mind how ugly they are. I just want to get the car running and will deal with cosmetics after the fact...
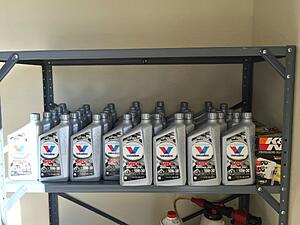
In anticipation of starting this car up soon and going through break-in, I also purchased 42 quarts of Valvoline VR-1 10-30 for break-in and to continue running. Also purchased 5 K&N filters 3001. This is the only conventional oil you can find that is high in Zinc and Phosphorus to help with new mating surfaces. It's also extremely cheap from Amazon.
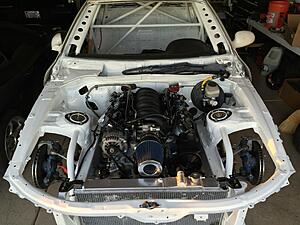
Got around to finally making the radiator hoses. Wasn't too bad at all actually. Once that was done, I also threw on the electric fans and shroud. The fans and shroud are actually ebay brand and I'm HIGHLY impressed by the quality you get for 85 bucks. Direct bolt on and the fans pull as much or even more air than Mishimoto fans. Even if the fans fail, 85 bucks for the fan shroud itself is well worth it.
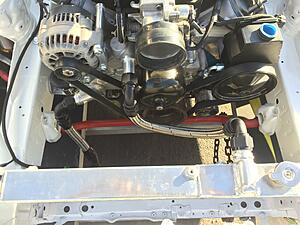

Also installed the coolant crossover tube that ventilates excess pressure in the heads and is routed back to a pre-existing bung on the bottom of the radiator.
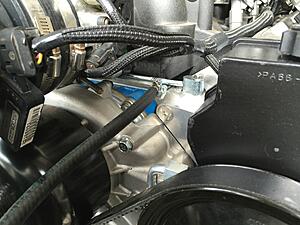
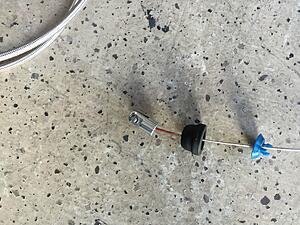
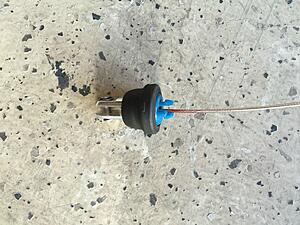
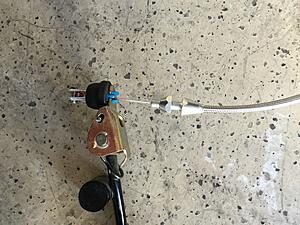
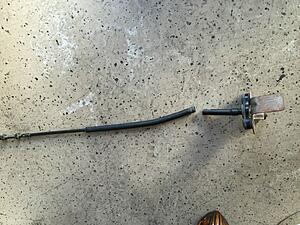
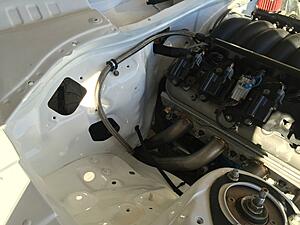
The throttle cable was another small challenge. The throttle cable that was on the car already was a camry throttle cable, so it was the longer ones from Toyota and it was too short. So I had to resort to something custom. I ended up Purchasing a Lokar throttle cable for an LS1 without even knowing how it would work with the pedal.
Well, too my surprise, it was a pleasantly easy install. The Pedal end of the Lokar cable was the perfect diameter for the factory Toyota bushing on the pedal, so literally I just had to do the following...
Cut the factory cable to get the bushing and clip.
Put the Lokar cable through the bushing and clip
Then cut away the firewall mount for the factory cable and utilize it on the new Lokar cable. Just had to take a dremel to it and cut the excess tubing away.
Then just install, trim the excess from the Lokar cable, and install again.
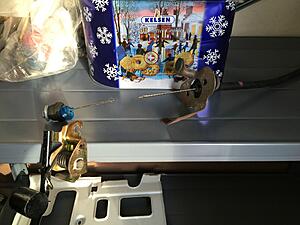
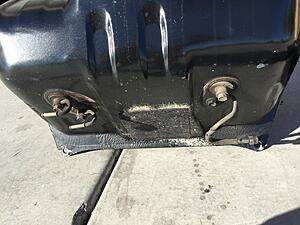
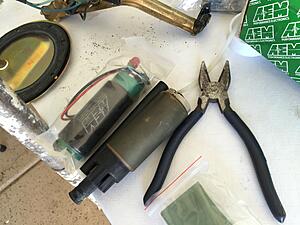
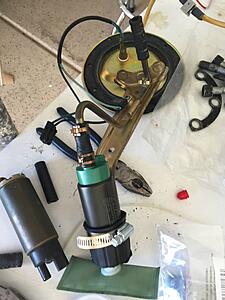
I also got around to installing the fuel pump and lines.Since I wasn't going to be using any of the factory hard lines, I ran into a small issue with the feed and return portions on the tank. The feed on the tank has a female inverted flare fitting that NO ONE makes and adapter fitting for. NO ONE. So the only option it seemed like was to weld some bungs on the tank, which I REALLY didn't want to do. It was overkill for my power goals.
The solution was easy and NO ONE online has ever posted this, and I feel it's good useful information for someone looking for an easy way to run dash 6 AN from the tank back.
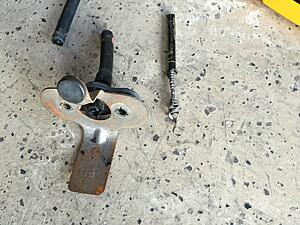
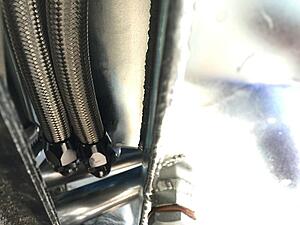
As you'll be able to see on these two pictures, on the left side is the return (3/8 inch barb style), and on the feed is that stupid inverted flare that no one makes an adapter fitting for. On the right is the ventilation tube which is a 3/8 inch barb style as well.
The solution was stupid easy....swap the feed line banjo on the left for the ventilation banjo on the right. That's it. So now, you can have two 3/8 inch barbs which you can just clamp a hose on and clamp a barb to dash 6 AN fitting on the other end of the hose! Done! This fuel set up should be good for 600-700 MAX on 91 octane. So I have some room to grow...
Long story short, there was a major issue with the company Fueled Racing was using to make the bends for the runners on the headers. It took months and outsourcing a new company that was finally able to get it right. So this whole time, I was on standstill not being able to do anything to the car.
The headers finally came in and started working on all the small stuff that is left to get this thing fired up!
Starting with the headers of course! Made out of 304 stainless and utilizing an oem type exhaust clamp to provide more clearance over a v-band style. As you'll be able to see from the pictures, there's a TON of room between the frame/steering shaft and the headers. I couldn't be happier. They fit like a glove and took all of 10 minutes to install both sides by myself.


I also ended up throwing on my spare rear TT calipers and rotors. Don't mind how ugly they are. I just want to get the car running and will deal with cosmetics after the fact...

In anticipation of starting this car up soon and going through break-in, I also purchased 42 quarts of Valvoline VR-1 10-30 for break-in and to continue running. Also purchased 5 K&N filters 3001. This is the only conventional oil you can find that is high in Zinc and Phosphorus to help with new mating surfaces. It's also extremely cheap from Amazon.

Got around to finally making the radiator hoses. Wasn't too bad at all actually. Once that was done, I also threw on the electric fans and shroud. The fans and shroud are actually ebay brand and I'm HIGHLY impressed by the quality you get for 85 bucks. Direct bolt on and the fans pull as much or even more air than Mishimoto fans. Even if the fans fail, 85 bucks for the fan shroud itself is well worth it.


Also installed the coolant crossover tube that ventilates excess pressure in the heads and is routed back to a pre-existing bung on the bottom of the radiator.


The throttle cable was another small challenge. The throttle cable that was on the car already was a camry throttle cable, so it was the longer ones from Toyota and it was too short. So I had to resort to something custom. I ended up Purchasing a Lokar throttle cable for an LS1 without even knowing how it would work with the pedal.
Well, too my surprise, it was a pleasantly easy install. The Pedal end of the Lokar cable was the perfect diameter for the factory Toyota bushing on the pedal, so literally I just had to do the following...
Cut the factory cable to get the bushing and clip.
Put the Lokar cable through the bushing and clip
Then cut away the firewall mount for the factory cable and utilize it on the new Lokar cable. Just had to take a dremel to it and cut the excess tubing away.
Then just install, trim the excess from the Lokar cable, and install again.


I also got around to installing the fuel pump and lines.Since I wasn't going to be using any of the factory hard lines, I ran into a small issue with the feed and return portions on the tank. The feed on the tank has a female inverted flare fitting that NO ONE makes and adapter fitting for. NO ONE. So the only option it seemed like was to weld some bungs on the tank, which I REALLY didn't want to do. It was overkill for my power goals.
The solution was easy and NO ONE online has ever posted this, and I feel it's good useful information for someone looking for an easy way to run dash 6 AN from the tank back.
As you'll be able to see on these two pictures, on the left side is the return (3/8 inch barb style), and on the feed is that stupid inverted flare that no one makes an adapter fitting for. On the right is the ventilation tube which is a 3/8 inch barb style as well.
The solution was stupid easy....swap the feed line banjo on the left for the ventilation banjo on the right. That's it. So now, you can have two 3/8 inch barbs which you can just clamp a hose on and clamp a barb to dash 6 AN fitting on the other end of the hose! Done! This fuel set up should be good for 600-700 MAX on 91 octane. So I have some room to grow...

 02-19-16 | 11:58 AM
#59
Thread Starter
Pole Position
Joined: Sep 2009
Posts: 221
Likes: 5
From: AZ
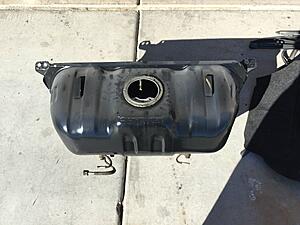
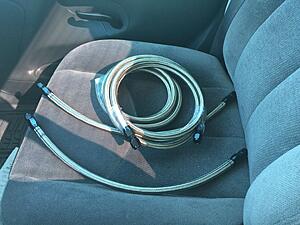
And here is the rest of the fuel install...
One thing to make note of, and we found this out the hard way, is that Moroso made the pan in a way which ONLY the GTO starter is compatible with. An F-body, corvette, or even truck starter will not work because they are too big and won't fit.
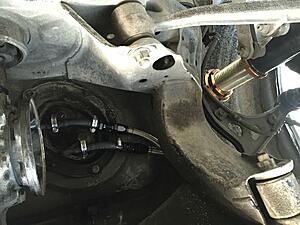
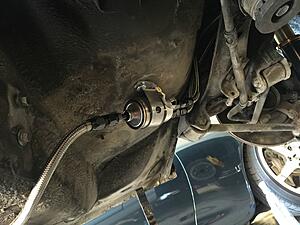
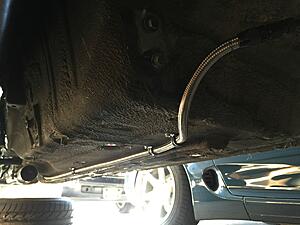
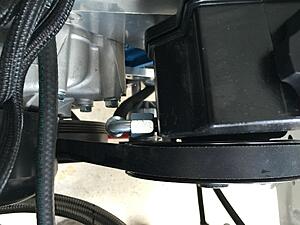
Also installed the Fueled Racing power steering lines which will come with the kit...

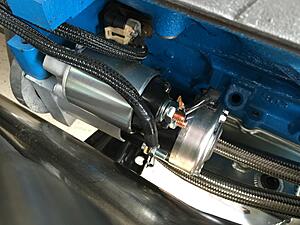
Another thing that comes with the kit is the Fueled Racing oil filter relocation kit. I mounted the filter to a pre-existing 10mm hole on the frame rail. From there, is just running the lines behind the motor mount and behind the engine to the pan on the driver's side.


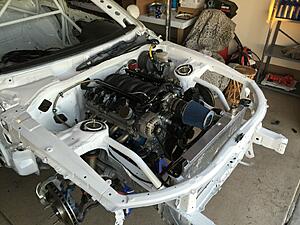
As of last night, with the help of my friend Travis, we finally finished the gauge set up and mounted everything in its place. Took hours worth of cutting and grinding since I didn't have the appropriate size holesaw, but it was worth all the effort!

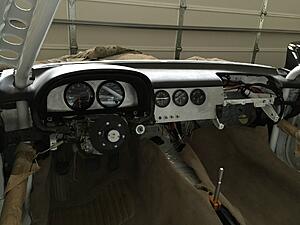
Currently, this is how she sits...
Now all that's left is the following...
Install dip stick
Install and wire headlights, taillights, and blinkers
Wire starter and alternator
Wire gauges
Wire power windows
Wire interior lights
Wire Ignition
Get exhaust made
Find and install a coolant reservoir
Bleed the brakes
Buy and install bucket seats
Top all fluids
Break in engine
HOON THE EFF OUT!


One thing to make note of, and we found this out the hard way, is that Moroso made the pan in a way which ONLY the GTO starter is compatible with. An F-body, corvette, or even truck starter will not work because they are too big and won't fit.

Also installed the Fueled Racing power steering lines which will come with the kit...


Another thing that comes with the kit is the Fueled Racing oil filter relocation kit. I mounted the filter to a pre-existing 10mm hole on the frame rail. From there, is just running the lines behind the motor mount and behind the engine to the pan on the driver's side.


As of last night, with the help of my friend Travis, we finally finished the gauge set up and mounted everything in its place. Took hours worth of cutting and grinding since I didn't have the appropriate size holesaw, but it was worth all the effort!


Currently, this is how she sits...


Now all that's left is the following...
Install dip stick
Install and wire headlights, taillights, and blinkers
Wire starter and alternator
Wire gauges
Wire power windows
Wire interior lights
Wire Ignition
Get exhaust made
Find and install a coolant reservoir
Bleed the brakes
Buy and install bucket seats
Top all fluids
Break in engine
HOON THE EFF OUT!
