When you click on links to various merchants on this site and make a purchase, this can result in this site earning a commission. Affiliate programs and affiliations include, but are not limited to, the eBay Partner Network.
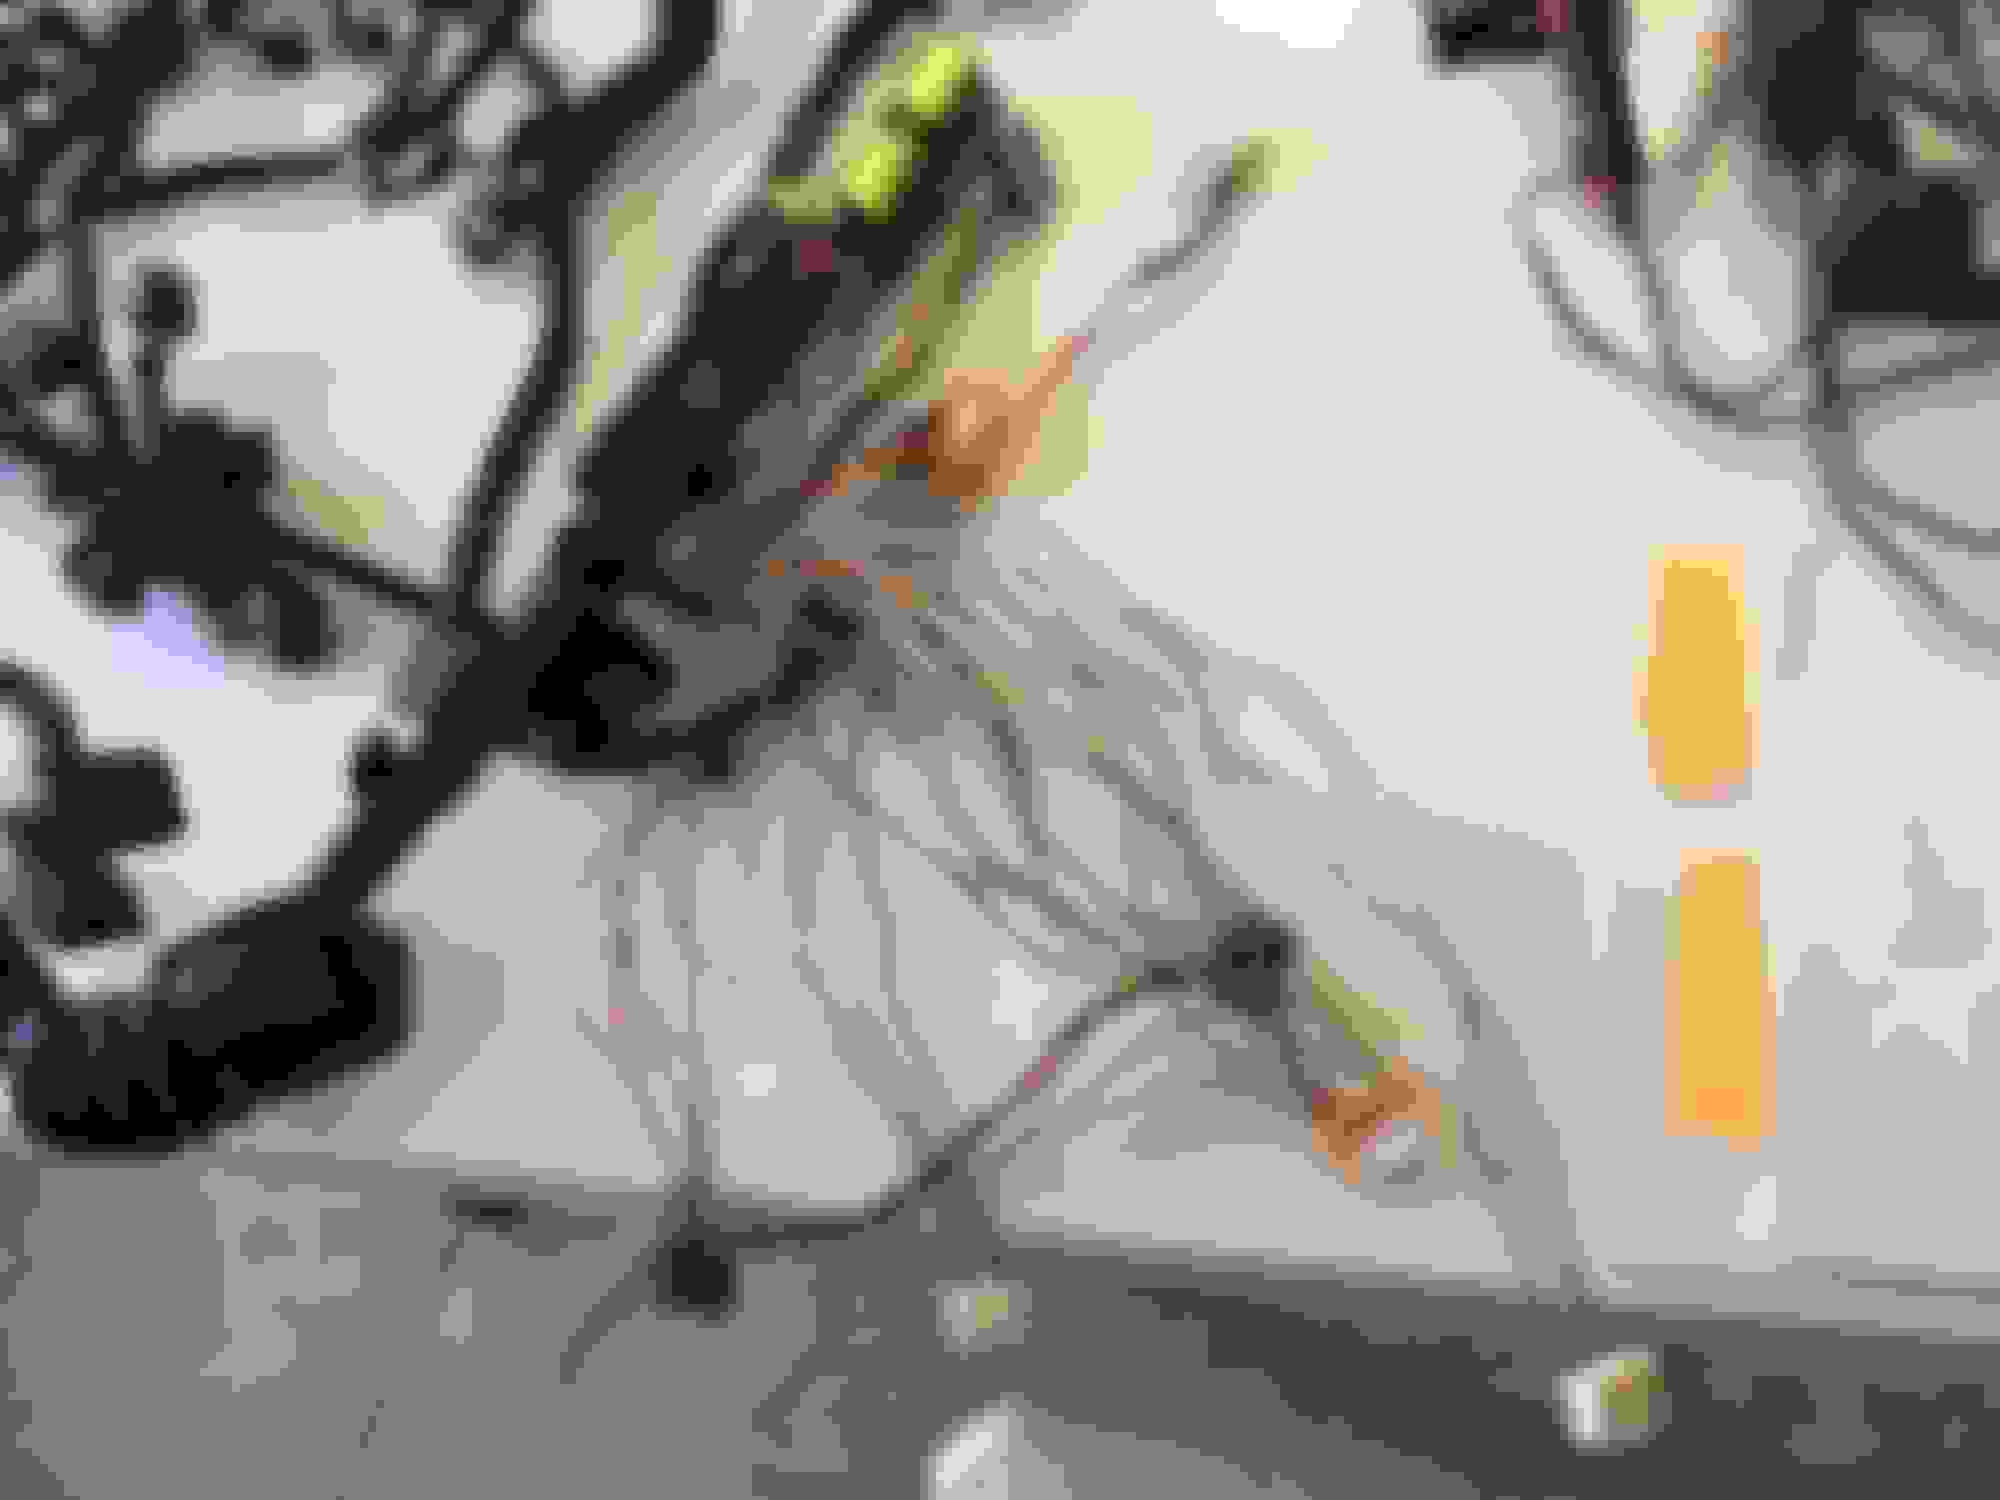
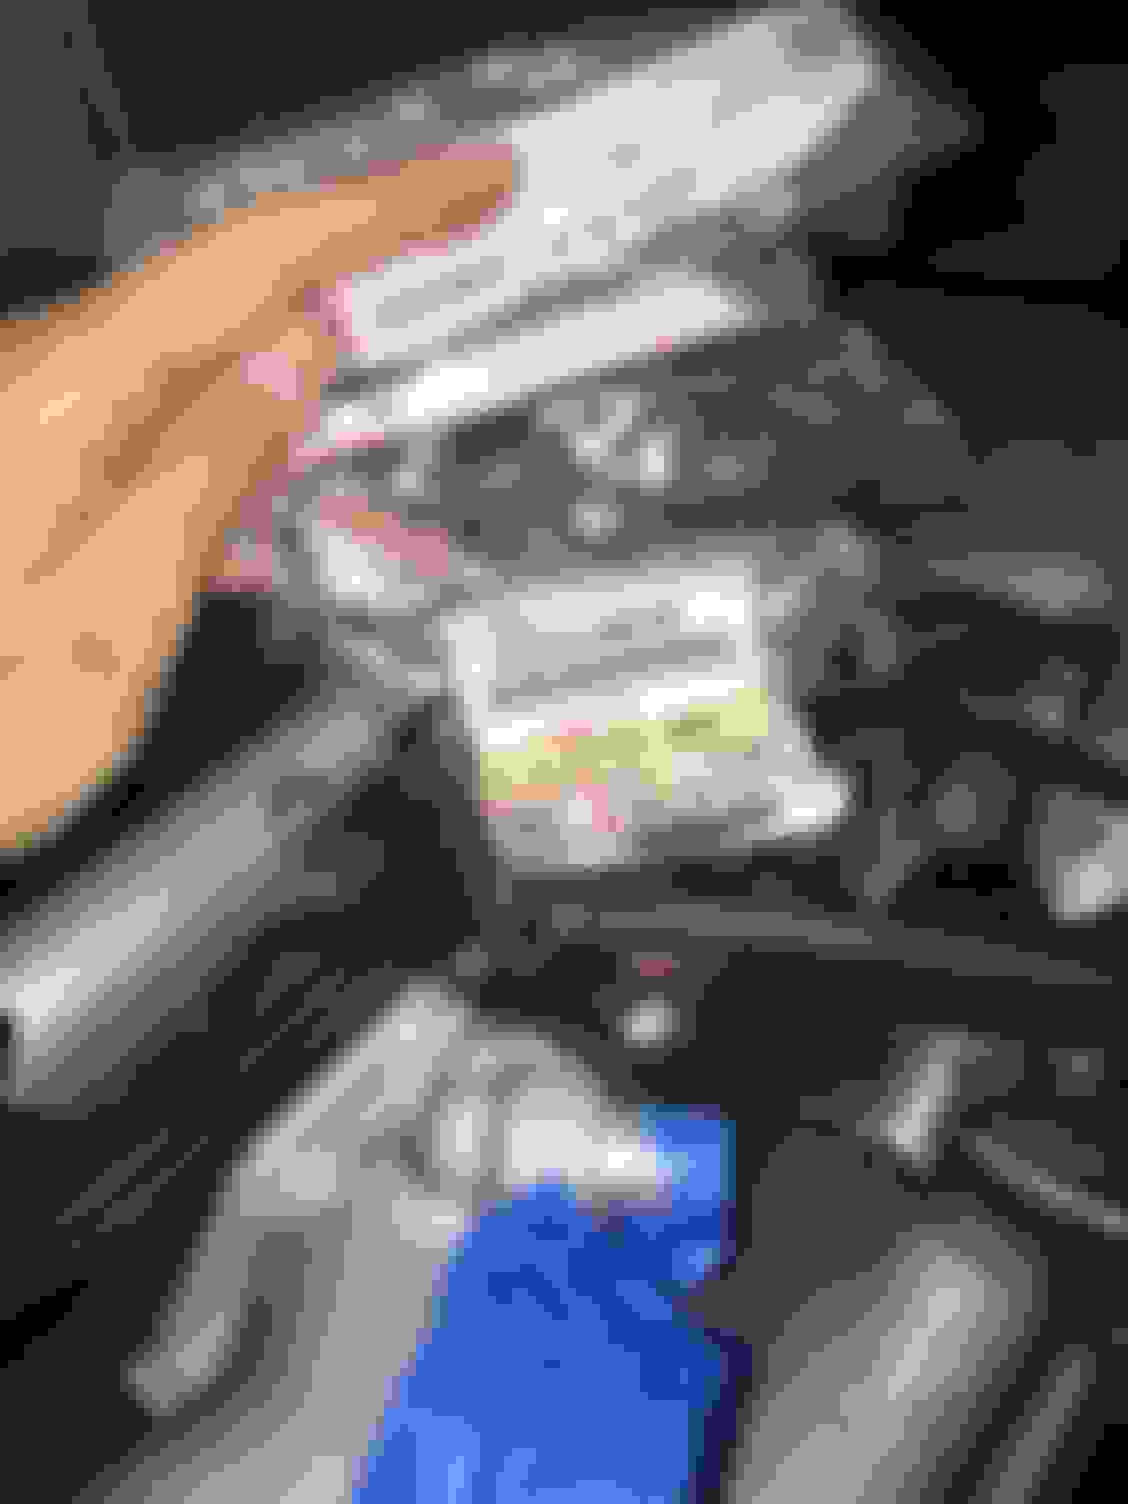
I'm not sure if these are even available brand new any longer but I assume(?) they last a ridiculously long time. The hard part was correctly identifying some of the very specific hoses with pre-bent angles.
To connect all of this we have:
-- The OEM BOV (17650-46021)
-- BOV front hose (17349-46010)
-- BOV rear hose (17344-46040)
-- BOV hose clamps x4 (96134-52600)
-- BOV small actuator vacuum hose (90445-12256... I think) with x2 clamps (96135-51100)
At this point the thread is now caught up to the present
And as such, with only a couple of things left to address on the GTE engine besides stealing most of the front accessories from the original GE, it's also time to get into this
At Gerrb's suggestion I am planning to move ahead with swapping out the old engine and getting the new one into the car in a few days before completing the wiring harness.
Although getting to some of the connections under the driver's side are some trouble due to the space constraints without taking apart and removing the upper intake manifold.
Maybe I'll make good progress on the wiring harness conversion before the GTE goes in.
If you think you have everything for the swap , then you can wait to drop it on the bay till you have harness. The problem in doing a swap is we many times we are missing this and that once the engine is in then waste time waiting for such part. Where as while working on the harness , you already know and ordered what is missing , by the time you are installing your harness , you got every other part you need too .
for that harness to be installed , all you need out is the upper intake plenum. All the rest of it are easy to install on that engine. Connectors are either on top or in front of exhaust side and under coil cover. The hardest to reach is basically the O2 sensor which actually has a long lead wire so it is easy to reach too.
Recalling what you said when you were around last week that most of the job on the wiring will be repining of body plugs . It is yes and no , there will be removing and adding also since the body pins of a TT MKIV and SC are not one is to one.
For now it has been helpful just to have use of the car as is during the stressful holiday time. I have been so tied up with family since I arrived that I haven't had a chance to work on the harness yet but now I can start on it. When I did have a little time I was always so tired and it was late at night. Not a good idea to dive into wiring work if I didn't have 100% concentration when making critical connections.
I actually noticed exactly what you just said in the wiring notes I have: that it is not all a one-to-one connection that is made. The heater control VSV for instance.
And also the wiring for the TT fuel pump ECU. I am going to try to make that work since I have two of those TT fuel ECUs and the body harness connector for it.
Right now I am still identifying what each MKIV and SC300 harness connector is called. I am using a small label maker to mark each of them.
Making very slow progress on the USDM 2JZGTE M/T harness conversion. Double checking everything as I go...
For this I am repurposing unnecessary SC connector wires of similar colors to the appropriate MKIV wires when possible as well as various gauges of factory Toyota repair wires.
Some damaged connectors and wires on the engine bay side of the harness were replaced and it looks like I should splice in all new coil pack wires and connectors to fix some very slight open connections when the pack connectors are bent at certain angles. I would say it is minor but... it's probably a good idea to overhaul those.
Looks great !! But please you don't use solder any wires...crimp everything and you will thank me later!!
Nice progress after 2years I see you are still going with this.
Thanks! Yep, still chipping away at it doggedly. Two years ago I thought I'd have finished the conversion already.
On the wiring... I'm only doing soldering with heat shrink tubing and some 3M Super 33+ electrical tape for finishing. I'm also reusing some of the protective heat shielding that came on parts of the MKIV harness. Respectfully I have to disagree regarding crimping the wires versus soldering. That would not give me any confidence in case one of the crimps came loose-- far too risky... and bulky once the bundles are consolidated.
.....
Regarding my progress, I've gone through each SC body connector at this point and matched up as many OBD1 92-93 SC300 pin locations with the correct OBD1 MKIV pin locations as I could. Trouble I've noticed now is that some random pins that are supposed to be there on the MKIV OBD1 harness... aren't present. The majority of them were exactly where they should have been. This MKIV harness was not ever messed with on the body plugs so these are unexpected wiring differences from the factory.
I took a lot of time to verify what wires I did transfer and do a continuity test on any pins I was suspicious of. The next step is to start going through what I have according to as many of the references laid out in this 1995 Supra 2JZ-GTE engine compartment wiring diagram as possible to verify again that all the wires in accordance with the pins outlined in the OBD1 to OBD1 conversion pinout for USDM have been correct.
As for the few pins that were supposed to be there but which were completely missing on the MKIV harness... that's a larger conundrum. Maybe there were actually some mid-year differences between 1993.5, 1994 and 1995 MKIV TT's. I hadn't heard of this before but now I have to imagine it is possible. I'm too new at this to confirm that is the case but in every part of the wiring I have been meticulous and methodical about following every pinout and instruction very carefully so as not to mis-identify anything or make a mistaken connection. Every wire I have transferred over can be identified and reversed back to stock (for the MKIV) if needed by following the guide in the reverse order.
The primary reference I have been using is the extremely detailed USDM 2JZ-GTE swap manual by Phil Auldridge combined with Gerrb's extremely visual and notated 2JZ-GTE Wiring Harness Made Easy thread and some notes from vigman who completed this same USDM 2JZ-GTE swap about two years ago.
At this point sorting out the final anomalies and special wiring required to allow the SC to control things like the heater VSV, A/C and fuel pump, etc. get a little more complicated than the tedious work that I just got through.
.....
The 2JZ-GTE is pretty much ready to get installed. I installed brand new Denso TT coil packs yesterday. The engine just needs the GE harmonic balancer (which is practically brand new), A/C compressor, PS pump and fan clutch swapped on. New coolant, Comp Cams 10W-30 break-in oil and some cycling before the first start and it is good to go.
A new SouthBend Stage 2 clutch kit is on standby to replace the inadequate OEM Supra MKIII Turbo clutch kit.
The wiring harness is currently the only thing keeping all of that on hold.
Thanks Gerry! I’m pushing forward but at this point figuring out what to do next became a lot harder. With no Lexus connectors left to go through but several required wiring connections left in limbo I have to figure out if there were any changed between 1993.5, 1994 and 1995.
Let me know what you think about this list I have made below. It is everything I have not been able to identify on the MKIV harness as laid out in the wiring guide for USDM OBD1 2JZ-GTE to OBD1 SC300:
....
MKIV IJ1 Pin #8, Blue/Red wire (“FUEL FP DIAGNOSIS POINT”) to SC300 IJ1 Pin #1 — No pin/wire found here on MKIV IJ1 connector. Also no “FP” pin found on the diagnostic port. However there is a thick Black with Red Stripe wire on the Pin X location just underneath IJ1 Pin Location #8 that Seems to get continuity at the smaller ECU plug Pin #31.
MKIV II1 Pin #22 Blue/White wire (“THEFT HORN”) to SC300 IJ1 Pin #9 — No pin/wire found here on MKIV II1 connector.
MKIV IJ1 Pin #17 Pink/Green wire (“TE2 Diagnostic”) to SC300 IK1 Pin #2 — No pin/wire found here on the MKIV IJ1 connector. Also no TE2 pin on the MKIV diagnostic port.
MKIV IJ1 Pin #5 (“TO DIAGNOSTIC BLOCK TE1”) to SC300 IK1 Pin #4 — A wire is present on the MKIV IJ1 at this location but it is a Brown wire. The swap pinout says it is supposed to be a Yellow/Blue wire. When I tried a continuity test between this pin on the IJ1 and the pin at the TE1 diagnostic port I got no continuity. No evidence of any previous owner damage to this part of the wiring. It all looks factory.
...
Those are the ones that I either didn’t exist on the USDM MKIV TT OBD1 harness that I have or which I was suspicious of when a continuity test could not verify a very easy to find connection. I still have to go through ALL the transferred connections I have made so far to try to verify their wires go to the connectors they were supposed to.
I am still not familiar with all the engine bay connectors to know what each of them does, so that TSRM wiring layout guide I put into my last post is invaluable.
…
Now there are several wiring connections that this swap manual points out need to be done specially for this swap which I have also left unfinished (for now):
Lexus SC300 IJ1 Pin #2 (“IGNITION PWR TO A/C ECU”) Red/Blue wire — Note says: N/A… connect to Lexus II1 Pin #2. Also says “Same connection, PWR to Heater VSV”.
Lexus SC300 IJ1 Pin #12 (“FUEL PUMP B+”) Black/Red wire — Here I am supposed to run a separate 14 gauge wire through the entire engine harness to the main engine power connection at (connector?) EA-2 behind the battery but… “This wire was connected via a separate single-wire pull-apart connector, to the IJ1-12 Black/Orange wire by cutting the wire fm back of the IJ1 connector on the cowl, and joining, thereby bypassing connector IJ1-12 for this connection.”
Lexus SC300 IK1 Pin #8 — TACHOMETER OUT to convertor device (MSD?). And this device also needs MKIV II1 Pin #29 for its TACH IN signal.
Lexus SC300 II1 Pin #1 Brown wire — Connected to MKIV II1 Pin #20 (“A/C Lock Sensor”) but as the directions say it also needs to be connected to the SC’s Ambient Temp Sensor with a separate wire from EB1 Pin #7 on the chassis.
Lexus SC300 II1 Pin #2 Red/Blue wire — (“PWR for A/C ECU”) — ^^ same as mentioned above ^^ — but this also gets spliced to the 2 wire Heater VSV connector?
Lexus SC300 II1 Pin #7 Black/Yellow wire — (“VSV for Heater”) — Direct connection to 2-wire VSV connector
…..
Right now before getting into the special extra wiring needed for the SC A/C and heater control I am much more concerned about the missing pins on the MKIV harness and whether or not the connections I have done my best to verify all pass continuity tests. Those missing wire/pins on the MKIV side bother me.
I am going to do as much additional problem solving as I can for now but will have to stop again in a few days.
For now I have elected to leave the SC in running condition with the old 2JZ-GE. To my surprise (but I guess I shouldn't be surprised) it's been doing just fine. I may have set this in motion a bit prematurely since the wiring is such a big job in itself!
It certainly is time consuming for sure. I do appreciate your good advice but... well... at this point I've already done plenty of neat soldered and heat shrink insulated connections already :/ I made sure they were securely tied before applying solder but I do hope I can avoid any breakage... or interference as you've pointed out. It's too far into the process now to change.
As for the missing wires I am going to try to figure out how to add them up into the harness at the same time the heater VSV wire(s) are added. TE2 to the diagnostic port seems straightforward... and it's absence almost suggests that I have an OB2 rather than OBD1 harness since it's a diagnostic connection only used in OBD1 Supra TT's and ECUs. Same for the Fuel FP Diagnosis Point on the diagnostic port. Not sure about the TE1 wire that I can't confirm a connection for on the TE1 location at the diagnostic port or the Theft Horn wire.
I'm trying my best to understand the wiring diagrams. I can pretty much figure out pathways for connections but understanding the symbol markers for what a connection does takes a lot of looking up in the glossary (which I have printed out for reference).
Anyway, from doing some research on old SF threads I understand that you can basically get any Supra OBD1 or OBD2 ECU to run on any OBD1 or OBD2 Supra. The main differences are supposed to be the operation of the secondary O2 sensor (something ground wire related) and the TE1 and TE2 diagnostic port operation being different between the two.
This is where I found the majority of the info on OBD1 and OBD2 differences:
What I hope is that no matter what any differences may be, the OBD1 ECU and its wiring direct to the ECU pins don't need any changes. Or maybe I'm wrong about my OBD2 harness hunch but the absence of the TE2 Diagnostic pin and the inability to continuity test TE1 Diagnostic makes me think it may be the case.
Taking a break for the moment to think on the remaining wires left to be completed. I need to get some proper repair wire spool in 14 gauge and.... I'm not sure what other gauges I need for the others. Probably copper braided 16, 18 and 20?
Yes and no. The inexpensive OEM Toyota 1986.5-1992 MKIII Supra Turbo R154 clutch kit (which is my current clutch setup for the non-turbo engine) will work just fine and last a long time against a stock 2JZ-GE which puts out only 225 hp / 210 ft-lbs but when you jump up to a mere 320 hp / 315 ft-lbs it will not cut it for very long. The low down torque and immediate boost from the 3.0L 2JZ-GTE is a very different delivery of power compared to a rev-happy stock 2.5L 1JZ-GTE or especially a boost-less 3.0L 2JZ-GE.
The R154 clutch kit I will be using is a SouthBend Stage 2 Endurance (full organic face disc for street driving) that can handle 365 ft-lbs of torque. If I ever crank up the boost I would need to get an even stronger clutch kit. The next stage up from that one would be the SB Stage 3 Endurance which is rated for 395 ft-lbs of torque. With a much higher boost 2JZ-GTE I'd probably consider a twin disc clutch kit with a movement change from either Exedy or OS Giken. I'm not a fan of puck clutches personally.
The only thing that is different in the clutch area when using any R154 against a 2JZ engine is the bellhousing of course and then the flywheel which will be an OEM 1JZ-GTE R154 flywheel or any aftermarket flywheel intended for the R154 and a JZ series engine. The clutch kits themselves (sans flywheel) you will find are all the same spec as for any MKIII Supra Turbo 5-speed or any 1JZ-GTE 5-speed Toyota.


 12-23-17, 12:43 AM


 ... keep it up !