When you click on links to various merchants on this site and make a purchase, this can result in this site earning a commission. Affiliate programs and affiliations include, but are not limited to, the eBay Partner Network.
I don't mind the front mount since it tucks away so nicely behind the bumper. Much more stealth that I anticipated and I dig that.
Nice clean job on the gauge harness! I'm looking forward to getting mine running 100% so that I can try and tackle the boost gauge job next. But that Autoextrude vent may be the death of us haha. I have a feeling pulling my GE took less time than it's going to take me to figure out how to use that damn vent mount lol.
I don't mind the front mount since it tucks away so nicely behind the bumper. Much more stealth that I anticipated and I dig that.
Oh I agree. Installing an OEM side mount intercooler or reconditioning one is a very rare choice over the common front mount intercooler in this and most built turbo cars. And front mounts look good anyway
Also, at a certain point the roughly 400 CFM (or slightly more so I was told) rating of the little SMIC would become a bottleneck but not until I might try to exceed BPU level modification (above 450whp and above 18psi I think).
Most front mounts will have much higher CFM rating and will be much more effective at cooling the air at significantly higher boost levels.
At my mere 10-12psi stock and maybe 15-16psi later on? For that my little IC is fine and very efficient. But I�m also not going for as much HP as most will in their SC�s, yours included
Originally Posted by RudysSC
Nice clean job on the gauge harness! I'm looking forward to getting mine running 100% so that I can try and tackle the boost gauge job next. But that Autoextrude vent may be the death of us haha. I have a feeling pulling my GE took less time than it's going to take me to figure out how to use that damn vent mount lol.
Thank you! I've been busy all week so have only had a little time to chip away at it bit by bit. My Delphi connector kit came in today and I did some measuring and determining of how I'll need to replace my Weatherpak 6-pin connector and run one more wire from it into the cabin. Tonight I'm just making notes for wiring changes/routing needed for the interior side to the console. One stage of this wiring project at a time.
I got away without a boost gauge for some months now but I do think it is helpful for both single turbo setups and stock twin setups just for the sake of monitoring diagnosis alone of issues alone.
My new 2JZ-GTE sequential Intake Air Control Valve assembly has shipped out to me finally. Glad I could still buy one brand new! Hopefully installing that will cure my 2nd turbo transition issue.
That Autoextrude A/C vent gauge pod... yeah, it hasn't proven straightforward to me either (yet...) but in all honesty I haven't given it more investigation over the last few days. I will again very soon but just have kept shifting to make progress on any other current projects with the time I have available every day.
I will have to come back to it soon and follow up with Autoextrude to see if they have anything new to offer. If not then once I have time available I'll get down to attempting removal myself with some fine metal pick tools.
Tomorrow I'm taking the SC in to see if replacing my current leaking oil pan with a new one (which I already have on standby) will be an extremely difficult and expensive thing for my dealer techs to do.
The car is due for its next oil change anyway so I'm going to have them install my Mishimoto oil filter sandwich plate at the same time so that I'll have my oil temp sensor pre-installed to hook into the revised engine bay accessory harness I'm making.
Since I have a stock TT oil cooler on my engine and have no intention of removing it I hope this doesn't make removing and installing a standard size oil filter insanely difficult. It shouldn't but hopefully it will be OK for clearance.
(FYI, Loctite 565 thread sealant was used to install the oil temp sender and some was also used on the threads of the NPT plug next to it. All the pre-installed plugs come loose in this sandwich plate even though a minimal amount of thread tape comes on them so if you have one of these or any aftermarket oil filter sandwich plate do remember to seal all threads properly and tighten them down before installing the assembly onto your engine).
Awesome work as always, that will be a nice set up. I'm surprised to hear that you take that to the dealer! However, I'm sure the techs are ecstatic to work on something besides a Rav4 lol. As long as they treat you well that's all that matters! As for the vent gauge, once mine is 100% I'll start working on it too. Hopefully between all of us we can get it figured out because I love the idea of keeping it stealth.
Awesome work as always, that will be a nice set up. I'm surprised to hear that you take that to the dealer! However, I'm sure the techs are ecstatic to work on something besides a Rav4 lol. As long as they treat you well that's all that matters! As for the vent gauge, once mine is 100% I'll start working on it too. Hopefully between all of us we can get it figured out because I love the idea of keeping it stealth.
I do a lot of work on the car myself but I do take it in for service every now and then, yes. I only use two places: a Toyota dealer where I know the techs who work there and with whom I have a longstanding relationship with, including the sole service advisor who takes care of me and my family. They've seen the car a lot and they do get a kick out of it (the clutch not as much though, lol).
Mostly it just goes in for oil changes or brakes. And then I also have one other independent shop that I also take the car to occasionally and which I also trust. It never sees a Lexus dealer for any service... just due to having no relationship with them honestly (and I'd hate to see the bill for the same work I get done at the Toyota dealer or independent shop).
It helps to take even a modified car like the ones we own in for basic things like oil changes, brakes, coolant flush, etc. but *definitely* you only want to take it in to a service center with techs whom you know and trust.
That all being said I might have a different opinion if my SC was a near racecar setup where almost everything might deviate too much from the standard SC300 and MKIV TT TSRM guidelines for normal servicing.
....
I'm with you on the side vent gauge pod. We'll figure it out between all of us and the company and hopefully the original designer chiming in also. It's a great location for a monitoring gauge and too good to pass up. I'm happy to be patient to get to it soon.
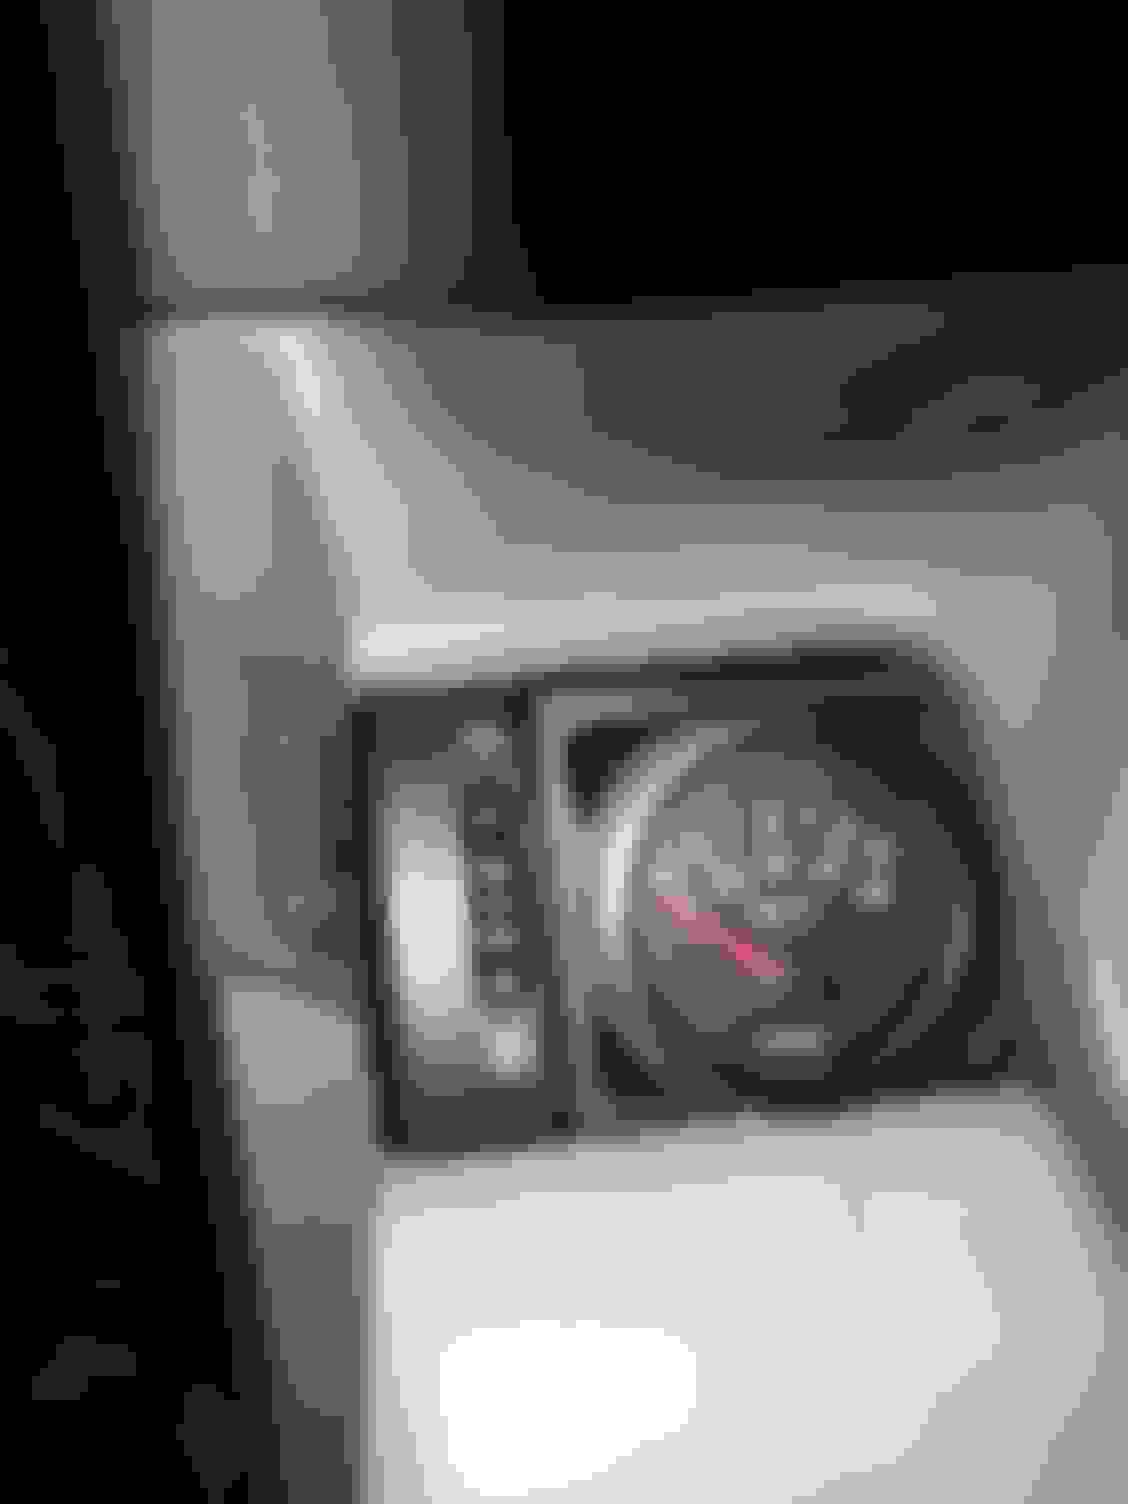
Last night I finished some wiring to get my oil temp gauge and the cheap little voltmeter installed. I'll snap a couple of pics today. It seems that my side vent gauge will either house my old 52mm voltmeter gauge or my Prosport boost gauge since I discovered that the Prosport's rear twist lock ring couldn't reach the threads on the back of the gauge when installed into the Autoextrude ashtray dual gauge pod/panel. So with that I just threw the matching style VDO oil pressure and oil temp gauges side by side.
My bad, I certainly didn't say that implying that you don't work on it. Clearly that's not the case! It just seems like a rare thing these days to have a dealer that treats an older modified car with respect. Like you said, knowing a few techs and having a good relationship with a dealer can be your best friend, but certainly a harder status to achieve these days.
Oh, Rudy I didn�t take it that way at all. Nothing to worry about!
I�ve got no hangups about taking an old modified car in for normal service and inspection vs doing it all myself. One has to have the time for that if you daily it, haha.
You definitely want to only take an older modified car in for service with a place that will treat it with respect. Thankfully this dealer does just that and I�m pleased that they do.
I feel the key to this is to form a relationship with a good service manager who you get along well with and who is honest with you and also get to know the techs who work on your car.
What I have found is that only some Toyota dealers will even touch a Lexus. Additionally, any time I went to a Lexus dealer in the past they tend to emphasize insulating the customer from the shop process and mechanics as much as possible. And I don�t prefer that.
The Toyota dealers who will work with Lexus vehicles I have found tend not to insulate the customer away from the actual service quite as much.
Oil temp gauge in and sender within filter sandwich plate in.
It really is helpful to be able to monitor both oil pressure AND oil temperature.
My new $12 LED voltmeter on the other hand, while equally useful to have handy, looks incredibly junky and tacky IMO.
I think this will be temporary until I can find a new place to mount my old 52mm VDO voltmeter gauge.
...
As for the oil pan servicing, I didn�t have it done. Long story short there is very minor leaking from the lower pan lip but there is also a minor leak from the upper pan. Since I assembled the upper and lower pans I can only conclude that I did something slightly wrong with the FIPG application two years ago.
Removing, cleaning and re-sealing and reinstalling both require pulling the engine out or dropping the subframe.
I�ve decided I�ll just get to it at some point in the future but for now I�ll just always check the oil level every so often and make sure it�s topped off.
Building an engine for the first time you learn from your mistakes. As those go this is still a very minor and manageable one.
You may be able to put some "Right Stuff" brand sealant (I forget exactly what it's called, but they have a variation of it that is a step down from something like JB weld, but a slight step up from your typical gear oil sealant) that you can "smear" on the leaking areas after cleaning them that may greatly reduce your oil leakage until the day you want the motor to come out. If you prep the area well (perhaps when you drain the oil at the next change), it will scrape off with a razor blade when you're ready to remove it. I had to do that to my GE as the previous owner had cracked the upper oil pan slightly from trying to jack the car up. It worked well and GREATLY reduced the amount of oil leakage. It lasted for two or three years and barely wept when I pulled it out for the GTE transplant.
You may be able to put some "Right Stuff" brand sealant (I forget exactly what it's called, but they have a variation of it that is a step down from something like JB weld, but a slight step up from your typical gear oil sealant) that you can "smear" on the leaking areas after cleaning them that may greatly reduce your oil leakage until the day you want the motor to come out. If you prep the area well (perhaps when you drain the oil at the next change), it will scrape off with a razor blade when you're ready to remove it. I had to do that to my GE as the previous owner had cracked the upper oil pan slightly from trying to jack the car up. It worked well and GREATLY reduced the amount of oil leakage. It lasted for two or three years and barely wept when I pulled it out for the GTE transplant.
Rudy, I�ll take a look into that, thank you! Since my leak issue isn�t but in one place on the upper pan and one place on the lower pan it might be worth trying.
I think I will not pull the engine or subframe to re-seal both unless there is another major reason to temporarily pull the engine, such as to replace the turbochargers down the road.
Oh, it also turns out that somewhere between getting my block cleaned, getting the bottom end built at a machine shop and beginning the assembly the iron surface never got a coat of high temperature paint. I actually thought it had since I thought I�d requested a coat of paint at the machine shop.
But apparently I didn�t know the difference between raw un-oxidized iron and dull black painted iron
Two years later I just noticed that the entire block surface has a mild, dull rust color. It won�t hurt it but... oh well. I still cannot remember how that happened before assembly other than that at the time I assumed it was already painted. Nope, lol.
I won�t be correcting that. No need to dismantle the whole engine again.
Next the brand new sequential turbo Intake Air Control Valve (the *other* “IACV” for 2JZ-GTE’s) came in today.
Hopefully this will cure my 2nd turbo transition issue since it has a brand new vacuum actuator.Edit: it turns out I was testing with my MityVac on the wrong setting. My original/used Intake Air Control Valve actuator is fine. However since the part is so old anyway I'm glad to have this one as a BNIB spare in case it's ever needed.
Now to read the MKIV Supra TT TSRM and Stu Hagen’s 97suptaturbo website to see the best way to take the old one out and install this one.
Note to anyone using one of these: it does not come with the top aluminum cover or an internal Reed Valve or gaskets. Those must be re-used or bought separately.
Looks great man. Looking forward to how stoked you�ll be to have both turbos working! I put my auto extrude vent in and wired as well yesterday. Definitely a pain, but it�s growing on me I�ll admit.
Looks great man. Looking forward to how stoked you’ll be to have both turbos working! I put my auto extrude vent in and wired as well yesterday. Definitely a pain, but it’s growing on me I’ll admit.
Awesome, Rudy! I haven't wired mine yet. I actually found the rear spade terminals on the illumination bulb on the rear of the VDO gauge stick out far enough that they hit the vent flapper control. So I ordered a Prosport classic style voltmeter gauge to replace it and I'll start my wiring once I have it in hand.
If I may ask, where did you decide to route your wiring? Was drilling a small hole and adding a little rubber grommet necessary?
....
As for the twin turbo operation, I jumped the gun it seems. The new TT-IACV part is nice to have but it turns out that I needed a Mityvac that operates in a pressure-output mode and not vacuum mode. So I bought a new Mityvac with both settings. Now I was able to verify that the older TT-IACV (not to be confused with an Idle Air Control Valve) actuator was actually working fine and its diaphragm holds pressure well. I performed the same test to the Exhaust Gas Control Valve actuator lower in the engine and that also seemed to operate correctly and hold pressure. Same for the TT pressure tank (although that's a new part on this engine so it *should* have been fine).
So far I've tested three of the four TT VSV's with this new Mityvac and they all check out fine. I expected this as they are brand new VSVs. The fourth one I still need to test (the thick piped Exhaust Blowoff Valve VSV on top of the engine) is also brand new so I fully expect that to check out and hold pressure correctly as well.
All the vacuum piping in the engine is new and I did follow the diagrams carefully when connecting all of them during assembly. I did recently replace one odd thickness hose going to the Wastegate VSV to ensure a tighter fit but I *think* that didn't make a difference on a previous post-fix test drive. Can't recall.
Once I have everything back together I'll warm it up and see if I still have the problem of the #2 turbo not coming online. I don't like to test that much in practice as the risk is that if #2 doesn't get its needed pre-spool before all the valves open up it can get slammed with air and this can over time harm the impeller blades on it.
If I've tried everything with no luck I'll try the hose method to bypass the sequential system and temporarily run the car in True Twin Conversion (TTC) just to be sure that both turbos are working in tandem. Low end will suck in TTC but at least it will confirm that the #2 turbo is in the good shape it seemed to be before I installed it. 150k miles was on both turbos when I assembled the engine but they were in good shape and had no excessive shaft play that seemed out of spec.
My hope is that if I rule out enough of the many parts of the sequential system through testing that will only leave so many other factors to suspect.
I'll probably also do a turbo system leak test and either check my wire continuity test notes or just pull off the ECU and test each turbo VSV's wire connection back to the corresponding pin on the ECU. The VSVs all seem fine and are new parts so checking for no electrical issue in the engine harness would be the very last step.
However I have no CEL error codes for a TT VSV malfunction so even that may be an unlikely part of the system to test.
So far I've found that the sequential system isn't really THAT complicated but it does have just enough things to check out that it's tedious and time-consuming to do so all at once.
You�re certainly doing your due diligence! Sometimes I look at all of it and can�t believe how complicated... but you�re right, when you break it down part by part it�s less daunting than it seems. I�ll be curious how it drives in TTC.
I routed them through the HVAC tube with a grommet, down under the dash, and over to the ash try light as you recommended! It worked out beautifully. However, my auto meter boost gauge�s fitting also hits the vent unless the gauge is upside down. So I�ve either got to get creative or find another gauge as well... but at least I have it for reference haha.
You�re certainly doing your due diligence! Sometimes I look at all of it and can�t believe how complicated... but you�re right, when you break it down part by part it�s less daunting than it seems. I�ll be curious how it drives in TTC.
I do think the sequential system as a whole has become less daunting the more I've familiarized myself with it. As for TTC, I actually tried that mode today. It was really easy to hook up and revert back to stock.
My impression is that the low end acceleration actually is not as slow as I'd thought although it is less pronounced with both turbos operating in tandem. It brings back some of the turbo lag that used to characterize a lot of 80's turbo cars (which I've always found amusing as a period-specific experience) but there is still plenty of power.
However in my case it allowed me to finally discover what my sequential turbo issue is: all along, ever since the engine was first started up, the 2nd turbo was bad or just going bad. Both turbos had 150k miles on them to start with and very little/negligible shaft play but I guess I was wrong in thinking the rear one was all right.
The same sudden power halting wall occurred again and the same mild but audible noise occurred again while in TTC where both turbos spin up simultaneously.
So this tells me that all my tests on the sequential system were indeed correct and that sequential operation is 100% fine.
It was my 2nd turbo, which along with the first turbo I opted not to rebuild at time of the engine assembly, that was bad.
Aside, I do not feel I was incorrect about needing to step up to a much stronger twin disc clutch kit. I did actually have some issues holding full torque from turbo #1 between 2000-3500rpm before the second turbo was ever engaged. However the inadequate couple of first clutch kits that I started out with certainly did not help matters.
....
For now I've reverted back to sequential operation and will just drive on turbo #1 below 3500-3800rpm as I have been doing as long as this engine has been in the car (crazy that I�ve taken the new engine even a mere and brief 5,000rpm only once or twice ever because of the 2nd turbo transition issue concerns).
For those interested in USDM Toyota CT12B turbo servicing without going with a pricey full STU Hybrid GT28 upgrade:
I have contacted The Boost Lab Inc. in Tampa, FL who do work on these specific and somewhat rare OEM turbos.
Gerrb helped me score a spare set of USDM 2JZ-GTE CT12B's several months back and I will be sending those in for rebuilding and full inspection as soon as I can swing it. Then once I have them in hand I'll consider how I want to tackle removing the entire twin system in my car and install those.
...
For the time being the SC does pretty well in quick daily driver mode with the first turbo only up to 3500 rpm and while cruising on the highway.
I think that if you find a set of USDM CT12B twin turbos it is probably more likely they have been run hard and at their 18 psi limit or higher which can contribute to accelerated wear (even though 17-18psi is still considered "safe" for these). JDM CT20B twins in the early non-vvt-i spec may need to have their ceramic exhaust wheels replaced with steel ones but the JDM 1996+ VVT-i version CT20B's with steel exhaust wheels probably fare a lot better and may not be run quite as hard or at quite the same level of boost as a lot of USDMs have seen over the years.
I may be totally wrong but that's my theory. Anyway, the USDM CT12B's in my car, at least the rear one, definitely needed a refresh from the start. I'll keep those once I have all this sorted out and will probably rebuild them too eventually.
...
Originally Posted by RudysSC
I routed them through the HVAC tube with a grommet, down under the dash, and over to the ash try light as you recommended! It worked out beautifully. However, my auto meter boost gauge�s fitting also hits the vent unless the gauge is upside down. So I�ve either got to get creative or find another gauge as well... but at least I have it for reference haha.
Thanks Rudy!! Did you happen to take any pictures of the wiring install? What size grommet did you use for this and where did you get it? I've been thinking that drilling a little hole in the A/C vent tunnel before the flapper is probably the only good way to get any wires in there.
I hear you on the gauge rear depth issue. I've decided I will keep it simple in that location and use a simple LED lit analog dial boost gauge. The depth should be less than with the current one and the wiring should be pretty simple.
I'm considering picking up one of AutoExtrude's console ashtray triple 52mm gauge pod panels to keep my oil temp, oil pressure and add the traditional boost gauge with some cutting down of the twist-lock ring(s). It may be a tight fit but I'll know soon. Then I'll just have to relocate my 12V DC port somehow (to the dead volume **** location? Hole saw another hole for it on the console trim surround?) and where that might be I'm not sure yet.
I already have a 2nd 12V DC accessory port fitted under the center console lid and I am planning to add a USB charge port to the center console's rear ashtray door. Actually that's something I've thrown at AutoExtrude in hopes they might run with it and come up with a new drop-in replacement part for that.
Anyway, glad to hear you got that vent pod installed! It's definitely for those 52mm gauges that have shallow rear depth and internal LED lighting for more compact length.
I'm sorry to hear about your second turbo! That's too bad... These things under full boost are just awesome and it bums me out you've done all this work and haven't gotten to enjoy it as much as you hoped. However, I think you've got a great plan! I noticed a few companies will also rebuild/upgrade them with larger turbine wheels etc to be able to push a little more air which may be fun in the scheme of things. You'll have to keep us up to date on what you plan to do.
As for the gauge - I did exactly that. I drilled before the damper, installed the grommet that came with my autometer gauge, and ran the wiring/tube to the left and down under the dash. My gauge is definitely too deep with this set up... However, it's a lot better than nothing for the time being, and I do like that it's a little covert.

 03-03-20, 08:59 AM