When you click on links to various merchants on this site and make a purchase, this can result in this site earning a commission. Affiliate programs and affiliations include, but are not limited to, the eBay Partner Network.
Great news - I'm glad you found someone to get that driveshaft sorted for you! It's such a relief to find professional shops that can do good work when you need it the most.
As for the boost gauge - a voltage drop at the sender certainly makes sense. Let us know what you find! I'm excited for you to get your driveshaft back, turbos back on, and to have that bad boy ready for summer!
Thanks Rudy! Yeah, they're a good driveline shop. I looked up every specialist driveline shop within the state and this one was one of the closest without going into a major city. And their communication was excellent.
Well I don't think the voltage drop at the boost sender is the issue. Not from the tests I've made so far. I will do more when it stops raining.
I think the voltage drop is actually at the gauge's power source, not the sender. That's what I need to narrow down and prove/disprove to determine the electrical culprit. It may be as simple as sharing too much power from the cigarette lighter circuit wires for three VDO gauges, a 12V DC accessory jack and the boost gauge through its long dash harness that I made. And the boost sender shares the 12V Switched source from there as well.
But so far nothing until this suggested any electrical current sag. So with more testing we'll see. I know of one other 12V Switched electrical circuit to pull from in the center console area (behind the shifter) and I may switch it to that as a test to see what happens.
...
Changing out the turbos will take a bit longer. I still need to send out the spare #1 CT12B for rebuilding, buy another gasket kit (I have a spare gasket kit already but one should be kept as a spare for the set of turbos that will come out of the engine), and I need to do a LOT of research on every aspect of what it is involved with removing and replacing these with the engine in the car.
That is neat they can get the 3/4 taken off before the bulge, that should be perfect when done and pretty reasonable also for re-balancing both.
I always like going to those shops they have so much fun machinery! And nice progress on the gauge, definitely in to see the results!
Yeah, it definitely is neat. I think I read about another person with an R154 swapped SC doing this with their MKIII R154 front driveshaft (no tube replacement, just shortening the existing one) and I suspect it's possible because 3/4" is really not that much to remove from that front section. So long as it all gets rebalanced it will be fine.
This shop had SO MUCH cool aged machinery inside! But like the 70 year old drill-press I have in my tool room the heavy duty machining equipment from way back just seems to last forever.
I'll need to get back to the gauge wiring testing once this week's rain and wind die off. According to the weather report that won't be until Tuesday unfortunately. Until then I've got some unrelated stuff to film and send out before my plate is clear again.
I've also seriously been thinking of installing a rear view camera... but not in the dashboard. Rather by using a custom installed (needs a V-mount bracket on the windshield) Gentex #ADVGENM5S aftermarket rear view mirror. That model has a little 4:3 backup screen built in, a digital compass function and of course auto-dim. Gentex mostly sells to OEM's and they also made the stock mirrors for our SC's.
For the rear view camera I actually want to embed a nearly flush-mounted backup camera into the stock SC400 1992-1996 rear wing that I have on my SC. That would very closely replicate the backup camera function that came in the same rear wing as stock on the rare Soarer UZZ32 Active cars. I dislike aftermarket license plate mounted backup cameras with a passion so a fully embedded camera is the only way I'd do it.
I'd have to run the necessary wires from the spoiler through the trunk lid through the back seat panel side access port down under the rear seats and through the center console. The mirror wires would have to be run through the head liner, down the side windshield pillar, through the upper to lower dash somehow and then to the center console (or maybe everything would just be connected under the dash).
I'd like that function but I'm in no hurry to start another mini electrical project.
Just a small update for this slow side project:
Amayama got back to me and confirmed that the little OEM Soarer 92-96 spoiler camera window part (which would fit onto our USDM factory 92-96 spoilers with some template marking, masking and drilling) is actually NOT available any longer. I got a little too hopeful.
I had wanted to house a bulky (as in not a flush mount camera) Pioneer NDBC8 CMOS surface mount backup camera or a Kenwood CMOS-130 or CMOS-230 backup camera inside the factory 1992-2996 SC300/400 wing with the factory Soarer backup camera window part for it to see through... but since that part is no longer available I'm scrapping that idea.
I dislike license plate mounted backup cameras so my Plan B for this will be to use a COOLINT CT-106S 360 degree adjustable flush mount aftermarket backup camera. It will be even more compact than the idea of recreating a Soarer factory backup camera, will fit into the same general location on the factory fiberglass wing (yes, stock SC400 1992-1996 wings are made of very hard fiberglass) and it will be adjustable from the outside should there be any need to.
Hopefully it is as good, reliable and long lasting as the reviews for it indicate. I'm not sure what to expect when it's only a $30 camera. The Pioneer and Kenwood cameras range from $50-$90.
As far as mounting it goes it's excellent though, especially if your SC has black factory paint
I've picked up a junk Lexus Phone transceiver with wires and connectors from a late 90's Lexus LX450 to make a little patch harness to plug right into the trunk located SC Lexus Phone transceiver plugs and pull +12V and Ground from it. The same plugs exist on that salvage/ebay factory Lexus Phone harness. I can attach the long video cable and reverse trigger wire to that harness when I make it. For the $36 it cost me I figured that was cheaper than buying the plugs and terminal repair wires brand new individually from a dealer.
This will be a little pre-wiring side project for now. I'll be doing the camera install and accompanying aftermarket Gentex ADVGENM5S rear view mirror with built in compass, auto-dim and 4:3 corner screen for the backup camera at a later time.
FYI, in the Lexus Phone SC300/400 wiring diagram you can pull +12V Switched power from the 15A TELEPHONE fused circuit from the big phone "A" connector in the trunk at Pin 9 and you can pull a ground from that "A" connector at Pin 11. Alternatively the "A" connector's Pin 10 goes to the 15A ECU-IGNITION fused circuit. Both are +12V Switched wires.
Thanks Rudy! I'm just leaving the post with those preliminary notes for it right now. The little camera still has yet to arrive and I'm not buying the Gentex mirror right now. But once there are enough parts gathered to at least pre-wire the system before the mirror would be connected I'll go further into that. It's not high on my priority list for now.
I'm still waiting for the driveshaft modification to be completed. Hopefully I can get it back before the weekend. I spoke to the shop owner and it hadn't been done by Tuesday and there was a repair needed for their balancing machine that slowed things down. Hopefully I'll get the go-ahead call soon but I want it done right no matter what.
I finally opened up the box with the #2 CT12B turbo that was rebuilt. Wow! The Boost Lab in Tampa did a truly amazing job! It really looks brand new. Set side by side with the old #1 CT12B it's night and day visually. Getting that one rebuilt will still have to wait for now though.
While driveshaft has been in for service I've been focused on other unrelated projects. I'll get through some more once I get it back.
I'm glad the driveshaft is coming along and hopefully it gets back to you ASAP so that it's one less worry off your mind. As for the turbo - that's awesome news! What a great feeling it will be to have those rebuilt and ready for action. Can't wait to hear more as this unfolds. Hope you're holding up well Craig!
Finally made some progress with the revised Supra MKIII R154 front driveshaft.
I picked up that and the SC300 rear driveshaft that were balanced as a set. The weights were changed on both the front and rear so the combination is probably only good AS a set at this point but that�s fine with me.
The requested length change to the front driveshaft was 3/4� shorter but what I got back was only 1/2� shorter than before. I�m not happy about that but nonetheless I think that will still be enough difference that should make everything work.
And from the look of it you�d never know it had been modified from stock. Very clean work! He even added some clean alignment marks for me in all the right spaces.
The only other annoying thing is that despite providing the exploded picture diagram of the driveshaft assembly, a new crush nut, two new washers and the front d/s loosely assembled in order... I got the otherwise great looking finished part back with the new center bearing installed backwards.
And I was not sure if the nut had been pre-torqued and final torqued to spec. And he managed to lose the thick reusable washer that goes before the crush nut.
So... I had to order another new crush nut, new washers and a new thick washer.
I didn�t have the SST tool recommended to hold the flange in place so I improvised one, got the old nut de-staked and removed, reassembled everything in the right order and got the new nut torqued to the TSRM required 134 ft-lbs, backed it off and then re-torqued to the required 51 ft-lbs and finally stake-punched the nut into the indented area.
When I re-measured the revised front shaft�s length I again only got a 1/2� shorter figure. But still, I think this will work. I�ll know for sure once I install everything.
I also painted my new replacement R154 output dust cup.
I bet they could only cut 1/2" before the ballooned part, they should have just changed out the whole front shaft.. I guess at least you have the oem shaft still.
^^ That may be so, Ali. And in that case I�d have been fine if I were just told it will cost more to get the exact length change request of 3/4�.
I have no spare driveshafts. I gave them the only rear and only front that I had. So my MKIII front is permanently modified. Which is actually OK with me.
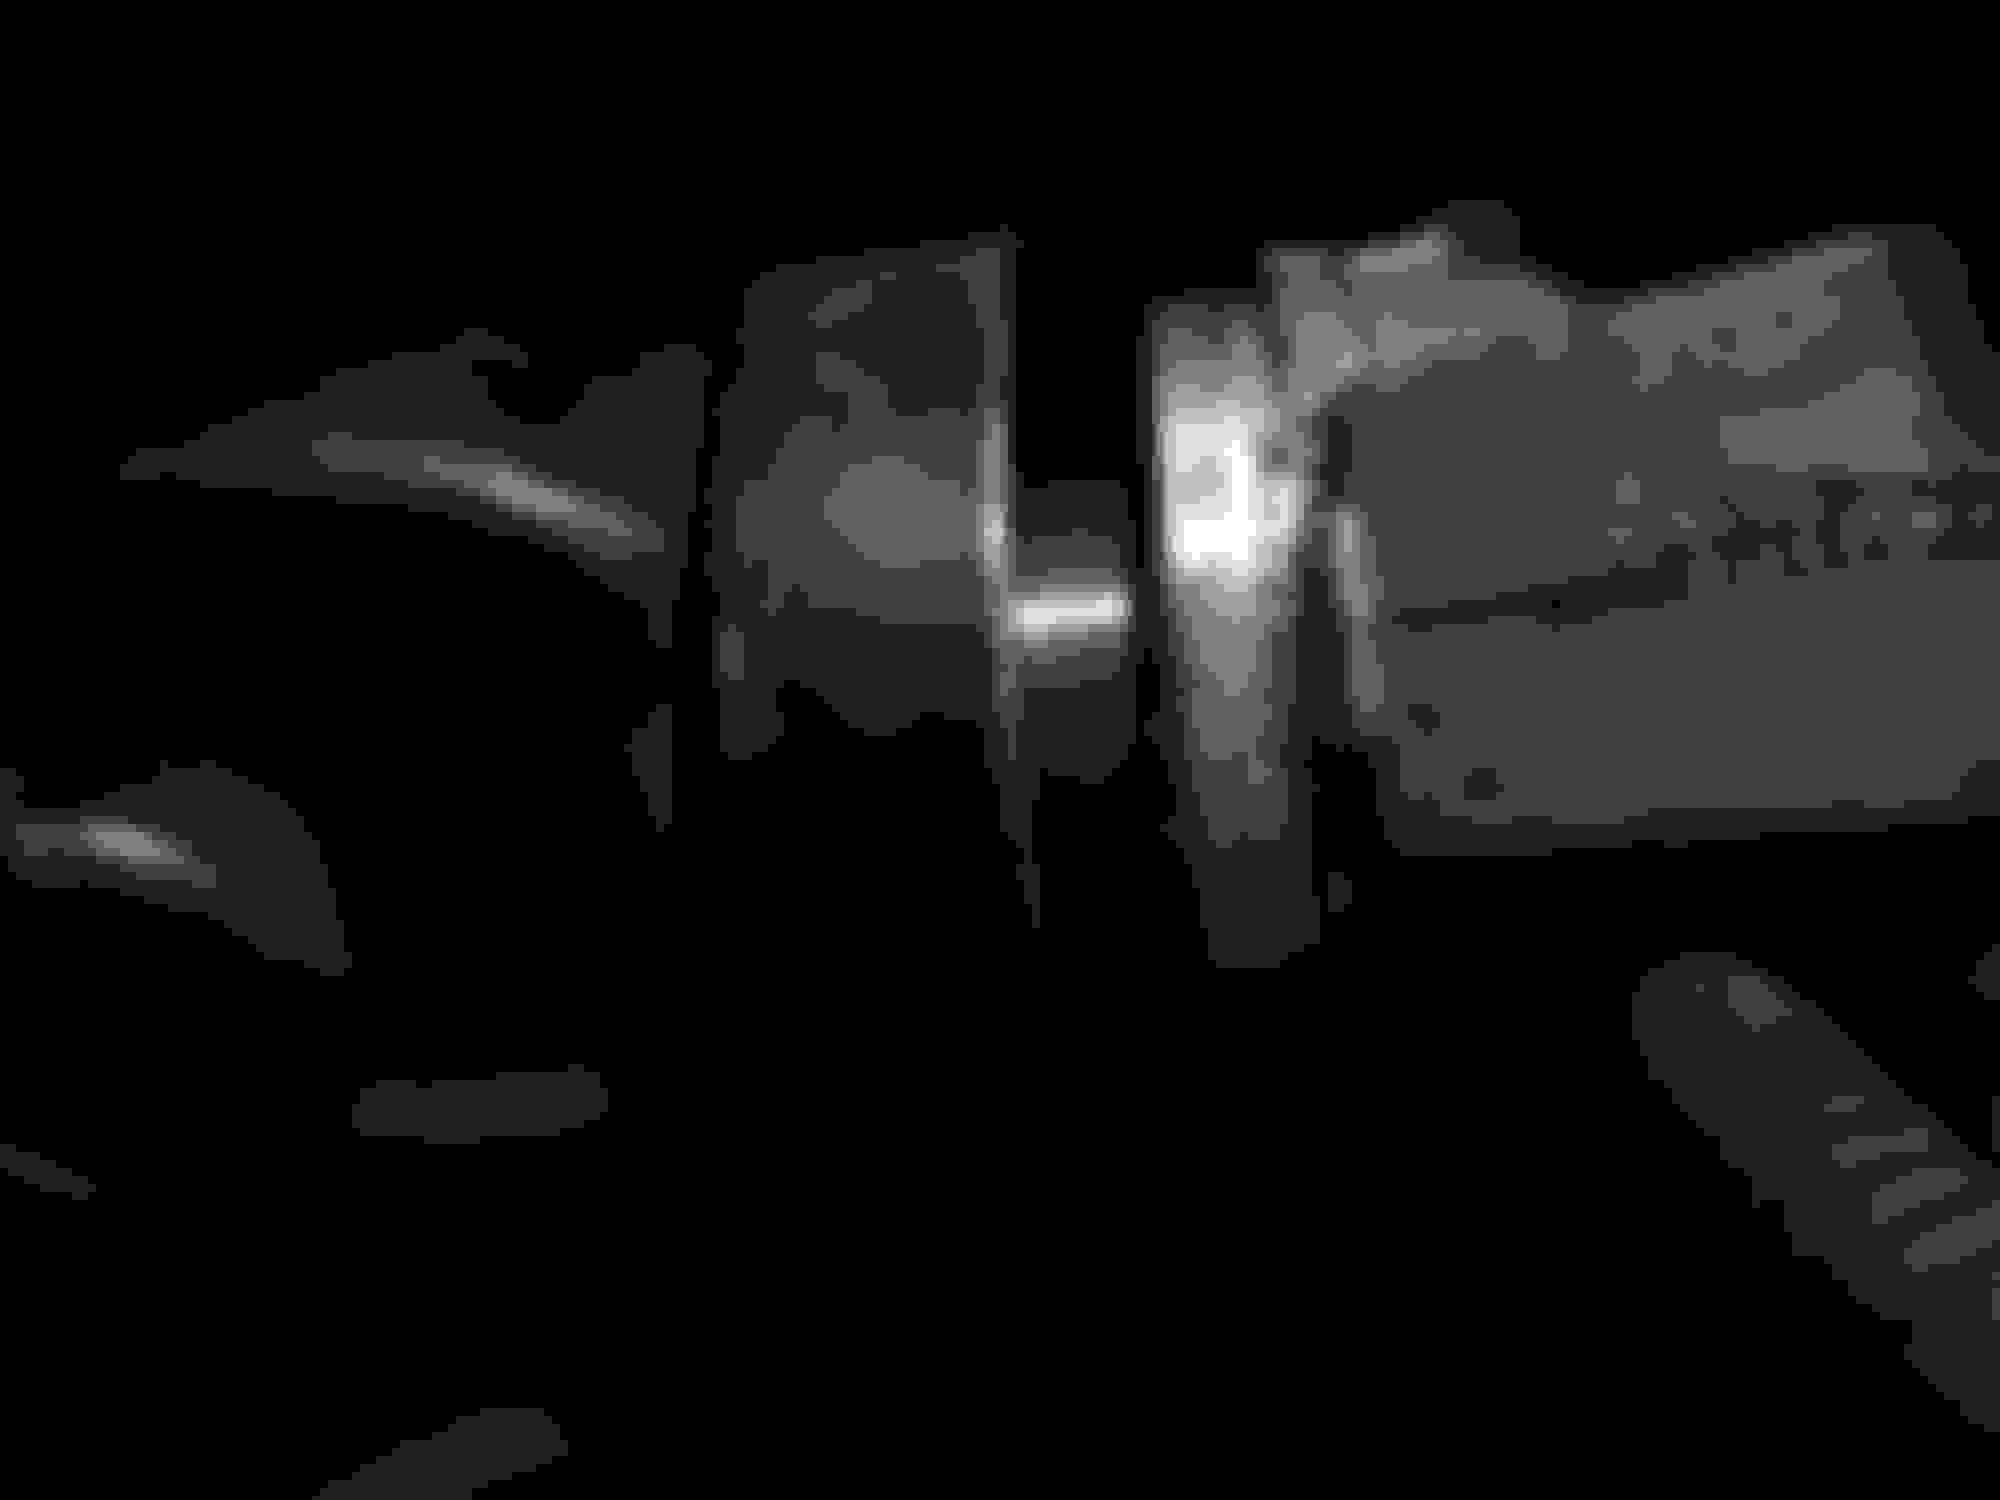
I have everything mocked up and adjusted in place before tightening all the bolts to the TSRM torque. This is how the new front D/S length sits now.
Getting the brand new R154 dust cup onto the trans is a PAIN. I am considering leaving it off and I do not know if it needs 1/4� trimmed off or not.
This is just 1/2� shorter engagement than before when the MKIII shaft cup was *right* against the R154 trans casing. As you can see, now that is not a problem and spline engagement still looks good. I may just cut the dust cup to be safe before hammering it on.
....that is IF I can hammer it on. My center cat exhaust pipe is in the way and due to chasing a pitter-patter minor exhaust leak for the last few weeks I took it to an exhaust shop who used a cement sealer on that flange. And right now I do not want to have to clean it all off and deal with that too.
I give up with the dust cup. I just can�t get it on there centered enough with a block of wood between it and my hammer.
Maybe it�s because the center exhaust pipe is in my way. And if so, what am I getting into if I have to dremel off all of that cement on its seal? I am not sure I even have another gasket.
Mostly this damn dust shield just does NOT want to go onto the rear of the trans.
I just hope I won�t have a trans oil leak issue if I leave it off. That did happen when I used an SC300 Automatic front driveshaft in 2013. It was WAAAAY too short.
But this? It�s only 1/2� shorter than before and *should* be fairly close to the length of an actual Soarer R154 front driveshaft.
I wish someone had posted a length measurement for a genuine one of those over the years. I�ve looked everywhere but no one has ever posted an exact length measurement for one :/
Oh well... I�m going to bolt this together and hope I have no leaks or rainwater splashing issues.
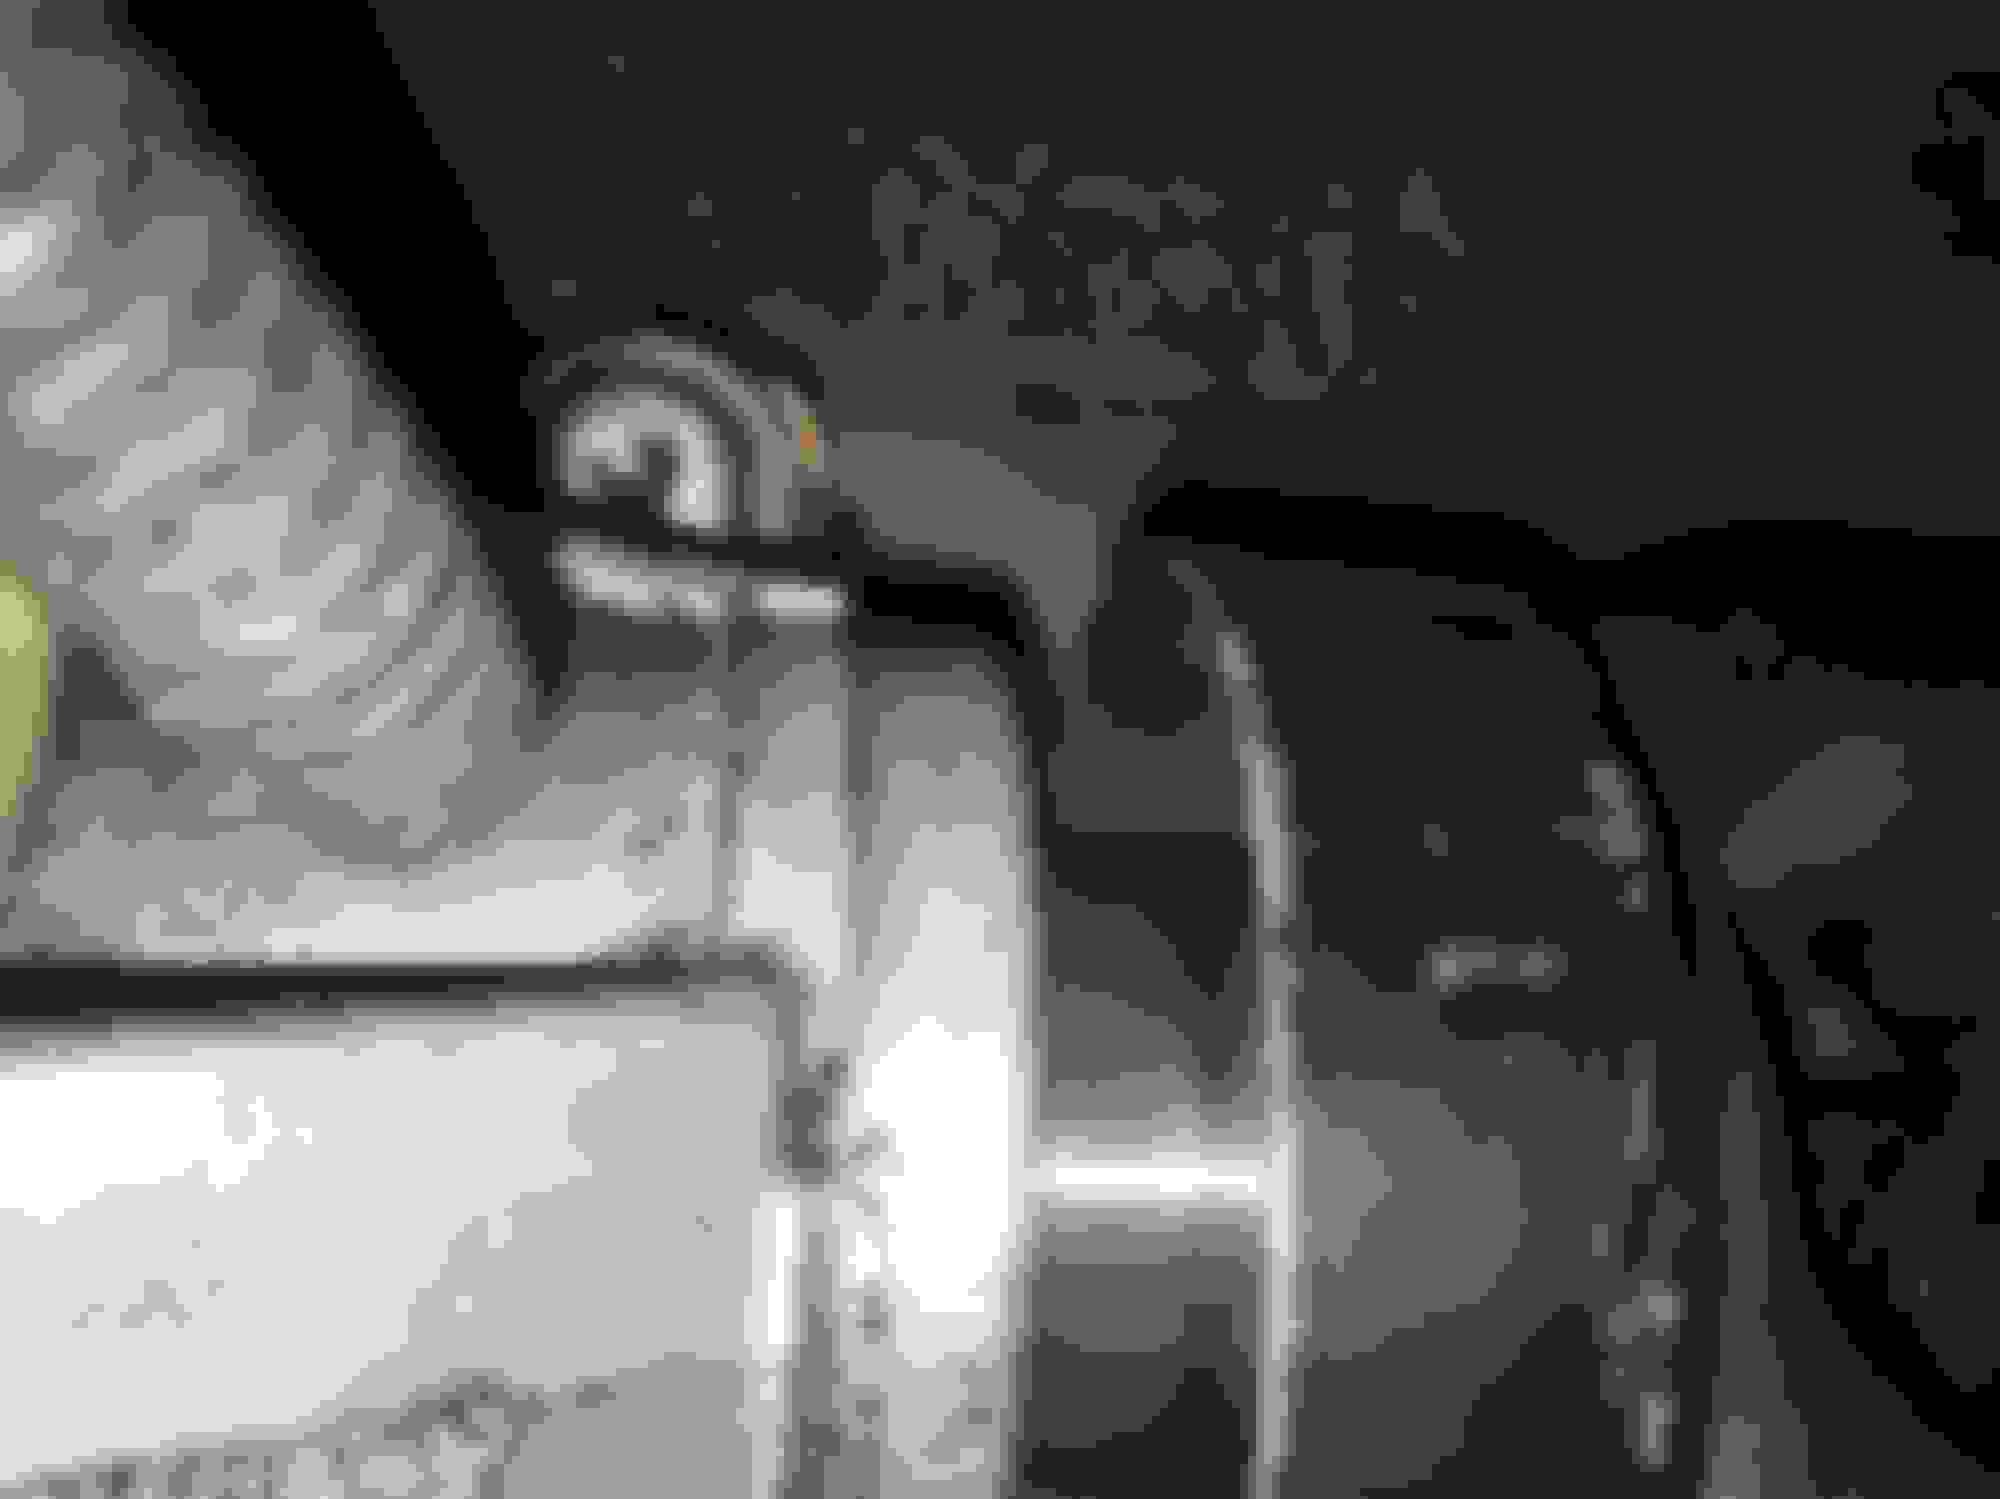
Further pictures of the current modified Supra MKIII driveshaft engagement.
The driveshaft�s outer cup edge (where the U-joint begins) is approximately 1 & 1/4� from the very edge of the back of the R154 trans where the dust cup would be hammered tight onto.
And the dust cup is right about 1 & 1/4� in total length when installed correctly.
The photos do not show it but the trans output seal is basically open to the air now.
I do not think the revised driveshaft is an incorrect length at all. I am however a little concerned about the lack of a dust shield in the long term.
I�d have to take my car in to have a shop install it unless I can find a better method of getting it on there from a driveway with limited clearance under the car :/
So far so good. I gave SC about 14 miles checking to see how everything felt and sounded.
The noise from before is gone. Since it’s a near 30 year old car with a turbo-spooly-whistly engine, a twin disc clutch and a not whisper quiet transmission designed in the 80’s it is kind of hard to isolate every minute noise but I think everything sounds okay now.
It certainly drives fine. On a side note I’m very happy to have the Torsen LSD back in service. Powering through turns has become a very stable experience again.
I checked the rotation while still under the car and confirmed the driveshaft has no binding. No weird noises from a stop rolling through 1st or Reverse.
I ran it gently up to 70mph (no highway run so had to keep it brief) and there was no abnormal driveline noise up through 70 in 4th or 5th. So that was good.
And most importantly, no leaks from the back of the transmission. I got under the car with a flashlight and checked the undercarriage front to back twice for signs of Redline MT-90 residue. Nothing was there!
I think this driveshaft length is probably just fine as it is now. Later I think I will either figure out how to better whack that tail shaft cup into place myself with everything removed again... or I’ll just take it in to my dealer and let a professional with a shop lift do it better than I couldn’t.
I do think that dust cup should be on there.
...
I’ve still got about 150 miles left to break in the differential side carrier bearings and give it another change of fresh oil.
I’ll take it easy until then and I’ll keep listening for any odd sounds just to be certain all is well.
It’s good to have the SC back up and running even if it won’t see that much use during the quarantine.
I'm glad you got things sorted for the most part! I think the length is fine, and if you don't have any noise or vibration I certainly wouldn't be worried. Those tail shaft cups should only be pressed in and you should be able to pry them out gently if I remember correctly... Keep up the great work - by the time we can get out of the house more you're going to be well sorted!
Thanks Rudy! It is good to have the driveshaft pretty much sorted now (apart from replacing the rear cup).
The little cup does onto get pressed on, correct. However do you know of a better or more proper way to get it on there?
I used a block of wood to evenly cover its entire lip surface while using the top end of a steel hammer on the wood surface�s other end to get it on.
That didn�t work for me. It might have been my low clearance under the car. I can�t imagine another way to do it with the transmission installed in the car.
...
Other than that I think it�s fine More listening while the diff breaks in for another 150 miles will tell.

 04-16-20, 07:14 PM