When you click on links to various merchants on this site and make a purchase, this can result in this site earning a commission. Affiliate programs and affiliations include, but are not limited to, the eBay Partner Network.
Oh Craig I remember the days... I burned through COUNTLESS Car and Drivers, Import Tuners, etc etc as a kid. Between mags and Gran Turismo I was obsessed long before I ever got behind the wheel. Love this unique project and I always enjoy the updates on your car!
SC300/400/Soarer Manual Tilt/Telescope Column Swap Project - Part 2
I had a little time to mess with this tonight and made some good progress!
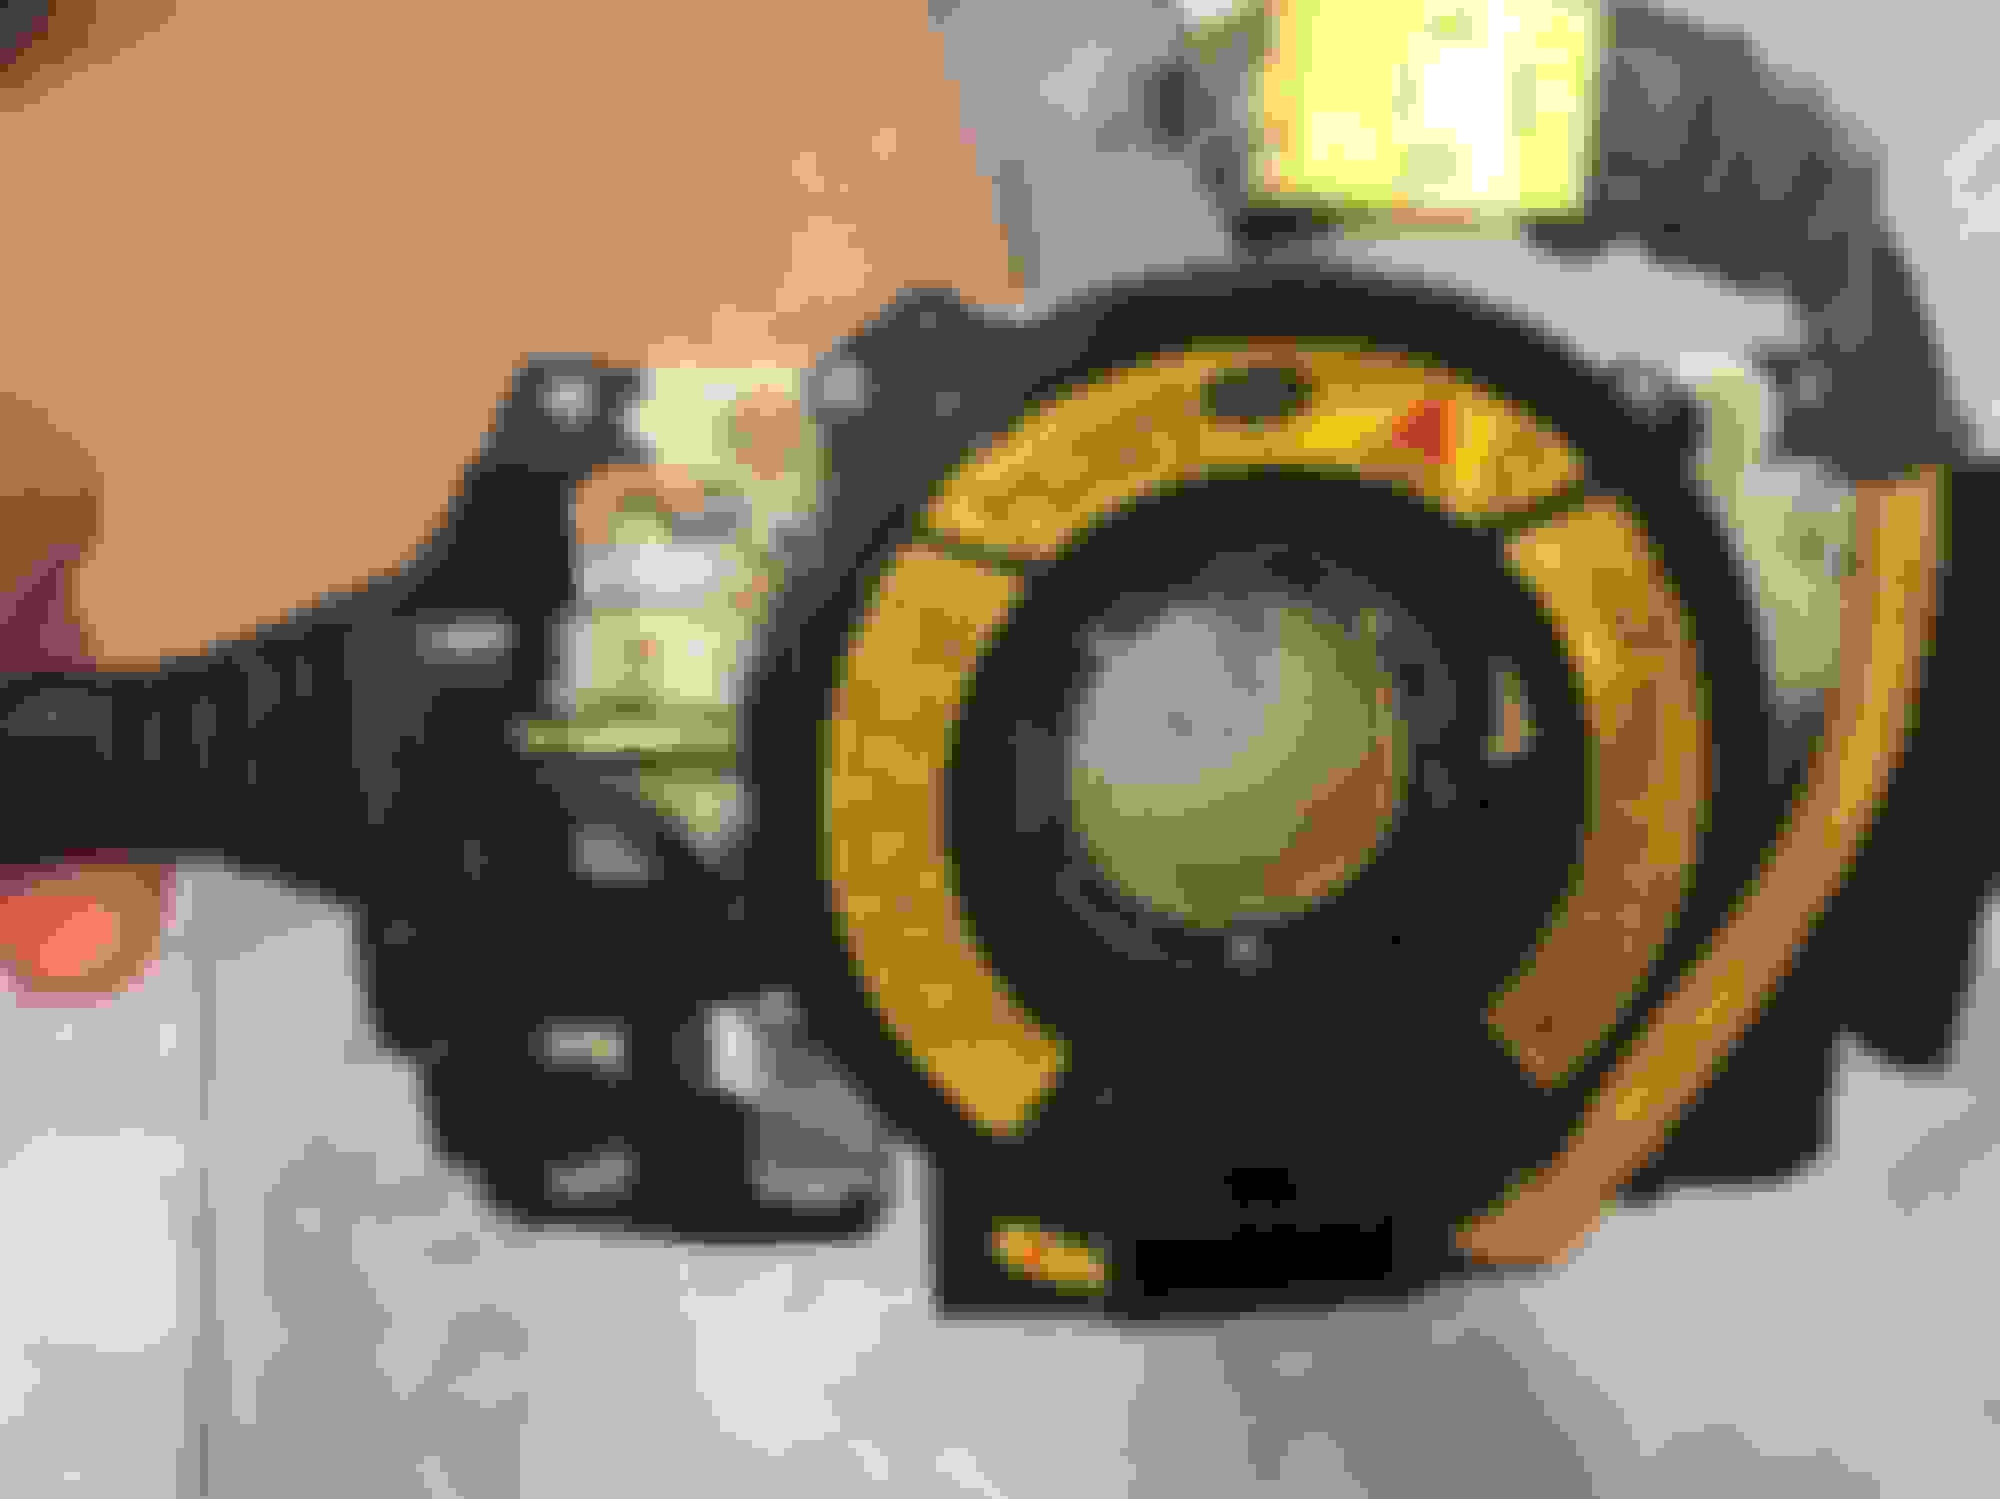
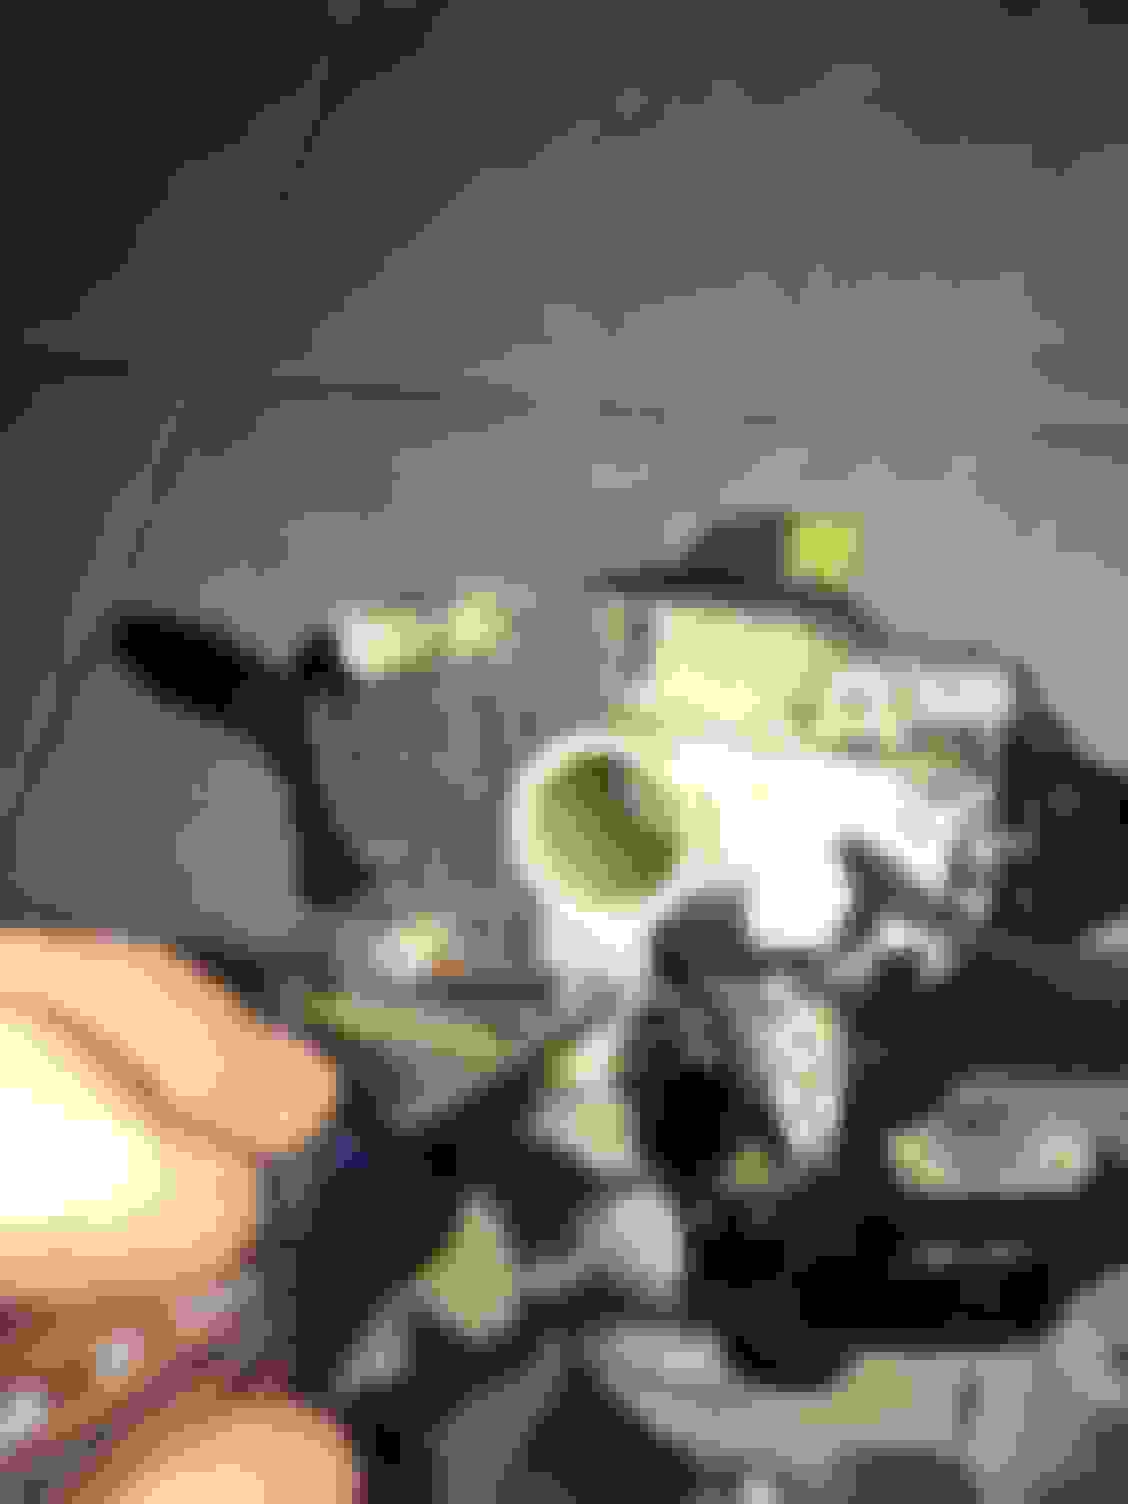
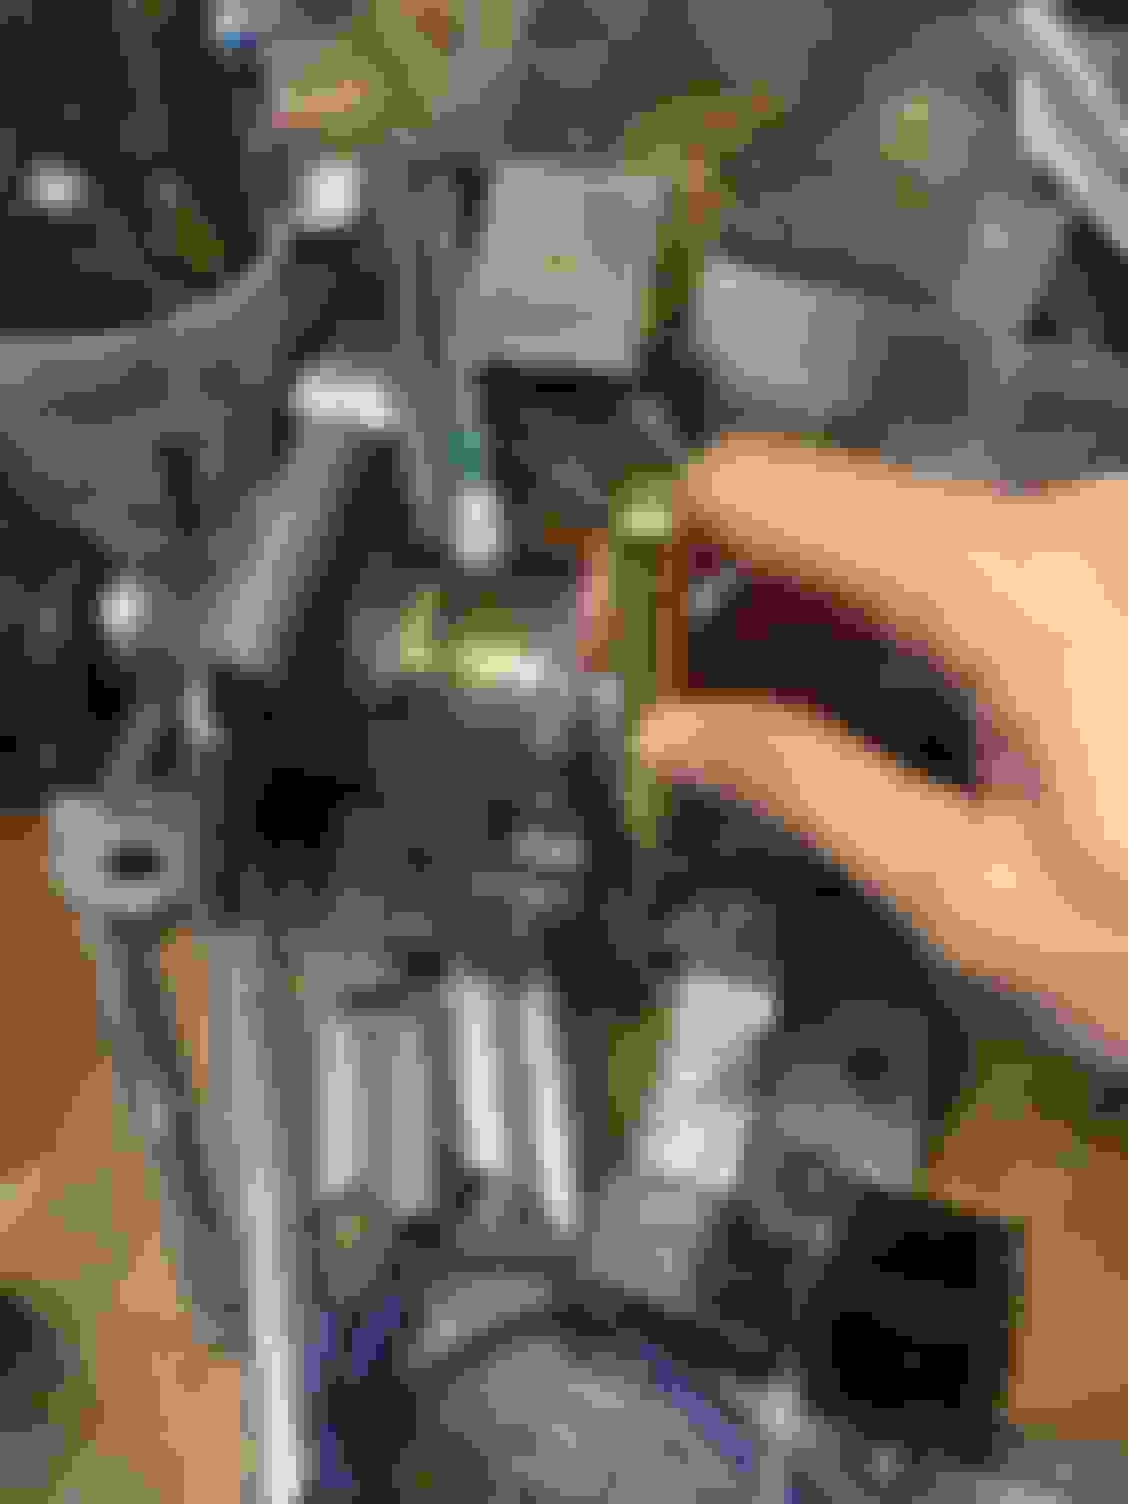
I was right about the little plastic inside structural bezel on the Soarer manual column’s signal stalk assembly needing to be swapped over to the SC300/400 signal stalk assembly.
It was just a little work to get it off and then there were some more steps to get the SC automatic column joystick bezel off and then get its wires removed and de-pinned from the gray connector at the end of the wire bundle.
But it worked!
Since this is a 1995 SC300/400 signal stalk assembly that I have modified I will need to make sure that every pin on each connector lines up correctly for my 1993 SC’s connectors that will plug in to them.
In my case since I will want to use the 1995+ stalk fog light switch I will have to identify and buy two extra OEM terminal repair wires in order to re-route my fog light wires from my old aftermarket switch to the OEM stalk switch. I’ll have some wiring schematic review when I get to that.
Here are some pictures of my process swapping over that bezel. The end result is as the US models had it from the factory!
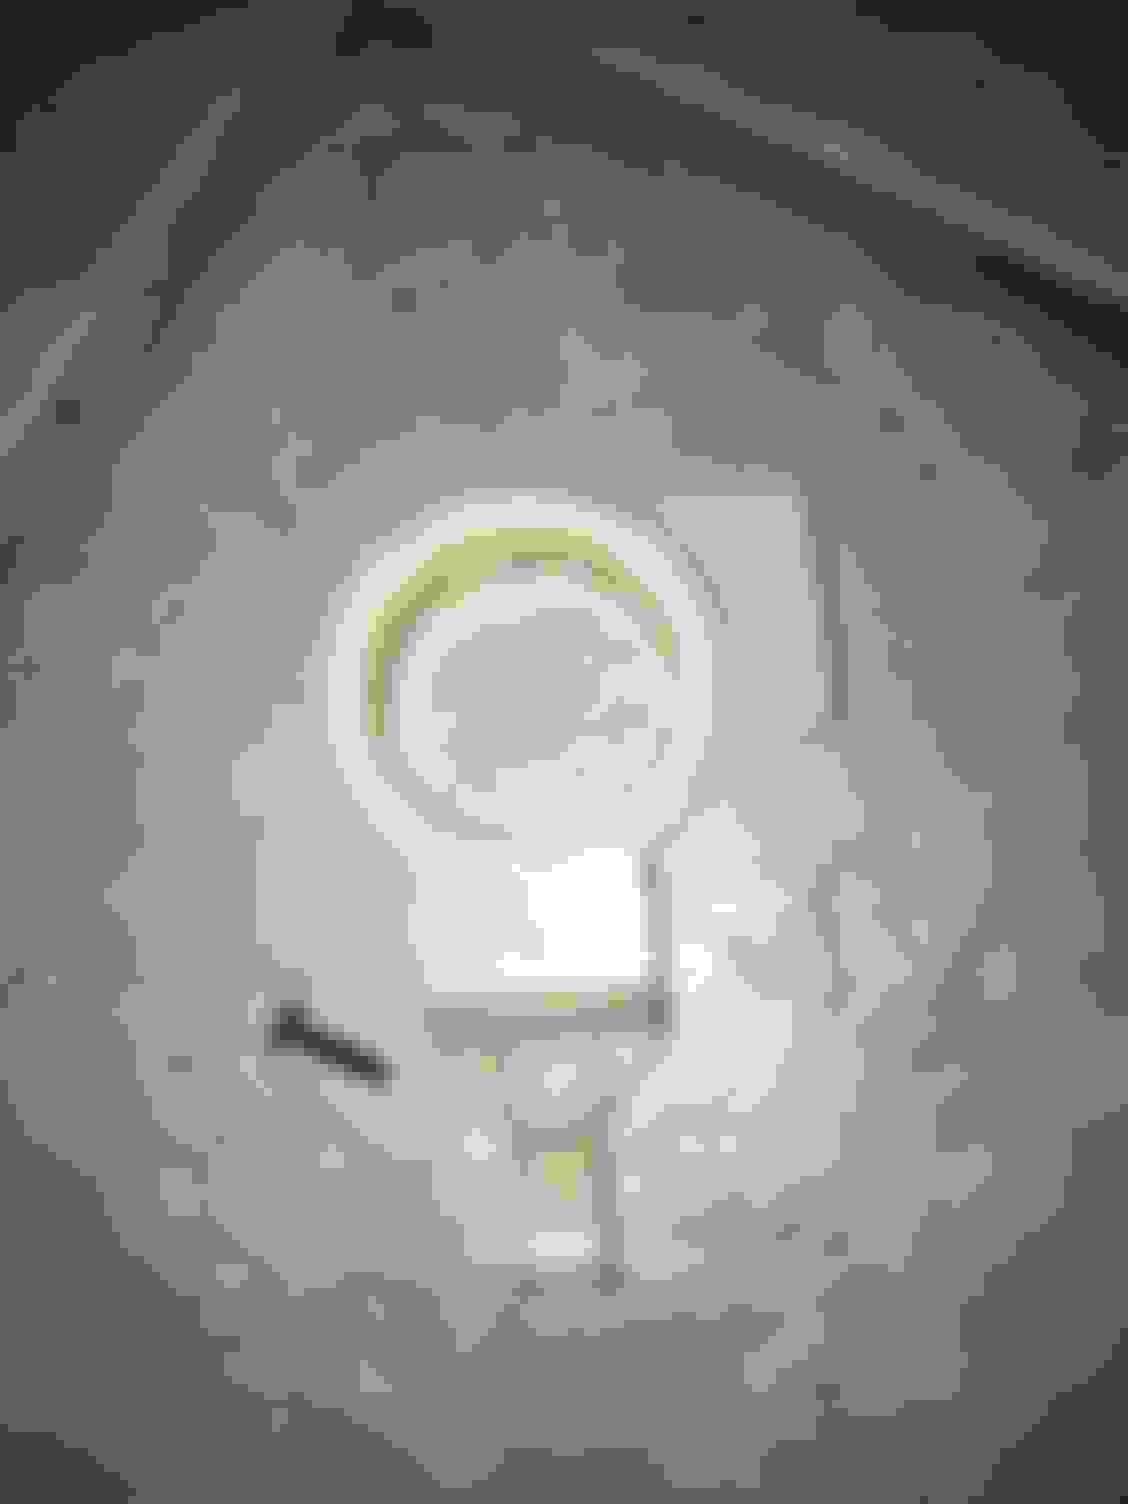
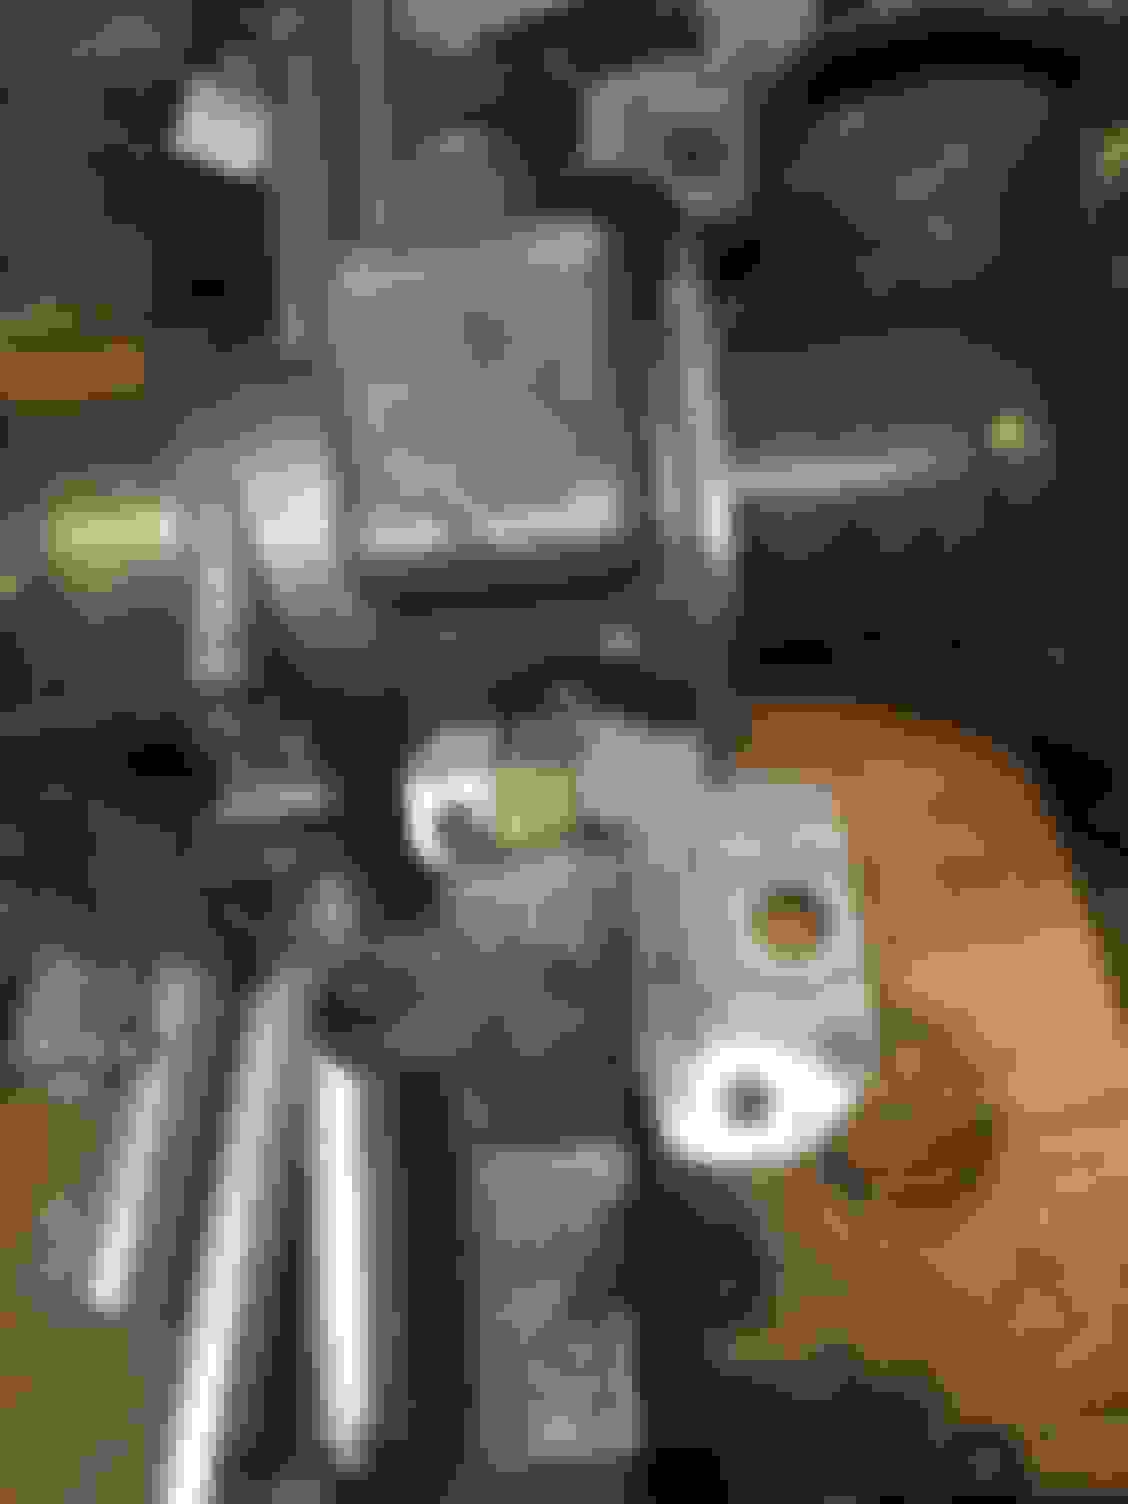
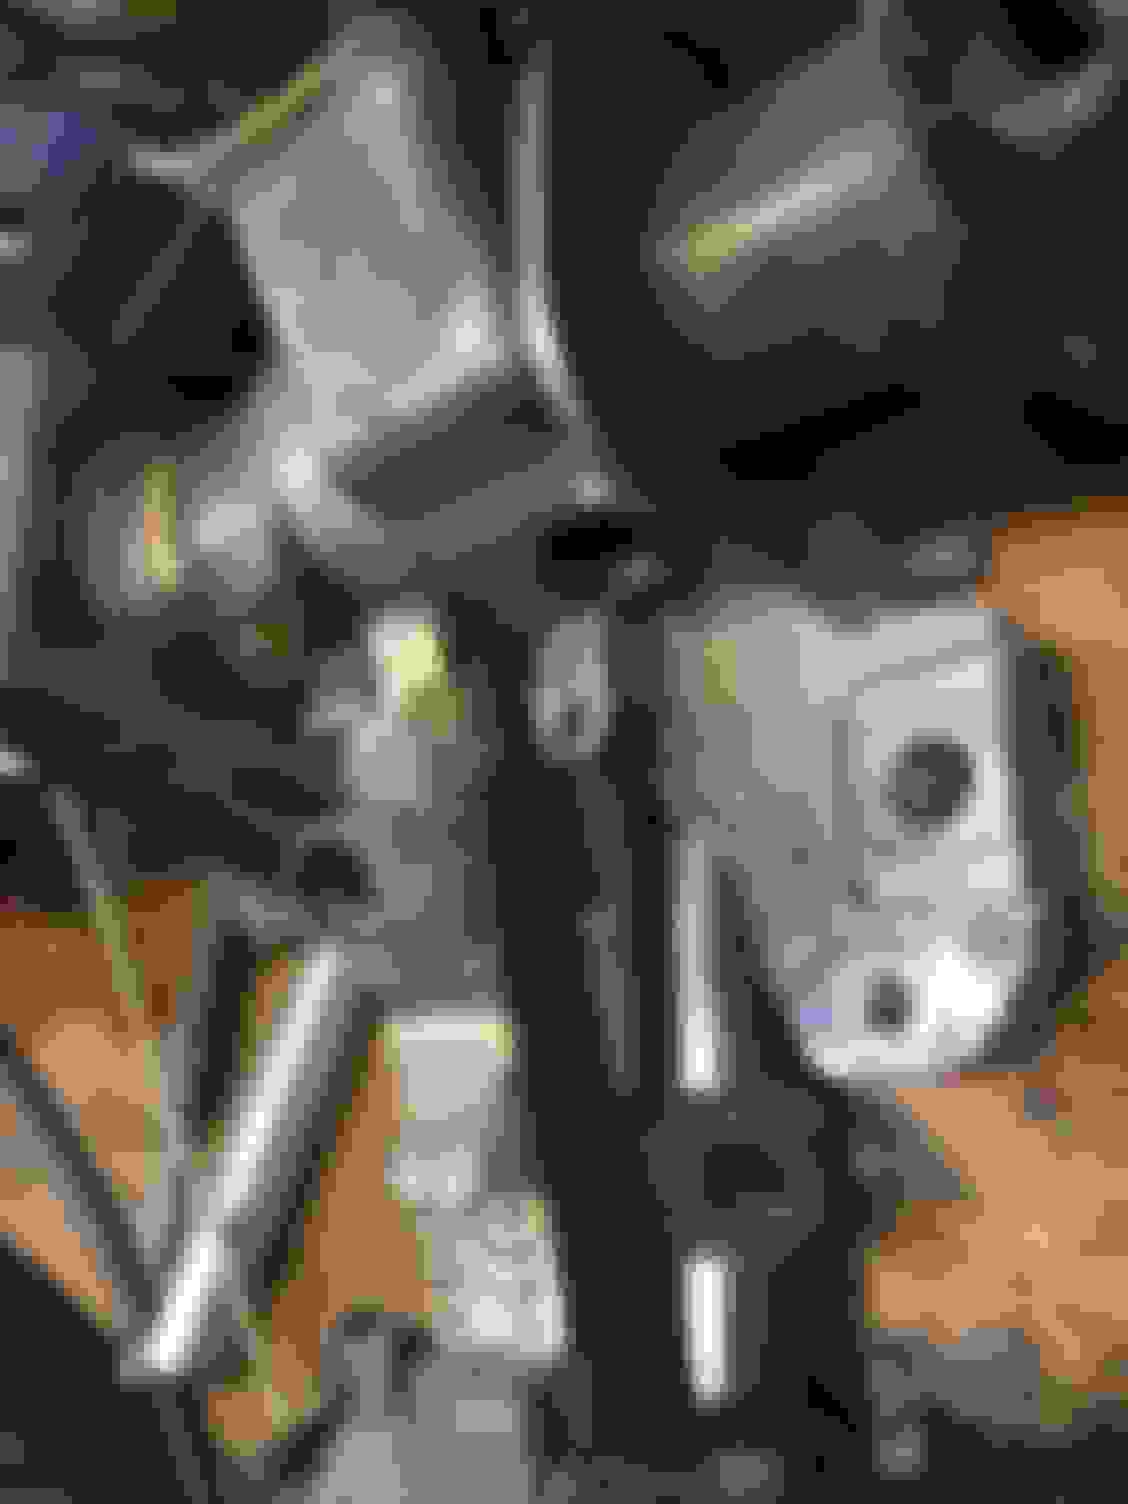
Four main Philips screws hold the main signal and wiper stalk assembly onto the column's mounting flange. Be sure to use the correct size long screwdriver so as not to strip these. They won't be super tight coming loose. Put them on back to the same tightness later.
Use a small magnetic pickup tool to retrieve each screw easily since they are deep into each access hole.
Also be very careful when removing the turn signal stalk's retaining plate. Underneath it is a spring loaded steel ball at the very end of the turn signal stalk. Note how it comes out and reinstall it exactly the same way. Don't lose anything!
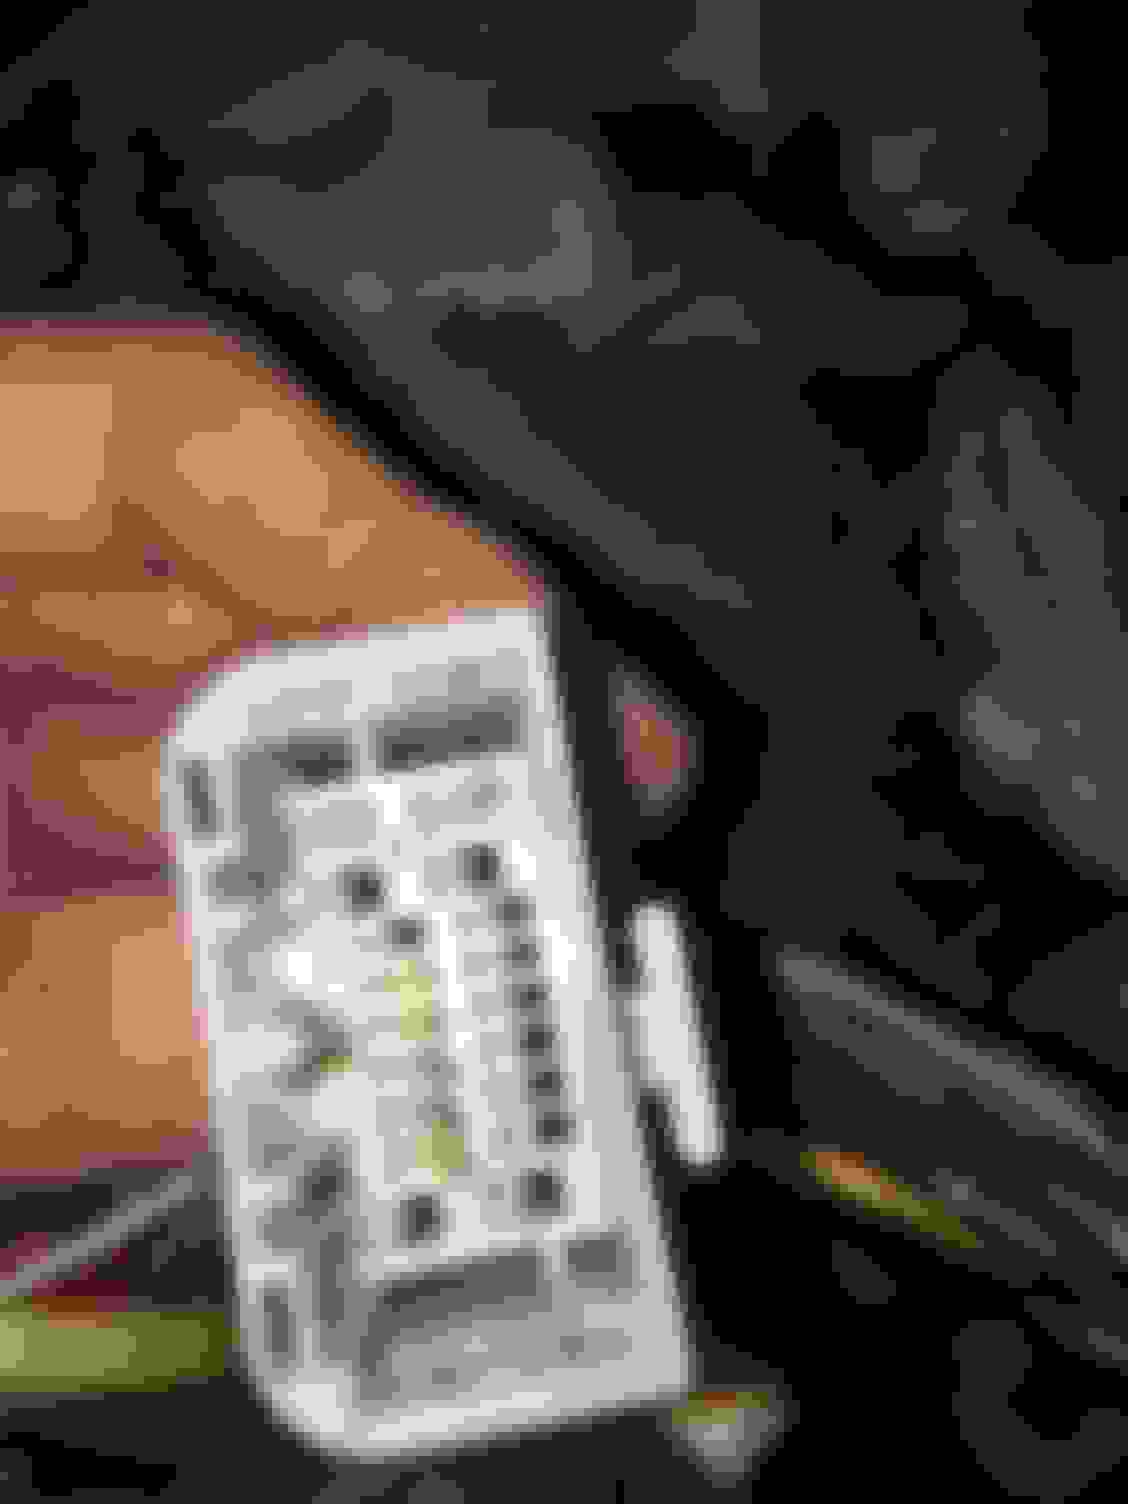
The SC300/400 switchgear stalk assembly with the SC/Soarer manual column left side inner plastic bezel installed over the USDM turn signal and lighting stalk. It fit right into place on the SC300/400 version of this assembly further proving that this little bezel is a JDM and USDM part (which you unfortunately couldn't ever buy on its own for either car since it never had its own part number):
Wear some disposable rubber shop gloves while working on the signal switch assembly. There is some nasty white lube all over everything from the factory and it will get all over your hands! Keep some Fast Orange pumice hand cleaner handy and some paper towels and Windex to wipe off any residue when you're done.
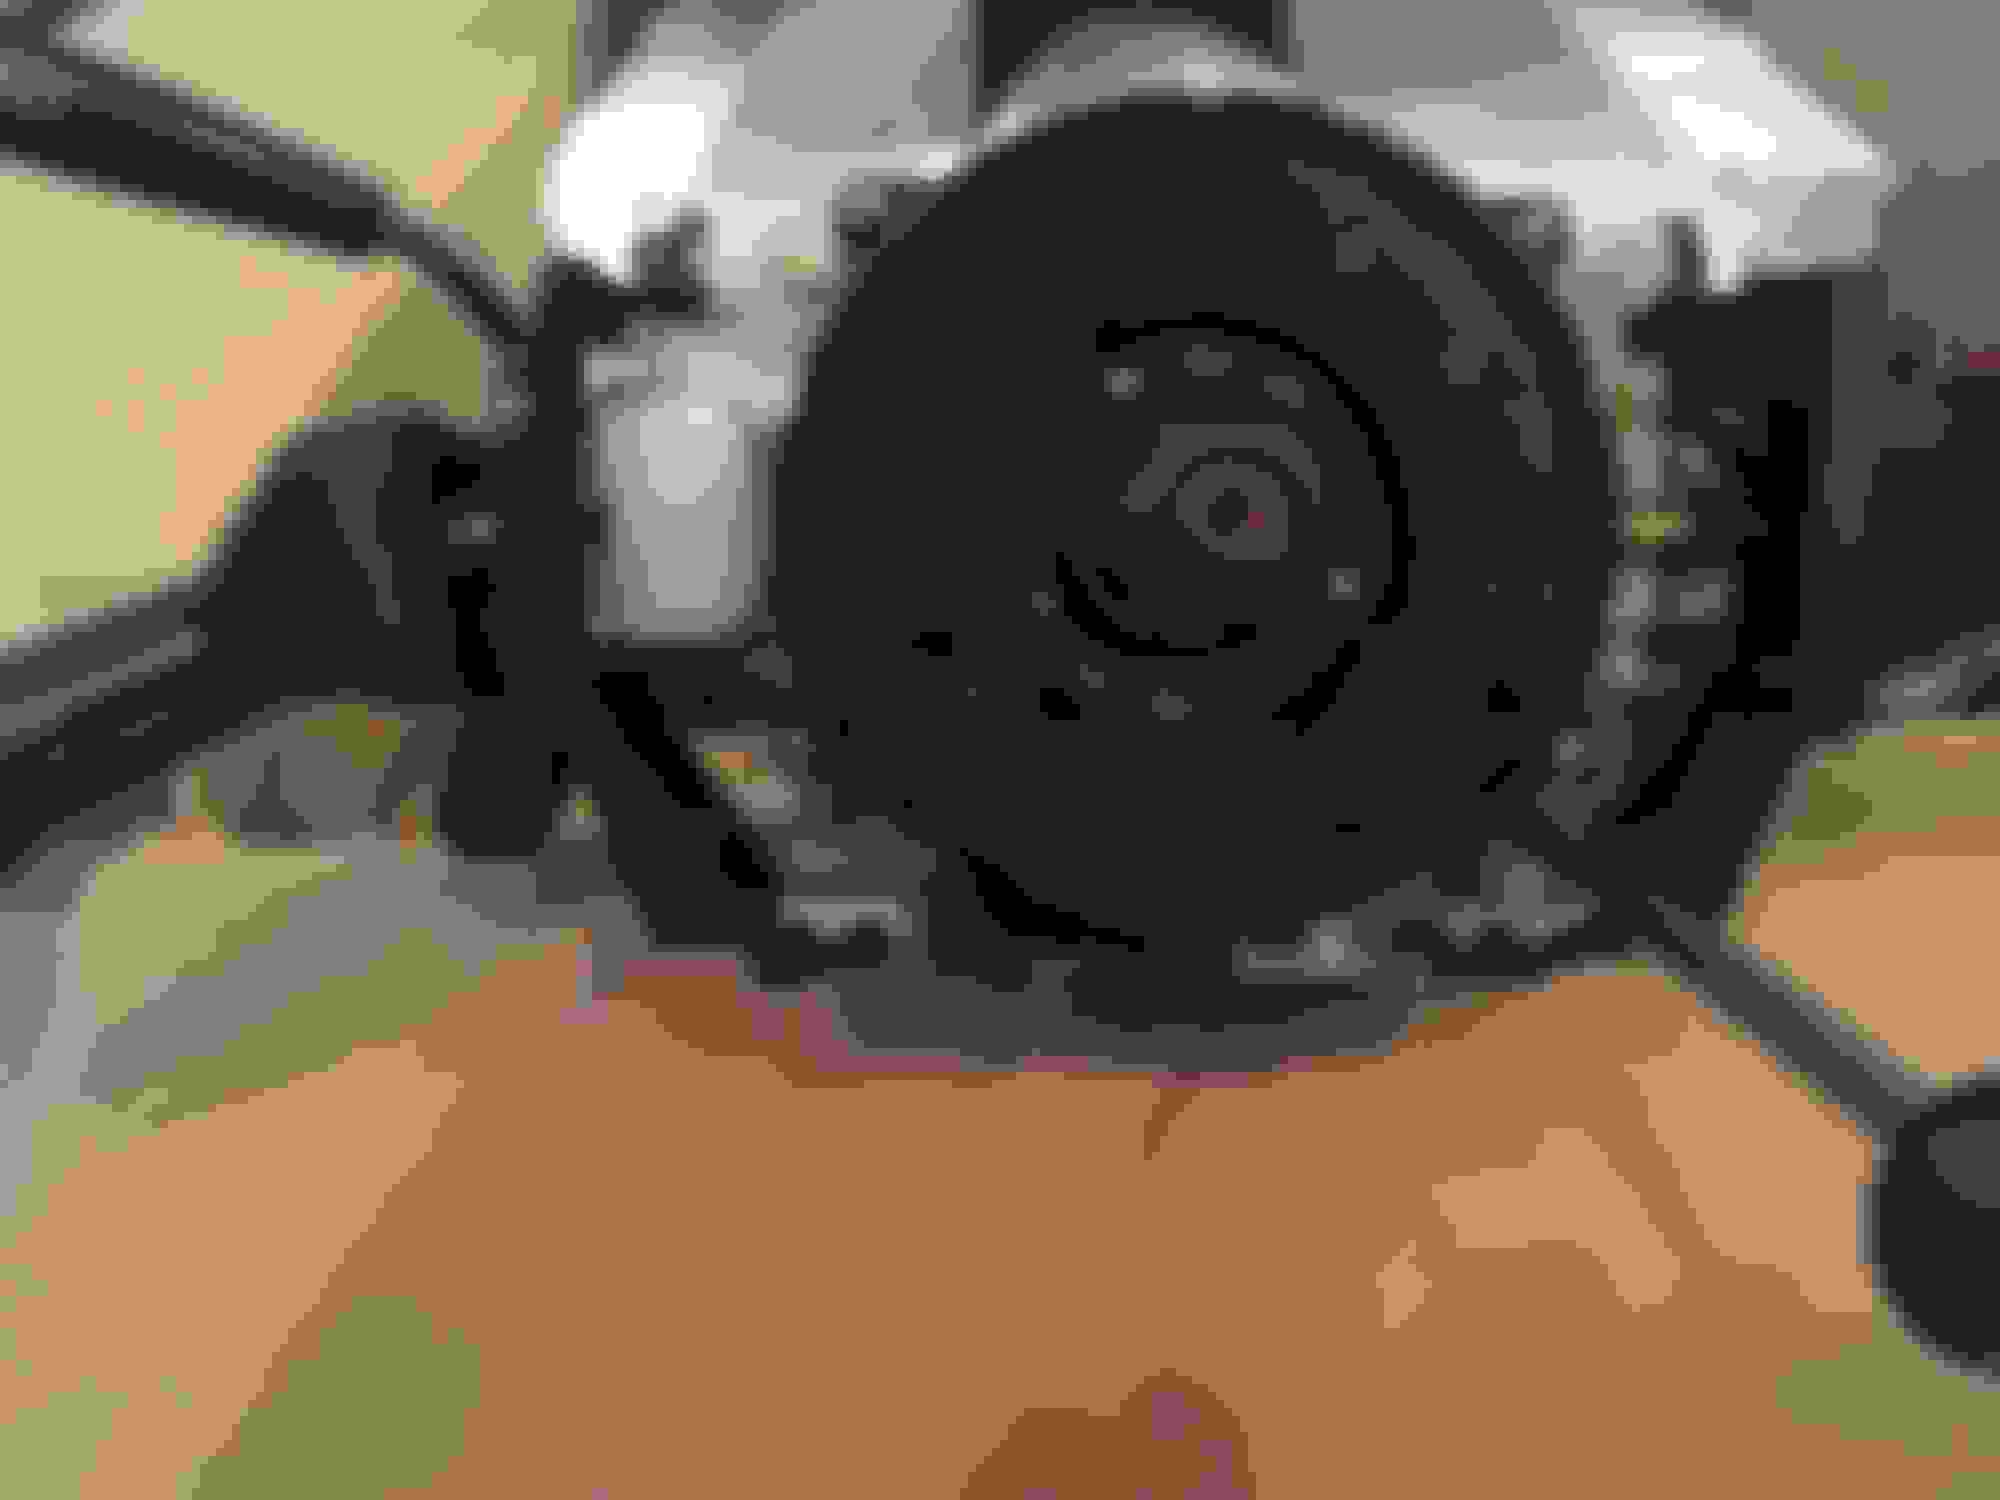
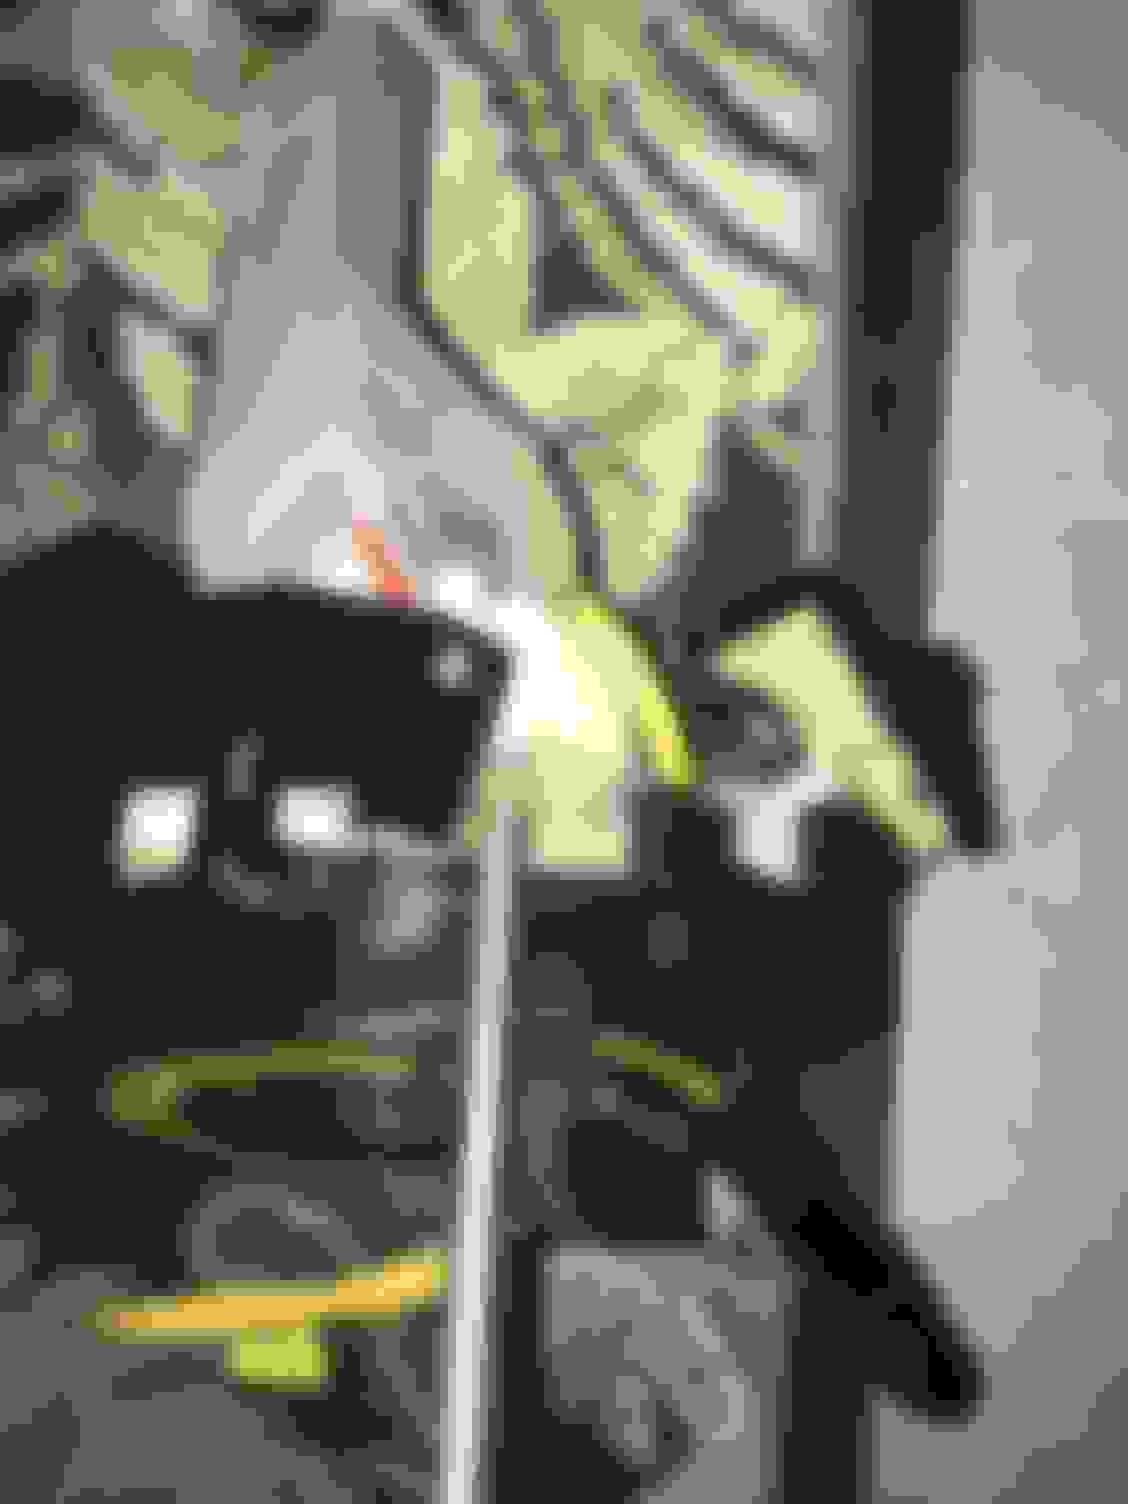
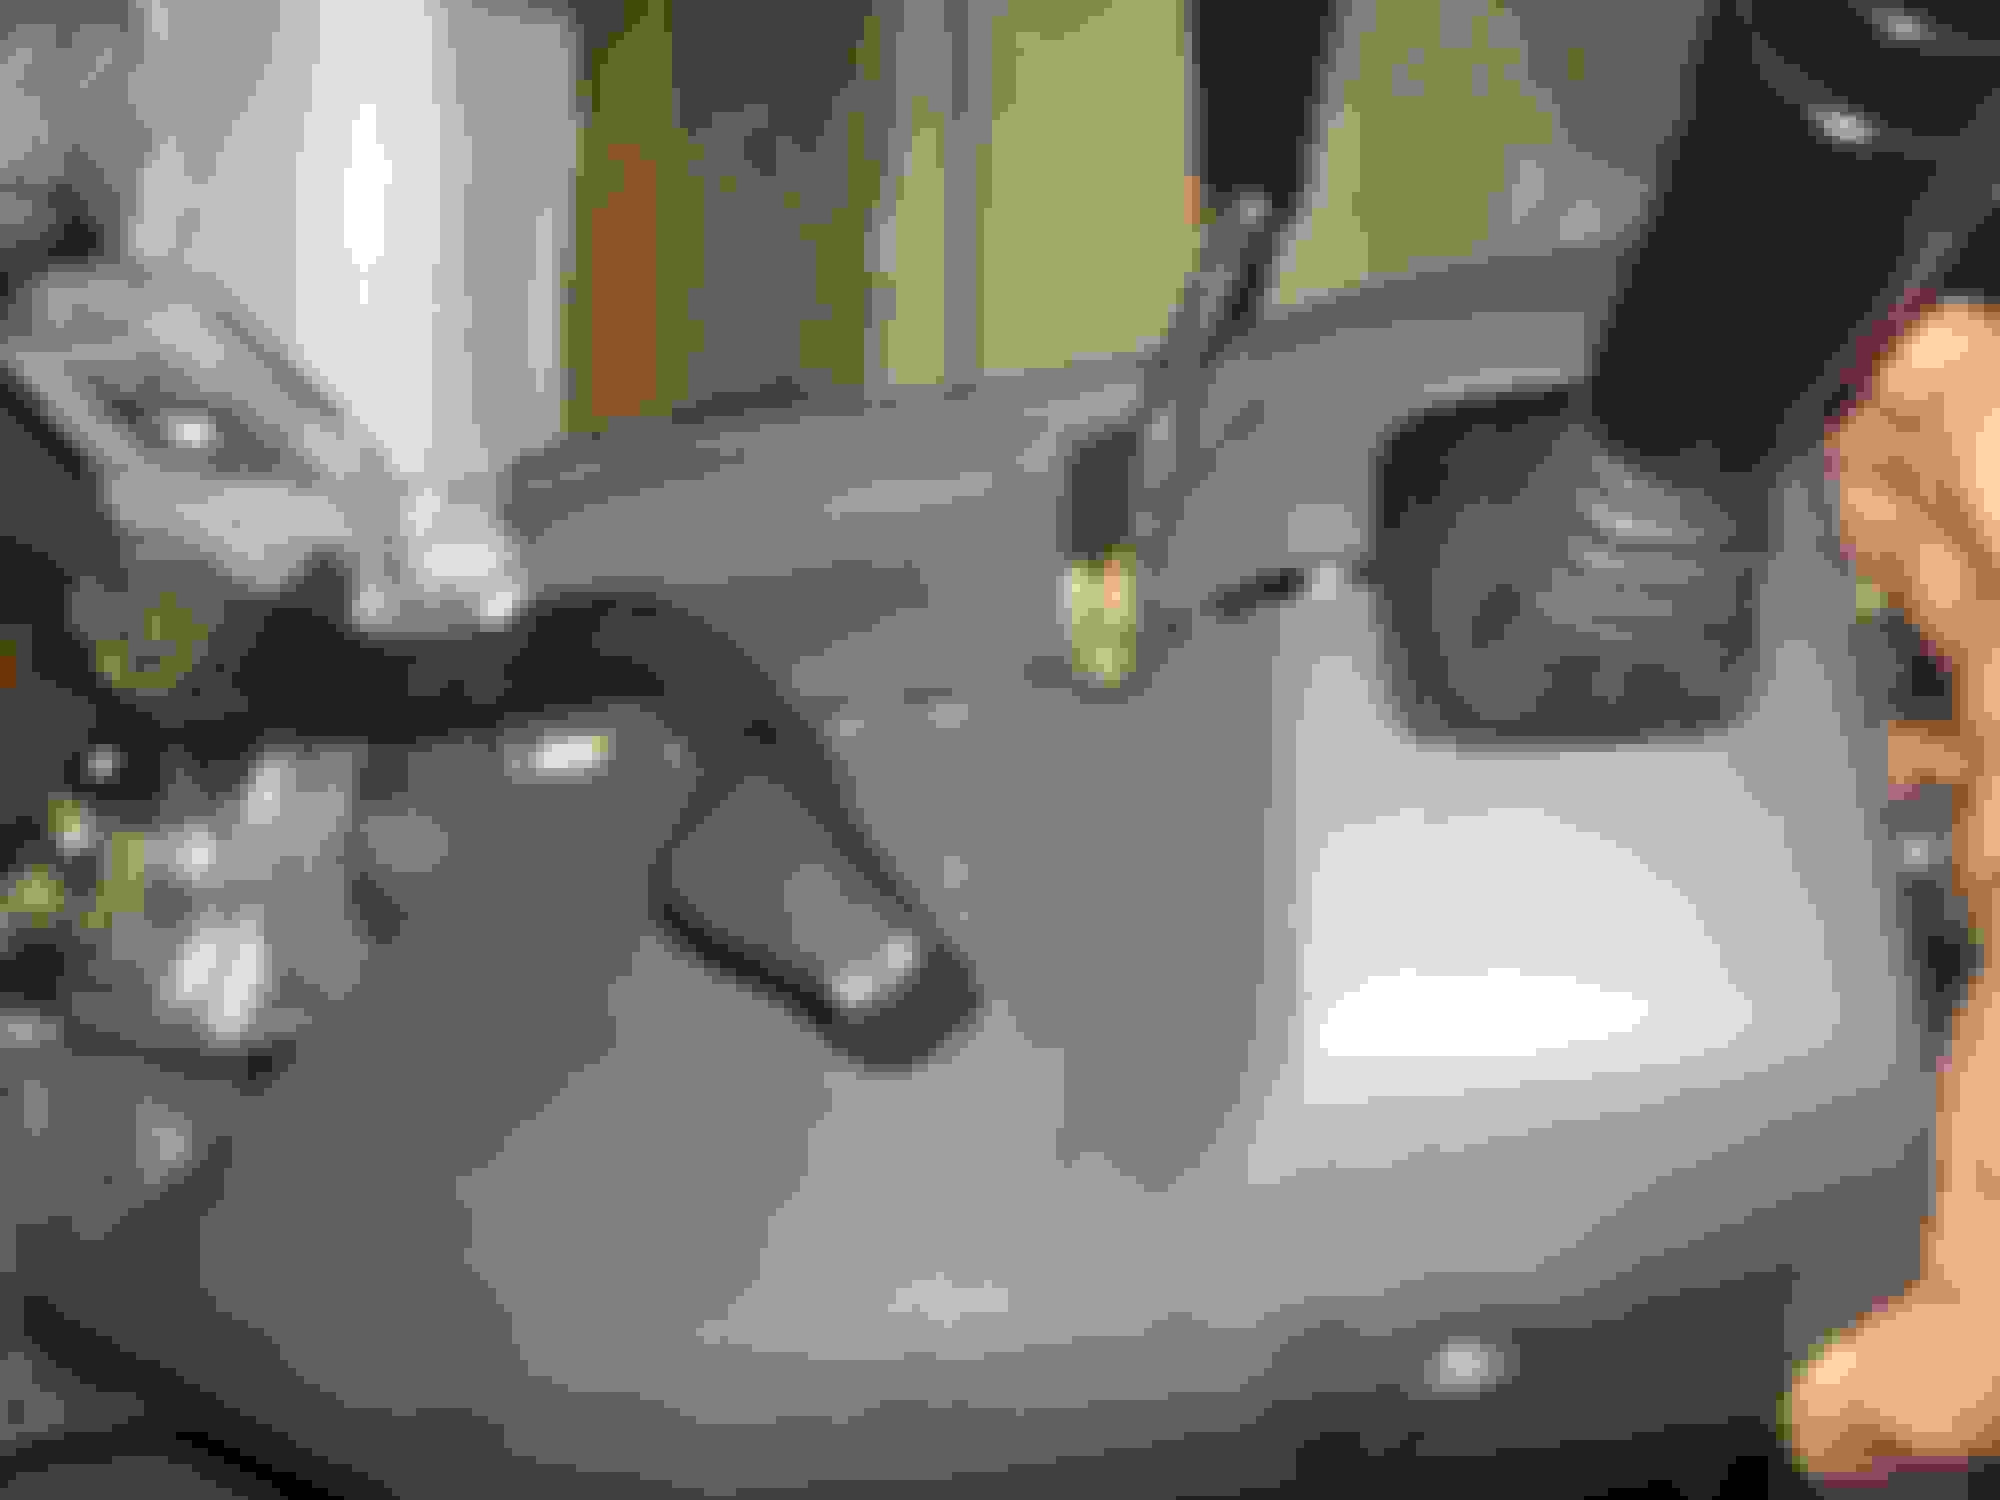
Beginning the process of removing the Auto Tilt/Telescope joystick module and bezel. Unwrap the electrical tape. There will be only so many catches on the plastic covers that you will be able to undo. This is okay. The little plug end will slide through and out. Then you just need to get to the main wires for this module.
Trace them down to the gray connector shown in pictures below and unwrap all the factory vinyl electrical tape and special harness tape.
To replace these tape wrappings later use Tessa #51036 automotive wiring harness tape (it has a cloth-like surface) and Scotch Super 33+ electrical tape.
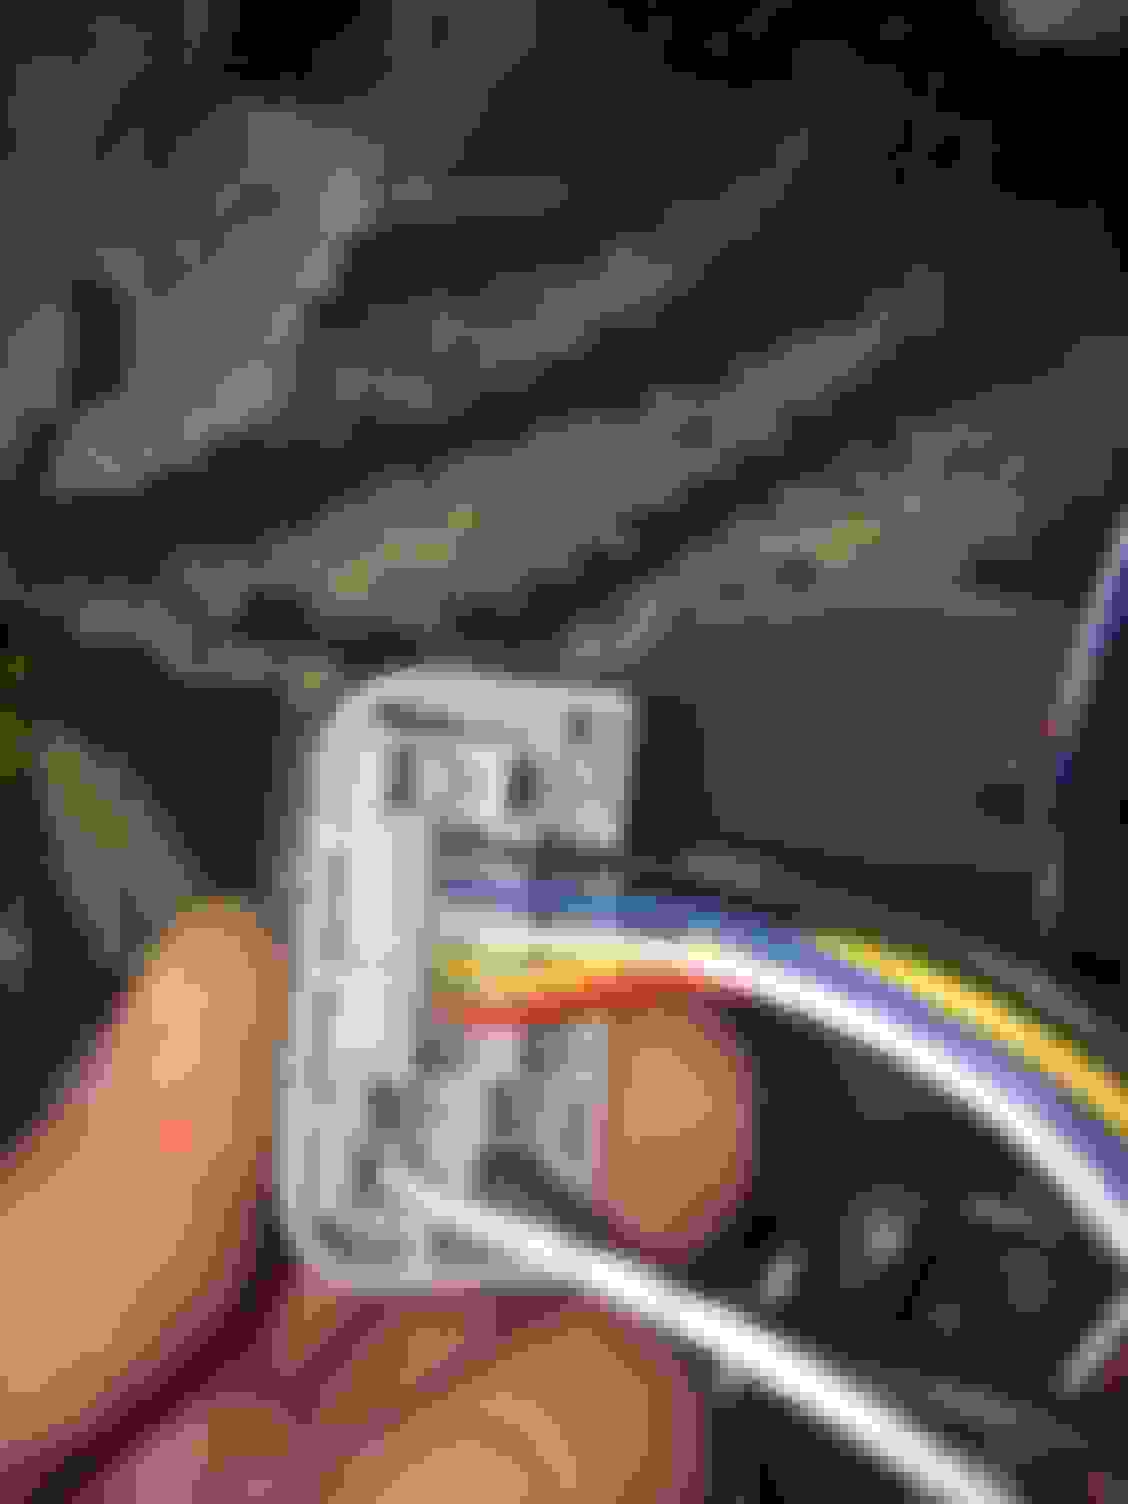
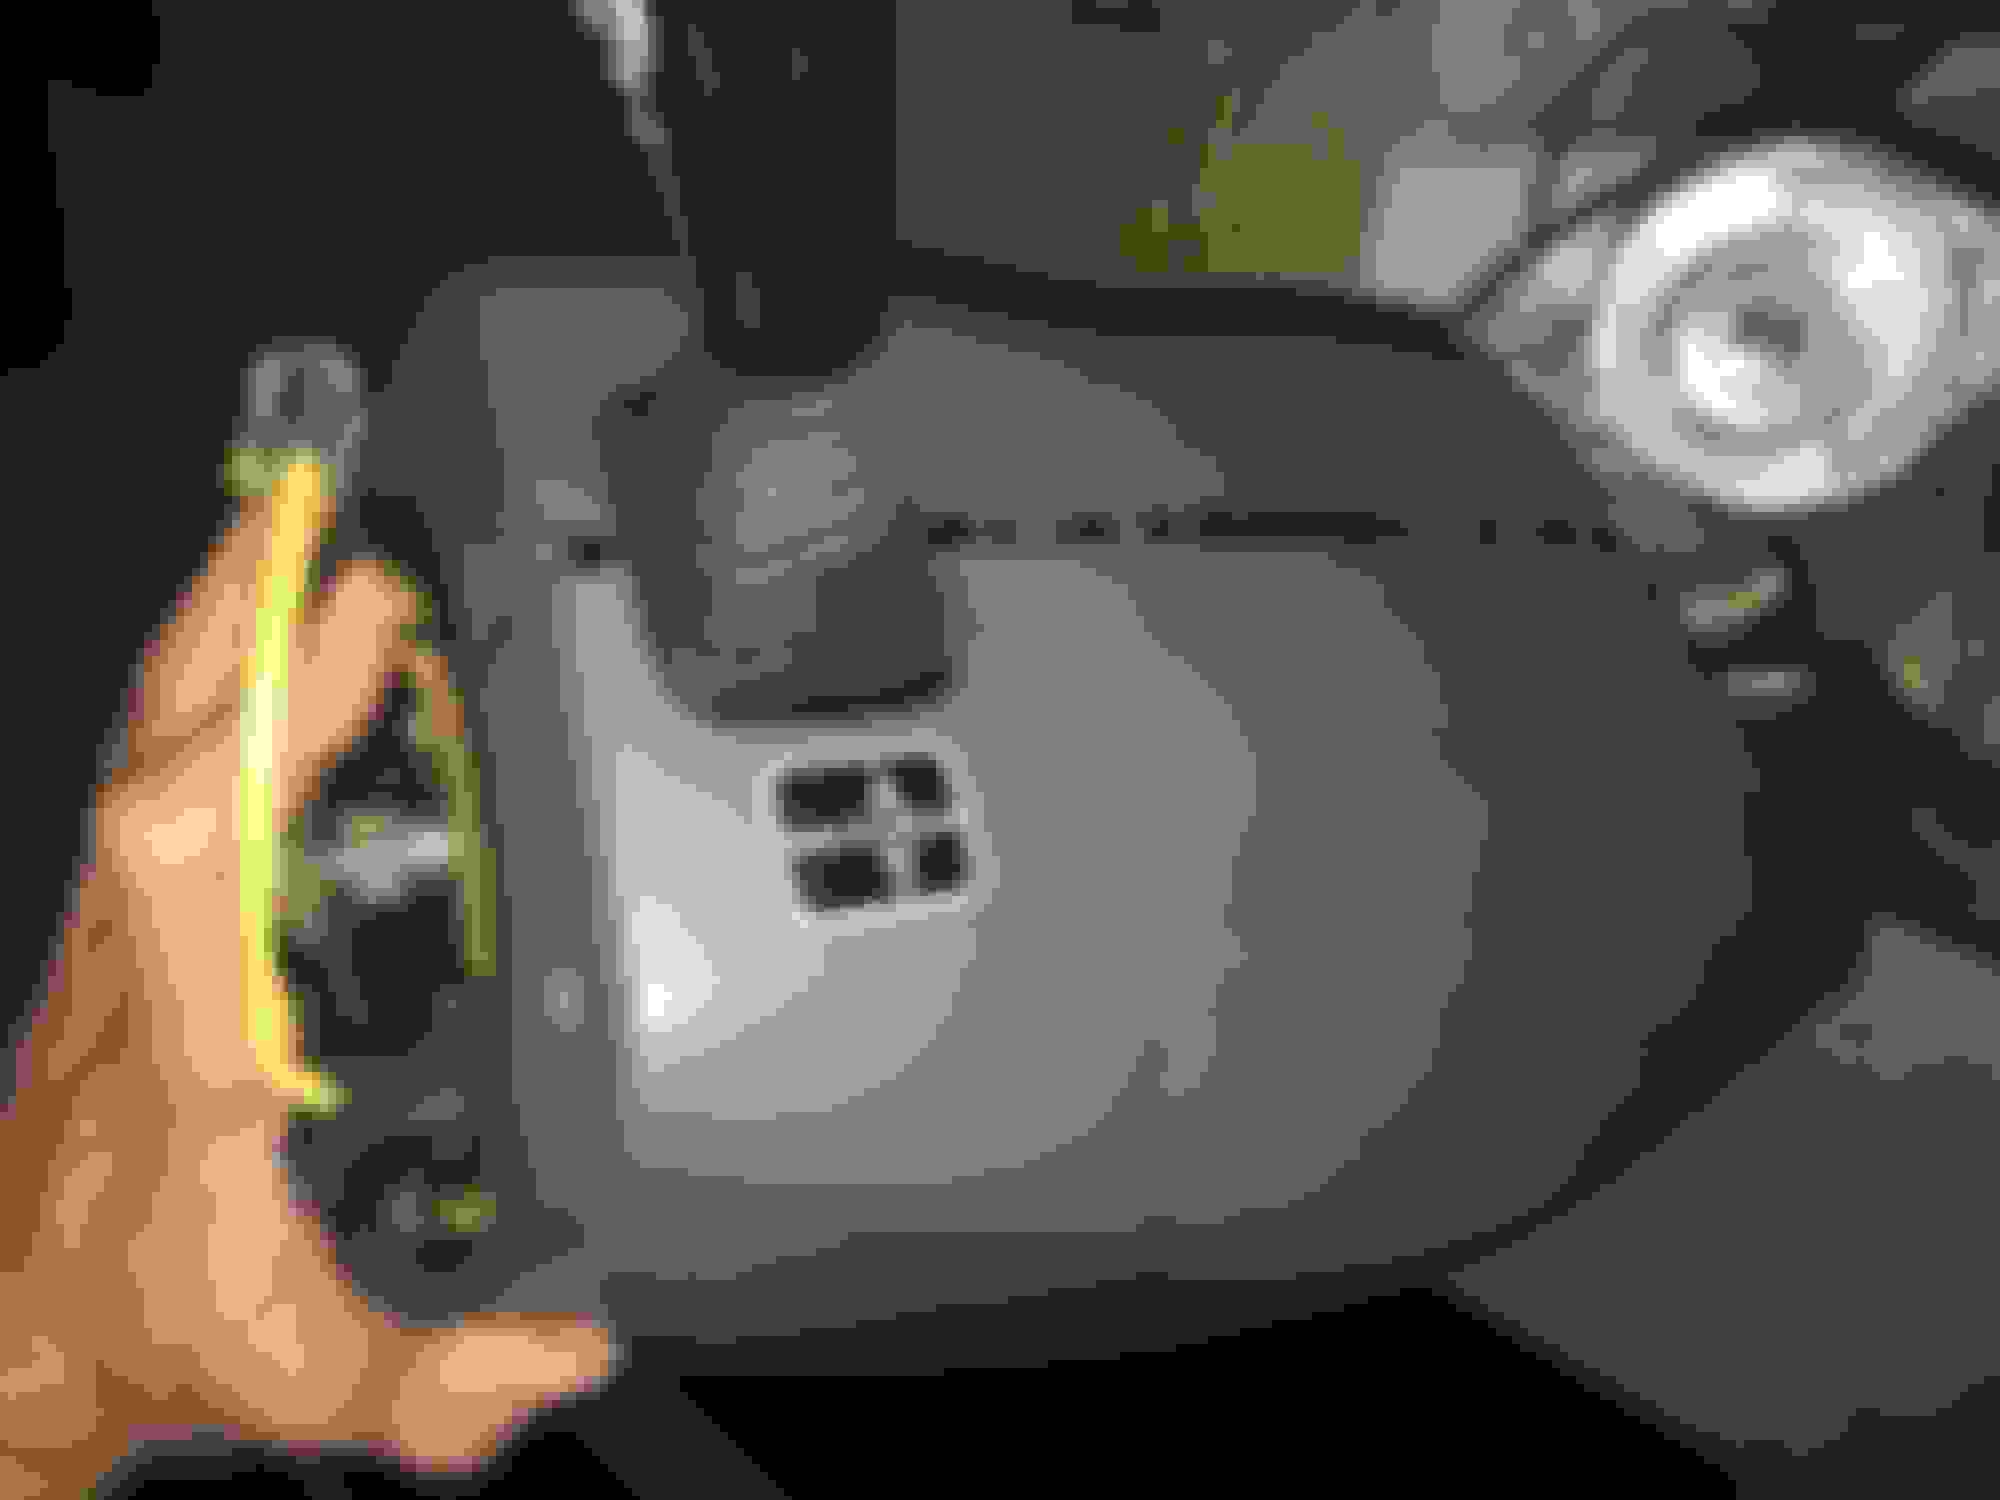
This is the gray connector that you will need to de-pin. Have a set of very fine small electronics screwdrivers handy to work the very tiny and fragile plastic catches. You will need to very gently pull the inner connector protector up and then gently pry a little on the catch on one side while holding it in place on the other side so as to pry up on the other little catch. Then it will slide right out of the connector.
For the de-pinning it is the same as it always is: pry up on the connector's outer securing tab/strip so that it pops up slightly. Then use a VERY fine flathead electronics screwdriver to carefully push the plastic retaining catch holding the terminal wire in while pulling it out from the back.
Do this with each wire that needs to be removed. Take pictures before hand just in case you will need to know where each wire terminal goes on one of these gray connectors.
Brand new Tessa #51036 automotive harness tape applied as a finishing touch.
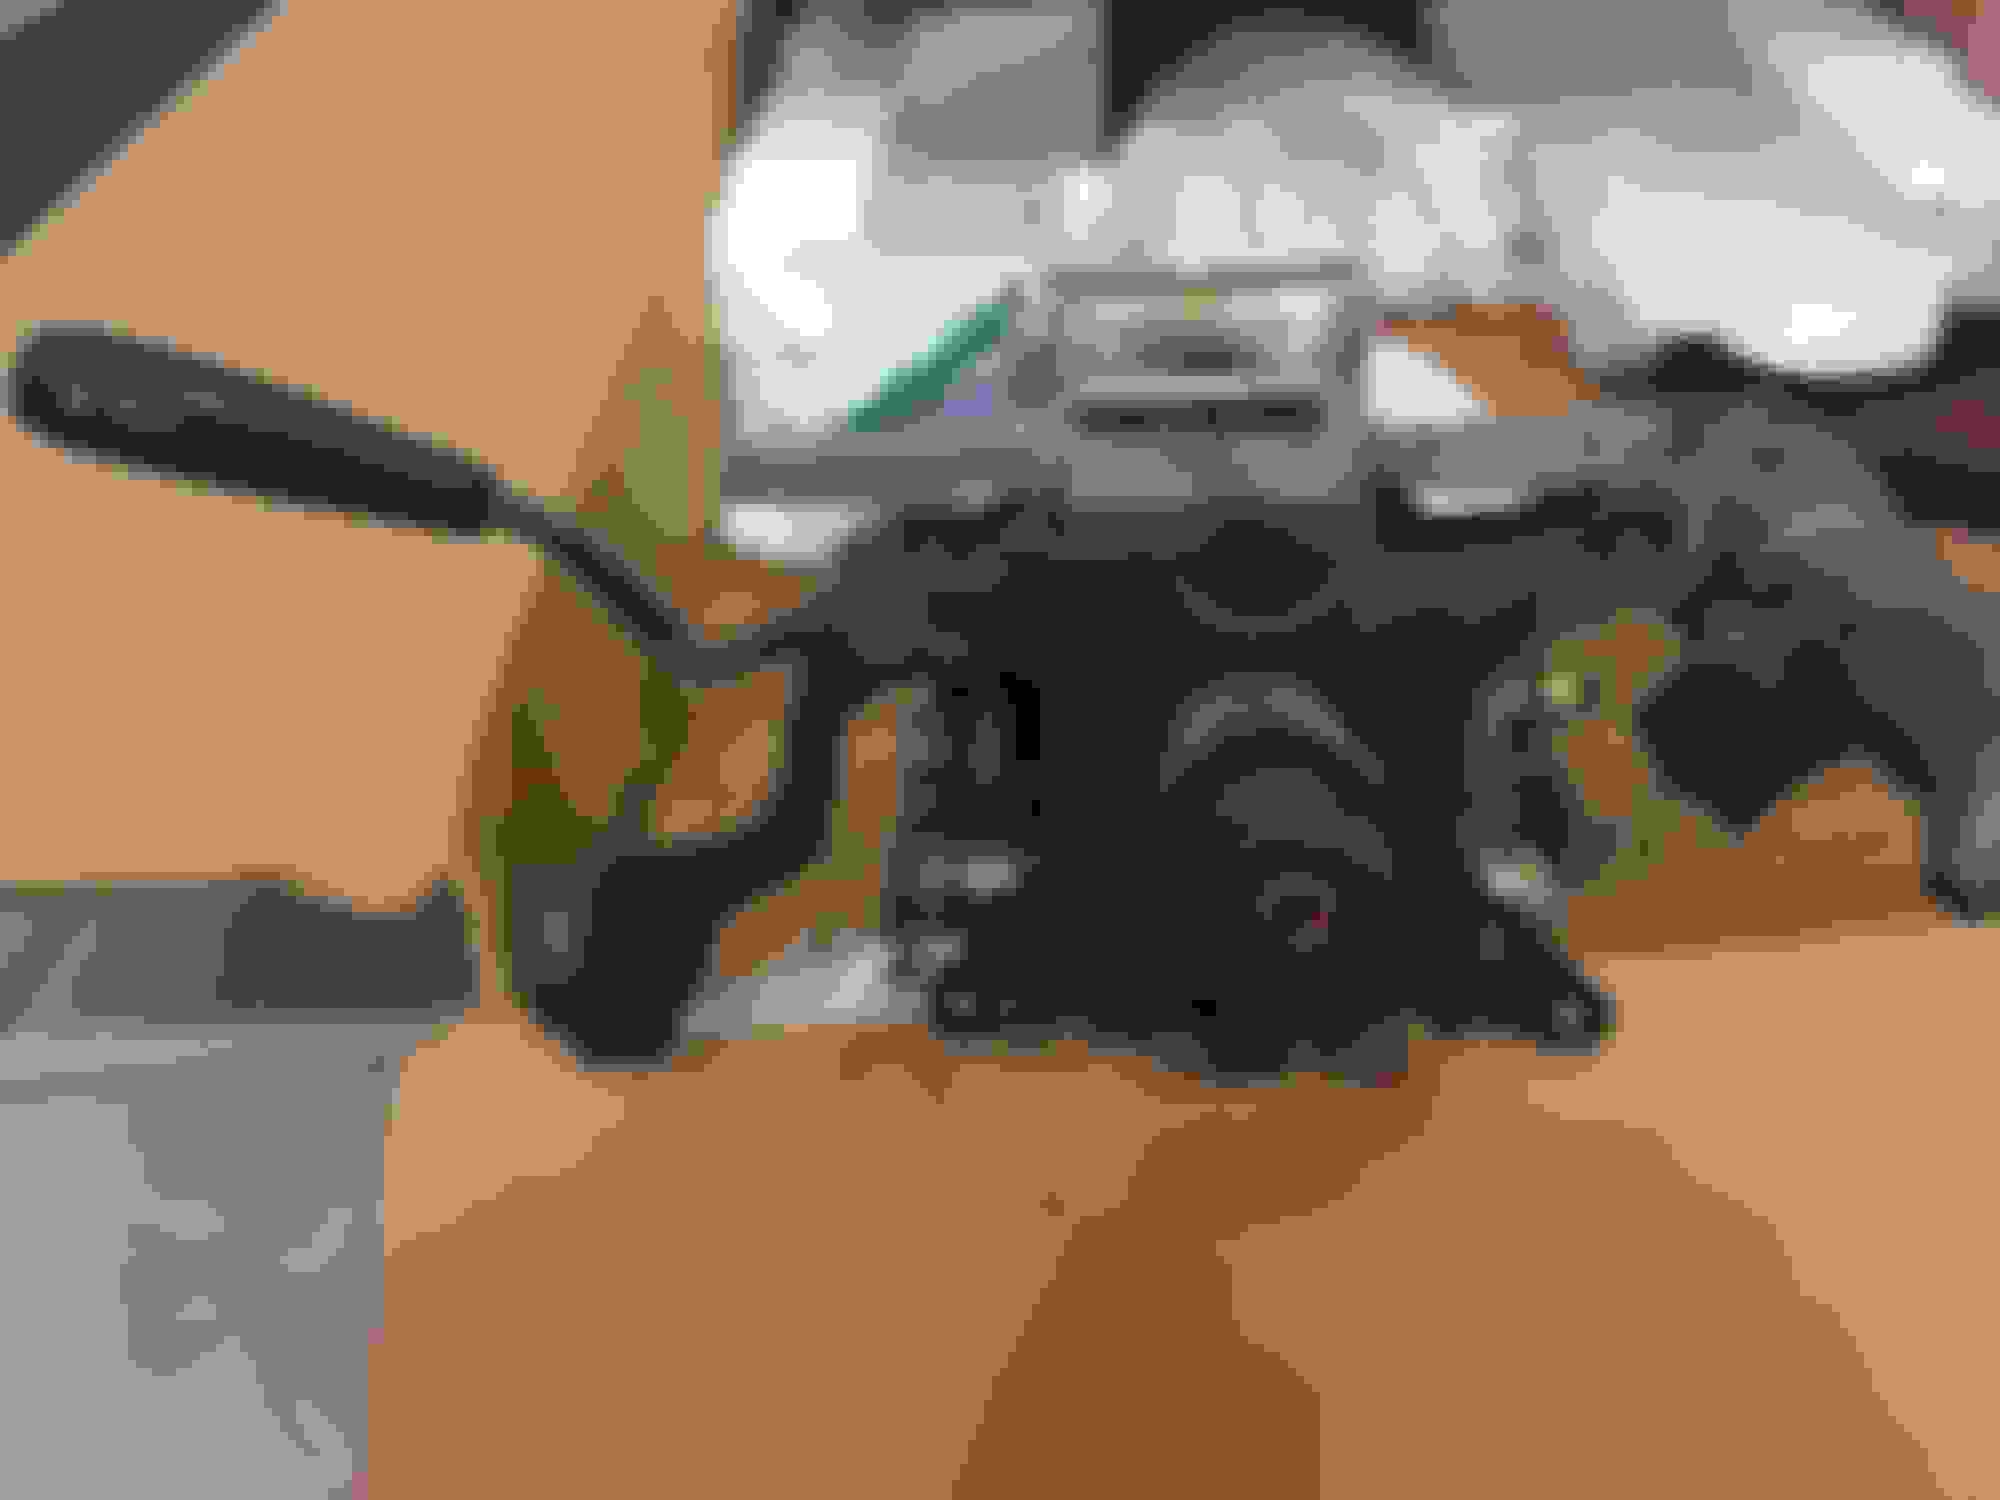
Mocking up the upper and lower manual adjust column covers loosely to check for fitment. Everything checks out!
The next step will be to deal with removing the Soarer ignition switch and tumbler assembly from the column.
I think the importer or wrecking yard rounded off the bolt heads holding the Soarer’s ignition assembly onto the column... or deliberately cut them off for some reason. I think I may have to drill, tap and remove these the hard way in order to remove this ignition assembly and install my SC’s unit. You can see what I mean below.
The SC300/400 TSRM section on the steering column removal/installation and disassembly/reassembly is very clear on how to remove the ignition tumbler module but there are no clear bolt or screw heads here to put a screwdriver or special socket onto
Also no key came with this column so if there is a rod locked in place I will have to figure out how to get that dislodged somehow without having the benefit of a key to turn the lock.
On a side note I can insert my SC300's ignition key into a Soarer ignition tumbler. It just won't turn. So I guess both cars used the same type of laser cut keys?
Edit: Oh boy.... according to this thread it looks like I may indeed need to drill these bolts out (and find appropriately threaded replacements) that hold the ignition lock assembly onto the steering column. I guess all SC’s and Soarers have them installed this was from the factory.
SC300/400/Soarer Manual Tilt/Telescope Column Swap Project - Part 3
Another interesting development. While going through the EPC diagram for this part of the steering column I found the OEM bolts that Lexus uses for this purpose. It turns out that it is very common for many 1992-2021 Toyota and Lexus models.
You can see it in the picture below as 45897:
Clicking on that number and looking up the actual part number I got 45897-12020. It's maybe $5 or less each form any dealer and looks like this. Notice something odd about how this bolt is shaped?
This explains the weird cut off bolt heads on the SC/Soarer steering column where the lock cylinder attaches. Toyota meant for these to be installed once and then ground off or broken off. Maybe they are designed to break away at the top with enough torque applied.
Therefore to remove the lock cylinder from any SC/Soarer column these special bolts have to be drilled and tapped out with a bolt extractor tool. I have one of those already.
Now to go and order a brand new set of these bolts
Good morning Craig, I ran into this type bolt on early BMW's on the ignition switch also. I wonder how long Toyota has been using them on Toyota and Lexus cars.
Should be pretty easy to look at the head and see whether toyota cut them or snapped them off from factory; but looking at the design of that I imagine it breaks at a specific torque rating.
SC300/400/Soarer Manual Tilt/Telescope Column Swap Project - Part 4
Originally Posted by Bimmerbill
Good morning Craig, I ran into this type bolt on early BMW's on the ignition switch also. I wonder how long Toyota has been using them on Toyota and Lexus cars.
Bill, according to Toyota's parts system these specific bolts have been used for Toyota and Lexus steering column ignition key assemblies since 1992.
Originally Posted by joewitafro
Should be pretty easy to look at the head and see whether toyota cut them or snapped them off from factory; but looking at the design of that I imagine it breaks at a specific torque rating.
Just the other day I bought four of these special bolts (P/N 45897-12020). They are tapered after the 10mm head like an hour glass. According to the TSRM pages regarding installation you are instructed to torque them down "until they snap off". There is no specific torque mentioned but it probably is enough to get them in there tight before snapping off cleanly.
This was undoubtedly designed for security purposes. Since each steering column I have contains two snapped off bolts in each I will use a Hansen #11119 bolt extractor kit and pick the appropriate size bit for the job to remove them.
The new bolts look exactly like the one un-snapped example in my last post above.
What I will do in this case is remove the Soarer ignition key assembly from the manual adjust column, then once my automatic adjust column is fully removed from the SC300 I will then extract the snapped off security bolts from my original ignition key assembly and then install that onto the manual adjust column with two of the new security bolts.
Below are the relevant TSRM pages covering the SC300/SC400 1992-1994 manual tele/tilt steering column from basic service to total disassembly and reassembly:
SC300/400/Soarer Manual Tilt/Telescope Column Swap Project - Part 5
A little more progress was made on the SC/Soarer manual adjust steering column.
The lock cylinder assembly had to be removed since I plan to swap over the one from my SC�s original automatic-adjust column.
In accordance with the TSRM for this (PDF pages in the last post before this one) you are required to drill out the two security bolts that are by design snapped off at the ends.
I used an Irwin Hansen bolt extractor tool set and a new cobalt drill bit that matches the one in the kit for the extractor size I needed.
You can only do this with the column out of the car on a workbench. Metal shavings will get everywhere.
I used a center punch tool first. You can get these on Amazon for $8 if you don�t already have one.
I used a little Tap Magic cutting fluid. My container was for aluminum when I should have used the type for steel cutting but it was all I had handy at the time.
I drilled into each bolt first fairly deep.
The sensor blocking the straight entry of the drill and bit to one of the snapped-off bolts had to be unscrewed and left to hang off to the side temporarily.
Then in went the extractor tool in the counter-clockwise direction. A hand crank tool and a pair of thick leather gloves were used to break it loose.
A lot of effort was needed!
And then the result was a removed Soarer lock cylinder assembly!
I cleaned away all the metal shavings and set everything aside for the next stage: verifying all the wiring connections work the same way between the wiring I have for this column vs my original column�s wiring.
I could just swap over my original column switchgear wiring also if I were to remove the auto column control switch wiring but I want to leave that stock for the time being and just switch over what I have to.
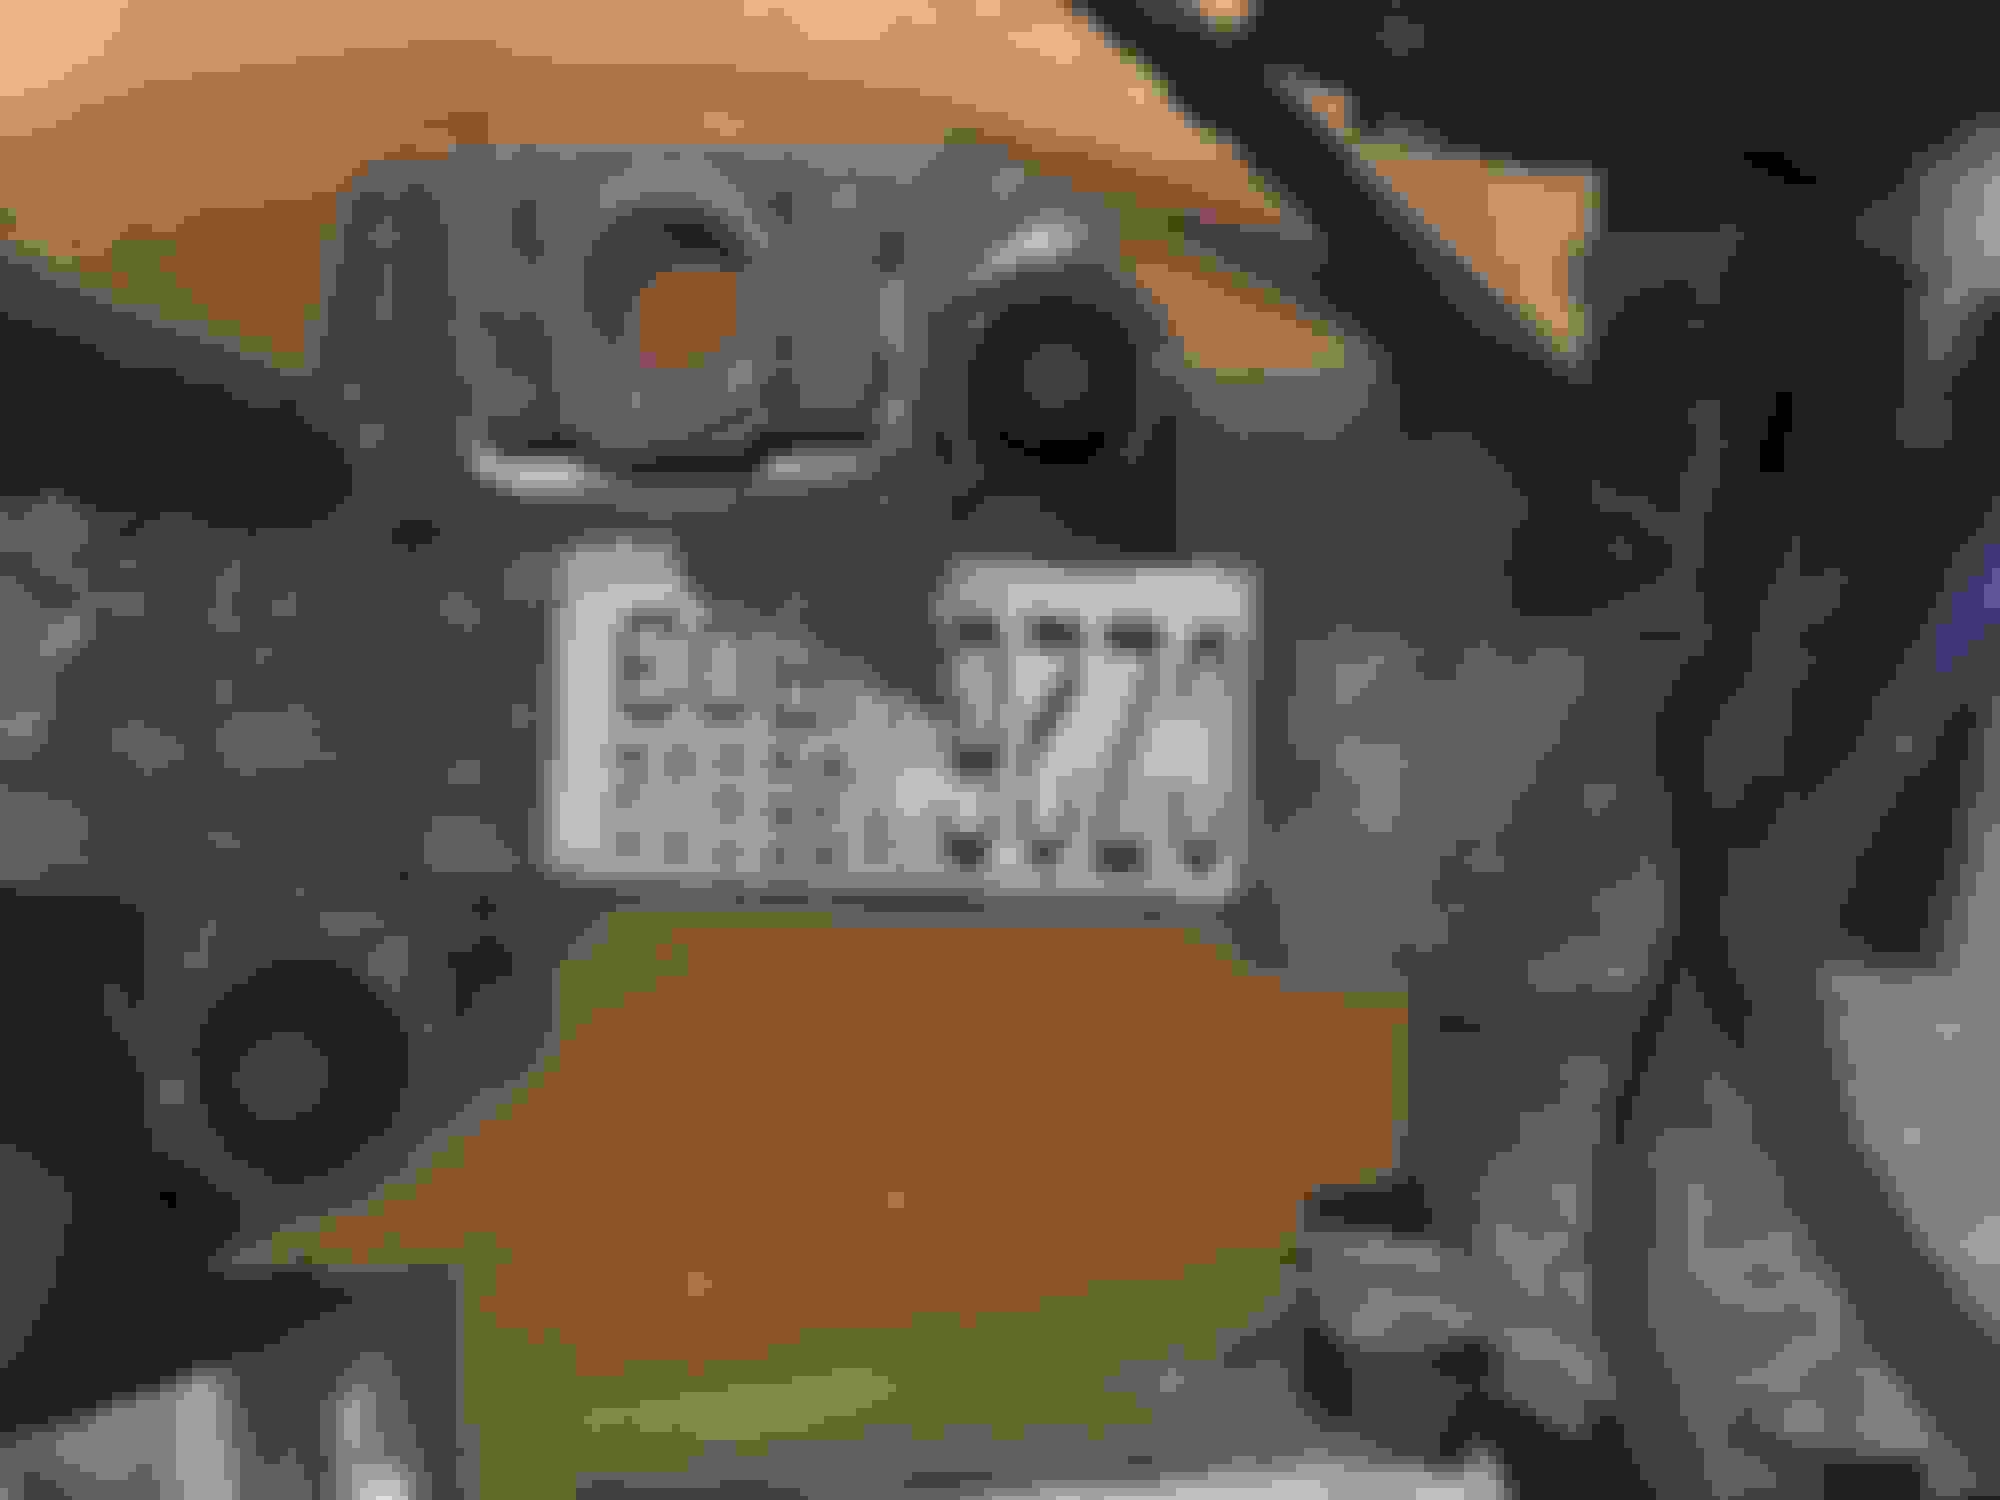
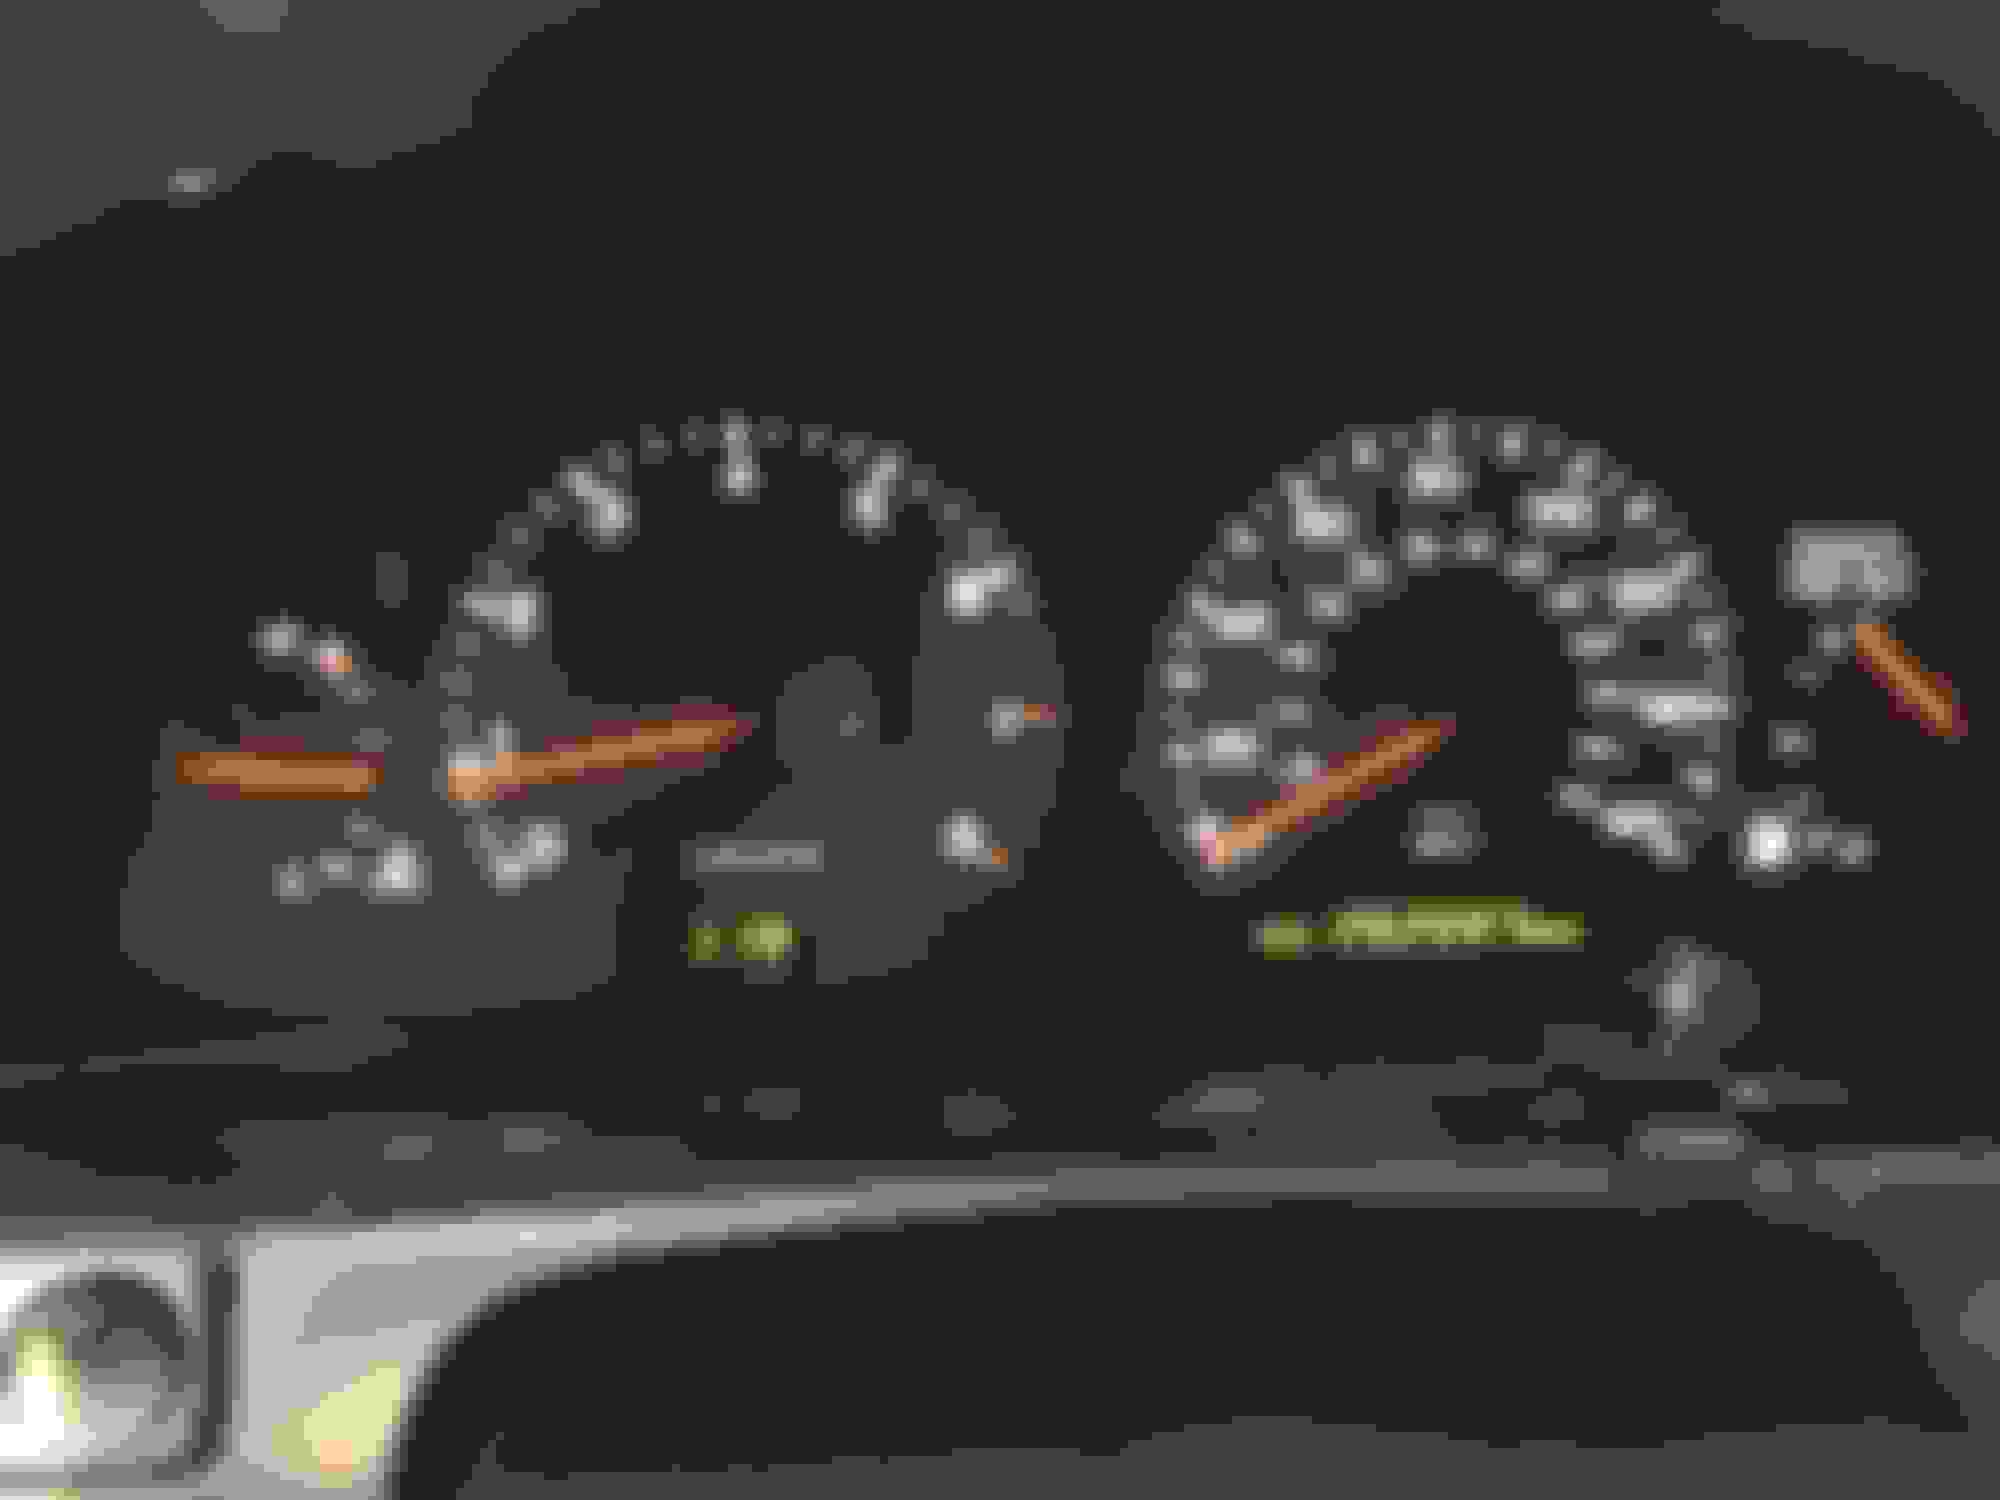
Restored and Repaired instrument cluster by Tanin Auto Electronix is in!
I had sent my SC’s original instrument cluster to Tanin Auto Electronix for service a few weeks ago. I just got it back earlier today and the final result is everything I had hoped for!
Huge shout out to these wonderful folks for offering us service and repairs for these clusters!
I will try to take some better pictures but really they won’t quite capture how good this lighting looks at night.
......
Primarily I needed my Tachometer and Speedometer gauge motors repaired since they were sticking fairly regularly and required slapping on the dashboard several times to make them respond again. Thankfully in my case new capacitors were the only repairs to those that were required! My coolant gauge motor however turned out to be failing so that did have to be replaced with a good used spare motor with new capacitors.
My original factory needle lighting was working fine as was all my backlighting but nonetheless I had them do the entire V4 LED needle lighting and backlighting upgrade anyway to future proof the cluster for good.
There is a very slight difference in how the factory needle backlighting glows inside the needles versus their custom made LED boards but the result looks very good and the LEDs are dimmable with the factory control dial.
The new LED backlighting has a slightly more white light glow compared to the stock backlight bulbs but I like it.
I waited almost 3.5 years to deal with the gauge issues and I’m happy to have them solved at long last!
After more than a month of letting the SC sit dormant it was great to take it out on the road again!
That looks absolutely spectacular!! Mine is holding up well, but some days I wish it would start to fail so that I can justify sending it in lol. Also watching your manual column progress! Very cool. I have to admit though, I'm such a sucker for getting in mine, turning the key, and having the wheel come towards me automatically. It's always made me drool!
Hi Guys
Craig, Nice gauges Those are totally OEM. They did a nice job.
Thats the one issue I've had w my car, is the infamous cluster gauge debacle. The whole time I've had it the gauges have never completely worked. The needles give the correct readings, up til now but the lights have never completely lite up. Here's a pic of what its looked like
The situation is being the car has been my daily driver, so I've never had the time to take it off the road long enough to take it out and send it off to Tanin. I certainly don't have the know how to take the cluster out of the car. I couldn't see myself letting a Lexus shop take me to the cleaners. I've lived in the Bay Area and downtown San Fran where its impossible to own a 2nd car unless your James Bond or someone like that. A garage parking space alone can cost a grand if your lucky.
So the needles work and thats the way its been all these years. Now if the fuel gauge goes south I'm in deep S__t . One interesting thing, the temp gauge starts out at the bottom and when it heats up it goes right to the center and I've never seen it move from there. When I shut it off it goes down to the bottom.
Now I'm out there in the middle of a desert, 100 degrees, 80+ mph for hours, a lot and I've never seen the needle move up or down and I have never overheated or come close to it, I think. Including long, long, long slow grades like Baker Grade on the way to Vegas
Then congratulations on your cluster gauge, something else I'm envious of now LoL
A little off topic but it is about driving the SC. I wanted to ask you Colorado guys, You and Rudy, read you driving your mountains;
I'm living in the 4 corners: What has your weather been like? I've hardly been able to leave my house to drive the Bullet all season. Been getting Flash Flood warnings,, life threatening situations from the Sheriff's office almost daily. Its been raining, lightning and thunder like that. Monsoon season. Had a huge storm even yesterday.
How about you guys?
Barbary
That looks absolutely spectacular!! Mine is holding up well, but some days I wish it would start to fail so that I can justify sending it in lol. Also watching your manual column progress! Very cool. I have to admit though, I'm such a sucker for getting in mine, turning the key, and having the wheel come towards me automatically. It's always made me drool!
I don't think a failure is something to wish for, lol! But I do understand. I went for the whole service and upgrade because I wanted to do it all once and never have to again. I have to say that I am very pleased with their quality of work!! It takes a little waiting but they do an excellent job with these and it is well worth it when you want to restore a malfunctioning cluster.
I've been taking my time with the manual column project but I do want to get it done relatively soon. Once I can verify that all my pinouts will be correct when plugged into my 1993 model and source out the correct terminal wires to get the factory 1995+ factory fog light function working from the lighting stalk then I'll move forward with the big installation job.
I agree with you about the appeal of the automatic motorized column function 98% of SC's have! It was a cool selling point when I first bought my SC and made me feel that some of that timeless and classic LS400 technology was in my Lexus coupe I will miss it a bit honestly. You cannot argue against the convenience and cool factor of the automatic column!
Craig, Nice gauges Those are totally OEM. They did a nice job.
Thats the one issue I've had w my car, is the infamous cluster gauge debacle. The whole time I've had it the gauges have never completely worked. The needles give the correct readings, up til now but the lights have never completely lite up. Here's a pic of what its looked like
That certainly looks like a classic case of 90's Lexus gauge cluster needle lighting failure. I can't tell if your backlighting is also not totally working or not. This is exactly what Tanin developed their LED gauge needle and backlighting upgrade service for. They also put stoppers on the Tach and Speedo needles to help the motors last longer.
Originally Posted by Barbary
The situation is being the car has been my daily driver, so I've never had the time to take it off the road long enough to take it out and send it off to Tanin. I certainly don't have the know how to take the cluster out of the car. I couldn't see myself letting a Lexus shop take me to the cleaners. I've lived in the Bay Area and downtown San Fran where its impossible to own a 2nd car unless your James Bond or someone like that. A garage parking space alone can cost a grand if your lucky.
I know it may not seem like it since I have had so many instances of downtime, repairs and troubleshooting but my SC300 is my daily driver and only car as well although I don't need to drive it every day (for now). I feel your pain though. It's terrible when your car is out of commission for any length of time. This time the gauge cluster just had to be done at long last and I had to just wait it out until it was done.
In San Francisco you're lucky to have anything but street parking let alone a private parking spot! In L.A. it's just not a good idea to have an apartment without a parking spot in a driveway or building garage included if you own an old car. But a 2nd parking spot...? Yeah that's rare to be able to secure in L.A. as well. I hope it's a little easier where you are now.
Actually taking the cluster out is easy! Tanin Auto has a video on the process for our cars. Note: never put the key into the ignition and attempt to turn on your SC with the cluster removed and disconnected. You'll trigger an annoying to reset airbag light. Just leave it alone and better yet disconnect the battery until you get your cluster installed again.
Tanin Auto also sells whole SC300/400 automatic clusters with all the reconditioning already being done. You'd just need to get them to officially reprogram the Odometer to reflect your car's actual mileage if you took that option instead of sending in your original cluster for repairs.
Originally Posted by Barbary
So the needles work and thats the way its been all these years. Now if the fuel gauge goes south I'm in deep S__t . One interesting thing, the temp gauge starts out at the bottom and when it heats up it goes right to the center and I've never seen it move from there. When I shut it off it goes down to the bottom.
Now I'm out there in the middle of a desert, 100 degrees, 80+ mph for hours, a lot and I've never seen the needle move up or down and I have never overheated or come close to it, I think. Including long, long, long slow grades like Baker Grade on the way to Vegas
Then congratulations on your cluster gauge, something else I'm envious of now LoL
Thank you, lol! But honestly it took me SO long to get to doing it and budget for it. I'm very happy with the final result but I'd recommend it to anyone once they can figure out some safe downtime for their SC.
Tanin can repair or replace any of the gauge motors as necessary. Usually the coolant and fuel gauge motors don't have issues. My coolant gauge did for some reason and that was a very rare thing to happen-- usually not the case.
The coolant temp gauge operation is exactly as you describe. It's designed by Lexus to start heating up and go to the middle or just above middle and stay that way UNLESS there is a severe overheat condition occurring that would make it go up higher and indicate this. I also have an additional aftermarket water temp gauge with its own separate sender which tells me the active temperature of the coolant/engine as it fluctuates a little here or there. This additional gauge tells me accurately when the engine is at 160F, 180F, 200F, 210F, etc.
The factory Lexus SC coolant temp gauge only gives you a very simple average range at which it doesn't move unless there is a true problem.
I still use the factory gauge for general reference during cold startup but I will also use my aftermarket oil pressure and oil temp gauges to tell me when the engine is truly up to temperature since it's turbocharged.
In that desert heat it's good that you don't notice it getting too hot! Preparing to drive through the hot areas of the country are why I did the full upgrade on my SC's additional cooling fans. I think all SC's could benefit from at least one additional electric cooling fan.
I hope you too can send your cluster in to get it restored. Driving at night without those needles lighting up is not fun.
Originally Posted by Barbary
A little off topic but it is about driving the SC. I wanted to ask you Colorado guys, You and Rudy, read you driving your mountains;
I'm living in the 4 corners: What has your weather been like? I've hardly been able to leave my house to drive the Bullet all season. Been getting Flash Flood warnings,, life threatening situations from the Sheriff's office almost daily. Its been raining, lightning and thunder like that. Monsoon season. Had a huge storm even yesterday.
How about you guys?
Barbary
I haven't gone as far north as Colorado yet but I have been through monsoons while I was traveling through New Mexico. Some of the most intense rain I've experienced outside of some of Florida's heaviest downpours and flooding.
Here in my part of Florida a couple of months ago while I was traveling in the SC on a very old highway with poor drainage we had a rainstorm so strong and intense that I had to pull off the road a couple of times to wait it out and and the rest of the time the rain was still so intense and the surface flooding (not deep) was so bad that I had to slow down and cruise along in the right lane at about 45mph on a road rated for 65mph. Other cars passed me going much faster but I wasn't going to tempt the limits of my traction and risk hydroplaning or upsetting my Torsen LSD. I made it home just fine but that was certainly an intense and uncommon storm.
Barbary - weather here down in Denver has been spectacular, and for now, the mountain weather has been good as well. However, here in a few short week's we'll start seeing snow in the high country. I can attest that these cars do very well on a good, thin (by then I mean no wider than stock sizes) snow tires, however, I wouldn't want to be climbing any of the passes here in the middle of a storm in an SC no matter how good the tires (granted I've been there, done that in my old SC4 more than once).
Craig - haha, true on not wishing for malfunctions, but with items like that I don't mind since they're easily rebuildable and upgradeable without spending a huge amount of money. Like say, my W58 explodes tomorrow, that = sad Rudy haha, but my gauge cluster going out would give me a good excuse to have some fun with it.
Best of luck - can't wait to see how your column project goes!
They did a really good job on that cluster, everything looks nice and even which is pretty difficult to get just right especially on the backlighting.
I have to agree the weather in Denver has been fantastic, just moved back to CO a few weeks ago and can't get enough of it

 09-10-21, 07:13 AM