Kyle's GS300 2JZGTE Project Reboot
 04-20-16, 05:46 PM
#46

Thank you for taking the time to answer my questions!
That is so, so great that the electrical wiring is becoming easier and easier for people to do. Slightly under 3000 RPMs at 80mph really does not seem that bad at all. I believe my car with the 3.23 final drive ratio does about 2600 or so at 80mph, and that is in fifth. I believe 4th would be slightly higher at maybe 31-3200 if I remember that right.
That is so, so great that the electrical wiring is becoming easier and easier for people to do. Slightly under 3000 RPMs at 80mph really does not seem that bad at all. I believe my car with the 3.23 final drive ratio does about 2600 or so at 80mph, and that is in fifth. I believe 4th would be slightly higher at maybe 31-3200 if I remember that right.
The sad thing with the 1UZFE is you can only top out at about 280whp, unless you do porting, or forced induction which would be way more expensive in the long run.
I dream about a GS with the Supra's TT LSD and 2JZGTE with about 350-400whp which is very easy to do.
I just need a daily driver, so this could probably not happen unless I was constantly borrowing my family's cars for weeks on end while doing a swap. Ideally I would love to find a GS300 where some one has already done the swap, and if was as perfect as yours, it'd be golden. I'll be following your build, and thanks for sharing!
Respectfully, Ya'acov
Cheers!
 04-20-16, 06:36 PM
#47

Yes, they are very similar, which can only mean the actual gear ratios in the transmission are different as well.
No problem, I really find these enjoyable to read, and feel thankful people share their builds here. I agree on the LSD, I want one for my car as well. I do have to say the VSC is very good on these cars though, I was surprised. I think putting in a whole housing would not be bad, as I have dropped a differential before, as long as the axle shafts and driveshaft flanges fit, it probably wouldn't be too bad.
I would want to keep my original 3.23 ratio though, so I would have to swap parts out of the 3.73 Supra TT automatic LSD into mine, which is more than I think I could do. I can't just swap the whole pumpkin unless I wanted the shorter gear ratio.
I know the Supra driveshaft flange does not fit the end of the GS300, only the GS400, with out modification. But to swap them is very easy so it bolts up to the TT flange.
Maybe down the line, we can both get some nice LSD differentials!
Last edited by GS400V8; 04-20-16 at 06:39 PM.
04-27-16, 08:32 PM
#48
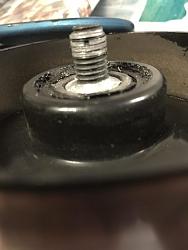
No real significant updates. I was in Little Rock visiting family this past weekend. While there, I robbed a couple of parts off the old GE motor. My GTE power steering pulley was a little bent, likely from shipping. The tensioner pulley bearing was shot, and upon cold startup sounded really bad.
I got back home and was excited to change the pulley out. Removed the accessory belt and pulled the old pulley off no problem. Went to put the "new" pulley back on and upon tightening it up, found the bolt essentially stripped out before the tightening enough to take tension off the tensioner. in order to get the belt back on.
Ordered a new complete tensioner from Rock Auto as per a recommendation from Mike.
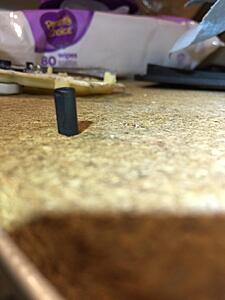
The old bolt. Aluminum on the threads where it stripped:
Old vs. new:

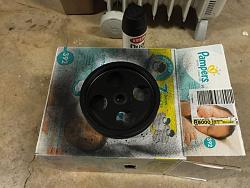
Since I had the pulley off, I went ahead and hit it with some of my slider touch-up spray paint:
Pretty straight forward process in case anyone else finds themselves in this situation:
1) Remove intake elbow/snout that attaches to radiator
2) Remove the top engine cover
3) Remove upper timing belt cover
4) Unbolt 3 bolts off tensioner - NOTE be very careful when removing and re-installing these bolts, as they could fall down into the lower timing belt cover making this a much ore involved job.
5) Re-install
I got back home and was excited to change the pulley out. Removed the accessory belt and pulled the old pulley off no problem. Went to put the "new" pulley back on and upon tightening it up, found the bolt essentially stripped out before the tightening enough to take tension off the tensioner. in order to get the belt back on.
Ordered a new complete tensioner from Rock Auto as per a recommendation from Mike.
The old bolt. Aluminum on the threads where it stripped:

Old vs. new:

Since I had the pulley off, I went ahead and hit it with some of my slider touch-up spray paint:

Pretty straight forward process in case anyone else finds themselves in this situation:
1) Remove intake elbow/snout that attaches to radiator
2) Remove the top engine cover
3) Remove upper timing belt cover
4) Unbolt 3 bolts off tensioner - NOTE be very careful when removing and re-installing these bolts, as they could fall down into the lower timing belt cover making this a much ore involved job.
5) Re-install
04-28-16, 01:25 AM
#49
No real significant updates. I was in Little Rock visiting family this past weekend. While there, I robbed a couple of parts off the old GE motor. My GTE power steering pulley was a little bent, likely from shipping. The tensioner pulley bearing was shot, and upon cold startup sounded really bad.
I got back home and was excited to change the pulley out. Removed the accessory belt and pulled the old pulley off no problem. Went to put the "new" pulley back on and upon tightening it up, found the bolt essentially stripped out before the tightening enough to take tension off the tensioner. in order to get the belt back on.
Ordered a new complete tensioner from Rock Auto as per a recommendation from Mike.
The old bolt. Aluminum on the threads where it stripped:
Attachment 385938
Old vs. new:
Attachment 385939
Since I had the pulley off, I went ahead and hit it with some of my slider touch-up spray paint:
Attachment 385940
Pretty straight forward process in case anyone else finds themselves in this situation:
1) Remove intake elbow/snout that attaches to radiator
2) Remove the top engine cover
3) Remove upper timing belt cover
4) Unbolt 3 bolts off tensioner - NOTE be very careful when removing and re-installing these bolts, as they could fall down into the lower timing belt cover making this a much ore involved job.
5) Re-install
"4) Unbolt 3 bolts off tensioner - NOTE be very careful when removing and re-installing these bolts, as they could fall down into the lower timing belt cover making this a much ore involved job. "
It is easy to have one of the bolts fall down into the lower timing cover, and yes it sucks, ask me how I know!
 05-18-16, 06:20 PM
#50
Driver School Candidate

Join Date: May 2016
Location: florida
Posts: 2
Likes: 0
Received 0 Likes
on
0 Posts
Awesome job. I'm getting ready to do the swap in a couple months, what did you have to do for the drive shaft did the original one work or have to get the aristo one.
05-19-16, 03:28 PM
#51

I say get the aristo drive shaft . Forum member just finished his swap and got the adapter plate to use his original shaft and is having vibration and thinks it's coming from that. Try and get a complete swap and save yourself time and headache in advance.
05-23-16, 08:21 PM
#54
Lets make sure we are talking about the same thing so i'm not giving him the wrong info. You got your swap from japanese parts service correct? They sell everything for a direct swap so in that case I was talking about the two sections that come off the transmission. Is that what you are talking about ?
05-26-16, 08:19 PM
#56
Yes, Mike that is where I got my swap from. And I know they included the driveshaft. But as I recall (and I can double check), I kept the stock driveshaft on the GS and just swapped over the isolater to connect to the back of the trans. I don't remember swapping the whole driveshaft....
06-26-16, 06:33 PM
#57
Update 06/26:
PART 1 OF 2
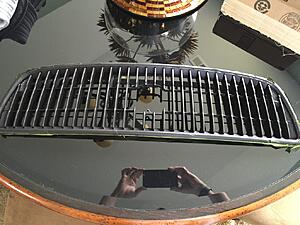
My car had right at 200k miles on it when I purchased it from the prior owner. Despite it being in overall decent shape for the age, the front nose was pretty sand blasted. I touched up as much as I could on the hood with dabs of touch-up paint. The grille was also badly dinged up. I've never played with plasti-dip before, but figured I'd give it a shot. I was pleased with the turnout. It's been on there for 3 months or so now and I've not noticed any chips thus far. I'm sure they'll come in time, but I'm please with the results for only about an hour of work. Most of that was masking off the chrome.
BEFORE:
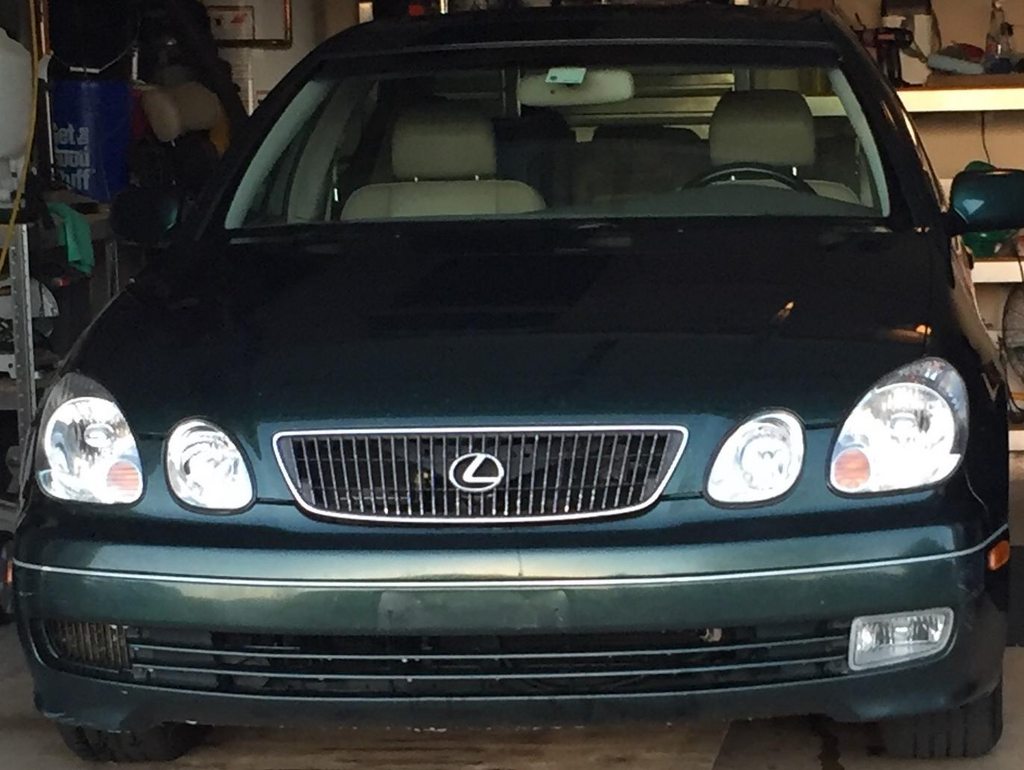
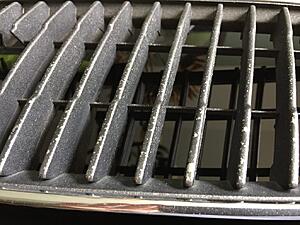
AFTER:
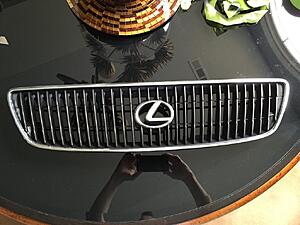


It still doesn't look like a new car. I've debated putting a little more money into the bumper and hood to refresh them. But in reality, there's nothing perfect about the car, but that's part of the thing I like so much about it. I can drive it and it's comfortable and fast (and relatively efficient compared to my SUV) yet I don't sweat door dings and
With the warmer weather, I've found the power door lock actuators are less than enthusiastic with regard to working properly. This wouldn't be a big deal, but I have 2 kids under the age of 3 and I have drop-off and pick-up duty. Nothing like walking outside on the 95 degree weather with a kid in one arm, holding the hand of another while fighting a couple of shoulder straps to find the doors aren't unlocking.
I looked here on the forums and found some great articles on addressing how to replace the motors on the back door locks. All 4 of mine are somewhat faulty, but the back looked easier and as long as I can get those doors open, life will be immediately better. What I found to be lacking was both pictures and narrative in a cohesive manner, so here goes:
Tools Needed:
Phillips Screw Driver
30 Torx bit / driver
Small Gear puller (or equivalent - I didn't use one)
Sharp Utility Knife Blades & much time & patience or Dremel
Hammer
Flat-head screw driver (recommended)
Flash Light (recommended)
Time - First time - figure 3-4 hours to be safe
Second time - 2 hours
Other Notes - Ensure the window is rolled all the way up. Recognize when you get beyond step 1, the car will be pretty well useless, as removing the lock / latch assembly from the door in step 2 will render that door completely unlatched, free to swing where it may.
1 - Remove the door panel -
There are 5 screws that need to be removed. All Phillips to get the door panel off.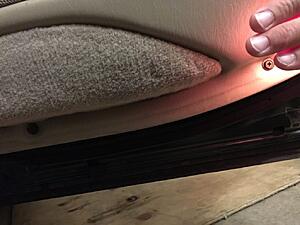
Once all 5 screws are out (don't worry, it won't fall), the door panel is held in place with 3 or 4 clips around he perimeter of the panel, and hooked over the lip of the door along the top. Working your way around the panel from the bottom up, start popping these clips out of the door by pulling on the panel. I didn't have any of these break. Once it's good and loose, you'll need to lift straight up on the door panel to get it to lift it off the top lip of the door. A little wiggling required.
NOTE - READ BEFORE REMOVING PANEL -
When you get the panel removed, be prepared to do a little work on it before you set it down. So you'll want the appropriate tools close-by. There are 2 cables that hook to the door panel. One cable operates the door latch. The other cable operates the door lock. You need to disconnect both of these. There are 2 options to get these off the door panel. One is to unbolt the 2 phillips screws that attach the latch/lock handle/**** to the door panel. The other option is to remove the cables from the mechanism. I've done it both ways. It was easier for me to just unscrew it the first time because the light was low and I didn't want to mess with threading the cables. The second time around when I knew what I was doing I just popped the cables out of their anchors and unthreaded the cable ends from their respective mechanisms.
ADDITIONALLY, you'll need to unplug the door light plug from the back side of the lamp when you have the panel pulled off the door.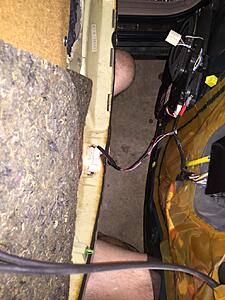
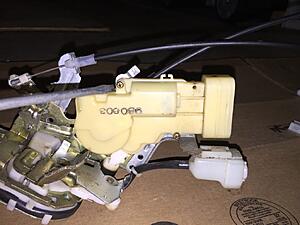
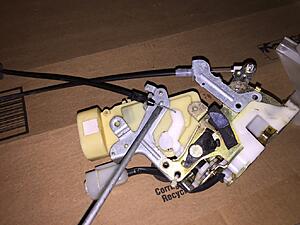
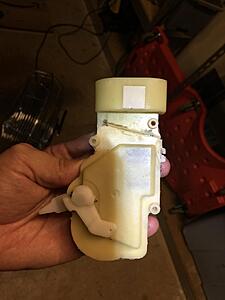
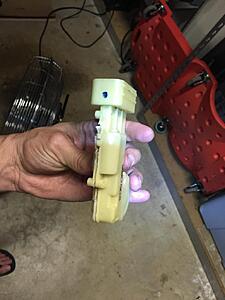
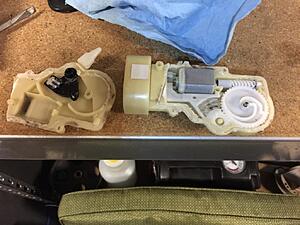
2: Door Latch / Lock assembly removal:
The door lock/latch assembly, removed:
CONTINUED BELOW
PART 1 OF 2
My car had right at 200k miles on it when I purchased it from the prior owner. Despite it being in overall decent shape for the age, the front nose was pretty sand blasted. I touched up as much as I could on the hood with dabs of touch-up paint. The grille was also badly dinged up. I've never played with plasti-dip before, but figured I'd give it a shot. I was pleased with the turnout. It's been on there for 3 months or so now and I've not noticed any chips thus far. I'm sure they'll come in time, but I'm please with the results for only about an hour of work. Most of that was masking off the chrome.
BEFORE:

AFTER:


It still doesn't look like a new car. I've debated putting a little more money into the bumper and hood to refresh them. But in reality, there's nothing perfect about the car, but that's part of the thing I like so much about it. I can drive it and it's comfortable and fast (and relatively efficient compared to my SUV) yet I don't sweat door dings and
With the warmer weather, I've found the power door lock actuators are less than enthusiastic with regard to working properly. This wouldn't be a big deal, but I have 2 kids under the age of 3 and I have drop-off and pick-up duty. Nothing like walking outside on the 95 degree weather with a kid in one arm, holding the hand of another while fighting a couple of shoulder straps to find the doors aren't unlocking.
I looked here on the forums and found some great articles on addressing how to replace the motors on the back door locks. All 4 of mine are somewhat faulty, but the back looked easier and as long as I can get those doors open, life will be immediately better. What I found to be lacking was both pictures and narrative in a cohesive manner, so here goes:
Tools Needed:
Phillips Screw Driver
30 Torx bit / driver
Small Gear puller (or equivalent - I didn't use one)
Sharp Utility Knife Blades & much time & patience or Dremel
Hammer
Flat-head screw driver (recommended)
Flash Light (recommended)
Time - First time - figure 3-4 hours to be safe
Second time - 2 hours
Other Notes - Ensure the window is rolled all the way up. Recognize when you get beyond step 1, the car will be pretty well useless, as removing the lock / latch assembly from the door in step 2 will render that door completely unlatched, free to swing where it may.
1 - Remove the door panel -
There are 5 screws that need to be removed. All Phillips to get the door panel off.
- Pull the ash tray straight up and out of the door. It makes a great screw holder as you go!
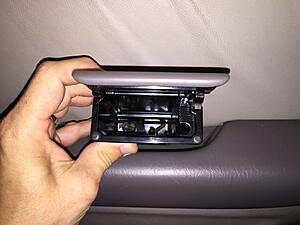
- Using a pry tool (I used my hands in the pocket that had previously held he ash tray and picked straight up) and pull out the ash tray / window switch panel. Note - the tabs they hook into that are molded into the door panel are brittle and in my case, they broke. I don't see a good way around avoiding this. In both cases at least one stayed in tact, so I don't expect I'll have issues with it rattling around or falling out. This was probably the worst of the damage associated with the project.
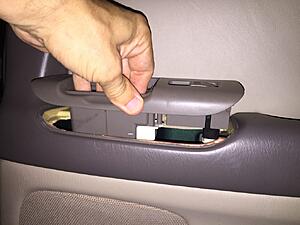
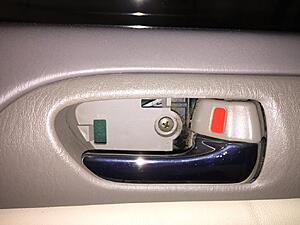
- Remove the bulb/socket (it's just a compression fit - pull out on it) that lights the ash tray and the connector that hooks to the power window switch. You can see (well you can't, because it's no longer there) that I broke the front (left side of pic) plastic piece off that the clip for the panel fits into. The rear one (right side) is still in tact.
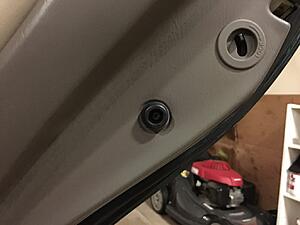
- Use a screw driver and pry out the plastic cover that sits behind the chrome interior door handle. I didn't have any tabs break on me here on either side.
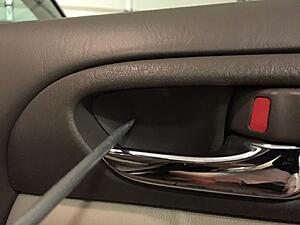
- Now all 5 screws should be revealed. 2 on the bottom, one in the door latch area that was covered by the plastic panel you popped out, one brass colored one under where the power window panel was, and one toward the rear of the door that is recessed with a plastic stopper.


Once all 5 screws are out (don't worry, it won't fall), the door panel is held in place with 3 or 4 clips around he perimeter of the panel, and hooked over the lip of the door along the top. Working your way around the panel from the bottom up, start popping these clips out of the door by pulling on the panel. I didn't have any of these break. Once it's good and loose, you'll need to lift straight up on the door panel to get it to lift it off the top lip of the door. A little wiggling required.
NOTE - READ BEFORE REMOVING PANEL -
When you get the panel removed, be prepared to do a little work on it before you set it down. So you'll want the appropriate tools close-by. There are 2 cables that hook to the door panel. One cable operates the door latch. The other cable operates the door lock. You need to disconnect both of these. There are 2 options to get these off the door panel. One is to unbolt the 2 phillips screws that attach the latch/lock handle/**** to the door panel. The other option is to remove the cables from the mechanism. I've done it both ways. It was easier for me to just unscrew it the first time because the light was low and I didn't want to mess with threading the cables. The second time around when I knew what I was doing I just popped the cables out of their anchors and unthreaded the cable ends from their respective mechanisms.

ADDITIONALLY, you'll need to unplug the door light plug from the back side of the lamp when you have the panel pulled off the door.

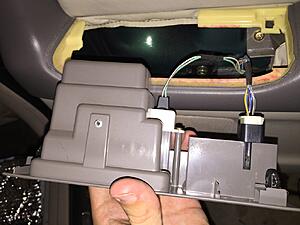
2: Door Latch / Lock assembly removal:

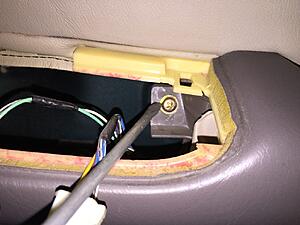
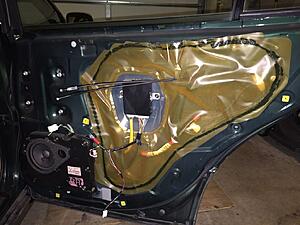
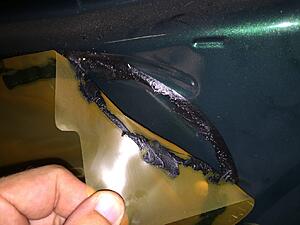
- Partially remove the plastic sheeting/barrier that is glued to the door panel. I used a razor blade in hand to cut the tacky glue as I pulled the sheeting away to prevent tears and make it easier. Be sure you don't cut the sheet itself.
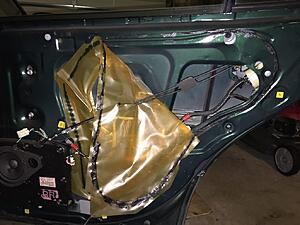
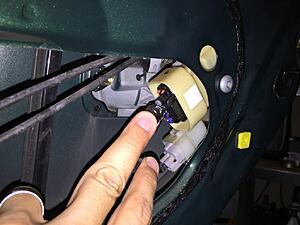
- Disconnect these two electrical connectors.
- Remove 4 torx screws that hold the latch/lock assembly in the door.
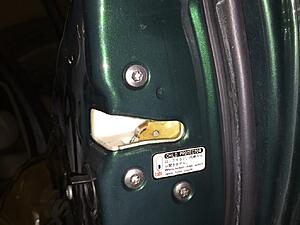
- Remove the door lock / latch assembly. As has been written in other threads, you need to manually pull the lever on the latching mechanism to allow it to clear the back side of the outer door handle in order for you to finagle it out. Some people say stick a screw driver in there. I found I could just use my hand. I dropped a flashlight down in the door pointed up at this area and had to take a couple of looks to figure out what I was doing. If you're unsure where to press, just grab your handle on the outside and jiggle it a bit and see where it's pressing on the assembly arm. Note the child door latch safety switch is sticking out through the side of the door, so be mindful of this as you're wiggling away to wrestle it out. I was a bit concerned about it, but didn't damage it on either side. It took maybe 5 minutes or less to get it out of the door. Not bad at all. Many thanks to whoever decided it could be done without outer door handle removal.


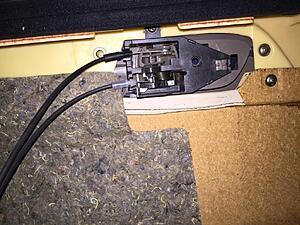
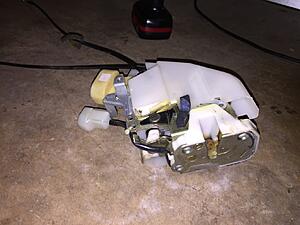
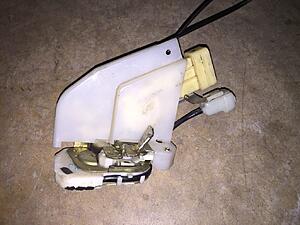
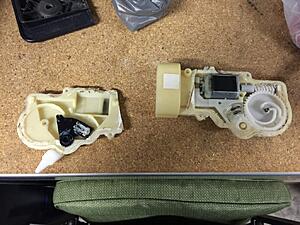
The door lock/latch assembly, removed:

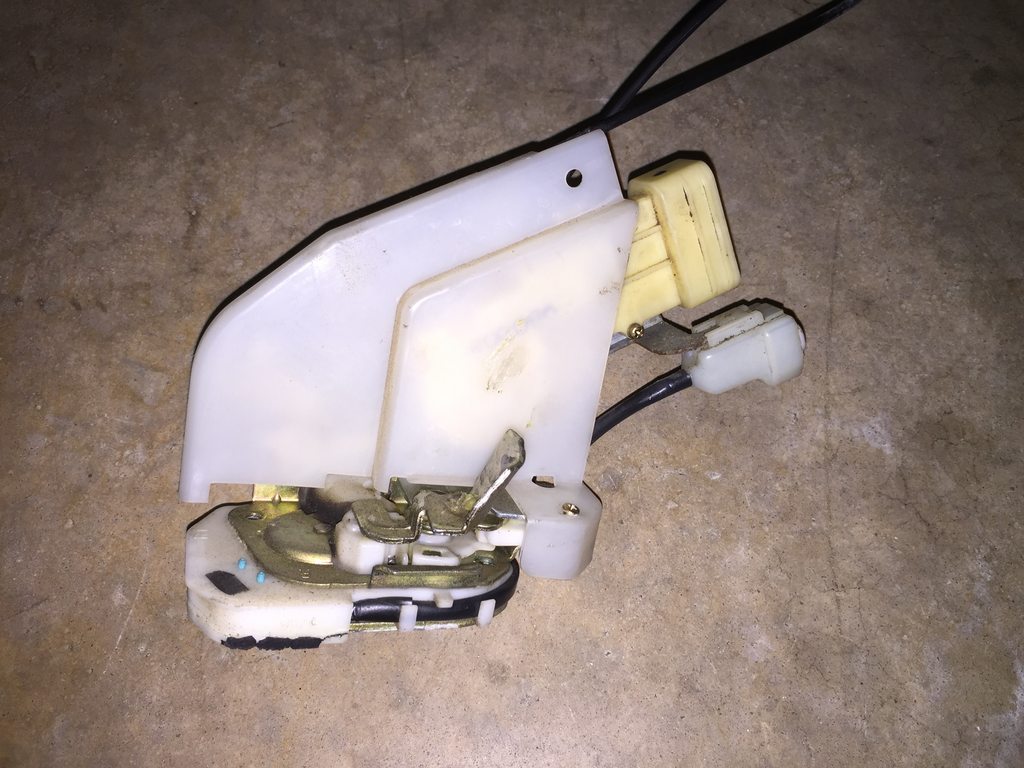
CONTINUED BELOW
06-26-16, 06:39 PM
#58
PART 2 OF 2
3:Removal & replacement of the motor/actuator
This is where all the work is and where you need to get into to fix your problem. It took me much longer to write the above information than it will likely take you to get to this point.
So far, 1+ day of glorious proper locking and unlocking of rear doors.
I guess that's it for now. I've done no material upgrades to the car, despite having a longing to do so. I've just been enjoying the car. I've been driving it most days / weeks. No leaks to speak of. The A/C still acts up from time to time, but just cycling the button off and on seems to bring it back. The car has been running great. It's a lot of fun. Whenever I feel it needs to be faster I drive my 4Runner for a few days and instantly realize it's quick. I've had a couple of stop-light challengers since the engine swap. The tired looking old GS has probably surprised them and is 2 and 0.
3:Removal & replacement of the motor/actuator
This is where all the work is and where you need to get into to fix your problem. It took me much longer to write the above information than it will likely take you to get to this point.
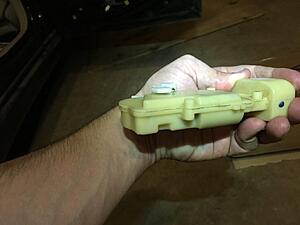
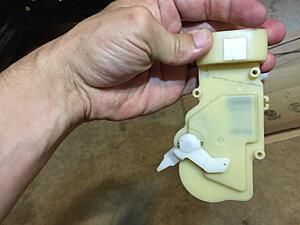
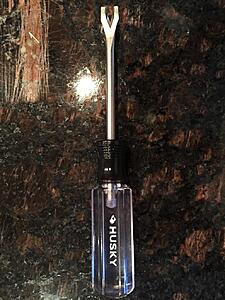
- Remove the outer cover of the assembly with the single short brass screw
- Remove 2 screws that hold the plastic housing for the motor/lock mechanism to the assembly

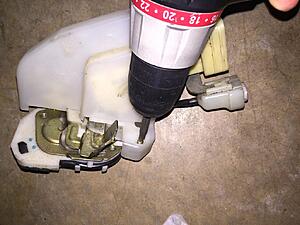
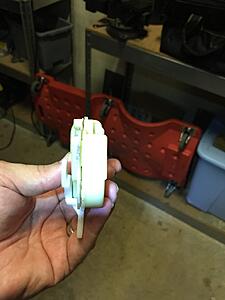
- Remove the cable that controls the lock mechanism from the housing and then unthread the cable from the white lever on the plastic housing. It has a 90 degree bend in it to hold it in place. Once you've disconnected the cable from it's anchor point, it's easy to unthread it. NOTE: for removing the cables from their compression-fit anchors, if you can't get it with your fingers, pry them with a flat head screw driver.
- Mark yourself a cut line to split the case open. I traced along what seemed to be the plastic seam. Note these housings clearly weren't designed for this, so this is both the most time consuming and risky part of the operation.
- Pick your tool - I've read of people using a knife for opening these housings. I have no idea how one would get this done. I must have spent an hour or two picking away trying not to cut off a finger or stab. I ended up using a dremel and would advise anyone to do the same. I didn't realize at first the depth of the cut necessary. Once I got after it with the dremel, I found the depth of cut necessary to be about that of the radius of the cutting disk. I surely would have lost a digit before getting it done with the razor knife.
As for the cutting tool, I found that the very thin sanding disks worked best for cutting out of the supplies I had on hand. I found that an actual cutting disk I had was too thick and I didn't like how big of a cut it was making.

- Start cutting! I used a vise with very LIGHT pressure to hold the housing while I started getting my initial cuts made. Eventually I resorted holding it while dremeling.
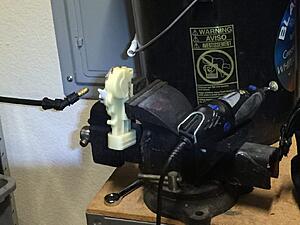
I strongly advise anyone using a dremel to wear a set of eye protection, as the best angle to look at your cut is in the angle of attack for your disk, which aside from it becoming a projectile, will certainly be churning bits of plastic in your face. I don't think I have the best method, but it worked for me. The hardest thing to do is keep the plastic cool and from melting too much. Try to move over the cutting surface as opposed to staying on one spot too long.
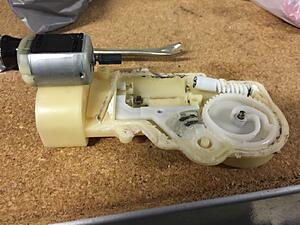
Cuts done:

- Split the case apart - After you've gotten all the cutting done, use a flat head screw driver to GENTLY pry the case apart. It is old and brittle. A little popping is okay, but if you don't have it cut well enough, you could snap it in a spot you didn't really intend to. So take your time and you may need to go back and do a little more cutting as you go. NOTE: Where the little white lever is, I couldn't cut. I just cut as close as I could and the case snapped apart fine.
- Pull the motor! Some say to pick up on he worm gear end. I found I could pry up under the back side of the engine and pry it out that way. I feel more comfortable prying on metal bits that I'm throwing away anyway.
- Clean up / prep.
As I had deposited a fair amount of chewed plastic onto the worm gear while cutting the case open, I went ahead and removed it so I could clean it up. Do take note of this and the plastic splined gear. I used a toothpick to clean up the spline gear, as it's spring loaded and I didn't want to see what happened if I removed it.
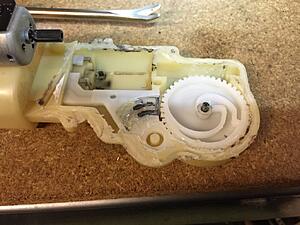
Additionally, where the leads off the lever run, there was build-up of black material in the tracks where it has been running. I wiped it off as best I could and then spread the fresh grease that was off the tracks into the tracks and spread it on the leads themselves. - Remove the gear (?) from the shaft of the old motor
Before starting this step, get a sense of the gap left on the shaft between the motor and the gear. You'll want a similar gap when you apply this gear to the new motor. I ordered a gear puller off ebay at the same time I ordered the motors. I think the motors arrived within a few days. Last I checked the gear puller was in Shenzhen. Maybe it will be ready for when I decide to tackle the front doors.
I put the old motor in my vise and used this tool and a flat-head screw driver (for leverage) and pried the gear off the shaft of the old motor.
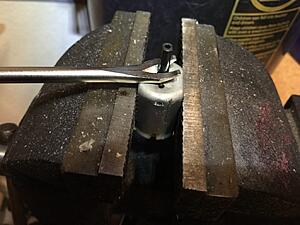
I didn't see this mentioned elsewhere, but this gear does require correct orientation when putting it on the shaft. On the bottom of the gear (side closest to the motor) the gear is beveled. If you get it upside down, I don't expect the gear will fit into the worm gear housing.
- Reassemble the motor / housing
Apply the old gear to the new motor shaft with the beveled end of the gear facing toward the motor/shaft. Using a hammer, and a light touch, put the gear onto the shaft. Tap it down until it's at the same clearance on the shaft as it was when on the old motor.
Once assembled, slide the new motor/gear into the plastic worm gear and seat the motor back down onto the contacts.
Put the case back together. You might find some final cleaning necessary to get them to seat back together as closely as possible. Realize you removed a good bit of material with your blade / cutting disc, so don't expect for them to clamp tight against each other. I've read some people just put the screws back through the plastic housing, attaching it to the assembly and rely on this to hold the pieces back together. I suspect that would work. I however wanted to be sure (and on my first one, I broke one of the plastic ears where the screw goes through off) so I used JB weld, as it's what I had on hand. I attached the plastic housing back to the assembly with the screws and then applied the glue after I had put the screws in so it would hold the two sides together. Be sure when you're screwing it to the assembly that the little white lever falls into its cradle or your lock won't work.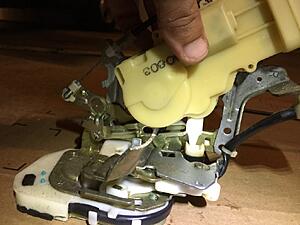


So far, 1+ day of glorious proper locking and unlocking of rear doors.
I guess that's it for now. I've done no material upgrades to the car, despite having a longing to do so. I've just been enjoying the car. I've been driving it most days / weeks. No leaks to speak of. The A/C still acts up from time to time, but just cycling the button off and on seems to bring it back. The car has been running great. It's a lot of fun. Whenever I feel it needs to be faster I drive my 4Runner for a few days and instantly realize it's quick. I've had a couple of stop-light challengers since the engine swap. The tired looking old GS has probably surprised them and is 2 and 0.
The following users liked this post:
Arussto (11-02-19)
07-24-16, 04:30 PM
#60
Well not a whole lot new to report. I went ahead and changed the front door lock actuators. For grins, I took time to do a time lapse. Overall I'd say the front were maybe slightly more difficult than the rear, but not much. There's a lot of confusion in those threads that are 70+ pages. In short, if anyone's reading this, the solution goes as follows.
Remove door panel:
Screw behind plastic cover under/behind chrome handle
Screw under arm rest area (not covered)
Screw in the air vent hole in the door
4-5 screws along bottom of door
Screw on out-side edge of panel inside bump stop
Pop panel out (clips on the back side of panel)
Lift up to clear the lip on the top of the door
Unhook the electrical connectors and lock / latch cables on back side of door
Remove the plastic or at least peel it back 3/4 toward the front of the car, clearing the upper and lower access holes
Remove the outside door handle with 3 screws. You can get a 1/4" ratchet drive on them by reaching up from the large hole. Or remove the plastic covers to access them head on. I didn't want to remove the plastic access covers if not necessary for fear i wouldn't be able to seal them back as nicely and or they'd break.
Finagle the rods out of the handle and put the handle aside
With a 10mm Remove the bolt that holds the bottom of the window track to the door. It's on the lower side of the door (side closest to the rear of the door), and it will be the obvious thing that would prevent you from removing the lock/latch mechanism.
I find it useful to also remove the 10mm bolt that secures a plastic holder to the door in the middle of the plastic sheet and the plastic clip that attaches the harness to the door to allow move movement of items within the door
Remove 4 30 torx screws from the door that hold the lock/latch mechanism
Wiggle it out. The rest of the story is as I described for the rear doors.
Biggest tip I have is plug in your harness to the lock/latch mechanism before you bolt it back in place, because it's very difficult to get them plugged in due to visibility thereafter. Oh, and unplug the battery before you do the driver door. Unsettling things happen if you don't. It happens quickly in the last video, but is more unsettling in real time.
Links to the fun:
https://goo.gl/photos/G2uH7WkhmbVappCG8
https://goo.gl/photos/edGfv57QZr1Lu33Z6
https://goo.gl/photos/QFS4JqrZkR4eP8V59
https://goo.gl/photos/GeQHPKoEmTUxoHSK8
https://goo.gl/photos/uY5LipD2Pj5zjCC17
.
Otherwise, so far, so good. I did order my first power enhancer this past weekend. Hopefully the next update will include more excitement than rebuilt door locks. Although I'll say with this heat I'm not in a huge hurry.