
Weswork's RCF
 04-12-16, 08:56 PM
#31

Nice build! With regarding to the KCLV, the more runs you do on the dyno, the hp should be higher run after run until eventually you get heat soaked, but that wasn't my case though, I made the most HP on the first run...lol.
You are not far from me though, I dynoed at 413.24 RWHP 380.24 RWTQ @ STD 5 on dynojet, with almost the same setup, I have a LEMS intake pipe with AFE filter instead of Apexi. My stock numbers were 369 RWHP and 351 RWTQ on a mustang dyno.
You are not far from me though, I dynoed at 413.24 RWHP 380.24 RWTQ @ STD 5 on dynojet, with almost the same setup, I have a LEMS intake pipe with AFE filter instead of Apexi. My stock numbers were 369 RWHP and 351 RWTQ on a mustang dyno.
Last edited by weswork; 07-10-16 at 03:05 PM.
 04-12-16, 09:03 PM
#32


First, I have to say I love your car. I would probably go a little further with mine if it wasn't my daily. Curiosity question for you regarding your dyno results. When you did the 413 did you have CCBs and aftermarket wheels? If so, do you think the aftermarket wheels were any lighter than stock? Just thinking that possibly those two things could have a slight impact on #s due to less rotating mass.

Last edited by RCFormante; 04-12-16 at 09:11 PM.
04-15-16, 12:18 PM
#33
Question time!!!!
- Did you weigh the new wheels yet before you mounted the tires?
- Did you put the new wheels on the car yet?
- Did you ever get and install the 2-piece rotors?
04-19-16, 07:57 PM
#34
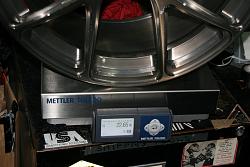
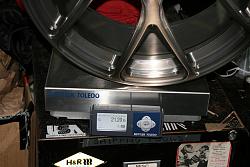
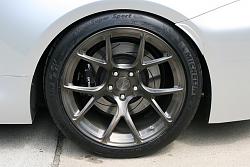
Got the wheels mounted up and installed on Friday. I’m beyond happy.  I know looks can be subjective so, I will just say these look fantastic TO ME. Again, many props to FIGS (Mike Figaro). Not only is the look, color and machining great but they are also very light. 19x10 fronts are 21.20 lbs and 19x11 rears are 22.65 lbs.
 IMG_2815 by Westley Workman, on Flickr
 IMG_2817 by Westley Workman, on Flickr
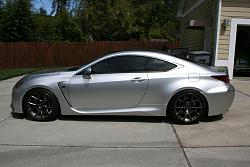
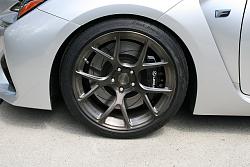
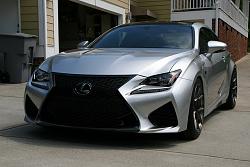
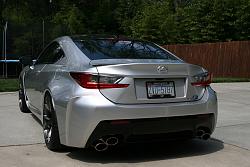
The tire sizing ended up being spot on as well. I was worried that the 285s on an 11 would look stretched but the beefy PSSs swallowed it all. No rub and I’m lowered on Swift springs. Here are a few shots of the car. I plan on doing a proper photo shoot but there are a couple “special” things I’m waiting on. Also, I may end up letting FIGS talk me into 2-piece rotors and Ohlins (sshhh! Don’t tell the wife).
 IMG_2838 by Westley Workman, on Flickr
 IMG_2845 by Westley Workman, on Flickr
 IMG_2843 by Westley Workman, on Flickr
 IMG_2848 by Westley Workman, on Flickr
 IMG_2841 by Westley Workman, on Flickr
 IMG_2839 by Westley Workman, on Flickr
My one light disappointment is the valve stems. Our TPMS sensor stems are huge. They stick out like a sore thumb. Trying to explore some alternatives.
I know looks can be subjective so, I will just say these look fantastic TO ME. Again, many props to FIGS (Mike Figaro). Not only is the look, color and machining great but they are also very light. 19x10 fronts are 21.20 lbs and 19x11 rears are 22.65 lbs. IMG_2815 by Westley Workman, on Flickr
 IMG_2817 by Westley Workman, on Flickr
The tire sizing ended up being spot on as well. I was worried that the 285s on an 11 would look stretched but the beefy PSSs swallowed it all. No rub and I’m lowered on Swift springs. Here are a few shots of the car. I plan on doing a proper photo shoot but there are a couple “special” things I’m waiting on. Also, I may end up letting FIGS talk me into 2-piece rotors and Ohlins (sshhh! Don’t tell the wife).
 IMG_2838 by Westley Workman, on Flickr
 IMG_2845 by Westley Workman, on Flickr
 IMG_2843 by Westley Workman, on Flickr
 IMG_2848 by Westley Workman, on Flickr
 IMG_2841 by Westley Workman, on Flickr
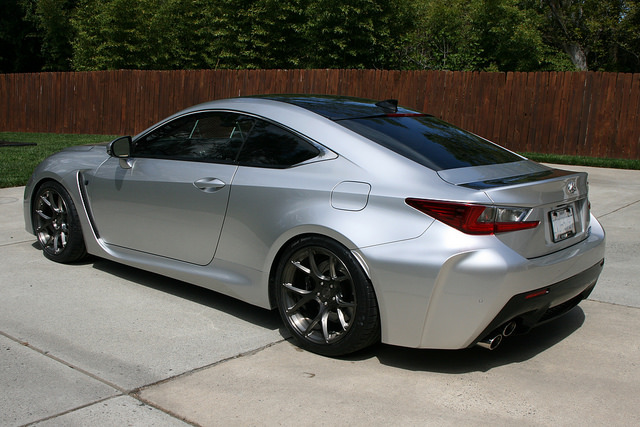 IMG_2839 by Westley Workman, on Flickr
My one light disappointment is the valve stems. Our TPMS sensor stems are huge. They stick out like a sore thumb. Trying to explore some alternatives.
Last edited by weswork; 04-27-16 at 08:18 PM.
04-19-16, 08:13 PM
#36
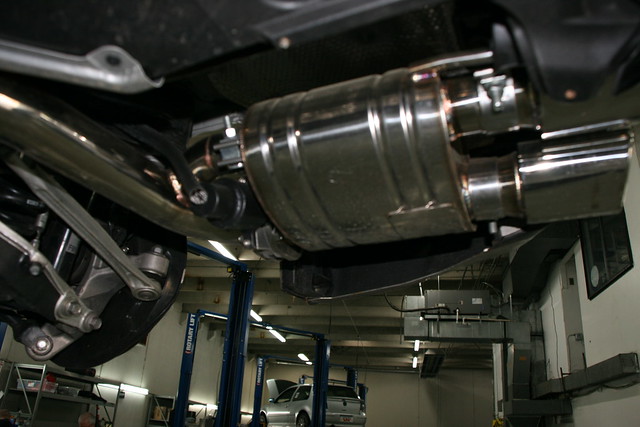
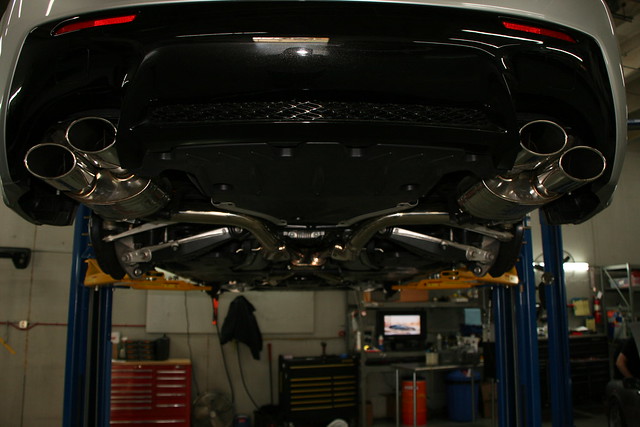
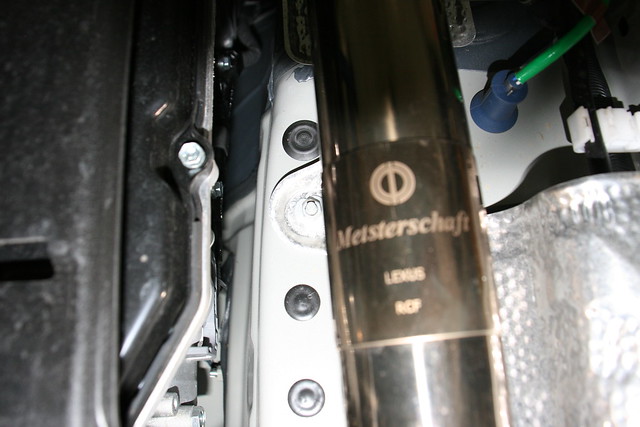
I know you’ve probably seen this on other cars but, while the car was up in the air getting wheels installed I snapped a few pics of the Meisterschaft installed in all its yumminess. This really is a nice piece. My installer also took the time to install braided heat shielding over the wiring. Oh, and did I tell you I got the homelink to learn the remote signal for the valves. I probably did but, it doesn’t hurt to say it again!
 IMG_2819 by Westley Workman, on Flickr
 IMG_2820 by Westley Workman, on Flickr
 IMG_2818 by Westley Workman, on Flickr
 IMG_2823 by Westley Workman, on Flickr
IMG_2819 by Westley Workman, on FlickrIMG_2820 by Westley Workman, on FlickrIMG_2818 by Westley Workman, on FlickrIMG_2823 by Westley Workman, on Flickr
04-19-16, 09:06 PM
#37

Now go work on that photoshoot

__________________
Redefining Lexus Aftermarket Parts Since 2001
-- We are your Lexus suspension experts--
BCR - KW - PENSKE - OHLINS - HKS - GREDDY - STANCEPARTS
Links - Arms - SuperPro Poly Bushings - Solid Bearing Conversions - Motor Mounts
RB BBK's and 2P Rotors, G-Loc pads, Radium Fuel Systems
Custom Fabrication Design and Machining - Industrial 3D Printing - Laser Cutting
2018 USTCC Sportsman Class Champions - 2018 NASA ST5 National Champions
Last edited by FIGS; 04-20-16 at 10:40 PM.
04-20-16, 07:48 AM
#38
Car looks great with the new wheels and exhaust! Congrats! Did you get the weight of the new fronts and rears w/ the tires mounted?
Give you props to sticking with the oval tips...looks better than round and keeps it more like stock.
Hoping I get lucky as well with my new front tires and don't rub.
Ever thought about blacking out the one area between the rear spoiler and the rear windshield? Pretty sure I am going to black out my roof and that section on mine once I get my CF long tail rear spoiler...just flows better.
Congrats! Did you get the weight of the new fronts and rears w/ the tires mounted?Give you props to sticking with the oval tips...looks better than round and keeps it more like stock.
Hoping I get lucky as well with my new front tires and don't rub.
Ever thought about blacking out the one area between the rear spoiler and the rear windshield? Pretty sure I am going to black out my roof and that section on mine once I get my CF long tail rear spoiler...just flows better.
Last edited by Ne1tHeRe; 04-20-16 at 07:58 AM.
04-20-16, 11:08 AM
#39
Nice! BC Forged & Meisterschaft..
-Josh
-Josh
__________________

Your #1 Dealer for Aftermarket Performance Products
Orange County, CA
Email: info@merakiautoworks.com
Text/Call: 213 394 2886
Website: www.MerakiAutoworks.com
Your #1 Dealer for Aftermarket Performance Products
Orange County, CA
Email: info@merakiautoworks.com
Text/Call: 213 394 2886
Website: www.MerakiAutoworks.com
04-20-16, 11:17 AM
#40
Lead Lap
 04-20-16, 08:00 PM
#43
Very simple as long as you have used only 1 of the 3 available home link buttons as you will want/need the two remaining buttons for open and close functions.
1. Press and release 1 of the unused homelink buttons on the mirror. An orange indicator light should flash on the mirror.
2. Press and hold the Open button on the valve remote while holding pointed at the mirror about an inch or two away from the mirror. Release the Open button when the indicator light turns solid green.
3. Repeat 1 and 2 on the remaining unused homelink button and the Close button on the valve remote.
4. Test homelink buttons. Remember to have ignition "switched" to whatever mode the valves are wired to while testing. I.E., if there is only power going to the valve controller when the engine is "on" then make sure car is on.
04-20-16, 08:12 PM
#44
Car looks great with the new wheels and exhaust! Congrats! Did you get the weight of the new fronts and rears w/ the tires mounted?
Give you props to sticking with the oval tips...looks better than round and keeps it more like stock.
Hoping I get lucky as well with my new front tires and don't rub.
Ever thought about blacking out the one area between the rear spoiler and the rear windshield? Pretty sure I am going to black out my roof and that section on mine once I get my CF long tail rear spoiler...just flows better.
Congrats! Did you get the weight of the new fronts and rears w/ the tires mounted?Give you props to sticking with the oval tips...looks better than round and keeps it more like stock.
Hoping I get lucky as well with my new front tires and don't rub.
Ever thought about blacking out the one area between the rear spoiler and the rear windshield? Pretty sure I am going to black out my roof and that section on mine once I get my CF long tail rear spoiler...just flows better.
Hadn't thought about blacking out those areas but I like the way the silver frames/contrasts with the CF. I think if I black that out it may just all look black instead of CF. That is one of the reasons I didn't just go with doing the hood vent surround in black and having it done in CF. Soon, very soon...
Last edited by weswork; 04-27-16 at 08:17 PM.
05-01-16, 06:23 PM
#45
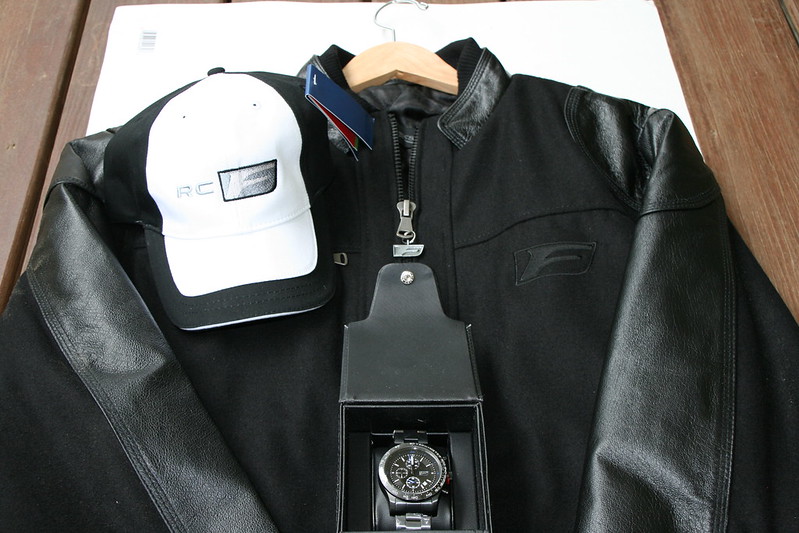
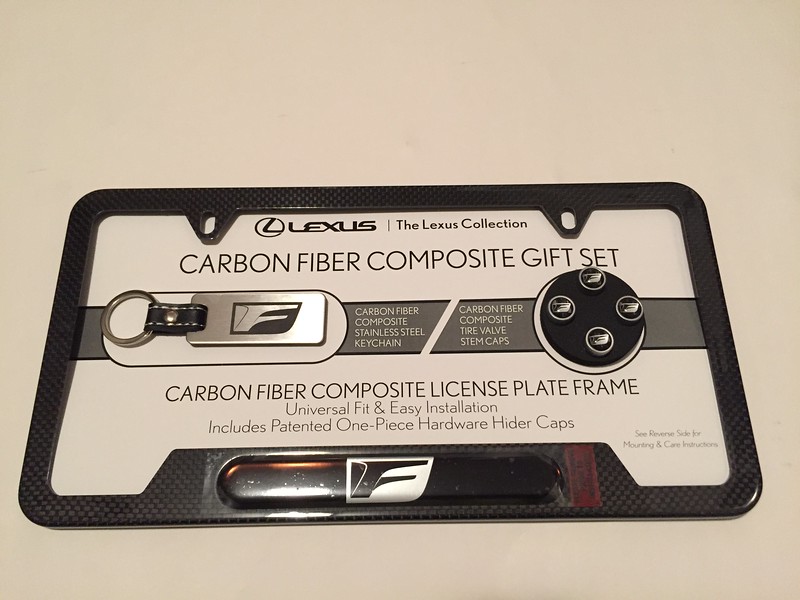
I'm all "F" 'd Up!!
 IMG_2867 by Westley Workman, on Flickr
 IMG_2869 by Westley Workman, on Flickr
 IMG_2263 by Westley Workman, on Flickr
IMG_2867 by Westley Workman, on FlickrIMG_2869 by Westley Workman, on FlickrIMG_2263 by Westley Workman, on Flickr