When you click on links to various merchants on this site and make a purchase, this can result in this site earning a commission. Affiliate programs and affiliations include, but are not limited to, the eBay Partner Network.
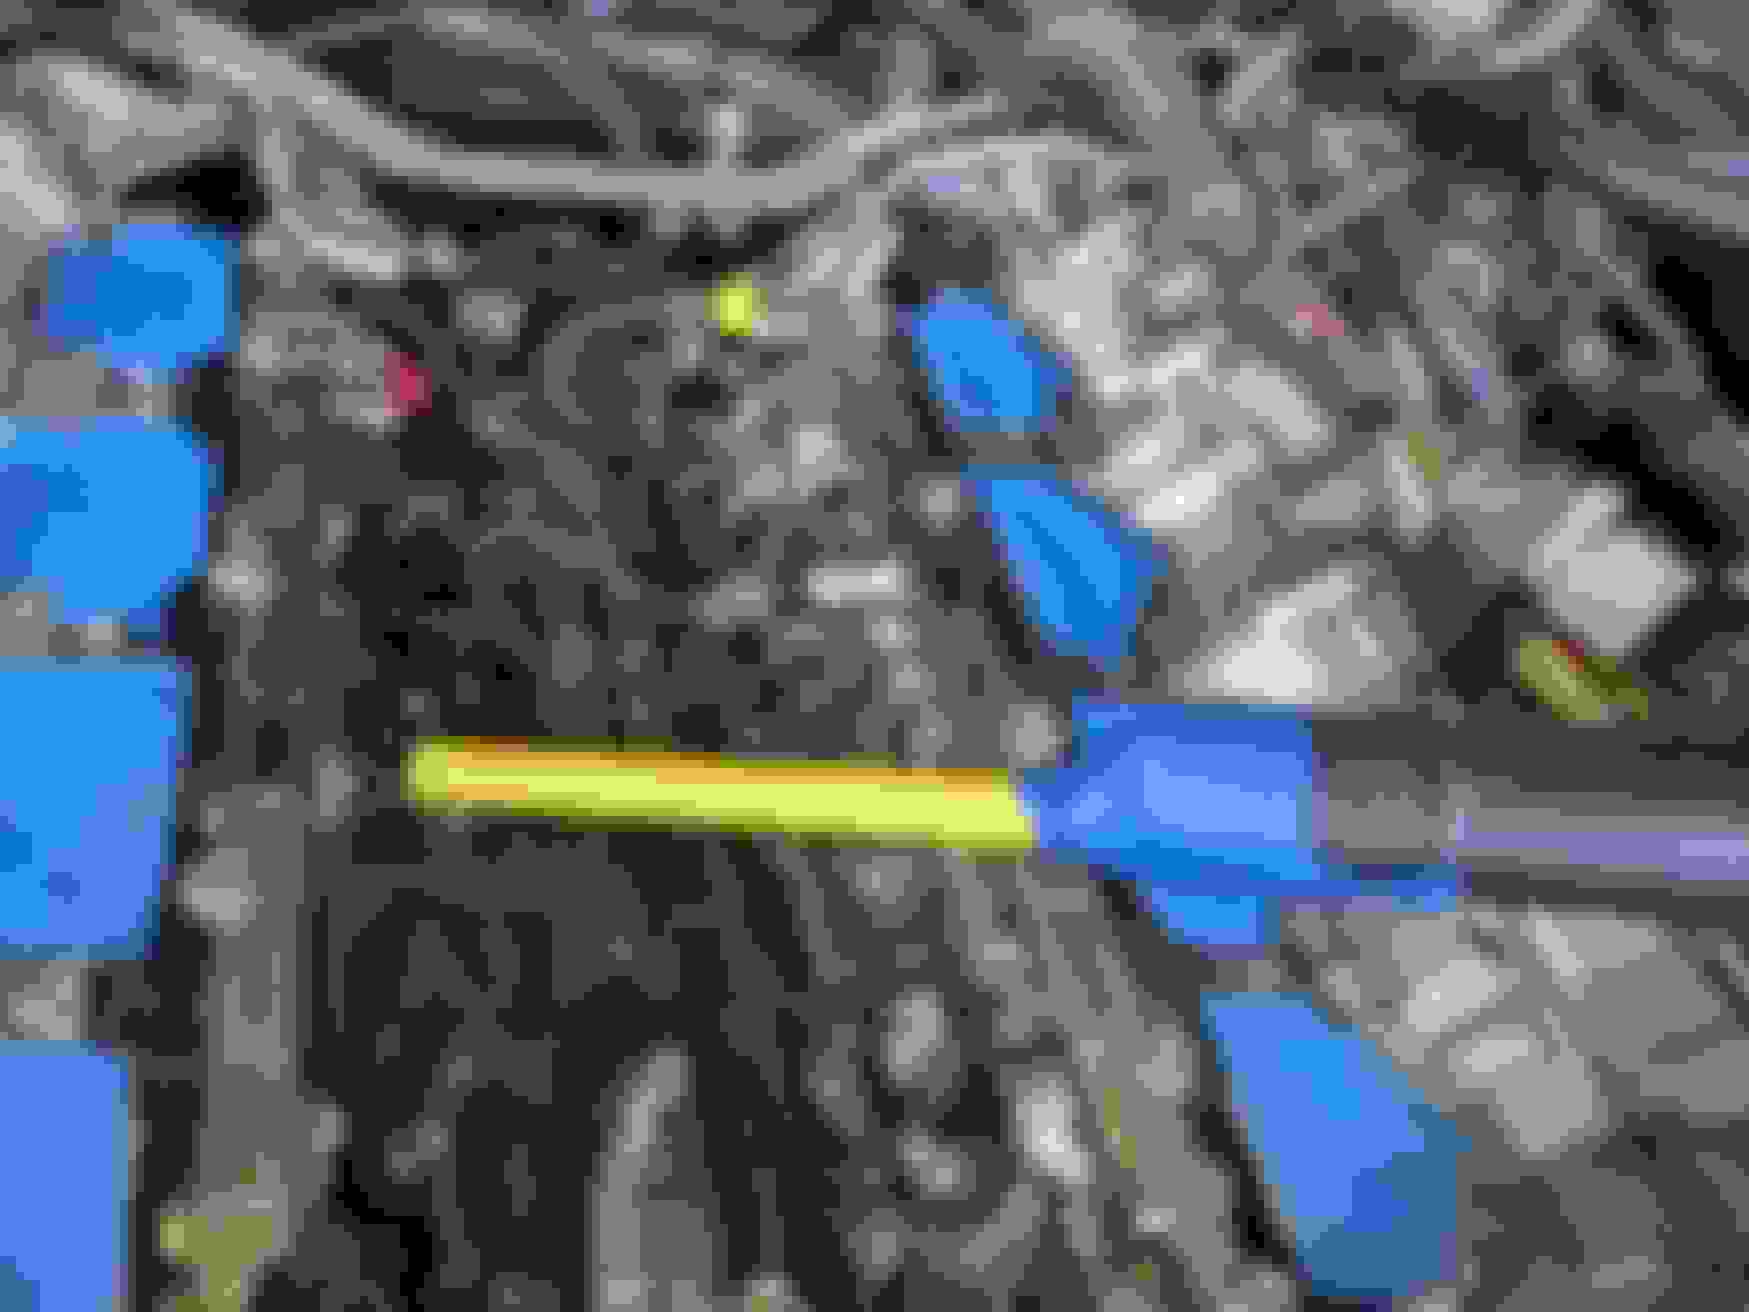
Here's an example of the grime that fell into some of the valve tops, ugg.
I took my shop vac and a Boba straw and was able to suck up most of the grime. My cyl 3 was open on the intake stroke so i have no idea what fell into the valve gaps. Luckily it wasn't near the really filthy parts but still the unknown is kinda a bummer. I swapped all the plugs out and tried to scope the cyl's at the same time but the angles made it inconclusive. All it takes is a single tiny grain of sand..
I then went through and put a few table spoons of SeaFoam into the valves and let it sit a few min to loosen up any of the stubborn pieces. They were then much easier to suck up using the boba straw method. I know that all the ports that were close are 100% clean of debris... but the 2 that were open on the intake stroke; I guess i'm just gunna have to cross my fingers..
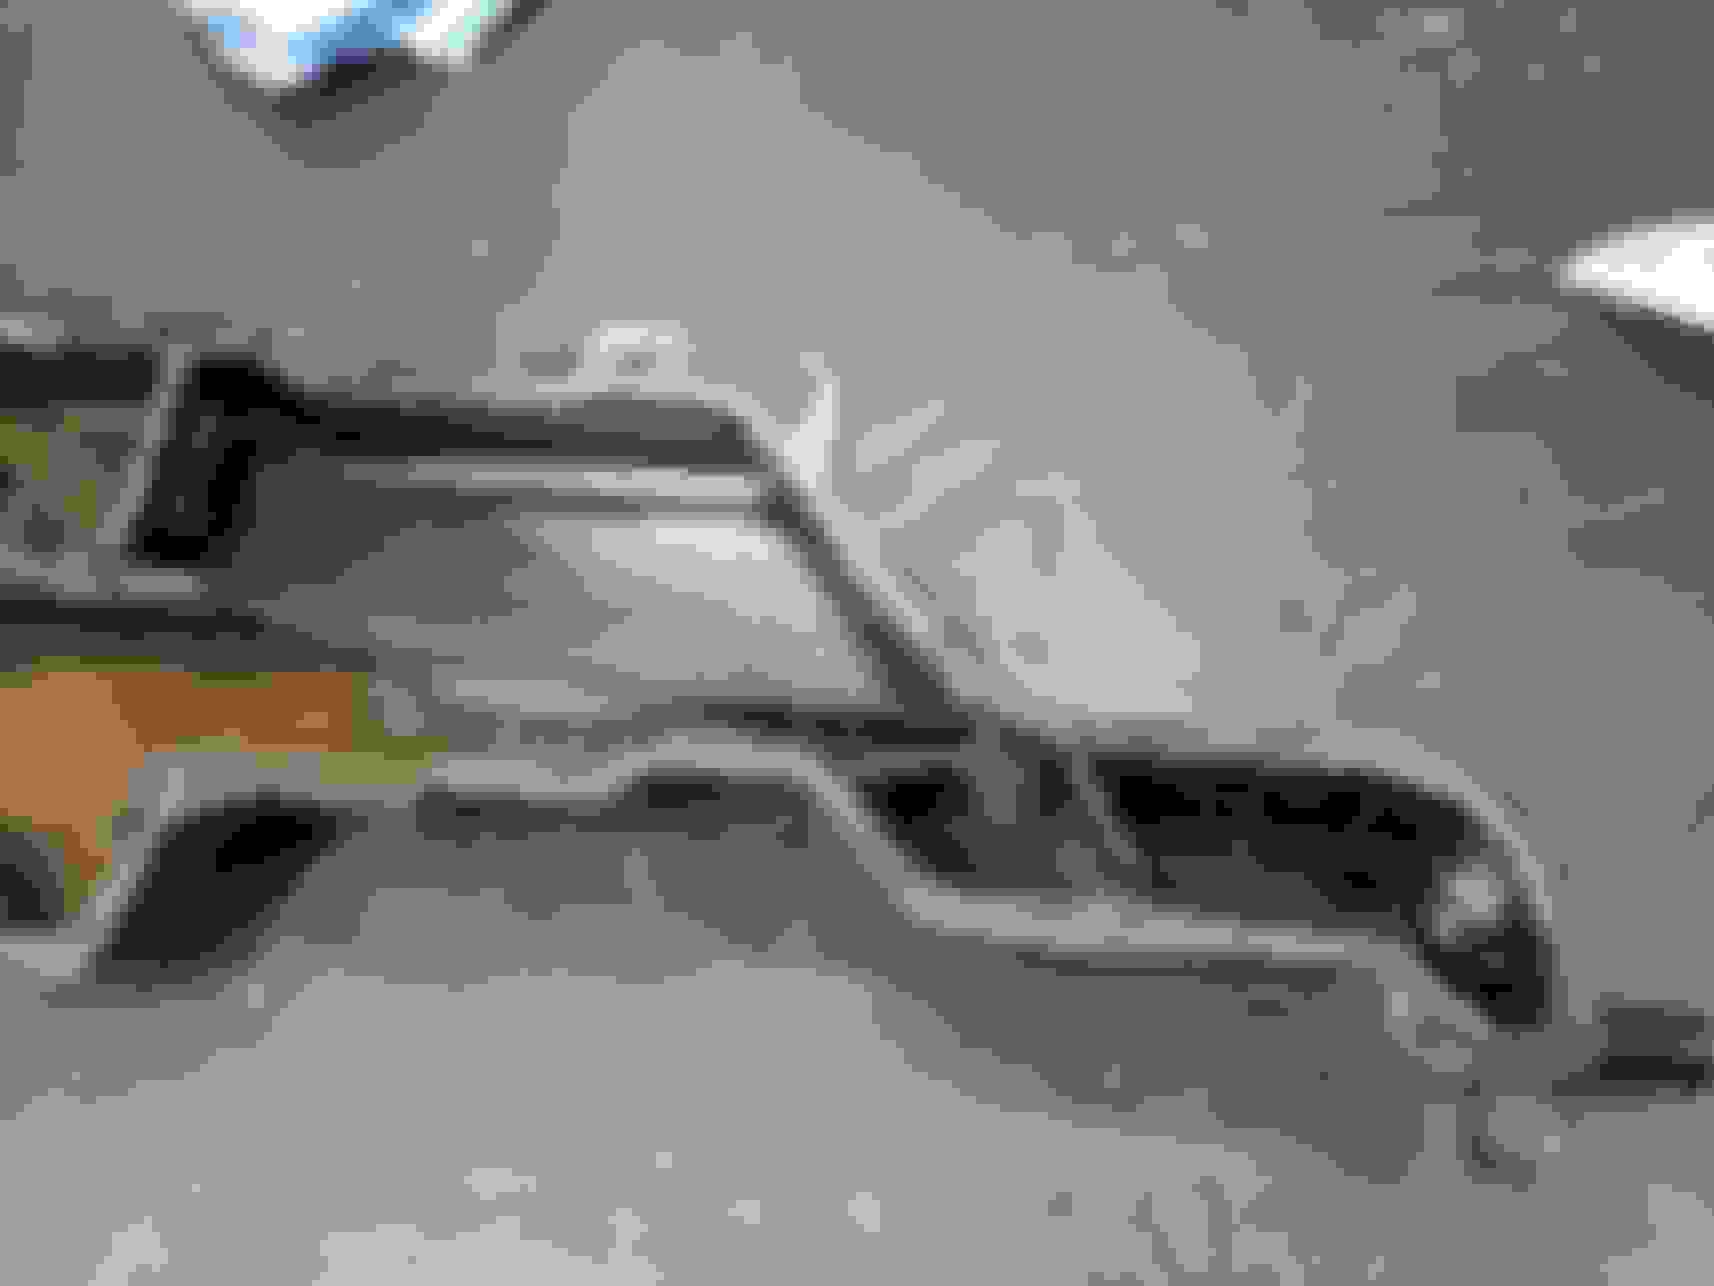
I then turned my attention to the intake manifold. I was cleaning the inside and realized while bolted together I wasn't able to get all the way back to clean all of the oil out. I also noticed that the factory didn't list a part number for the metal gasket separating the two halves so I would have to be careful when pulling it apart.
I'm glad I did, becasue there was some hidden cracks in the back housing grime.
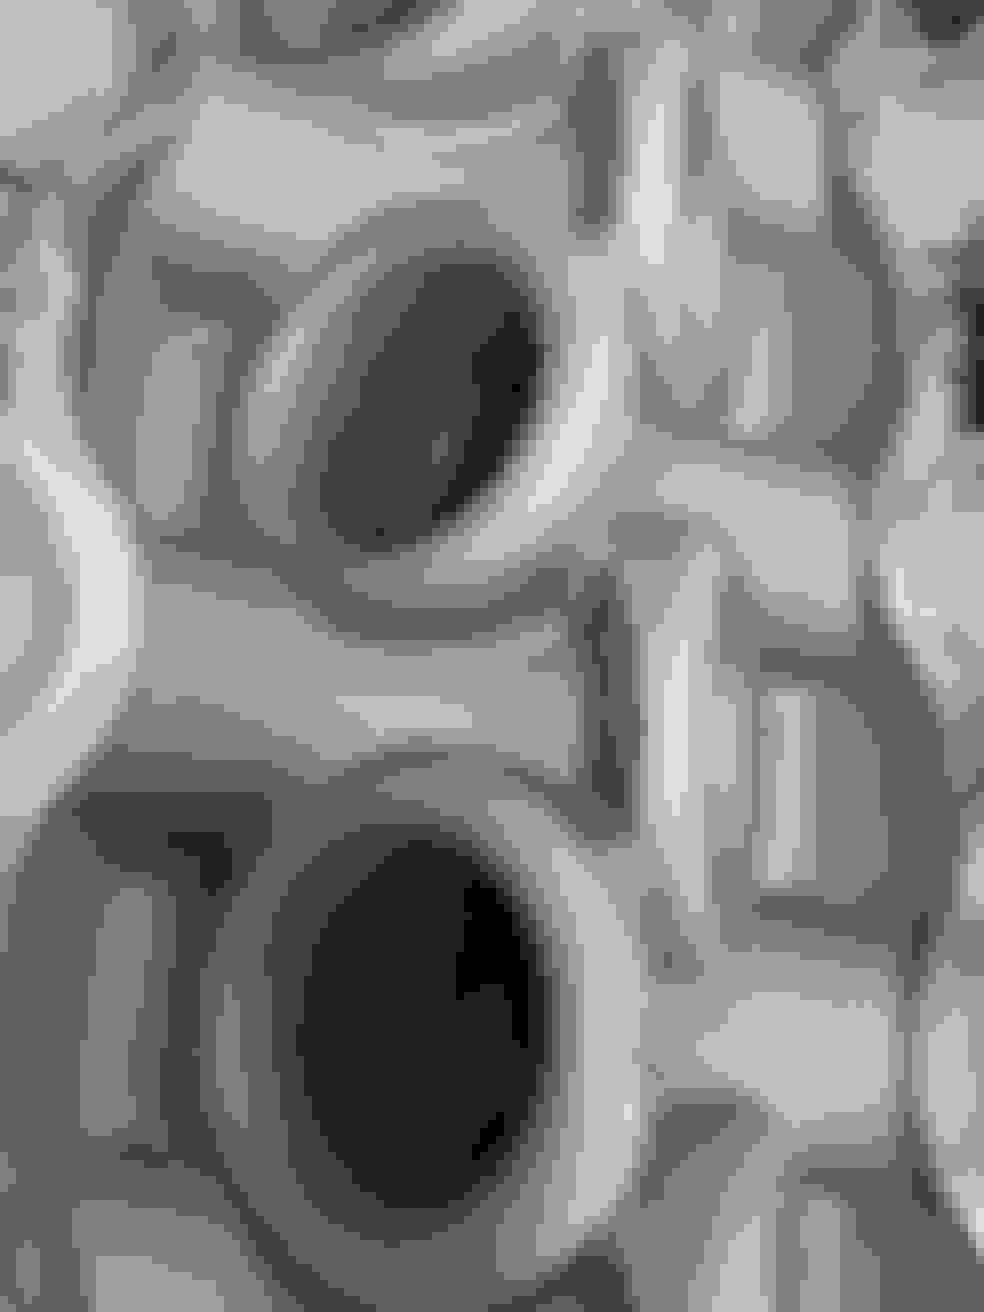
Once I had it apart I was shocked to see how poor the sand casting was on the intake runner trumpets...
Ridges are a huge no-no anywhere inside the manifold, much less on the trumpets themselves..
I made a call to my porting guy and asked if he'd be available to do a rush job over the weekend. Luckily he was game and I drove the intake manifold over Friday night. Sunday he called me and said it was all ready for pick up..
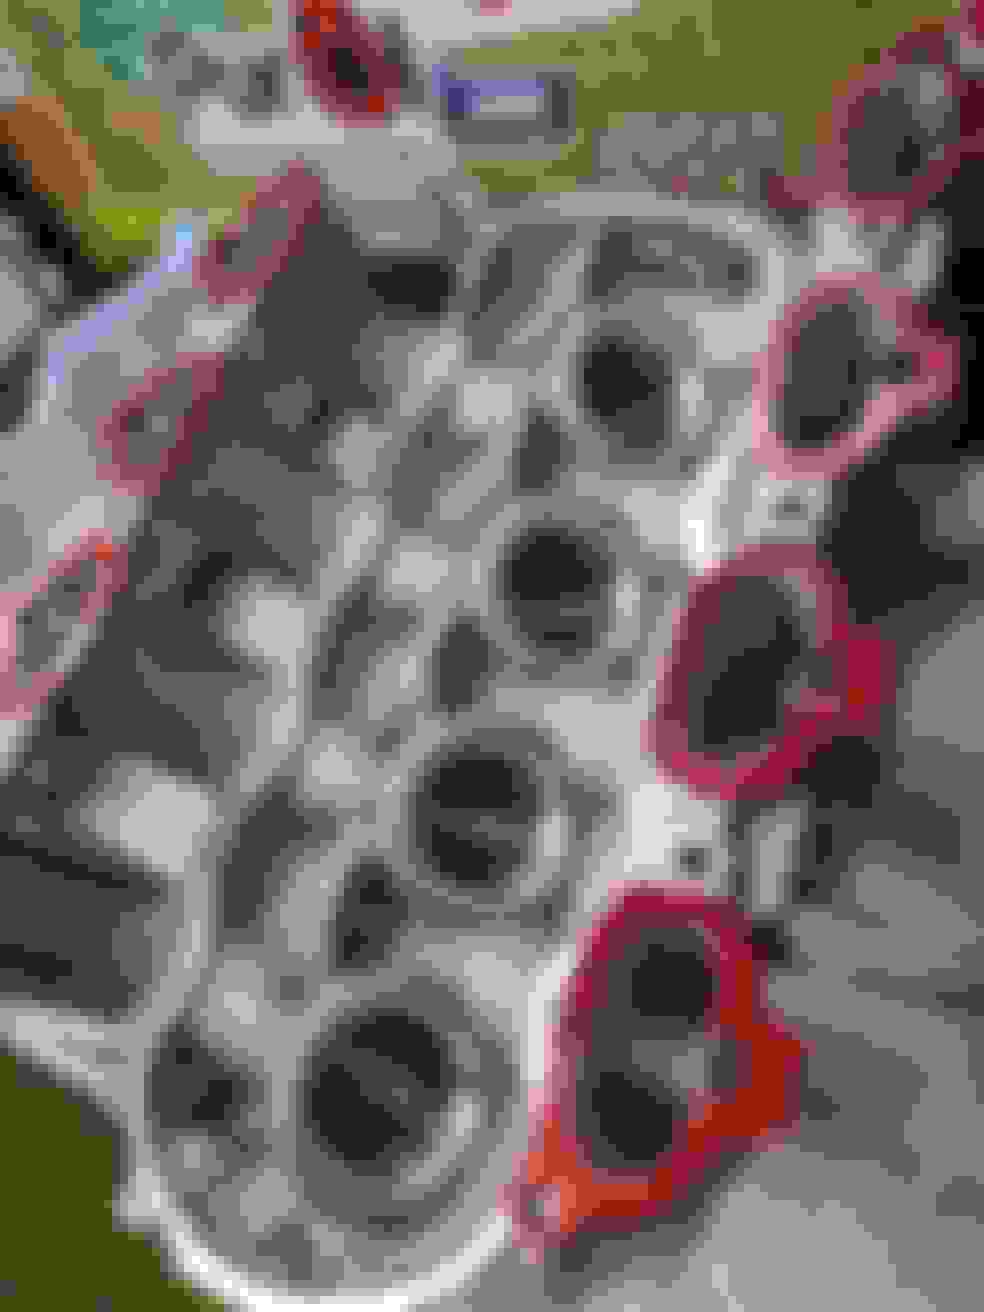
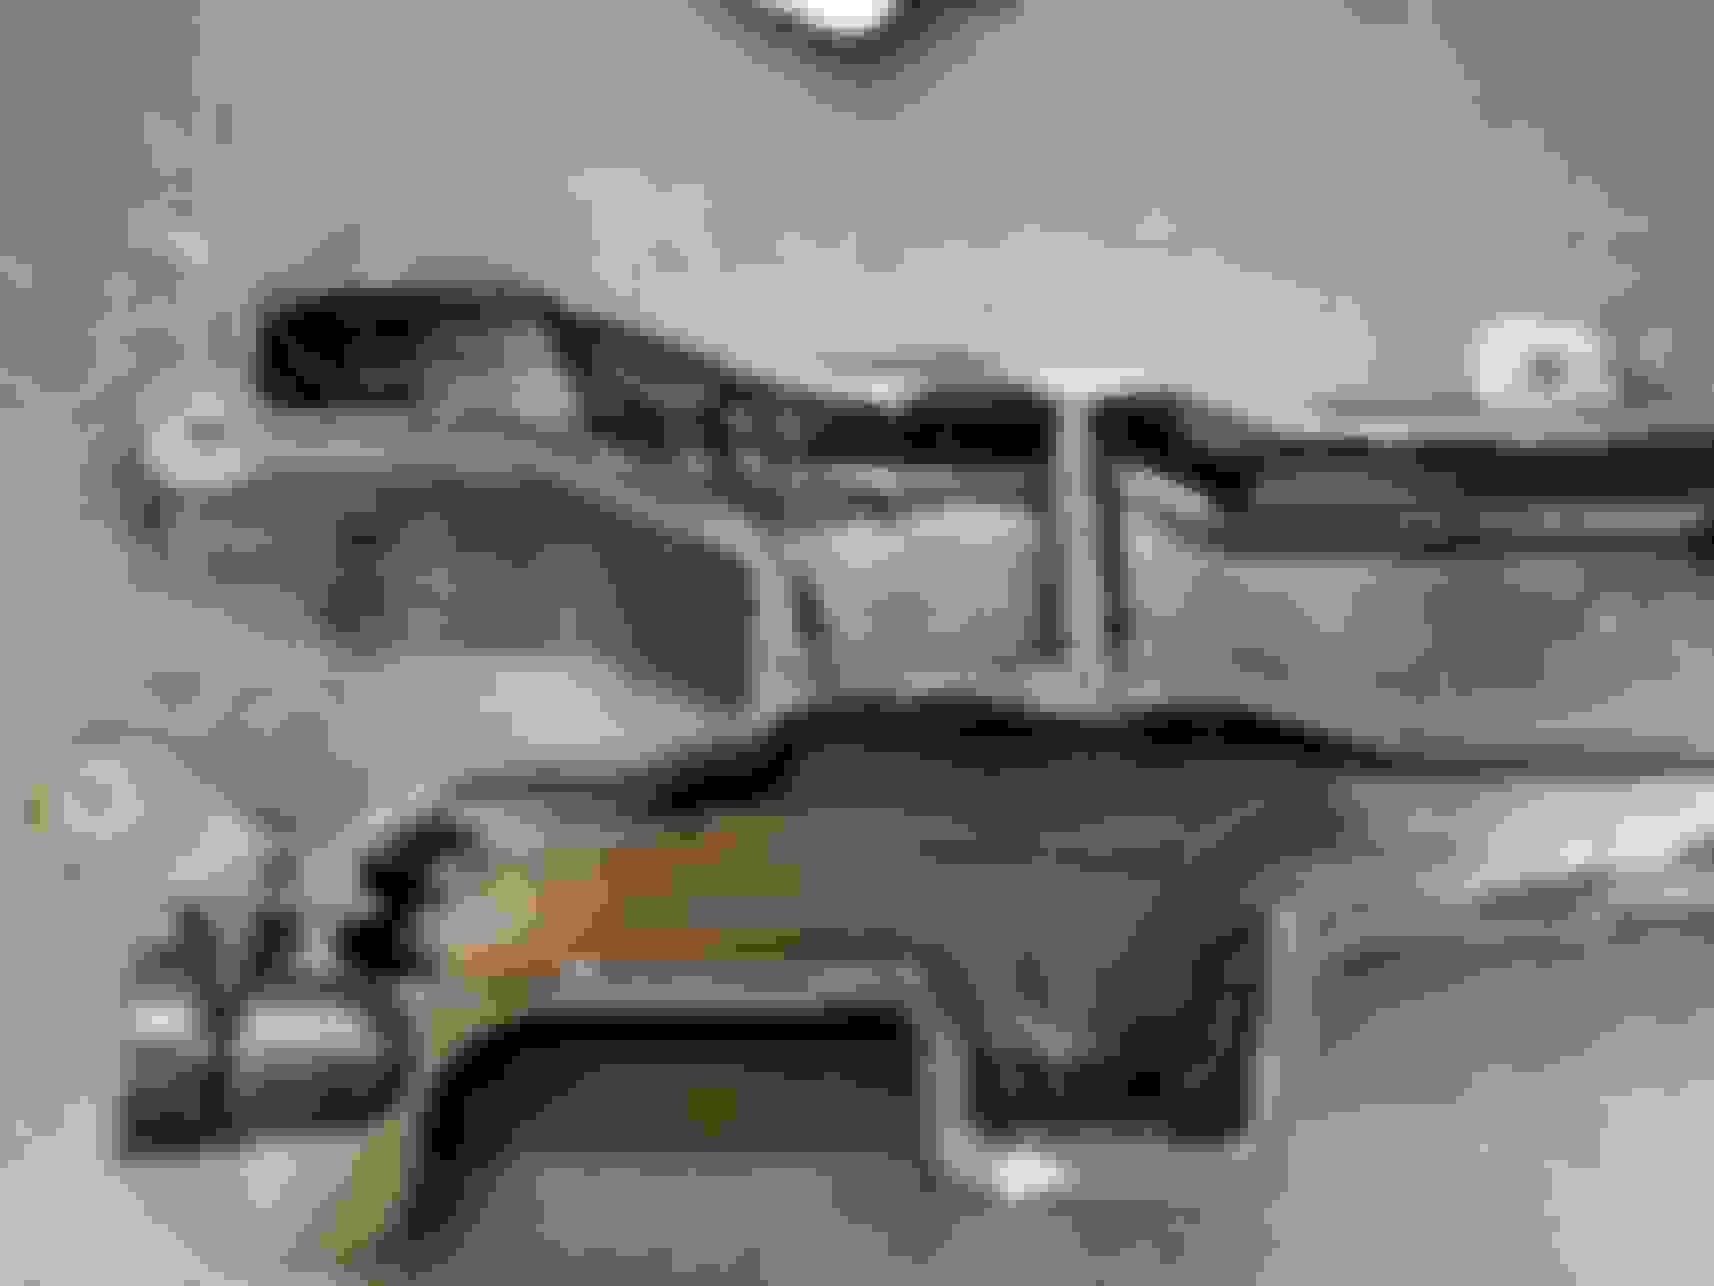
I can say the dude is a miracle worker. He was able to clean up all the burrs and edges on the trumpets and port the bells and runners.
4 stage grinding process always comes out looking great.
He also smoothed the casting defects on the trumpet edges too, according to his experience he said this alone will make a huge difference in flow.
Also worked on the transitions and did an slight cut and polish on the TB port.
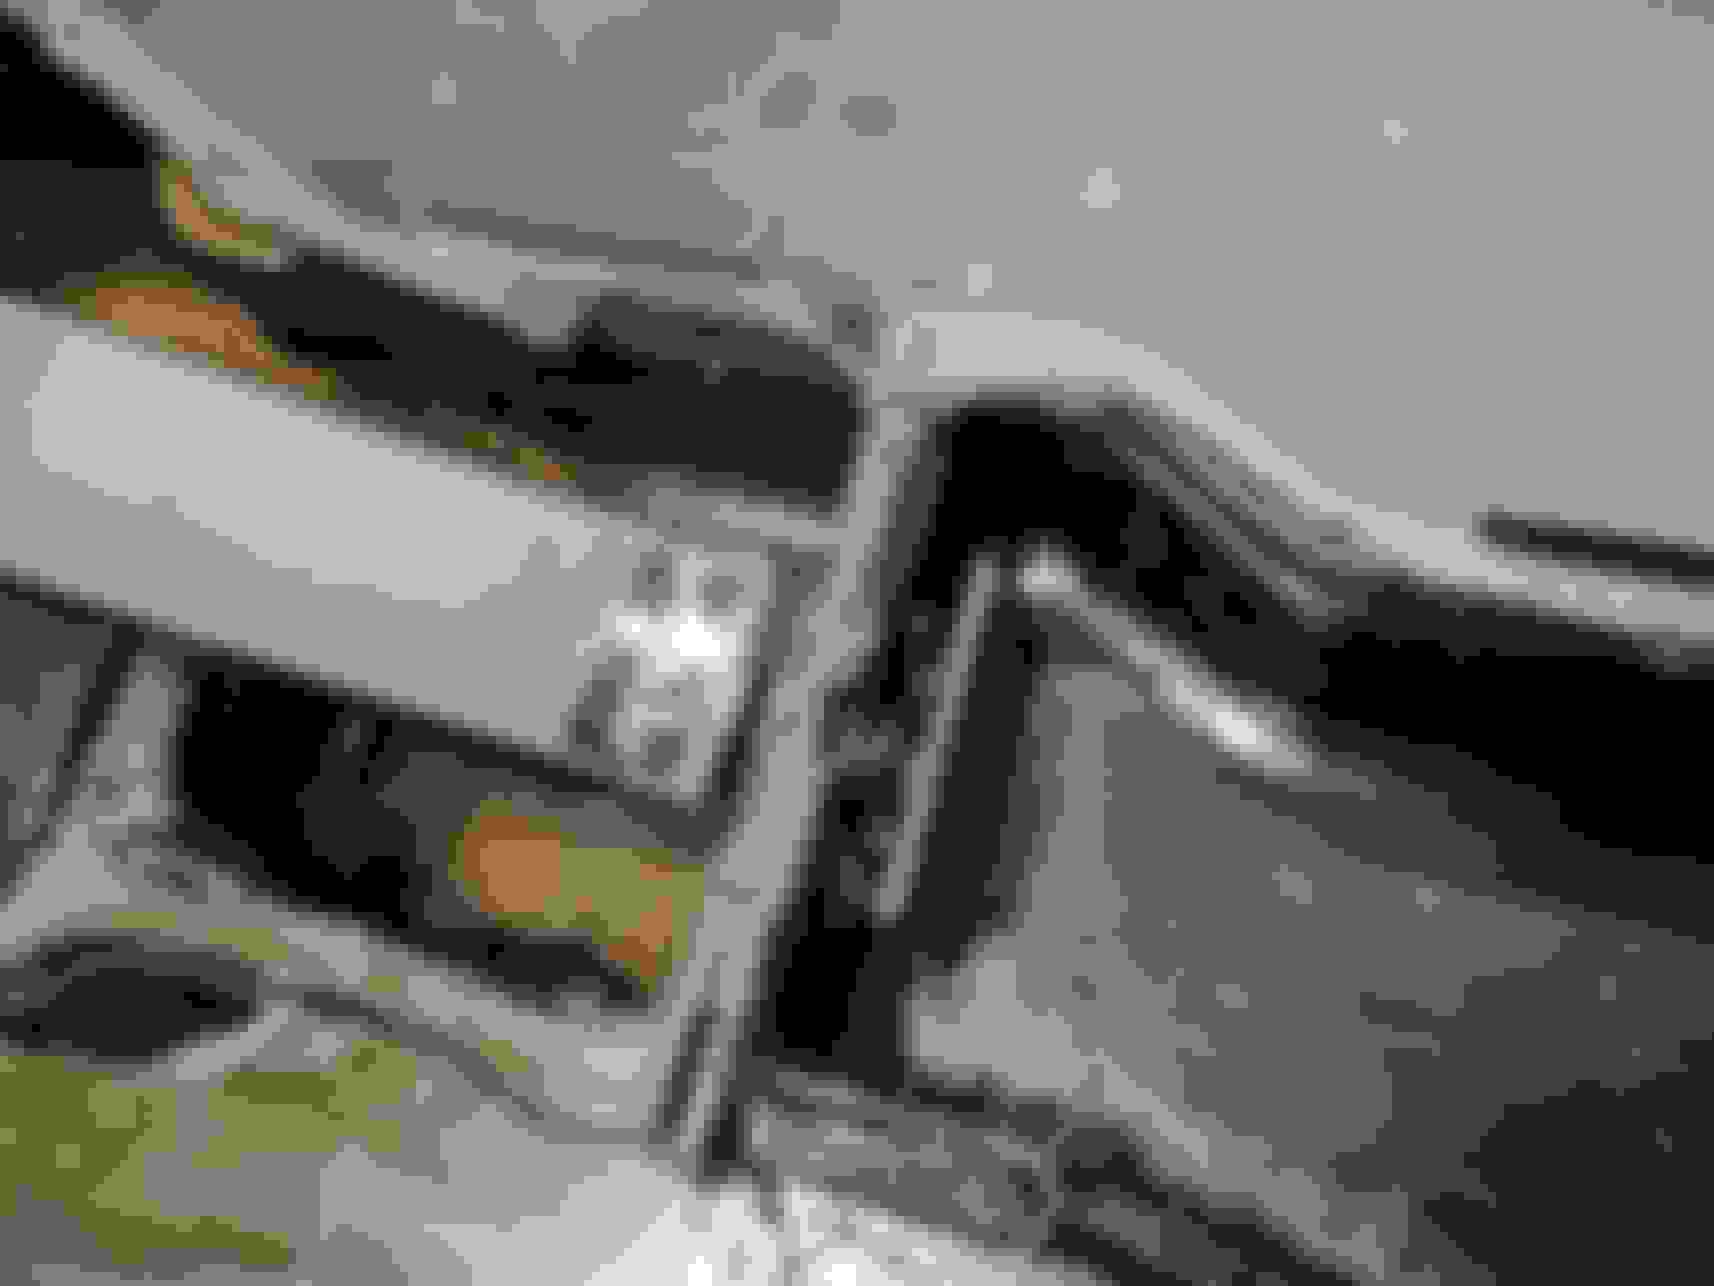
Here's some more gratuitous pictures..
Its post MAF so air volume wont change and the tune will still be good, it'll just allow more efficient flow into the cylinders. Port guy said he's sure the car will make more power now that this is all cleaned up, I believe him. At the very minimum it will change the high end and mid range tq curves for the better. I have been thinking about building another NA motor on the side for a while. If i did do it I would clean the bowls, up the compression and maybe bore size. I'd perhaps look into a larger TB size as well after seeing a few of them floating round. That's when a mod like this really starts to shine, so its nice to already have it done and in my back pocket.
For rejoining the two halves i used a thin smear of Hondabond on the metal gasket and tq'ed to 12ft lbs.
Now I just gotta put everything back together.
More than one person has ported the manifold. Results haven't been very impressive. Like the vast majority of porting success, the last 1/2" is where the power lies. So, if you got this done expecting much, don't be disappointed when it doesn't deliver. It really hasn't for anyone yet. Like your friend, I've spent a lot of time freezing my hands with a die grinder, and I've been frustrated and confused by how often results are counter intuitive, meaning something that looks really good flows like crap, and something that looks like NFW that could ever flow, tests out stupid good.
The evaporative emissions purge VSV and the ACIS VSV that operates the flap in the OEM airbox are the same. They are the only VSVs on the entire car. Connector is two pin. Part number is 90980-11156. Repair pin with wire is 82998-12440.
If you go to the EWD in TIS, find the part you want to connect, highlight it, then hit the orange icon on the bottom right, it will take you directly to the connector and give you everything you need to know about the connector and wire repair.
If you go to the EWD in TIS, find the part you want to connect, highlight it, then hit the orange icon on the bottom right, it will take you directly to the connector and give you everything you need to know about the connector and wire repair.
I was surprised to find that the '08 ISF EWD's are in PDF form. So the click and highlight doesn't work.
@ lobux- I agree on the porting. Not expecting night-and-day gains either. Hell, I hadn't even dyno'ed this car to see where I was baseline so there will be no way to tell. My experience with porting heads and IM's has always been better with the more accompanying mods I had to support the flow, in my ISF's case I have all the big ones except the head work. It was also a no brainier since it was already off the car and I didn't pay much for it. I can say for 100% certain that it will be better than stock. In the end even 10hp is around a 10th of a second at the racetracks I frequent, and in the $$=laptime equation this was pretty low hanging fruit.
FYI the 90980-11156 is also apparently the tail lamp connector on some Toyota's too. I found my replacement for pretty cheap becasue of this.
A deeper question is what would make more sense... figuring out a RCF/GSF 2UR swap into the ISF or piecing together a ISF gen motor with bumped compression and some mild head work. For ease of details (and becasue I already have the bolt on parts currently) i've recently been leaning towards a mild ISF motor build. Its no doubt a bit of a bummer that there is no real open tuning solutions other than RR's crack. Not that that's not an option but it throws a hurdle in tuning options and IMO tuning specifically for the build is where the potential lies if I were to put together an ISF gen 2UR. As far as the later gen motor you can pretty much just bolt them in stock and already gain like 65 HP. Curious to hear your guys thoughts on it.
I've been thinking about it a lot, but the complications of different fuel system and wiring would make it a significant modification. IS F has 4 lines running front to back, RC F and GS F have 3. The later model engine has the higher compression already. Getting one of those, cleaning up the factory heads and setting the deck height for proper squish would probably benefit, but it will be a lot of work getting it from where we sit today to fully running late model engine in our chassis. The easiest part is it bolts right in. After that, it gets challenging.
From what I have read, full tuning capability was cracked around 6 plus months ago, and that�s why you see company�s like Sector 7 in beta. If that�s accurate, a custom dyno tune should be an option in the near future.
The newer motor would be wonderful to have, and over the years would become a more common upgrade if someone can figure it all out considering that the fuel system is also superior.
So I tried 295/35/18 square in a052's- They are NOT true to size and run MUCH larger than a true 295. I did not want to raise the car any so it was a shot in the dark, I knew it would be close. The benefit of a larger diameter on track would be a 2% larger contact patch front and back in addition to the extra width. I was hoping this might be a solution to the peaky rear grip with the added benefit of more front rake.
Turns out they were juust to big. for my set up as-is.
The rear would probably work with a fender pull and tab delete or with the use of a +40 10 wide tire. The fronts were really really close too, especially to the castle nut on the upper camber arm.
As close as it was i would still run it, the problem turned out to be the front aluminum fender liners I had made. The car couldn't get full lock. It'd would probably be fine on track but would be kind of a pain around the pits.
Because I have an important event this coming Sat/Sun and id have no time to fiddle with tire fitment and ride height, I decided to split the difference in size between the old set of AR1's that I know work and the 295/35 A052. Right in the middle of the two size-wise is a 295/30 A052's. You can see the difference here between the 30 and 35. The 295/30 ar1 would be a slight step down and narrower than the smaller a052.
Once I had them mounted the car was drivable, I could get full lock to lock but would still rub on big dips and higher compression turns. I had a friend carefully pull and form both the fronts and the rears to fix this and make room for the eventual 295/35 retry on the rear
We were able to add another 1/2 inch of fender width by heat gunning and bending the plastic bumper out to meet the new fender width.
You can see we flappy wheeled down the tabs out back so there is nothing for the tire to come into contact with.
Fronts look way tougher with a bulged fender.
No more scuffing the tire over large bumps. After this coming weekends competition ill perhaps try and mount the 295/35's on the rear again and see what it'll gain me.
Out of curiosity I decided to cut open my old oil separator box to see what was inside. I took pictures of it for anyone that may be curious.
Took the ISF out to Chuckwalla for Narita Dogfight Attack Challenge yesterday. The track repave made driving the car at the limit interesting; decent grip online as it started to rubber in but was still really, really slick off line. I ended up getting a 3rd place podium finish out of 30 qualifiers and just about matched my other racecars PB that runs on full R-compound Hoosier A7. I was really stoked for that considering the ISF was on a 200tw tire. I really have to figure out a better cooling solution. Seems the Koyo cant keep up with the heat-load in the oem coolant volume, I need more coolant or another more efficient core. Also thinking about running another T-stat that opens at a lower temp to give the rad more time to cool, but that's not really a long term solution. Going to speak with some people about a custom radiator.
The biggest problem is to improve cooling efficiency you need to go taller, wider, or both. More area is what actually works. Thicker isn't much better for the effort that goes into it. Also, remove anything else in front of the radiator (like the transmission cooler) to help keep the air hitting the radiator as close to ambient as possible.
The biggest problem is to improve cooling efficiency you need to go taller, wider, or both. More area is what actually works. Thicker isn't much better for the effort that goes into it. Also, remove anything else in front of the radiator (like the transmission cooler) to help keep the air hitting the radiator as close to ambient as possible.
Not necessarily, not all cores are created equal. Efficiency is what is critical to manage the heat. A better core would do wonders in it's own right. Can look at FPI (fin per inch), and see that the higher end cores have a higher count, whereas others have less.
Could even do a smaller opening, but with a larger outlet, to help keep the efficiency in check too.
 09-21-20, 12:21 PM