
LS460 New owner, intro and build thread
 01-31-20, 12:23 PM
#16

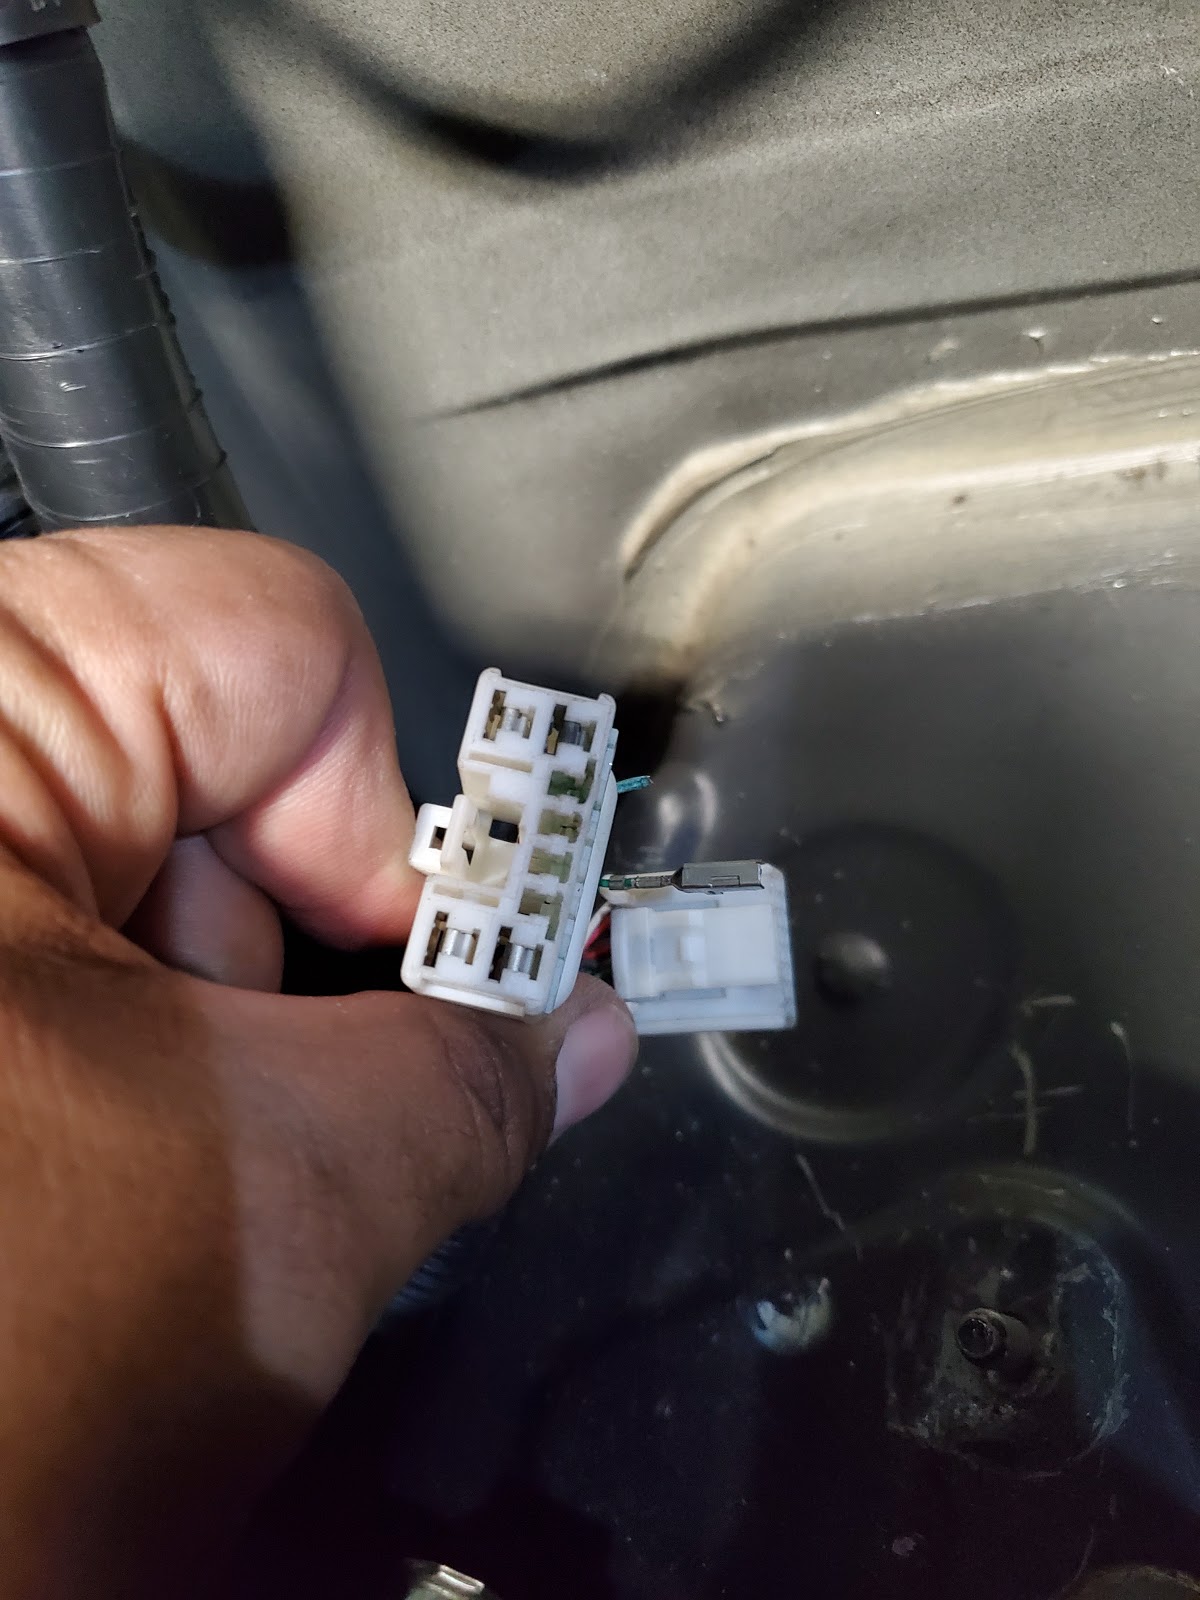
The LS460's automatic parking brake was not working since I bought the car. On inspection before I bought it I saw that there was some past water accumulation in the trunk and saw the residue on the parking brake ECU. When I hooked up my computer to the car and did a scan it showed no communication to the Parking Brake ECU. On opening up the ECU I could see corrosion etc which definitely showed signs of water damage. So worst case scenario I thought I needed a new ECU which can be found online for under $200 so ordered one after I bought the car. When the new ECU came in I swapped it out and did a reset memory and linear valve offset calibration on the ABS/VSC/TRC module and cleared the DTC. No error message on the dash yet but it takes a bit for everything to register at times. Next day I was driving and the same error message started coming up intermittently which was weird. I noticed that the colder it got the longer the error message would stay on and then it would go away for awhile. The parking braes would work though, if I switched the parking brakes on it would actuate and engage and when I switch it off I could hear it disengage. I went ahead and took the trunk apart again to look at the parking brake module again, the module looked fine but when I inspected the plug it showed signs of corrosion.
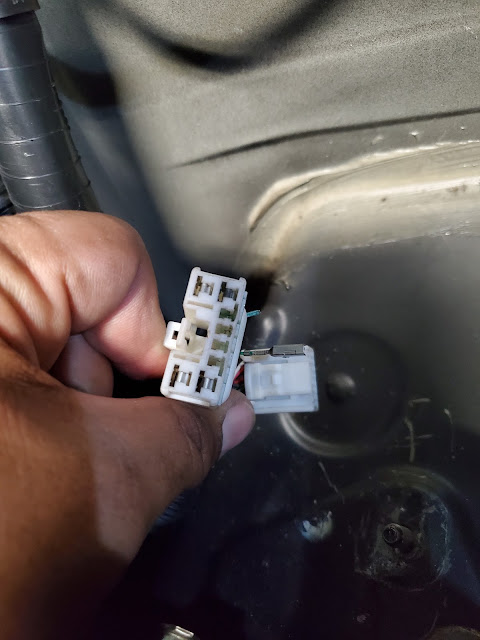


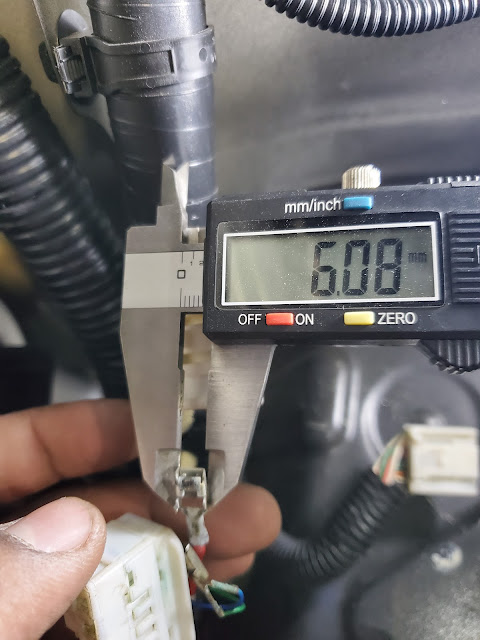
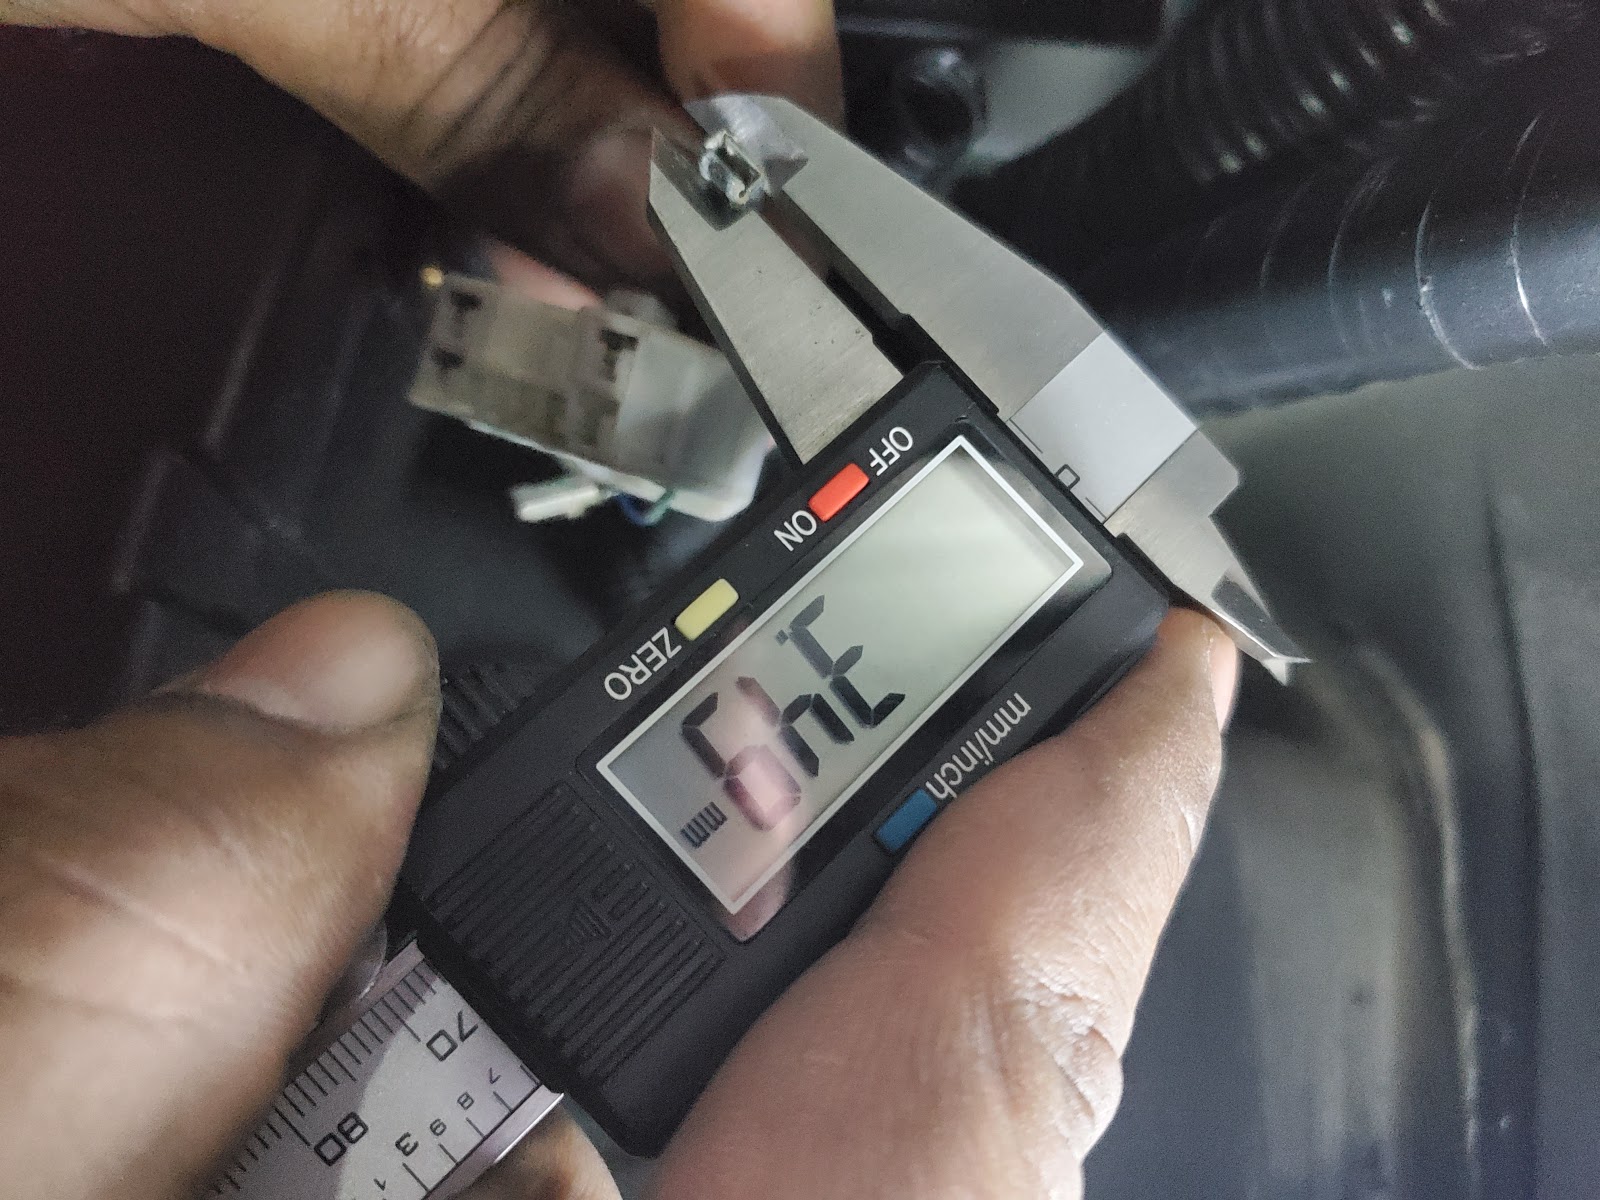
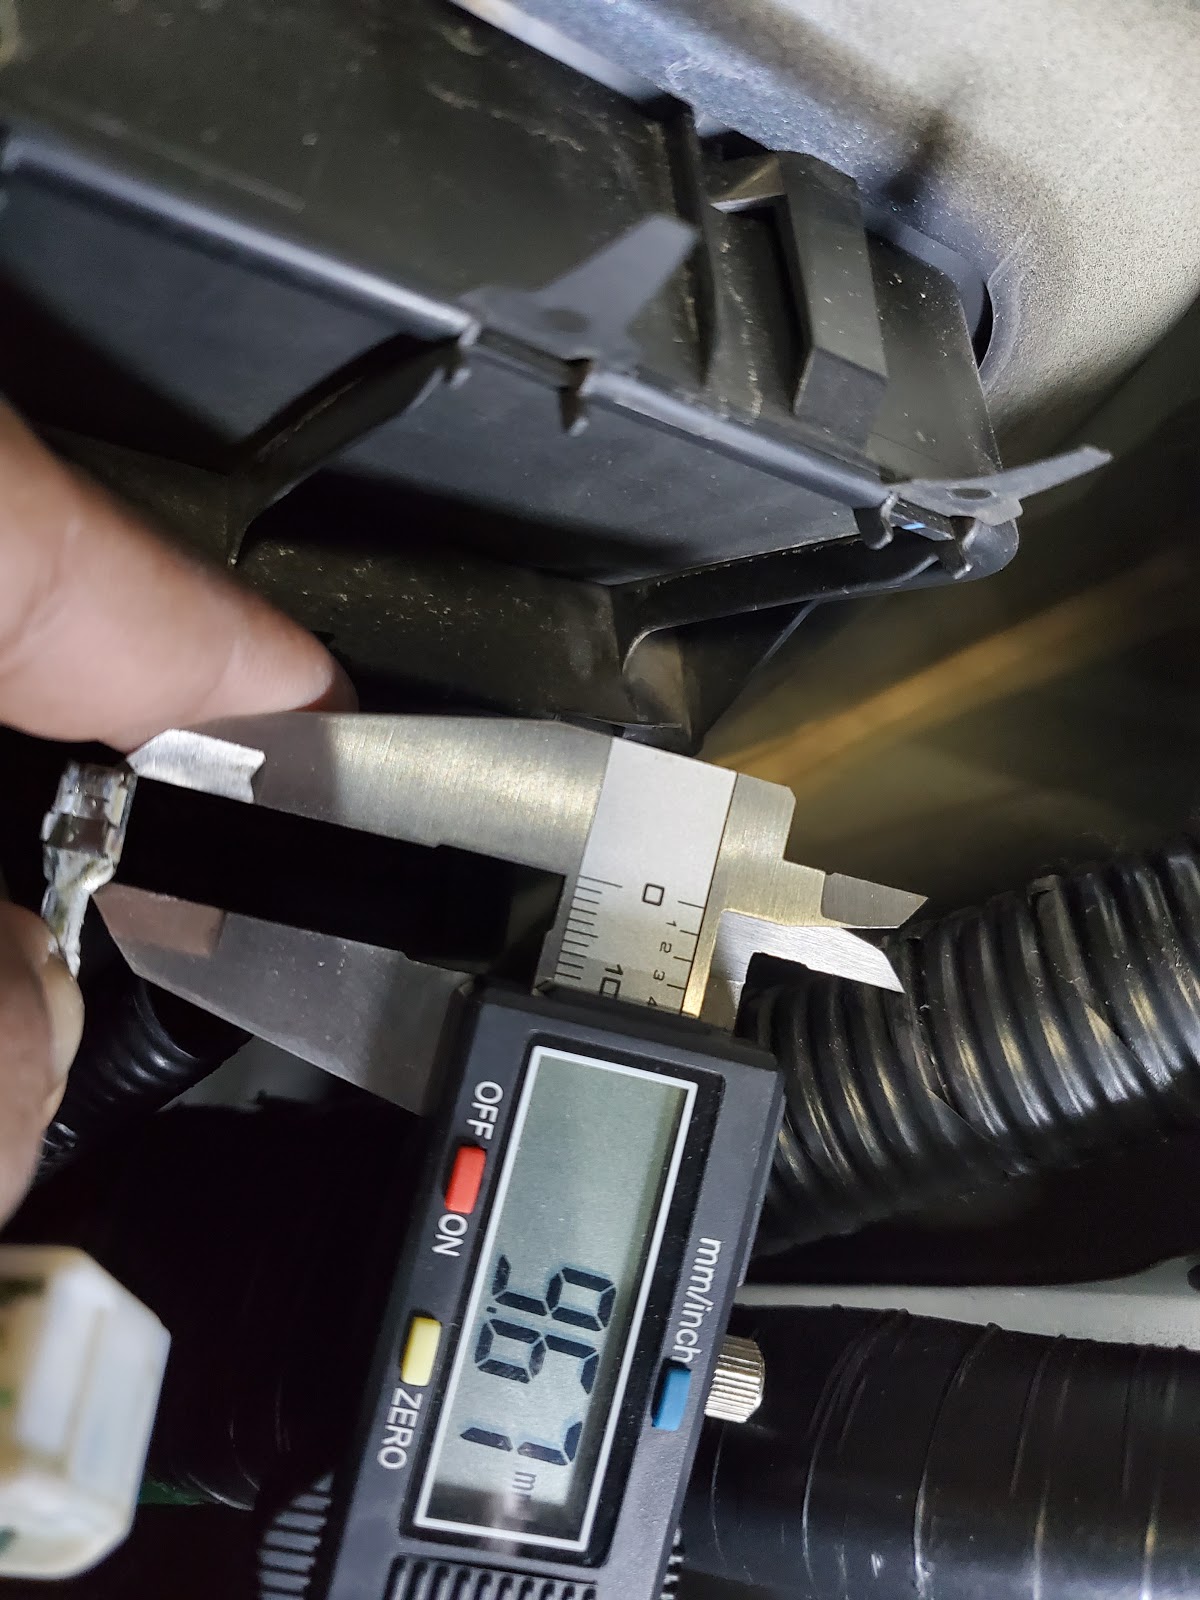
I took pictures for reference and then depinned the wires from the plug which revealed the problem. One of the plugs had a lot of corrosion and was barely making a connection. Once depinned the end pretty much fell off because it was that corroded.
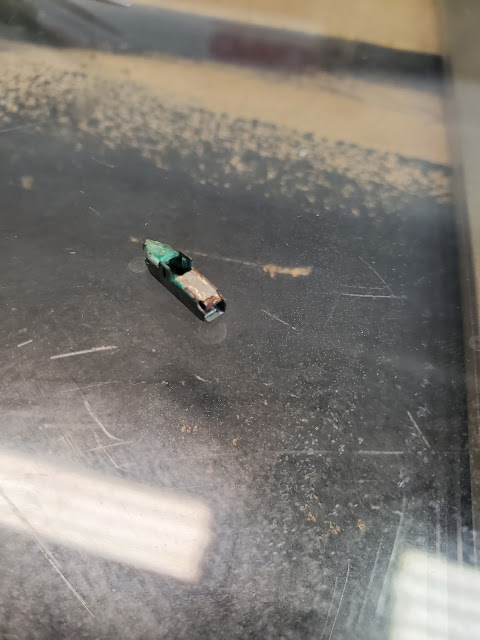
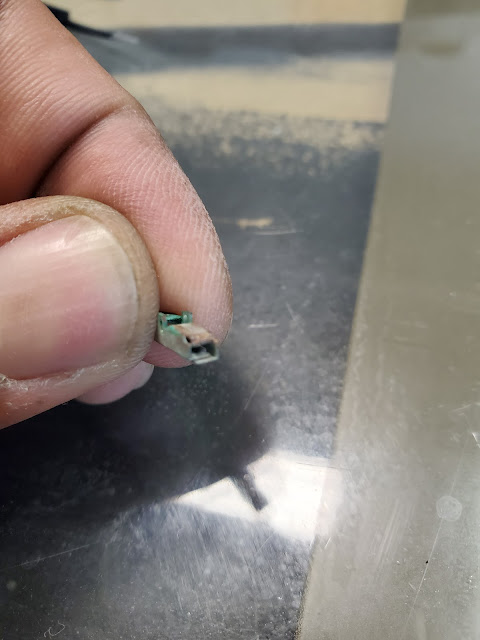
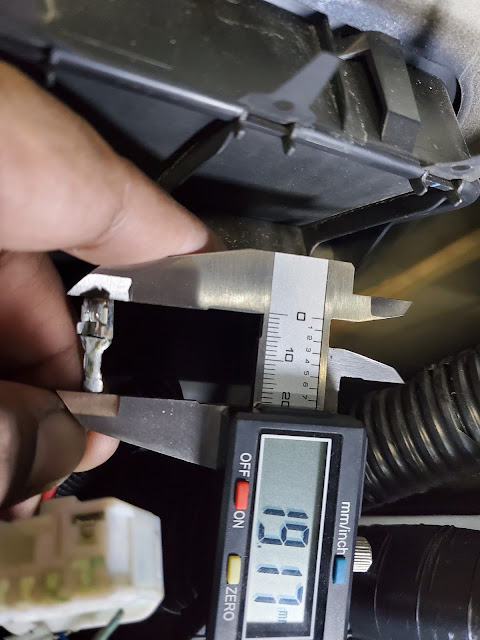
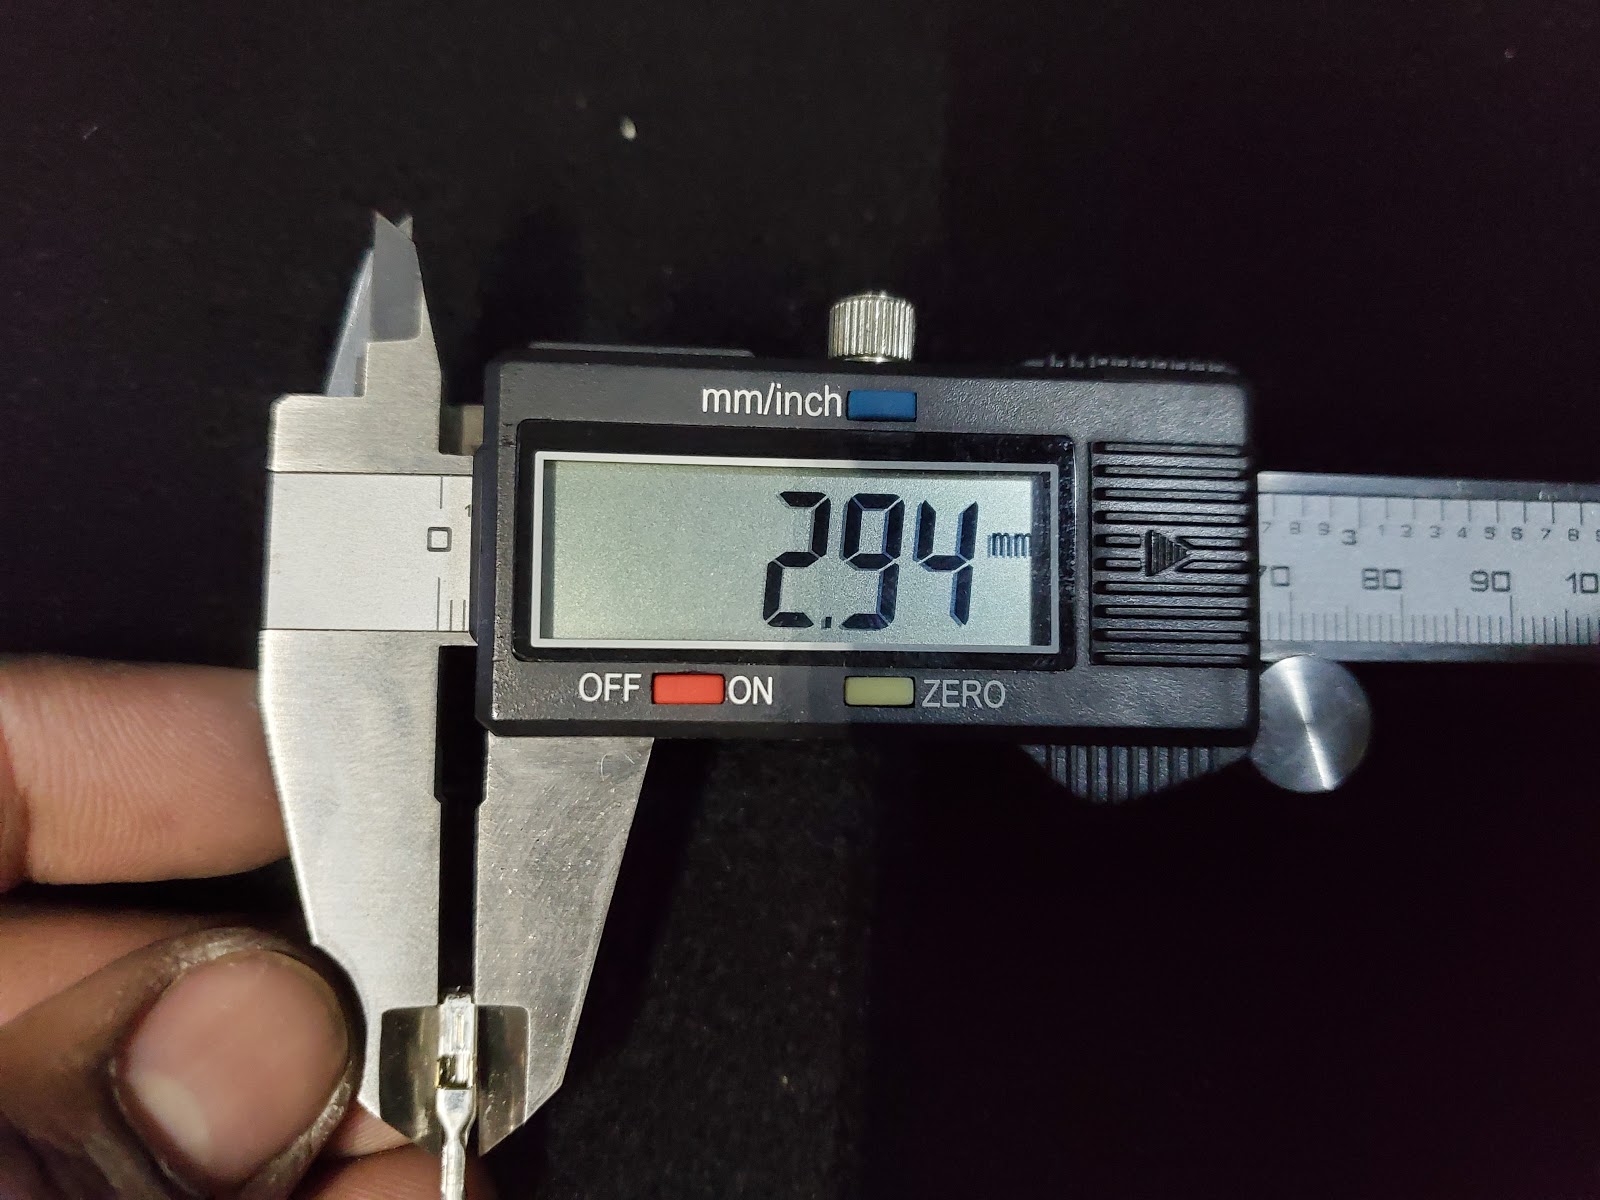
This kinda made sense to why temperature would affect the connectivity. Took some measurements on what pin to order to get this connected back up again, also went ahead and measured the power and ground plug as well just in case it needed it, for future reference.


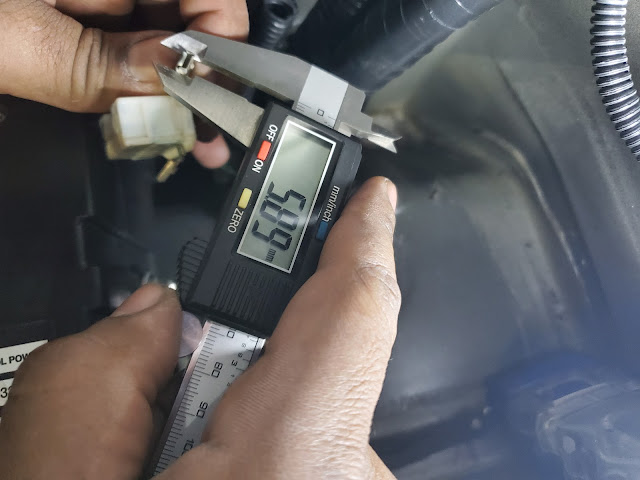


Ordered the right pins, cleaned up the plug and sprayed all the connectors down with electronic contact cleaner a thin coating of dielectric grease and put everything back together.
It's been a couple of weeks since this was done and no more error messages. Thanks for all the guys who reported about the parking brake issue and fixes, just thought I would add to that.


I took pictures for reference and then depinned the wires from the plug which revealed the problem. One of the plugs had a lot of corrosion and was barely making a connection. Once depinned the end pretty much fell off because it was that corroded.


This kinda made sense to why temperature would affect the connectivity. Took some measurements on what pin to order to get this connected back up again, also went ahead and measured the power and ground plug as well just in case it needed it, for future reference.


Ordered the right pins, cleaned up the plug and sprayed all the connectors down with electronic contact cleaner a thin coating of dielectric grease and put everything back together.
It's been a couple of weeks since this was done and no more error messages. Thanks for all the guys who reported about the parking brake issue and fixes, just thought I would add to that.
 02-17-20, 12:05 PM
#17
So most euro cars from the early 2000's and almost all new cars has this cool feature, you half tap or soft tap the left or right indicator and it flashes for a series of 3 to 5 flashes and automatically switches off. This in essence doesn't require you to engage the left or right indicator and then disengage it when merging etc. I know it's a trivial feature but I really liked it and well my car didn't have it.
After a little research etc I found a company called Diode Dynamics that makes a flasher relay that does that! This flasher relay also would fix the hyper blinking if you changed your turn signals etc to led's as well. Follow the link and read about everything it can do. I primarily just wanted the 'Smart Tap' feature, the others are a bonus in my eyes and I can think of a couple of mods that it will help me out in.
Anyway, I digress, onto the install:
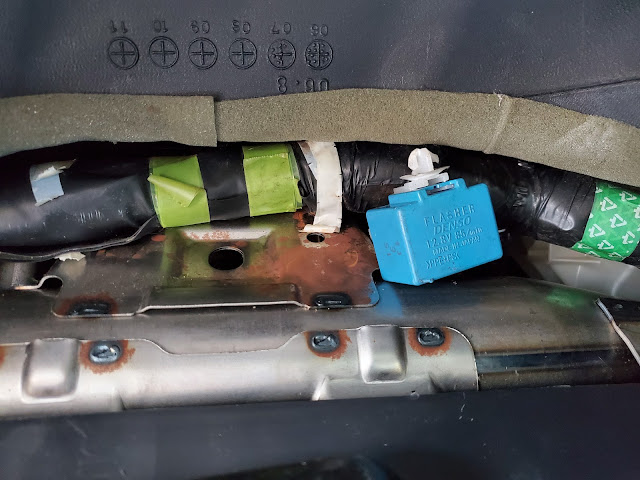
The flasher module sits behind the cluster on the upper portion of your dashboard as you will see in the pics below. You can go from under neath and contortion yourself into doing it that way but I'm not much of a contortionist so I chose to do it by taking out the cluster etc. To take the cluster out there are two plastic screws you have to remove to remove the trim, and then there are four bolts that hold the cluster in the dash. I chose not to disconnect the cluster but you can do so at your own risk. There was enough slack in the wiring for the cluster to come out and sit on top of the dashboard.

The picture above is what you will with the cluster out of the way. Now if you look you will see a blue colored plastic cover. This is the flasher relay!

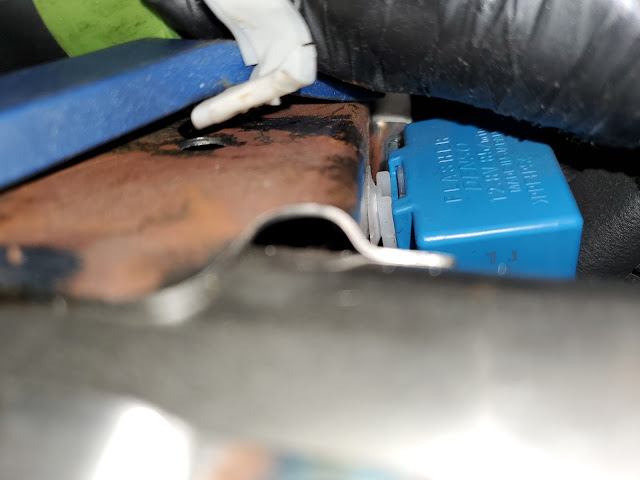
It is held in by a plastic clip to the frame. Use a panel popper and you can pop it off the frame. I also used a small plastic pry bar to actually wedge between the wiring and the frame so that I can sneak the flasher relay between the wiring harness and the frame and can access the wiring and plug it is connected to as shown in the pics below.

Unplug!
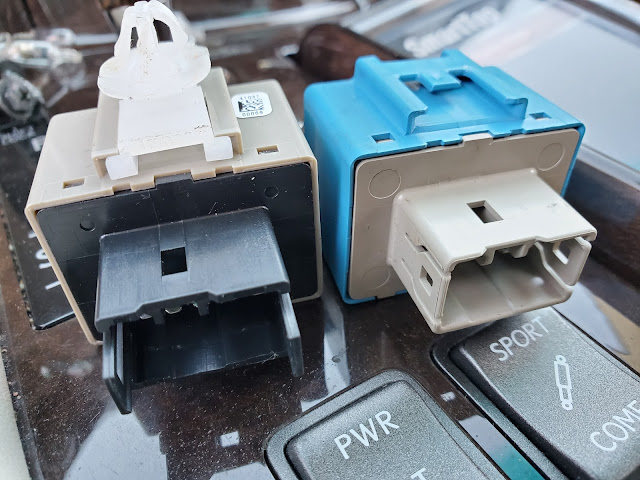
I transferred the clip across to the smart tap flasher and installed it. Install was reverse of disassembly.
Video showing working smart tap indicators.
After a little research etc I found a company called Diode Dynamics that makes a flasher relay that does that! This flasher relay also would fix the hyper blinking if you changed your turn signals etc to led's as well. Follow the link and read about everything it can do. I primarily just wanted the 'Smart Tap' feature, the others are a bonus in my eyes and I can think of a couple of mods that it will help me out in.
Anyway, I digress, onto the install:
The flasher module sits behind the cluster on the upper portion of your dashboard as you will see in the pics below. You can go from under neath and contortion yourself into doing it that way but I'm not much of a contortionist so I chose to do it by taking out the cluster etc. To take the cluster out there are two plastic screws you have to remove to remove the trim, and then there are four bolts that hold the cluster in the dash. I chose not to disconnect the cluster but you can do so at your own risk. There was enough slack in the wiring for the cluster to come out and sit on top of the dashboard.

The picture above is what you will with the cluster out of the way. Now if you look you will see a blue colored plastic cover. This is the flasher relay!


It is held in by a plastic clip to the frame. Use a panel popper and you can pop it off the frame. I also used a small plastic pry bar to actually wedge between the wiring and the frame so that I can sneak the flasher relay between the wiring harness and the frame and can access the wiring and plug it is connected to as shown in the pics below.


Unplug!

I transferred the clip across to the smart tap flasher and installed it. Install was reverse of disassembly.
Video showing working smart tap indicators.
05-15-20, 08:36 AM
#18
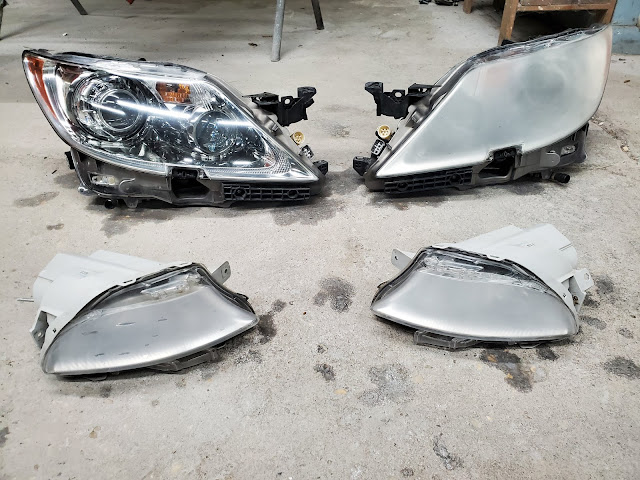
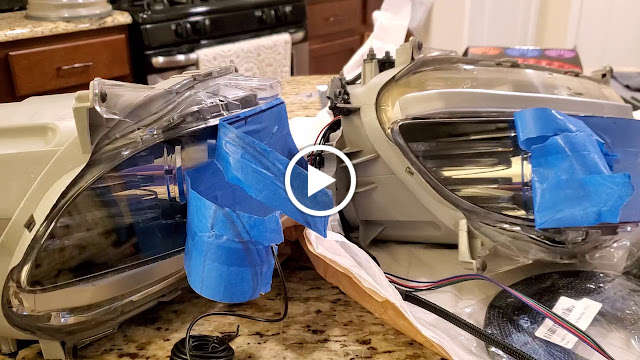
The headlights and fog lights on the car were not bad by any means but it definitely did show signs of age a little bit of yellowing etc but nothing that couldn't be fixed. The fog lights I think took the most beating because of how low it is and prone to pitting etc by rocks and other debris from the road.
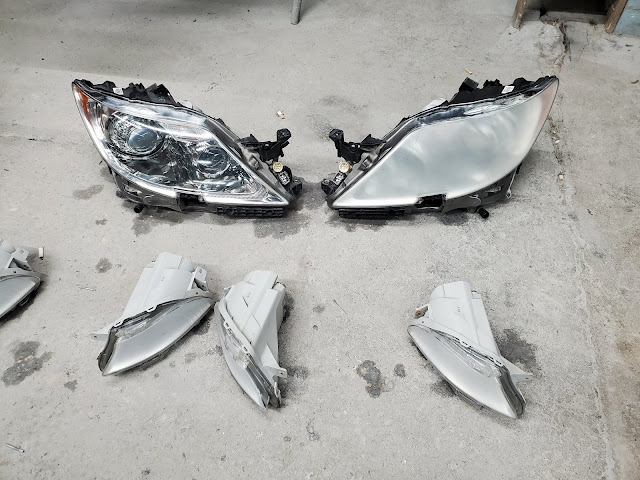
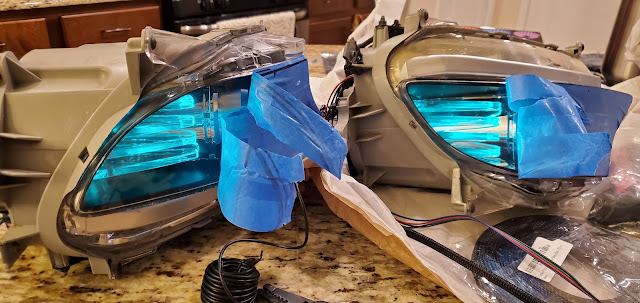
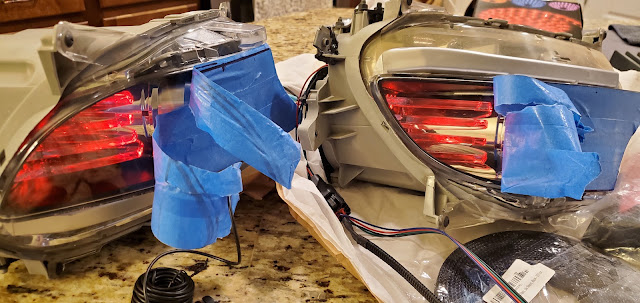
Sanded them all down starting at 1000 grit and worked my way down according to how much of the damage could be fixed and then worked my way up. On the headlights I ended up going to 800 grit and then moving up to 1000, 1200, 1600, 2000, 3000 and then polishing it. The headlight on the left was my first one and did all the steps to see the results before I did the other one. The fog lights I ended up having to go from 600, 800, 1000, 1200, 1600, 2000 and then 3000. I used sanding disks on a DA and by hand only in areas where the DA couldn't be maneuvered to so it went by fairly quickly.


After all the sanding, all the housings were taped up and prepped for some 2K PPG clear. Headlights and fog lights cleared and looking fresh.
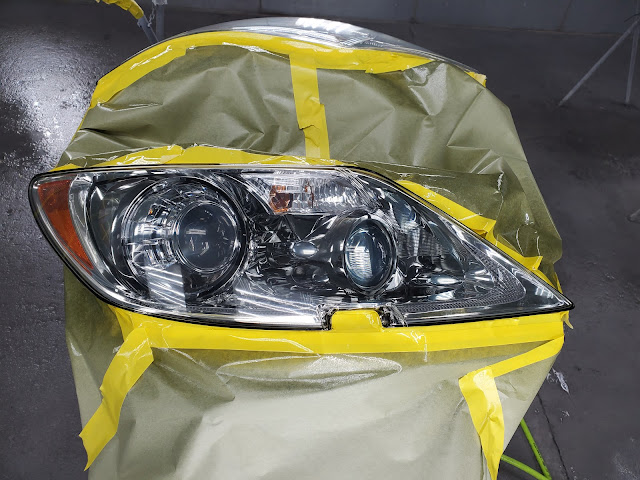

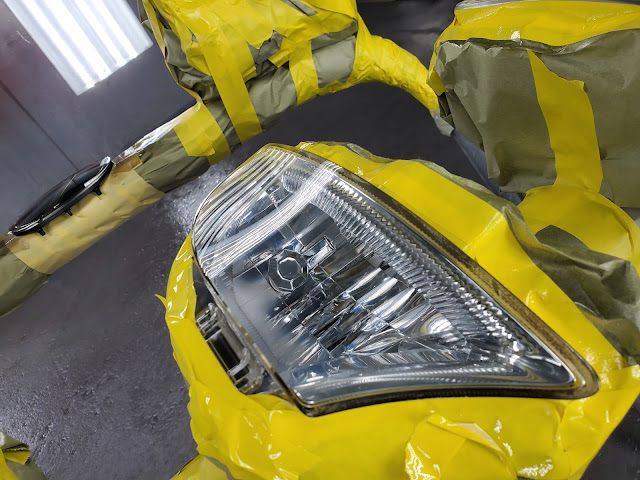

Untaped everything and carefully two hours after it was cleared and then I let it cure completely for 24 hours and then back on the car it went.
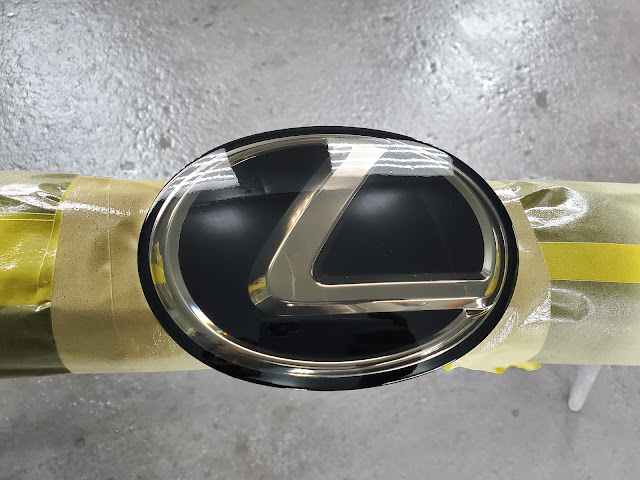
Since everything was getting cleared I went ahead and sanded down the front Lexus emblem as well to get rid of the pitting and fading it had. Had to be careful to not take too much off because the radar cruise sits behind this emblem and is calibrated for it. I also wanted to give the emblem a little smoked effect so mixed a couple of drops of black to the clear and it was cleared.

I want to smoke the grill out now too but the chrome plating of sorts on the grill isn't too susceptible to clear sticking on it so I figured I would try some headlight tinting film to achieve the same outcome. Ordered some Luxe tint film and went about trying to put my vision together.
Started by dismantling the inner grill from the chrome surround, then cleaning everything and degreasing the chrome surround with IPA. Also the inner grill was cleaned and I spayed it down with 303 just to condition the plastic.
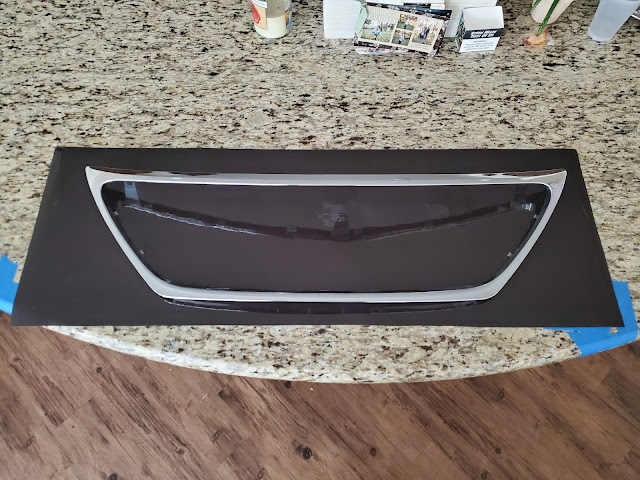
With the chrome surround all prepped and dry started off wrapping it. Patience and a little bit of time and planning can help a long ways here. The film was warmed up with a heat gun and tucked behind to reduce the chance of edges lifting . Overall I think the wrap came out pretty nicely.
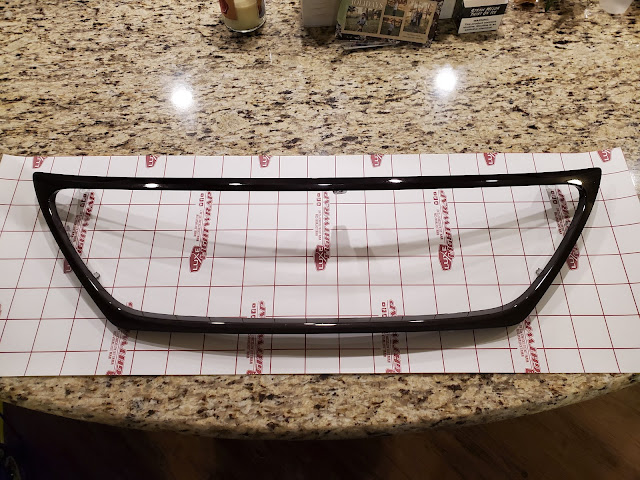

Reassembled everything and it looked good in my opinion.


Put it back on the car.

So once it was on the car I don't know if I like it as much. The grill kinda blends in with the paint but it stands out too the shade is a little darker than what I was imagining and I'm not sure if I'm completely happy with it. I had ordered the Luxe film in gloss mid smoke and I think it makes it too dark to where it doesn't really give it that mid black chrome look that I wanted like I got from the emblem. I think at a future date I might order some of the gloss mild smoke film and try that to see if I like that better. Leaving it on for now to see how the elements affect the film staying on etc and see if there are any peeling or any other issues.

Sanded them all down starting at 1000 grit and worked my way down according to how much of the damage could be fixed and then worked my way up. On the headlights I ended up going to 800 grit and then moving up to 1000, 1200, 1600, 2000, 3000 and then polishing it. The headlight on the left was my first one and did all the steps to see the results before I did the other one. The fog lights I ended up having to go from 600, 800, 1000, 1200, 1600, 2000 and then 3000. I used sanding disks on a DA and by hand only in areas where the DA couldn't be maneuvered to so it went by fairly quickly.


After all the sanding, all the housings were taped up and prepped for some 2K PPG clear. Headlights and fog lights cleared and looking fresh.


Untaped everything and carefully two hours after it was cleared and then I let it cure completely for 24 hours and then back on the car it went.
Since everything was getting cleared I went ahead and sanded down the front Lexus emblem as well to get rid of the pitting and fading it had. Had to be careful to not take too much off because the radar cruise sits behind this emblem and is calibrated for it. I also wanted to give the emblem a little smoked effect so mixed a couple of drops of black to the clear and it was cleared.


I want to smoke the grill out now too but the chrome plating of sorts on the grill isn't too susceptible to clear sticking on it so I figured I would try some headlight tinting film to achieve the same outcome. Ordered some Luxe tint film and went about trying to put my vision together.
Started by dismantling the inner grill from the chrome surround, then cleaning everything and degreasing the chrome surround with IPA. Also the inner grill was cleaned and I spayed it down with 303 just to condition the plastic.

With the chrome surround all prepped and dry started off wrapping it. Patience and a little bit of time and planning can help a long ways here. The film was warmed up with a heat gun and tucked behind to reduce the chance of edges lifting . Overall I think the wrap came out pretty nicely.


Reassembled everything and it looked good in my opinion.


Put it back on the car.

So once it was on the car I don't know if I like it as much. The grill kinda blends in with the paint but it stands out too the shade is a little darker than what I was imagining and I'm not sure if I'm completely happy with it. I had ordered the Luxe film in gloss mid smoke and I think it makes it too dark to where it doesn't really give it that mid black chrome look that I wanted like I got from the emblem. I think at a future date I might order some of the gloss mild smoke film and try that to see if I like that better. Leaving it on for now to see how the elements affect the film staying on etc and see if there are any peeling or any other issues.
05-15-20, 08:41 AM
#19
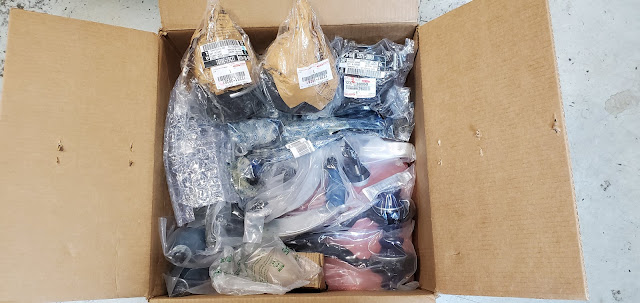
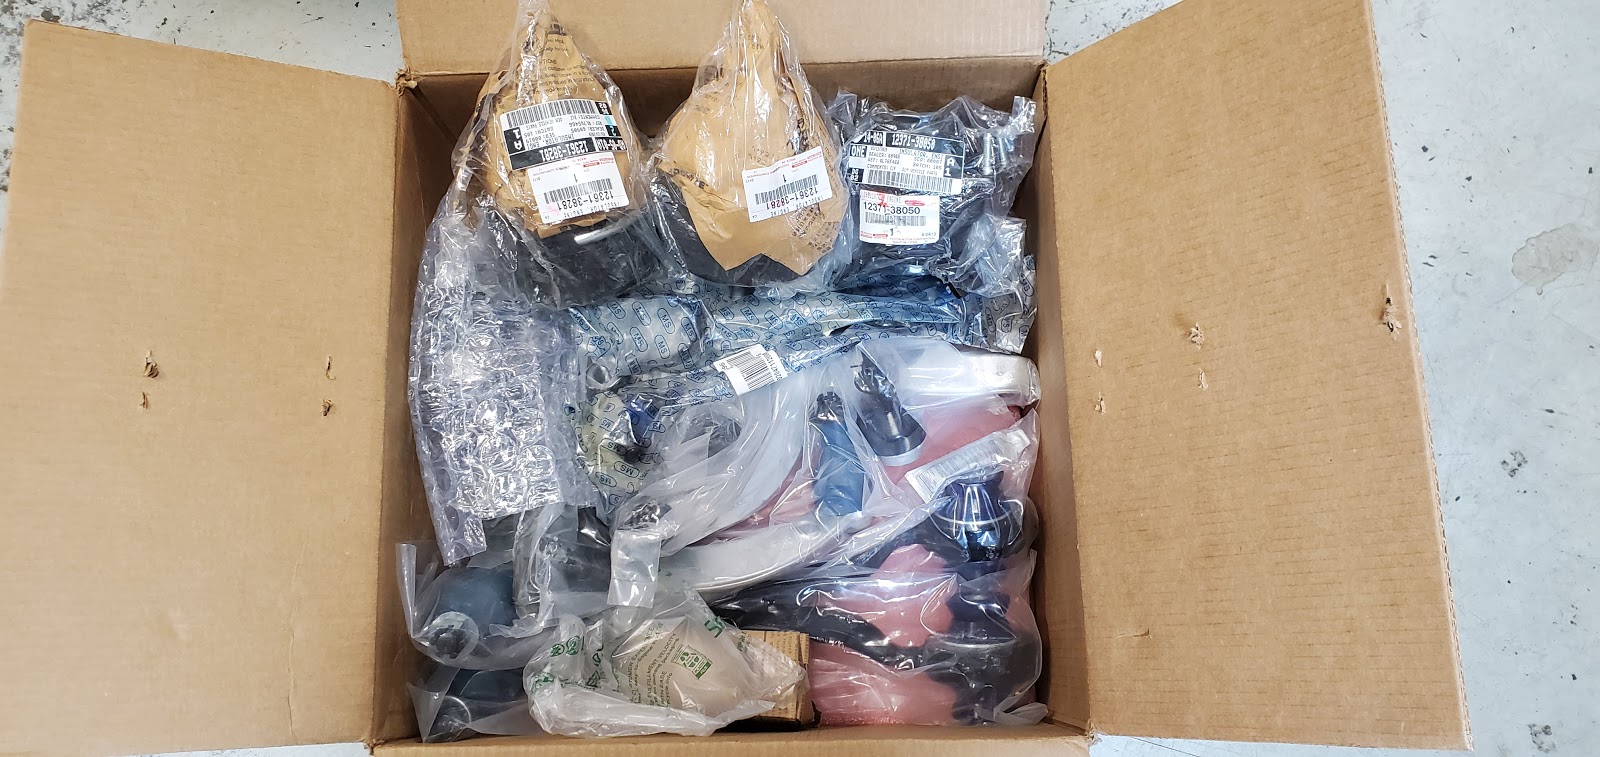
Got my box of suspension components from Figs Engineering with all the mevotech arms for the front end with the bushings available from figs pressed in.
Tie rods - Front Inner - MEVOTECH MS86740 x 2
Tie rod - Front Left Outer - MEVOTECH MS86620
Tie rod - Front Right Outer - MEVOTECH MS86621
Sway bar end link - Rear Left - MEVOTECH MS86860
Sway bar end link - Rear Right - MEVOTECH MS86861
Sway bar end link - Front Left - MEVOTECH MS86858
Sway bar end link - Front Right - MEVOTECH MS86858
Sway bar bushings - Rear - BECK/ARNLEY 1018323
Control Arm - Front left upper forward - MEVOTECH CMS861157
Control Arm - Front left upper rearward - MEVOTECH CMS861078
Control Arm - Front right upper forward - MEVOTECH CMS861158
Control Arm - Front right upper rearward - MEVOTECH CMS861077
Figs front upper control arm bushings (LS460-FRUCABSH-41) pressed into mevotech arms
Control Arm - Front right lower rearward - MEVOTECH CMS861076
Control Arm - Front left lower rearward - MEVOTECH CMS861075
Control Arm - Front left lower forward - MEVOTECH CMS861073
Control Arm - Front right lower forward - MEVOTECH CMS861074
Figs lower forward control arm bushings pressed in to Mevotech arms
Ball joint on front knuckle - Febest 0120-USF40F
Also got in Engine and Transmission mounts.
Engine mount L& R (12361-38160 x 2)
Transmission mount (12371-38050)


Prior to actually installing all these components I wanted to clean all the old components just to get rid of all the gunk that has build up over the years. Plus a clean area to work on later makes it feel so much better. Also after cleaning everything up I sprayed Seafoam DeepCreep on all the bolts, nuts, ball joints etc to help things come apart easier later.
Before:

After:

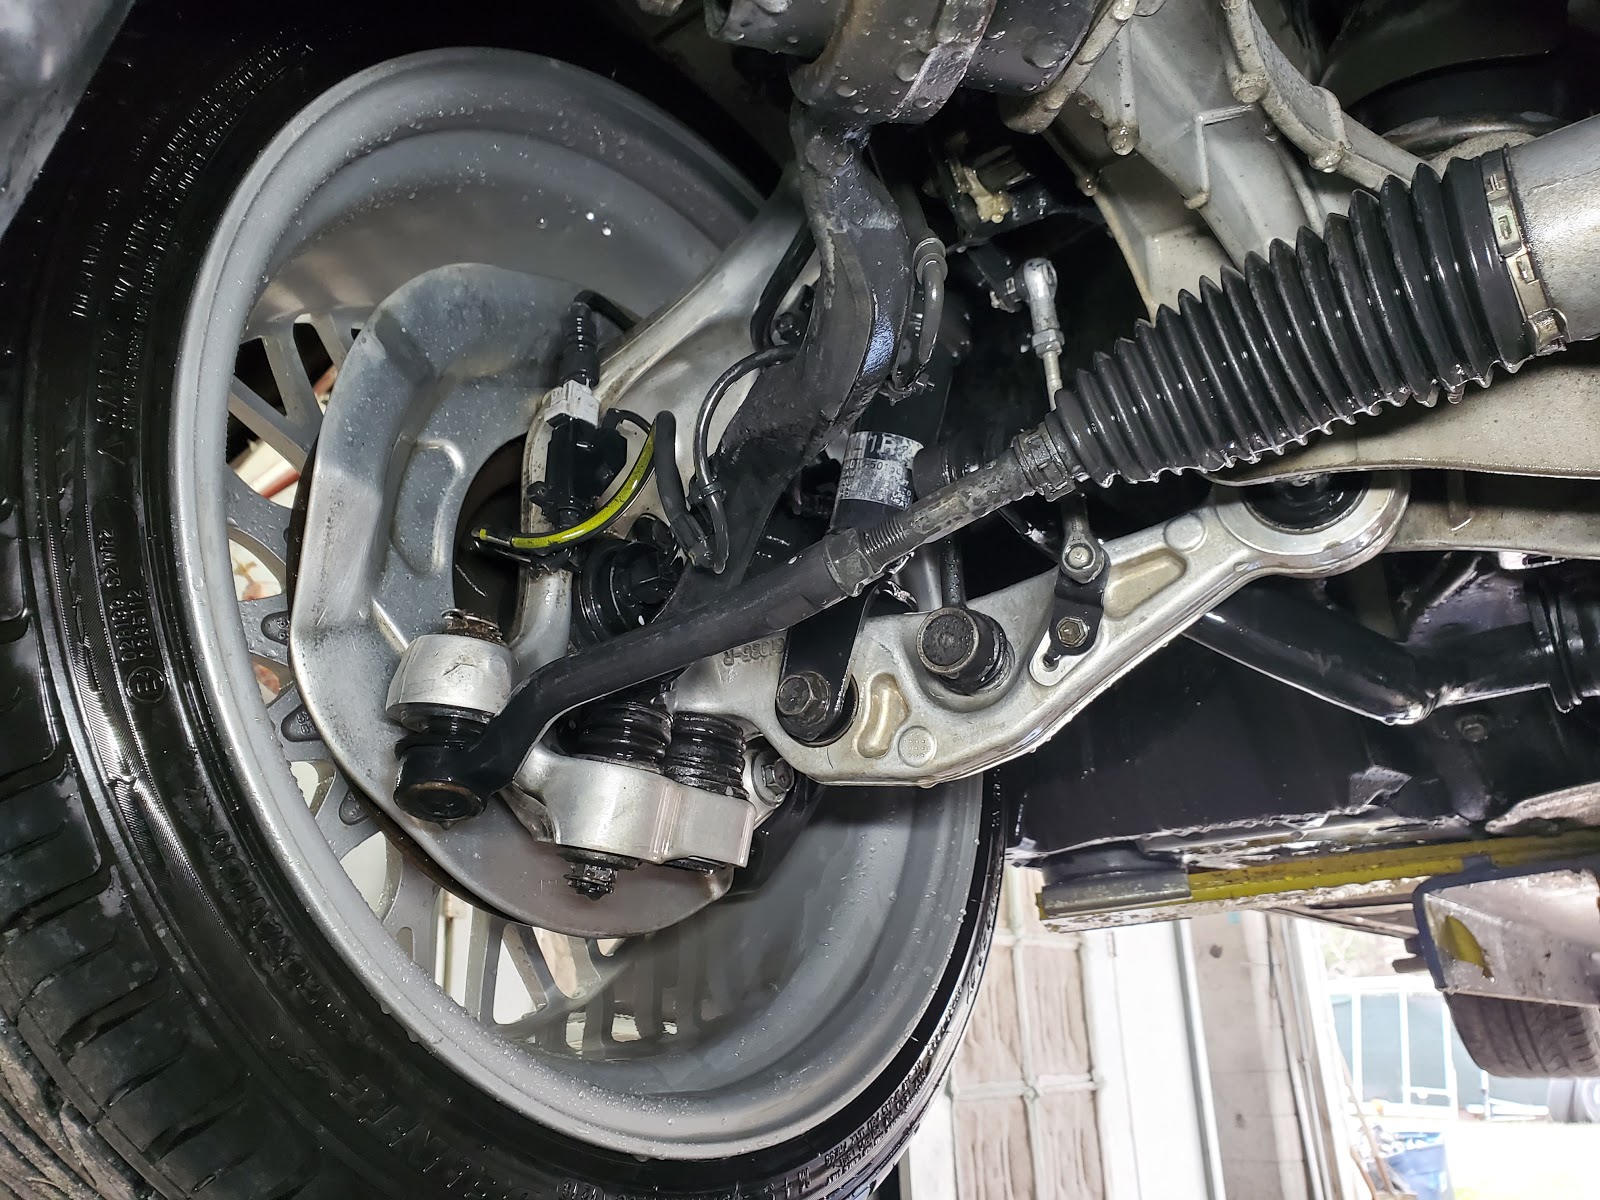
A friend of mine is the lead tech at a reputable shop here. He has an LS460 and have done all the arms etc so I asked for his help in getting everything done. He is also one of the few techs I would have work on my car. Thanks Matt and thanks Import Motor Werks for use of the shop! So Matt changed all the arms out and I wanted to run all my air lines and level sensors etc for my future aftermarket air ride setup and stay out of his way.
Removed all the arms.

Supported the motor and dropped lowered subframe to get the motor mounts done.


Old motor mounts were definitively shot.

New motor mounts.

The ball joint on the hub I think took the longest time but wasn't bad. Getting the right length and width of the cups to go over the ball joint was crucial. Luckily he had a couple of different sets to pick cups etc from. Like everything else the right tools and availability makes all the difference.


Arms got a scrub down and looks clean and newer looking!

With everything addressed, he did an alignment and went on a test drive. Everything took about 6 hours primarily because Matt knew what he was doing, had the right tools, he has done it on his car a couple of times and I stayed out of his way. I got all my mounting brackets, and bolts installed for the air ride, ran all my air lines and level sensor wiring safe, tucked away, heat shielded where it needed and ready for the next phase of the install. My goal was to get everything underneath the car done while it was on the lift because. Productive day and glad everything went well. My car drives amazing right now, steering and suspensions feel responsive and no creaking and moaning can be heard. Thanks again Matt and IMW! Also Figs Engineering for all the support!
Tie rods - Front Inner - MEVOTECH MS86740 x 2
Tie rod - Front Left Outer - MEVOTECH MS86620
Tie rod - Front Right Outer - MEVOTECH MS86621
Sway bar end link - Rear Left - MEVOTECH MS86860
Sway bar end link - Rear Right - MEVOTECH MS86861
Sway bar end link - Front Left - MEVOTECH MS86858
Sway bar end link - Front Right - MEVOTECH MS86858
Sway bar bushings - Rear - BECK/ARNLEY 1018323
Control Arm - Front left upper forward - MEVOTECH CMS861157
Control Arm - Front left upper rearward - MEVOTECH CMS861078
Control Arm - Front right upper forward - MEVOTECH CMS861158
Control Arm - Front right upper rearward - MEVOTECH CMS861077
Figs front upper control arm bushings (LS460-FRUCABSH-41) pressed into mevotech arms
Control Arm - Front right lower rearward - MEVOTECH CMS861076
Control Arm - Front left lower rearward - MEVOTECH CMS861075
Control Arm - Front left lower forward - MEVOTECH CMS861073
Control Arm - Front right lower forward - MEVOTECH CMS861074
Figs lower forward control arm bushings pressed in to Mevotech arms
Ball joint on front knuckle - Febest 0120-USF40F
Also got in Engine and Transmission mounts.
Engine mount L& R (12361-38160 x 2)
Transmission mount (12371-38050)


Prior to actually installing all these components I wanted to clean all the old components just to get rid of all the gunk that has build up over the years. Plus a clean area to work on later makes it feel so much better. Also after cleaning everything up I sprayed Seafoam DeepCreep on all the bolts, nuts, ball joints etc to help things come apart easier later.
Before:

After:
A friend of mine is the lead tech at a reputable shop here. He has an LS460 and have done all the arms etc so I asked for his help in getting everything done. He is also one of the few techs I would have work on my car. Thanks Matt and thanks Import Motor Werks for use of the shop! So Matt changed all the arms out and I wanted to run all my air lines and level sensors etc for my future aftermarket air ride setup and stay out of his way.
Removed all the arms.

Supported the motor and dropped lowered subframe to get the motor mounts done.


Old motor mounts were definitively shot.

New motor mounts.

The ball joint on the hub I think took the longest time but wasn't bad. Getting the right length and width of the cups to go over the ball joint was crucial. Luckily he had a couple of different sets to pick cups etc from. Like everything else the right tools and availability makes all the difference.


Arms got a scrub down and looks clean and newer looking!

With everything addressed, he did an alignment and went on a test drive. Everything took about 6 hours primarily because Matt knew what he was doing, had the right tools, he has done it on his car a couple of times and I stayed out of his way. I got all my mounting brackets, and bolts installed for the air ride, ran all my air lines and level sensor wiring safe, tucked away, heat shielded where it needed and ready for the next phase of the install. My goal was to get everything underneath the car done while it was on the lift because. Productive day and glad everything went well. My car drives amazing right now, steering and suspensions feel responsive and no creaking and moaning can be heard. Thanks again Matt and IMW! Also Figs Engineering for all the support!
The following users liked this post:
Boomin (05-17-20)
05-15-20, 09:04 AM
#20
Lexus Fanatic
Lookin good!
 05-15-20, 09:59 AM
#21
Instructor

looks great, some time if you don't mind sharing, how much was car without the new additions and how much in parts for where it is at currently.. great work your talented
good luck
good luck
05-15-20, 02:37 PM
#22
Instructor
Awesome job with the lights and front end! Thanks for taking the time to write up the details and including pics. I too dig black chrome and wish my grill and lower inserts could be done in it. Keep up the great work, I'll be following your refresh and mods as I too have a black '07 L.
05-28-20, 07:39 AM
#23
I've been feeling a slight pulsation in the brakes ever since I got it but I was waiting to finish up the suspension maintenance before I tackle the brakes. Mainly because I did not want the calipers getting marred up during the removal and installation of the suspension components. I went with the stoptech cryo treated rotors for this car as well and the Akebono pads. My favorite brake setup has been the cryo treated rotors and the Hawk HPS pads with stainless steel lines. Since Hawk HPS did not make pads for the LS I went with the Akebono which I like too. I also could not find stainless steel lines for the LS, I've found companies that make it for the rears but not the front. I didn't want to go with the custom brake lines right so I just stuck to the OEM brake lines. If you would like to know more about the cryo treating process, this is a good read: Cryo.
The parts I ordered:
Amsoil Brake fluid (BFLVCN-EA) 6 pints
Front Brake Pad Fitment Kit - OEM - (04947-50120)
Rear Brake Pad Fitment Kit - OEM - (04948-50060)
Front Left Disc Brake Rotor - Stoptech 126.44148CSL
Front Right Disc Brake Rotor - Stoptech 126.44148CSR
Rear Left Disc Brake Rotor - Stoptech 126.44149CSL -
Rear Right Disc Brake Rotor - Stoptech 126.44149CSR
Akebono Front brake pads - ACT1282
Akebono Rear brake pads - ACT1283
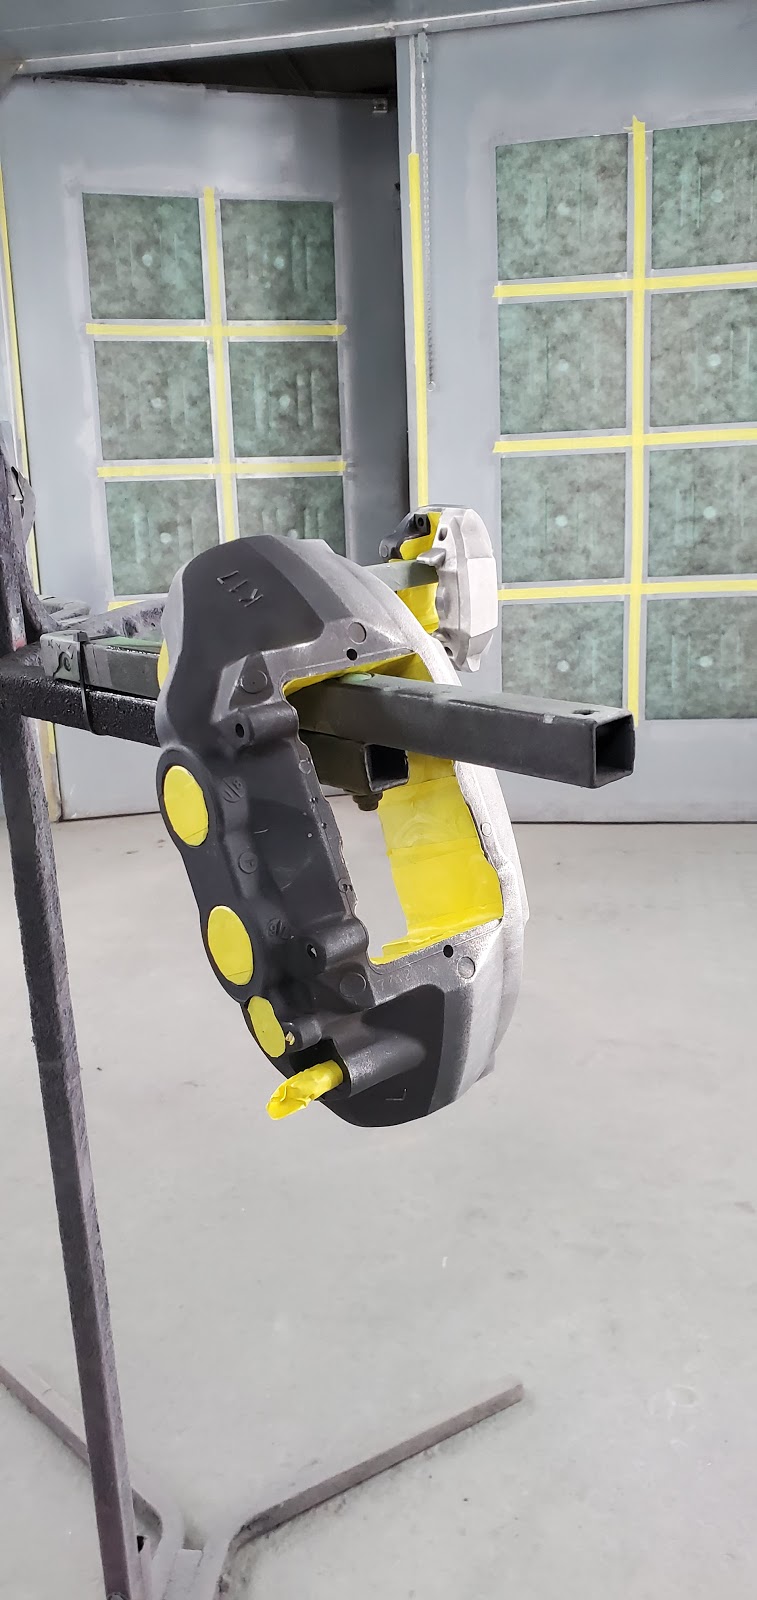
I wanted to pick a color for the brake calipers and possibly use that as accent colors later on for the car. So asked a friend of mine to mix up some shades of green and do a spray out card. Thanks Jeremy! With the color picked I started disassembly.

Prior to disassembly here are a couple of steps I did.
1. Disengage the parking brake.
2. Using techstream I zeroed down accumulator pressure.
3. Disabled electronic controlled brakes.
4. Disconnect battery.
Zeroing down accumulator pressure and disabling ECB is only temporary and will reset when the car starts up again. My thought process was to zero down and disable the ECB to reduce the pressure in the actuator and brake lines so that when the brake lines are disconnected from the calipers there won't be as much fluid that squirts out. Disconnected the battery so the actuator wont re initialize until I was ready.
Front rotors

Rear rotors
 I used a 3M ear plug to blug up the brake lines. I also used saran wrap on the brake fluid reservoir and capped it to prevent as much air from getting into the system as possible. The ear plugs swell up with brake fluid and I didn't see any fluid drip out. I had it this way for two days while the calipers were out getting prepped and painted.

Calipers stripped, cleaned and prepped for paint.

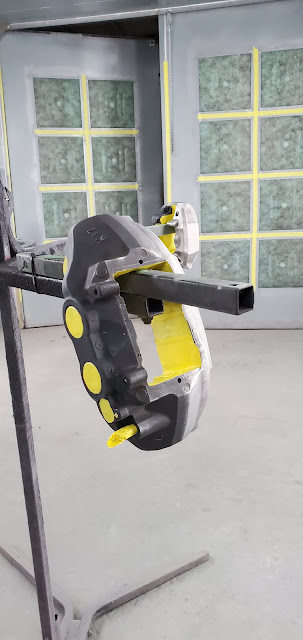


Used etching primer for extra bite so paint can adhere better.
 Paint!!


 I measured the calipers and used some holographic oil slick vinyl to cut some decals. I put a small arch in the decal just to flow with the caliper better. That's my air tank which I had painted along with the calipers. Very happy with the end results.


Reassembly.


Once assembled, I wanted to do a full brake fluid flush. Below is the procedure I used using techstream. Once the battery is reconnected did the zero down and ECB invalid process again because when the car is put into acc mode everything resets. MAKE SURE THERE IS A
BATTERY CHARGER CONNECTED!!! Brake bleeding uses a lot of power and the last thing you want is the battery to die during this process. With everything assembled and bled I made sure that the brakes were working by trying to move forward and backwards with the brake applied. Thankfully it was. Now to bed in the rotors and pads. Definitely smoked the rotors and pads during this process.
Brakes feel awesome and no more pulsation! Happy happy!
The parts I ordered:
Amsoil Brake fluid (BFLVCN-EA) 6 pints
Front Brake Pad Fitment Kit - OEM - (04947-50120)
Rear Brake Pad Fitment Kit - OEM - (04948-50060)
Front Left Disc Brake Rotor - Stoptech 126.44148CSL
Front Right Disc Brake Rotor - Stoptech 126.44148CSR
Rear Left Disc Brake Rotor - Stoptech 126.44149CSL -
Rear Right Disc Brake Rotor - Stoptech 126.44149CSR
Akebono Front brake pads - ACT1282
Akebono Rear brake pads - ACT1283
I wanted to pick a color for the brake calipers and possibly use that as accent colors later on for the car. So asked a friend of mine to mix up some shades of green and do a spray out card. Thanks Jeremy! With the color picked I started disassembly.

Prior to disassembly here are a couple of steps I did.
1. Disengage the parking brake.
2. Using techstream I zeroed down accumulator pressure.
3. Disabled electronic controlled brakes.
4. Disconnect battery.
Zeroing down accumulator pressure and disabling ECB is only temporary and will reset when the car starts up again. My thought process was to zero down and disable the ECB to reduce the pressure in the actuator and brake lines so that when the brake lines are disconnected from the calipers there won't be as much fluid that squirts out. Disconnected the battery so the actuator wont re initialize until I was ready.
Front rotors

Rear rotors


Calipers stripped, cleaned and prepped for paint.


Used etching primer for extra bite so paint can adhere better.


Reassembly.


Once assembled, I wanted to do a full brake fluid flush. Below is the procedure I used using techstream. Once the battery is reconnected did the zero down and ECB invalid process again because when the car is put into acc mode everything resets. MAKE SURE THERE IS A
BATTERY CHARGER CONNECTED!!! Brake bleeding uses a lot of power and the last thing you want is the battery to die during this process.

Brakes feel awesome and no more pulsation! Happy happy!
07-01-20, 11:38 AM
#24
The LS460L although longer it looses a good bit of trunk space because of the additional rear air conditioning and cooler options (edit: if it has those options, thanks SW17LS). The last LS460 install I did was on the shorter wheel base and had a much bigger trunk but still wanted to retain as much of the trunk space as possible. For this one as well wanted to retain trunk space so everything went in the wheel well too. The only thing I did different on this one was to sound proof the wheel well and add noise isolators for the compressors.
Parts I used:
Air Lift (50714) Compressor Isolator Kit (x2)
Noico 80mil sound deadner
Quiet Barrier 1/4" High Density Sound Barrier
Viair 444C Compressor (x2)
Ridetech management
3/8" Airline for the front air bags
1/4" Airline for the rear air bags
SMC check valve for the compressors
DEI Heat Shroud
With the wheel well vacuumed and cleaned I used some isopropyl alcohol to wipe down the wheel well to make sure there was no grease etc to help give the sound deadening a better bond. The power wire and signal wires were ran to the trunk and the power wire has its own circuit breaker and kill switch. For the signal wire, I tapped into the utilities fuse in the fuse block on the passenger side under the glove box.

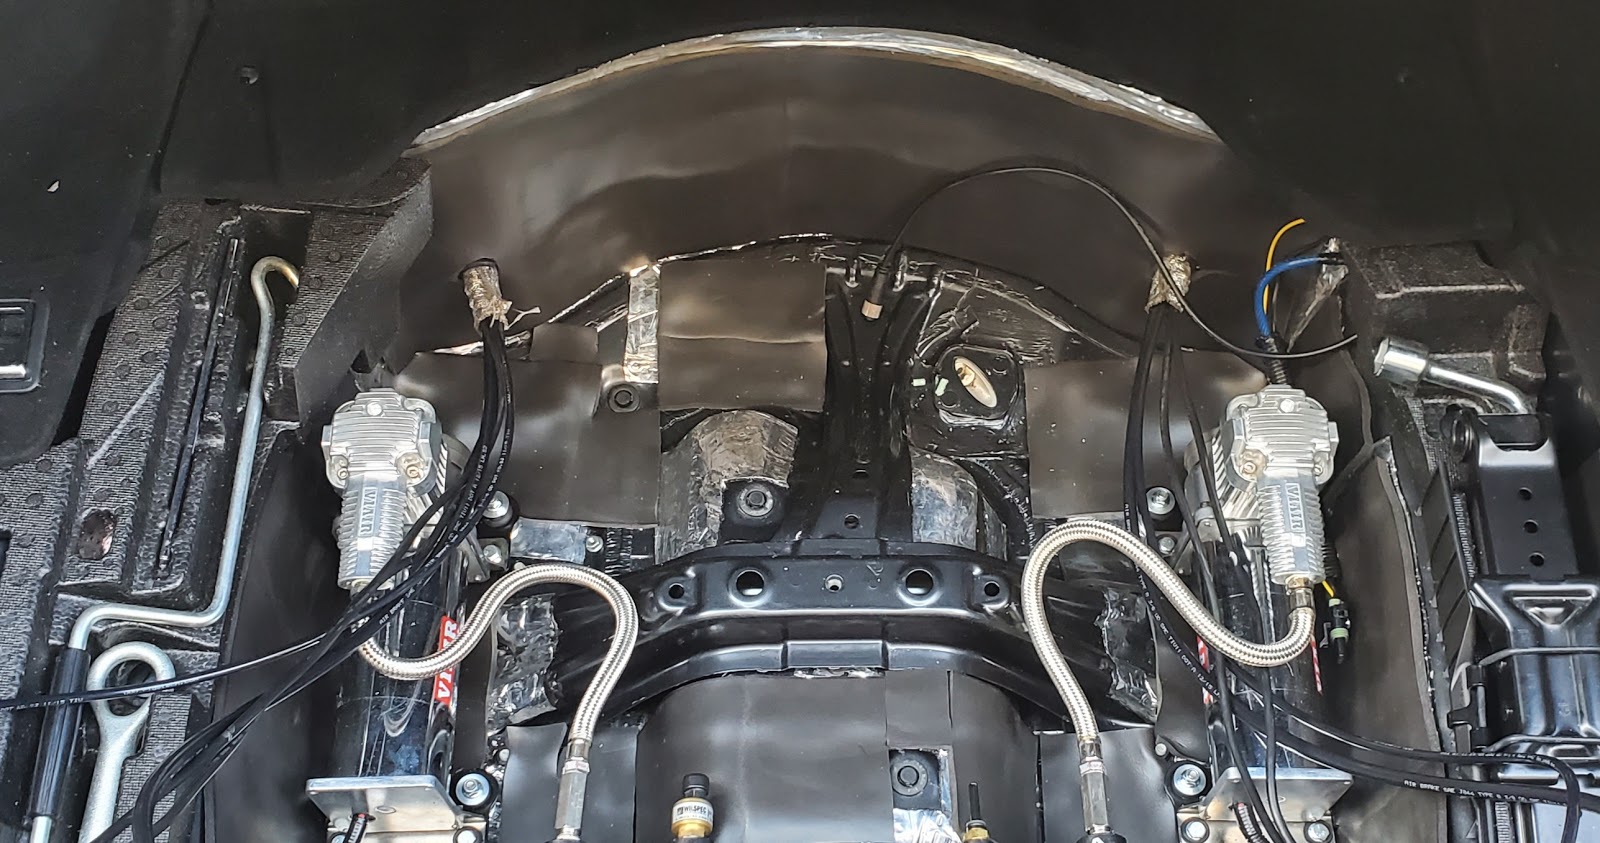
Warmed up the back of the sound deadening and stuck it on. You can see the lines coming into the wheel well below. I drilled a 1.5" hole for the left and the right and was able to fit both the air lines and both level sensor wires for each side through it. All the lines coming out of the wheel well was wrapped with the DEI Heat shroud, just anywhere I thought might get affected by exhaust heat at all. The lines were ran under the car along the frame rails on either side. Have done this multiple times in the past without any issues. If the fuel lines and brake lines are going to be ok being run that way so should the air lines. The hole for the lines got sealed with flex tape to prevent contaminants entering the wheel well through the hole that was made. After the sound deadening was in place I test fitted where I wanted all the components. All the components are serviceable because I mounted bolts from under the wheel well and locked everything in place with lock nuts and washers. All the components slide onto the bolts and held in by nuts. Anything that need to be serviced, just remove the nuts and slide the component off. The tank, compressors on isolators and valve body is held down this way.

Over the sound deadening went the quiet barrier. I did wipe down the sound deadening with IPA as well to clean up any grease etc again to make sure the quiet barrier would bond better.

With all the test fitting etc done I wanted to streamline the wiring a little and also wanted to make sure the valve body didn't have any trash in it. I had a rebuilt kit handy just in case it needed anything. Ran all the wires with some techflex wire loom, soldered and heat shrunk all the connections. Opened up the valves and just ran compressed air through the internals to get rid of any debris, added some oil to the o-rings and plunger and assembled everything


The tank, painted and decaled.

Everything mounted and secured in the wheel well.

Powered everything up and let the compressors fill the tank and verified that all the valves operate in the right order. Filled up the tank to 150psi and checked for any leaks with soapy water, no leaks. Filled up the tank and left it overnight to verify no leaks, no leaks!! With all that done, and if everything goes according to plan, I just need to mount the ride height sensors, put the bags on and connect everything. Fingers crossed.
Full write up and larger pictures: Flawless Fitment
Parts I used:
Air Lift (50714) Compressor Isolator Kit (x2)
Noico 80mil sound deadner
Quiet Barrier 1/4" High Density Sound Barrier
Viair 444C Compressor (x2)
Ridetech management
3/8" Airline for the front air bags
1/4" Airline for the rear air bags
SMC check valve for the compressors
DEI Heat Shroud
With the wheel well vacuumed and cleaned I used some isopropyl alcohol to wipe down the wheel well to make sure there was no grease etc to help give the sound deadening a better bond. The power wire and signal wires were ran to the trunk and the power wire has its own circuit breaker and kill switch. For the signal wire, I tapped into the utilities fuse in the fuse block on the passenger side under the glove box.

Warmed up the back of the sound deadening and stuck it on. You can see the lines coming into the wheel well below. I drilled a 1.5" hole for the left and the right and was able to fit both the air lines and both level sensor wires for each side through it. All the lines coming out of the wheel well was wrapped with the DEI Heat shroud, just anywhere I thought might get affected by exhaust heat at all. The lines were ran under the car along the frame rails on either side. Have done this multiple times in the past without any issues. If the fuel lines and brake lines are going to be ok being run that way so should the air lines. The hole for the lines got sealed with flex tape to prevent contaminants entering the wheel well through the hole that was made. After the sound deadening was in place I test fitted where I wanted all the components. All the components are serviceable because I mounted bolts from under the wheel well and locked everything in place with lock nuts and washers. All the components slide onto the bolts and held in by nuts. Anything that need to be serviced, just remove the nuts and slide the component off. The tank, compressors on isolators and valve body is held down this way.

Over the sound deadening went the quiet barrier. I did wipe down the sound deadening with IPA as well to clean up any grease etc again to make sure the quiet barrier would bond better.
With all the test fitting etc done I wanted to streamline the wiring a little and also wanted to make sure the valve body didn't have any trash in it. I had a rebuilt kit handy just in case it needed anything. Ran all the wires with some techflex wire loom, soldered and heat shrunk all the connections. Opened up the valves and just ran compressed air through the internals to get rid of any debris, added some oil to the o-rings and plunger and assembled everything


The tank, painted and decaled.

Everything mounted and secured in the wheel well.

Powered everything up and let the compressors fill the tank and verified that all the valves operate in the right order. Filled up the tank to 150psi and checked for any leaks with soapy water, no leaks. Filled up the tank and left it overnight to verify no leaks, no leaks!! With all that done, and if everything goes according to plan, I just need to mount the ride height sensors, put the bags on and connect everything. Fingers crossed.
Full write up and larger pictures: Flawless Fitment
Last edited by kuWuPt; 07-02-20 at 10:13 AM.
07-01-20, 12:08 PM
#25
Lexus Fanatic
The following users liked this post:
SW17LS (07-01-20)


The following users liked this post:
SW17LS (07-01-20)
07-02-20, 10:02 AM
#28
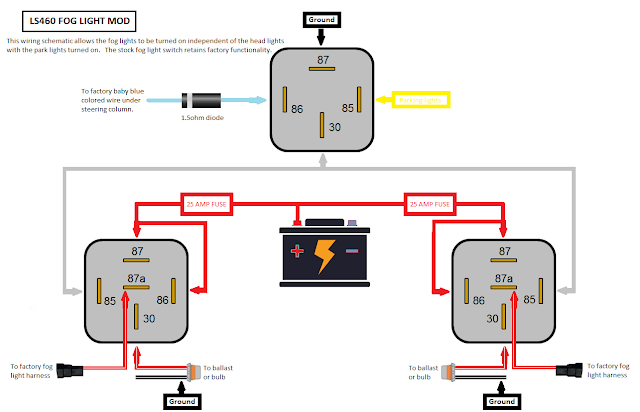
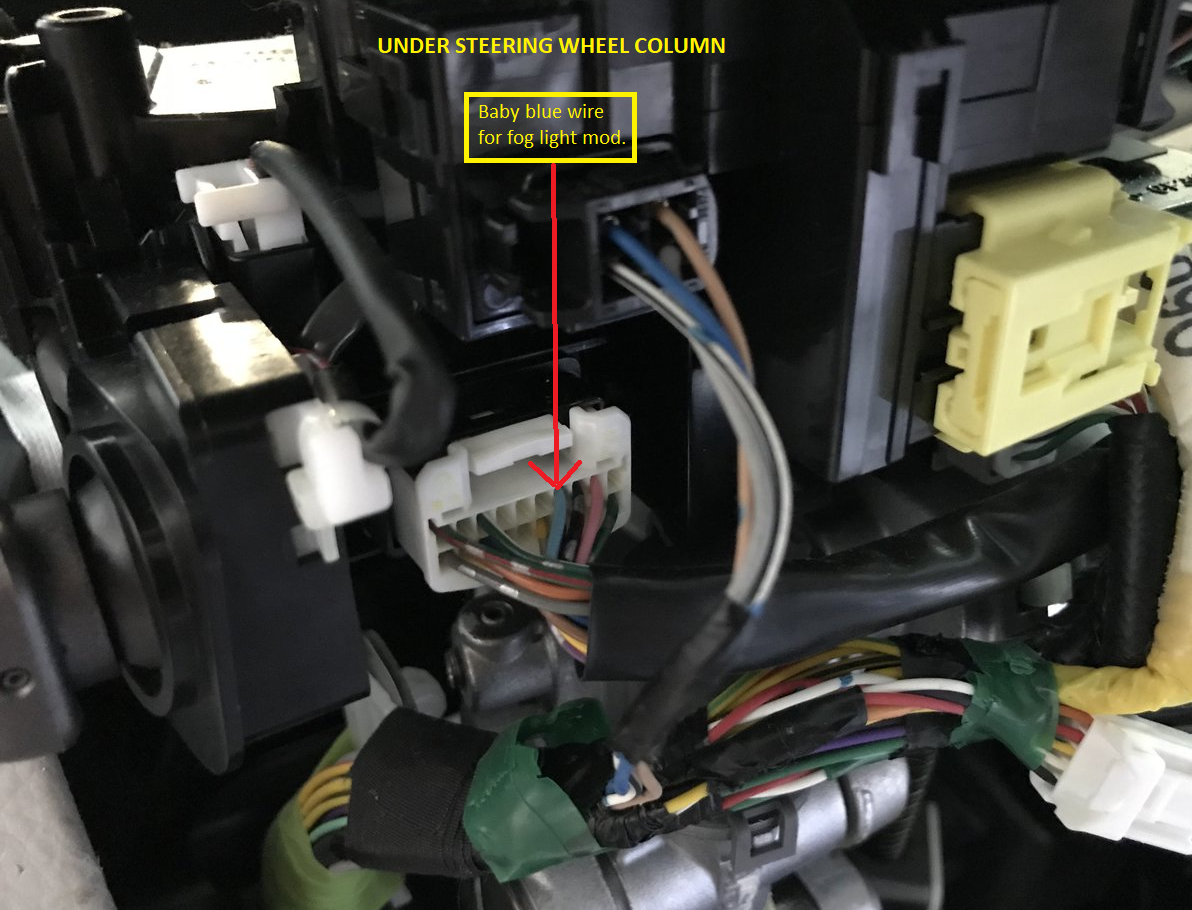
The LS460's fog lights from factory only comes on with the low beams on. With the high beams on the fog lights turn off. Wanted the flexibility of being able to turn on my fog lights, independent of the headlights. Want to thank Shibumi1 for documenting his version of the mod, I just modified it to do what I wanted. I did not want the fog lights on all the time nor did I want to put in another switch. I just wanted my fog lights on when the park lights come on and also full functionality of the factory fog light switch. The wiring diagram below is how I wired everything up.
The baby blue wire below is the ground signal for the fog light switch. It is located under the steering column, just remove the plastics of the steering wheel column and the picture below is what you see with the bottom plastic piece removed.

(picture courtesy of daniel1235)
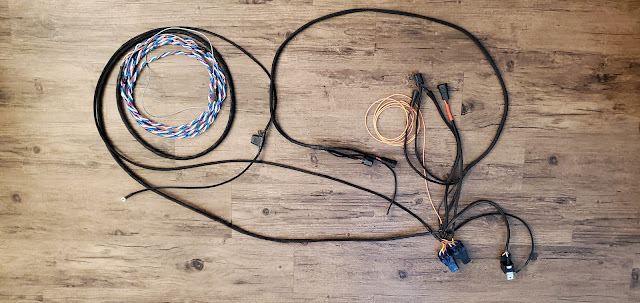
For the harness I planned on mounting all the relays etc up front behind the bumper support so ran the fog light ground signal wire from under the steering column through the firewall into the engine bay to the front behind the bumper support. Soldered all the wires, heat shrunk every connection and made a nice harness with some techflex wire loom. The below shows the harness but with some extra wires etc I wanted to run that ties in to the front I plan on doing later. Also the harness has a fused power wire to run the HID's for the fog lights.
The relays mounted behind the bumper support.

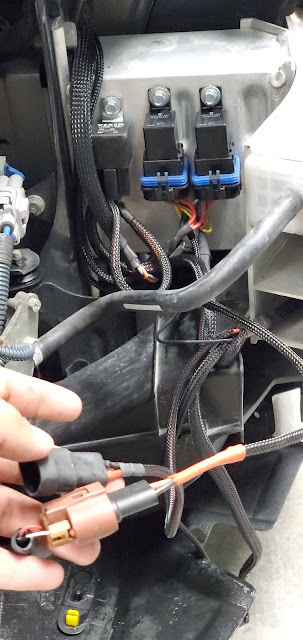
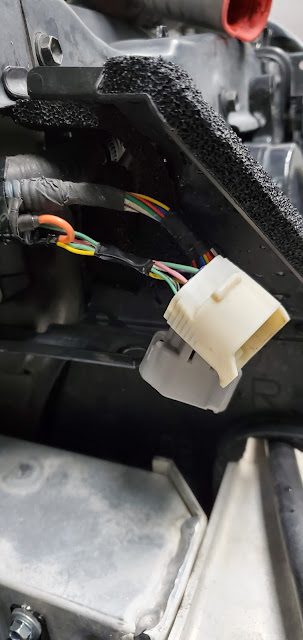
For the fog lights to come on with the park lights, I tapped into the yellow wire on the harness that is connected to the headlights. Picture below shows the orange wire I used in my harness and tapped into the yellow wire.
The JDM fog lights that were modified slightly.
Full write up and larger pictures: Flawless Fitment

The baby blue wire below is the ground signal for the fog light switch. It is located under the steering column, just remove the plastics of the steering wheel column and the picture below is what you see with the bottom plastic piece removed.
(picture courtesy of daniel1235)
For the harness I planned on mounting all the relays etc up front behind the bumper support so ran the fog light ground signal wire from under the steering column through the firewall into the engine bay to the front behind the bumper support. Soldered all the wires, heat shrunk every connection and made a nice harness with some techflex wire loom. The below shows the harness but with some extra wires etc I wanted to run that ties in to the front I plan on doing later. Also the harness has a fused power wire to run the HID's for the fog lights.

The relays mounted behind the bumper support.


For the fog lights to come on with the park lights, I tapped into the yellow wire on the harness that is connected to the headlights. Picture below shows the orange wire I used in my harness and tapped into the yellow wire.

The JDM fog lights that were modified slightly.


Full write up and larger pictures: Flawless Fitment
Last edited by kuWuPt; 07-02-20 at 10:12 AM.
 09-14-20, 08:07 AM
#30
I would really like to thank Charles for documenting the fix and also for taking the time and effort to help me with it. I had messaged Charles to get a template in pdf format so I could make the template out of metal ahead of time and keep my down time low. Not only did he send me the template but he was kind enough to make and mail it out to me. Although I wasn't really experiencing a whistling noise etc I thought I would go ahead and preemptively fix the issue before I put my visors on. The instructions are well documented here so I'm not going to elaborate no it. I just added a little of my OCD and understanding of the fix into it.
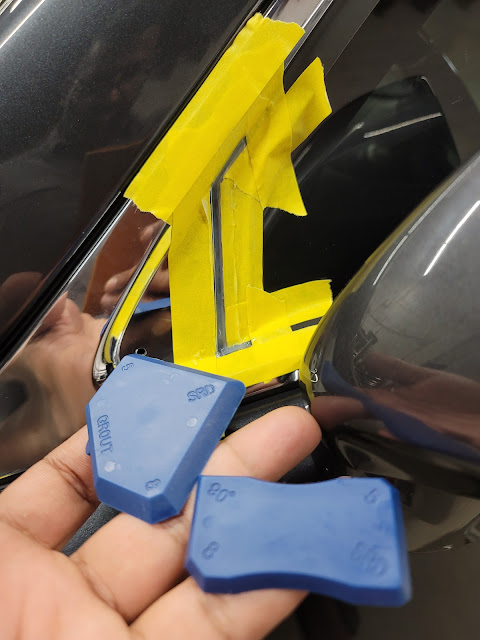
These are the tools that I used:
Non marring mini pry bars - to pry up the trim
Plastic blades - clean up the double sided tape and glue from under the trim.
Caulk Applicator tool - to smooth out the caulking and fill in gaps.
Isopropyl Alcohol - clean up excess caulking and prep before silicone glue is applied.
Goo Gone - clean up tape and glue from under the trim.


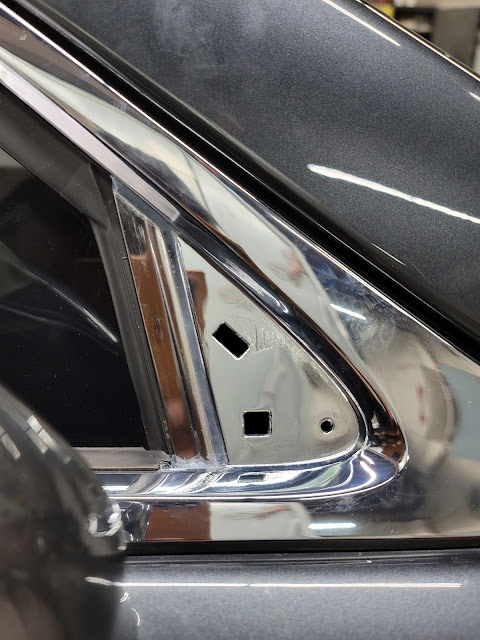
After trim removal.
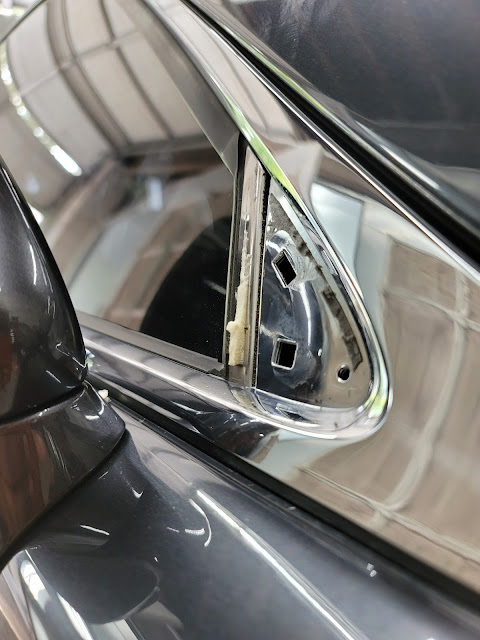

Used goo gone and scraped the tape off and also used the caulk applicator tool to get the gaps free from the old foam and glue.

Wipe down with isopropyl alcohol. Prep is key for adherence to any substrate.

Taped up the gaps where the silicone glue is to be filled with. Prep is key.
Used the applicator tool to spread and push in the silicone glue. The different edges of the applicator tools helped smooth everything out and remove the excess glue.
Removed the tape, edges are clean.
The metal patch I scuffed up with 80 grit sand paper and wiped it down with isopropyl alcohol before more of the silicone glue was applied to adhere the patch. Pressed in the patch evenly and it'll squeeze out the glue from the sides and used the caulking application tool to scrape up all the excess glue and smooth out the joints. Used isopropyl alcohol again to clean up.

Full cure time is 24hrs but drove the car a couple of hours later and is still quiet. As mentioned I wasn't experiencing any weird noise issues, this was just a preemptive fix. I'll attach the black trim in a day or two after full cure and verify that there are no wind noises. Thank you again Charles for the help.
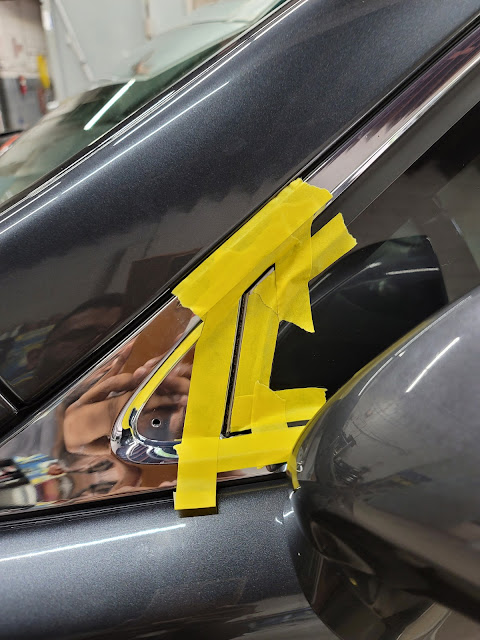
After about 48hrs and verifying that there were no issues with my install it was time to put the trim piece back on. I removed the taps that would normally clip the trim piece on, sanded the base with 50 grit sandpaper so the silicone glue has something to bite to, prepped both surfaces with IPA and spread some glue on and attached it.

I went ahead and taped up the edges . I squeezed the trim piece down and this squeezed out the glue around the edges. I used the grout tools again to wipe and smooth out the excess glue and used some tape to just hold the trim in place while it dried.

This is what it looks like with everything cleaned up and tape removed after about 4 hours.

I'm going to let it continue curing for a couple of days and then install my visors. Happy so far.
Full write up and larger pictures: Flawless Fitment
These are the tools that I used:
Non marring mini pry bars - to pry up the trim
Plastic blades - clean up the double sided tape and glue from under the trim.
Caulk Applicator tool - to smooth out the caulking and fill in gaps.
Isopropyl Alcohol - clean up excess caulking and prep before silicone glue is applied.
Goo Gone - clean up tape and glue from under the trim.
After trim removal.
Used goo gone and scraped the tape off and also used the caulk applicator tool to get the gaps free from the old foam and glue.
Wipe down with isopropyl alcohol. Prep is key for adherence to any substrate.
Taped up the gaps where the silicone glue is to be filled with. Prep is key.
Used the applicator tool to spread and push in the silicone glue. The different edges of the applicator tools helped smooth everything out and remove the excess glue.
Removed the tape, edges are clean.
The metal patch I scuffed up with 80 grit sand paper and wiped it down with isopropyl alcohol before more of the silicone glue was applied to adhere the patch. Pressed in the patch evenly and it'll squeeze out the glue from the sides and used the caulking application tool to scrape up all the excess glue and smooth out the joints. Used isopropyl alcohol again to clean up.
Full cure time is 24hrs but drove the car a couple of hours later and is still quiet. As mentioned I wasn't experiencing any weird noise issues, this was just a preemptive fix. I'll attach the black trim in a day or two after full cure and verify that there are no wind noises. Thank you again Charles for the help.
After about 48hrs and verifying that there were no issues with my install it was time to put the trim piece back on. I removed the taps that would normally clip the trim piece on, sanded the base with 50 grit sandpaper so the silicone glue has something to bite to, prepped both surfaces with IPA and spread some glue on and attached it.
I went ahead and taped up the edges . I squeezed the trim piece down and this squeezed out the glue around the edges. I used the grout tools again to wipe and smooth out the excess glue and used some tape to just hold the trim in place while it dried.
This is what it looks like with everything cleaned up and tape removed after about 4 hours.
I'm going to let it continue curing for a couple of days and then install my visors. Happy so far.
Full write up and larger pictures: Flawless Fitment
Last edited by kuWuPt; 09-17-20 at 06:56 AM.