When you click on links to various merchants on this site and make a purchase, this can result in this site earning a commission. Affiliate programs and affiliations include, but are not limited to, the eBay Partner Network.
It all started when the left/front dash speaker woofer stopped working, ironically, the tweeter is fine. I was simply going to replace it but realized the ML audio system as whole is a "good" factory system, but I'm not interested in merely "good". Though acceptable for many, I find the ML system to lack overall dynamics, imaging, clarity at higher volumes and authoritative bass response. So, I decided to take advantage of Covid work from home restrictions and overhaul the ML system.
Goals:. Drastic improvements in audio system fidelity, including staging, imaging, tonality, linearity, bass response and authority. The goal is an SQ-ish build with high fidelity bass (i.e. flat and not boomy and bloated), and with the ability to dial in extra bass when wanted just for fun.
New system must meet the following criteria:
1. Retain factory controls, such as climate control, bluetooth, steering wheel controls and all other services integrated into the ML head unit.
2. Must be stealth. If stealth cannot be maintained, changes in appearance must look stock - subjective, I know. I do not want to see obtrusive speakers and do not care for people in the Aldi parking lot to get a glance of my system as I load red bag chicken and $2 whole milk in the trunk.
3. No major cosmetic alterations, cut panels, spliced factory wiring, etc. System must be able to return to full factory appearance when removed with no noticable signs of alteration. Acquire wiring harnesses when available and replacement panels if cutting/drilling is necessary.
4. Enough trunk space should be reserved to safely haul groceries, sports equipment, luggage, etc. Though some space will be used for sub enclosure and amp racks, minimize those space requirements to support the trunk retaining a great deal of utility.
5. Spare tire to remain in place and accessible.
6. No electrical upgrades (other than The Big 3 wiring). I prefer not to replace my factory alternator. Just don't want to have to deal with compatibility issues, mounting compromises and the overall expense. Really do not want to add batteries either, but will consider some of the newer, small footprint lithium options in a concealed trunk mount configuration - we'll see. This will mean limiting amplifier power, using efficient drivers, making use of more efficient class D amp topology, etc. In real world use, I have a hard time believing I will be pulling more than 50 amps from my electrical system for audio. I will test, if I'm wrong I make upgrades based on the results and needs.
7. ALL work to be completed by me. No pre-fab enclosures, no assistance from local shops. Just me, Amazon, eBay and a few select online retailers.
8. Make use of much of the older equipment, installation materials, parts and accessories I've accumulated over the years. This equipment will span the 90s, 2000s, 2010s and current day. This is where the Decades of Dominance theme is derived.
9. Budget for any new equipment: $2000.
Budget for any new wiring, installation materials & misc. parts: $1500. This seems high, but I know these sort of things can add up fast. I expect that most of the things I buy will have an abundance of leftovers - screws, fuses, wire, terminals, lugs, carpeting/upholstery etc.
As of this original posting the system is about 90% complete, with only some minor cosmetic work and system tuning to complete. I will share photos and talk about challenges and my solutions to problems. My hope is to help provide a resource and, perhaps, give someone the confidence to take on something like this. Though I have a decent amount of 12 volt and electronics experience, beginning in the early 90s, there will be some things I will be doing for the first time and documenting my findings. Hope y'all enjoy.
Last edited by mjrudick; 02-17-23 at 06:10 AM.
Reason: new data
Speakers:
I decided to replace the front door and dash speakers, but keep the factory rear door or factory rear deck speakers. This will allow me to purchase a higher grade driver for the fronts. The rears will be used for differential rear fill only for 99% of my listening, so, their performance is far less critical. With the volume levels, amount of delay, EQ and phase manipulation required to simulate space and openness out of the rear fill, one would have a hard time distinguishing these rear factory speakers from most any upgrade in driver anyway.
Audiofrog GS690 - 6x9 component woofers. Front doors. First direct experience with AF. Come well recommend and regarded. The options for a component 6x9 are limited to the AF and about 3 others - Hybrid Audio Technologies (HAT), CDT Audio, Image Dynamics, and some cheaper options. One could buy a component set with tweeters and crossovers and just use the woofers (I didn't want to spend money on things I wouldn't be using). Also considered the Dayton RS 7" 4 ohm woofer. Ultimately, decided that less modification would be required with the 6x9 plus i could take advantage of the additional cone area. Purchased new.
Scanspeak Discovery 10F/4424G, 4" midrange for front dash locations. Specs are identical to the ScanSpeak Silver Series 10M-4614G06, the only difference is that the Silver Series has a, well, silver colored frame and costs $23 more. Both frames are cast aluminum and possess identical thiele small parameters and dimensions. This driver is efficient, measures well, has great off axis response up to 3 kHz and, with a simple trick, are exceptionally easy to fit in the stock dash speaker locations without modification. Purchased new.
SEAS Prestige 27TFFNC/G (H1396) 1" Textile Dome Tweeters. In custom mounts. These great tweeters have one of the lowest usable frequency response for a tweeter of this size. With proper crossover slope, these can be used safely down to 3 kHz. These just may be the Toyota 4Runner of the tweeter world. They are consistent, very well constructed, goes anywhere, they may not be the fastest, but will, no doubt, be the last one standing. This is my second set as I installed a pair of these in an 2002 Nissan Maxima. I sold the car and the tweeters went with it. Seas has been making these great drivers for close to 2 decades in the same Norwegian factory. The only thing that has changed is the technology to track production, quality control, testing and verification. I probably abused them a bit in my last install, but they simply begged for more. There style is timeless and cosmetically fit with the styling of the GS F-Sport. They have no cheesy logos or cheap appearance. Their value is undisputed, performance is proven, looks are solid, - a no brainier. Purchased new.
Infinity Kappa Perfect 12VQ. 12" subwoofer, 4 ohm. This one was also installed in the Maxima, I took it out because I just couldn't part ways. I was always impressed with the musicality, efficiency, and solid output from it even loaded in a smallish, sealed enclosure. Every so often a manufacturer designs a product that checks every box and somehow gets past the bean counters in terms of cost and expected sales. My only hangup is that it's a single voice coil at 4 ohms which will limit my sub amp output, but the 4 ohm load will make the amp run more efficiently. Andy Wehmeyer of Audio Frog frame was the Product Manager over this product for Harman International prior to founding Audio Frog. This has to be one of the most versatile autosound subwoofers ever made. It offers 3 options to adjust the overall Q or Qts. These options are in the form of metal inserts that change magnetic and motor force of the sub. This allows the user to tailor the sub to the application. Small or larger sealed enclosure, free air, bandbass, vented - it doesn't matter, the sub can be adjusted to fit the need. Since I'm going for a flat response and want to preserve trunk space, I chose a sealed enclosure. Total useable enclosure airspace ended up being 1.2 cu feet after accounting for speaker displacement and bracing. Acquired in 2007.
Processing:
Minidsp C-DSP 8x12. Allows for individual channel time correction, EQ, crossover, input/output level adjustment, differential rear fill, and a wealth of other options. A tweakers dream. Acquired in 2020.
AudioControl LC6i. To convert amplified speaker high level signals from the trunk-mounted ML amp to low level RCAs. Though the Minidsp has high level inputs, nobody does high to low level conversion as well as AudioControl. Plus, the Minidsp owner's manual stated that it's high-level maximum input is 36 watts - the ML literature claims the amp puts out 1.21 jigga-watts , but who knows. Decided to play it safe here with some excellent AudioControl gear. Acquired in 2018.
Amps:
Alpine MRV-F345. 75x4 rms class AB. To power front dash left/right midrange and front door left/right midbass. A favorite, so flexible, clean, dynamic. If you can tolerate the low fan noise, (can't hear the fan mounted in the trunk) there are no negatives. Acquired in 2007. UPDATE: Due to a failure in the Sony XM-3021, I repurposed the Alpine MRV-F345 to power only the front door left/right midbass drivers and the dash center midrange. Channel 4 is currently unused.
Sony XM-3021. 30x2 rms class AB. To power front left/right tweeter pair. If you see the brand "Sony" and think "uhg", you may not have experience with their pre Sony X-Plod series of amplifiers. The early to mid 90s Sony XM amps boasted an industry leading high S/N ratio, low THD, super high frequency response and, if used appropriately, sounded very sweet. Not the best option to drive subwoofers, but these XM series amps excelled at midrange clarity and high frequency smoothness. One of the only mass market manufacturer to ever use higher end green Nichicon Muse audiophile capacitors in the signal stream. A Japanese-made gem. Lovingly acquired in 1995. UPDATE: XM-3021 failed. Replaced with Sony XM-GS4. Currently used to power the front tweeters and dash midranges.
Alpine MRV-F300. 50x4 rms class D. To power rear fill. An affordable amp that performs well above it's price point. Feed it a higher voltage signal (4v+) to keep the input gain low and you will be rewarded with clean, noise-free and surprisingly great sound. Stays exceptionally cool to the touch. A class D steal of a deal. Excellent reviews from pros and owners alike. Acquired in 2018.
Alpine MRV-M500. 300x1 rms (@ 4 ohm) class D. To power the single 12" sub. Same basic design as the the MRV-F300 but in a mono format. Acquired in 2018. Web search for "Williston Audio Labs budget bass Alpine" for an excellent test and review of this overachiever.
Other components:
Aksonic BRX01 Bluetooth receiver. To make use of the Minidsp optical toslink input. Supports aptX, bluetooth v5.0. Also makes an excellent Bluetooth receiver for the home.
Douk Audio USB to digital converter. To make use of the Minidsp digital coax spdif input. Allows direct connection from Android device, using Android On The Go (OTG). Also will allow me to test and measure the digital inputs using REW (Room EQ Wizard) with a Windows 10 laptop.
Both of the above units will allow me to completely bypass all of the factory ML equipment and processing and feed the Minidsp a direct digital signal.
Tobsun 12v to 5v DC-DC converter, 3 amp. Will allow me to power the bluetooth receiver and USB digital converter through the vehicles 12v system. I didn't want to power the USB to digital coax converter directly from the Android device to save it's battery life.
Cables, distribution, power:
Minidsp to amp interconnects (unbalanced connection). Esoteric Musica 500 coax (stranded copper center, copper braid and copper foil shield). Cut to custom length, low profile RCA male connectors installed.
AudioControl LC6i to Minidsp (balanced differential). NXV twisted pair interconnects.
Conextlink tinned OFC copper 2 gauge power cable for battery terminations.
Various speaker cables (18, 16, 14 and 10 gauge). All OFC copper.
Various other 4 and 8 gauge OFC copper power cables. Stuff I had accumulated over the years.
Stinger and Knuconceptz fuse distribution blocks. Stinger ground distribution.
Electop 6-way fuse block from Amazon for lower power 12v electronics.
Last edited by mjrudick; 02-17-23 at 06:21 AM.
Reason: New info
Will start the upgrade with The Big Three. This represents an upgrade to the wiring to the vehicle's charging system. Using 2 gauge tinned OFC between alternator and battery, a 2nd 2 gauge cable between battery and chassis, and a 3rd between the engine block and chassis. All existing cable will remain, new cables will be additions to and not replacements for.
I removed the battery and battery mount tray first to help determine cable routing and noticed a problem. One of the bolts underneath the battery mounting bracket had signs of corrosion and had began to drip corrosive material onto the wiring harness beneath it causing a hole in the harness to form. I cleaned it and the bolt.
The insulation for the wiring was visible as the harness developed a hole exposing the insulated wire, though the insulation for the wire itself seemed OK. I have no idea what this wire is for, but I doubt I or a Technician would find it easily if it infact had corroded through.
After cleaning with battery terminal cleaner and then alcohol, I applied a healthy coating of liquid electrical tape. May be something for y'all to check when you replace your battery in the future.
The metal grounding bracket attached to the vehicle body just on the passenger side of the battery is completely painted. Furthermore, the body itself is painted at the points in which the metal bracket touches the body. I sanded away the paint at each of these touch points paying close attention and not stripping away more paint than was needed.
Here is the metal grounding bracket reinstalled. The new 2 gauge ground can be seen at the top-right portion of the photo. Original ground wire remains and is terminated underneath the new 2 gauge cable.
Also did the same for the factory ground point paint for the engine block. You have to remove the air filter housing to more easily access this point - simple, with just a handful of bolts to remove.
Here is the factory engine block ground. Its on the passenger side. Once the air filter housing is removed it's easy to access.
The new 2 gauge ground wire added. Again, I kept the original ground in place and just added the new cable routing it right along side the original cable.
You can see the new 2 gauge engine block ground cable terminated at the body grounding point. New ground cable next to the pink, original next to the green.
Last edited by mjrudick; 02-26-21 at 08:35 AM.
Reason: Added pics
I originally thought I would route the new alternator-to-battery 2 gauge positive lead alongside the existing factory cable. Unfortunately, there just isn't any room for anything larger than a 6 gauge cable - 4 gauge tops. The factory cable route for this wire takes it above the serpentine belt and pulleys. Larger cables just cannot fit in the factory wiring harness with the factory alternator cable. Though the factory cable is well secured and protected, any larger additional cables just wouldn't have room and would be exposed.
I chose a route behind the engine closest to the windshield alongside the air intake duct. There are no major electronics, no moving parts, no excessive sources of heat. As a bonus, the route ended up being almost 2 feet shorter than the original route, and there are more gradual bends without the need for sharp turns. The new alternator-to-battery 2 gauge cable can be seen next to the red lines in the photos. Yes, the fuse for the alternator cable is missing in the photo. The amp cable routed to the trunk is next to the green lines.
Nice project. Good choices. I am about to do the same thing. But not replace any amps, but add the Sub amp. Funny as it is, I was going with the same Tweeter and Mid. I changed directions though. on the Door speaker plans and will be building something else in the doors.
Other funny thing is I have 2 of the Infinity Kappa Perfects 12.1. I don't think there is a better all around Sub. I'm going to install 1 in a Spec'd Ported Box. Going to drive it with a Soundstream Rubicon 702 amp. I'm a Old School Car Audio guy myself and have some stuff I saved over the years to.
Just picked up a Audio Controls LC2i Pro for the Sub amp pick up. Have the sound deadening, speaker mounts, Big 3 ground wires and more. Just waiting on a few more things at the moment. Still on the Fence about the DSP about which one?
Keep us posted. I will love to see how this turns out. Looks to be its going to turn out to be a top notch System.
Thanks!
Glad to see another taking care of the details. The Big Three and sound deadening are almost a must for anything involving a subwoofer. Good luck to you as well.
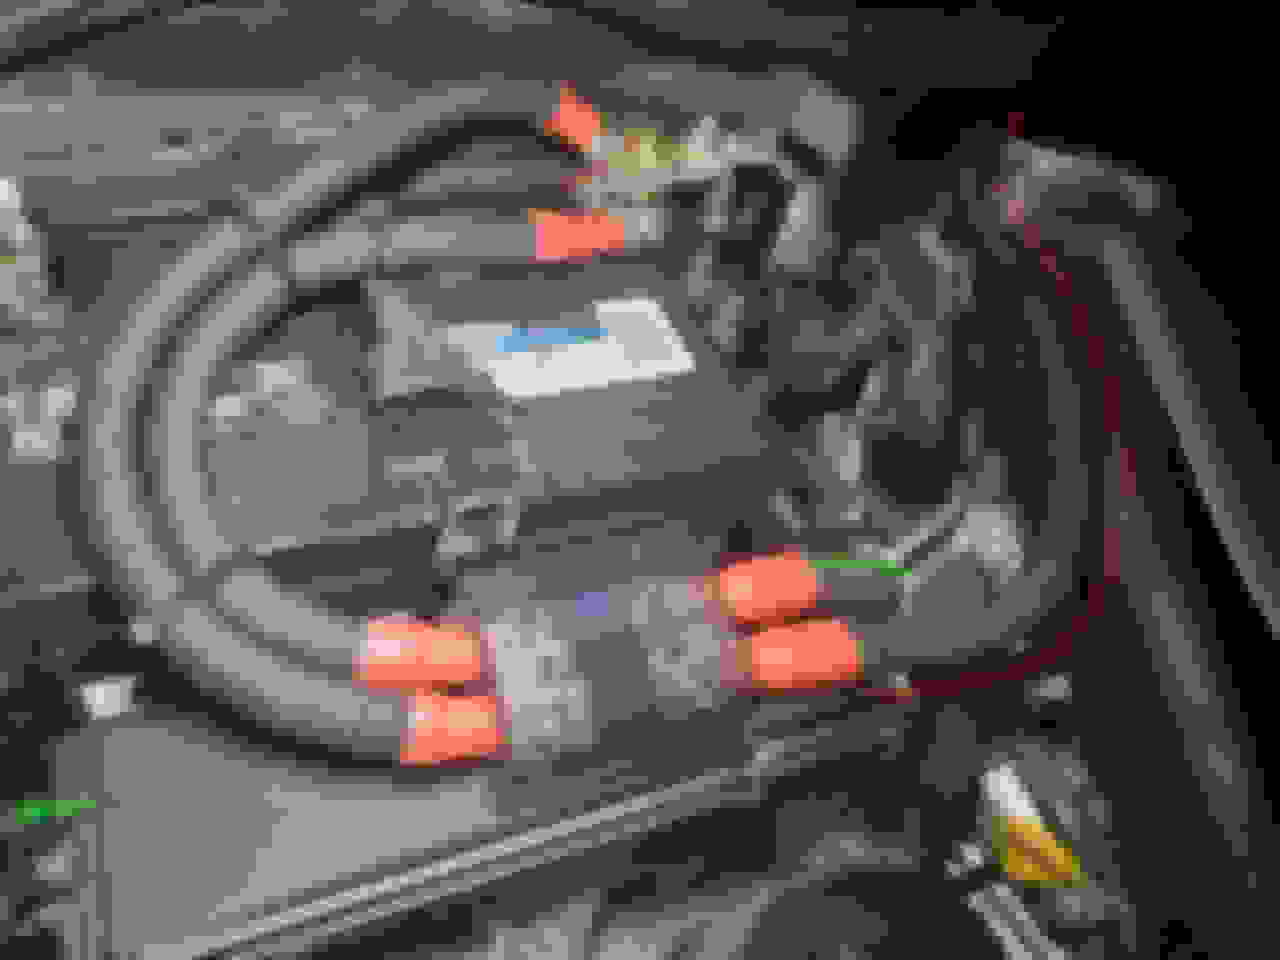
To this point, I've protected the power cables within the engine compartment with split loom and Tessa High Heat 51036 tape. Double layers of both loom and Tessa tape were used at contact points.
The positive power cable to the trunk leaves the fuse block, routes between the factory fuse distribution and battery and enters the into cabin through the large factory grommet that is between the battery and metal grounding bracket on the passenger side of the body. No High Heat Tessa tape was used here, but I may go back and add some for extra protection.
Pulling a 2 gauge cable through this was a pain. This was easily one of the most difficult tasks for me to complete - it's not complex, but still a PITA. Being 6'4", 220.lbs with big hands and long arms and fingers, my body is not ideally suited for the amount of contortion you will need to do this easily. You should remove the glove compartment door (I kept the yellow airbag wire harness plugged in). Also remove the kick panel in the front passenger floor and side railings. l highly recommend pulling the cable FROM the interior TO the engine compartment. Also, get your vehicle battery out of the way, you're gonna need space, leverage, patience and persistence.
I used a plastic-coated metal wire coat hanger, cut it and bent it so that it was straight and smooth. You'll need about 1 foot of straight hanger wire. For good measure, I put a bit of cable lubricant (you can also use KY, Vasoline, no judgement here) and inserted the hanger wire from the interior side underneath the existing wires traveling through the grommet. Unless you have a 2nd set of eyes looking from the engine compartment side, push a couple of inches of the coat hanger at a time and check progress for the wire peeking through the engine side of the grommet.
Once you have enough hanger wire on the engine side to grab on to, secure your power cable to the hanger wire on the interior side with electrical tape (wrap tightly!). Apply cable lube of your choice and slowly, but firmly pull hanger wire from engine side and feed power cable from interior side.
I broke protocol and had my son help with this, with two people the pulling/feeding through the grommet only took a minute, all the work is in the set-up. Make sure you pull enough cable through to reach your fuse holder or fuse block.
Once installed, you cannot get underneath the power cable enough to wrap any tape around it near the grommet. I applied a nice coating of liquid electrical tape around the base for protection mainly from water (see the glossy area of the power cable near the grommet). You can see the trunk power cable routed with the red line here.
Once pulled through the engine compartment grommet, route the cable alongside and underneath the passenger-side rails. Just remove the front, rear and middle section (where the seatbelt resides) and place cable in. 2 gauge fits no problem, even with 3 seperate pairs of added speaker cable, an RJ11 phone line, and thick USB extension cable added. Not sure if 2/0 or even 0 gauge cable would fit enough to reinstall the side rails. If not, you could always put it underneath the carpet, but definitely not required for 2 gauge or smaller.
I had to cut away some of the rear passenger side rail to fit all the cables. Its close enough to the rear bench seat that the only time you'll ever see it is when the rear passenger door is open. You can decorate the cable bundle with some fleece interior Tessa tape and matching poly carpeting (the stuff used for sub enclosures), as did I, to make it look good. The pink line is approximately where the original line started before I took a Dremel to it. Didn't need to remove much material.
In order to route the cable all the way to the trunk, you must also remove the rear bench seat, rear seatbelt bolts, disconnect the rear air bag terminals for BOTH driver-side rear and passenger-side rear, then remove the seat back rest.
The rear bench seat simply pulls up. It is secured in two separate spots underneath the front edge approximately in the middle of the rear passenger seating positions. Not complex, but that bench seat is IN THERE! Gorilla technique that sucker to get it out. Once you disconnect the seatbelt bolts remove your vehicle battery ground and disconnect the yellow airbag terminals on both sides (this one is odd, it has a double lock on it, but I promise, they separate.) Also, it's highly advised to remove your car battery from the electrical circuitry of the vehicle before you touch the yellow air bag terminals. Performing this step immediately after routing the power cable through the engine compartment grommet, where your battery is already removed, probably makes the most sense time wise. I did not have to do anything with Techstream or any other setting after disconnecting and reconnecting the airbag terminations. I admit, I erroneously neglected to disconnect the battery prior to disconnecting and reconnecting these once or twice and still had no issues. Once I even started the vehicle with them disconnected, the car's computer gave warning of an airbag fault, but once the terminals were reconnected (with the engine and ignition OFF) the warning cleared. Just remove the battery for safety.
Not gonna lie, removing the rear seat back rest is another one of those not-complex-but-still-hard-to-do tasks. Would be much easier with an assistant, but not impossible to do alone. Forcefully lift up towards the headboard. As difficult as it is to remove, it's even more frustrating to reinstall, you've been warned. My poor scheduling forced me to remove and reinstall this one about half-a-dozen times and it never got any easier.
I routed the power cable, along with the aforementioned speaker, RJ11 and USB extension cable underneath the rear bench seat. I protected the cables with split loom and interior Tessa tape.
For reference, the RJ11 phone line connects to the Minidsp remote and the USB extension cable is to connect to the Douk USB to spdif digital coax converter.
I measured resistance back to the negative battery post at various points around the trunk area. The best one I found was behind the right side paneling. I sanded the paint away from the front and rear. Used a 10mm bolt and placed a star washer and nut from the rear. I coated the area on both sides with a thin layer of dielectric grease, this will help prevent any rust issues in the future.
I don't really have a pics of the sound deadening, but lots of attention was paid in the trunk sides, rear, top and actual trunk lid underneath the panels.
The Audiofrog GS690s will be going into the front doors. Doors with large woofers are notorious for rattles, buzzes, road noise and any other annoying sound imaginable.
I wiped down all interior door surfaces with isopropyl alcohol and applied butyl rubber-based sound deadening with the foil layer inner side of the exterior metal, the inner side of interior metal, and the outer side of the inner metal in the areas around the speaker mount.
I'm using two different types of sound deading. I had some inexpensive Rockville Rockmat sound deadening I used on the inner exterior metal and some Siless 80 mil aluminum covered butyl everywhere else. Finally, I covered the entire door with some Siless Liner 157 mil liner and applied it so that it sits between the metal door apparatus and the interior door panel. With plenty of experience with Dynamat and other namebrand vibration deadening materials, these less expensive options are fine. As long as you clean and prep the surface and apply firmly, preferably with a roller, I doubt one could find a difference. If you have a $200 budget for dampening materials, these options will get you much more coverage and greater overall results than lower quantities of the more expensive options.
As a side note, the contoller for the door locks and windows is a big source of vibration. When you remove it, shake it and you'll see what I'm talking about. Simply apply some high-quality 3M electrical tape between the light and dark colored sections of the controller to stop vibration. Wrap it around 2 or 3 times. I used cheap tape on this a year ago; the cheap stuff just doesn't hold up to the heat and humidity we have here in the deep south.
I used Stinger Fast Rings RKFR69 for the foam baffle behind the woofer and for the gasket to mate the woofer to the door panel. This helps direct sound to the panel speaker grill and prevent unwanted sound from being directed into the door panel and cavity itself.
The foam speaker baffle was mounted directly behind the speaker. There is a T brace as part of the door frame. You'll have to cut out the foam baffle in the shape of this T deep enough that allows the foam baffle's adhesive to stick to the inner door surface at all other points. Add some 3M spray adhesive to the T area you cut out. You can see by the photos that there is JUST enough space for the window to roll down without touching anything (about 1/4" clearance) for the baffle.
I did the passenger door first and learned NOT to cover the holes the door panel secured to with sound deadening. I went back and removed sound deadening from those immediate areas on the passenger side and avoided applying it on those areas on the driver side.
I used Metra 82-8149 mounting brackets and installed double sided sticky gasket material between both the door frame and speaker bracket and between the speaker bracket and speaker frame itself. When mounted there is about 3/4" of clearance between the speaker magnet and window when rolled down.
I had big plans to route new 14 gauge speaker wire all the way to the door speaker. Once I had the vehicle apart, I didn't feel it was worth the effort, time and risk. So simply used the newly installed 14 gauge wire and spiced the factory speaker wires near the kick panels. Pink & red pair on driver side, green & blue pair on passenger side. There are other wires of the same color in the bundle. The factory speaker wire seems to be of a slightly larger gauge than the rest. Cut away a small portion of the insulation of your candidate wire and verify with a voltmeter before you cut.
To connect to the factory speaker wiring inside the door, I used Metra 72-8104 wiring harnesses. These wiring harnesses DO NOT fit the dash speakers and I was unable to find any that did. Wrapped the harness connection with interior fleece Tessa tape.
Finally, no photo, but I removed the white clips that secure the door panel to the door frame and wrapped interior Tessa fleece tape around the circular part that touches the door panel clip mount itself. This stiffens and isolates that contact and prevents a rattle at that contact point.
Three Scanspeak midranges will be installed in the three front factory dash locations. There are challenges with this location, especially the center channel (very close to the rear of the video monitor). There is limited depth in the factory locations and it's designed for a standard 3-1/2" speaker. There just aren't many options in the form of a high end or premium 3-1/2" driver. You could try to to cram in a 4", and it would be doable. But depth will be your issue. You only have a hair more than 1.8" of depth (46 mm) and most 4" drivers are pushing well beyond 2".
The Scanspeak 10F/4424G is about as much a perfect fit, with only very minor fabrication required. The Scanspeak's mounting holes do not line up wiith the dash's 3-1/2" mounts, so we must make some ears, or mounting tabs.
For these tabs, I used universal back straps and trimmed wiith a hacksaw to fit. These back straps, purchased from Crutchfield (item# 120BKSTRAP), are a bit more stiff than others I've used in the past and worked exceptionally well.
Start by cutting a few 2-and-a-half hole sections (the holes in the back strap, that is). Then drill a small hole (large enough to fit your mounting bolts you'll need to attach these tabs to the speaker) approximately midway between the middle and last back strap hole near the long long edge. See photo for reference
These tabs will be sharp, use a metal file to smooth the edges.
Using a bolt small enough to fit through the Scanspeak's mounting holes plus an appropriately sized lock washer and nut, attach your fabricated tabs as shown here, mount this specific way so the tab does not interfere wiith the Scanspeak's surround or cone, very lightly tighten the tab nut/bolt. No need to overly tighten just yet, you'll still need to align the tabs so they match that of a 3-1/2" driver.
Now take one of your Mark Levinson 3-1/2" dash speakers and place it on top of the Scanspeak, cone facing cone. Do this then align the tabs of the Scanspeak so they match the mounting holes of the ML 3-1/2" speaker.
With the mounting holes lined up, now fully tighten the nut/bolt securing the tabs to the Scanspeak driver.
Don't worry about the color or appearance of the tabs, they will not be visible when installed with the factory grill set in place. Just make sure the tabs are not sharp and are filed down and that they do not interfere with the Scanspeak's surround or cone.
Good job so far. I'm waiting to see the inconspicuous tweeter mountings.
Have you seen how they are in the 2021 Camay with the upgraded JBL systems in the Pillars?
Thanks. Haven't seen those specific mounts. Are they similar to these?:
I do like that design, how the tweeter is partially resessed at an angle into the A-pillar.
I wished the GS had enough clearance behind the A-pillar to accommodate something similar. Ultimately, I had to make compromises, but am satisfied with the results so far. I'll post some tweeter mount pics soon.

 02-25-21, 08:32 AM


 , but who knows. Decided to play it safe here with some excellent AudioControl gear. Acquired in 2018.