When you click on links to various merchants on this site and make a purchase, this can result in this site earning a commission. Affiliate programs and affiliations include, but are not limited to, the eBay Partner Network.
StriViK's 1998 SC400 - The Odachi Build - Six Speed 1UZ VVT-i
Hello everyone,
StriViK here, aka DrAtomica. Haven't made a post in a while so here's an update with many changes that are upcoming and are already done to this 1998 SC400.
Updates to this car will be made on this thread and indepth related videos/pictures you can also check on my instagram @strivik
About the car, not too much has been to it on the extreme side, such as an engine swap or going standalone or even modifying anything on the engine side. It still has the stock intake with a stock Toyota filter, so that should give you an idea.
Modifications: Bilstein Shocks + Supra TT Lowering Springs (Hypercoil), Gixxer Drew Setup although non adjustable, TT Brakes, IS350 Wheels, TRD Front Strut Bar, Supra TT Front & Rear Swaybars, Bellraceworks Front Lower Control Arms with replaceable balljoints.
Stats: 12/01/2021
- Mileage: 245,000+
- Issues: P/S Line Leaks, Valve Cover Leak, Possible rear subframe mount issues
26/02/2022
- Mileage: 245,000+
- Issues: Valve Cover Leak Goal of this build -
Sometime around 2017 I decided that my goal was to build this car into something that could handle your average hillside backroads and some aggressive elevation corners but yet keep the luxuries of the car intact, NVH is an important factor here that I do tend to keep if not increase unless my goals change but I don't see that happening. The thought comes to mind that this isn't exactly the best car to begin with so it can handle aggressive corners and because of that this makes this build quite challenging, you simply just can't fight gravity but maybe there is a way to not fight it as much.
Mindset -
The name "Odachi - 大太刀 ", is a specific type of Japanese great sword which is traditionally made, the character 大 means big which is part of the car's personality. These 1UZ VVT-i SC400s came with the highest amount of HP from any SC and even possibly Soarers, so they have plenty of power and torque which makes them no slouch for even today's standards. The high torque on the lowend does make it feel that it is exerting a lot of force as expected from a V8. One other characteristic of an Odachi is how long it is, perhaps one of the longest Samurai swords to be made and till date the 1st Gen SC (Z30) is the longest coupe ever built by Lexus, including the LC500 (Z100) which is it's successor. What you have is a combination of great power and a lot of weight which means handling it (whether it be the car or the sword) is not so easy to do, one important factor in handling is also balance. Even though the car does weigh quite a bit, weight distribution is an important factor not just for the car but also for the driver. As many drivers know that weight in the front can cause a car to feel nose heavy, this may not necessarily be a bad thing but it also means the front brakes and tires have to do more work when that weight is shifted to the front, you can easily notice that diving into a corner the front tires may feel as if they are being overworked. Comparing a JZ to a UZ this is one of the areas where the UZ powerplant makes the car feel a bit better if you want to use the Z30 as a car for spirited driving, the engine sits almost aligned with the front axle, meaning there is very little weight that is sitting in the front so when you brake hard there isn't as much of a weight transfer happening and on top of that you have a Aluminum/Aluminum engine vs Iron/Aluminum engine which also means that UZ weighs significantly lighter than a JZ. Many car companies try to keep the weight behind the axles, cars such as the 350z, they even called it a FMR layout which is Front-Mid Engine Rear Wheel Drive which is safe to say the UZ in the SC400 also matches that exact description. So does it mean it can handle quite well like a 350z? Well no, at the barebones of this car it is not a sports car but a grand touring car, you have a long wheelbase which although provides more stability it is not as nimble and lighter like it's younger sister. The idea behind this build is to create a luxury grand tourer that has low NVH, a comfortable ride, with touches of modern tech and materials yet be a solid platform that can be used for having fun.
The Build -
Now onto the fun stuff, I'm starting this thread with the biggest change that the car will go through which is a manual conversion from a six speed 350z transmission known as a CD009 or CD00x. Throughout the the thread I will post my reasoning for the choices I have made and also provide feedback on any of the parts installed on my car and any future parts that I am considering, will also include a parts list for those who are interested in doing the same or similar swap. So here we go!
Why CD009 vs R154 vs W58 vs AR5?
The age old question, well here's my opinion on this matter.
Starting off with the weakest, W58, this is quite an easy answer that most W58s are not going to be found in their greatest condition, these transmission have seen a lot of age and from factory their torque ratings are very low, I have seen UZs swapped with it but you're going well beyond the point it was designed to handle in terms of torque, so all that effort may just come at a halt someday, some have even blown these up with their stock 2JZs although that may not always be the transmissions fault. That being said, I do love the whine of a W58. R154 - Ah yes, the transmission that came in the Soarer Turbo, MK3 Turbos and other Toyota vehicles as well. A good transmission that has been abused through and through and has proven itself to fight back, with the increase in demand and limited quantities the amount of transmissions on the market are decreasing which also means the price is going up naturally and top of that the covid situation is not helping the market. Which means you'll have to spend a good amount on a R154 which may be 20-30 years old so the condition is unknown with parts that are not that common to find as they used to be, a gamble I say but if you found a transmission for a bargain then it may worth it. AR5- The next best thing? A transmission that most have heard of but not as common of a swap around. In short, the AR5 is an almost identical transmission to the R154, it is an updated transmission that can be found in many junkyards. It came in GM vehicles so finding one for a good price should not be an issue. Initially I was deciding on getting one but I wasn't too happy with the gearing ratios, especially the ones that come of the Pontiac Solstice Turbo which IIRC has some gear ratio of 1.0 vs 1.6, which leaves quite a decent gap in power when you're on the stock diff of 3.26. CD009 - The transmission I chose, why? Extremely well built transmission that still has parts laying, it has been proven to be abused and taken extreme amounts of torque (800+), many G35s, 350zs are being used at drift events and they almost never give out. The best thing is that parts can be found easily for it and if it really comes down to it, you can still buy this transmission brand new. The demand of this transmission has slightly increased in the last 2 years but they can still be found at an affordable price. The gear ratios are something that I like as well, it evenly spreads out the power so shifting from one gear to next should feel quite natural and top of that a sixth gear will help if needed.
There are other transmissions too such as the 240sx transmission, the BMW six speed getrags, and even a J160 but I did not consider them for various reasons such as too short ratios, expensive adapter parts and not enough support.
Since the 98+ SC400s come with a five speed auto (A650e), let's compare the gear ratios of that to a CD009. A650e: 1st 3.357 2nd 2.180 3rd 1.424 4th 1.000 5th 0.753 Reverse 3.431
With a final drive of 3.266 this is what the numbers are for speed assuming rev limit at 6,000 RPM. A650e: 42mph -> 64.5mph -> 100mph -> 142mph -> 187mph CD009: 37mph -> 60.5mph -> 87mph -> 111mph -> 141mph -> 178mph
Compared to the A650e which spreads the power of the UZ unevenly, the CD009 really spreads it in a nice manner. For example 4th gear in the A650e goes straight from a 1.4 in 3rd to 1.00 in 4th, while the CD009 has 1.6 to 1.2 and then finally 1.0 which is a gradual drop and will give you that extra pep you need on the highway. 1st gear is quite short on the CD009 which is why its a MUST to use a lower final drive, the 3.266 works perfectly with this setup because it gives a high amount of power from the start up.
For those interested here is the V160 gear ratio set and you can see how close it is to a CD009, the final drive gear ratio in the Supra Turbo is also very close if not identical to the 3.266 from this SC. So in many ways, you aren't too far off from the question "What if the V160 came in the SC400s" V160:
1st 3.827 2nd 2.360 3rd 1.685
4th 1.312 5th 1.000 6th 0.793
The CD009
We picked this CD009 from a 350z at a junkyard in Dallas, it had about 150,000 miles and we checked if there were any fragments or shiny particles coming out of the gear oil, luckily there wasn't anything of the sort, the gears shifted well and no unusual noises were there but until the transmission is in the car and running we won't know for sure. This specific transmission is what many consider a CD009 #2 or revision #2, it is when Nissan changed from double cone synchros on the third gear to triple cone synchros, previous versions have been reported to get damaged under load and wear. Even though this transmission says CD#2 on the side of it, this is NOT the correct way to know if the transmission is the revised edition or not. The only sure way to know is to get the VIN from either the car it was pulled from or check the VIN which is on a plate on the side of the transmission (you can see on the top left on the picture), sometimes it may have a sticker which says CD009 #2 but usually those are not readable. Once you obtain the VIN you can check what year it was produced and go from there, there are also other services online that you can ask them to check the VIN with their database for a small fee.
Picture below is a guide which may give you more insight on what years to get, the ones you should be looking for are with the triple cone synchros on the third gear.
CD009 Shifter
There are in my opinion 3 or 4 essential parts to what makes a car feels nice to drive.
The steering wheel, the clutch pedal feel, the sound and how it shifts. I will talk about the last part, the shifter. There are many shifter kits available for this transmission, specifically shifter relocation kits which allow you to bring the CD009 closer in since you will need to do that in this chassis, brands such as GKTech, Autosports Engineering, Xcessive Manfucaturing create shifter relocation kits but since this is such an important part of this build I wanted to make sure that whichever shifter relocation kit I chose had to be a high build quality and most importantly would feel great. Now its close to impossible to tell how a shifter would feel just by looking at but you can get an idea by asking around and trying out so that's exactly what I did. The choice I landed on was the CD999 Shifter Relocation from SerialNine, the other brands I mentioned had many complaints and one of them even I had used on someone's car and it just did not click with me. I knew that this would be something that would bother me quite a bit so as John Hammond says "Spared no expense", went with this kit and it just shifts beautifully. It's been machined very well and they have great customer support too, can't say too much as of right now since the transmission is not installed but so far it feels great, even has a reverse lockout!
I'm very excited for this project! I'm very familiar with how the 1UZ VVT-i, A650E with its somewhat subdued until pushed shift logic and gearing feels against a 3.266:1 final drive ratio combination feel... at least in a much heavier 98-00 LS400 chassis. The CD009 is a great manual transmission option and the gear ratio comparisons do make it interesting.
I am concerned that you may need to look into going with an aftermarket ECU to dial in the driveline 100% with a manual transmission but I am curious to see how this setup will come together overall.
A 290hp/300ft-lbs 1UZ VVT-i against a 6-speed manual transmission is going to transform your car!
I love the history of "Odachi" and your philosophy of it as relates to your SC400 and how you see it being set up optimally.
As for having the highest horsepower rating even more than Soarers... by the *official* rating yes since all 1JZ-GTE's and all other Japanese high performance engines of that era were rated at the same maximum "280PS" (276hp). However the 1JZ-GTE VVT-i more than likely makes a bit more than 300hp at the crank stock in reality despite the official rating. Regardless the 1UZ VVT-i has a very nice linear power curve and has gobs of easy to cruise with low end torque that feels totally different than a 2.5L engine with a turbo coming on line.
As always thanks KahnBB6.
If you're referring to how the ECU will respond to this swap the easiest solution is to get a piggyback automatic emulator which I will install, without that or without proper wiring the ECU will limit the amount of power delivery. Specifically, it will disable VVT-i from working and most likely will run in limp mode. There are various solutions posted on GS and IS forums but to my knowledge there is nothing for 98+ SC400s when it comes to wiring so I will post those when the time comes for me to wire it up. I do intend to use the ECT Power/Normal/Snow mode since it also affects maximum RPM and throttle response/sensitivity from the pedal, so will have that module installed. Now the question is will it work as intended? Guess we'll see.
Glad you brought up the Soarer figures. In my post I mentioned that it is possibly higher than Soarers but the figures are all over the place for whp. Some stock 1JZs seem to have dynoed anywhere between 235whp and 260whp (don't know if auto or manual numbers) and if we go by an average percentage of drivetrain loss of 15% of 290, that gives us 247whp which is what the 400s theoretically sit at, although as you said the torque feels different with the 2.5 + Turbo so it may not be there as much as the V8 which means there is more power on the get go even though peak HP may be lower it's possible average HP may be higher but that in itself is entirely different discussion than can go back and forth for many pages.
Sometimes it's easier to understand an idea by association and I felt the representation of this SC related to the Odachi would work nicely since I feel they are related in many ways.
Now that I have shown that I am going with a six speed CD009 transmission it's time to move on the Part 2 which is Parts. What parts I bought, why I chose those parts over others and so on.
Parts List: Supra MKIV Clutch Pedal
Supra MKIV Wilwood Clutch Master Cylinder and Adapter
Supra MKIV Brake Pedal
CD009 Transmission
CD009 Shifter Relocation
Hydraulic Throwout Bearing
XAT CD009 to UZ Kit - Includes Adapter Plate and Flywheel
SPEC 300ZX Stage 1 Clutch Kit
1UZ Rear Main Seal & Rear Oil Galley Seal
CD009 to Z30 Transmission Mount & Crossmember
Aluminum Single Piece Driveshaft
To begin with the most important item on the list,
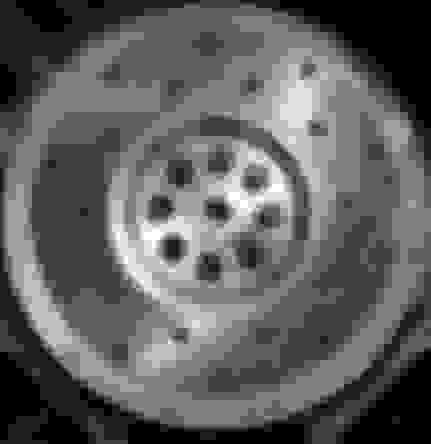
Flywheel -
When doing a conversion on a 1UZ there are a few things to consider when searching up flywheels online. One thing is that since the UZ never really came manual (except some obscure Land Cruiser) there are no OEM flywheels which means that every company will take their own approach in making a custom flywheel for the UZ. Since I'm interested in the driver experience and want something with a high fun factor so I decided to look for lightweight parts. Why lightweight? Less rotational mass means faster revs which means easier to rev match, engine brake and get back on the power curve quicker, there are some disadvantages too but I will discuss that in depth later on.
Right off the bat I noticed that many companies mention that their flywheel is based off another car and some of them even had it almost identical to it, which concerned me because how will I be able to start the car, won't the ring gears be mismatched? Well many people have a solution is to stack up the flexplate and spacers with their flywheel.
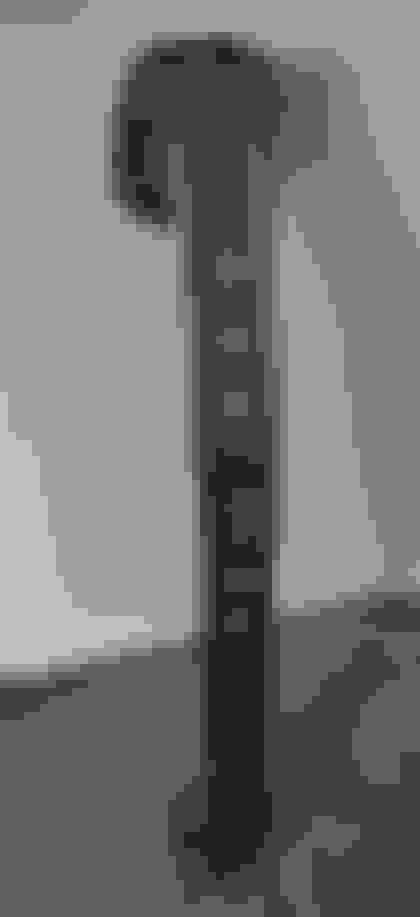
Flexplate
Picture above is a flexplate, it sits on the crankshaft and the torque converter is bolted onto it. The flexplate itself weighs about 2-3lbs and the gear around it is called a "Ring Gear", this ring gear is what mates up with the starter crown gear and allows the engine to start when the starter is engaged. I wanted a flywheel that didn't require this flexplate and had it's own ring gear that worked with the crown gear, meaning no modifications required, some companies even suggest that you may have to shave down the crown gear a bit to get it to work. That's a big no no in my book not because it won't work but because there is a proper way of doing things and these methods may cause reliability issues in the future, we know that the OEM method works, it's tried and true. Any flywheels that required the flexplate to be mounted with the flywheel or have the crown gear modified were not in my basket anymore. What I was looking for next is something that is light which is not so easy to find, I saw examples of flywheels that weighed from 11lbs to 23lbs, some of the lightside ones are the ones that have to be stacked up with the flexplate which just meant you're adding additional weight, so what was the point of having a light flywheel in the first place.. Alas I landed up on deciding to get the lightflywheel for a CD009 to 1UZ that had a compatible ring gear and non custom clutch setup which is from XAT. This flywheel weighs about 13.5lbs and isn't the lightest flywheel available but it's at the point where it wouldn't be too light to make street driving difficult. On top of that they also have an option for a replaceable friction disc which is nice so you may not need to change your flywheel if need but instead can just replace the disc itself. This flywheel is compatible with Nissan 300zx Turbo clutches (Z32), which means if you buy most single disc clutches it should be able to fit. There are plenty clutch options for these cars so it shouldn't be much of an issue in finding one.
Adapter Plate -
The adapter plate is also from XAT which requires the cutting of the CD009 bellhousing. To those who haven't seen the bellhousing in person, it's quite a large bellhousing and it has issues with fitment in our chassis since the transmission tunnel is a bit small for it. The solution for most is to bash the tunnel until you make enough space but it wasn't something that I wanted to do. The disadvantage/advantage (depends on who you're asking) is that you'll require cutting the bellhousing which means you will lose the stock fork clutch setup. Clutch fork setups are not by any means, it really boils down to the driver, some people prefer the older style feel and some prefer the newer style feel but generally hydraulic throwout bearings are self adjusting and have an overall consistent pressure across the pedal. This adapter will be mated to the inside housing of the CD009, the outside of it part will be mated to the stock U1 bellhousing (both found on the A340e and A650e), I think the Crowns are the ones with the U2 bellhousing. Adapter plate has a tube for the throwout bearing assembly to sit on and a cut to prevent a lot of movement. Overall it's a well designed piece and lightweight.
Flywheel and Adapter Plate Quarter Master Hydraulic Throwout Bearing - There isn't much to say about this just that it provides a consistent pressure and works by hydraulic pressure
Clutch - Coming in clutch!
The clutch I chose for this build is a SPEC Stage 1 Clutch for a 300ZX Turbo. It's a fairly lightweight clutch at around 12lbs and is rated at 450ft-lbs which is plenty for the 1UZ. Originally I had chosen the Exedy replacement clutch for Z32s but for some reason most of them were out of stock so decided to opt for this instead. Even though its a lightweight clutch the feel of it should be very stock like and I think that's because of the organic lining on this clutch which helps in a smoother engagement, will update when it is installed!
I love your thought process, your "purpose", and the swap itself. I think a 1uz vvti 6-speed car would be an absolute IDEAL SC. I love this project and look forward to your progress!
Supra Parts - Clutch Pedal Assembly, Master Cylinder, Brake Pedal
Here is another item that I mentioned earlier which is part of what makes it feel like a driver's car. There are a few clutch pedal assemblies available, you can try getting the stock SC300, some aftermarket ones or you can get this bolt in one from a Supra MKIV. I believe the SC300 ones are no longer manufactured which is why I chose this instead, the one I bought was direct from GrannasRacing since they assemble all the small pieces together in one package so you won't have to, definitely worth the price. The part itself is fairly easy to install once you drill out the holes for the clutch master cylinder which I used a 36mm holesaw for the center hole and just drills for the bolt holes.
I also installed a clutch switch that I pulled off a 93 Corolla but that part can easily be found in almost any manual Toyota/Lexus, it bolts right in and I plan to wire it up to the NSS (Neutral Safety Switch). This way when the clutch is not engaged you will not be able to start the vehicle, gives it a nice OEM touch.
Now the brake pedal on the autos is large and you have a few solutions, easiest one is just to cut off the that side and bend the rod slightly so it's evenly spaced. Since the OEM brake pedal was only $60 I decided to buy that, currently I am in the middle of replacing it and installing the Clutch Master Cylinder.
Speaking of that, previously I had the AISIN OEM SC300/Supra Clutch Master Cylinder installed but recently found out that I most likely will have issues engaging my throwout bearing with that clutch master cylinder since its a 5/8" bore vs what is required which is a 3/4" bore size.
I opted to get the Wilwood Master Cylinder + Adapter from Grannas, its a small unit that I'm still trying to install so will update on it once I do.
Supra MKIV Clutch Pedal Clutch Safety Switch Installed to be used a NSS Holes have been drilled out, they were already stamped from factory so you don't have to do any measurements. Pedal sits close as of right now but will be changed to a manual brake pedal
Much appreciated!
I absolutely agree that it would be ideal, it's a shame that these cars never came with a manual option but luckily there is more and more support coming every year so it seems very promising.
Speaking of Supra parts, a few months ago I picked up this TRD Front Strut Bar. There were some fitment issues where the top of the manifold was touching ever so slightly on the bar, quite a simple fix is just add a few washers to increase the height by 3mm.
As to how much it has improved handling, hard to measure but it does feel like its made the front stiffer, there is slightly less roll on the front but honestly don't know if it has improved handling, it does provide more confidence in the car because the front feels solid.
Removal of Transmission and Maintenance -
I'm not going to go in depth on how to remove the exhaust, driveshaft, auto shifter and transmission. Most of these are fairly straightforward but I'll mention a few tips that may help others who are interested.
First thing to do is to remove the center console, there are many guides on this forum that go in depth so you can follow them. The shifter is held on by a few connectors and the main shift rod that allows you to go through the gears is connected to the transmission, so it's easier to do everything up top and then remove the nut on the transmission that the rod is connected to when you get to that part.
Exhaust is held on by a few bolts and brackets, you shouldn't have any issue removing those. The secondary O2 sensors will be connected right after the cats and those cables go through the interior. Just be careful with those when removing them because you have to twist them and they can twist on itself when you are unbolting them, that will most likely happen especially if they haven't been changed so keep that in mind.
Disconnecting the drive shaft is also simple, first is to unbolt the driveshaft couplers/damper/guibo on both sides then you can use a pry bar to get some leverage and wiggle them out, once that is done you can remove the center bracket of the driveshaft and wiggle both sides to remove it out.
Removal of the transmission may give you some issues but here are a few things, first of course you must remove the bolts that are attached to the torque converter, you can do that by accessing them through the front of the bellhousing/back of engine, there is a small compartment there held on by two bolts, remove those two and you should have access to the torque converter. It's a bit of a tight space there so you'll have to get creativity, having a swivel and a thin ratchet can help a lot, you must prevent the crank from spinning while you are removing those bolts. Once that is done you can start removing the lines with a wrench, this can take some force. You can also remove the shifter rod nut that I mentioned earlier and the shifter should just be able to pop out. Getting the connectors removed you can use a combination of different picks but try not to break them because you'll need them later on. The transmission lines need to be followed all the way for proper removal but since I haven't done that yet I suspect removal of other things in the way from the looks of it.
Other than that, you'll need some long extension(s) and just get to the bellhousing bolts. Once all that is done, slowly pry the bellhousing surface on the engine and slowly disconnect the transmission, just be patient. When removing the flexplate, there are some kits will recommend in using the flexplate or using the spacers that are on the flexplate, so just see what's required for your application.
Goodbye old friend A650e, you've been great to me
While you're there it is highly recommended to replace the rear main seal and O-ring, I say highly recommended but really what I mean is you better.
Here are the part numbers you'll need for the 1UZ -
Rear Main Seal: 90311-95013
Rear Oil Seal: 96721-24025
Get the OEM seals ahead of time, don't rely on your local parts store for these seals, you don't want to go back here because you wanted to save a few single dollar bills.
Apply some Toyota FIPG for a gasket, also don't forget the two bolts that go in the bottom of this cover.
The 1UZ pilot bearing size is much larger compared to that of a Nissan or other manual Toyota engines, so you will need to get an adapter as well. XAT does provide an adapter bushing that sits perfectly and you just use a mallet to get that in.
Now for manual cars, the input shaft from the transmission will just sit in that space mentioned above. There are different types of bushing/bearing that you can put there but the most common is a bronze bushing.
You can look up for more info on bearings vs bushings but for this application I opted for the needle nose bearing. Nissan/NISMO use needle nose bearings for their 370z as well, just need to make sure they are greased when installing.
Installation of the pilot bearing may be difficult but I recommend to use a blow torch on the adapter and press the bearing in the adapter, there inside the adapter which will not let the bearing go further than it should. We didn't have a blowtorch at the time so instead used the compression method which is put the bearing in a freezer for a while which allows it to become slightly smaller and used a socket to help it press it in.
A lot of hours put in this weekend but alas progress has been made.
Installation of the Flywheel
Now that the bearing has been fitted to the adapter you now have to press the adapter into the crank, you can just use a mallet and press it in. You will need to install the friction disc onto the flywheel and get it a tight fit, the friction disc is the part of the flywheel that the clutch disc will grab against. Once that is done, clean up the flywheel and make sure there are no oils on the surface and install the flywheel and torque down the bolts to what the original bolts in place were torqued down to which is 85ftlbs for those bolts from Toyota. Now depending on the flywheel you will need to ask if you need to add the spacers or add the flexplate, in my case I did not have to do either. Once the flywheel is installed you need to check if it's touching the starter bolts or not, it should not be gears because when the starter motor is engaged it will push the crown gear and then it will align with the flywheel ring gear.
Starting The Engine / Neutral Safety Switch Bypass
In order to start the car it has to be in one of the two gears, you can have it in Park or in Neutral, there is a switch that lets the ECU knows if it's in either of the two gears. That switch is on the side of the transmission, so that will be the connector where you have to connect the wires.
Depending on which model and year your vehicle is the NSS wiring can be different but in general there will be two wires that you will have to look at. In the case for this 1998 SC400, you will need to bypass wire 5 and 6
Note: If you look at other videos or tutorials online DO NOT rely on the colors of the wires or the locations of those wires, these wires are different depending on the car.
Now this does not mean all the CEL will go away, that will be addressed much later since I still have to figure those out.
Start the engine and see if everything is working as intended!
Installing The Clutch
Grease up the clutch alignment tool and insert the clutch alignment into the pilot bearing, sometimes the clutch alignment tool can bend due to the weight being applied to it and that affect inserting the transmission so I recommend getting a steel alignment clutch tool, I'm sure that would have saved me quite a hassle when installing the transmission. With the clutch alignment tool installed, put the clutch disc over, just make sure it is facing the right direction. and then put the clutch cover on top of that. Make sure everything is aligned properly and start to bolt down the bolts. You can apply some loctite for those bolts to ensure they will stay there not get loose, you'll need to hold the crank while torqueing them down.
Great thread! Anxious to see how well your used tranny shifts! I have been hesitant to try one for that reason, but I am planning to run the same transmission in my �97. Good luck and keep plowing ahead!
Great thread! Anxious to see how well your used tranny shifts! I have been hesitant to try one for that reason, but I am planning to run the same transmission in my �97. Good luck and keep plowing ahead!
Nick
I'm hoping that it does work out, one of the big unknowns on this build.
There are many kits available and a few them require the cutting of the bellhousing, this cut doesn't need to be perfect as long as its not too deep and has clearance for the adapter plate. The adapter plate is what mounts between your transmission and your automatic transmission bellhousing, there are no bolts on the outside of the CD009 like the A340e/A650e but instead has bolts inside, the adapter plate will connect to those so we need to cut the bellhousing to gain access to those. This used transmission I got had quite a nasty bellhousing, maybe the previous car had a leaking rear main oil seal we decided to give it a thorough wash. There are some things that poke that will need to be cut as well and also remove any unnecessary brackets. Applying FIPG to the adapter plate for a proper seal What it looks like when the front plate is removed How it looks like when installed
Installing the Automatic A650e U1 Bellhousing onto the CD009
The install of the bellhousing onto this adapter is quite straight forward, it uses the same bolts that you removed from the auto transmission however there is some preparation you'll need to do.
When you install the throwout bearing assembly the bellhousing must clear the feed and bleed line, this part is not so easy because you have to drill a hole on the side of the bellhousing and check multiple times if you have enough clearance, don't have a picture right now but will add one when I get it. As for the throwout bearing, it doesn't need to be mounted anywhere, with install it will stay in place by the pressure of pressure plate fingers.
Decided to paint bellhousing for that personal touch and add some stickers. A650e bellhousing on the XAT adapter plate attached to the CD009 in all it's glory
Installing the Transmission Onto the Car
Prior to install depending on your application, you may need to adjust your throwout bearing. There is an entire set of calculations that need to be made in order to figure that out but usually a guide is given with your setup to help you go through it, I may add that if anyone really needs one and I can talk in detail about it. Generally you have to just creep in the transmission since its tight there in there, I installed my shifter in the transmission prior to installing the transmission so it was having issues reaching to the top, had to cut down the tunnel slightly to give it some space. The automatic shifter hole should be enough to get that shifter through it but if it doesn't you can cut it slightly. Really you just have try different methods and push the transmission, angle the transmission and even angle the engine if you want more angle, turn around the output shaft or crank to get the splines aligned. It may be a fight or it may go easy, for us it wasn't that easy.
For the transmission crossmember I bought one from Fisch Racing Tech with the Energy Suspension mount.
CD009 in the SC400, got a few signatures from friends who helped with this build.
TODO:
I will be now ordering the driveshaft, a single piece aluminum driveshaft. In the meantime there are a few more things to do.
Overall we need to check the work, make sure the lines are in proper places (not too close to the exhaust or being squeezed), install the feed line on the clutch master cylinder, I also noticed that the Supra Turbo brake pedal does NOT work with the SC400, it just keeps hitting the firewall. I'm not sure why on multiple places on this forum people mention that it does, maybe it does for SC300s or maybe it's for a NA Supra brake pedal but I'll most likely just end up cutting the auto one. Need to fill the transmission with fluid and double check for leaks, finish up some of the basic wiring and get it all nice and tidy. I have removed the harness for the reverse switch from the CD009 and will extend the wires so we can wire it up to the reverse switch on the auto.
 12-01-21, 10:09 PM