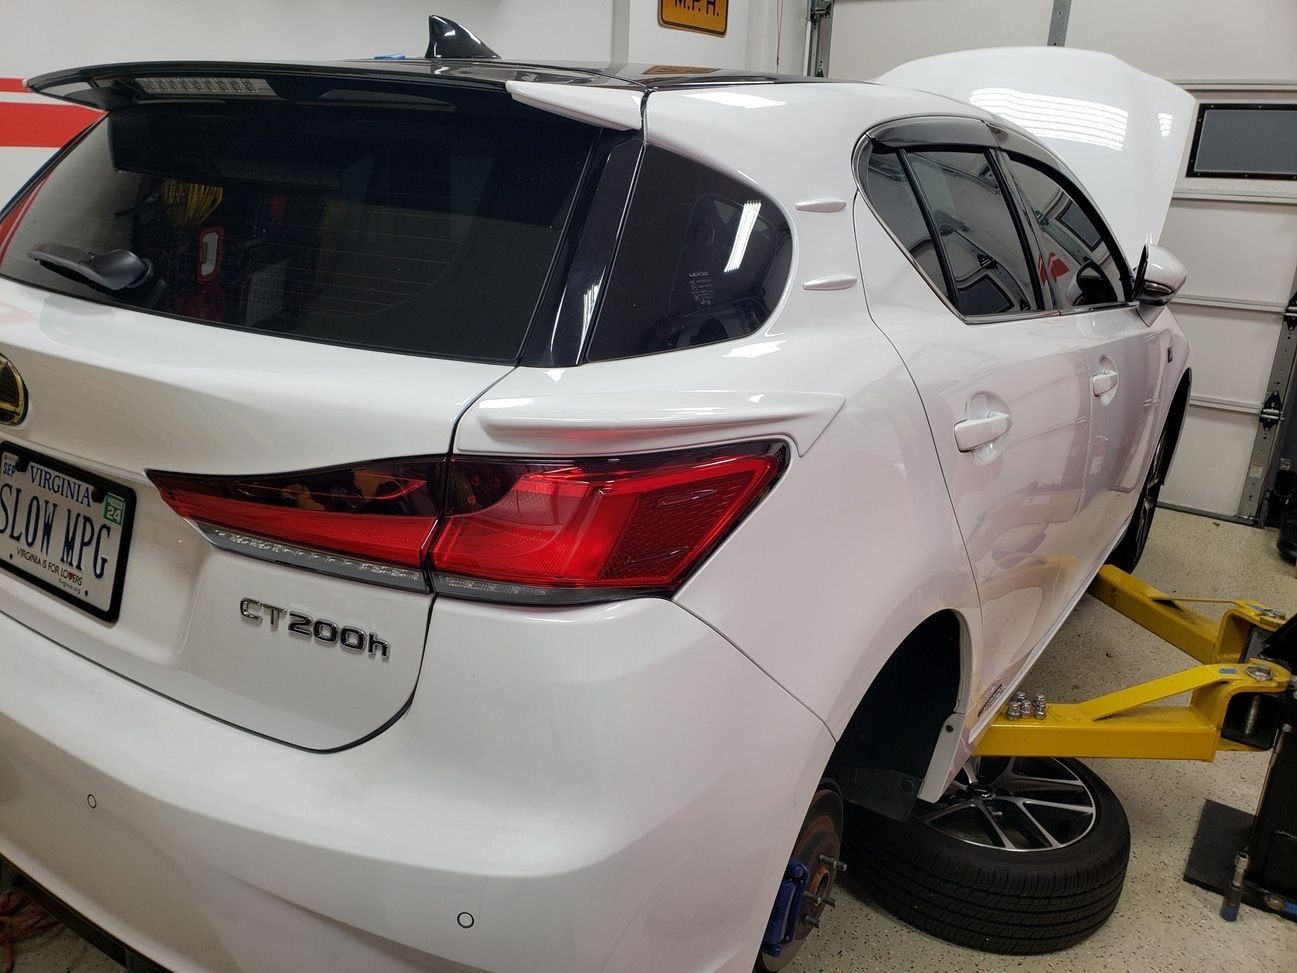
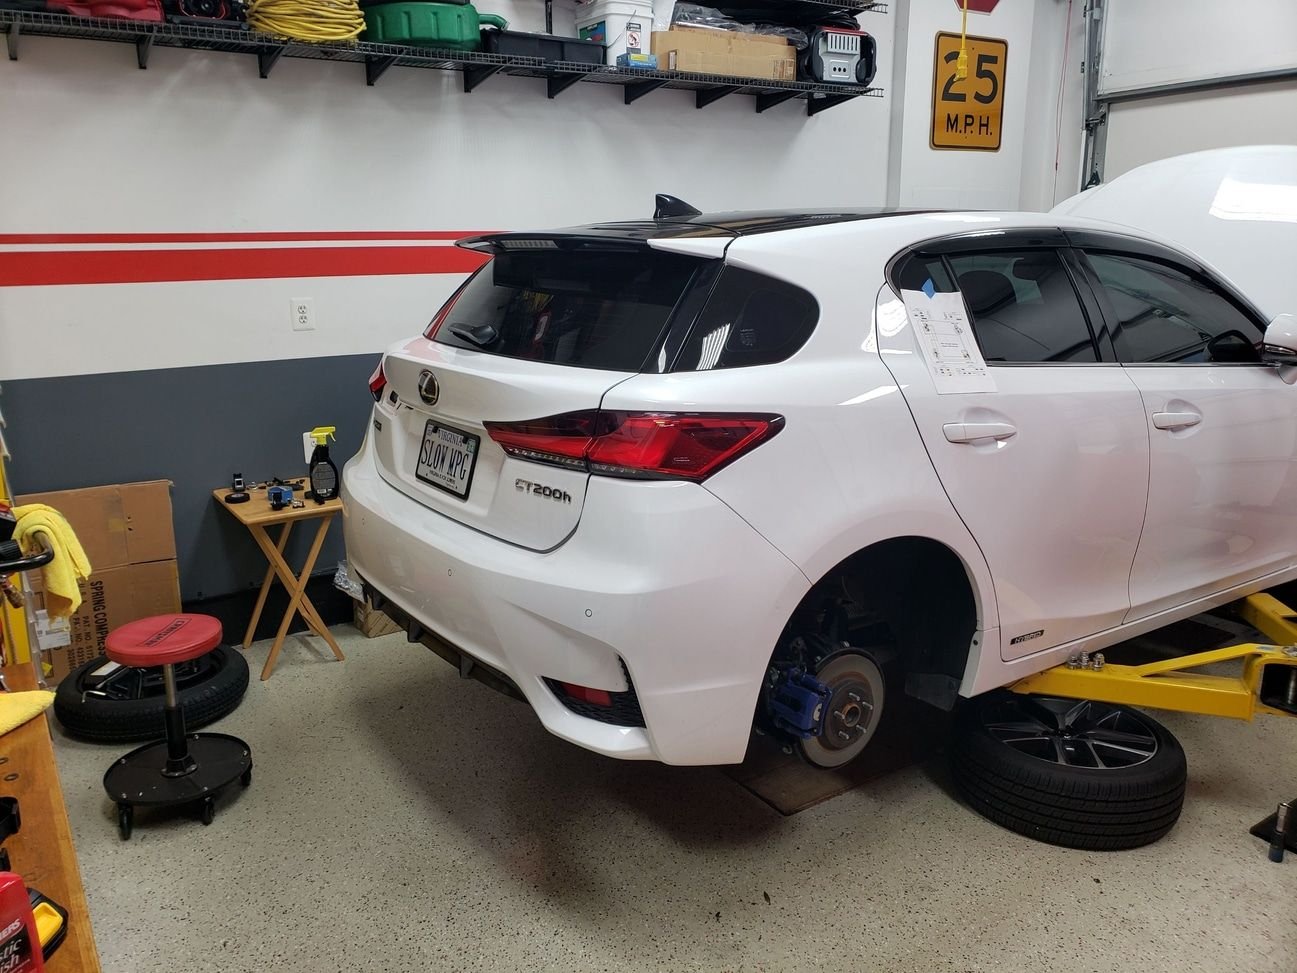
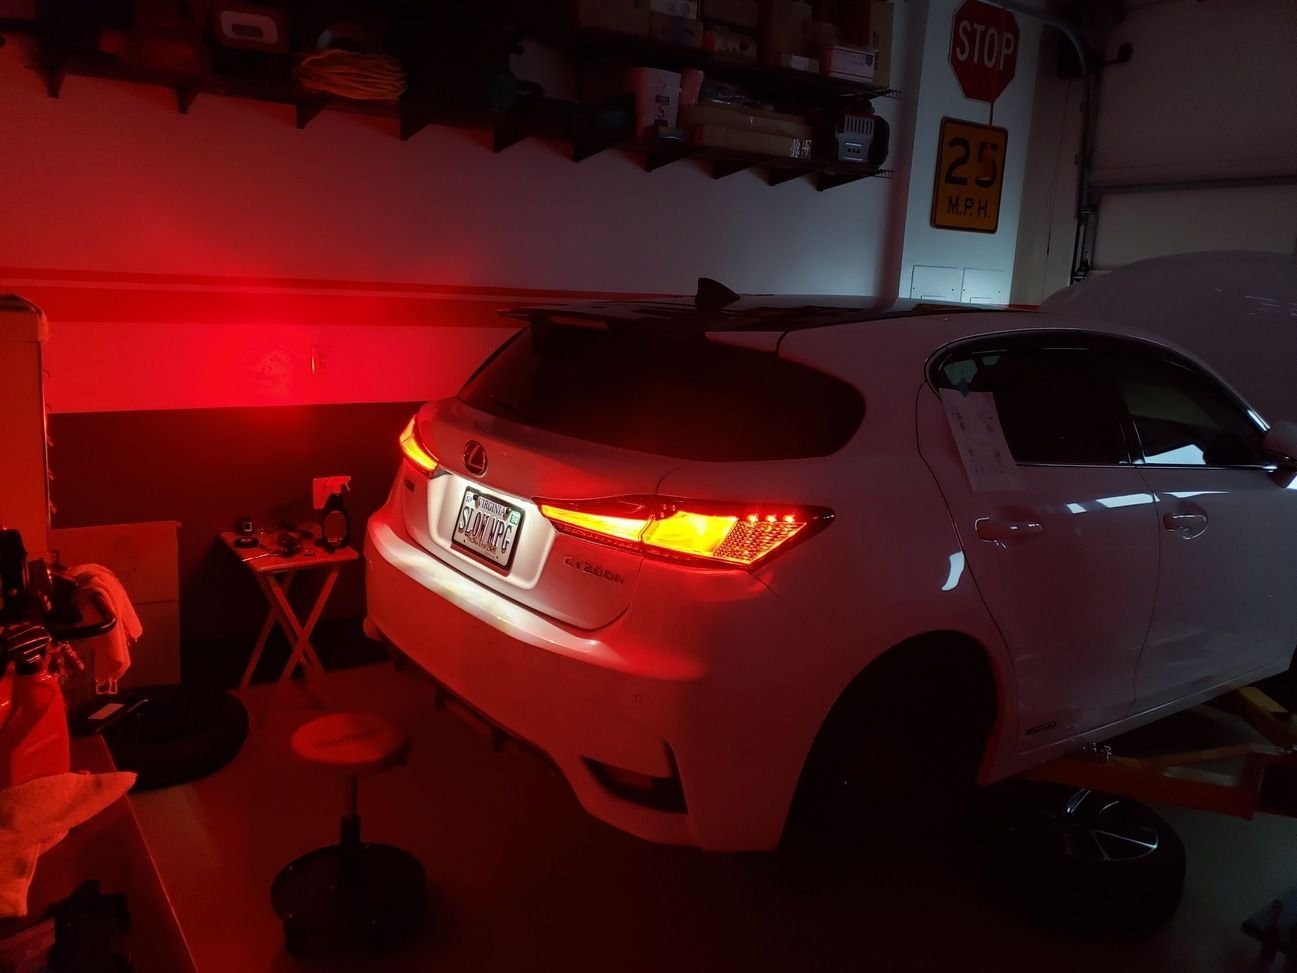
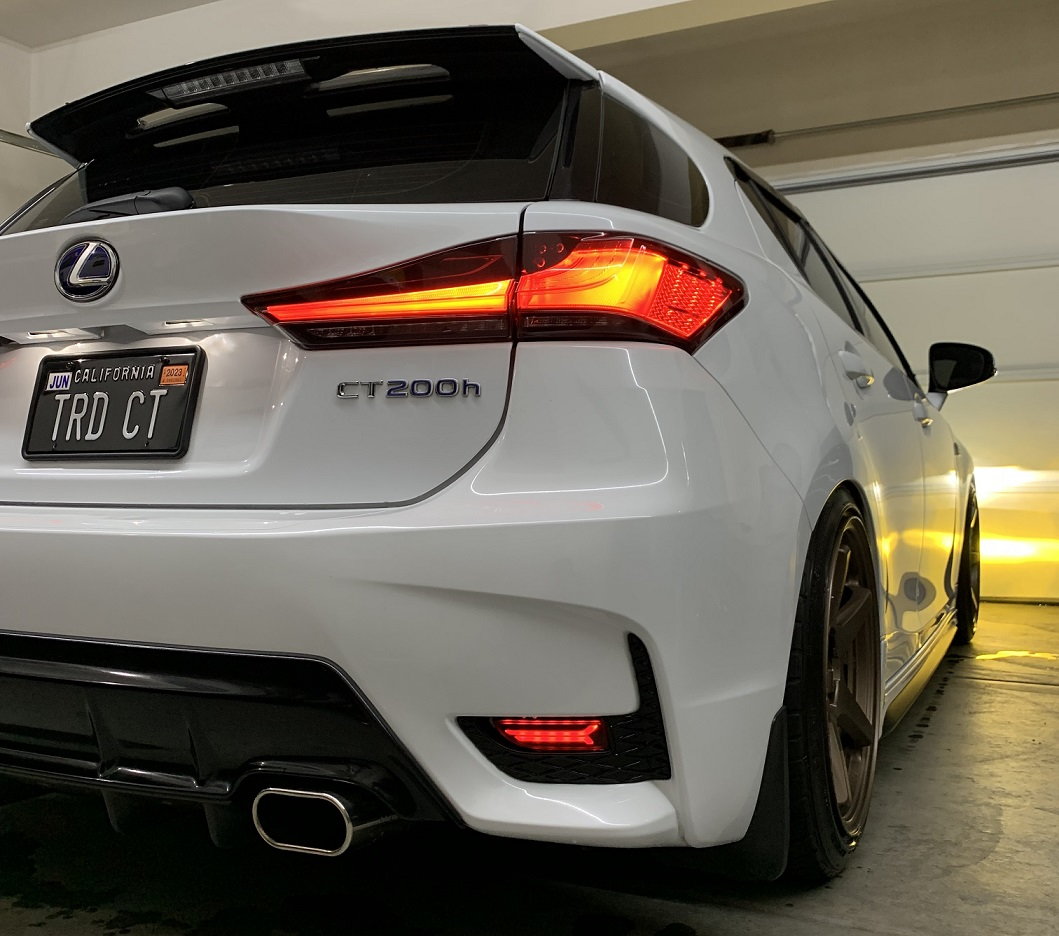
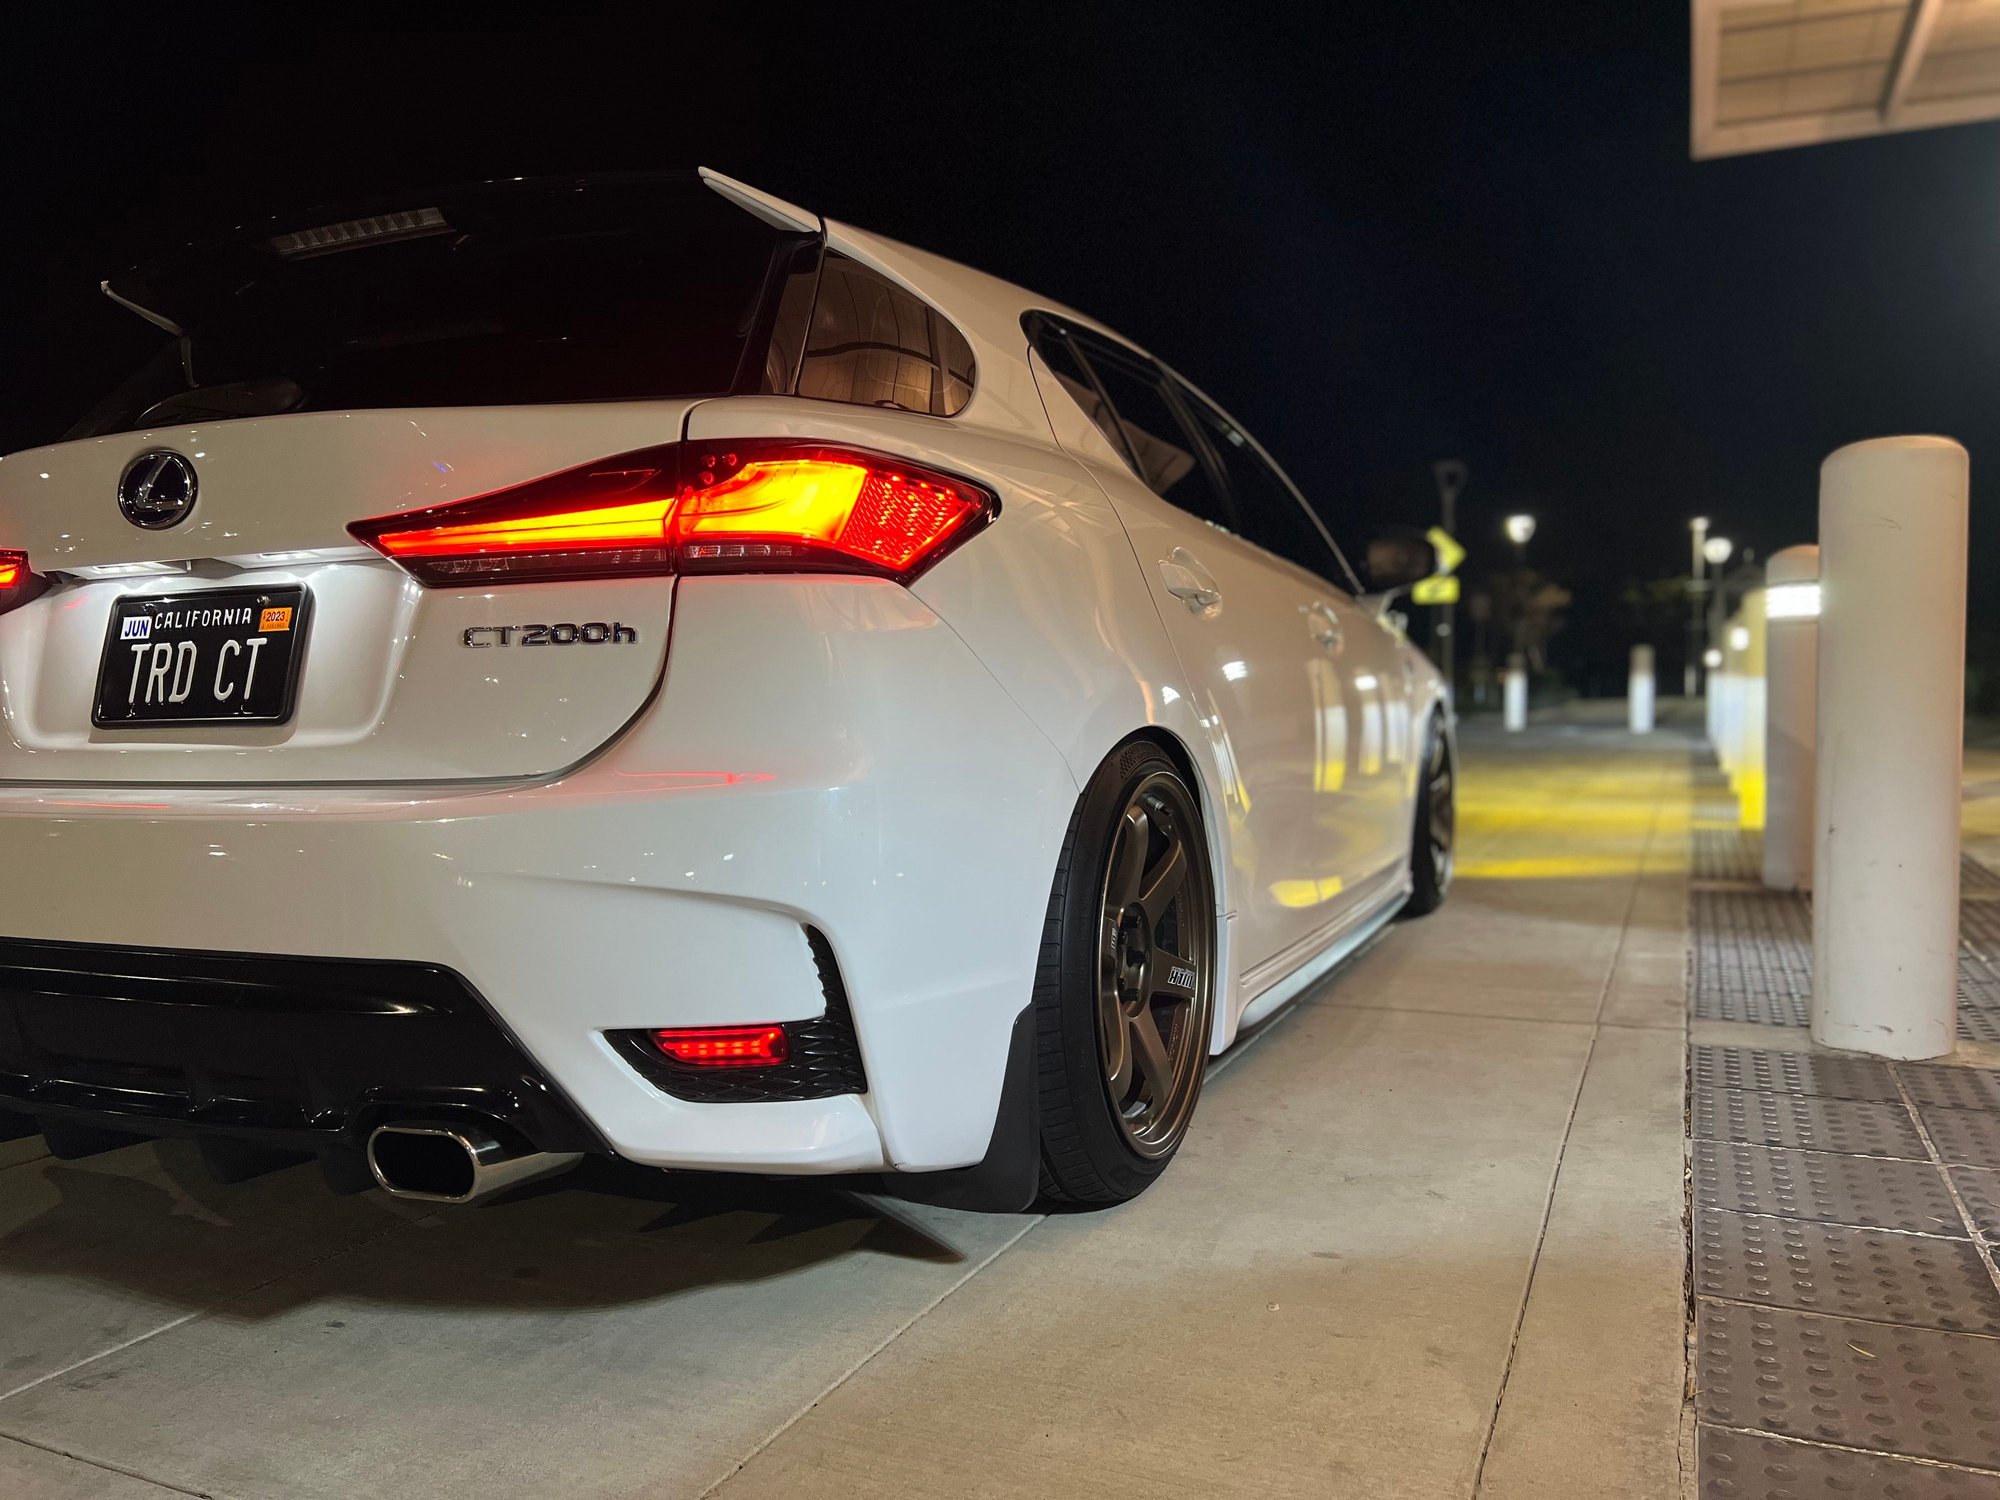
2018+ Taillight Conversion
#1
Rookie
Thread Starter
in· do· lent [ˈin-də-lənt] adjective = averse to activity, effort, or movement: habitually lazy
I’ve had these taillights on since March 2022, but I mentioned not doing a write up until it functions as it should. Thanks to @nigel821 I finally have working turn signals on my 2015. He found out that we needed to tap/splice Combination Lamp Pin-6 (Green) to a 12V source / Turn signal. Also, shout out to Raymond for getting him on board with a project he probably wouldn't have started. On another note, two of my buddies with Gen 1 CT’s did not have to do this for functioning turn signals despite me helping them wire it up the same way prior to the tap/splice. I will update this thread if there are any discrepancies or improvement needs, but feel free to reach out if you need help or clarification.
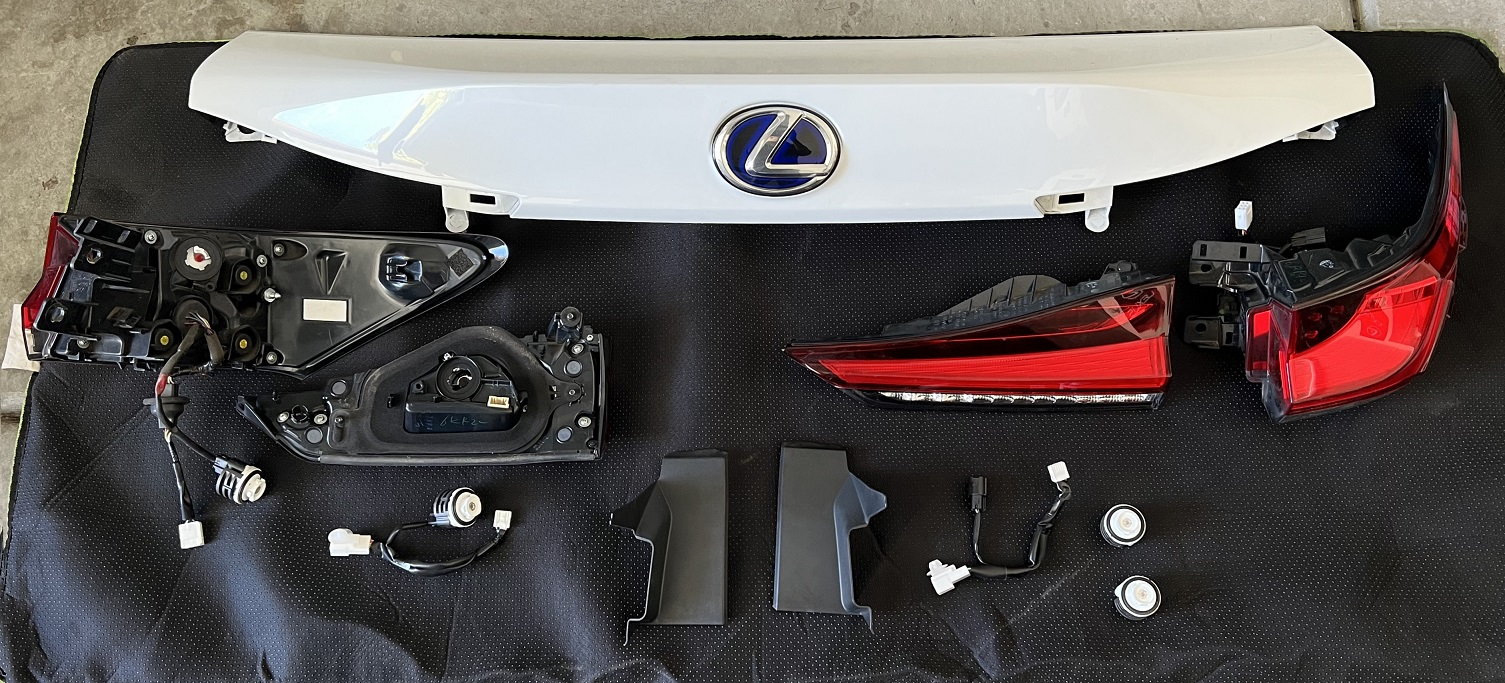
2018+ CT200h Taillight parts list:
- 76801-76040. Hatch Garnish Panel
- 81591-76081/81590-76080. Tail Lamp, Inner Left
- 81581-76081/81580-76080. Tail Lamp, Inner Right
- 81561-76261/81560-76260. Tail Lamp, Combo Outer Left
- 81551-76261/81550-76260. Tail Lamp, Combo Outer Right
- 81497-76010. Cover, Rear Combo Lamp, Right
- 81498-76010. Cover, Rear Combo Lamp, Left
- 8158A-0D610. LED Bulbs (x4)
- 81585-76080. Socket & Wire for Inner/Gate Tail Lamp (x2)
- 90980-12368 Connector Housing, (Female 10-Pin). Inner Tail/Gate Lamp (x2)
- 90980-11011 Connector Housing, (Female 6-Pin). Combination Tail Lamp (x2)
- 90980-11452 Connector Housing, (Male 6-Pin). Body harness (x2)
- Sumitomo TS 025 Female Terminal 0.22 - 0.5mm (24 - 20AWG) (x16)
- Sumitomo TS 090 Male Terminal 0.5 - 1.25 mm2 ( 20 - 16 AWG) (x12)
- Sumitomo TS 090 Female 0.5 - 1.25 mm2 ( 20 - 16 AWG) (x12)
- 18 AWG wire (Combination Lamp/Body Harness)
- 24 AWG wire (Inner / Gate Tail Lamp, factory wiring is ~1.4mm OD)
Tools:
- Wire Strippers
- Terminal Crimper
- Wire Puller (i.e. VIM MEG20)
- 10mm Socket / Wrench
- Philips & Flat Head screwdrivers
- Panel removal tool
Test your lights pins to confirm the wiring and function of your lights prior to installation. For the inner lamp, you’ll need to install your socket & wire (81585-76080) followed by your LED bulbs x4 (8158A-0D610) for all 4 lamps.
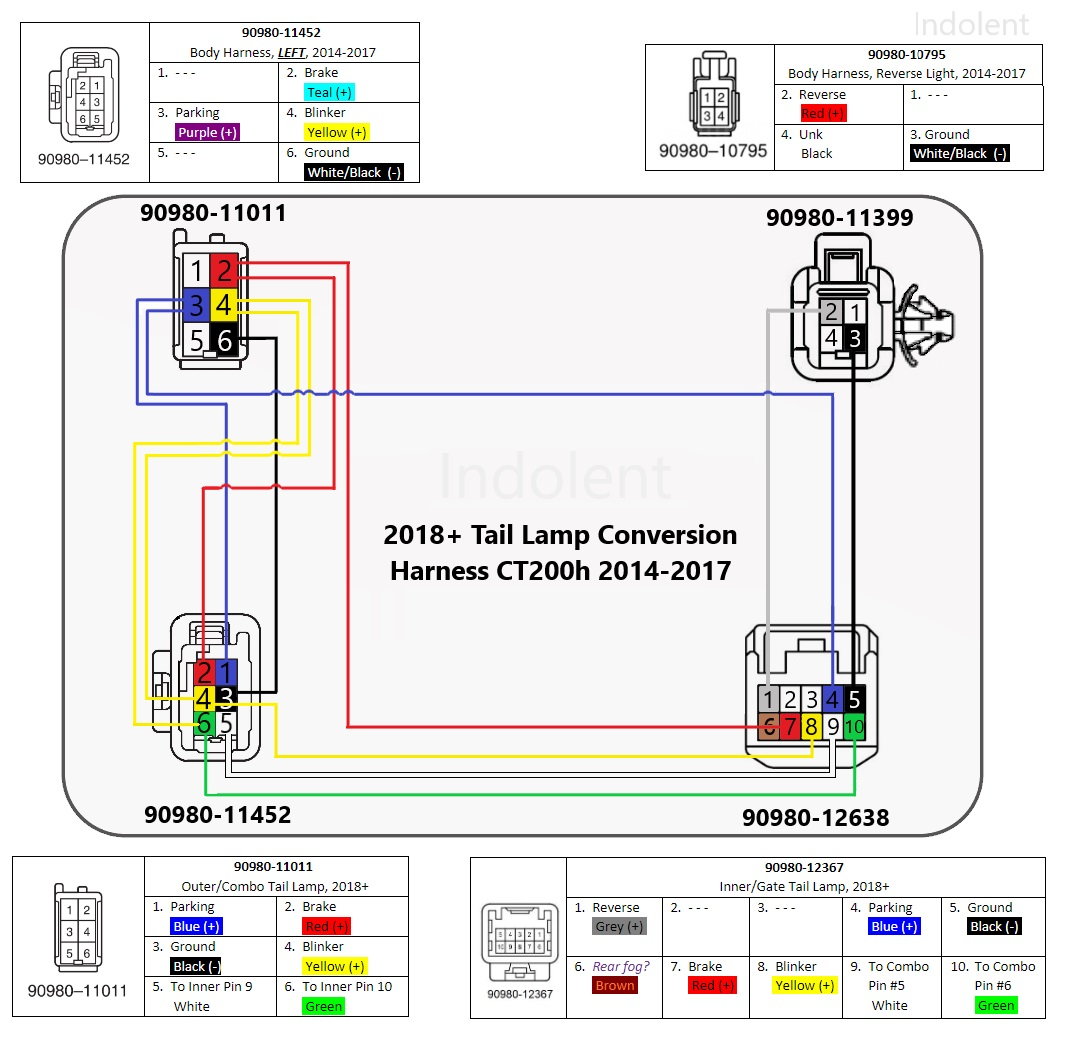
**The difference between the above/below diagram is the body harness wire colors**
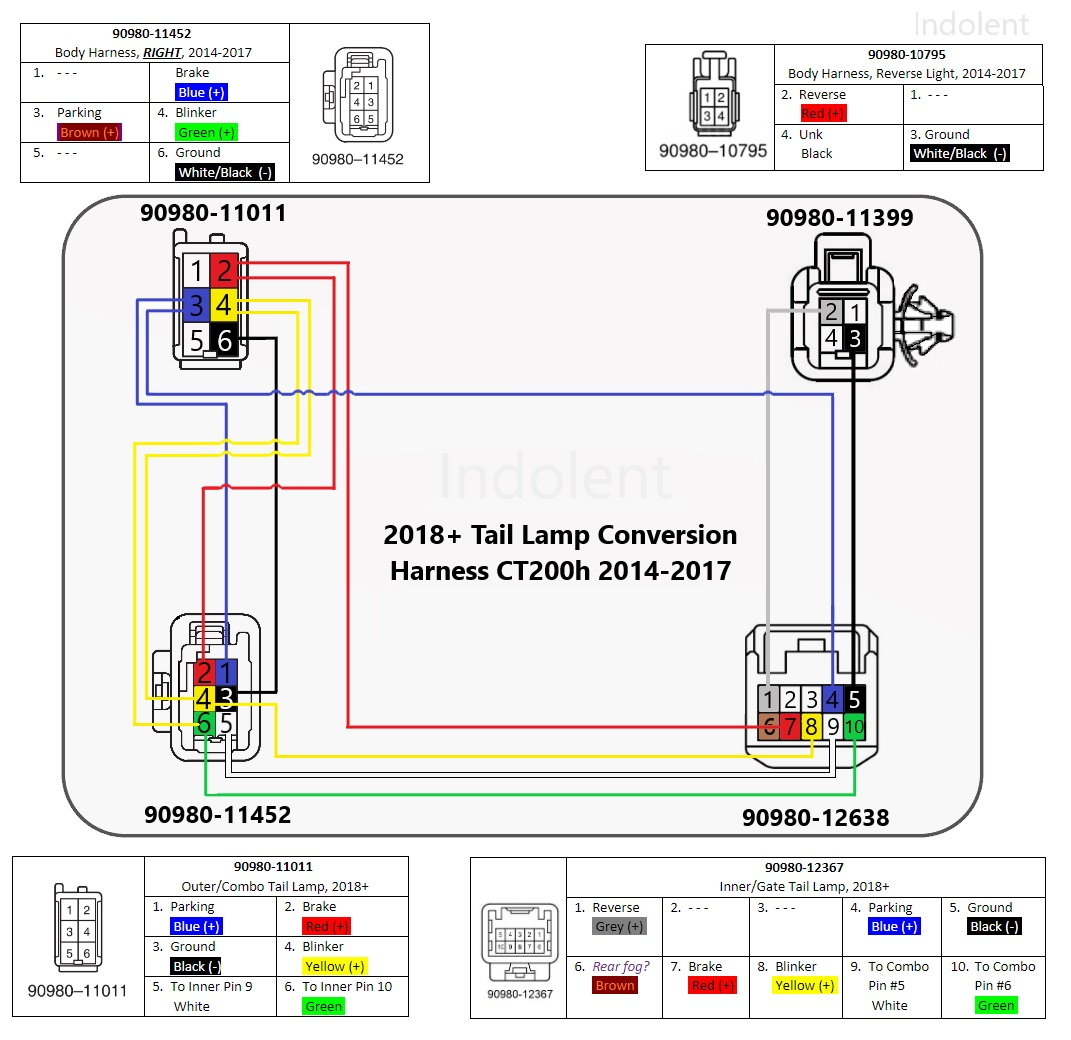
TLDR: Above are my diagram(s) I made with the pin locations and associated wire colors. Hopefully it’s easy to understand and to match everything all up. I’m sure you can wire, tap/splice them differently to achieve the same result. However, my diagram represents my actual, functional wiring (with pictures included throughout the thread). Remember that the chassis body harness colors differ per side despite having the same connector pin #’s. Also, depending on the connector the actual pin # on the diagram be reversed (i.e. male connectors). Due to this, I’ve included pictures of the connectors for better visualization. Make sure you order plenty of extra terminals for any mistakes.
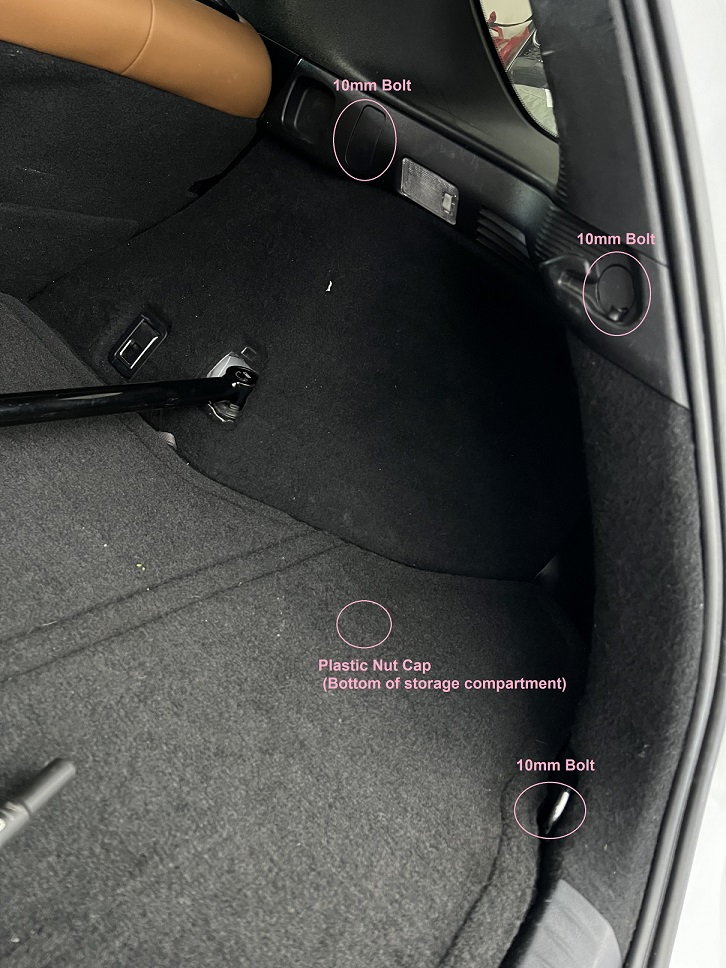
Remove the tailgate/hatch plastic covers. This video here is very helpful.
Pop the two outer/combo taillight bolt covers, remove the 10mm bolts, then you should be able to pull the taillight back/out. If you’re having a hard time pulling it off, place along piece of tape to the side of the light wrapped around your hand to help you pull it back and out.
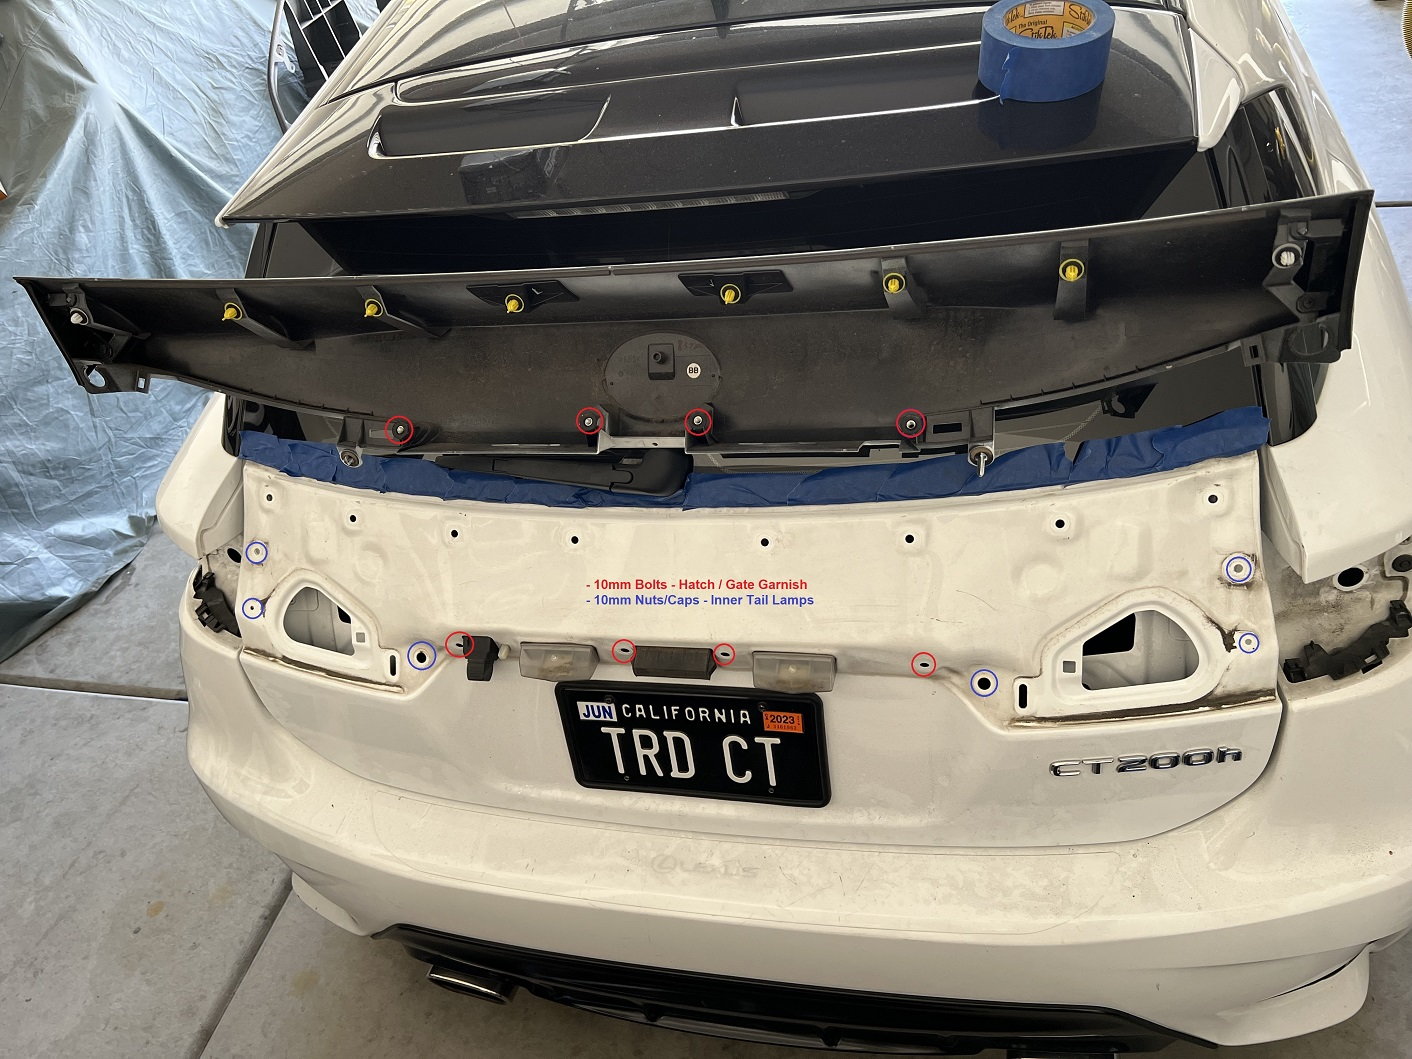
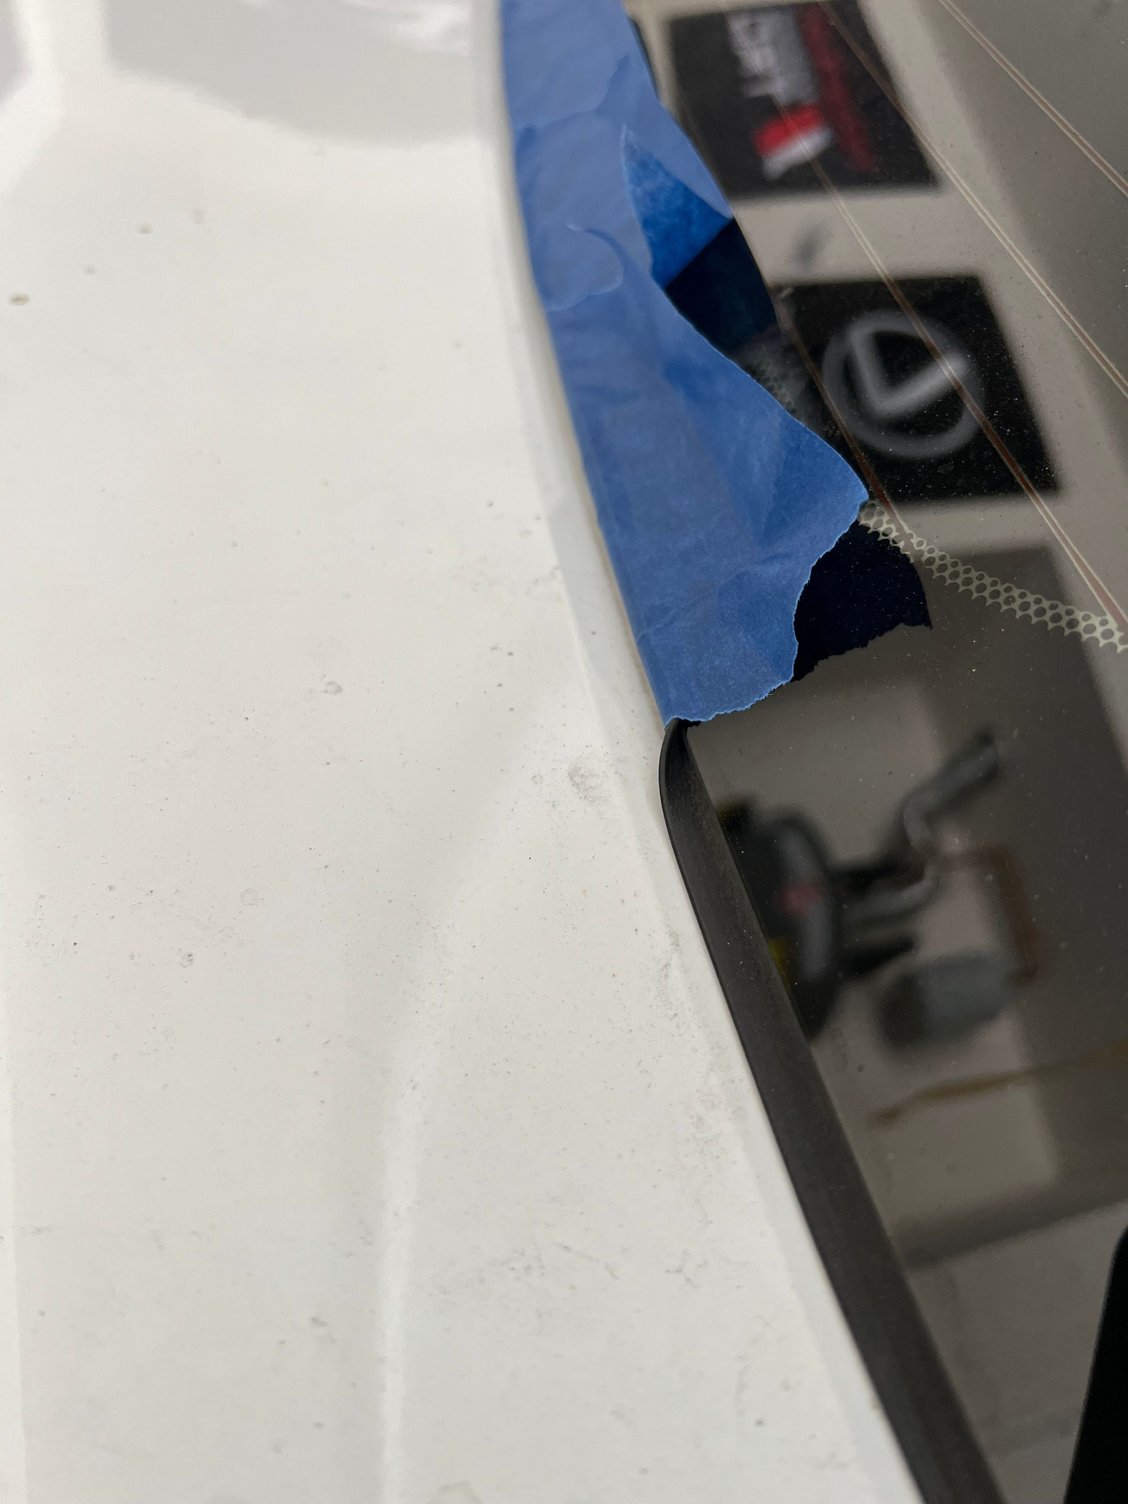
Remove the inner taillight by disconnecting the reverse light plug/wedge, then the three 10mm cap/nuts. Remove the hatch garnish by removing the four 10mm bolts circled here within the hatch gate. Prior to installing the new hatch garnish, I recommend you fold and tape the rear window rubber gasket upwards toward the window for easier placement afterwards (see pic for reference).
I went to a local electronic shop to purchase wiring by the foot in various colors. I used 18 AWG (2ft per color) for the body (90980-11011) to combo lamp (90980-11452) connector and mostly 24 AWG for inner lamp (90980-12638) connector (about 12ft per color [Red, Yellow, White, Green, Blue]). Be careful not to order too thick of a wire for the inner lamp connector as the factory TS 025 (20-24 AWG) terminal wiring is about ~1.4mm OD.
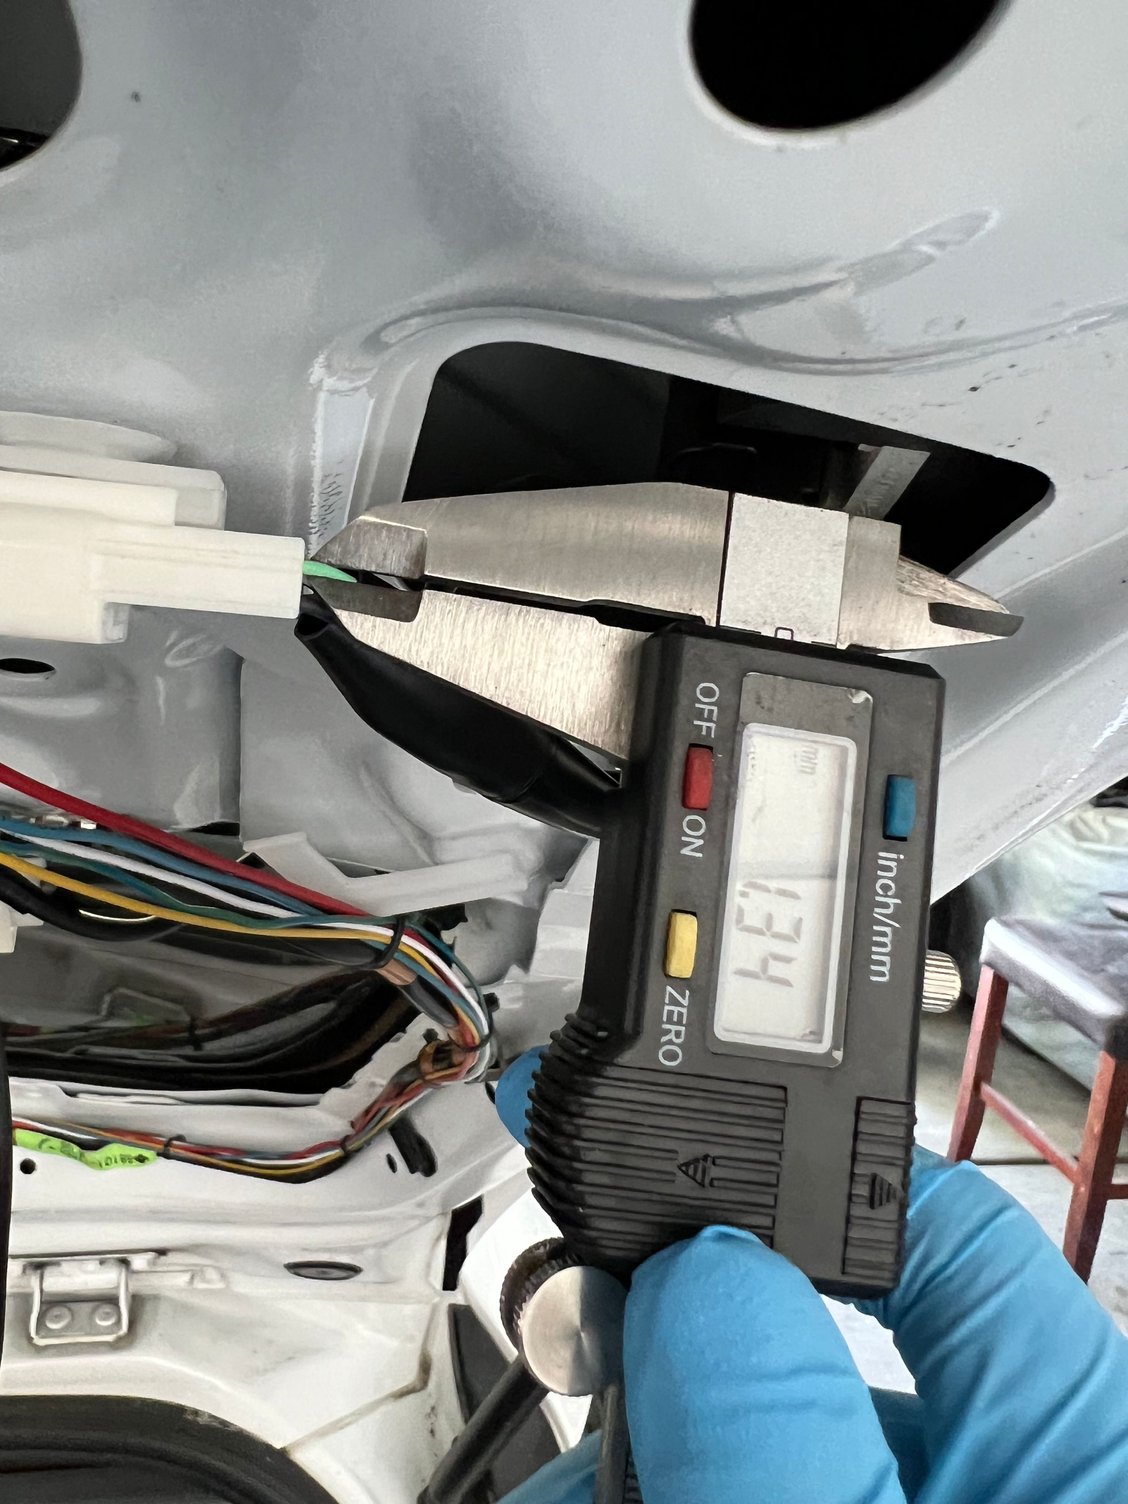
Some wire insulation thickness may vary between brands and you may have trouble placing the terminal in the housing well. I used about 7’ of one wire just to reach the inner light. Another tip is to get a better terminal crimper than mine, one that maybe works for >24 AWG terminals. I used a cheapo terminal crimper (IWS-1424A, 14-24 AWG) that wasn’t that great for the smaller TS 025 female terminals.
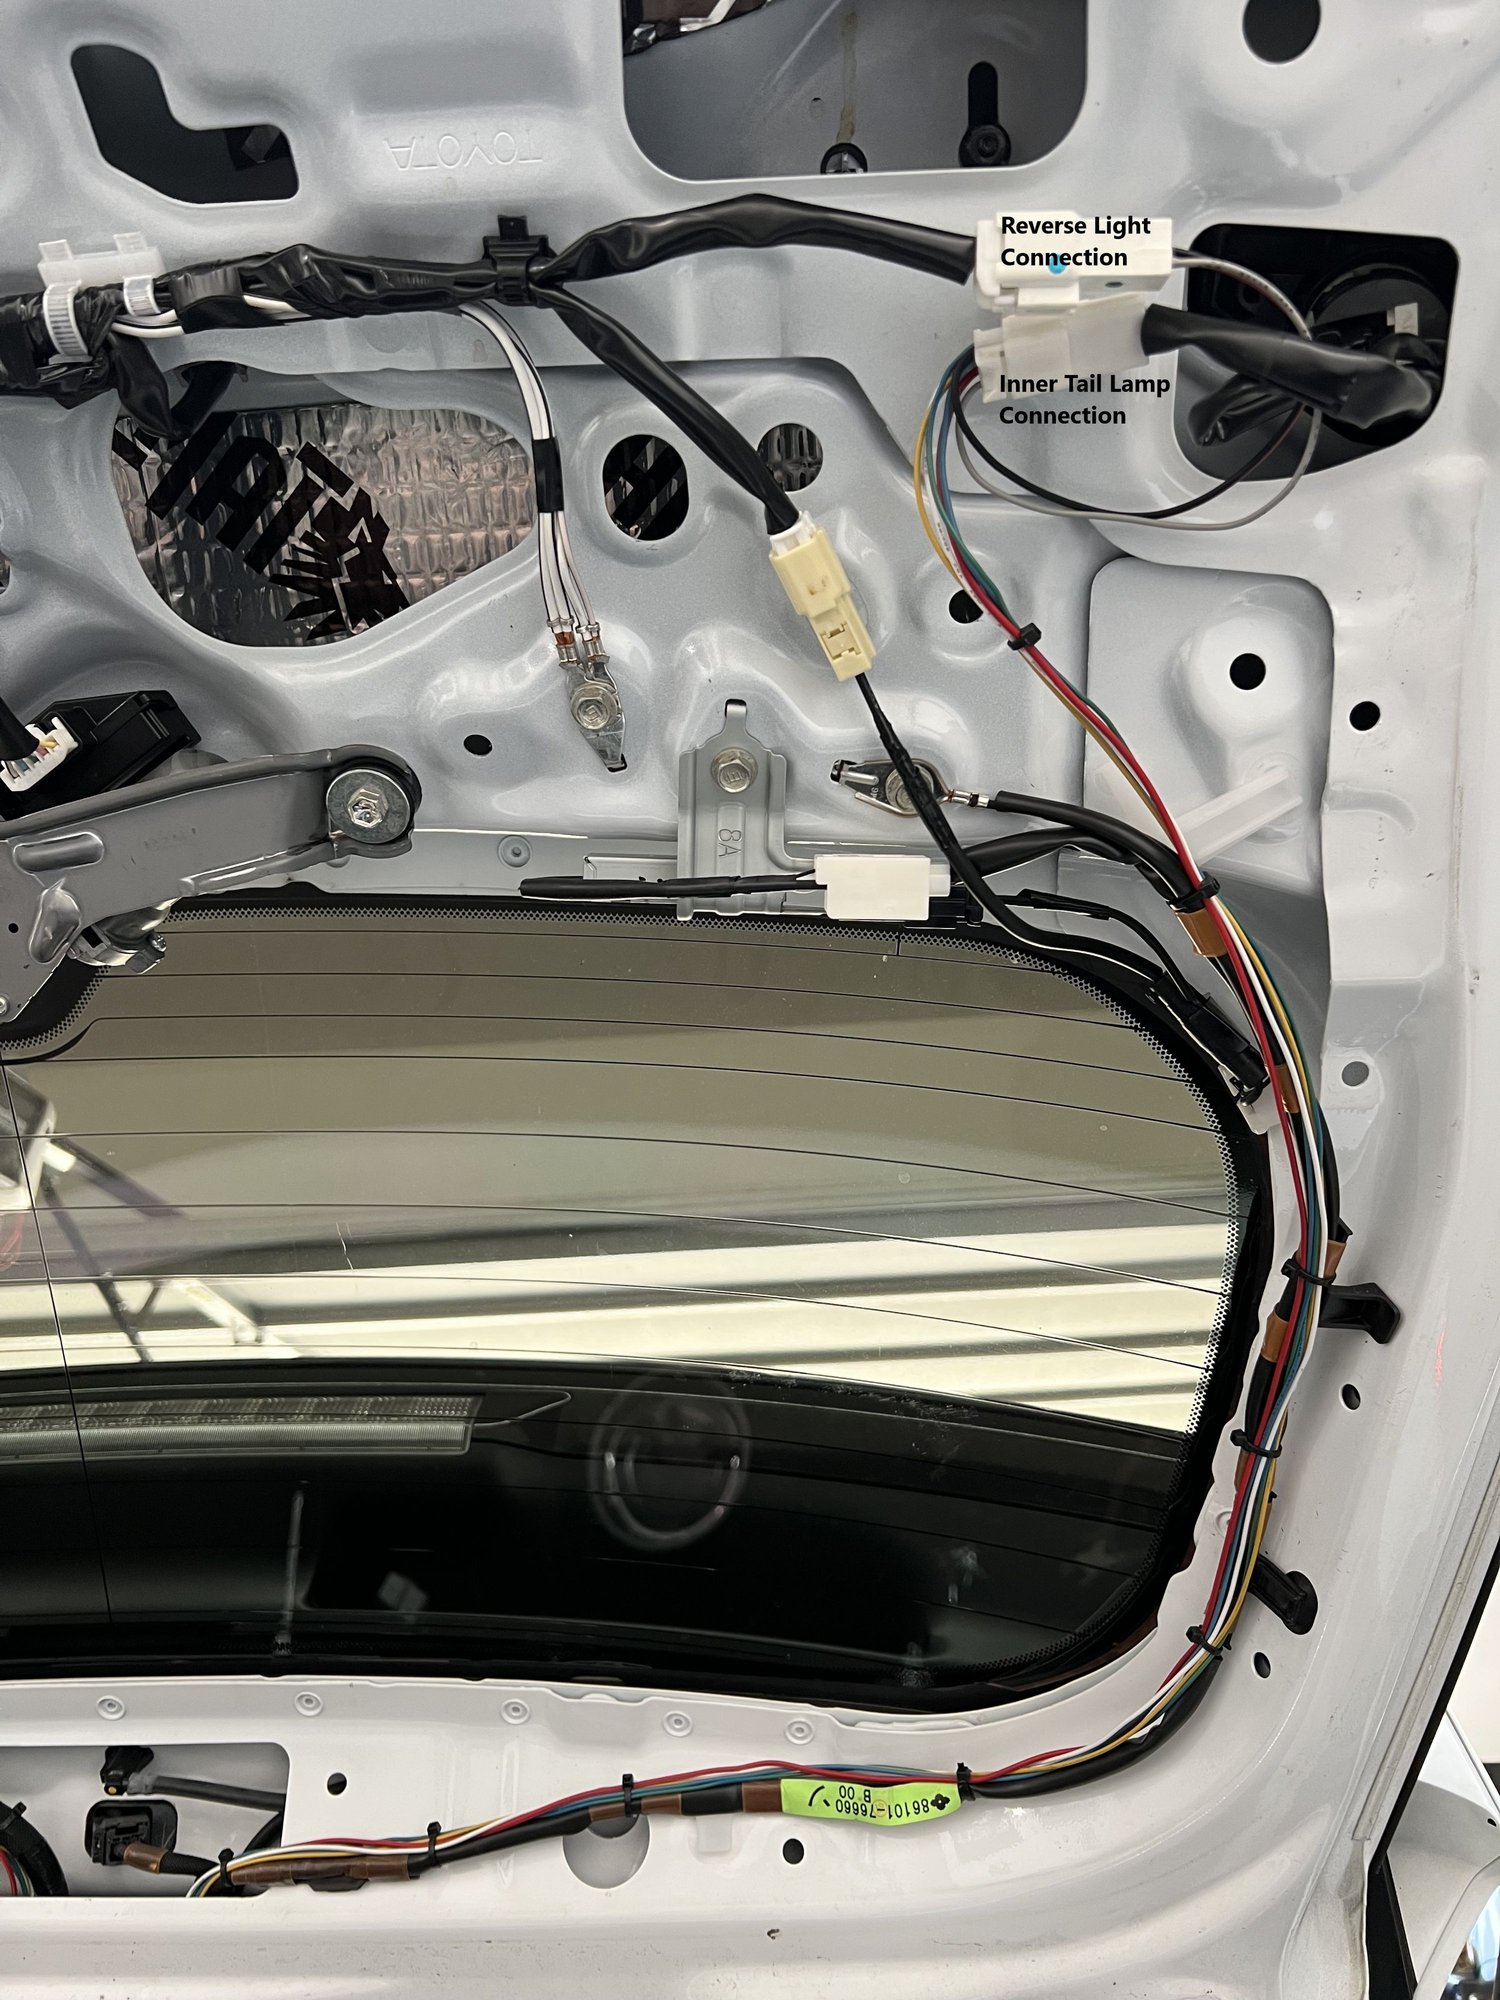
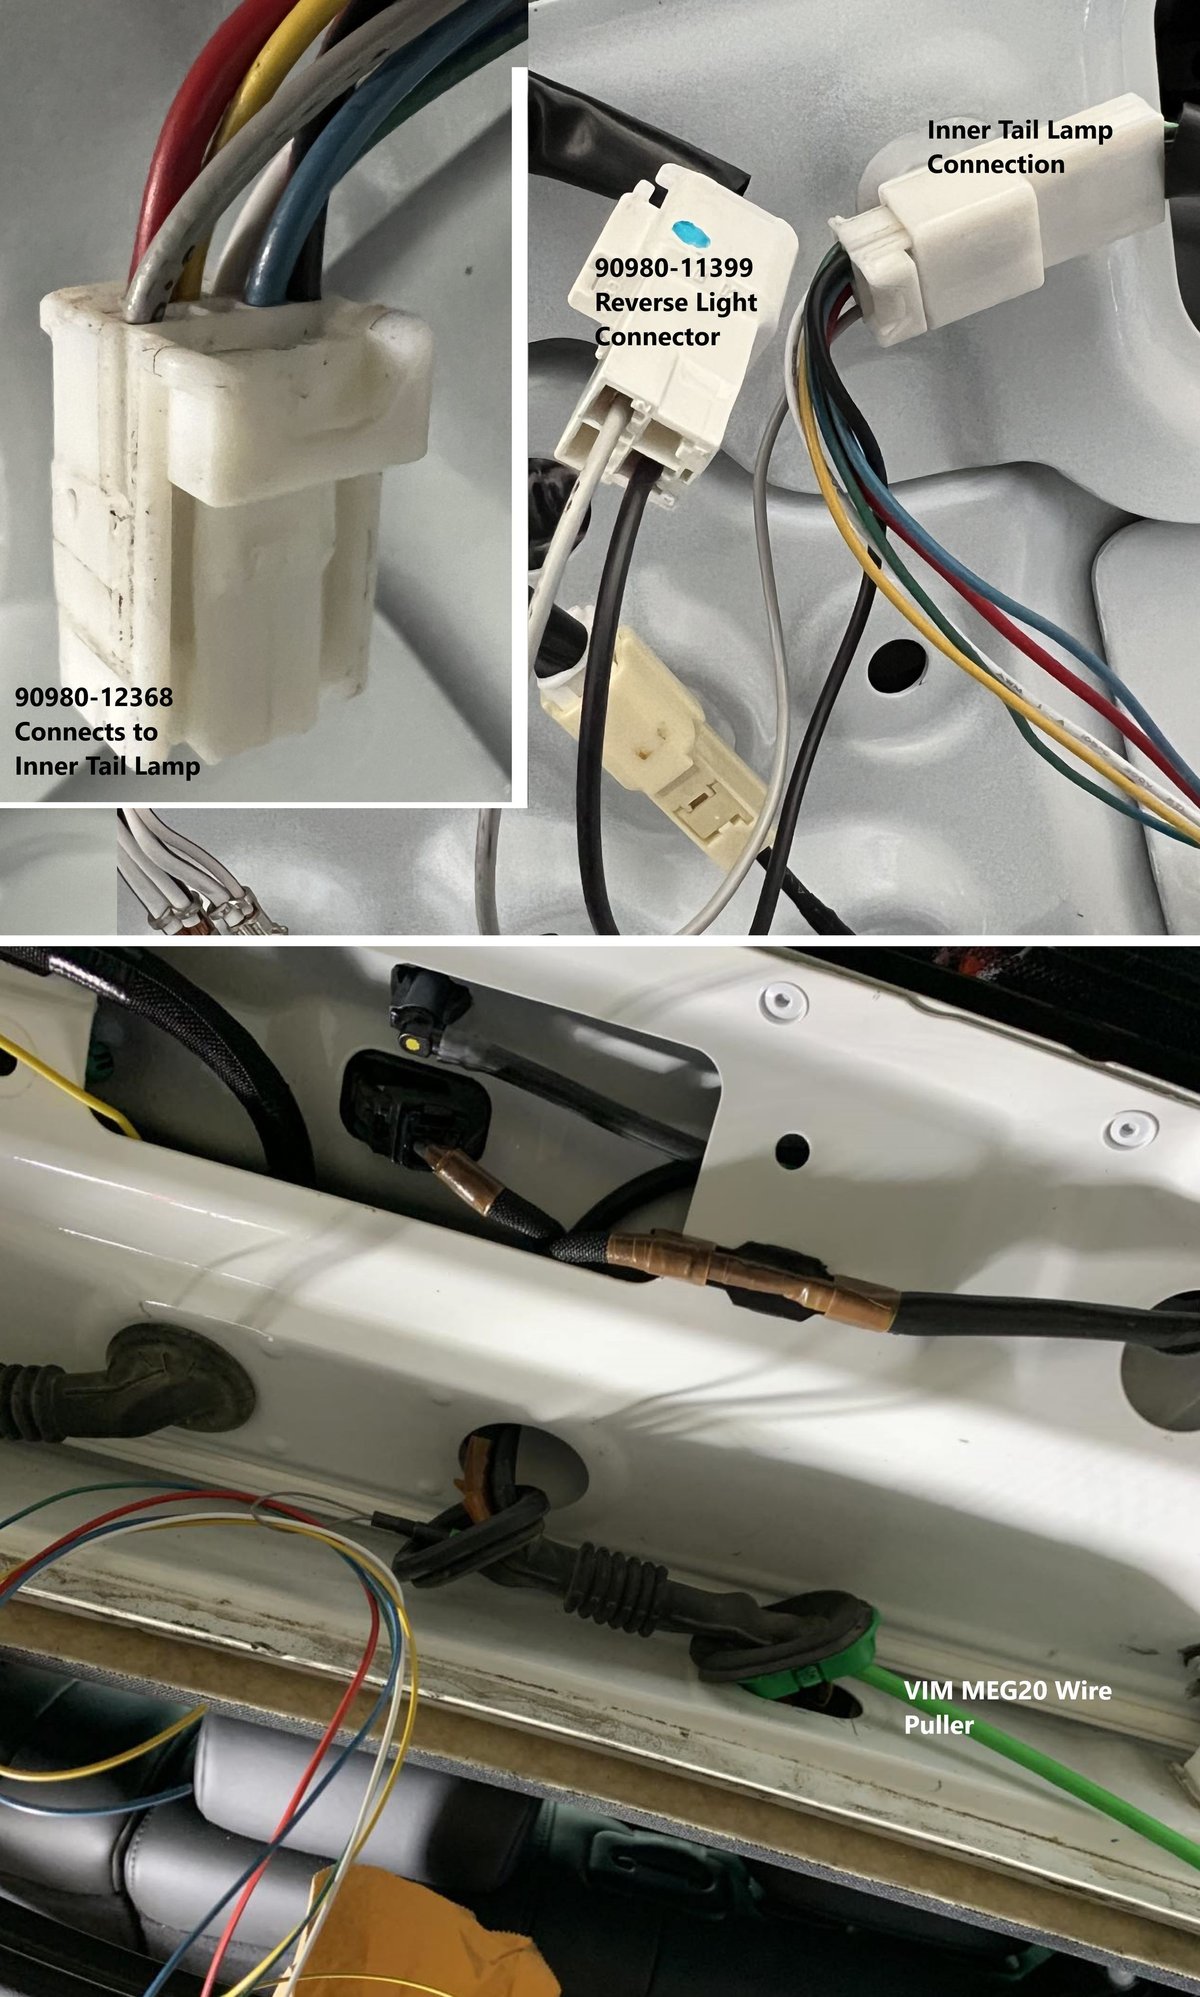
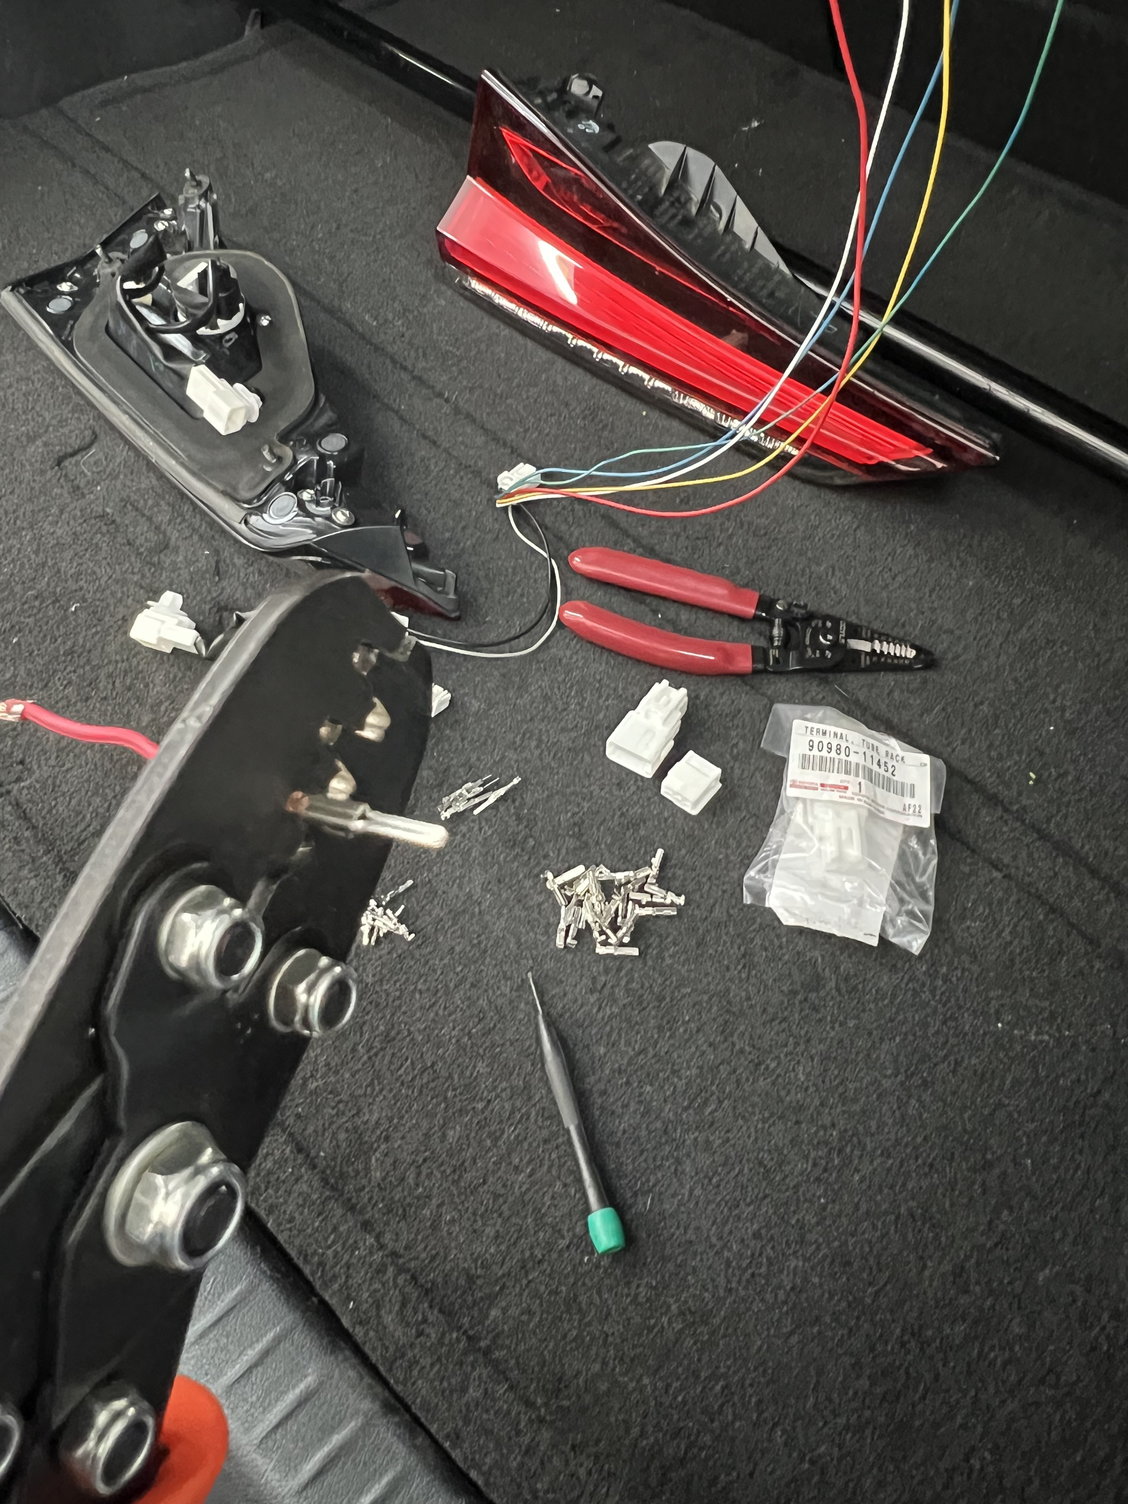
I would probably start with the inner lamp connector (90980-12638) wiring. Make sure you leave a good amount of wiring in case you make a mistake. Start by crimping the 24 AWG wiring to the TS 025 Female Terminals x8/side, lift the retainer on the connector, then insert the terminals. Mount/connect your (90980-12638) pigtail to your Inner/Gate taillight. I de-pinned my old reverse light harness connector (90980-11399) which will connect to the inner taillight connector. Connect the ground and reverse wires by crimping the TS 090 Male terminals and placing them in the hatch/gate connector (90980-11399). Proceed to route your wires (#4,7,8,9,10) through your hatch/gate grommet. I used a wire puller tool using hand sanitizer (dries quick) as lube to easily loom it through.
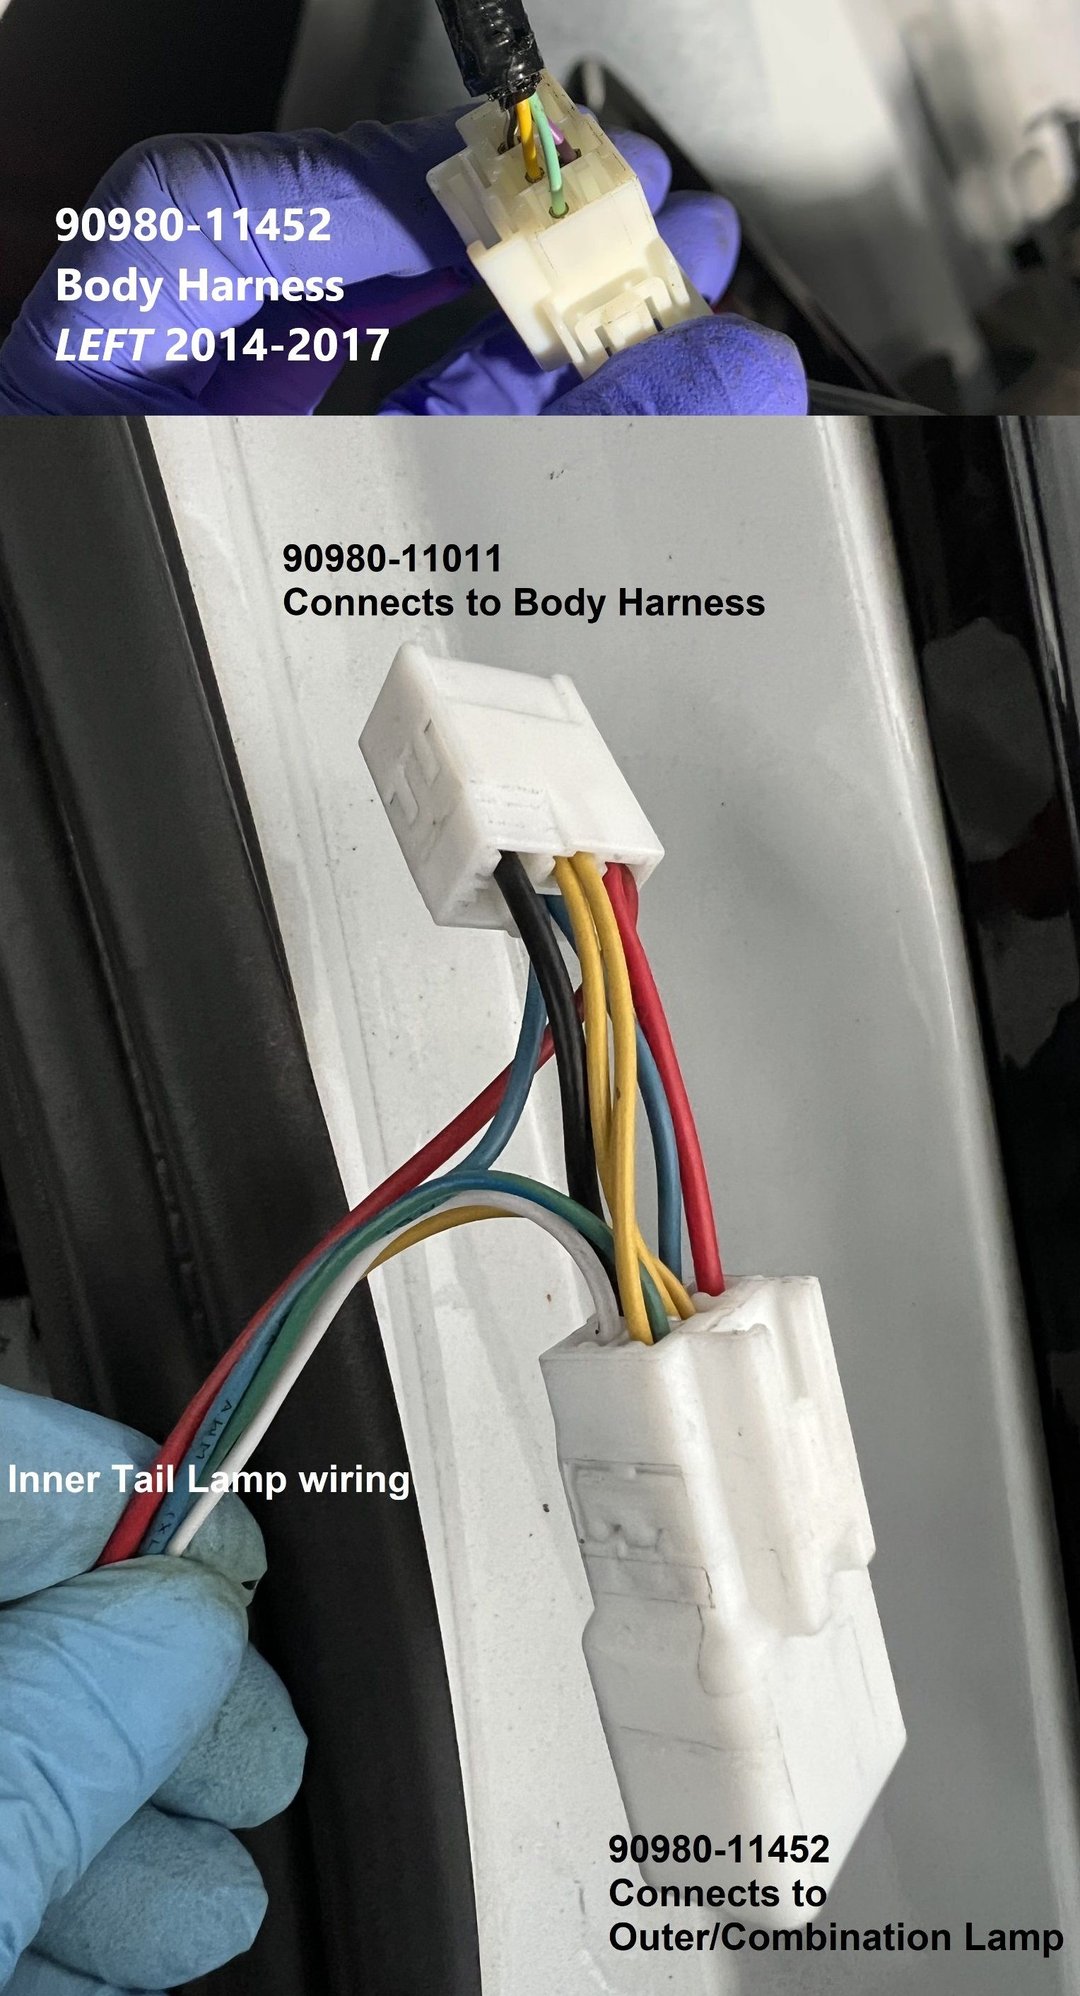
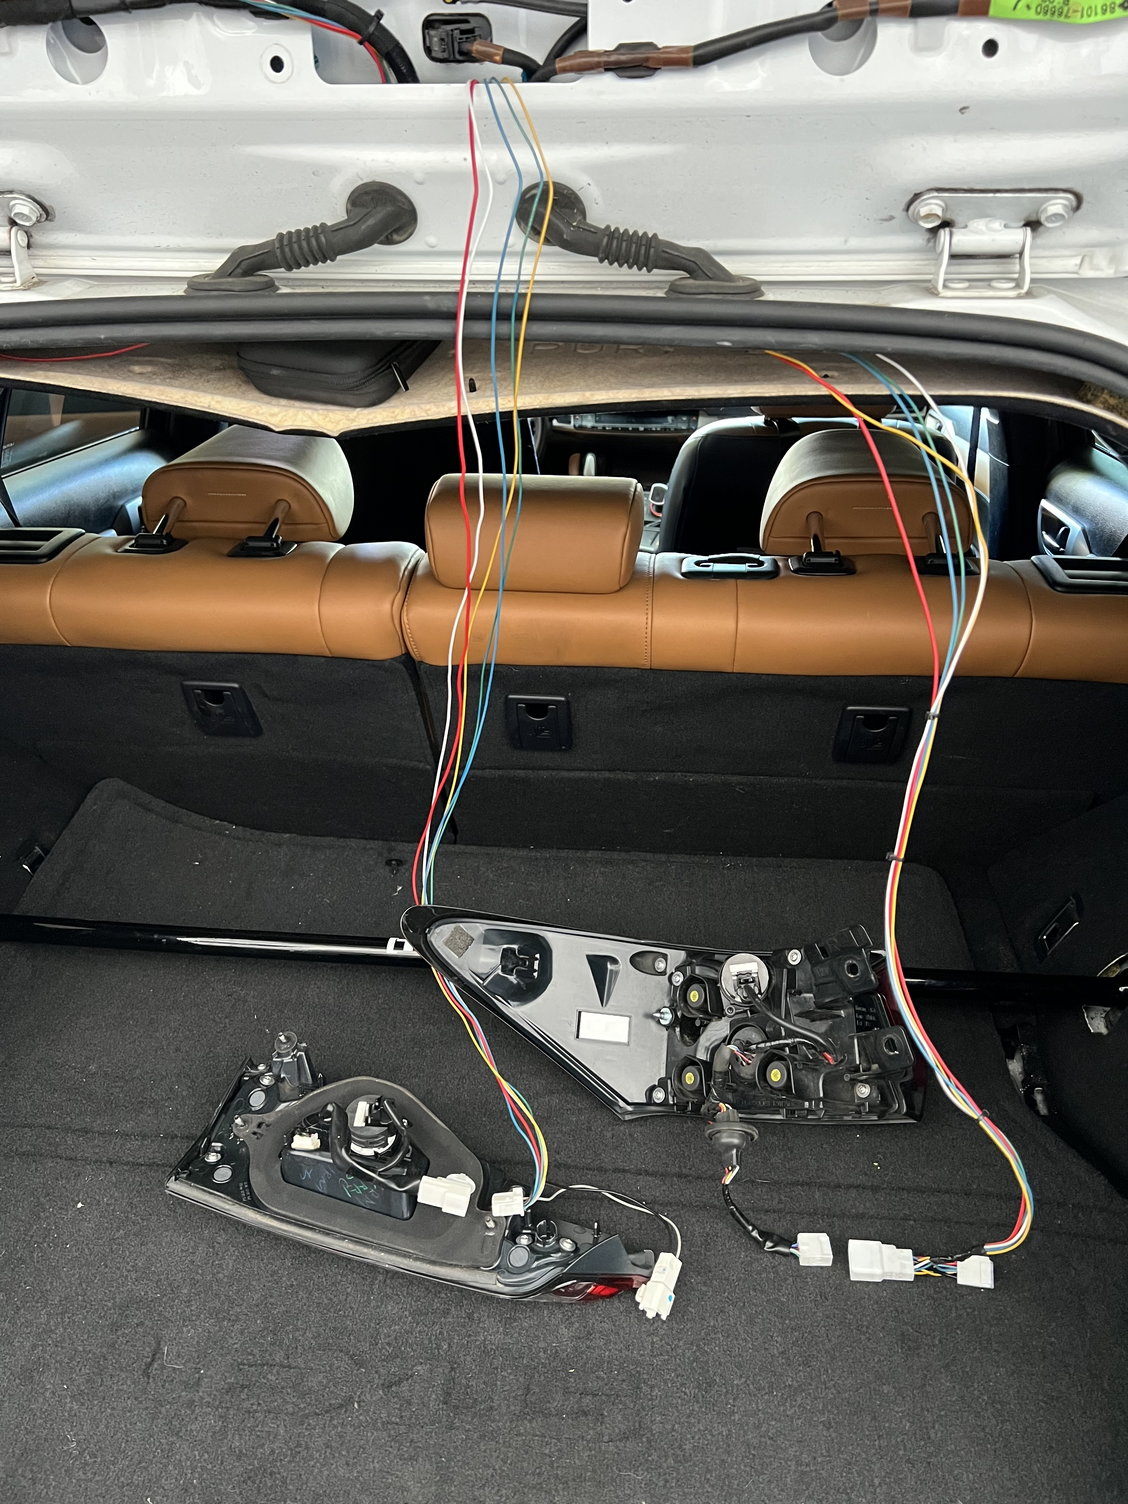
From here, you can start making the rest of your conversion harness connecting the rest of your inner lamp pigtail to the body & combo taillight. Body connector (90980-11011) uses TS 090 female terminals x4, outer combo/taillight connector (90980-11452) uses TS 090 male connectors x6. See diagram and pictures for reference on splicing.
Here are some links to the sources I used
https://minkara.carview.co.jp/userid...8060/note.aspx
https://minkara.carview.co.jp/userid...ote.aspx#title
Last edited by Indolent; 06-23-23 at 09:21 AM.
The following 2 users liked this post by Indolent:
nigel821 (06-22-23),
TobiasSing (06-22-23)
#2
Very nice! Thanks for sharing the write up!
The following users liked this post:
Indolent (06-22-23)
The following users liked this post:
Indolent (06-23-23)
Thread
Thread Starter
Forum
Replies
Last Post


