
CT200h New owner, intro and build thread
 11-30-22, 11:35 AM
#1

Just wanted to share my CT200h journey with you guys as well.
1. CT base or premium - 2012 Base
2. Nav / no nav - Non Nav
3. Color for exterior and interior: Nebula Grey Exterior with Black Interior
4. Options or Option Packages - Base
5. F-Sport? - No
6. Planned modifications? Maintain and drive for now
7. What other cars were you considering? What did this replace or add to? - None. Nothing replaced, added to LX470, LS460, SC430 & NX200t
CT200h - Pickup, First wash and mod.
CT200h - Rearview mirror upgrade.
CT200h - EGR & Intake cleaning
CT200h - Catch Can Install
CT200h - Intake, EGR valve and cooler assembly PCV swap & Lessons learned.
CT200h - Front End Refresh
CT200h - Suspension Refresh
Last edited by kuWuPt; 04-03-24 at 11:46 AM.
 11-30-22, 11:37 AM
#2
I've been on a hunt for a CT200h off and on for over two years now I feel. I say off and on because when I started in 2020 prices on average were under 10k for a 2011. I kick myself for not picking up a 2015 F Sport up from a private seller then for about 9k. My thought process on picking up any vehicle is to figure out everything that can go wrong with the vehicle, along with all maintenance items needed to bring it up to par. I price out parts, labor needed etc., add that all in a spread sheet and then figure out what I want to spend on a car. So with the CT, a high mileage one, will need a lot to bring it up to par. I accounted for everything, head gasket, main battery, hybrid battery, EGR cleaning or replacement, gaskets, etc. At that point purchasing a used CT for over 15k made no sense to me. It made more sense to just go buy a brand new hybrid Corolla. Well I didn't really need it but just wanted a CT really so I just put it no the back burner till prices for these cars came down. Few friends of mine who are dealers knew I was looking for me and out of the blue got a call saying that one was coming up for auction the next day and carfax mentioned that the head gasket was done 18k prior. He gave me the VIN# and I did my due diligence and found out it was a one owner vehicle with everything done at the dealer since new. It did have a reported check engine light on the auction listing but the body looked like it was in very good condition, same with the interior and excellent service history so took a gamble and gave him a max bid price I didn't want to go over. Well, HE WON IT! He had to pick up another car as well from the auction so I figured we can just go up together and I'd just tow the CT back. Got to the auction and my buddy plugged in an OBDII scanner to check the code and he had a smirk, popped the hood and found the MAF was disconnected, connected it back, started the CT and no more check engine light. 800 miles later the CT was home!
Although a head gasket was done, there was no history of the EGR valve, cooler or intake being changed out or cleaned. Being serviced at Lexus I was pretty sure no cleaning of these said parts would occur so as preventative maintenance that is on my list. For now I'm just gong to drive it for a bit and see the issues, if any come up and then tackle all the needed maintenance items I had in mind done.
First Wash, don't mind my drying towel on the windshield, it's drying.
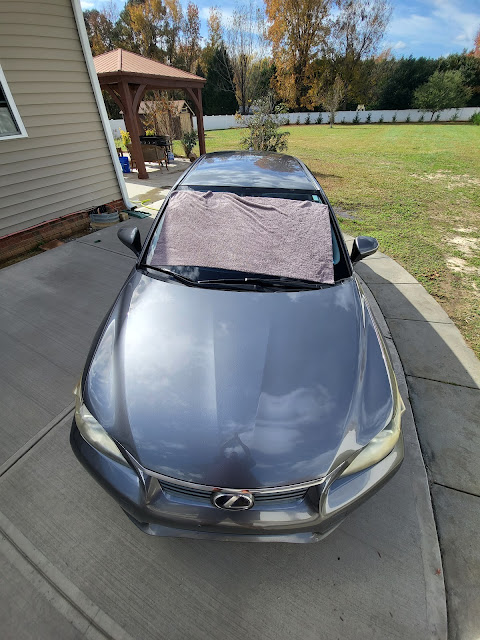
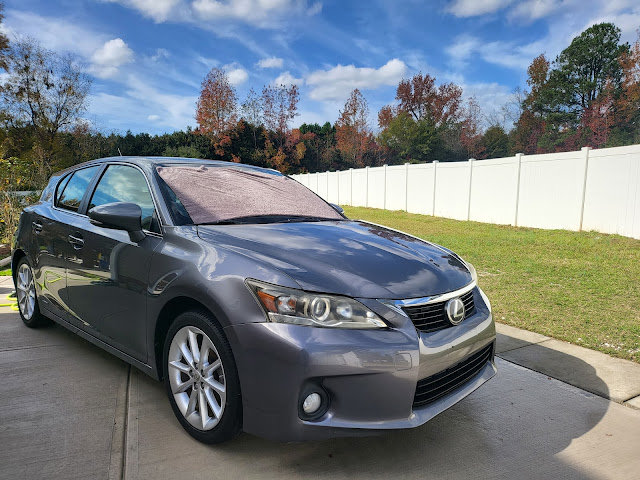
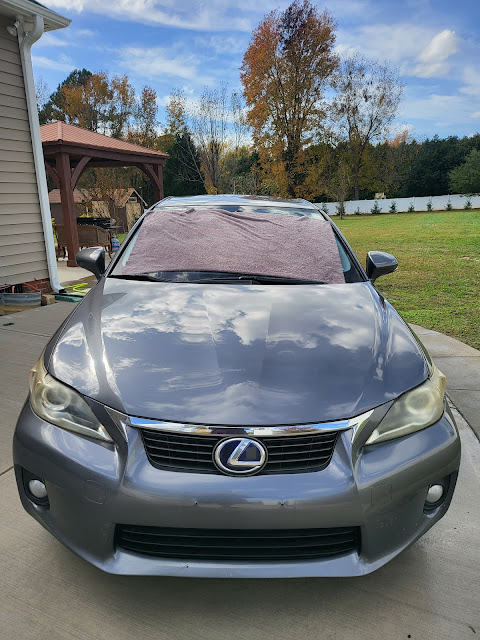


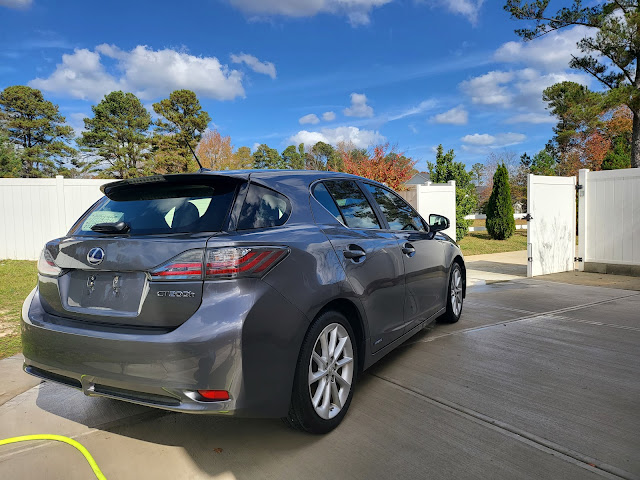
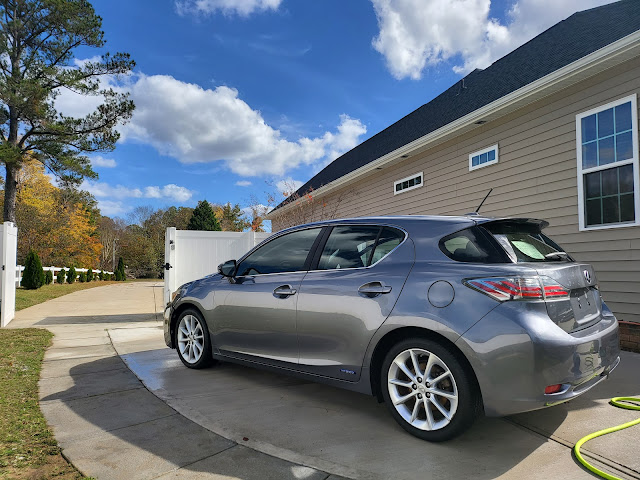
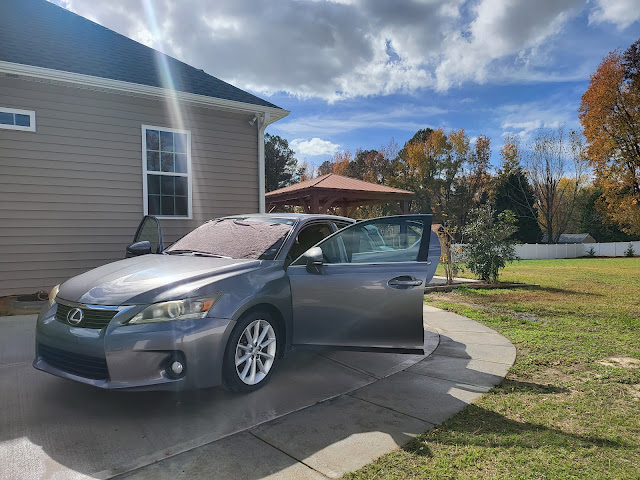
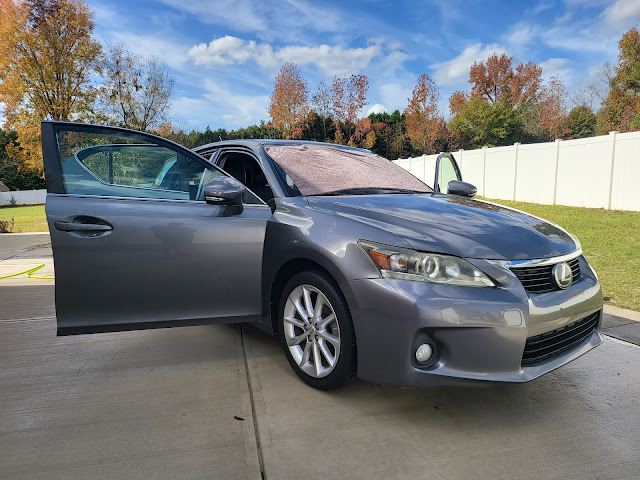

As mentioned before body was in great condition, I found 3 tiny dings that weren't really noticeable. It definitely showed it's age though, outside definitely needs a full detail. The bumper has a tab missing on the driver side so it is not sitting in properly at the fender. Might look into a front end conversion later. The headlights are horribly oxidized, I'll try the sanding, polish and clear method to see how it turns out. If it is not to my liking then I'll probably get some new headlights or at least new lenses if I can find some. Some clay, polish, elbow grease etc. and this will look beautiful.
I had a diode dynamics relay on hand so wanted to add that because I love the soft tap turn signals feature so did that. It was a pain to get my big hands into the tight spaces behind the dash but got it done.


On my LS460 it was easier to access the relay from behind the cluster so removed the CT cluster but was a no go on accessing it. Since I had the cluster out, figured I would just polish the lenses and protect it before putting it back on.

The cluster being nice and clean lead me to polish the other display area.


A couple of minutes and a whole lot of satisfaction. Also ended up changing out all the interior bulbs and side view mirror puddle light bulbs to leds. Super happy and excited to own one finally.
Although a head gasket was done, there was no history of the EGR valve, cooler or intake being changed out or cleaned. Being serviced at Lexus I was pretty sure no cleaning of these said parts would occur so as preventative maintenance that is on my list. For now I'm just gong to drive it for a bit and see the issues, if any come up and then tackle all the needed maintenance items I had in mind done.
First Wash, don't mind my drying towel on the windshield, it's drying.
As mentioned before body was in great condition, I found 3 tiny dings that weren't really noticeable. It definitely showed it's age though, outside definitely needs a full detail. The bumper has a tab missing on the driver side so it is not sitting in properly at the fender. Might look into a front end conversion later. The headlights are horribly oxidized, I'll try the sanding, polish and clear method to see how it turns out. If it is not to my liking then I'll probably get some new headlights or at least new lenses if I can find some. Some clay, polish, elbow grease etc. and this will look beautiful.
I had a diode dynamics relay on hand so wanted to add that because I love the soft tap turn signals feature so did that. It was a pain to get my big hands into the tight spaces behind the dash but got it done.
On my LS460 it was easier to access the relay from behind the cluster so removed the CT cluster but was a no go on accessing it. Since I had the cluster out, figured I would just polish the lenses and protect it before putting it back on.
The cluster being nice and clean lead me to polish the other display area.
A couple of minutes and a whole lot of satisfaction. Also ended up changing out all the interior bulbs and side view mirror puddle light bulbs to leds. Super happy and excited to own one finally.
The following 2 users liked this post by kuWuPt:
MattRX (02-10-23),
TobiasSing (11-30-22)
11-30-22, 11:43 AM
#3
Went to the junk yard over the weekend because there was 2012 Prius listed and wanted to get the EGR valve and cooler assembly along with the intake manifold. Figured if I had a spare I could clean it out to my liking and then swap out the old with the refurbished old parts. Well obviously waited too long, went to the junk yard to find the whole motor was ripped out already. I did see an 09 Prius there with the rear view camera that had the home link and auto dimmer feature in it so got that to see if I could retrofit it into my CT that only had a regular rear view mirror. Also got the wire cover and the connector for the rear view mirror. Wasn't 100% sure if the rear view mounts would be the same but usually Toyota/Lexus cars use parts across multiple platforms if they can so took the gamble that paid off. Same mounts.
These mirrors are made by Gentex and come to find out they make the mirrors for a plethora of vehicle manufacturers. A lot of them also have temp, compass display etc. built in as well. Working with what I have and found the wiring diagram for it as shown below. The 10 wire connector uses the basic 3 connections to work.

I also wanted to not run wires down the A-pillar etc and wire it to look like it was stock. Was hoping to find a wiring harness already under the upper console but didn't so had to trace the wires needed. The wires needed are the denoted below. Just three wires, Constant 12V, Ignition 12V, and Ground.
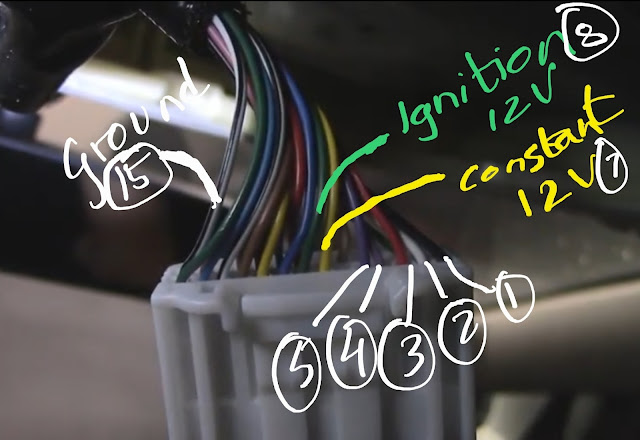 Ran the wires from the rear view mirror through the headliner, through the factory loom itself and soldered it onto the corresponding wires of the factory harness.
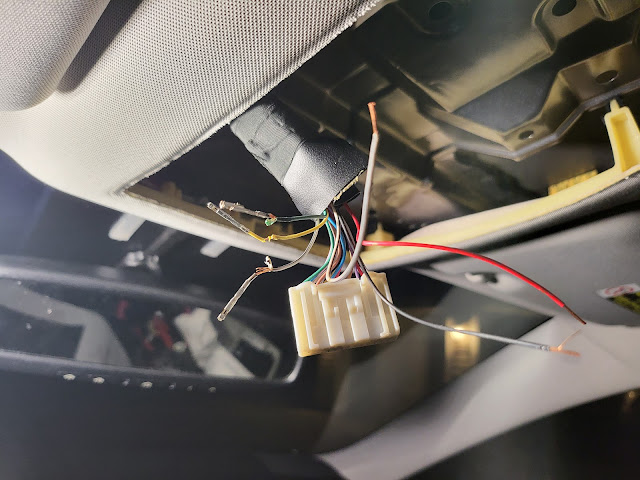
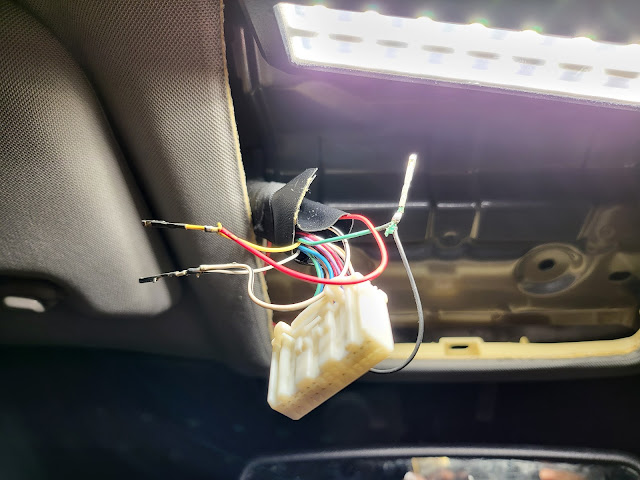
Used the wire cover off the Prius as well and everything looks like factory.

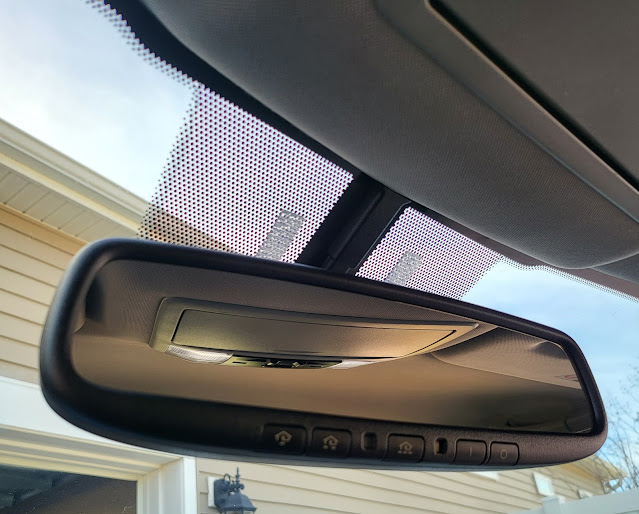
Simple mod that can be done for cheap and now I have home link and auto dimming. Everything works as it should and happy. Low key do want the rear view mirror that show temperature and compass. Also do this at your own risk I claim no responsibility if things go south.
These mirrors are made by Gentex and come to find out they make the mirrors for a plethora of vehicle manufacturers. A lot of them also have temp, compass display etc. built in as well. Working with what I have and found the wiring diagram for it as shown below. The 10 wire connector uses the basic 3 connections to work.
I also wanted to not run wires down the A-pillar etc and wire it to look like it was stock. Was hoping to find a wiring harness already under the upper console but didn't so had to trace the wires needed. The wires needed are the denoted below. Just three wires, Constant 12V, Ignition 12V, and Ground.
Ran the wires from the rear view mirror through the headliner, through the factory loom itself and soldered it onto the corresponding wires of the factory harness.Used the wire cover off the Prius as well and everything looks like factory.
Simple mod that can be done for cheap and now I have home link and auto dimming. Everything works as it should and happy. Low key do want the rear view mirror that show temperature and compass. Also do this at your own risk I claim no responsibility if things go south.
The following 4 users liked this post by kuWuPt:
12-02-22, 11:52 AM
#4
Nice job on the mirror. Maybe I'll get around to doing the same on my mom's CT. I added teh dimming/compass mirror to a Yaris, and tapped it into the power-mirror switch. Works like a charm, but the CT200h is tight back there...
I have a set of OE lights with ~10k on them. For some reason the LED's never worked once installed (car was rebuilt), I assume I was scammed with these with non-working DRL. Never diagnosed it, but I would be willing to sell them, just to see them used somewhere!
PS. these are a nice touch, after many years of staring at boring, basic sills, I bought & I installed these into my mom's CT.
https://www.ebay.ca/itm/175336836305...EAAOSwItVivkXQ (I think I offered 80$ CAD and it was accepted)
12-03-22, 03:38 PM
#5
Nice job on the mirror. Maybe I'll get around to doing the same on my mom's CT. I added teh dimming/compass mirror to a Yaris, and tapped it into the power-mirror switch. Works like a charm, but the CT200h is tight back there...
I have a set of OE lights with ~10k on them. For some reason the LED's never worked once installed (car was rebuilt), I assume I was scammed with these with non-working DRL. Never diagnosed it, but I would be willing to sell them, just to see them used somewhere!
PS. these are a nice touch, after many years of staring at boring, basic sills, I bought & I installed these into my mom's CT.
https://www.ebay.ca/itm/175336836305...EAAOSwItVivkXQ (I think I offered 80$ CAD and it was accepted)
I have a set of OE lights with ~10k on them. For some reason the LED's never worked once installed (car was rebuilt), I assume I was scammed with these with non-working DRL. Never diagnosed it, but I would be willing to sell them, just to see them used somewhere!
PS. these are a nice touch, after many years of staring at boring, basic sills, I bought & I installed these into my mom's CT.
https://www.ebay.ca/itm/175336836305...EAAOSwItVivkXQ (I think I offered 80$ CAD and it was accepted)
Thanks for the plug on the door sills. I like the look of the illuminated door sills. I just put in my offer. 😬
The following users liked this post:
01LEXPL (12-04-22)
12-06-22, 08:43 AM
#7
Mirror upgrades are fun. years ago i retrofitted a GX570 mirror to my 3IS. direct plug and play. non-bezel mirror for a modern look.
For headlights, I would go fully professional RX350 BI-Xenon using professional genuine Lexus / German OE/OEM parts. No junk aftermarket bulbs or ballasts or projectors. All professional. it's not that expensive.
See my earlier threads/posts about it.
For headlights, I would go fully professional RX350 BI-Xenon using professional genuine Lexus / German OE/OEM parts. No junk aftermarket bulbs or ballasts or projectors. All professional. it's not that expensive.
See my earlier threads/posts about it.
Trending Topics
12-07-22, 01:59 PM
#8
Mirror upgrades are fun. years ago i retrofitted a GX570 mirror to my 3IS. direct plug and play. non-bezel mirror for a modern look.
For headlights, I would go fully professional RX350 BI-Xenon using professional genuine Lexus / German OE/OEM parts. No junk aftermarket bulbs or ballasts or projectors. All professional. it's not that expensive.
See my earlier threads/posts about it.
For headlights, I would go fully professional RX350 BI-Xenon using professional genuine Lexus / German OE/OEM parts. No junk aftermarket bulbs or ballasts or projectors. All professional. it's not that expensive.
See my earlier threads/posts about it.
01-10-23, 07:53 AM
#9
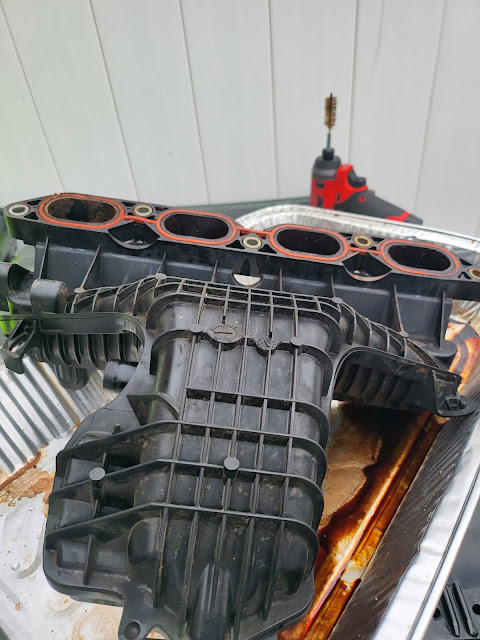
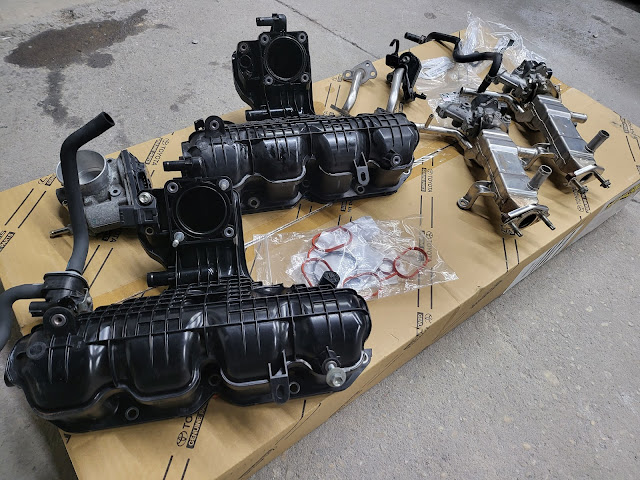
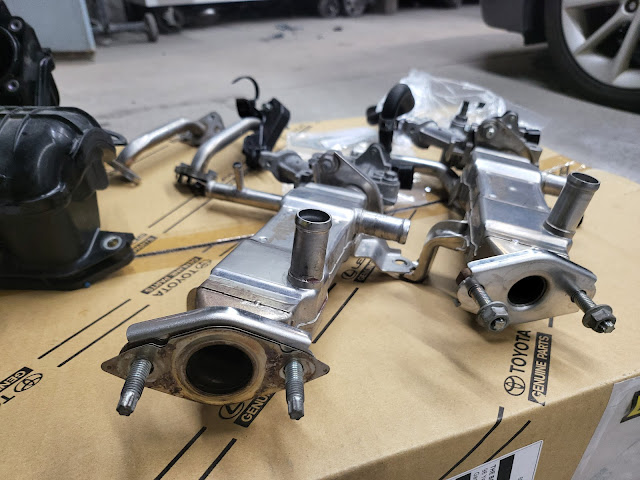
When I purchased the CT the carfax reported a history of the head gasket being done 18k mile ago. Although a head gasket was done, there was no history of the EGR valve, cooler or intake being changed out or cleaned. Being serviced at Lexus I was pretty sure no cleaning of these said parts would occur so as preventative maintenance wanted to address all the GR components including the intake manifold.
I am not not a huge fan of rushing things and knowing how picky I am I chose to just get a used EGR valve, cooler, piping and intake manifold etc. Obviously buying used with current prices online and then working on it seemed non beneficial to me and so was planning on just buying new EGR cooler and clean the valve, and intake manifold when I took it out. I had gone to the local pick your parts but all the Priuses already had the engine removed. Last week they had one listed and the listing was only 2 days old. Rushed to the junk yard after work and luckily everything was still there. Pulled off the EGR valve, cooler, piping, intake manifold, injectors etc.
There are a bunch of how-tos on removal, cleaning and installation of said components so I don't feel like I need to reiterate it here. Also thank you to the everyone that do videos and guides etc. to make things easier for us. Some things I did do differently though so just wanted to point some things out.

I left the valve connected tot he cooler and blocked off all the open ports and filled it with carburetor cleaner. You can use aluminum tape for this, vinyl tape and paper will not work. I let it soak for a day or so and then started cleaning.
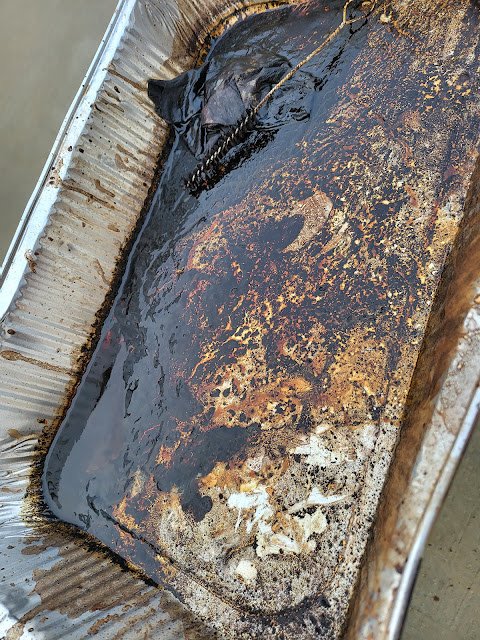
I bought a brush kit that came in super handy. Wearing a mask and eye protection I used the brush bits on a drill to clean up the parts. Used a brass brush bit for the intake manifold wherever it would fit, the kit that I got came with a couple of different bit sizes and had one thin enough to fit in the EGR recirculating ports. Did this with the intake manifold dry. Noticed that if it is wet with whatever cleaner the brass brushed clog up. When it is dry it just dissipates the carbon deposits as dust, hence the face mask.
The intake manifold, cooler, piping, valves etc. were all nasty and definitely clogged up. This was what came out of the initial rinse from just the intake manifold.
With the brush bits I cleaned up all the piping etc.

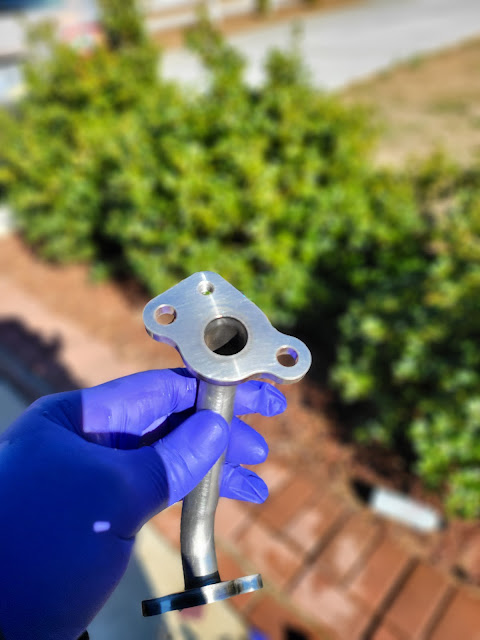
For the EGR cooler, leaving it soaked in carberator cleaner I think definitely helped. Used a thin welding road and noticed that it would go through fairly easily from one end to the other so then I used a pressure washer to clean it out. With light coming through from the other side I was very happy with how this turned out.

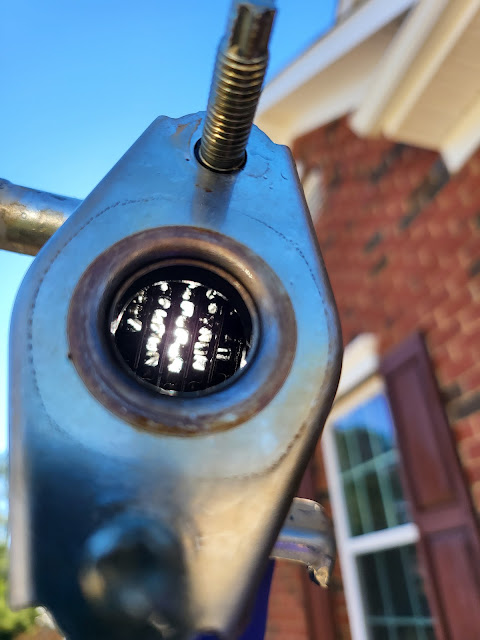
As for the EGR valve I ended up disassembling it to clean it out.

Used lithium grease on the shaft under the magnet after cleanup as well.


With everything clean it is ready to get put on once I'm ready with everything else.
-AJ Abraham
Follow me on Instagram:
@flawless_fitment
@aj_ls460
@aj_lx470
@aj_sc430
@aj_ct200h
I am not not a huge fan of rushing things and knowing how picky I am I chose to just get a used EGR valve, cooler, piping and intake manifold etc. Obviously buying used with current prices online and then working on it seemed non beneficial to me and so was planning on just buying new EGR cooler and clean the valve, and intake manifold when I took it out. I had gone to the local pick your parts but all the Priuses already had the engine removed. Last week they had one listed and the listing was only 2 days old. Rushed to the junk yard after work and luckily everything was still there. Pulled off the EGR valve, cooler, piping, intake manifold, injectors etc.
There are a bunch of how-tos on removal, cleaning and installation of said components so I don't feel like I need to reiterate it here. Also thank you to the everyone that do videos and guides etc. to make things easier for us. Some things I did do differently though so just wanted to point some things out.
I left the valve connected tot he cooler and blocked off all the open ports and filled it with carburetor cleaner. You can use aluminum tape for this, vinyl tape and paper will not work. I let it soak for a day or so and then started cleaning.
I bought a brush kit that came in super handy. Wearing a mask and eye protection I used the brush bits on a drill to clean up the parts. Used a brass brush bit for the intake manifold wherever it would fit, the kit that I got came with a couple of different bit sizes and had one thin enough to fit in the EGR recirculating ports. Did this with the intake manifold dry. Noticed that if it is wet with whatever cleaner the brass brushed clog up. When it is dry it just dissipates the carbon deposits as dust, hence the face mask.
The intake manifold, cooler, piping, valves etc. were all nasty and definitely clogged up. This was what came out of the initial rinse from just the intake manifold.
With the brush bits I cleaned up all the piping etc.
For the EGR cooler, leaving it soaked in carberator cleaner I think definitely helped. Used a thin welding road and noticed that it would go through fairly easily from one end to the other so then I used a pressure washer to clean it out. With light coming through from the other side I was very happy with how this turned out.
As for the EGR valve I ended up disassembling it to clean it out.
Used lithium grease on the shaft under the magnet after cleanup as well.
With everything clean it is ready to get put on once I'm ready with everything else.
-AJ Abraham
Follow me on Instagram:
@flawless_fitment
@aj_ls460
@aj_lx470
@aj_sc430
@aj_ct200h
The following 2 users liked this post by kuWuPt:
All4Lexus (01-10-23),
TobiasSing (01-10-23)
02-08-23, 07:35 AM
#10
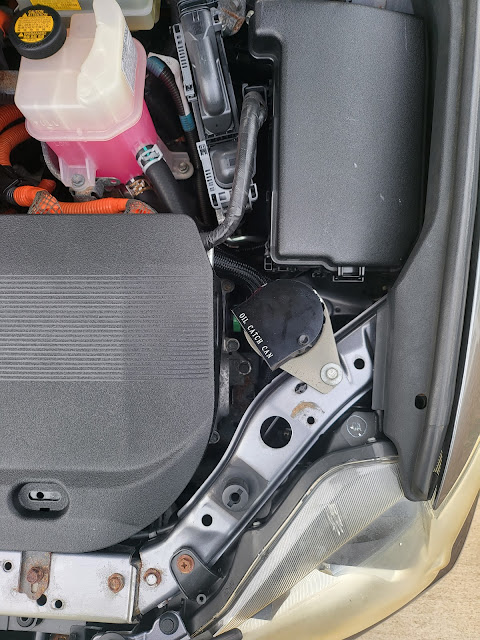
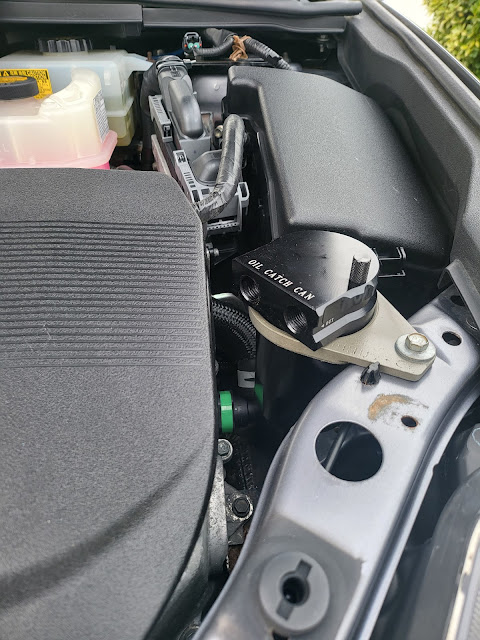
Was swapping out the EGR valve, cooler, intake and PCV valve so was the best time to install a catch can. To prep for this I had already 3D printed out a catch can holder that I found on thingverse, huge thanks to everyone who takes the time to share their work. I'll probably get one printed in carbon fiber later.
After I found a good placement for it I drilled a hole, touched up the exposed paint with primer and then used a nutsert in the hole to hold the catch can holder.
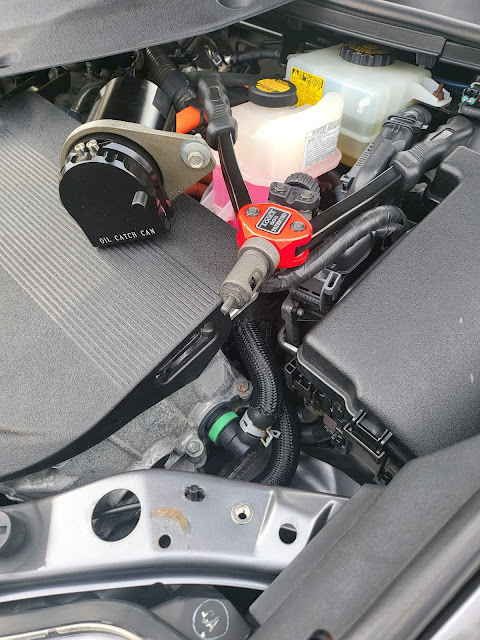
I cut the factory U piping from the PCV to the intake and used 3/8 barb fittings to splice into some 3/8" ID fuel hoses.

The following pictures is just to denote how I routed the hoses

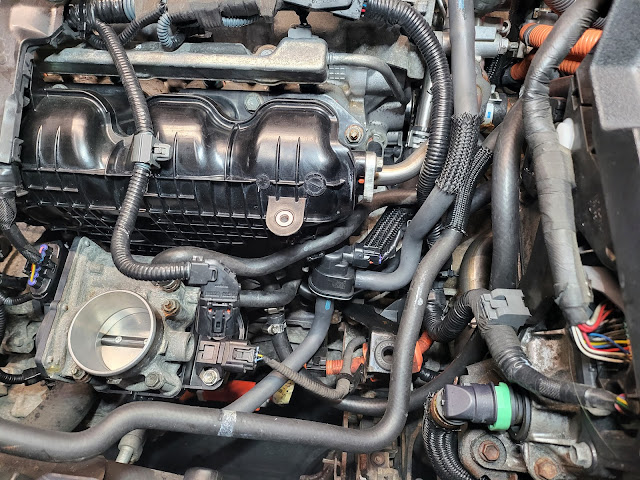
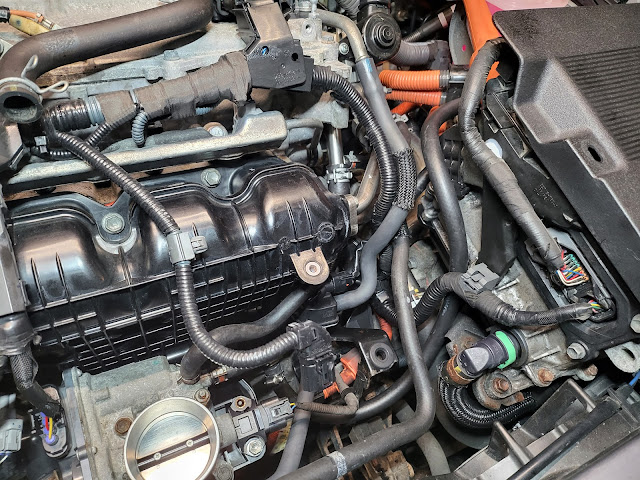
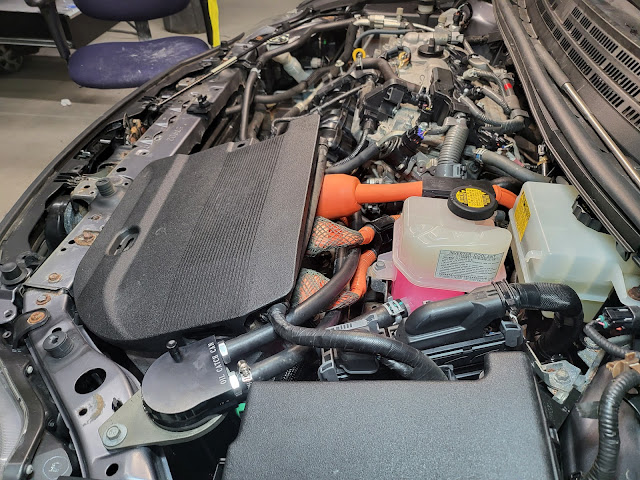
During the actual install, I found out the front plastic engine cover didn't fit. I ended up trimming it to fit.
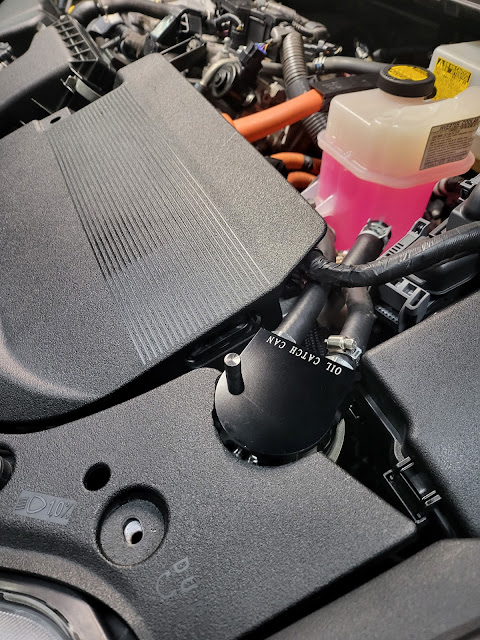
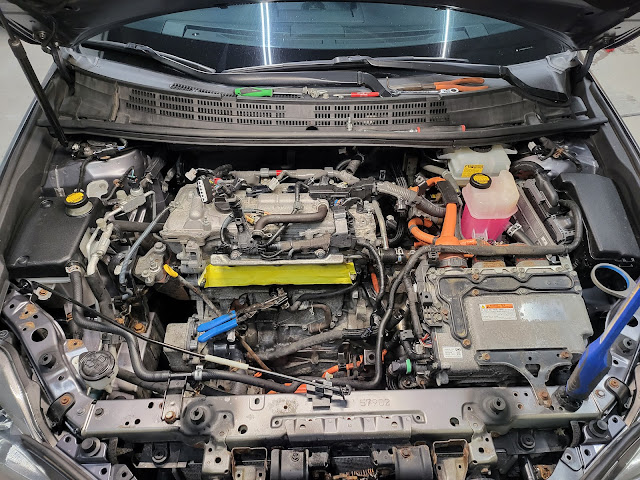
 All back together. Happy with how it turned out, will check on it to see how well it actually works over time.
After I found a good placement for it I drilled a hole, touched up the exposed paint with primer and then used a nutsert in the hole to hold the catch can holder.
I cut the factory U piping from the PCV to the intake and used 3/8 barb fittings to splice into some 3/8" ID fuel hoses.
The following pictures is just to denote how I routed the hoses
During the actual install, I found out the front plastic engine cover didn't fit. I ended up trimming it to fit.
All back together. Happy with how it turned out, will check on it to see how well it actually works over time.
The following users liked this post:
TobiasSing (02-08-23)
02-08-23, 07:36 AM
#11
Nothing out of the ordinary here, this has been well documented. I didn't however need to take the plastic cowling, wipers and tray off. I was able to get to everything without doing so.
 Lesson learned:
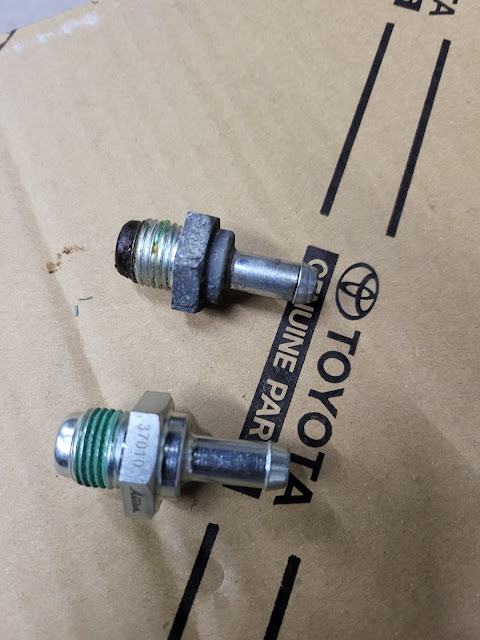
So, this was interestingly annoying! I got the new egr valve with part number 25520-37120 which replaces the part number 25520-37110 that was currently on my car. Well, after swapping everything the car started but the 'Check Hybrid System' warning came on and I couldn't put it into gear and it wouldn't move. I reset the 12V battery and the hybrid battery with no change. On further research I found out that there was a TSB issued, L-SB-0015-16 in regards to the EGR Valve for 2011-2012. The TSB would update the ECU to accept the new EGR part. Considering that my CT has been serviced completely at Lexus till about 2020 I figured it would already be done. Anyway, dismantled my old EGR valve, cleaned it out, pulled the whole assembly out replaced the EGR valve from the assembly with the clean EGR cooler and reinstalled it. Plugged the batteries back up and all is well.
Also, I didn't fill the coolant back up to 'Full'. Lost some coolant when I pulled out some of the coolant lines connected to the EGR cooler and throttle body. Instead of burping the system I usually just drive it for a bit till it reaches operating temperature and then park it and then next day fill coolant. The 'Check Hybrid System' message came up after about 5 minutes of driving but the car was still drivable so I attributed that to the coolant being low. Filled up the coolant the next day, reset the batteries again drove it around and no more light or issues. All's well that ends well.
-AJ Abraham
Follow me on Instagram:
@flawless_fitment
@aj_ls460
@aj_lx470 @aj_sc430
Lesson learned:So, this was interestingly annoying! I got the new egr valve with part number 25520-37120 which replaces the part number 25520-37110 that was currently on my car. Well, after swapping everything the car started but the 'Check Hybrid System' warning came on and I couldn't put it into gear and it wouldn't move. I reset the 12V battery and the hybrid battery with no change. On further research I found out that there was a TSB issued, L-SB-0015-16 in regards to the EGR Valve for 2011-2012. The TSB would update the ECU to accept the new EGR part. Considering that my CT has been serviced completely at Lexus till about 2020 I figured it would already be done. Anyway, dismantled my old EGR valve, cleaned it out, pulled the whole assembly out replaced the EGR valve from the assembly with the clean EGR cooler and reinstalled it. Plugged the batteries back up and all is well.
Also, I didn't fill the coolant back up to 'Full'. Lost some coolant when I pulled out some of the coolant lines connected to the EGR cooler and throttle body. Instead of burping the system I usually just drive it for a bit till it reaches operating temperature and then park it and then next day fill coolant. The 'Check Hybrid System' message came up after about 5 minutes of driving but the car was still drivable so I attributed that to the coolant being low. Filled up the coolant the next day, reset the batteries again drove it around and no more light or issues. All's well that ends well.
-AJ Abraham
Follow me on Instagram:
@flawless_fitment
@aj_ls460
@aj_lx470 @aj_sc430
The following 2 users liked this post by kuWuPt:
Fishwich (04-29-23),
TobiasSing (02-08-23)
04-03-24, 11:39 AM
#12
I did this September of last year but forgot to update this post.
Since Day 1 I've always wanted to get the front end at the very least painted. The bumper had a broken tab on one side which I rigged up to hold in place but needed to be messed with every so often to get it back in place. Also the fenders and hood had rock chips and fading clear. I knew that instead of getting another 2011+ bumper I wanted to go ahead and do a 2014+ F sport front end conversion.
I was pretty much more concerned with the mechanical aspect of things initially. Since the major mechanical aspect of the car was tackled and I couldn't stand the exacerbating condition of the bumper I figured it was time to shift focus and remediate that.
Ordered the front end parts and dropped the bumper off to get painted after a quick test fit. Also added the rear hatch trim piece to the paint list since it was in pretty bad shape for some reason. The parts were primed, blocked, wet sanded and sealed before painting it.
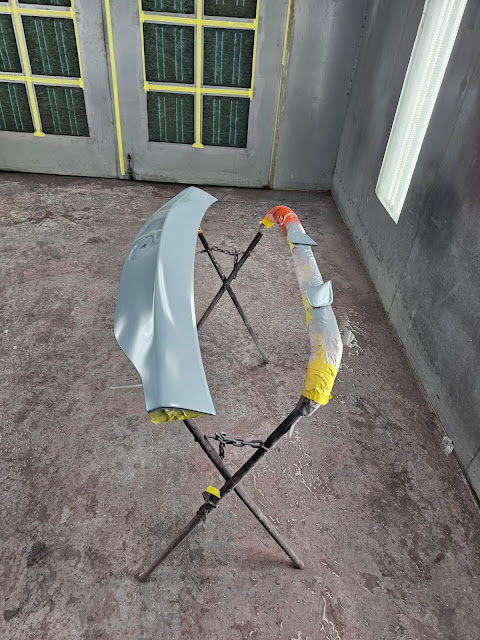

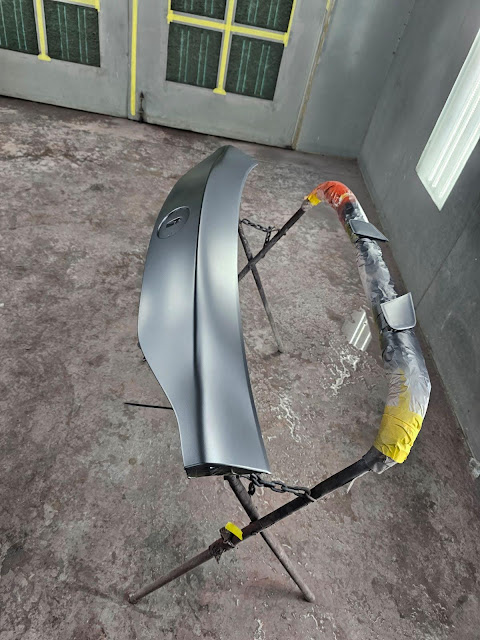
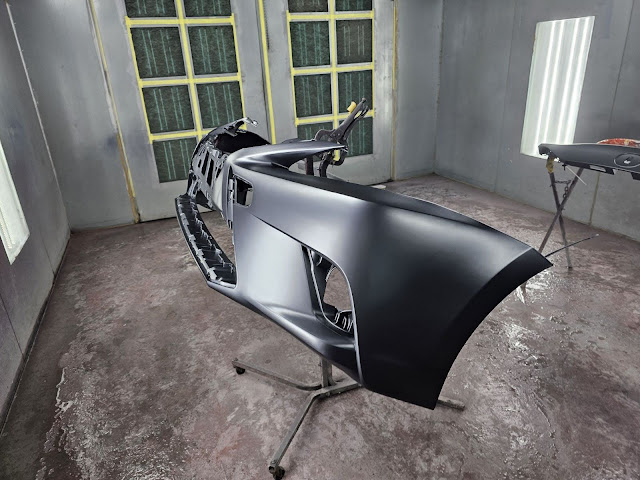
After the bumper was painted I assembled the bumper with the grill, fog lights and trim pieces. Then moved on to getting the front end prepped for paint. Stripped the front end and got everything primed and let it cure completely for over a week.


Unfortunately I had to leave the country for two weeks and put the project on the back burner till I got back. Thankfully I have some good friends and the day I landed back in the US to my surprise I got some pics of the car completely painted!! Thanks Jeremy!! Jeremy blocked, wet sanded and sealed the front end before paint.


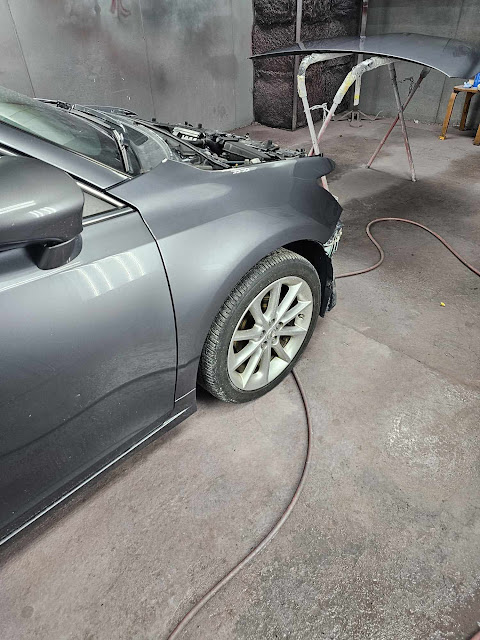
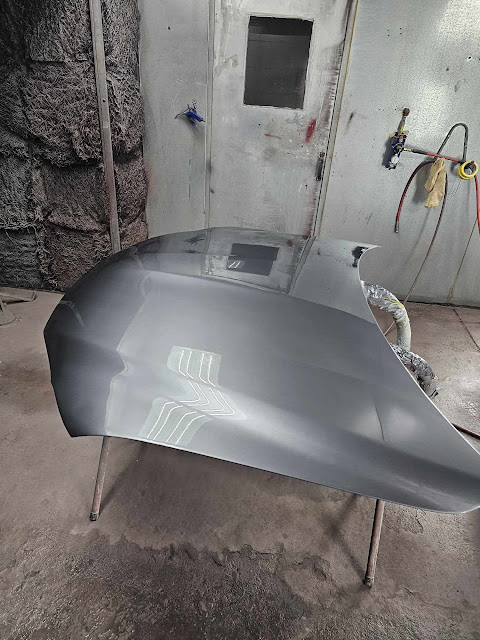
Only thing left to do was to put everything back together which I did enthusiastically the next day!


Happy with the outcome! Onto other things!
-AJ Abraham
Follow me on Instagram:
@flawless_fitment
@aj_ls460
@aj_lx470
@aj_sc430
Since Day 1 I've always wanted to get the front end at the very least painted. The bumper had a broken tab on one side which I rigged up to hold in place but needed to be messed with every so often to get it back in place. Also the fenders and hood had rock chips and fading clear. I knew that instead of getting another 2011+ bumper I wanted to go ahead and do a 2014+ F sport front end conversion.
I was pretty much more concerned with the mechanical aspect of things initially. Since the major mechanical aspect of the car was tackled and I couldn't stand the exacerbating condition of the bumper I figured it was time to shift focus and remediate that.
Ordered the front end parts and dropped the bumper off to get painted after a quick test fit. Also added the rear hatch trim piece to the paint list since it was in pretty bad shape for some reason. The parts were primed, blocked, wet sanded and sealed before painting it.
After the bumper was painted I assembled the bumper with the grill, fog lights and trim pieces. Then moved on to getting the front end prepped for paint. Stripped the front end and got everything primed and let it cure completely for over a week.
Unfortunately I had to leave the country for two weeks and put the project on the back burner till I got back. Thankfully I have some good friends and the day I landed back in the US to my surprise I got some pics of the car completely painted!! Thanks Jeremy!! Jeremy blocked, wet sanded and sealed the front end before paint.
Only thing left to do was to put everything back together which I did enthusiastically the next day!
Happy with the outcome! Onto other things!
-AJ Abraham
Follow me on Instagram:
@flawless_fitment
@aj_ls460
@aj_lx470
@aj_sc430
Last edited by kuWuPt; 04-03-24 at 11:44 AM.
The following 2 users liked this post by kuWuPt:
01LEXPL (04-05-24),
TobiasSing (04-03-24)
04-03-24, 11:43 AM
#13
I didn't address anything as far as suspensions were concerned since I got the car. During an oil change I noticed one of the rear shocks had a slight leak so thought suspension refresh was in order. Also I was hearing a slight ticking noise when I'm braking and the car was under 15mph. From my research the ticking could be caused by either axle or the steering damper. Since the damper was the cheaper of the two I started with that. Unfortunately the damper wasn't it so I moved on to the suspensions. Since parts needed to be addressed anyway I figured it was due time to address anything that could wear over time.
Onto the parts list:
Coilovers - D2 Racing RS Series Coilover - (D-LE-14-RS)
Tie rods - Front Inner - (MEVOTECH MS86749)
Tie rod - Front Left Outer - OEM (45047-49165)
Tie rod - Front Right Outer - OEM (45046-49225)
Front Cam Bolt - MOOG K90477 x 2
Rear upper camber arm - Megan - MRS-SC-0510
Sway bar end link -Front - MOOG K750043
Sway bar end link - Rear - MOOG K750522
Sway bar bushings - Front - MOOG K201559
Sway bar bushings - Rear - TRW JBU2265
Control Arm - Front right lower rearward - MOOG RK622202 Complete Arm w/ Ball Joint
Control Arm - Front left lower rearward - MOOG RK622203 Complete Arm w/ Ball Joint
Electric Power Steering Damper - OEM - (45254-28040)
Axle Front RH - PDL (1700-517435)
Axle Front LH - PDL (1700-517434)
Axle seal RH - OEM (90311-40037)
Axle seal LH - OEM (90311-50064)
My initial plan was to install the coilovers first, give it a week or two to settle and then change out all the other parts and then do an alignment.
Onto the install:

Before installing coilovers I go ahead and put some anti seize on the threads that come in contact with the lower perch. Some coilovers do state to not put any anti seize so follow manufacturers directions. I've never had any coilovers seize on me so this is what I do.

After the install with my initial measurements this is how the car sat with the wheels I plan on running.

Lowered it about 3/4" more to have a better fitment.

 With the height dialed in I put my factory wheels back on for about 2 weeks before my buddy Matt was able to schedule me in at the shop. This was planned because I figured the coilovers would settle in that time frame.
All the new parts.


I did know that there was a front main seal so did that as well. Then Matt pointed out that I had a slight leak coming from the Oil pressure sensor so have that one coming to swap out as well. There were no other leaks, happy about that.

All the motor mounts!! What a pain! All new OEM parts for replacement.

All the old parts that came out!
 A fresh oil change and after an alignment the car drives very well! Responsive, much smoother, no weird noises and peace of mind! 218000 miles and still going strong!
-AJ Abraham
Follow me on Instagram:
@flawless_fitment
@aj_ls460
@aj_lx470
@aj_sc430
Onto the parts list:
Coilovers - D2 Racing RS Series Coilover - (D-LE-14-RS)
Tie rods - Front Inner - (MEVOTECH MS86749)
Tie rod - Front Left Outer - OEM (45047-49165)
Tie rod - Front Right Outer - OEM (45046-49225)
Front Cam Bolt - MOOG K90477 x 2
Rear upper camber arm - Megan - MRS-SC-0510
Sway bar end link -Front - MOOG K750043
Sway bar end link - Rear - MOOG K750522
Sway bar bushings - Front - MOOG K201559
Sway bar bushings - Rear - TRW JBU2265
Control Arm - Front right lower rearward - MOOG RK622202 Complete Arm w/ Ball Joint
Control Arm - Front left lower rearward - MOOG RK622203 Complete Arm w/ Ball Joint
Electric Power Steering Damper - OEM - (45254-28040)
Axle Front RH - PDL (1700-517435)
Axle Front LH - PDL (1700-517434)
Axle seal RH - OEM (90311-40037)
Axle seal LH - OEM (90311-50064)
My initial plan was to install the coilovers first, give it a week or two to settle and then change out all the other parts and then do an alignment.
Onto the install:
Before installing coilovers I go ahead and put some anti seize on the threads that come in contact with the lower perch. Some coilovers do state to not put any anti seize so follow manufacturers directions. I've never had any coilovers seize on me so this is what I do.
After the install with my initial measurements this is how the car sat with the wheels I plan on running.
Lowered it about 3/4" more to have a better fitment.
With the height dialed in I put my factory wheels back on for about 2 weeks before my buddy Matt was able to schedule me in at the shop. This was planned because I figured the coilovers would settle in that time frame.All the new parts.
I did know that there was a front main seal so did that as well. Then Matt pointed out that I had a slight leak coming from the Oil pressure sensor so have that one coming to swap out as well. There were no other leaks, happy about that.
All the motor mounts!! What a pain! All new OEM parts for replacement.
All the old parts that came out!
A fresh oil change and after an alignment the car drives very well! Responsive, much smoother, no weird noises and peace of mind! 218000 miles and still going strong!-AJ Abraham
Follow me on Instagram:
@flawless_fitment
@aj_ls460
@aj_lx470
@aj_sc430
The following 2 users liked this post by kuWuPt:
01LEXPL (04-05-24),
TobiasSing (04-03-24)
04-03-24, 06:26 PM
#14
Very nice updates!


Thread
Thread Starter
Forum
Replies
Last Post
kuWuPt
LX - 1st and 2nd Gen (1996-2007)
23
07-17-24 06:53 AM