When you click on links to various merchants on this site and make a purchase, this can result in this site earning a commission. Affiliate programs and affiliations include, but are not limited to, the eBay Partner Network.
I'm new to this forum but glad I found it!
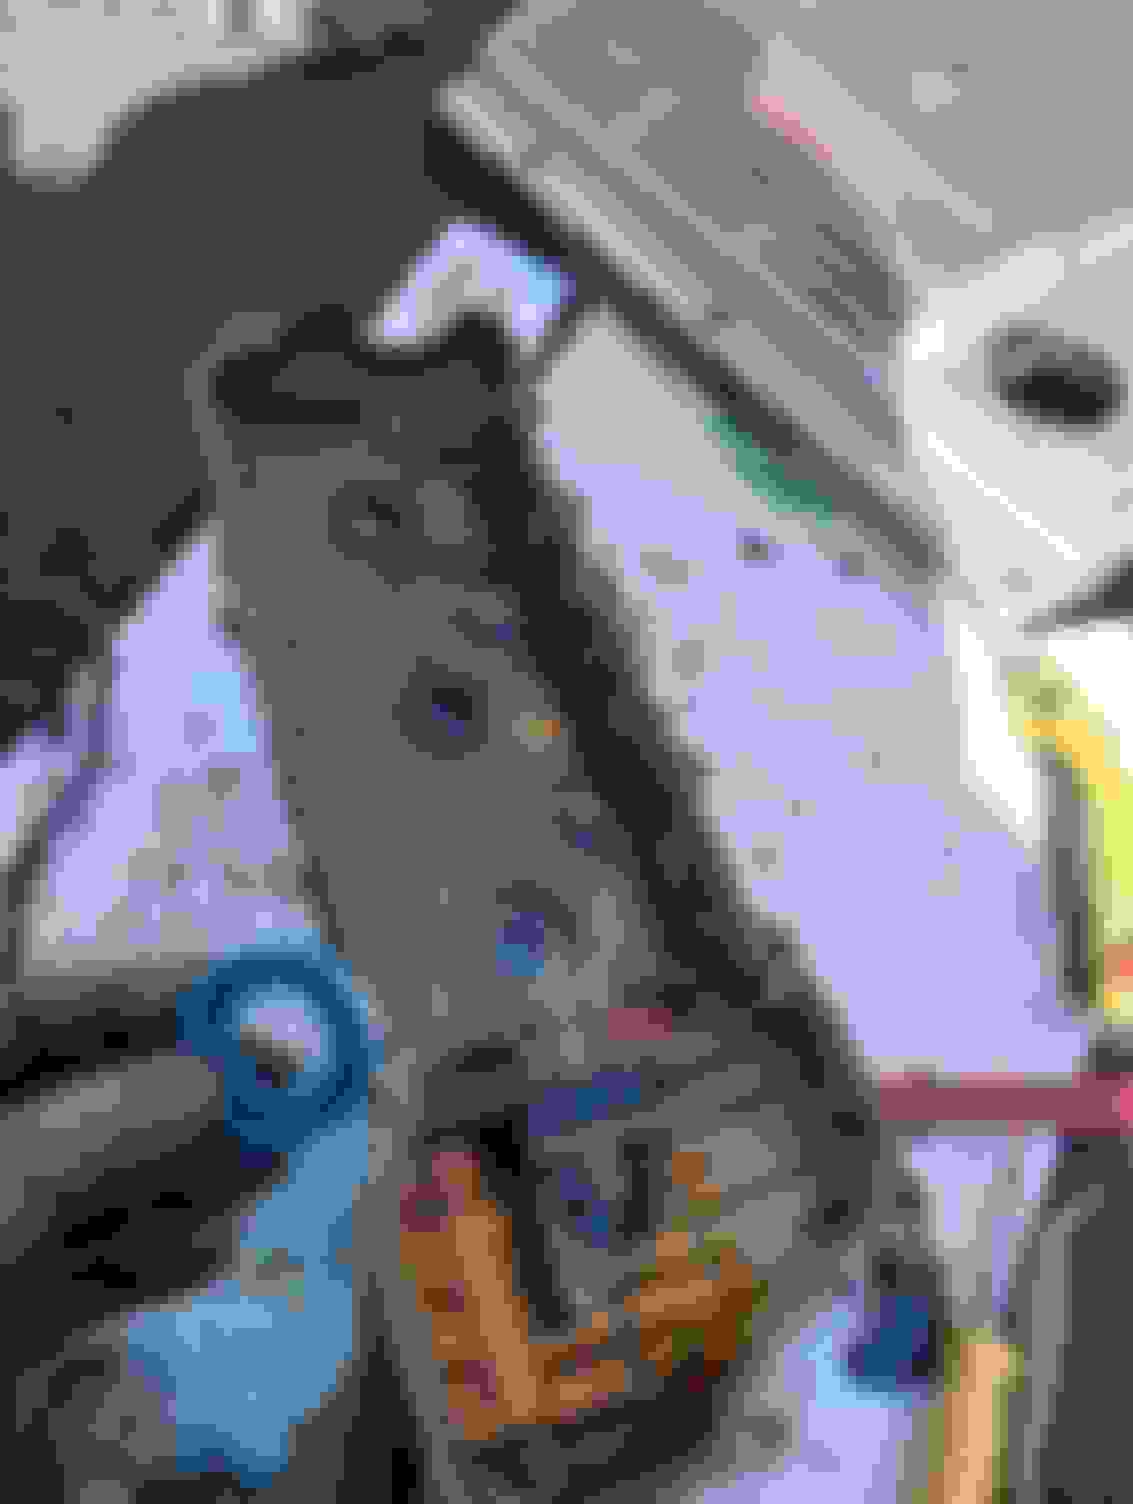
I have a 99 Lexus ES300 (1MZ-FE engine) and I want to replace the plug tube seals, which have never been replaced since I bought this car new in 1999!
I had to use a razor to scrape out the old rubber seals from the plug tubes 'cause they were so old and brittle and baked into the cover. I thought I was done removing the old tube seals, but the new ones don't fit and I think it's because I'm supposed to pry out the metallic ring that is still embedded in the valve cover tube holes.
Can someone confirm that I need to do this? Are you supposed to pry out and remove the metal ring that's inside the plug holes on the valve cover? Pics below.
Thanks in advance.
I bought the FelPro gasket set and the cover gasket fits perfectly, so I assume the tube rings are correct. If that metallic ring in the cover tube holes wasn't there, these new rings would fit perfectly.
It has a "U" shape. My guess is what's still remaining in the valve cover is brown portion (old seal) from the image above.
Also, there are two small metal tabs that hold the seal in place on the valve cover. You are to carefully bend the tabs up to allow the complete remove of the seal (& subsequent install of new seal). Based on your picture, these tabs have not been bent up.
Once new seal is installed, bend the tabs back into place
One other thing about the FelPro tube seals. There seems to be confusion about which direction to insert them. I did it the way the FelPro videos say (with the recessed side facing the tubes to make it easier for the rings to slide over the tubes). But to be honest, I still don't know if that is the right way or not. .I had originally put them in the other way (like the guy in the TRQ video on youtube), but I could not get the tubes to slide around them no matter how hard I tried. So I took the damn thing off and re-did the seals the other way.
The pic below is what it looked like when I did it the first time (before I switched the orientation of the tube seals).
I installed them opposite of your pic. They claim it doesn't matter which way if it doesn't catch tubes but the other way from your pic makes sense to slide on easier. Your pic has it where the tubes could get caught between the high sides vs the other way where it should slide itself through. But yeah hard to find concrete directions and from when i searched it seemed 50/50 on what people said and how they did it.
I ripped the last one i had inserting it, luckily they had some at local store. People say easy job but damn near took me 3 days. Although a lot of it was cleaning sludge. I had horrible sludge compared to your cover from previous owner never replacing pcv valve I think and taking short drives. Only 80k miles but the pcv hose was like concrete and the oil pan was just crazy. Sludge residue all in plenum. This was after flushing engine with 50/50 diesel and oil to let idle for a few mins too. Super clean works like no other chemical for dissolving oil. But it also seems to eat aluminum lol. Gotta be careful. I hate the smell of sludge mixed with super clean now though. Awful stuff.
80K is super low miles. I have 170K and thought that was pretty low.
Can't wait to get all the oil leaks resolved on this baby and get her back on the road.
in the video, around the 9:50 mark, he discusses the seals which look like your brand - felpro
I understand his idea of freezing them first (shrinks them) so they slide in easier. It can be done with out freezing them as well
Good link - I've seen that one before as well. Luckily the tube seals slipped right in without much issue for me, didn't need to cool them first.
I was worried about messing up those tabs when pressing them back in place. But I think I did an OK job. We'll find out I guess!
 02-04-24, 07:44 AM