
Low Budget DIY Solution for Burnt Out Needles
 03-26-08, 07:41 AM
#91
Lexucanafer
Thread Starter
Where did you find the strips of 1mm LEDs?
I hope you'll keep us updated on the project.
 03-26-08, 09:44 AM
#92

Lexucan,
Thanks for the response. I guess time will tell on the lifespan of the new needles.
The amber portion of the needle came out pretty easily with a Dremel tool. I purchased the LED strip on Ebay. I plan on replacing the amber with a clear plastic. If all goes well I should have this project completed in two weeks. I will give an update along with pics and details of the process if I am successful.
This is a salute to your ingenuity. Without your initial post and DIY I wouldn't even have attempted this.
04-10-08, 07:47 PM
#93
Driver School Candidate
Join Date: Apr 2008
Location: Colorado
Posts: 33
Likes: 0
Received 0 Likes
on
0 Posts
that is way sick man and i have a 94 es that looks just like yours before you redid all that and i was bout to look into the cluster so i am glad i didnt and i hope it aint to hard for what you did cuz i think i am goin to try it but i dont know much bout wiring
05-02-08, 09:43 PM
#94
http://babelfish.yahoo.com/translate...rUrl=Translate
 FINALLY. A DIY for replacing the entire needle lighting.
I found this through the Windom Owner's club links, and did a Yahoo Babel Translation. Can we have someone actually translate the DIY to English along with the parts used?
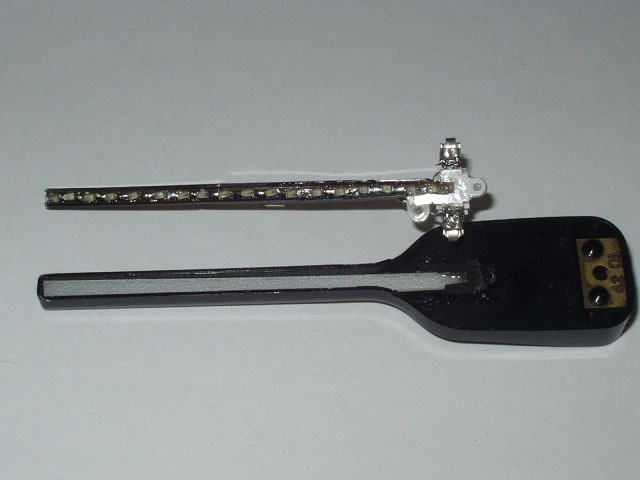
Interesting photos:
-The inside needle LED's
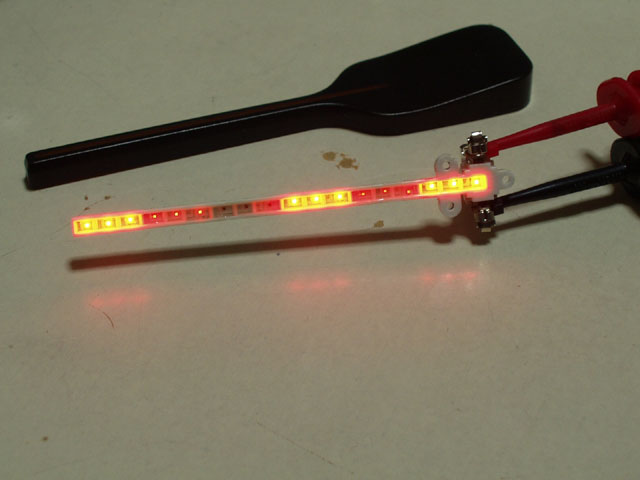
Circuit Board for Needle
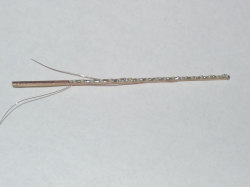
New Needle assembly
FINALLY. A DIY for replacing the entire needle lighting.I found this through the Windom Owner's club links, and did a Yahoo Babel Translation. Can we have someone actually translate the DIY to English along with the parts used?
Interesting photos:
-The inside needle LED's
Circuit Board for Needle
New Needle assembly
05-18-08, 07:56 PM
#97
Driver School Candidate
Join Date: May 2008
Location: Florida
Posts: 7
Likes: 0
Received 0 Likes
on
0 Posts
Finally got around to ordering my parts on eBay today and cant wait till they come in so I can get my cluster looking pimp.
I got #74 Super WHITE Wedge Base LED Bulbs 12V(Wasn't feeling the blue as much)
And I checked out mouser.com for the Needle LEDs (.20cent a piece)
Face gonna glow on the highway boy!!
Ill post pics of the cluster when I finish my project.
I got #74 Super WHITE Wedge Base LED Bulbs 12V(Wasn't feeling the blue as much)
And I checked out mouser.com for the Needle LEDs (.20cent a piece)
Face gonna glow on the highway boy!!
Ill post pics of the cluster when I finish my project.
07-02-08, 08:25 PM
#98

I think what Tuan was trying to link to was this: (Same link, read instructions)
http://babelfish.yahoo.com/translate...rUrl=Translate
You have to go to the bottom and click "It returns"
Then, click "DIY"
Then select which DIY you would like to see.
It's really hard to try and understand. Even with the English translation it can be very difficult to understand one paragraph.
http://babelfish.yahoo.com/translate...rUrl=Translate
You have to go to the bottom and click "It returns"
Then, click "DIY"
Then select which DIY you would like to see.
It's really hard to try and understand. Even with the English translation it can be very difficult to understand one paragraph.
07-03-08, 05:17 AM
#100
Driver School Candidate

Join Date: May 2006
Location: NY
Posts: 11
Likes: 0
Received 0 Likes
on
0 Posts
Lexicon, the writeup you did was very good. I do have a question though. why did you only use 1 led instead of more? With just the tip lit, it would seem hard to read. I would think 3 would be enough, you could eliminate 1 of the resistors.
07-03-08, 07:36 AM
#102
Lexucanafer
Thread Starter
In broad daylight the gauges are easy to read with the one LED per needle. At night the illumination is even better. The important part is the location of the LED. Seeing the tip of the needles is what's most important for accurately reading the gauges. Having the whole needle illuminated does not make reading of the gauges any easier or more accurate, it just looks a little flashier.
My reason for using two resistors instead of one per needle was to better dissipate the heat generated by the circuit. Two 330 ohm resistors are much happier and less prone to failure over a long period of time than one 680 ohm resistor.
I hope this answers your question.
Last edited by Lexucan; 07-03-08 at 07:50 AM.
07-03-08, 07:42 AM
#103
Lexucanafer
Thread Starter
07-04-08, 07:17 AM
#104
Now, not to discredit you or anything, but I'm curious. Ppl are saying that the needles are sagging below the normal 0mph/E fuel/0rpm levels. Is that true with this fix?
Oh. And, I've seen some ppl have to recalibrate/replace the gauge cluster after trying such a fix. Is it really that hard to put the needles back on and have them work properly? If you put one on wrong can you take it off and realign it, then put it back on and have no problems? I really just want mine to read correctly once I'm done. Probably the same concerns many have had.... If anyone can give me some insight on the chances of really leaving this cluster unusable, that would be great.
P.S. Between about 0-20 mph my mph needle bounces up and down. ie: Seems to get stuck at first, then bounces to about 12mph, drops to 7mph, seems to get stuck again, then bounces up to about 16, might get stuck again, and so on, until I'm about 20mph. It seems to work fine after 20mph or so. That was just an example, it is doing very similar motions to what I have explained. My story just may not be exact. But, I have not been in the gauge cluster yet and I'm thinking that this is a factory problem. It has been going on for a while now. I'll probably have to start my own thread. I was thinking about changing the transmission fluid because it is a little jumpy/rough when switching gears and maybe that would help...
07-04-08, 10:18 AM
#105
Lexucanafer
Thread Starter
Oh. And, I've seen some ppl have to recalibrate/replace the gauge cluster after trying such a fix. Is it really that hard to put the needles back on and have them work properly? If you put one on wrong can you take it off and realign it, then put it back on and have no problems? I really just want mine to read correctly once I'm done. Probably the same concerns many have had.... If anyone can give me some insight on the chances of really leaving this cluster unusable, that would be great.
 But by exercising some care and common sense when doing the work, I think most mishaps such as that can be avoided. The gauges are delicate so they have to be treated gently, but as far as I know, there haven't been many problems with doing this fix and I've received lots of positive feedback about the results. But, at the end of the day, to attempt the fix or not is up to the individual.