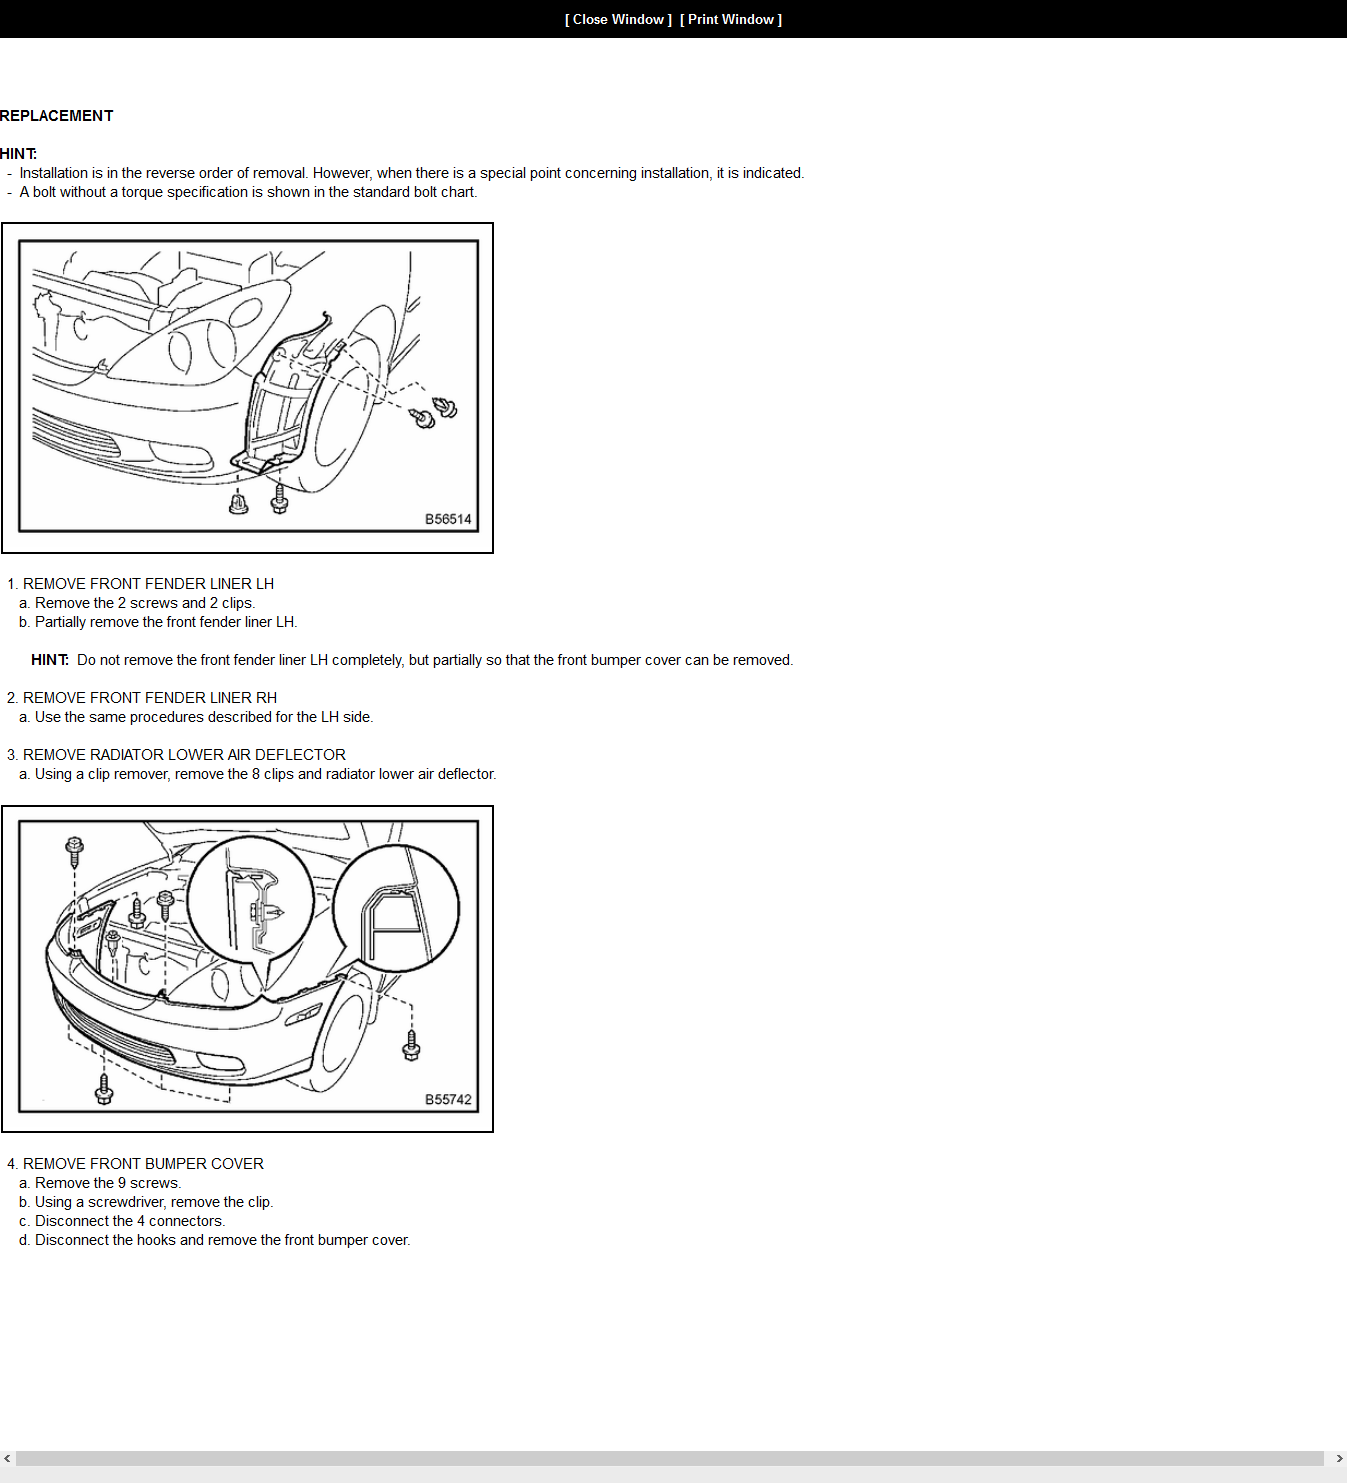
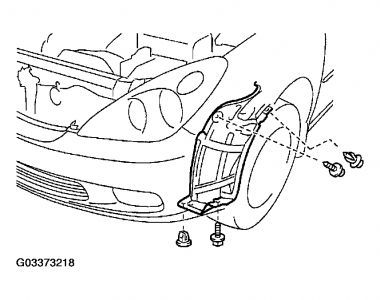
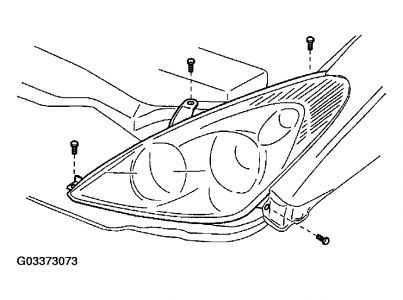
Removing HeadLight Assembly on 04 ES330
#1
Driver School Candidate
Thread Starter
Join Date: Feb 2008
Location: NC
Posts: 4
Likes: 0
Received 0 Likes
on
0 Posts
I have seen several posts on how to do this for other Lexus Models, but nothing on an ES330. I have removed the 3 10MM screws on top of the headlight assemblies, both left and right, but the assemblies still seem to be attached somewhere. Somewhere that I can't see. Maybe I just need to pull hard, but so far I have been afraid to pull very hard. Can anyone tell me if I am missing any screws, clips or anything else? This is my first post, I hope I have not posted this in the wrong place.
Thanks,
Thanks,
Last edited by zzublexus; 02-09-08 at 07:05 PM. Reason: poor grammar
#3
Driver School Candidate
Thread Starter
Join Date: Feb 2008
Location: NC
Posts: 4
Likes: 0
Received 0 Likes
on
0 Posts
Thanks, I was afraid it was going to be something painful to deal with. Do you think I can remove the plastic in the fender wells to get the screw without removing the bumper?
#5
Sorry to revive an old thread, I'm sure nobody on it is paying attention but it's the background to what I'm going to ask.
I have an '05 ES330 which needs the headlights replaced. I've ordered replacements as the 'restoration' job was not very satisfactory. While there are tons of videos about many other models, swapping out the headlight assemblies on this series of ES is not among them. HOWEVER there are a few videos of replacing the headlight assemblies on the same generation Camry which I know in many ways is similar to the ES. The methods I've seen don't require taking off the whole bumper cover, just removing fasteners at one end enough to get at the rear outer bolt of the headlight assembly.
Go to about the 1:45 mark which is where he starts showing how to remove the headlight housing.
I'd as soon not remove the whole bumper cover if I don't have to...
#6
Not entirely sure of you questions, but two comments:
A) if you tried to restore the headlights unsuccessfully, I would ask if you used the method of clear-coating them? I had several unsat restoration attempts using polishes, and sanding and then clearcoating them WAS successful. It has been good for several years now.
B) To get them fully out, you need to take off the bumper cover far enough to get at the bolts beneath it. The comment above about the whole bumper coming off is incorrect. Just the cover. But it looks like you understood that.
The following users liked this post:
mballew (10-30-20)
#9
Thanks for all the replies, much appreciated. When I get the new lights and the weather gets pleasant enough to work outside I'm going to start by removing just what is shown in the video of doing this on a Camry. I believe I also saw a video of replacing them on a Camry where they said to take off the whole front bumper cover... to get at two bolts, I think I'm going to try and avoid that if possible. When the new lights get here I'm going to see if it seems there are bolts in different places than the Camry video shows.
As for the restoration job not being good, I was never satisfied that the lenses were as clear as they should have been, and then the clear coat wasn't totally smooth either. I tried that on my beater Dodge Intrepid and also wasn't happy, but when I installed a set of aftermarket new headlights on that one, wow, the car looked new again. So - I've got the new headlights on the way, I'll save this thread for reference value (thanks for posting the drawings) and if I can't get the old ones off by pretending it's a Camry, I'll be back. Actually I'll update the thread no matter what happens but it won't be for a while.
As for the restoration job not being good, I was never satisfied that the lenses were as clear as they should have been, and then the clear coat wasn't totally smooth either. I tried that on my beater Dodge Intrepid and also wasn't happy, but when I installed a set of aftermarket new headlights on that one, wow, the car looked new again. So - I've got the new headlights on the way, I'll save this thread for reference value (thanks for posting the drawings) and if I can't get the old ones off by pretending it's a Camry, I'll be back. Actually I'll update the thread no matter what happens but it won't be for a while.
#10
I believe I also saw a video of replacing them on a Camry where they said to take off the whole front bumper cover... to get at two bolts, I think I'm going to try and avoid that if possible.
The risk of not doing it properly is flexing the cover too much to get access to the hardware, and then cracking the finish. It might take a little while to show up, but when you have nasty cracks in your paint, you will regret not taking the extra 10 or so minutes to just remove the cover.
The following users liked this post:
bullrider (12-31-18)
#11
Don't spend a whole lot of effort to over-think not removing a few bolts. Taking off the bumper cover is not a big deal; a few minutes with several fasteners.
The risk of not doing it properly is flexing the cover too much to get access to the hardware, and then cracking the finish. It might take a little while to show up, but when you have nasty cracks in your paint, you will regret not taking the extra 10 or so minutes to just remove the cover.
The risk of not doing it properly is flexing the cover too much to get access to the hardware, and then cracking the finish. It might take a little while to show up, but when you have nasty cracks in your paint, you will regret not taking the extra 10 or so minutes to just remove the cover.
Are there any clips or fasteners that are likely to break when I remove them, or are these parts pretty resilient?
#12
Intermediate
The clips and rivets are the main reason people take shortcuts and like ORO said, you will end up stressing and maybe ruining a bumper cover because of it. I insulated my trunk lid yesterday and the clip/rivet tools made the job sooo easy and replaced any rivets damaged. Bingo!
Last edited by Richardsr; 12-31-18 at 04:19 PM. Reason: Info
#13
YES you have to remove the front bumper cover to get the last two bolts out to do it right, or you will break them off . Remove the 2 fender wheel liners, the undercover splash shield front bolts, side marker light and fog light wire connections, and front license plate bolts if needed, and any remaining bumper cover bolts hidden under the splash shield. Removing the last 2 bolts on the top side corners of the bumper cover is done from the inside of the wheel splash shield under the car. If I remember correctly? Get help or place a blanket under the bumper B4 removing. When you pull the bumper cover off you will see the remaining hidden bolt holding the headlight housing, You also need to transfer over the old OEM ballasts to the new housings on (H I D) and a wire connector. Halogen have no ballasts When you get the housings out you will see the cover on the underside bottom of the headlight housing if its HID, New housings don`t often, or never come with the ballasts. Now would be the time to decide if you want or need new ballasts also? And if you want to change the side markers to white or get new amber now is the best time to do that too. Pick a nice warm day to tackle this project.
#14
Yes, there are clips... about a dozen of them as my previous pictures show. A set of handy dandy plastic clip/rivet removal tools is about $10 online and a few bags of clips and rivets are about $5 for a 100 each. Don’t buy “inch” size clips/rivets (1/4, 5/16, etc.) because Lexus uses metric sizes and SAE will either be loose or too big.
The clips and rivets are the main reason people take shortcuts and like ORO said, you will end up stressing and maybe ruining a bumper cover because of it. I insulated my trunk lid yesterday and the clip/rivet tools made the job sooo easy and replaced any rivets damaged. Bingo!
Can you point me to the right kind of tool and the clips / rivets I should have on hand? Maybe an example of some on Ebay in the correct type and size? I don't know what I'd need and it sure sounds like you do. Thanks!
YES you have to remove the front bumper cover to get the last two bolts out to do it right, or you will break them off . Remove the 2 fender wheel liners, the undercover splash shield front bolts, side marker light and fog light wire connections, and front license plate bolts if needed, and any remaining bumper cover bolts hidden under the splash shield. Removing the last 2 bolts on the top side corners of the bumper cover is done from the inside of the wheel splash shield under the car. If I remember correctly? Get help or place a blanket under the bumper B4 removing. When you pull the bumper cover off you will see the remaining hidden bolt holding the headlight housing, You also need to transfer over the old OEM ballasts to the new housings on (H I D) and a wire connector. Halogen have no ballasts When you get the housings out you will see the cover on the underside bottom of the headlight housing if its HID, New housings don`t often, or never come with the ballasts. Now would be the time to decide if you want or need new ballasts also? And if you want to change the side markers to white or get new amber now is the best time to do that too. Pick a nice warm day to tackle this project.
The new lights arrived - and here is a comparison of new vs current. (That's clear protective plastic film on the new one.) There is no way I was going to get the old ones to look anywhere near as good.
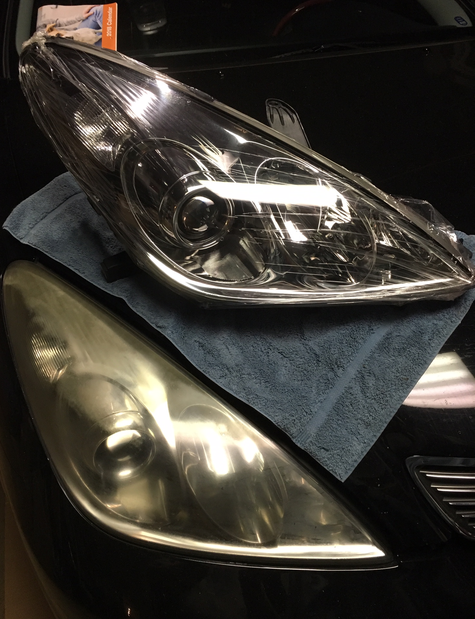
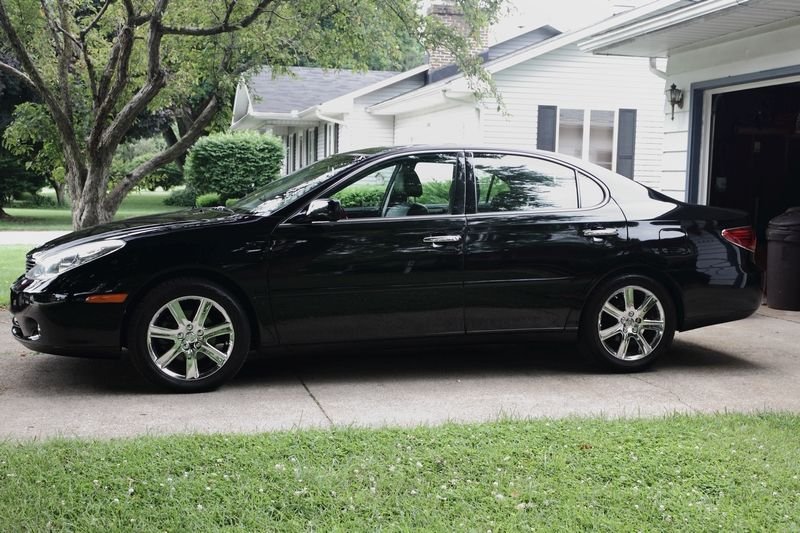
The rest of the car is pretty sharp, it's just the headlights that have been a real sore point and make the car look shabby. Those yellowed lights just scream 'old car!' from the front view. It's way too nice of a car for me to let it look like a beater. Any car that actually looks good has nice crystal clear shiny headlights. I rejuvenated my old Dodge Intrepid with a new set and it was night / day different. The headlights don't look so bad in this photo from a few years ago but even then they were getting cloudy and starting to yellow. By the way, those are 'clone' Lexus chrome wheels which were available starting in '06 or '07. I don't drive the car in winter so I can't say how well they would hold up in adverse conditions, but as far as appearance etc. I have been very pleased with them. The chrome wheels for the '05 model weren't available from that company but would have had one less 'spoke'. These clone wheels cost about as much for the set as one good Lexus wheel just like them would have been.
Last edited by bullrider; 01-07-19 at 06:05 AM.
#15
Intermediate
Here’s a great page for buying plastic rivets and clips. Forget about buying kits because they never have enough of what you need and a lot of what you don’t need. I buy the push-in ribbed type and replace all rivets I take out whatever job I’m doing. The other type are two-piece that work on the same principle as wall anchors in your home... they expand when pressed into place. Be sure to buy metric sizes (ex: 7, 8 & 9mm) because SAE doesn’t fit. https://www.ebay.com/bhp/plastic-auto-fasteners
The “Handy Dandy” Rivet/Clip Removal tool set I own is here. I like them because they are very tough but can be trimmed with a little sandpaper to reach those really tough places one encounters. I recommend them. https://www.ebay.com/itm/11pc-Trim-R...item3b265ee4ad
Love your nights lights and they certainly add to your car. To keep them looking pretty and keep oxidation down I highly recommend some of this for your lenses. Highly rated and it works. https://shop.advanceautoparts.com/p/...oat/10719345-P
Great looking car. Happy trails...
Last edited by Richardsr; 01-08-19 at 11:42 AM. Reason: Info


