Detailed '02 - not dial-up friendly!
 10-07-09, 03:13 PM
#1
Lead Lap
Thread Starter
Join Date: Aug 2004
Location: GB/KW
Posts: 567
Likes: 0
Received 0 Likes
on
0 Posts
This is an '02 with 159,000+ km (99,375+ miles) on the clock, and I did some serious maintenance over the course of 2 full days. The following items were replaced:
- Timing belt
- Timing belt tensioner
- Crankshaft seal
- Camshaft seals
- Water pump and gasket
- Spark plugs
- PCV valve
- Radiator cap
- Radiator hoses
- Thermostat
- Engine coolant
- Air filter
- Fuel filter
- Brake fluid
Thank goodness this is a small price to pay every 150,000 km. The plugs were a pain to replace, as was fitting the timing belt on the right bank with the wiring right above it. Auto-Rx was added to the power steering and transaxle, those two will be flushed out in 5,000 km (3,000 miles). And I'm waiting on a new cabin air filter as well. I've also got 4 litres of Motorcraft Synthetic Blend 10W-30 and a quart of Marvel Mystery Oil (along with a Motorcraft FL-910 filter) in the slump.
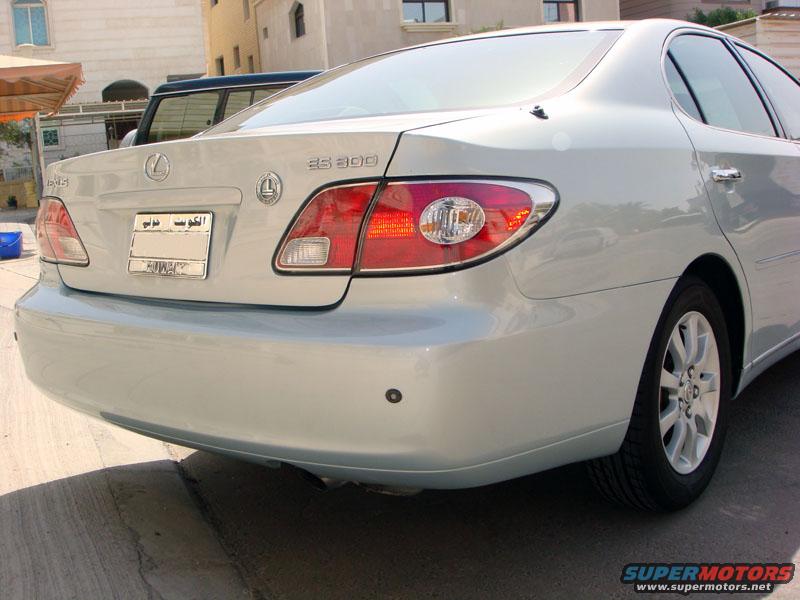
With all that out the way, it's only natural for detailing to be the icing of the cake. Now being a very light colour, you really have to look hard to see reflections. I started off by washing the vehicle with 4 times the strength of Sonax Auto Gloss shampoo. This was followed by Mother's clay bar, followed by 2 applications of 3M Scratch Remover. I then used 3M Professional Rubbing Compound and applied 2 coats of European Meguiar's Tech 2.0 Polish/Wax. Final step was Turtle Wax Carnauba. Tires and wheels were cleaned with Simple Green. These pictures were taken before the vehicle was washed after the detailing job, so some traces of wax are still evident around the headlights, etc. I use a fine brush to remove those, but wanted to get the photography out the way whilst taking a break. Total time for all this was 8 hours and a bit:


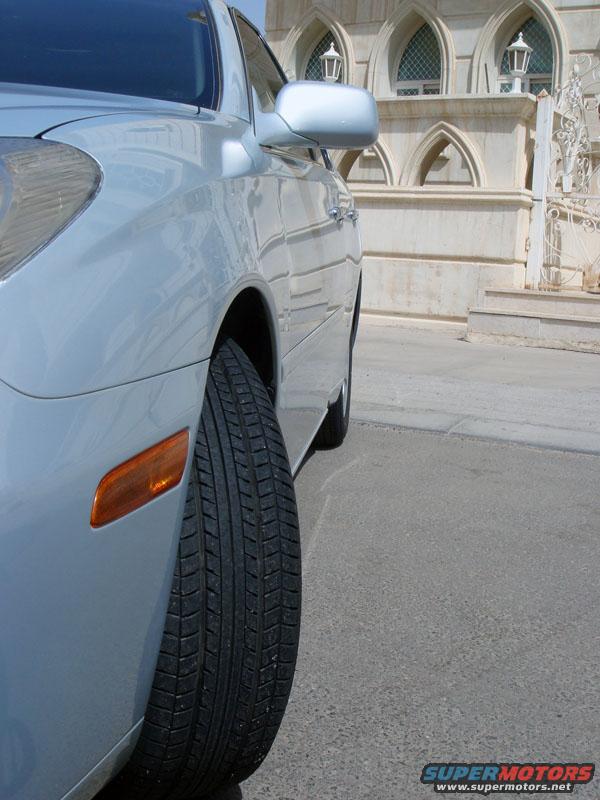


The headlights were quite hazed out, and I managed to get them to this state by using Formula One Scratch Out, which is apparently supposed to clear headlights, and 3M Scratch Remover. As luck would have it, I saw a headlight cleaning kit the other night, but when I went to purchase it there were none in stock. The difference is day and night, but I beleive the headlight cleaner kit will help make them clearer:

As far as the interior is concerned, the entire interior was first cleaned up with Sonax Interior Cleaner. This included the headliner. I used Meguiar's Carpet Cleaner for the carpets and floor mats, which had to be washed. As for the seats, after 2 applications of Mr. Leather leather cleaner, they were treated with Meguiar's Leather Cleaner and Conditioner with aloe. As a final step, Meguiar's Interior Detailer was used:


After 8 hours, I was too exhausted to do the engine.
- Timing belt
- Timing belt tensioner
- Crankshaft seal
- Camshaft seals
- Water pump and gasket
- Spark plugs
- PCV valve
- Radiator cap
- Radiator hoses
- Thermostat
- Engine coolant
- Air filter
- Fuel filter
- Brake fluid
Thank goodness this is a small price to pay every 150,000 km. The plugs were a pain to replace, as was fitting the timing belt on the right bank with the wiring right above it. Auto-Rx was added to the power steering and transaxle, those two will be flushed out in 5,000 km (3,000 miles). And I'm waiting on a new cabin air filter as well. I've also got 4 litres of Motorcraft Synthetic Blend 10W-30 and a quart of Marvel Mystery Oil (along with a Motorcraft FL-910 filter) in the slump.
With all that out the way, it's only natural for detailing to be the icing of the cake.
Now being a very light colour, you really have to look hard to see reflections. I started off by washing the vehicle with 4 times the strength of Sonax Auto Gloss shampoo. This was followed by Mother's clay bar, followed by 2 applications of 3M Scratch Remover. I then used 3M Professional Rubbing Compound and applied 2 coats of European Meguiar's Tech 2.0 Polish/Wax. Final step was Turtle Wax Carnauba. Tires and wheels were cleaned with Simple Green. These pictures were taken before the vehicle was washed after the detailing job, so some traces of wax are still evident around the headlights, etc. I use a fine brush to remove those, but wanted to get the photography out the way whilst taking a break. Total time for all this was 8 hours and a bit:The headlights were quite hazed out, and I managed to get them to this state by using Formula One Scratch Out, which is apparently supposed to clear headlights, and 3M Scratch Remover. As luck would have it, I saw a headlight cleaning kit the other night, but when I went to purchase it there were none in stock. The difference is day and night, but I beleive the headlight cleaner kit will help make them clearer:
As far as the interior is concerned, the entire interior was first cleaned up with Sonax Interior Cleaner. This included the headliner. I used Meguiar's Carpet Cleaner for the carpets and floor mats, which had to be washed. As for the seats, after 2 applications of Mr. Leather leather cleaner, they were treated with Meguiar's Leather Cleaner and Conditioner with aloe. As a final step, Meguiar's Interior Detailer was used:
After 8 hours, I was too exhausted to do the engine.
 10-08-09, 02:29 AM
#3
Lead Lap
Thread Starter
Join Date: Aug 2004
Location: GB/KW
Posts: 567
Likes: 0
Received 0 Likes
on
0 Posts
Thanks, Angmedic91! Cars are fixed up and maintained all the time over here, and parts are very easy to find.  I used OE Toyota parts for the whole thing (except the oil filter), and they're very reasonably priced as well. The only expensive item is the cabin air filter, costing $60 and I'm ordering 3 Beck/Arnley cabin filters online for that price - including delivery!
I used OE Toyota parts for the whole thing (except the oil filter), and they're very reasonably priced as well. The only expensive item is the cabin air filter, costing $60 and I'm ordering 3 Beck/Arnley cabin filters online for that price - including delivery!
10-08-09, 10:42 AM
#4
Thanks, Angmedic91! Cars are fixed up and maintained all the time over here, and parts are very easy to find. I used OE Toyota parts for the whole thing (except the oil filter), and they're very reasonably priced as well. The only expensive item is the cabin air filter, costing $60 and I'm ordering 3 Beck/Arnley cabin filters online for that price - including delivery!
I used OE Toyota parts for the whole thing (except the oil filter), and they're very reasonably priced as well. The only expensive item is the cabin air filter, costing $60 and I'm ordering 3 Beck/Arnley cabin filters online for that price - including delivery! 
 10-08-09, 05:09 PM
#7
Moderator
Very nice and clean looking ES 300 you have there. Keep up the good work and happy driving...
Trending Topics
10-08-09, 05:24 PM
#8
Lead Lap
Thread Starter
Join Date: Aug 2004
Location: GB/KW
Posts: 567
Likes: 0
Received 0 Likes
on
0 Posts
Way cool Falcon LS, nice to know cars are fixed up over there. How about lowering them and flushing the rim to the fender line, is that popular among car enthusiasts over there. Reason I ask, pics from the media during the war showed older cars and some stock mercedes and bmw's. I'm in the military, but have never been deployed to that region. Anyways, mad props on your nice looking Lexus.
Rollin'RX3, thanks for the compliments!
Rlx101, the PCV Valve is located on the left hand side of the engine when you're looking right at it from the front of the vehicle. It's underneath the intake plenum, near the spark plugs. I've faintly marked it in red in this picture. I'm on a computer where the only image editing program I have is paint, so it hasn't marked it very well I'm afraid:

To replace the PCV valve, you will need to remove the engine cover and intake plenum assembly. To remove the intake plenum, you will need remove the air tube assembly and get underneath the vehicle to unbolt a tube-like tie down holding the plenum to the engine block. Once that's out the way, the upper bolts are a piece of cake and it comes right off. You can then unbolt the PCV valve and bolt a new one in place.
As for the thermostat, you will need to remove the entire air box assembly (including the bottom, not just the cover) to access it. You will then need to remove the water inlet connected to the radiator hose to access the thermostat. It's location is a real pain in the backside. I haven't got a picture for it unfortunately, but I hope you find this helpful. This is what will be visible with the air box assembly out the way:


Thread
Thread Starter
Forum
Replies
Last Post