
1997 - 2001 ES300 Oil Change (Detailed with Plenty of Pics)
 07-29-10, 06:00 PM
#1
Driver School Candidate
Thread Starter

Join Date: Jul 2010
Location: FL
Posts: 34
Likes: 0
Received 0 Likes
on
0 Posts
An oil change may be mechanics 101, but not everyone knows how to do it. This is a basic detailed walk through for those that have been hesitant to do their own oil change. Hopefully this write-up will give you that boost of confidence you need to tackle this basic but important task.
Now before you begin make sure that you have all of the tools/supplies you need, here is my list:
Supplies
Tools
Ok, if you have everything listed above then you are ready to begin.
Step 1:
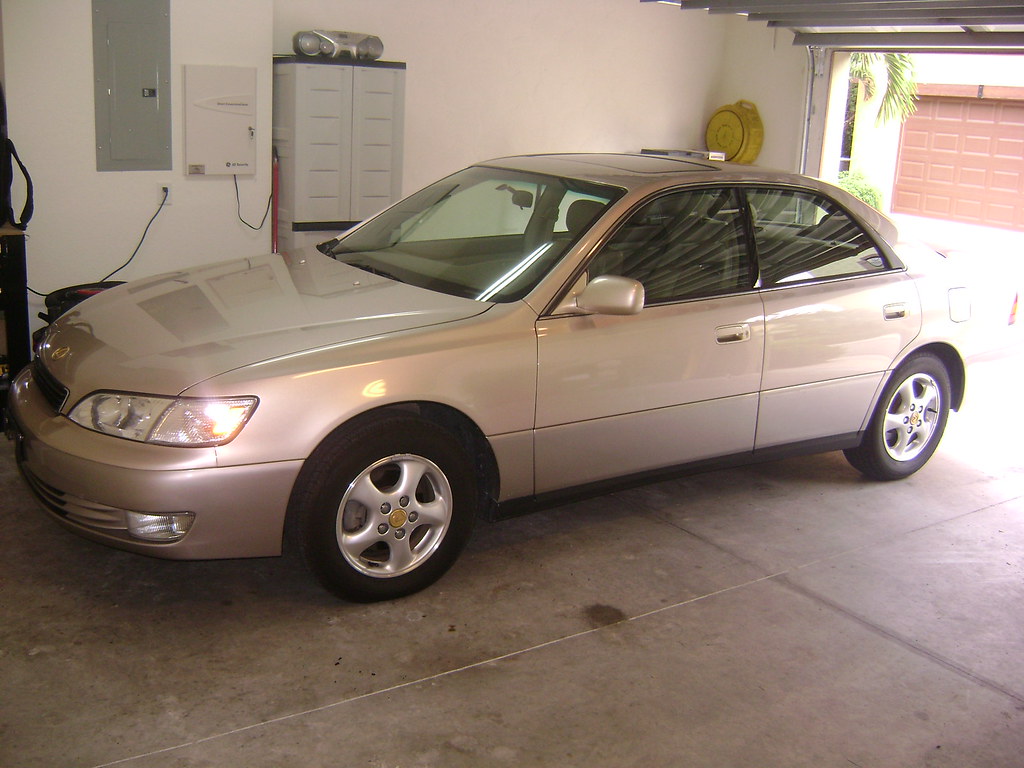
Park your vehicle on a flat/level surface.
Step 2:
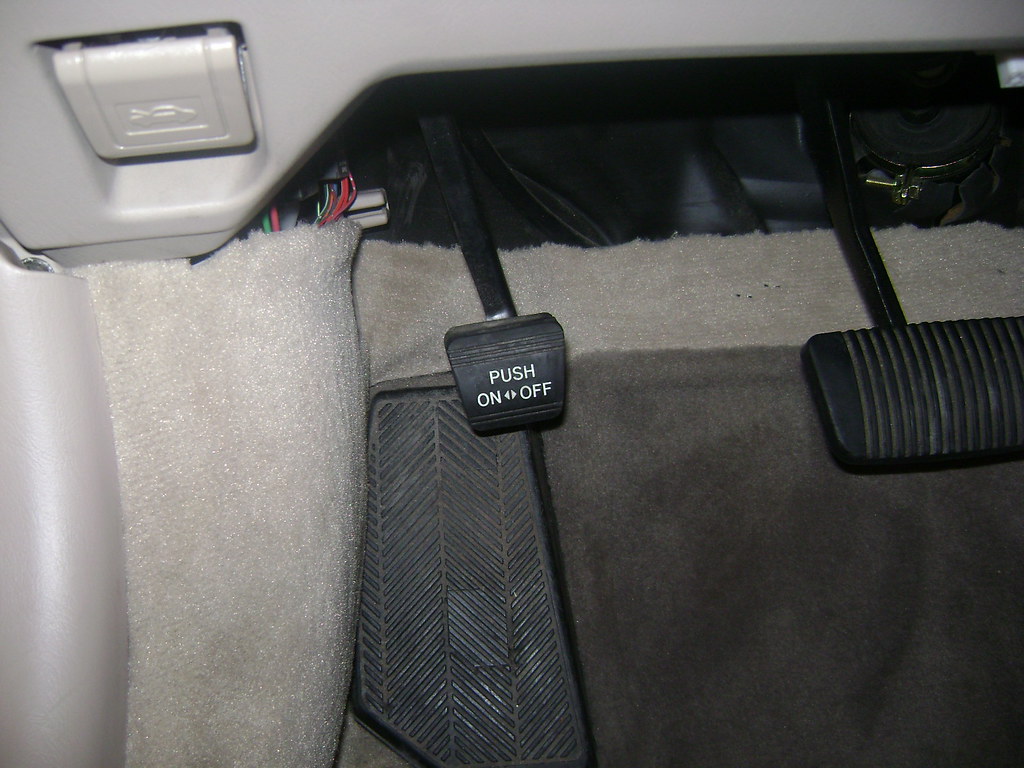
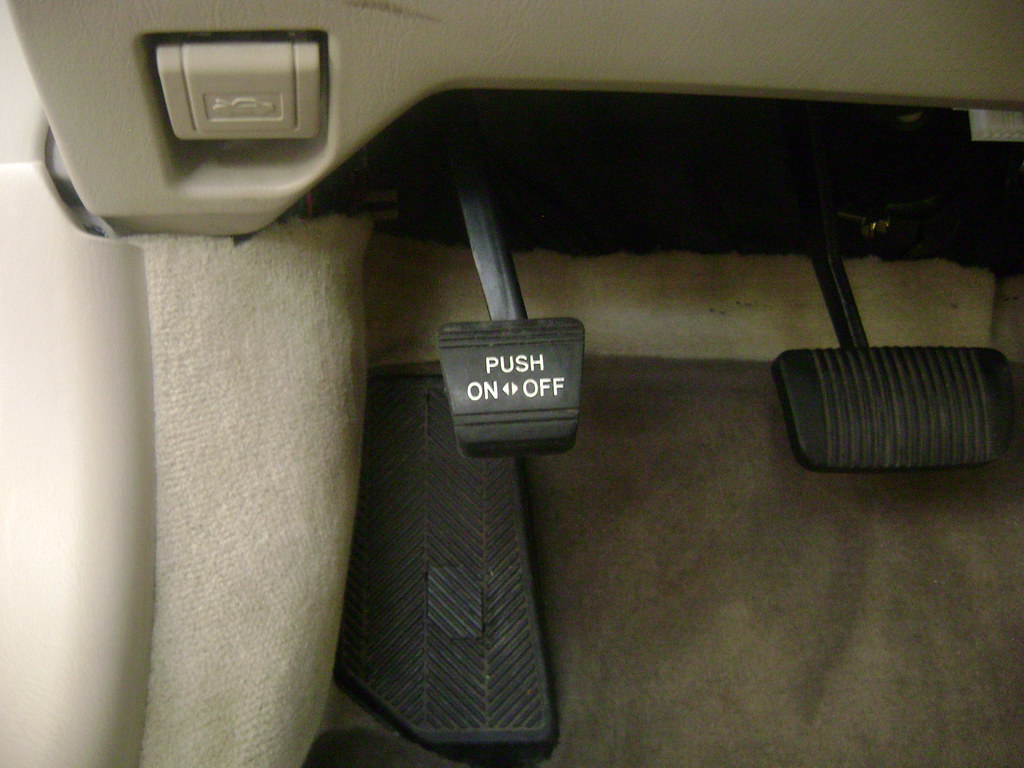
Set your parking brake by pushing it all the way down with your foot. It will lock in place, indicating that the parking brake is engaged. The parking brake pedal is found to the left of your brake pedal.
Step 3:
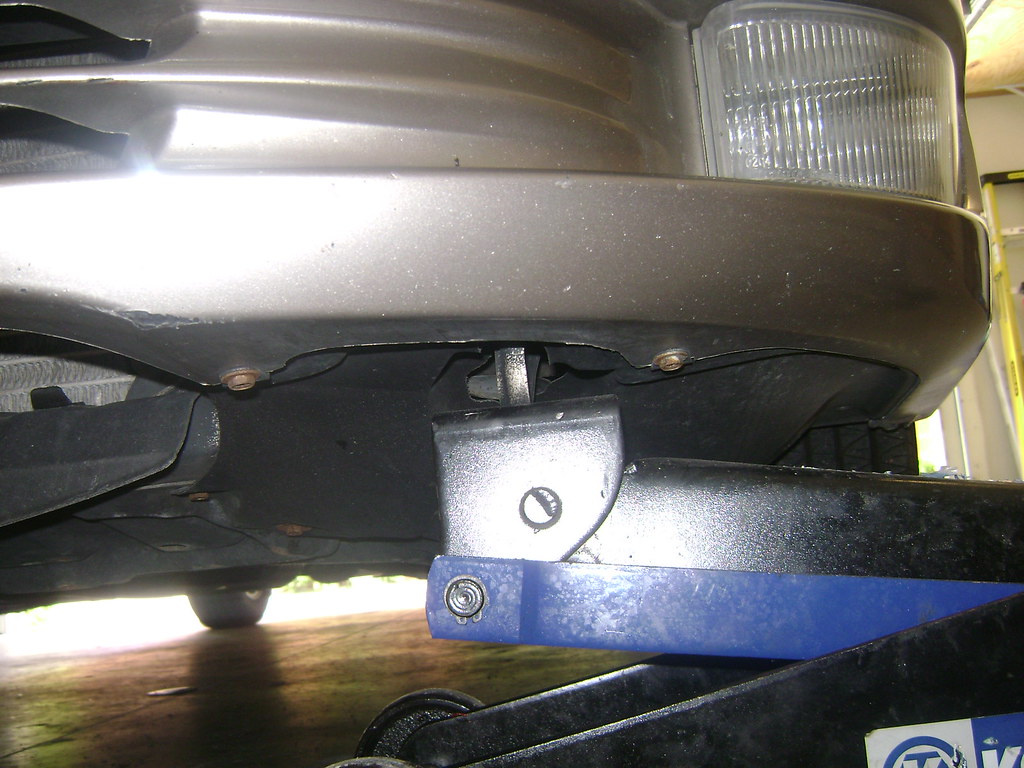
Place your jack under the drivers side front tow hook, and jack the vehicle up to the desired height. The front tow hooks are located beneath the front bumper perpendicular to the headlight assemblies.
Step 4:
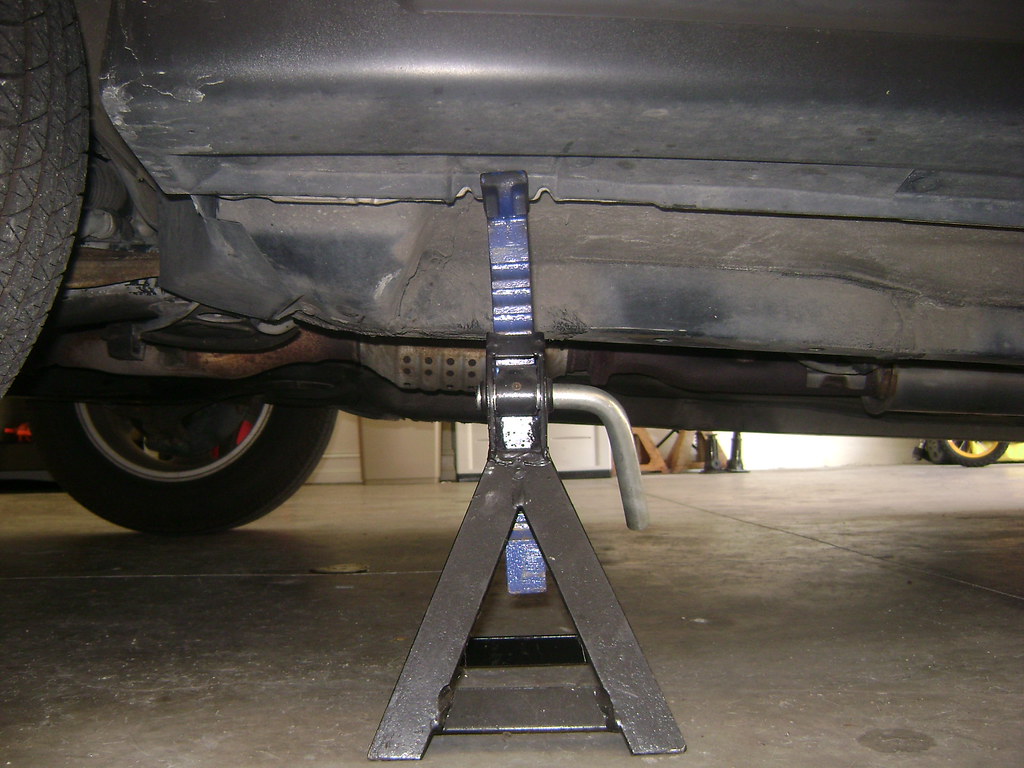
With the drivers side of the vehicle jacked up, place a jack stand under the drivers side front jacking point. Once the jack stand is in place, slowly lower the vehicle onto the jack stand. The front jacking point is located along the frame rail behind the front wheel. This location is identified by the notchs cut into the frame rail.
Step 5:
Repeat steps 3 and 4 on the passenger side. The location of the front tow hook, and front jacking point is in the exact same location on the passenger side of the vehicle. Your vehicle is now secure, and safe to work under.
Step 6:
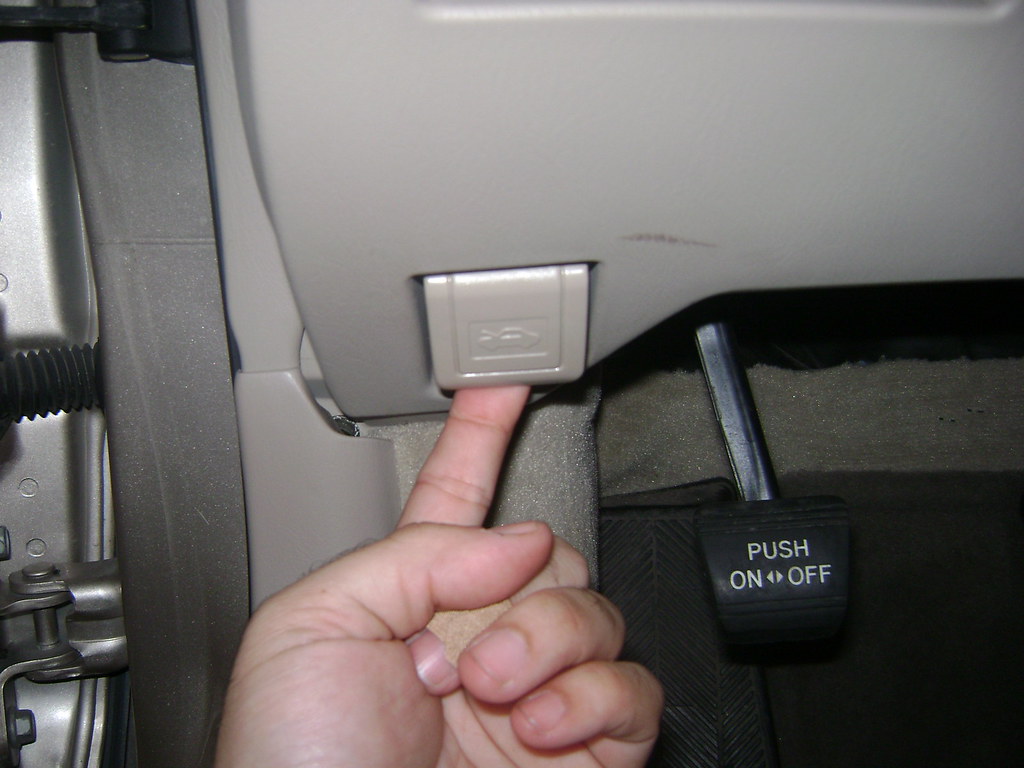
Open your hood. Start by pulling on the hood release lever. The hood release lever is located under the dash, just below the change tray and to the left of the parking brake pedal.
Step 7:
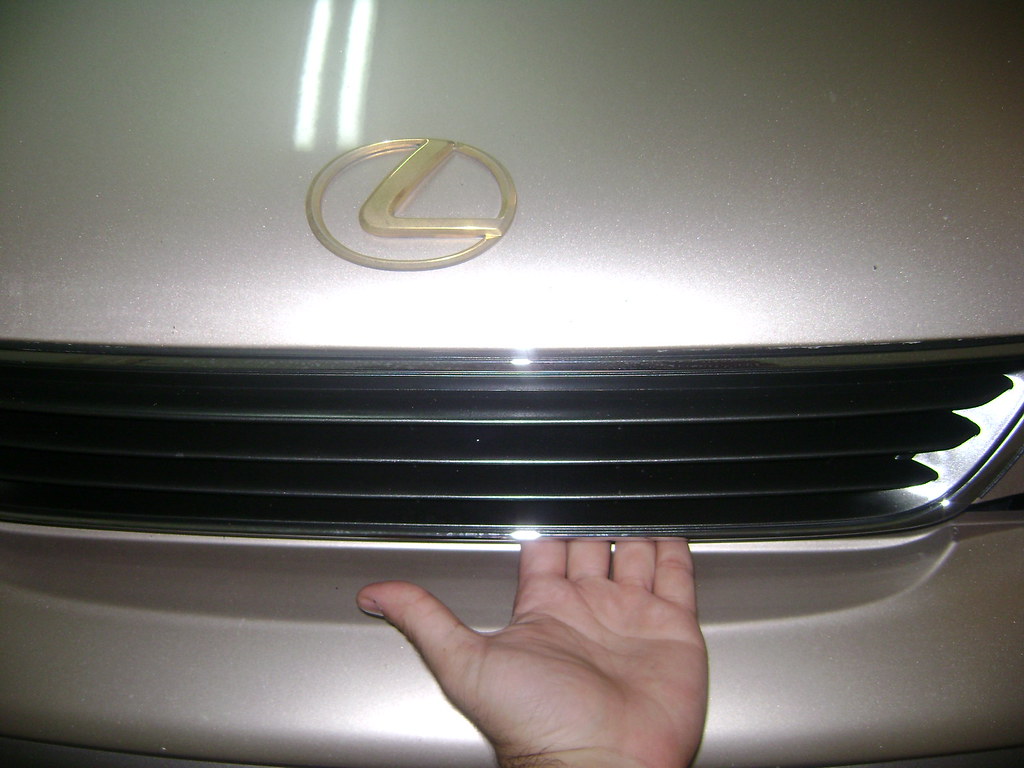
Now that the hood is released, you can open the hood by pulling up on the hood latch. Place your hand face up between the front bumper and the grille, push your finger tips upward on the latch to release it. Please reference the photo below for the exact location of the hood latch
Step 8:
Locate the oil cap, and remove it. Removing the oil cap will allow the old oil to drain faster once the drain plug has been removed.

Step 9:
Place your oil drain pan on top of your oil drip pan (or piece of cardboard) and position it underneath the oil drain plug. The oil drain plug is located under the passenger side of the engine.

Step 10:
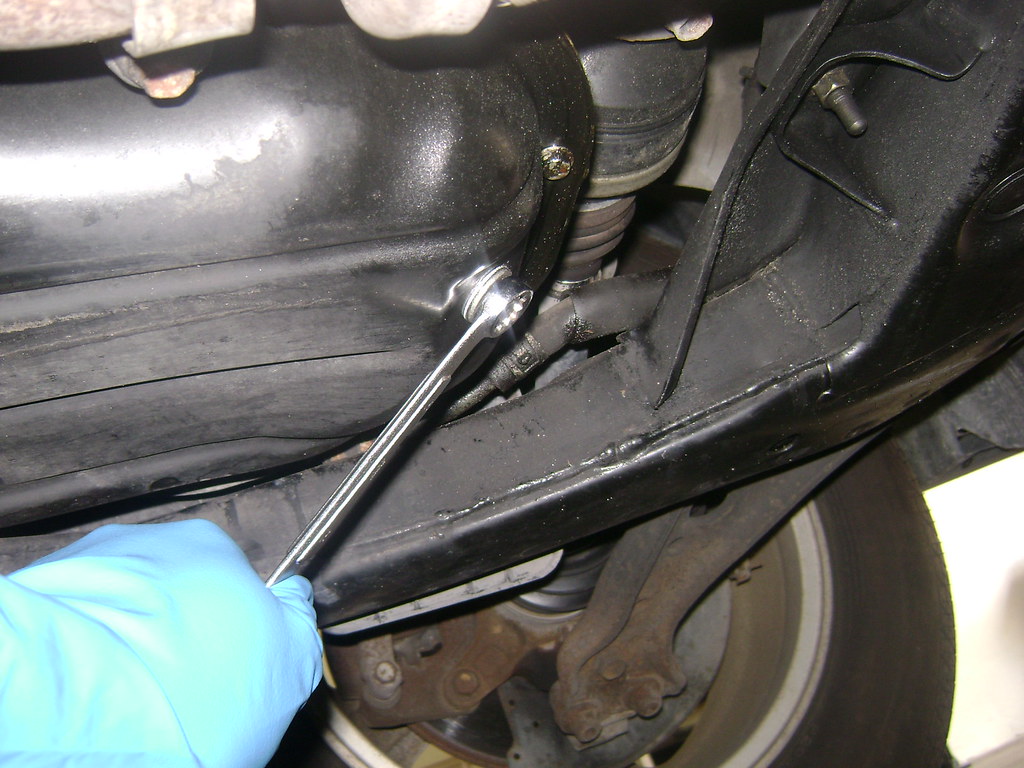
Using your 14mm box wrench, loosen/remove the oil drain plug slowly. It is ok if the drain plug falls into the oil drain pan, this may be difficult to prevent with hot oil pouring out of the drain hole.
Step 11:
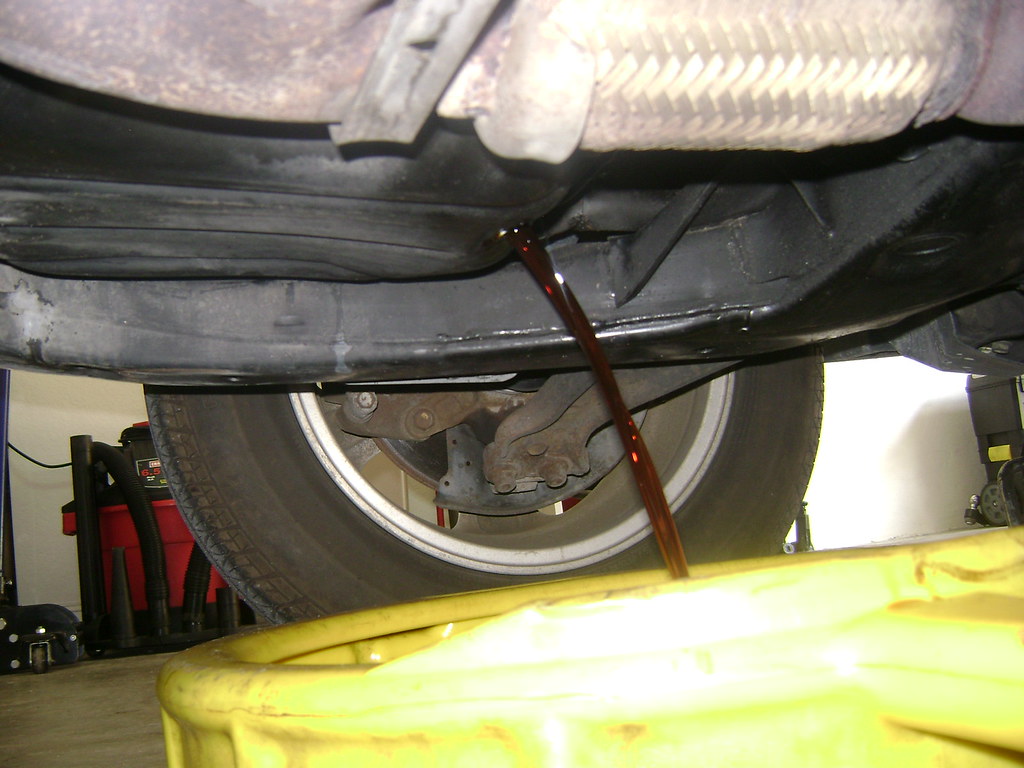
Take a breather. Allow the old oil to drain until the stream has reduced to a slow drip.
Step 12:
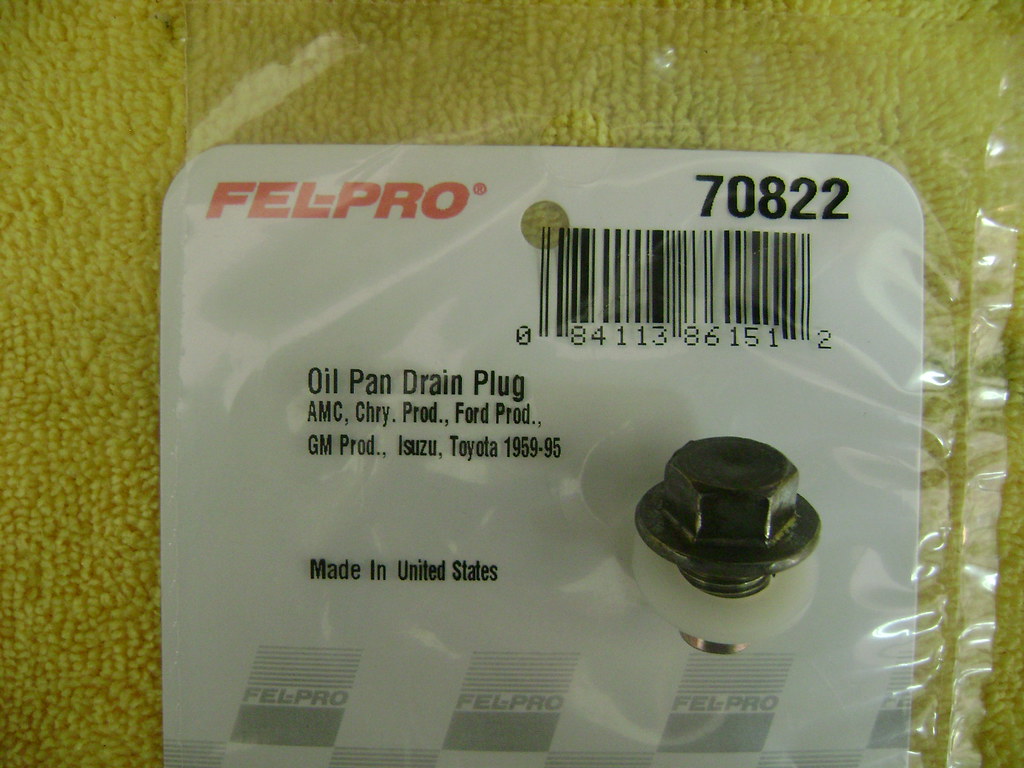
If your drain plug fell into the drain pan, recover it. Take a shop rag (or paper towel) and clean it up. Now place the new drain plug gasket onto the drain plug. There is no right side for the gasket, just place it on the drain plug in preparation for re-installation.
Step 13:
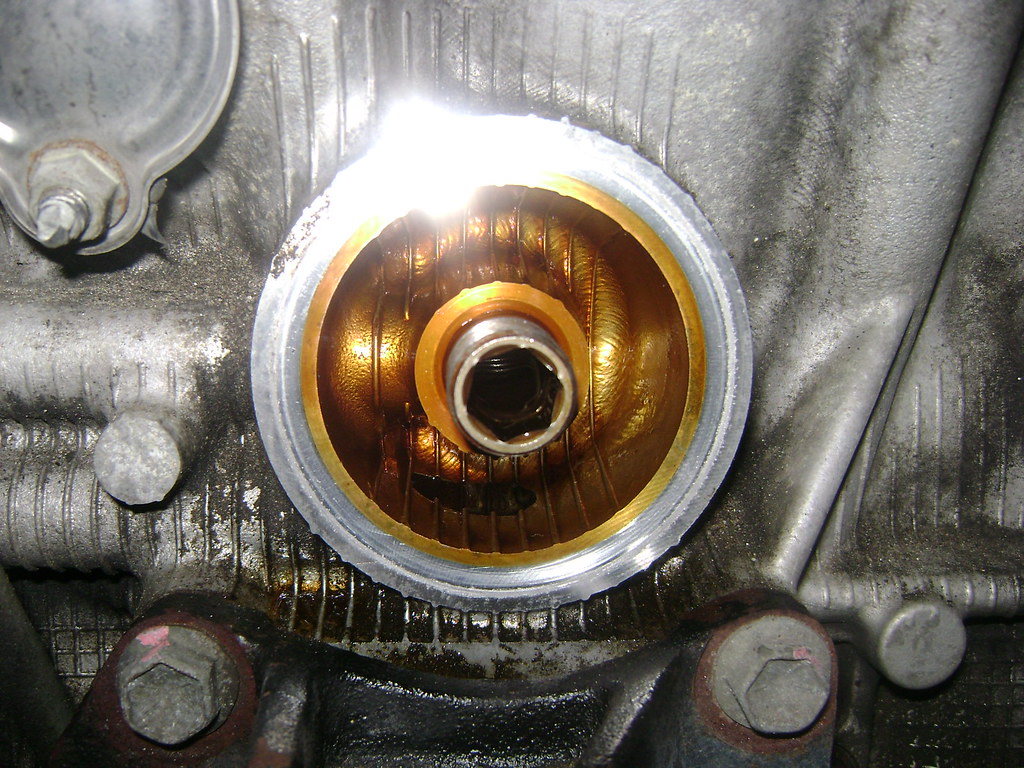
Using your fingers, thread the drain plug back into the drain hole until it is snug. Now take your 14mm socket and attach it to your torque wrench. Using your torque wrench tighten the drain plug to 33 ft/lbs (45 N�m). If you do not have a torque wrench handy, tighten the drain plug one half turn with your 14mm box wrench after it has been snugged by hand.
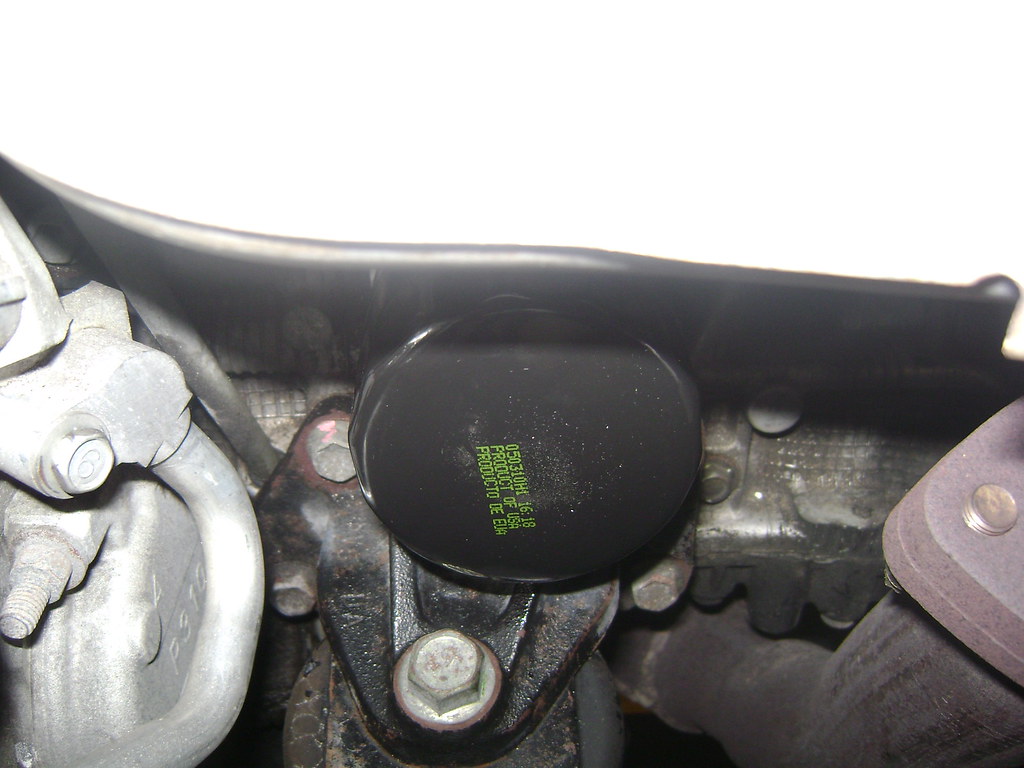
Step 14:
Locate your oil filter. It is on the side of the engine facing the front of the car. The filter is located right under the exhaust manifold. Reference the picture below if you are unable to find it, it is the yellow item in the picture labeled "PZ-21".

Step 15:
Now that you have located the oil filter, take a folded shop towel (or a couple of sheets of paper towel) and place it underneath the oil filter, and as close to the engine block as possible. This is done to attempt to capture as much old oil as possible from the filter when it is removed. DANGER: THE EXHAUST MANIFOLD CAN BE VERY HOT, TAKE CARE TO AVOID BEING BURNED BY WEARING VERY THICK GLOVES.

Step 16:
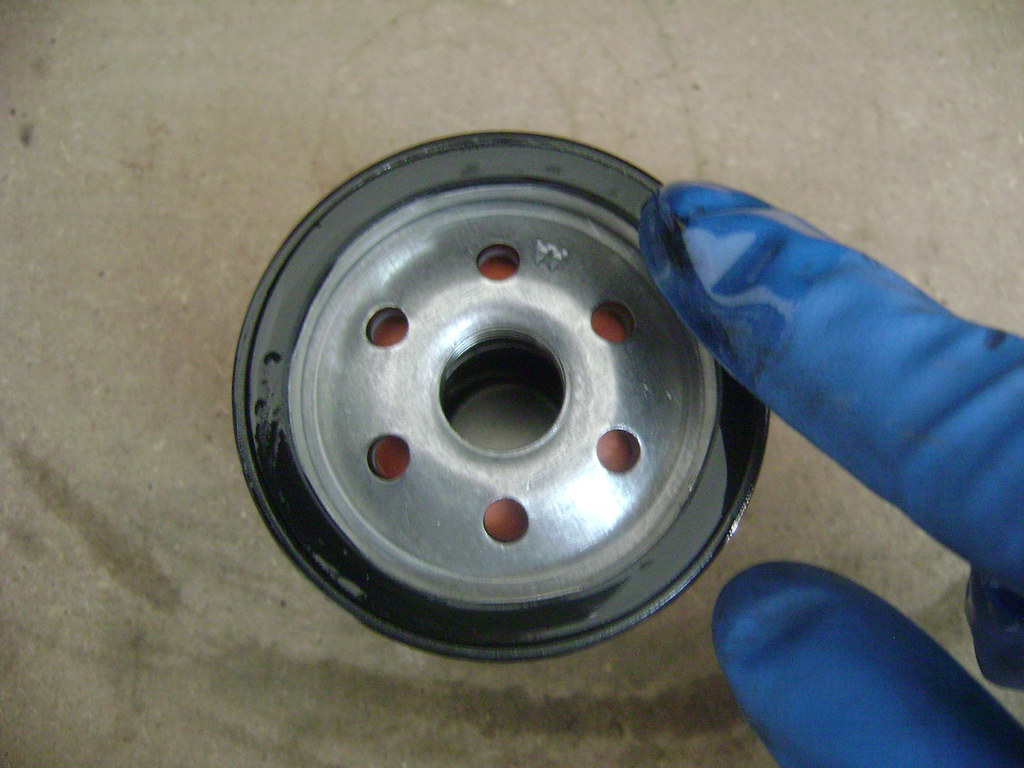
Wearing clean/dry gloves; grasp the oil filter and turn it counter-clockwise to loosen/remove it. If you are unable to loosen it by hand, there are oil filter wrenches that can be of assistance here, but there is no reason that the oil filter should be on so tight that it cannot be removed by hand.The picture below is of the filter removed from the engine.
Step 17:
Prepare the new oil filter for installation by applying clean oil on the rubber gasket with your finger.
Step 18:
Using a clean/dry glove, install the oil filter in the same location in which you removed the old one by turning it clockwise until snug. Once the oil filter is snug, turn it another 1/8 to a 1/4 of a turn by hand. Do not use an oil filter wrench to tighten your oil filter, it is unnecessary.
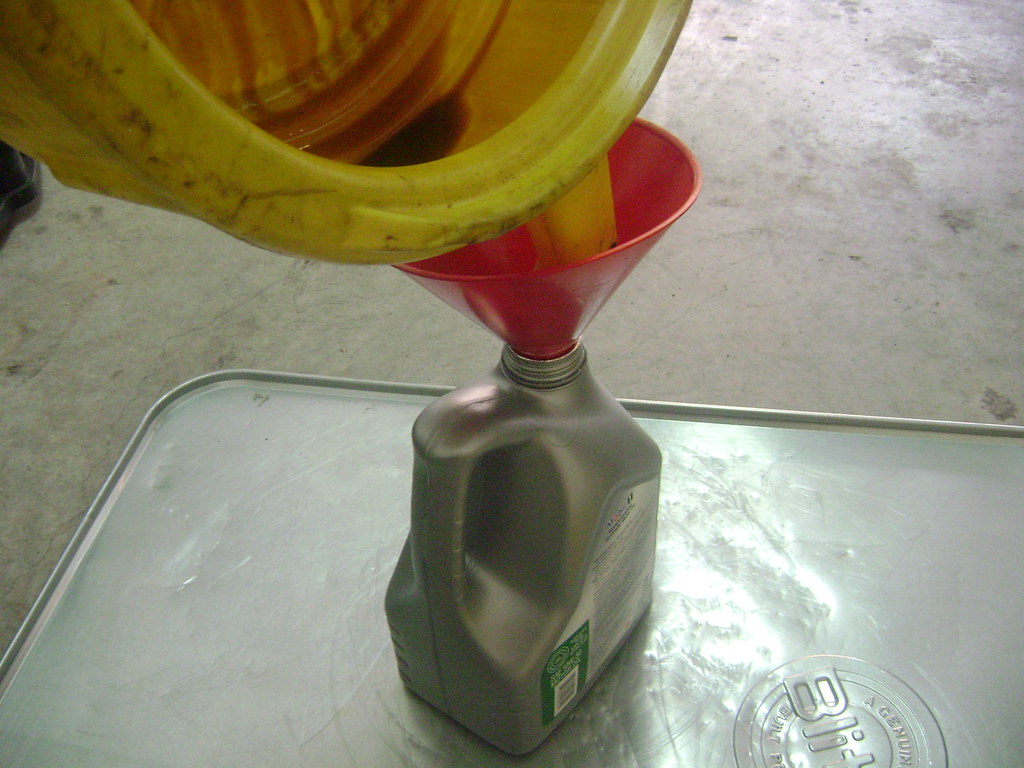
Step 19:
Place a funnel into the oil filler hole on top of the engine (where the oil filler cap was removed from in Step 8). Slowly pour five quarts of oil into the engine. If you pour the oil too fast it may overflow out of the filler hole.

Step 20:
Remove the funnel, and replace the oil filler cap. Remove the oil drain pan and oil drip pan (or cardboard) from underneath the vehicle, being careful not to spill any oil on the ground. Now return the vehicle to a level state. This is done by jacking the vehicle up one side at a time at the front tow hook , and removing the jack stands.
Step 21:
Enter the vehicle (make sure you are clean), and start the engine. While the engine is running look under the vehicle for any leaking oil from the drain plug, or oil filter locations. Once you have completed this inspection turn the engine off. Now pull out the oil dip stick, wiping the length of it with a rag (or paper towel) as it is removed. The oil dip stick handle is the yellow handle in the left side of the photo below.
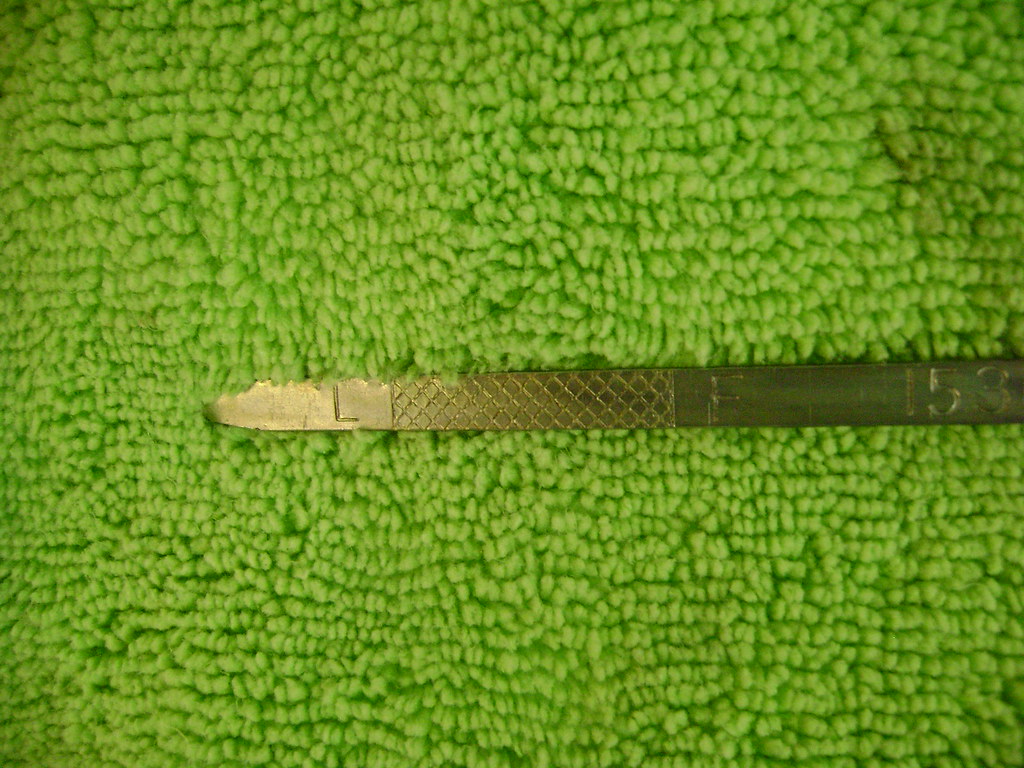
Step 22:
Place the oil dip stick all the way back into its hole, now remove it and inspect the level of the oil by looking at the end of the dip stick. There are markings on the dip stick rod that allow you to determine the oil level in the engine. The dipstick should be "wet" with oil up to "F" on the dip stick. The "F" on the dipstick means full, while the "L" means low. Once you have confirmed that the oil level is full (or close to full) place the oil dip stick back into the dip stick hole.
Step 23:
Release your parking brake by pushing it all the way down with your foot. It will unlock and rise back to its original position, indicating that the parking brake is disengaged
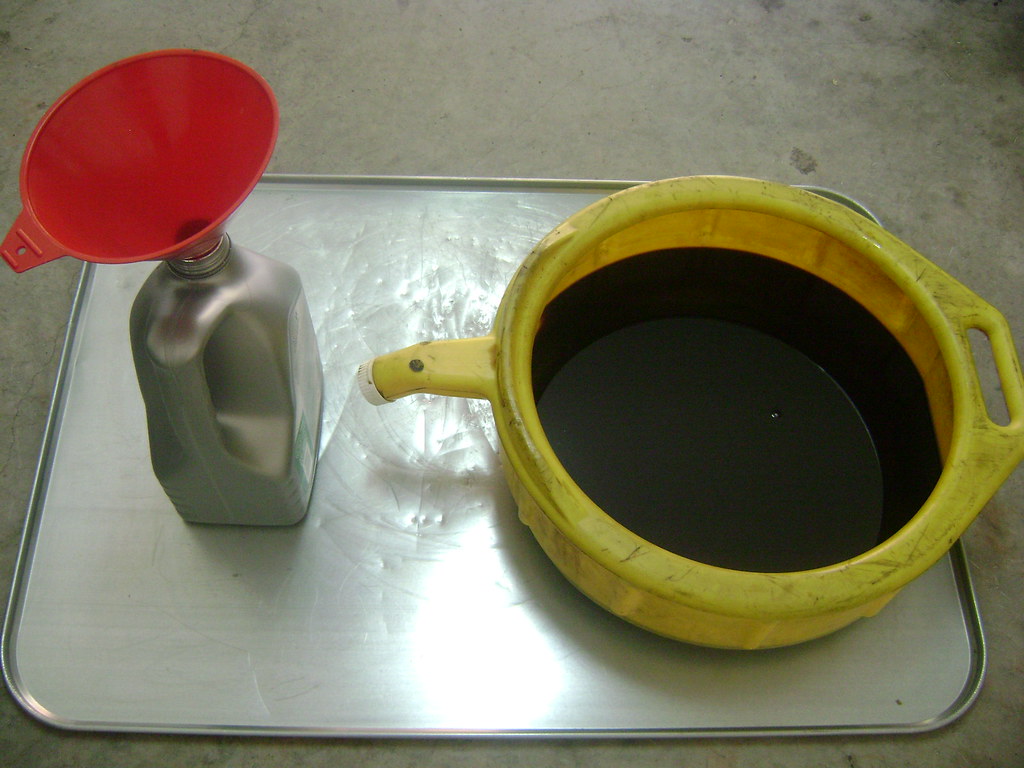
Step 24:
Place your funnel into the empty oil bottle(s), and pour the old oil from the oil drain pan into the empty oil bottle(s). This is best done on top of your oil drip pan (or piece of cardboard) to prevent oil from spilling on the ground. Take the old oil to your nearest big chain auto parts store, or Walmart automotive center to be disposed of properly. Please do not pour into a storm drain, sewer system, or place in the garbage.
Now before you begin make sure that you have all of the tools/supplies you need, here is my list:
Supplies
- Five quarts of 5w30 oil (brand/type of your choice)
- One oil filter (brand of your choice)
- One oil plug gasket (brand of your choice)
- Heavy duty gloves (rubber preferably)
- Shop rags or paper towel
Tools
- 14mm Box Wrench
- Funnel
- Oil drain pan
- Drip tray (a piece of cardboard can be used as well)
- Torque wrench (3/8 drive)
- 14mm socket (3/8 drive)
- Floor jack (your Lexus jack can be used)
- Two jack stands
Ok, if you have everything listed above then you are ready to begin.
Step 1:
Park your vehicle on a flat/level surface.
Step 2:
Set your parking brake by pushing it all the way down with your foot. It will lock in place, indicating that the parking brake is engaged. The parking brake pedal is found to the left of your brake pedal.
Step 3:
Place your jack under the drivers side front tow hook, and jack the vehicle up to the desired height. The front tow hooks are located beneath the front bumper perpendicular to the headlight assemblies.
Step 4:
With the drivers side of the vehicle jacked up, place a jack stand under the drivers side front jacking point. Once the jack stand is in place, slowly lower the vehicle onto the jack stand. The front jacking point is located along the frame rail behind the front wheel. This location is identified by the notchs cut into the frame rail.
Step 5:
Repeat steps 3 and 4 on the passenger side. The location of the front tow hook, and front jacking point is in the exact same location on the passenger side of the vehicle. Your vehicle is now secure, and safe to work under.
Step 6:
Open your hood. Start by pulling on the hood release lever. The hood release lever is located under the dash, just below the change tray and to the left of the parking brake pedal.
Step 7:
Now that the hood is released, you can open the hood by pulling up on the hood latch. Place your hand face up between the front bumper and the grille, push your finger tips upward on the latch to release it. Please reference the photo below for the exact location of the hood latch
Step 8:
Locate the oil cap, and remove it. Removing the oil cap will allow the old oil to drain faster once the drain plug has been removed.
Step 9:
Place your oil drain pan on top of your oil drip pan (or piece of cardboard) and position it underneath the oil drain plug. The oil drain plug is located under the passenger side of the engine.
Step 10:
Using your 14mm box wrench, loosen/remove the oil drain plug slowly. It is ok if the drain plug falls into the oil drain pan, this may be difficult to prevent with hot oil pouring out of the drain hole.
Step 11:
Take a breather. Allow the old oil to drain until the stream has reduced to a slow drip.
Step 12:
If your drain plug fell into the drain pan, recover it. Take a shop rag (or paper towel) and clean it up. Now place the new drain plug gasket onto the drain plug. There is no right side for the gasket, just place it on the drain plug in preparation for re-installation.
Step 13:
Using your fingers, thread the drain plug back into the drain hole until it is snug. Now take your 14mm socket and attach it to your torque wrench. Using your torque wrench tighten the drain plug to 33 ft/lbs (45 N�m). If you do not have a torque wrench handy, tighten the drain plug one half turn with your 14mm box wrench after it has been snugged by hand.
Step 14:
Locate your oil filter. It is on the side of the engine facing the front of the car. The filter is located right under the exhaust manifold. Reference the picture below if you are unable to find it, it is the yellow item in the picture labeled "PZ-21".
Step 15:
Now that you have located the oil filter, take a folded shop towel (or a couple of sheets of paper towel) and place it underneath the oil filter, and as close to the engine block as possible. This is done to attempt to capture as much old oil as possible from the filter when it is removed. DANGER: THE EXHAUST MANIFOLD CAN BE VERY HOT, TAKE CARE TO AVOID BEING BURNED BY WEARING VERY THICK GLOVES.
Step 16:
Wearing clean/dry gloves; grasp the oil filter and turn it counter-clockwise to loosen/remove it. If you are unable to loosen it by hand, there are oil filter wrenches that can be of assistance here, but there is no reason that the oil filter should be on so tight that it cannot be removed by hand.The picture below is of the filter removed from the engine.
Step 17:
Prepare the new oil filter for installation by applying clean oil on the rubber gasket with your finger.
Step 18:
Using a clean/dry glove, install the oil filter in the same location in which you removed the old one by turning it clockwise until snug. Once the oil filter is snug, turn it another 1/8 to a 1/4 of a turn by hand. Do not use an oil filter wrench to tighten your oil filter, it is unnecessary.
Step 19:
Place a funnel into the oil filler hole on top of the engine (where the oil filler cap was removed from in Step 8). Slowly pour five quarts of oil into the engine. If you pour the oil too fast it may overflow out of the filler hole.
Step 20:
Remove the funnel, and replace the oil filler cap. Remove the oil drain pan and oil drip pan (or cardboard) from underneath the vehicle, being careful not to spill any oil on the ground. Now return the vehicle to a level state. This is done by jacking the vehicle up one side at a time at the front tow hook , and removing the jack stands.
Step 21:
Enter the vehicle (make sure you are clean), and start the engine. While the engine is running look under the vehicle for any leaking oil from the drain plug, or oil filter locations. Once you have completed this inspection turn the engine off. Now pull out the oil dip stick, wiping the length of it with a rag (or paper towel) as it is removed. The oil dip stick handle is the yellow handle in the left side of the photo below.
Step 22:
Place the oil dip stick all the way back into its hole, now remove it and inspect the level of the oil by looking at the end of the dip stick. There are markings on the dip stick rod that allow you to determine the oil level in the engine. The dipstick should be "wet" with oil up to "F" on the dip stick. The "F" on the dipstick means full, while the "L" means low. Once you have confirmed that the oil level is full (or close to full) place the oil dip stick back into the dip stick hole.
Step 23:
Release your parking brake by pushing it all the way down with your foot. It will unlock and rise back to its original position, indicating that the parking brake is disengaged
Step 24:
Place your funnel into the empty oil bottle(s), and pour the old oil from the oil drain pan into the empty oil bottle(s). This is best done on top of your oil drip pan (or piece of cardboard) to prevent oil from spilling on the ground. Take the old oil to your nearest big chain auto parts store, or Walmart automotive center to be disposed of properly. Please do not pour into a storm drain, sewer system, or place in the garbage.
Congratulations, you have changed your oil!

 07-29-10, 08:09 PM
#4

Hey, I also agree: Excellent write up w/ pics to boot!! The one thing I do differently is while prepping the new oil filter, oil gets poured into it as well. I guess I'm just a "belt & suspenders" kind of guy and don't want there to be a split second where the engine is running w/ no oil pressure.......
But hey, Thanks for taking the time for the write up - TOP NOTCH!!
But hey, Thanks for taking the time for the write up - TOP NOTCH!!
07-29-10, 09:25 PM
#5
Pole Position
Join Date: Feb 2010
Location: ID
Posts: 200
Likes: 0
Received 0 Likes
on
0 Posts
Hey, I also agree: Excellent write up w/ pics to boot!! The one thing I do differently is while prepping the new oil filter, oil gets poured into it as well. I guess I'm just a "belt & suspenders" kind of guy and don't want there to be a split second where the engine is running w/ no oil pressure.......
But hey, Thanks for taking the time for the write up - TOP NOTCH!!
But hey, Thanks for taking the time for the write up - TOP NOTCH!!
But with the stupid placement of the oil filter on these V6s you can't fill the filter up much without it pouring out when screwing the filter back on. And it sucks when unscrewing the old filter because it makes a mess at times. They should of made the filter on the bottom of the engine next to the oil pan like my Legend. Ok enough with my rant.
OP, you made a really thorough and easy to follow DIY. Very nice work. Its nice when members like you give back to the community like you did.
12-10-10, 01:11 PM
#7
Driver School Candidate

Join Date: Sep 2009
Location: AL
Posts: 16
Likes: 0
Received 0 Likes
on
0 Posts
Great write-up.
Instead of going to all of the trouble to jack the car up on both sides, I use my car ramps and just use them as my 'jack stands.' I drive up the ramps, stop, turn off the engine and put the emergency brake on.
Instead of going to all of the trouble to jack the car up on both sides, I use my car ramps and just use them as my 'jack stands.' I drive up the ramps, stop, turn off the engine and put the emergency brake on.


