When you click on links to various merchants on this site and make a purchase, this can result in this site earning a commission. Affiliate programs and affiliations include, but are not limited to, the eBay Partner Network.
It took me a while to get the rigid spark tube seals off the valve cover.
In case anyone else runs into this problem I had to use a brake shoe adjusting angle tool. Any right angle tool would work. Angled prying tools.
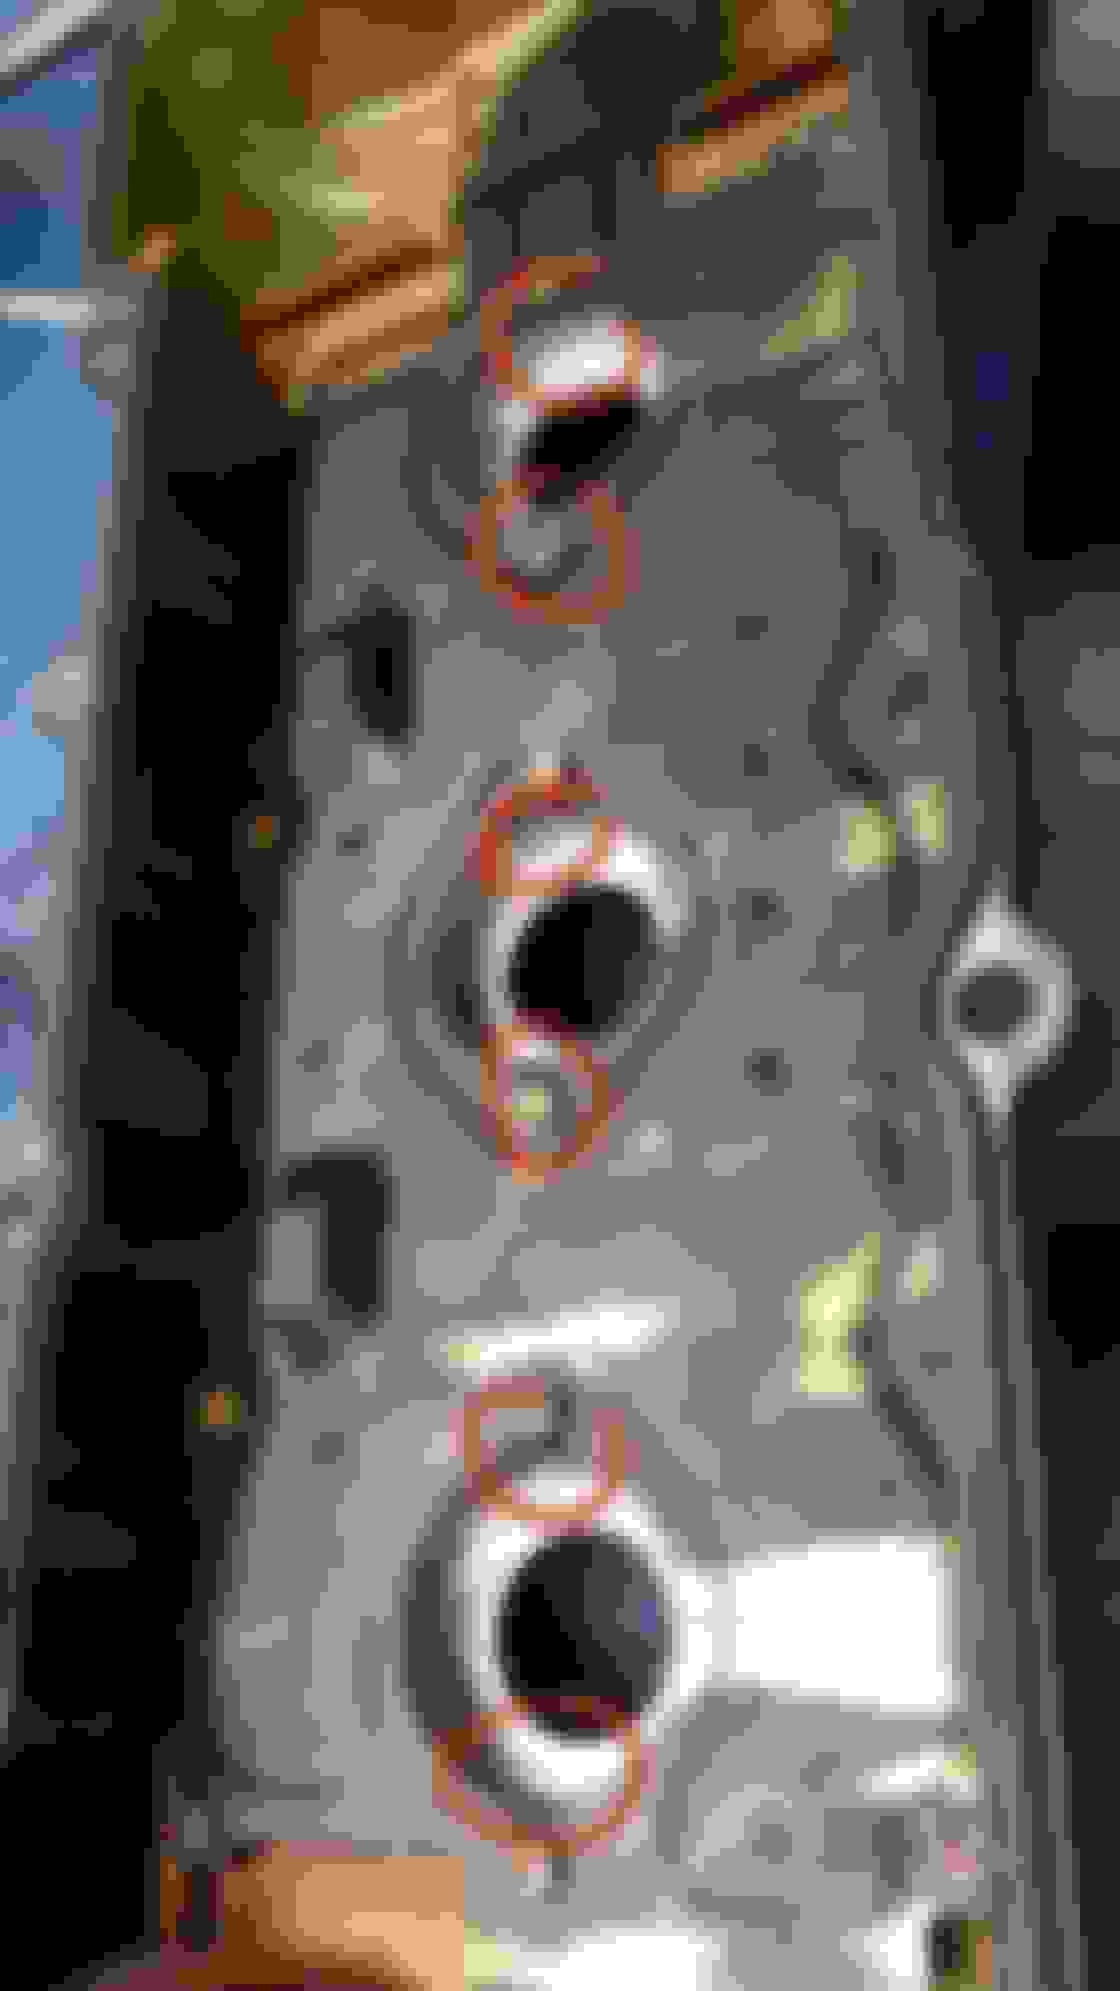
First you will have to bend back the tiny tabs that are on both opposite sides of each seal. Tabs in red. Bend upwards. NOT THE PINS, BUT THE SHEET METAL. BE Careful!
Then using the pry tool to pull out the seal Pry in the direction of the tool. Any orientation but inline with the tool.
Repeat x6
If you have a press then installation will be easy.
This is a good illustration of an annoying little task. And those tabs are fragile and easy to break.
A screwdriver will also work, stick it under the lip of the seal and use a fulcrum under it to give leverage upward. The brake tool is smart if you have one handy. Fewer people do nowadays because of the increasing rarity of drum brakes.
An appropriately sized large socket, tapped gently and squarely, is a good way to drive them in, also, if you do not have a press or a proper seal driver kit.
This is a place I really like to use a gasket sealant since the seal itself is not firmly held in place (like, bolted between flanges) and the surface is not new. I use Aviation #3 here because it is non-hardening (you can clean it out later when re-doing the job), high-temp, and oil-resistant.
How would you recommend getting around those tabs? Very hard to get the seal in without scratching up the rubber exterior of the seal. Seal rubber seems to be very soft and tear easily
How would you recommend getting around those tabs? Very hard to get the seal in without scratching up the rubber exterior of the seal. Seal rubber seems to be very soft and tear easily
When i did mine on my RX, I just pried the tabs back far enough for the seal to pass through.
Not one of the tabs broke. Maybe i was lucky that day.
Then also drove it in with socket using "gentle" hammer taps same diameter as the seal as Oro.
Make sure you install them right side up or else it will leak.
Tube seals i used were genuine Toyota and they were snug going in and bent the tabs in place.
I doubt it'll work itself out.
I didnt use any sealant.
100+k later and no leaks so far.
Must have a uncalibrated torque wrench, because after letting the cover sit overnight and coming in for a second torquing, the cover cracked on the corner bolt. Will have to use my current engine cover now and order new seals.
Must have a uncalibrated torque wrench, because after letting the cover sit overnight and coming in for a second torquing, the cover cracked on the corner bolt. Will have to use my current engine cover now and order new seals.
Glad you haver an extra one.
Not sure what you mean by second torquing
Shouldnt be more that 7-8 ft lbs. for the valve covers
I usually just snug them down/
Glad you haver an extra one.
Not sure what you mean by second torquing
Shouldnt be more that 7-8 ft lbs. for the valve covers
I usually just snug them down/
So I removed all the wiring from the motor, and will need to replace a few connectors that have broken tabs, I have a donor wiring harness, is there any way to remove the end connectors from one wiring harness without having to splice?
Is it possible to pull the wires out of the connector? I'm hoping something like this video would be possible :
So I removed all the wiring from the motor, and will need to replace a few connectors that have broken tabs, I have a donor wiring harness, is there any way to remove the end connectors from one wiring harness without having to splice?
Is it possible to pull the wires out of the connector? I'm hoping something like this video would be possible : How to remove terminals from automotive electrical connectors. Part 1
If that doesn't work out, I'll probably have to find a whole wiring harness from online.
Nah...
Every terminal in a connector can be de-pinned.
Just like the video, just look for a tab to release the lock and then pry out the tab that holds the terminal in place.
Then just pull out the terminal wire.
Practice on a connector that you know you wont use.
Once you get the hang of it, it'll get easier.
Take pics before you de-pin them so you know how to pin them back.
I will see tomorrow, this will make my life a lot easier if this can work.
I hate the tabs on connectors, there so brittle after aging and repeated heat/cold fatigue and break very easily.
I was able to replace 3 wire connectors, but it was a hassle trying to get the pins of the plastic connector to disconnect from the wire metal ends.
We got the engine and subframe back up onto the car frame. Wiring should be done tomorrow.

 01-11-19, 03:17 PM