
jcat_GS3's modding adventure
 10-18-12 | 02:29 PM
#16

Rookie
Joined: Jan 2005
Posts: 91
Likes: 1
You can swap the vanity mirror bulbs, trunk and the door/courtesy lights to LEDs.. I purchased the 5k 1watt flank leds from VLEDS (altho theyre not sold anymore) and they light up the car nicely. The white led look definitely modernizes the interior of the car.
10-19-12 | 07:50 AM
#17

Thread Starter
Lexus Champion
Joined: May 2008
Posts: 3,347
Likes: 5
From: RI
In case anyone was wondering, I bought my LED's from ijdmtoy.com. I've had exceptional luck with all their stuff and it costs half of what VLEDs costs.
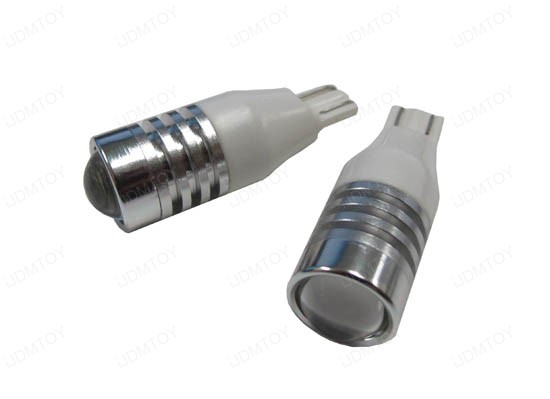
I ordered that stuff on the 15th, showed up in the mail (from CA to RI!) yesterday. I bought two pairs of load resistors just in case I need them for the LED turn signals, and they were only a couple bucks extra. I have 9-LED amber bulbs for the turn signals front and rear, and hyper white projector bulbs (2.5w for reverse and 2w for parking lights).
That, along with my 4500k HID low beams and silverstar Ultra high beams should all get in this weekend. Then, I'm just waiting on my 3000k fogs to come in and that will button up the front and rear exterior lighting.
I'm not 100% on what to do for the tail lamp bulbs, I have to look closer at how they actually work (what functions each perform) to make sure I get the right parts. I think they're dual filament, in which case that would require a pretty specialized bulb where half light up for running lights, and then the other half under braking. If I do end up smoking the tails, I'll want to go LED though to make up for the difference in brightness when they're lit up.
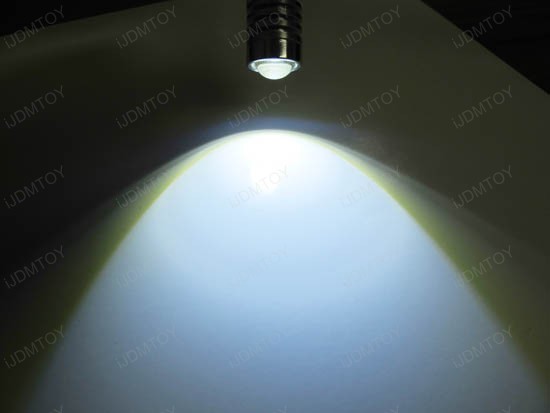
EDIT: Super beyond pumped to install these LEDs, particularly the projector ones. these are going in the reverse lights and the front parking lights...
I ordered that stuff on the 15th, showed up in the mail (from CA to RI!) yesterday. I bought two pairs of load resistors just in case I need them for the LED turn signals, and they were only a couple bucks extra. I have 9-LED amber bulbs for the turn signals front and rear, and hyper white projector bulbs (2.5w for reverse and 2w for parking lights).
That, along with my 4500k HID low beams and silverstar Ultra high beams should all get in this weekend. Then, I'm just waiting on my 3000k fogs to come in and that will button up the front and rear exterior lighting.
I'm not 100% on what to do for the tail lamp bulbs, I have to look closer at how they actually work (what functions each perform) to make sure I get the right parts. I think they're dual filament, in which case that would require a pretty specialized bulb where half light up for running lights, and then the other half under braking. If I do end up smoking the tails, I'll want to go LED though to make up for the difference in brightness when they're lit up.
EDIT: Super beyond pumped to install these LEDs, particularly the projector ones. these are going in the reverse lights and the front parking lights...
Last edited by jcat_350; 10-19-12 at 11:37 AM.
10-21-12 | 08:26 PM
#19
Thread Starter
Lexus Champion
Joined: May 2008
Posts: 3,347
Likes: 5
From: RI
Ok: quick, "I'm super tired and wanna go to bed but don't wanna leave you guys hanging", pictureless (for now) update post-install on some of the goodies.
1.) Parking lamps. 3x 10mm bolts, pop out the access panel, steroid shot to the *** cheek and muster up the strength to turn the damn fixture and pull it out the access panel. Remove old bulb, insert new bulbs (took more time because I reassembled pass. side before testing and had to modify the bulb a bit) all in all, between having to start the car to turn the wheels and actually doing the work, appx. a 15min job. The projector LEDs in the parking lights look PHENOMENAL! So much brighter, cleaner, and with the projector lens the look from the front of the car is awesome.
2.) Reverse lamps. I was actually able to get to these without dropping the whole trunk liner. All I did was bend the edge near the bottom of the trunklid, get my fingers past it and pull down firmly. This was enough to pop the clips, with only a couple falling down into the trunk. Reach in, twist the assembly, remove, install new bulbs, and reinstall in reverse order. Result: projector LEDs are great, look awesome, but not quite as bright as I had expected. This is because the reverse bulbs actually point 45* into the housing/reflector and not straight back behind the car. Because of this, there's very little space for the light to spread, and thus not as much light gets reflected. Were I to replace them again, I'd get some 360* LEDs for these since they'd be much brighter and reflect more light behind the vehicle.
3.) Low beam HIDs. These put up a fight before I even got to the HID part. The H7 setup in this car is pretty unique. The power connector connects to a sort of male-female adapter which the bulb plugs into on the other side. This adapter has standoff pegs placed such that they hit the bottom of the bulb base once the bulb is fully seated, but the surface of the adapter then is further back toward the engine bay away from the light housing which allows for extra spring tension from the spring clip to hold everything together.
To get the bulb out, disconnect the power connector. Pull the rubber dust boot off the housing, remove the adapter from the bulb, push the loop of the spring clip in and down toward the ground. Swing the spring clip out of the way, remove the bulb.
Now for the HID install. I bought a kit from DDMTuning. At the beginning, I installed the bulb by itself, but noticed the bulb base wasn't far enough back to provide the spring clip enough tension to hold it securely in place, allowing the bulb to rattle. I then located the replacement standoffs that came with the kit that I had forgotten about (never used them in any install ever...always threw them out) that served exactly this purpose, and now the bulbs sit securely. The power is drawn from two wires with blade connectors into the slots of the power connector. I install these by inserting the blade into the connector, pulling the wire flat down against the connector, then wrap the hell out of it in electrical tape. Some might call it hack, some might call it ghetto, it's never failed on me once.
The bulb then connects to the ballasts with the typical weatherpak connectors. I mounted the driver's side ballast to the radiator core support, zipped the hell out of the zip ties to hold it tightly and keep it from rattling. The wires are simply tucked in behind the headlight housing and between it and the battery. I still have access to the adjustment screw as well as the high beam bulb should I need it, and the ballast is far enough away from the fuse panel that I'm not worried about EMI.
The passenger side was marginally easier since when you pop the coolant overflow line out of the bracket, it gives you a lot more room to work with. I followed the same procedure, now having knowledge of the standoff, and the whole kit was in and tested within another 15min. I put 3 zipties together, and threaded them through the two holes on top of the ballast, and fastened the ballast to the neck of the washer bottle. These ballasts are waterproof and so are the weatherpak connectors, so I'm not worried about splashing washer fluid on it when I refill.
Now, for some lessons learned. I'll start with the HID install to keep it consistent. #1: This is not a novice-friendly install, but if you've done an HID install before, I just recommend that you go slow. Don't be in a rush to solve the problems with workarounds, be confident in your skills and your kit, and do it right. You can eliminate a lot of the time it took me by not having to redo some work. Find your ballast mounting points BEFORE you get everything installed. This allows you to move your wiring around in the bay before you connect the ballasts, which make it a lot harder to manipulate the wiring. Mount ballasts away from fuse panels and electronic equipment just to be safe. There is a margin of possibility for EMI to occur (I've seen it with other HID kits mounted near fender antennas...they cause static) so just be mindful of it. Most ballasts are rated for high and low temperatures and are waterproof. Don't try and test this by mounting them near the radiator, end tanks, overflow bottle, or in locations where they'll obviously get soaked/beat up.
Now I have an issue with the HIDs that I think should be easily resolved. I noticed that intermittently, one or both low beams won't turn on. Shutting them off entirely, then turning them back on solves the problem. I did order the error eliminators but didn't install them since it didn't seem I'd need them, but now I'm thinking I should use them. I'm not getting any bulb out warnings, but I think because of the automatic headlamp feature, there's some current always going to the system (to keep it 'ready' to pop on whenever necessary) which might be screwing the ballasts up somehow. I'm going to install the error eliminators tomorrow and see if that helps, since they're effectively resistors and this same HID kit (two of them actually) with the error eliminators didn't even flicker on my Mercedes with it's notoriously finnicky sensors and systems.
I also need to aim these things...I had high hopes that the halogen projectors would be OK, but I was beyond wrong. There's a phantom cutoff up around eye level when sitting in the car, but not much usable light. The hard cutoff is shooting damn near straight down at the ground, and is approximately 5 feet in front of the car. Not sure if this is just poor work from the previous owner (connectors COVERED in dielectric grease when I disassembled) or if it's poor projector/shroud design. I'm going to try and raise them up and see what kind of improvement I can get tomorrow.
Now, I did buy the 7443 LED turn signal bulbs, and got as far as installing one before I removed it and reinstalled the factory bulb again. LED's in the turn signals DO cause a hyperflash. My hunch is that the LED bulb draws less current, less load and thus the car sees that difference as a bulb being out, causing the hyperflash. I did buy the load resistors along with it, but didn't feel like doing the wiring (it was girlfriend day and she was inside while I was out working on the car haha) to get those in. I'm confident though that the resistors will correct this. I also have a suspicion that can-bus LEDs would probably solve this problem as well, but I didn't think to grab any this go-round. Hopefully the place that I buy from (ijdmtoy) having an account on here will pick this thread out and chime in. I will say that once I get the hyperflash thing worked out, those will look damn good in the car.
I'll follow with pictures. Much nicer looking now than the previous ugly yellow halogens. Even my girlfriend who's sole requirement of a car is getting from point A to point B said the HIDs and parking lights alone made the car look much newer and nicer.
So, I'm satisfied for now, but have a bit of a longer way to go to be 100% with it. I also have the 3000K fog lamps on the way and need to get some silverstar ultras for the high beams to finish up the front, and may go LED in the tail lamps if I can figure out how they work.
10-22-12 | 10:19 AM
#20
Rookie
Joined: Jan 2005
Posts: 91
Likes: 1
Great post man. Looks like you and me has the same modding approach (I did the LED parking lights, going to Lamin-x my fogs for the yellow look and going to drop in some 5k HIDs soon)... FYI, i bought the most expensive 360 degree reverse LED lights on VLED and they werent much brighter than the stock (whiter, but not significantly brighter).
Looking forward to the rest of your posts, keep up the great work man!
Looking forward to the rest of your posts, keep up the great work man!
10-22-12 | 10:22 AM
#21
Thread Starter
Lexus Champion
Joined: May 2008
Posts: 3,347
Likes: 5
From: RI
Great post man. Looks like you and me has the same modding approach (I did the LED parking lights, going to Lamin-x my fogs for the yellow look and going to drop in some 5k HIDs soon)... FYI, i bought the most expensive 360 degree reverse LED lights on VLED and they werent much brighter than the stock (whiter, but not significantly brighter).
Looking forward to the rest of your posts, keep up the great work man!
Looking forward to the rest of your posts, keep up the great work man!
 I decided to go away from the Lamin-x or colored halogen route since I love yellow HID fogs. As for the reverse lights, with the light sitting 45� in the housing like that it'd be tough to get anything to be much brighter, those projector LEDs do a good job of it though.
 10-24-12 | 06:43 AM
#23
Thread Starter
Lexus Champion
Joined: May 2008
Posts: 3,347
Likes: 5
From: RI
After driving at night a few times, I'm also extremely unhappy with the output of these HIDs in the factory projector lenses, but it looks like the driver's side is pointed straight down almost. I'm going to mess with the aim a bit hopefully tonight and see what I can come up with. It looks like a retrofit will be in my future...dunno when, but in the future haha.
10-24-12 | 01:04 PM
#24
Rookie
Joined: Jan 2005
Posts: 91
Likes: 1
I'm working on it! haha. Unfortunately it rained here last night so no good chances to take pictures. I still haven't done the silverstars yet but probably will this weekend. I can say from experience they'll still be a little yellowy under low voltage, but probably not as bad.
After driving at night a few times, I'm also extremely unhappy with the output of these HIDs in the factory projector lenses, but it looks like the driver's side is pointed straight down almost. I'm going to mess with the aim a bit hopefully tonight and see what I can come up with. It looks like a retrofit will be in my future...dunno when, but in the future haha.
After driving at night a few times, I'm also extremely unhappy with the output of these HIDs in the factory projector lenses, but it looks like the driver's side is pointed straight down almost. I'm going to mess with the aim a bit hopefully tonight and see what I can come up with. It looks like a retrofit will be in my future...dunno when, but in the future haha.
10-24-12 | 07:37 PM
#25
Thread Starter
Lexus Champion
Joined: May 2008
Posts: 3,347
Likes: 5
From: RI
So strange that the HID kit makes the light output so poor... Can't understand how a brighter, more powerful light in the same housing totally changes the projection of the light... I hope its simply a poorly aimed headlight? I thought I remember reading older post of people installing HID's in the ES halogen projectors and being happy with the improved output... Please let us know if aiming will help, thanks!
Quick update: I've narrowed down the intermittent headlight starting issue. It's only happening when the headlights come on on the 'auto' setting. What happens is either the driver or passenger side headlamp won't light up when the car is started and the autolamp kicks them on. I can fix it by shutting them off, then back on manually, even by going back to the auto setting. If I leave them off, and manually turn them to the on setting, both fire every time.
I have a theory that there's a small hesitation or gap in voltage on the auto setting that freaks out the ballasts when starting up on autolamp. The car starts, it has to check the light sensor to make sure the headlamps should be on, then when it realizes it's dark it kicks the lamps. Either that or it pulls voltage momentarily to verify and that's what causes one to go out thinking it's a surge or a short. I plan on putting on the error eliminators tomorrow in the hopes that the added resistance (the error eliminators are just resistor boxes) might help clean up the voltage going to the ballasts. I'll also try and aim the lamps a bit while I'm at it.
10-27-12 | 01:41 AM
#26

Just a little fyi before you order the curtains... are you aware that they only cover 2/3rds of the window? I had a few friends order the JP/Belezza curtains when they first came out and although cool looking many of my friends removed them because they were not functional at all.
10-28-12 | 06:11 PM
#27
Thread Starter
Lexus Champion
Joined: May 2008
Posts: 3,347
Likes: 5
From: RI
Just a little fyi before you order the curtains... are you aware that they only cover 2/3rds of the window? I had a few friends order the JP/Belezza curtains when they first came out and although cool looking many of my friends removed them because they were not functional at all.
10-31-12 | 06:51 AM
#29
Thread Starter
Lexus Champion
Joined: May 2008
Posts: 3,347
Likes: 5
From: RI
11-04-12 | 02:38 PM
#30

Lead Lap
Joined: Oct 2011
Posts: 432
Likes: 6
From: OH
This may be a shot in the dark... I could swear I read somewhere that if the light looks like it's aimed way down is to flip the bulb 180 degrees in the socket... although to be honest I don't know how that could help.