When you click on links to various merchants on this site and make a purchase, this can result in this site earning a commission. Affiliate programs and affiliations include, but are not limited to, the eBay Partner Network.
Wow, really hard to find info on speaker info all in one thread or pictures of anyone actually doing it. Just finding people talking about it, but no actual DIY's. Except for one. https://www.clublexus.com/forums/es-...8-es350-2.html
I'm attaching a few files I've found along the way. I also found a good diagram of speaker layout and sizes, ohm, ect, but computer crashed and lost it. If anyone has it, sure would appreciate it. Thx!
Unfortunately, my front door speaker are blown and so is the sub. Gonna be replacing these. Will let you guys know how it goes.
Starting with front doors, trying out Alpine R-S69.2. Haven't decided on a sub yet, not a big, gotta have my trunk lid shaking kind of a sub guy, the 6x9's may really be all I need, but would like to replace it anyway, to get the entire frequency range filled in as the system was designed to do.
Front door speakers (6x9, 7.9 ohms*) : 86160-0W560
Back door speakers (6.5", 7.6 ohms): 86160-0WE50 - measured ohms on good working speaker for this one.
Subwoofer (8", 5.5 ohms*) 86160-0WF70
rear deck tweeters/midrange (2.5", 7.8 ohms) 86160-0WF70 - measured ohms on good working speaker
dash center midrange ( 7.9 ohms ) 86160-0WC50 - this has a 3" hole for a speaker and mount screws are ~ 3.75" apart
(*ohms measured with scope on factory units that needed replaced, battery on my meter may be low, will try to put fresh battery in and circle back)
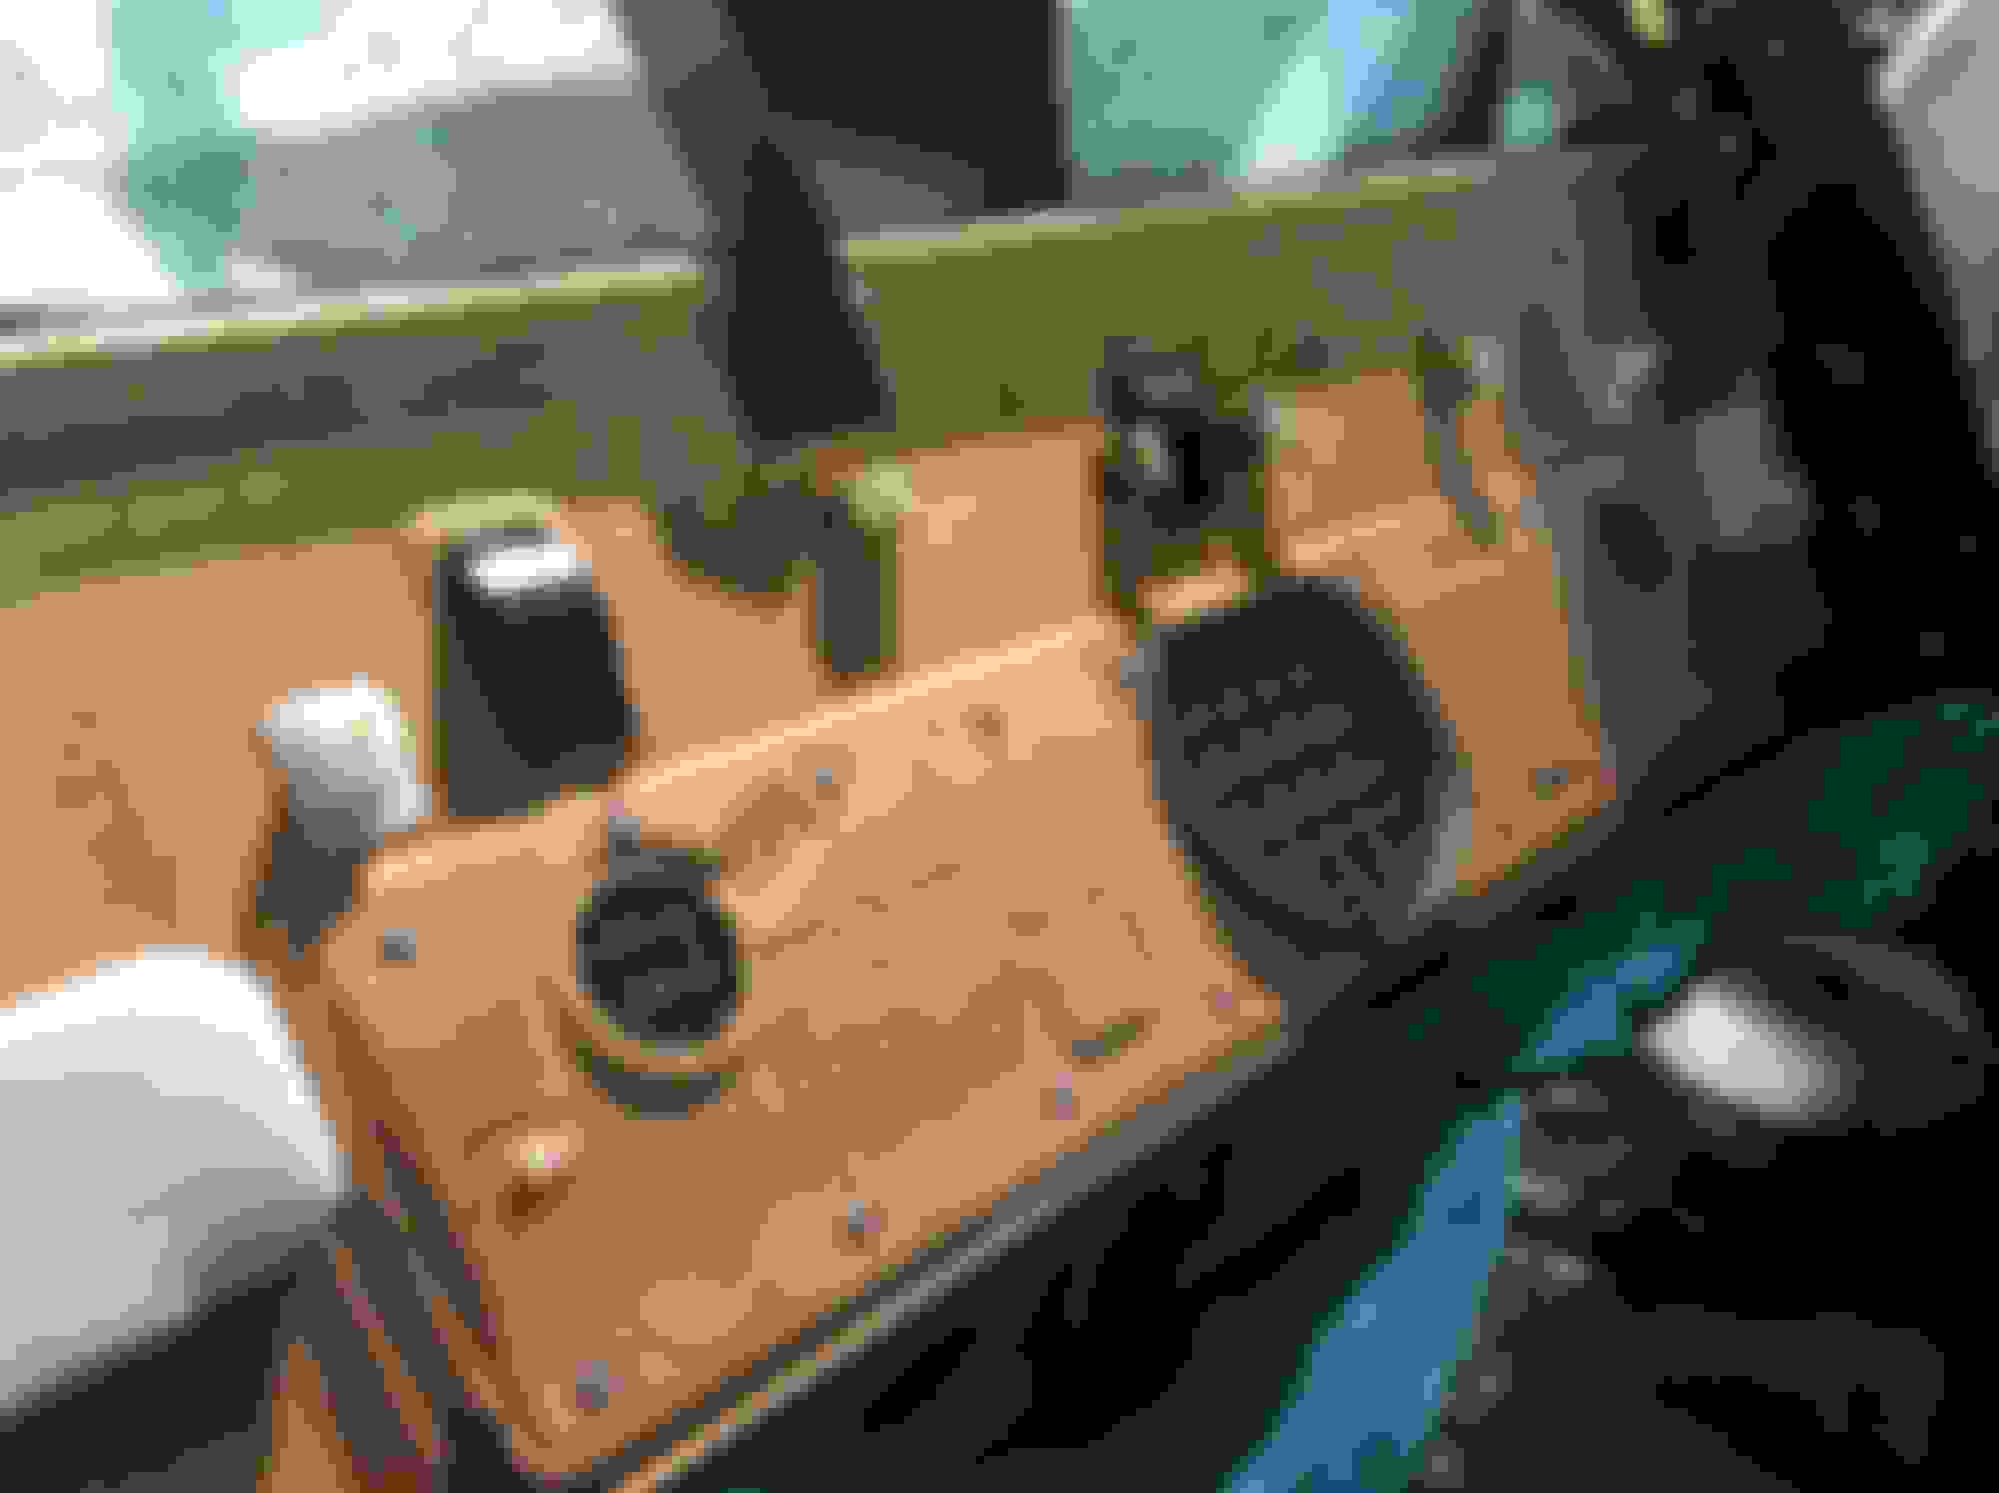
Showing some pictures of the door disassembly process so you can see what is hidden on the other side. Its easy. once all fasteners off, pull up at back of door window/channel, and it will slide along nicely. install in reverse order on the window channel.
Dinked around with the mounts and connectors that Crutchfield sent. Finally decided factories are superior. was unable to use top cover of factory speaker, its slightly bigger, left it off. sounds great anyway. The factory mounts will need 2 small tabs cut off. I used a dremel. The factory speakers also have a rubber seal between the speaker and mount. Be careful when you remove factory speaker and you can reuse it. The cut off frequency of these doors is pretty low, not sure if they deserve the Alpines I selected, but there was no turning back. The entire system is a 100% improvement! Decided to solder factory connectors to new speakers so they install just like factory. Everything goes together very easy.
back door panel removal essentially same as front door, but 2 less screws. The trick to getting it out of the window channel is shown in this photo. basically pry up towards the back (gently) and it will come up. installation of window channel is done in reverse.
Pioneer TS-A2000LD2 8" dropped in nicely. had to drill holes, no big deal. Sound great. Not boomy, fill the rear sound stage precisely, with no trunk rattling. Very happy with them. While testing, blew up my center speaker in the dash. Think I blew the glue off something. It self heals, but after 30 min of music, you can hear it rattling again. Will be addressing that next.
To access factory sub:
1. pull up on back passenger seat - middle of left/right seat bottoms, there is plastic retainers that will pop out of floor board. thats all that holds it in.
2. remove 4 10mm bolts from seat back - near bottom
3. remove side panels between rear deck and rear window - plastic retainers pull out, photos below show other items holding it in.
4. remove right side floor retainer that seat back bolts to - 2 10mm bolts - this allows access to seat belt retainer bolt
5. remove seatbelt bolts from floor boards
6. remove seat back from car by lifting up on each side and pulling away from its slot. then lift in middle and you will have it.
7. now you can pull window tray up to separate plastic retainers at front (shown in pics), then pull horizontally.
8. everything easy from here
wired in series for 4 ohms. placed 3 - 3m butyl strips around permeter of subwoofer to prevent vibrations and get good air seal. also used dynomat equivalent around various areas of rear deck to seal it up and prevent vibrations. forgot to take pics. secured with 4 bolts using washers, locking washers, and nuts with plastic retainer inserts.
So how do they sound once installed ? Thanks for all those pics and the post !
Everything is sounding pretty good. I'm still dealing with center dash speaker. I'm finding with radio - I listen to classic rock or country rock, that it typically sounds better with the signal processor off - forget what it is called. on the radio anyway. forget about CD which sounds better. basically with processor on, I feel center dash speaker is too bright, and the new sub isn't working as it should. with it off, I'm getting plenty of bass from the sub, and the center dash tones down. it does lose clarity on some songs, just depends on what they are.
I can't seem to find what a 2.75 inch speaker mounting hole width is. Check out what this guy did for his corner dash speakers. I think once I get the center worked out, its gonna sound great.

 05-21-20 | 08:36 AM