When you click on links to various merchants on this site and make a purchase, this can result in this site earning a commission. Affiliate programs and affiliations include, but are not limited to, the eBay Partner Network.
The Metra adapters are also reverse polarity (colors are correct, end of plugs are not), so if you use either metra or red wolf, you'll need to reverse the wiring. Red-wolf adapter looked better quality. Attached are photos.
Installed the Kicker 51-6x9 2 way speakers. Appears the factory amp only sends woofer frequency as the tweeter doesnt produce any sound. just FYI. With an amp these would sound better, but for the difference I would say these are more noticeable than the corner speaker upgrade.
Regarding the fitment, the bottom tabs needs to be broken off the 6x9 adapter (82-4149) to get the clips to fit back through the door. Hopefully this saves someone from taken apart the door more than necessary.
just double checked on my 23 es350 with pioneer system and everything is correct. How are you checking on your end and what year and model is yours?
Originally Posted by Damiansla
Update:
The Metra adapters are also reverse polarity (colors are correct, end of plugs are not), so if you use either metra or red wolf, you'll need to reverse the wiring. Red-wolf adapter looked better quality. Attached are photos.
Installed the Kicker 51-6x9 2 way speakers. Appears the factory amp only sends woofer frequency as the tweeter doesnt produce any sound. just FYI. With an amp these would sound better, but for the difference I would say these are more noticeable than the corner speaker upgrade.
Regarding the fitment, the bottom tabs needs to be broken off the 6x9 adapter (82-4149) to get the clips to fit back through the door. Hopefully this saves someone from taken apart the door more than necessary.
I checked a wiring diagram, and black was + from the stock speaker connector. Kicker had (+) on the bigger terminal, and the metra connector larger plug was the white wire, which had the larger connector.
I�d check with multimeter. Because as you can see the readings on my end are positive and they would of been negative if polarity was reversed.
Originally Posted by Damiansla
2024 e300h.
I checked a wiring diagram, and black was + from the stock speaker connector. Kicker had (+) on the bigger terminal, and the metra connector larger plug was the white wire, which had the larger connector.
Crap... really hoping thats not the case... but will check tomorrow after school.
This is the wiring diagram for 2019 + from crutch field.
In case you could use additional information to check Crutchfield's chart...
For a wiring diagram labeled with connector pins, see lexusguide.net Lexus ES (XZ10) Service Manual's Speaker Circuit (there's separate pages for gasoline and hybrid models but the content is the same). The top wiring diagram is for the 10 speaker (base) system and the bottom diagram is for the 17 speaker (Mark Levinson) system.
For diagrams of the speaker connectors with pin numbering, see Front Door Speaker (that's the woofer for both the base and Mark Levinson systems), Rear Door Speaker, and Instrument Panel Speaker. Although I couldn't track down connector diagrams for the other speakers, it looks like they are all using the same connector type with pin 1 always the negative (-) connection and pin 2 always the positive (+) connection.
Sorry for the late reply, week get past me. I had a chance today.
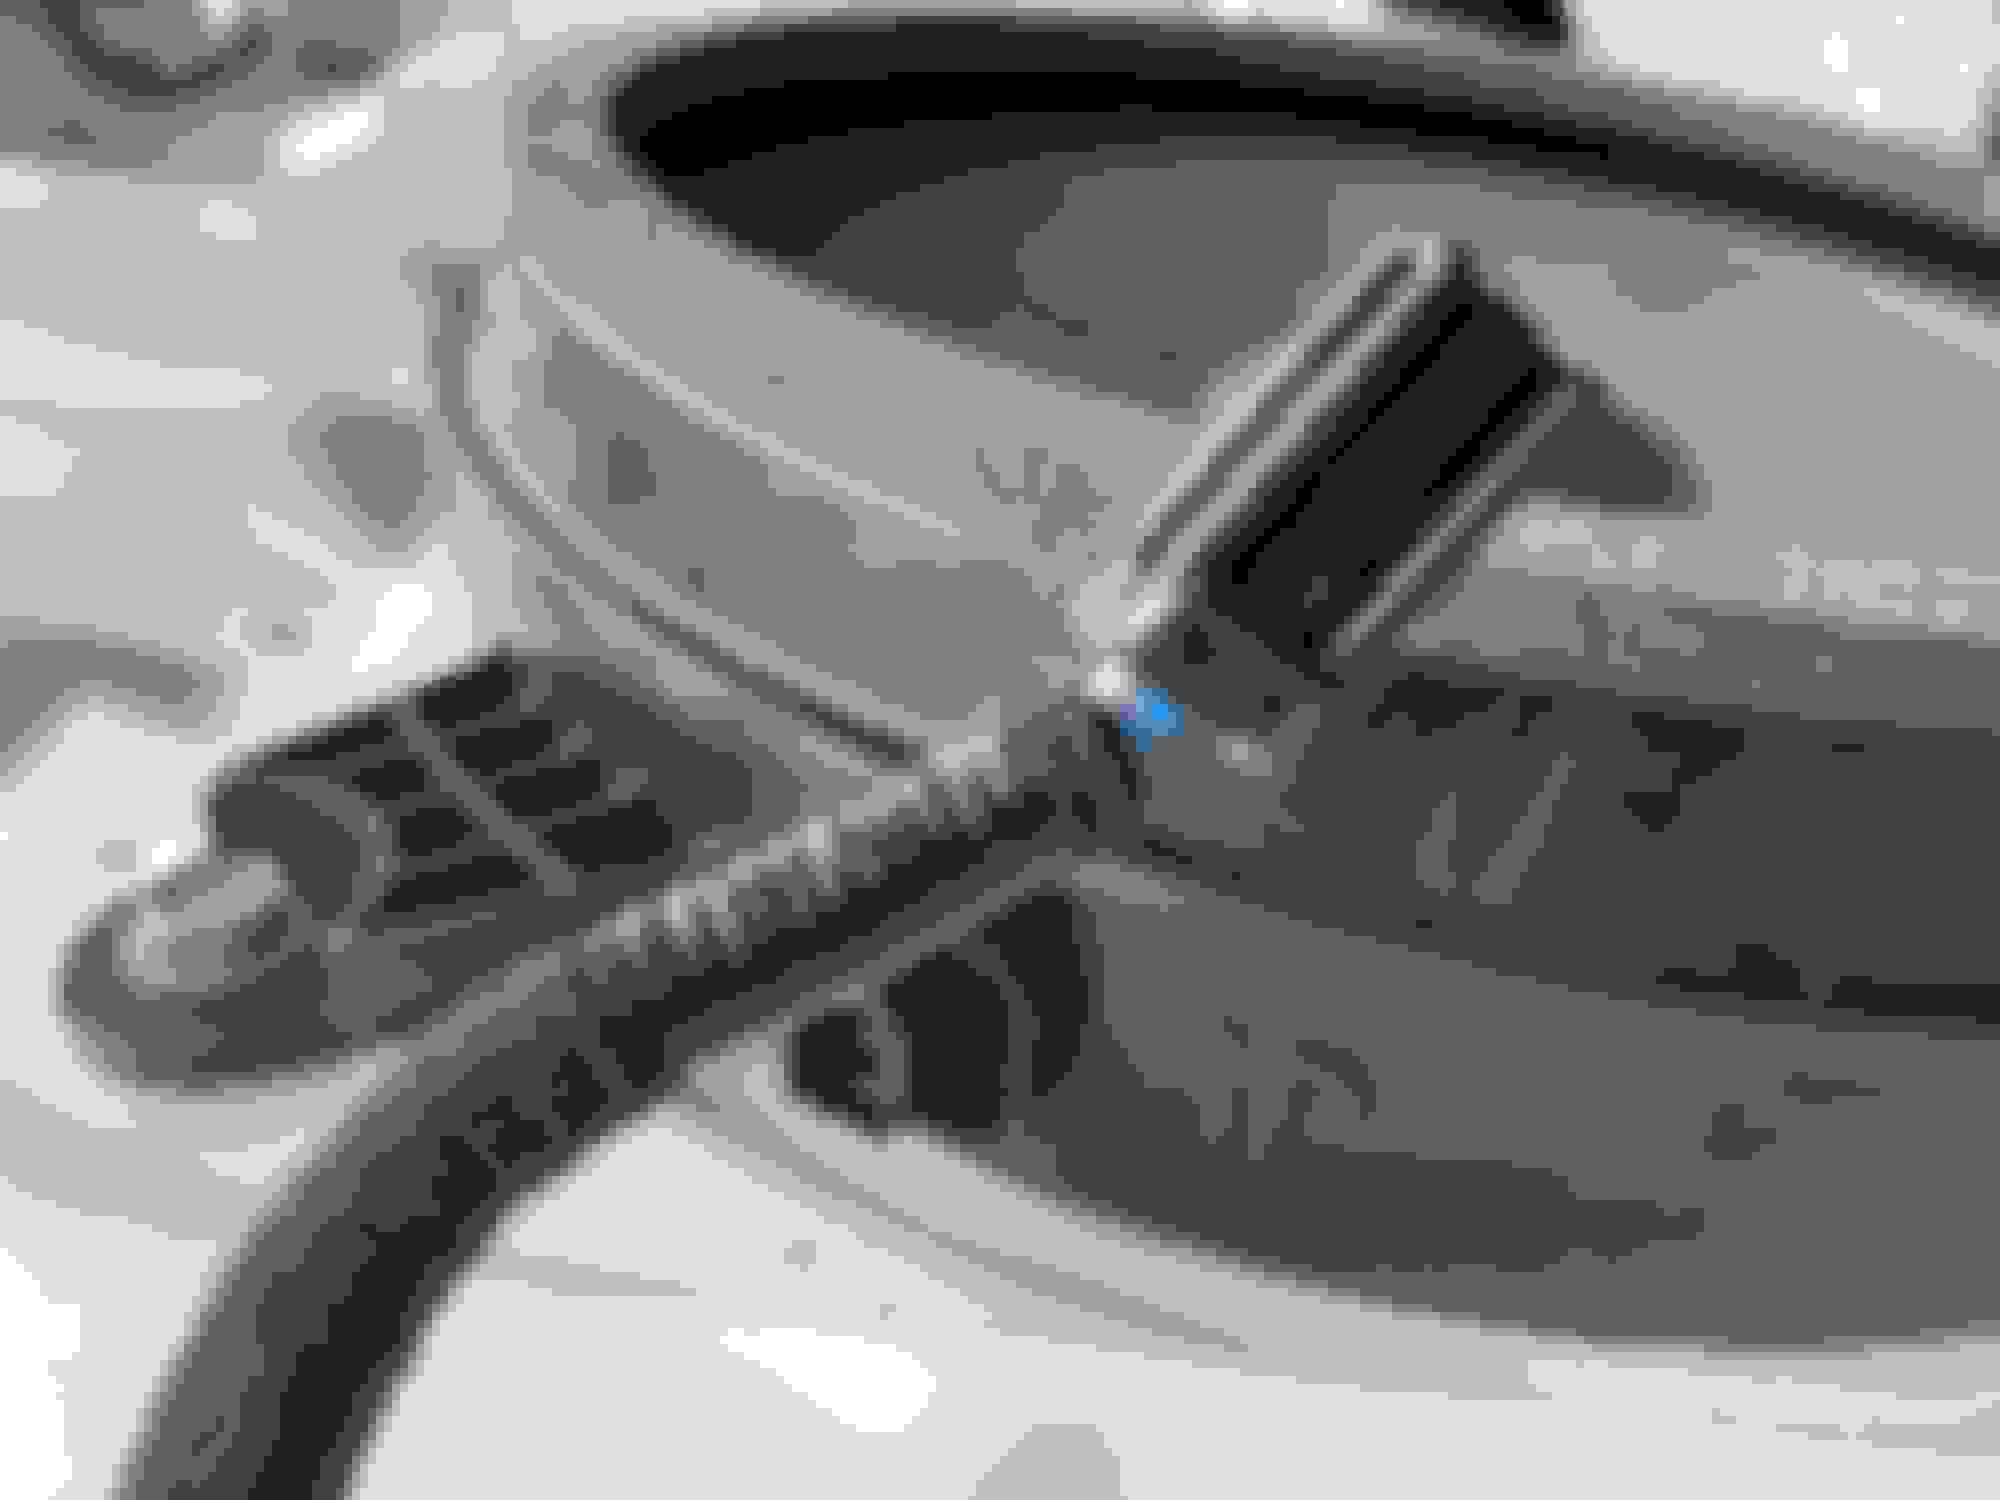
I took some other photos and the wiring close up.
From your previous post:
The wire connector (+) is closest to the cutout/indentation of the plug (pin 2). This wire was gray coloured. When I traced it, and plugged in the metra/wolf connector with the correct orientation (only in one way due to the cutout/indentation in the plastic plug/socket) it lead to, what is now, my positive terminal on the speaker itself. I took a multimeter and checked it numerous times, and it would flip between + / - readings with the music on based on that orientation (+ from speaker to + on multimeter = + value / + from speaker to - on multimeter = - value). So it appears the crutch field colour wiring is correct, and me splicing the wolf/metra connector gave me the correct polarity.
So regarding your discrepancy and mine would account, along with you not splicing your metra connector and me splicing my metra connector,
for either:
A) Toyota has reversed the wiring/polarity between the es350 and es300h OR
B) My multimeter is wrong, and the crutch field wiring guide is incorrect.
Either way it looks like we both have the polarity correct.
well I don�t think your multimeter is wrong and most likely there�s different wiring between ours cars.
i have 23 ES 350 and you have 300h?
Originally Posted by Damiansla
Hey!
Sorry for the late reply, week get past me. I had a chance today.
I took some other photos and the wiring close up.
From your previous post:
The wire connector (+) is closest to the cutout/indentation of the plug (pin 2). This wire was gray coloured. When I traced it, and plugged in the metra/wolf connector with the correct orientation (only in one way due to the cutout/indentation in the plastic plug/socket) it lead to, what is now, my positive terminal on the speaker itself. I took a multimeter and checked it numerous times, and it would flip between + / - readings with the music on based on that orientation (+ from speaker to + on multimeter = + value / + from speaker to - on multimeter = - value). So it appears the crutch field colour wiring is correct, and me splicing the wolf/metra connector gave me the correct polarity.
So regarding your discrepancy and mine would account, along with you not splicing your metra connector and me splicing my metra connector,
for either:
A) Toyota has reversed the wiring/polarity between the es350 and es300h OR
B) My multimeter is wrong, and the crutch field wiring guide is incorrect.
Either way it looks like we both have the polarity correct.
Base system is about 300W with 8 Speakers (3 Dash / 2 Front Doors / 2 Rear Doors / Sub). So around 37.5W per speaker but I'm sure its not all the same. Also, I'm not sure if its max wattage or rms. All speakers are 4Ohms and sub is 2.5Ohms.
My advice is, if you are not changing the AMP look for speakers with Highest Sensitivity to compensate for volume drop from stock. Kenwood Excelon KFC-X3C / sensitivity: 83 dB. I went with KICKER 51KSC3504 / Sensitivity: 88dB
JBL that was advised by some was in ML setups and those are 2.3Ohms or so. I don't know if ours actually supports 2ohms, so using them in 4ohms system can cause dmg to the amp over time. As for your sub, its meant for enclosure, you need to look for IB (Infinite-Baffle) subs.
Honestly to make this system sound nice you need new amp.
I will be upgrading my system in 23 ES when weather gets better.
Parts list:
KICKER 51KSC3504 x 5 (Dash / Rear)
KICKER 51KSC6904 x2 (Front Doors)
JL Audio M6-10IB (Sub)
Audison AFM8.14BIT 8-Channel Input & Output
I was looking at these diagrams. I don't know which is right for a 2024 model but I seem to remember that the base system was Sony not Pioneer. Maybe it makes a difference.
I was looking at these diagrams. I don't know which is right for a 2024 model but I seem to remember that the base system was Sony not Pioneer. Maybe it makes a difference.
it�s still pioneer, when I took out the speakers it said pioneer on em.
Man, Found official doc for Speaker Watt rating and they are pathetic lol
Also, don't follow how ML is 1800Watt amp with 150W/ch and speakers only rated @5W???
Decided to add the amp, and a free air Pioneer Subwoofer (PIONEER TS-A2500LS4).
Why I chose this subwoofer?
1) Dont need much bass, just a bit more with an amp
2) Frees up trunk space.
Total time: 7 hours (give or take 30mins)
Taking apart the es300h was a PITA. Huge PITA. Clips here, clips there, clips galore. In retrospect, its not hard, just SUPER tedious. Hoping the pictures aid in whoever else wants to tackle this.
The Subwoofer stock connector is the same as the speakers up front. Blue wire +, tan wire -. Didn't run a remote/turn on wire as the amp had auto sensing, and worked well, no buzzing.
The sub fits great, no movement, really well hidden, super happy with the install (my back wasn't).
But it rattles like a MF. The entire back dashboard/metal plate is about 1/16" thick, despite all the sound sealing, and vibration hunting I did to tie things down, its just ****. Not advised. Low volume is fine, outputs a good amount of bass, just so sad the car isnt more rigid.
Will be taking it back out and just putting in the stock, splicing in the high input wiring, and putting in a ported pre-made box. Bummer.
Sequence of steps to take the back apart:
0) disconnect + on battery.
1a) lift rear seat UP, (two clips) and pull OUT
1b) the rear seatbelt you will have to unscrew, and thread back through the seat to get it out. Its a PITA. but now the seat is free. #14mm socket
2) there are 4 (four) bolts which hold the rear vertical section of the seat in. There are one by each door, and two for the center. #12mm socket
3) Pull the seat UP, there are three metal guides. It takes some effort, but it will come out. BE CAREFUL OF THE SHARP bottoms where the step 2 bolts were, they will scratch everything.
4) disconnect yellow rear SRS airbag, one on each side.
5) 3 black push in clips that hold the felt in place. you can take these out
6) Remove the plastic trim by each door, starting with the bottom piece, then the middle section, and finally the window/column piece (just pops out, has 4 red tabs)
7) the black rear plastic on the dash/rear board pops up, takes some effort.
8) the twilight slides to the RIGHT, and pulls back towards you. Dont remove it yet, loosen it, and a connector goes to the underside, disconnect, then remove.
9) entire back black dash/rear panel comes out
10) Pull felt back, enjoy.
 03-17-24, 02:56 PM