When you click on links to various merchants on this site and make a purchase, this can result in this site earning a commission. Affiliate programs and affiliations include, but are not limited to, the eBay Partner Network.
It's very easy. This is for informational and educational purposes only. Perform at your own peril. The decision to work on your car is up to you. If you are unable to work on your car, or you don't feel confident, leave it to a professional. This took me maybe 3-5 min to remove the panel. This includes having no video or DIY reference and totally guessing at it.
Tools needed:
A philips screwdriver. The longer the better, but nothing too long is needed.
A plastic pry tool is helpful for popping the sensitive clips/covers, but if not, you can wrap your screwdriver in painters tape and/or a rag. The thinner the end the better. But I strongly advise to use a plastic pry tool.
1) You'll need to remove a) The window controls switch panel assembly, simply use your thin plastic pry tool and insert in the front (carefully) and lift upwards. Then undo the electrical connectors. Then undo the philips screw behind that holding the panel to the door b) The plastic panel right behind the door handle pull on the interior. It simply pops off. There's a screw behind it. c) Where you place your hand to close the door near the armrest, there's a black plastic hidden door that pushes straight down. It's like shutting a window, Gently take your pry tool and push down carefully being cautious not to scratch the vinyl/leather. Once that little window slides down, a hidden screw is behind it. You'll need to remove a total of three screws. Put them in a safe place.
2) then just like any other door panel, you use your hands and start popping off the clips around the perimiter starting at the bottom corners and working your away around and up. Then gently yet firmly lift the panel up and away from the door. But NOT all the way! You still have to address 1) The door pull cable, simply pull it away from the handle mechanism inside (carefully examine it to see how it hooks into place) it's marked with green plastic, then 2) the actual door lock that pops up, it's housed in a black plastic cylindrical housing that simply unclips from the door and the lock pulls out. Then 3) the electrical connector at the bottom for the LED light.
Carefully set the door panel aside so it doesn't get scratched. Then perform whatever work you need to.
Install is reverse of removal. Make sure all clips are securely into place and do not overtighten or strip the screws as the plastic receivers can strip if you're too aggressive.
For those wondering about the front door speakers, they're 4ohm woofers whose mounting points measure 16x19cm. They are equally spaced up and down and side to side. These speakers seem to be identical to the 2018 Camry for which a company called "Tacotunes" has custom adapters. I haven't ordered those yet but have ordered some other Metra 6x9 adapters. I have a feeling they'll need modification to work so I'll confirm that. But it seems the Tacotunes 18+ Camry adapters should be a perfect fit, though they don't provide measurements so not 100% sure.
You can push down with a pry tool or with your finger if you can catch the edge of the black plastic. This piece simply slides downward like an access door. Pull it up when you're done and it clicks into place. Easy. See red for the screw location. Start at the front with your pry tool edge. Be careful not to marr the door panel. The panel simply pops up. There's a screw behind there that you need to remove, see yellow. This black piece pops off to reveal a screw. Remove it. Voila. As mentioned above, don't forget the door pull cable, simply pops out away from door panel and the metal end hooks into the door handle. Also the door lock that pops up, you have to gently pry apart two plastic arms on the round cylindrical piece then the lock just slides down and out. Make sure the lock cable remains clipped into the holder on the door. if it pops out, just pop it back in. When you put the door panel back on, everything is reverse. just ensure you gently (yet firmly) tap all the way around the door panel so the clips lock into place. pay particular attention to the very top of the door panel. tap tap tap.
Thanks for the great detail. I�m planning on doing the same to my es 350 and was wondering if you had any tips and tricks for the dash speakers. I�ve already installed a pair of 12in subwoofers and would like to replace all the interior speakers and and an amplifier. Thanks for any help and I�ll continue to follow your post to stay updated.
Thanks for the great detail. I�m planning on doing the same to my es 350 and was wondering if you had any tips and tricks for the dash speakers. I�ve already installed a pair of 12in subwoofers and would like to replace all the interior speakers and and an amplifier. Thanks for any help and I�ll continue to follow your post to stay updated.
The dash speakers are plug and play using the red wolf harnesses. They are 3.5" in size and are accessed by simply taking a plastic panel pry tool and carefully lifting the covers. then two 10mm bolts hold each speaker in place. Same exact process in my CT and IS as well. Including the same speaker format. Replacing what is likely a (cost to manufacture) $1.50 speaker with $8 speakers (also cost) are a nice upgrade. No modification necessary.
Keep in mind, I did this for the base audio system.
I do not know how it will turn out for the 17-speaker ML system. The speaker locations are the same however the resistance appears to be variable. I don't really know how that works. doesn't seem like a big deal but not sure.
Thank you I have the base system I�ve always loved audio and have yet to find a stock system I like. Also do you have the wiring information for the stock amp I�m replacing the as well and can�t find it. My email is Johnwesleyaaron@gmail.com if you�d like to just talk via email. I�ve looked at your past builds and they look fantastic and definitely would like to bounce ideas off you I�m new to the Lexus community so I�m still kinda shooting in the dark with mods and installation.
I removed my door panel on my 2019 Lexus ES300h. In Lexus Fanatic�s picture you can see a connector on the upper right hand side of the drivers door panel. It sits on the small white plastic cover. Does anyone know what this connector goes to? I can account for all connectors except this one. Any help would be greatly appreciated!
It's very easy. This is for informational and educational purposes only. Perform at your own peril. The decision to work on your car is up to you. If you are unable to work on your car, or you don't feel confident, leave it to a professional. This took me maybe 3-5 min to remove the panel. This includes having no video or DIY reference and totally guessing at it.
Tools needed:
A philips screwdriver. The longer the better, but nothing too long is needed.
A plastic pry tool is helpful for popping the sensitive clips/covers, but if not, you can wrap your screwdriver in painters tape and/or a rag. The thinner the end the better. But I strongly advise to use a plastic pry tool.
1) You'll need to remove a) The window controls switch panel assembly, simply use your thin plastic pry tool and insert in the front (carefully) and lift upwards. Then undo the electrical connectors. Then undo the philips screw behind that holding the panel to the door b) The plastic panel right behind the door handle pull on the interior. It simply pops off. There's a screw behind it. c) Where you place your hand to close the door near the armrest, there's a black plastic hidden door that pushes straight down. It's like shutting a window, Gently take your pry tool and push down carefully being cautious not to scratch the vinyl/leather. Once that little window slides down, a hidden screw is behind it. You'll need to remove a total of three screws. Put them in a safe place.
2) then just like any other door panel, you use your hands and start popping off the clips around the perimiter starting at the bottom corners and working your away around and up. Then gently yet firmly lift the panel up and away from the door. But NOT all the way! You still have to address 1) The door pull cable, simply pull it away from the handle mechanism inside (carefully examine it to see how it hooks into place) it's marked with green plastic, then 2) the actual door lock that pops up, it's housed in a black plastic cylindrical housing that simply unclips from the door and the lock pulls out. Then 3) the electrical connector at the bottom for the LED light.
Carefully set the door panel aside so it doesn't get scratched. Then perform whatever work you need to.
Install is reverse of removal. Make sure all clips are securely into place and do not overtighten or strip the screws as the plastic receivers can strip if you're too aggressive.
For those wondering about the front door speakers, they're 4ohm woofers whose mounting points measure 16x19cm. They are equally spaced up and down and side to side. These speakers seem to be identical to the 2018 Camry for which a company called "Tacotunes" has custom adapters. I haven't ordered those yet but have ordered some other Metra 6x9 adapters. I have a feeling they'll need modification to work so I'll confirm that. But it seems the Tacotunes 18+ Camry adapters should be a perfect fit, though they don't provide measurements so not 100% sure.
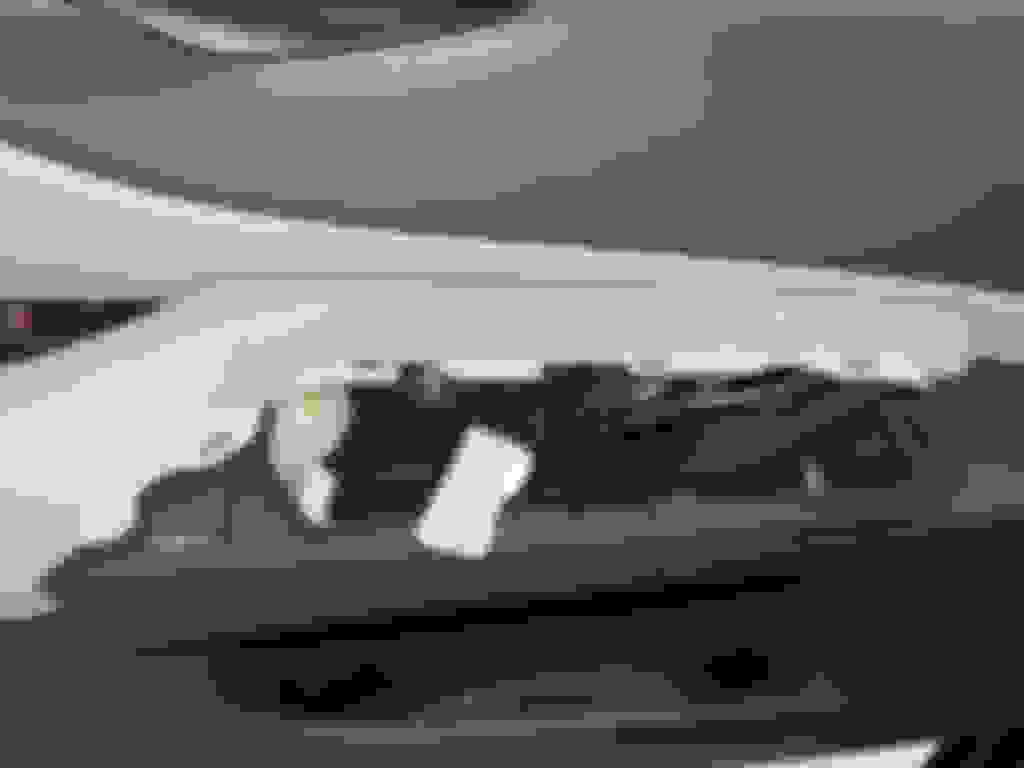
You can push down with a pry tool or with your finger if you can catch the edge of the black plastic. This piece simply slides downward like an access door. Pull it up when you're done and it clicks into place. Easy. See red for the screw location. Start at the front with your pry tool edge. Be careful not to marr the door panel. The panel simply pops up. There's a screw behind there that you need to remove, see yellow. This black piece pops off to reveal a screw. Remove it. Voila. As mentioned above, don't forget the door pull cable, simply pops out away from door panel and the metal end hooks into the door handle. Also the door lock that pops up, you have to gently pry apart two plastic arms on the round cylindrical piece then the lock just slides down and out. Make sure the lock cable remains clipped into the holder on the door. if it pops out, just pop it back in. When you put the door panel back on, everything is reverse. just ensure you gently (yet firmly) tap all the way around the door panel so the clips lock into place. pay particular attention to the very top of the door panel. tap tap tap.
how do you think off that white piece? I�m trying to dampen inside of it because every time I close the door it makes a hallow sound.
You should hear the Camry. It's 20x worse. Removing the speaker gives you more than enough space to reach in and add deadener to the steel door skin. Just little squares here and there will do. Do not need to cover the whole panel.
If you wanted to remove the "white piece" as you call i, you can see there's twist fasteners there. i'd start there.
Great post and thank you for taking the time to make it. Swapping the rear speakers in mine today and just wanted to make sure its the same procedure as the front doors. Thanks again! 🙏
I put them on open/blank spaces of sheet metal, mostly exterior. Put them as centrally as possible and don't over do it. The law of diminishing returns apply.
Also not all "SDM" is created equal. The butyl backed stuff the factory sticks on is not for sound blocking of ambient noise, but rather for resonance mitigation. This is why adding a ton of it isn't necessary and will actually make things worse if you use too much.
The thick furry stuff is for ambient and can be used in larger amounts.
thankfully my current car door has large amounts of both from factory. no need to add anything. no wonder it feels like a tank and is blocks lots of ambient.
For future reference, to supplement E46CT's front door panel removal posting, people may find the lexusguide.net Lexus ES (XZ10) Service Manual's Front Door (index page) useful. On that web page there's links to Components, Disassembly, Adjustment, and Reassembly web pages containing procedures and illustrations related to the front door. Of particular interest for DIYers is the accompanying illustrations showing locations of clips, claws, guides, connectors, bolts, and screws along with push/pull and removal direction arrows.

 02-18-21 | 10:09 AM