When you click on links to various merchants on this site and make a purchase, this can result in this site earning a commission. Affiliate programs and affiliations include, but are not limited to, the eBay Partner Network.
Long story short, I hate myself!. I was doing my wife a favor for a project she was working on and carefully put a sealed bottle of Acetone in the center cup holder. I left the car for 2 5 minutes and when I came back, the Acetone was dripping out of the bottle onto the palm rest and console. I was able to save the leather, but the acetone melted the plastic and it looks like crap!. I'm hoping I can replace the parts myself without taking it to the dealer. Looks like i can get away with just replacing the palm rest and the plastic structure under it. but will buy the whole console if needed. Can't stand looking at this. Any assistnace would be greatly appreciated.
Thank you
Oh man. That sucks. I'd like to suggest the idea of vinyl wrapping the center console. This could be a more cost-effective alternative to replacing it.
You could even do something like this https://www.aliexpress.com/item/1005002666797811.html
Wow, Thank you for this idea. Certainly something to think about, although I feel I should replace the parts as punishment for being so stupid!. Do you think the wrap cover the melted plastic divider that runs between the palm rest/trackpad and the cup holder and shifter?
It certainly could. But if you're going to wrap it, you should do the entire area to make it look uniform.
I think you might actually be in luck. It looks like the replacement part is surprisingly cheap https://www.discountpartsmonster.com...nel-5882006070
It certainly could. But if you're going to wrap it, you should do the entire area to make it look uniform.
I think you might actually be in luck. It looks like the replacement part is surprisingly cheap https://www.discountpartsmonster.com...nel-5882006070
Damn you're good. I've been googling and found console parts but not that one. I think that's all I would need, except knowing exactly how to disassemble the console so I can install the new part. Can you work your magic for that? lol. I've looked, but cannot find this.
Personally for a car that new, I'd shop for quality used OEM parts or even brand new OEM and just replace it. If it was a 1996 ES OK maybe I would do something else LOL
Thanks Guys, Part is ordered. I started pulling the trim pieces off and was able to get the upper trim lifted but not all the way off. I'll need to figure out how to remove the shifter **** and see if I can just pull the trim panel back to come off completely. Either that or bring it in and leave it to the professionals. Rather not cause at this point it's personal! So close!
It's easy as pie. but maybe cause I've done it maybe 6-7x already.
Pop knee pads using your fingers both sides
pop gear shift lever by pulling down on boot with fingers, using small pick, tiny screwdriver and pull out pin on backside. shift **** lifts straight up.
pop lower stereo trim piece by pulling tabs both sides (be careful but firm)
take trim removal tool and carefully pry at upper half of console by sticking it between the trim. start at the front and work your way back. it pops up using firm even pressure. you'll need to wiggle out the upper half past the shifter.. may help to shift to neutral prior to starting work. careful do not tear the boot.
undo all the plugs on the underside. there's 3 or 4.
go to back of car and pop off rear a/c vent fascia using fingers (no tools needed)
then peer into glovebox, front portion of console, and rear portion where you removed the vent cover, there's 10mm bolts holding it down in various spots. use a light.
if you're replacing just the upper half of the console, you do not have to remove the entire large lower console. not sure how much damage the acetone caused.
Awesome Thanks! Got about halfway through your description prior to my last post. My comments next to each step. Thank you again. I'll post after pictures once completed.
Pop knee pads using your fingers both sides Done
pop gear shift lever by pulling down on boot with fingers, using small pick, tiny screwdriver and pull out pin on backside. shift **** lifts straight up. Pulled the boot down, saw the pin. I see how to remove the pin, thanks!
pop lower stereo trim piece by pulling tabs both sides (be careful but firm) Ahhh I saw this was in the way. I will remove per your instruction.
take trim removal tool and carefully pry at upper half of console by sticking it between the trim. start at the front and work your way back. it pops up using firm even pressure. you'll need to wiggle out the upper half past the shifter.. may help to shift to neutral prior to starting work. careful do not tear the boot. I was able to easily pop this up with my hands. Once I get the radio bottom trim and the boot off. upper trim should come out.
undo all the plugs on the underside. there's 3 or 4.
go to back of car and pop off rear a/c vent fascia using fingers (no tools needed) Did this. It popped off easily
then peer into glovebox, front portion of console, and rear portion where you removed the vent cover, there's 10mm bolts holding it down in various spots. use a light. Didn't see the 10mm bolts but was looking for them. I'll find them.
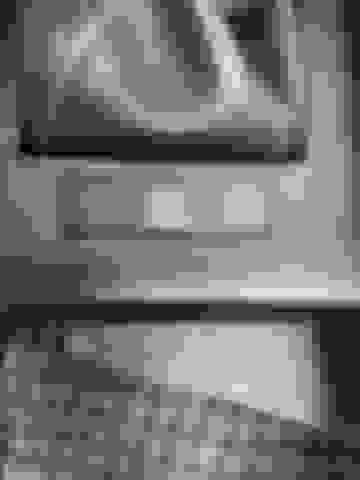
if you're replacing just the upper half of the console, you do not have to remove the entire large lower console. not sure how much damage the acetone caused.[/QUOTE] See picture in original post. I believe it's just the upper trim piece that needs replacing. I'll know for sure once I am able to remove the upper trim completely.
Awesome Thanks! Got about halfway through your description prior to my last post. My comments next to each step. Thank you again. I'll post after pictures once completed.
Pop knee pads using your fingers both sides Done
pop gear shift lever by pulling down on boot with fingers, using small pick, tiny screwdriver and pull out pin on backside. shift **** lifts straight up. Pulled the boot down, saw the pin. I see how to remove the pin, thanks!
pop lower stereo trim piece by pulling tabs both sides (be careful but firm) Ahhh I saw this was in the way. I will remove per your instruction.
take trim removal tool and carefully pry at upper half of console by sticking it between the trim. start at the front and work your way back. it pops up using firm even pressure. you'll need to wiggle out the upper half past the shifter.. may help to shift to neutral prior to starting work. careful do not tear the boot. I was able to easily pop this up with my hands. Once I get the radio bottom trim and the boot off. upper trim should come out.
undo all the plugs on the underside. there's 3 or 4.
go to back of car and pop off rear a/c vent fascia using fingers (no tools needed) Did this. It popped off easily
then peer into glovebox, front portion of console, and rear portion where you removed the vent cover, there's 10mm bolts holding it down in various spots. use a light. Didn't see the 10mm bolts but was looking for them. I'll find them.
if you're replacing just the upper half of the console, you do not have to remove the entire large lower console. not sure how much damage the acetone caused.
See picture in original post. I believe it's just the upper trim piece that needs replacing. I'll know for sure once I am able to remove the upper trim completely.[/QUOTE]
I've been able to remove everything off the trim plate except for the hold button. This does not come out easy and I don't see where there are clips holding it in. Any suggestions?
In your picture of the back, there are tabs on the right and the bottom. It looks like you need to pinch the little tabs together to get them to release.

 12-03-21, 08:53 AM