DIY Redout Revisited
 02-09-07, 04:58 PM
#1
Lead Lap
Thread Starter

I know that there are probably a bunch of threads on this DIY but Hey here's mine. Just did it a few hours ago. Here are the pics:
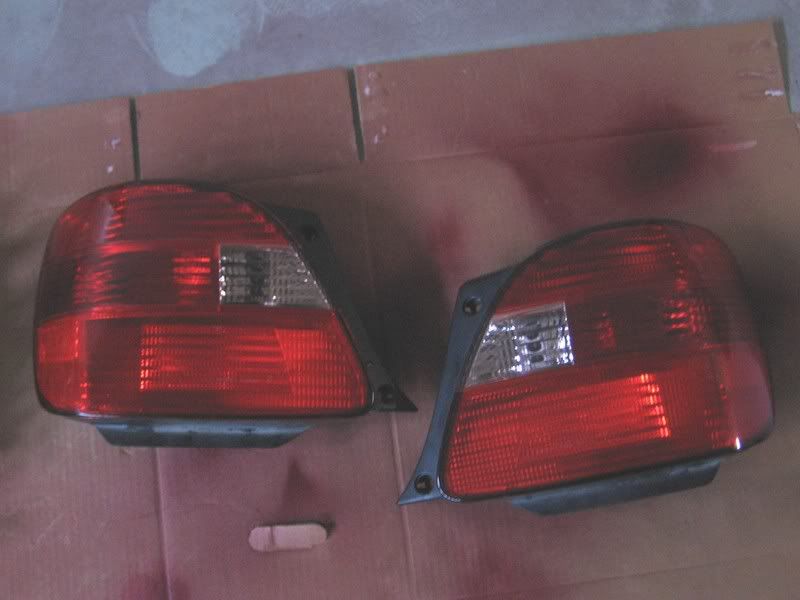
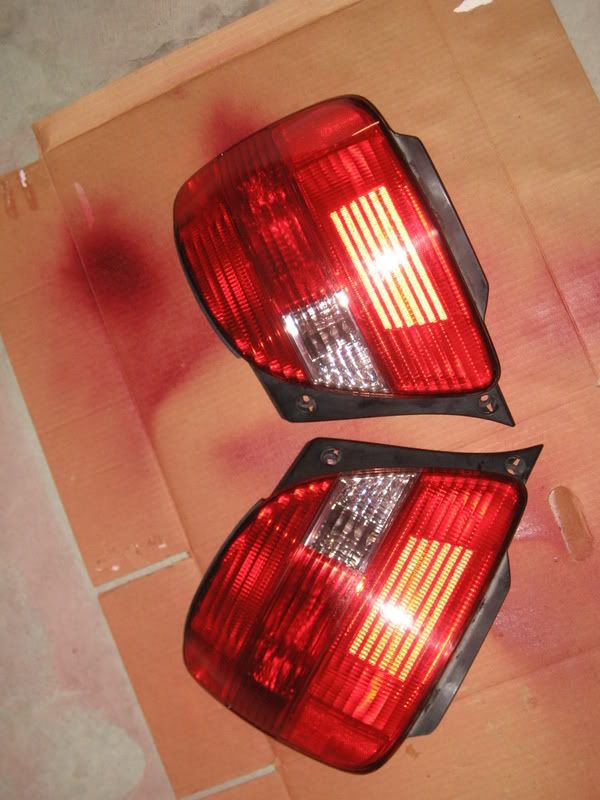
took about Three and a half hours start to finish.
I used the Krylon Stained Glass Red Paint. I thought about the film due to my lackluster spray painting skills but compared to my smoothening out bubbles from stickers skills, spray painting aint so bad.
Came out cool I think but upclose they are "textured" (see my comment regarding my skills) You cant really tell though cuz theyre shiny enough just when you touch them you can feel the texture. But from far away they look hella cool though!!!
Best 7 bucks I spent.
took about Three and a half hours start to finish.
I used the Krylon Stained Glass Red Paint. I thought about the film due to my lackluster spray painting skills but compared to my smoothening out bubbles from stickers skills, spray painting aint so bad.
Came out cool I think but upclose they are "textured" (see my comment regarding my skills)
You cant really tell though cuz theyre shiny enough just when you touch them you can feel the texture. But from far away they look hella cool though!!! Best 7 bucks I spent.
Last edited by Joelseff; 02-09-07 at 05:19 PM.


 02-09-07, 11:58 PM
#6
Lead Lap
Thread Starter

Trending Topics
 02-10-07, 05:07 PM
#10
Lead Lap
Thread Starter
 Yikes!!!
02-10-07, 06:27 PM
Yikes!!!
02-10-07, 06:27 PM
#12
Lexus Champion
iTrader: (2)
Join Date: Aug 2004
Location: Pennsylvania
Posts: 2,134
Likes: 0
Received 0 Likes
on
0 Posts
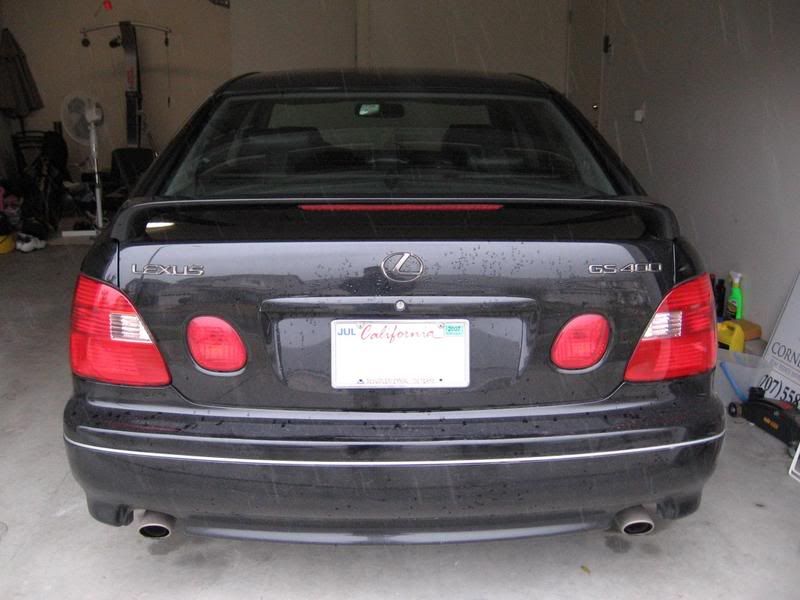
I've done this twice with my tails.
The first time, it was done by my cousin when he owned the car (long time ago). Because there was no clear coat or baking involved, the tint became dull over time. At first it looked great. OEM like. When he took the car to Lexus, they thought it was OEM. The techs couldn't tell the difference. After awhile (when I bought the car), the tint had already become dull looking.
We decided to re-do the taillight tint. This time, we baked the taillights after we sprayed them. You have to clean the taillight REALLY well before you do this. Any particles on the taillight and you'll get texture and bumps.
After spraying the taillight evenly, make sure you let it dry before you spray on clear coat. If you decide to heat it, bake it after you spray it. The baking lets the tint settle in. It lets the tint last much longer. It's been almost 7 months now since the last spray and it still looks OEM.
 02-12-07, 01:19 PM
#14
Lead Lap
Thread Starter
I've done this twice with my tails.
The first time, it was done by my cousin when he owned the car (long time ago). Because there was no clear coat or baking involved, the tint became dull over time. At first it looked great. OEM like. When he took the car to Lexus, they thought it was OEM. The techs couldn't tell the difference. After awhile (when I bought the car), the tint had already become dull looking.
We decided to re-do the taillight tint. This time, we baked the taillights after we sprayed them. You have to clean the taillight REALLY well before you do this. Any particles on the taillight and you'll get texture and bumps.
After spraying the taillight evenly, make sure you let it dry before you spray on clear coat. If you decide to heat it, bake it after you spray it. The baking lets the tint settle in. It lets the tint last much longer. It's been almost 7 months now since the last spray and it still looks OEM.
The first time, it was done by my cousin when he owned the car (long time ago). Because there was no clear coat or baking involved, the tint became dull over time. At first it looked great. OEM like. When he took the car to Lexus, they thought it was OEM. The techs couldn't tell the difference. After awhile (when I bought the car), the tint had already become dull looking.
We decided to re-do the taillight tint. This time, we baked the taillights after we sprayed them. You have to clean the taillight REALLY well before you do this. Any particles on the taillight and you'll get texture and bumps.
After spraying the taillight evenly, make sure you let it dry before you spray on clear coat. If you decide to heat it, bake it after you spray it. The baking lets the tint settle in. It lets the tint last much longer. It's been almost 7 months now since the last spray and it still looks OEM.