
Wrapped my wood parts
 10-21-10 | 11:29 PM
#1
Thread Starter
Pole Position
Joined: Jun 2010
Posts: 218
Likes: 0
From: Raleigh , NC
Well only did one so far and it turned out pretty good. I spent a total of $6 at lowes hardware for this black marble contact paper about 6 feet long and a foot wide. It easily peels off with no residue so that means that you can reposition it a million times and it sticks just as well and it can be removed at any time no problem. I spent about an hour and half doing this with some trial and error. I plan on doing the door wood as well .
Sorry for crappy blackberry pics
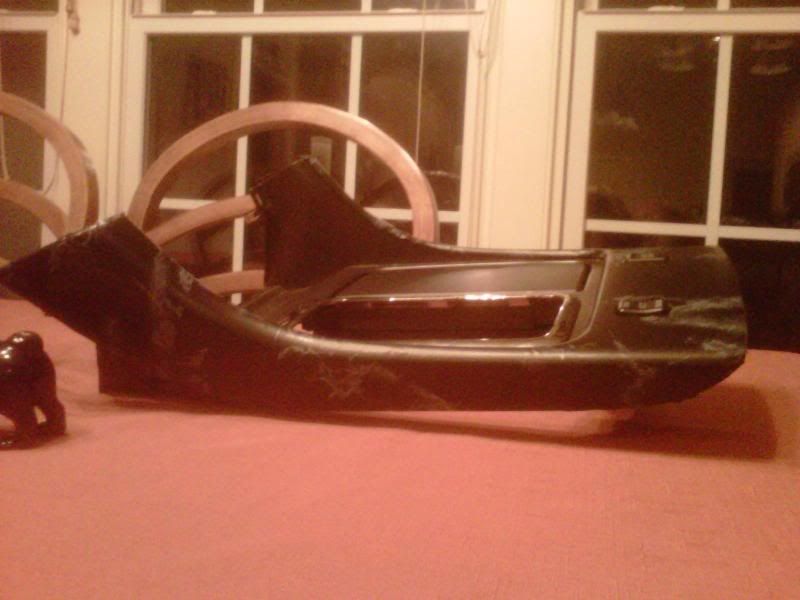

Sorry for crappy blackberry pics
Last edited by BrentGS; 10-21-10 at 11:39 PM.


Trending Topics
 10-22-10 | 07:22 AM
#10
Thread Starter
Pole Position
Joined: Jun 2010
Posts: 218
Likes: 0
From: Raleigh , NC
I'll get pics when I borrow my gf's camera later today lol
I am not having issues with wrinkles just air bubbles . The material is great, it does not stick to itself but the adhesive is only medium strength so you really have to apply pressure to make the corners stick. It's not perfect by any means and you can tell the flaws in good day light but for $6 it's looks alright!
I just finished the cig lighter/ashray area , all left is the doors and i'll see if it's possible to do the shift ****.
I am not having issues with wrinkles just air bubbles
. The material is great, it does not stick to itself but the adhesive is only medium strength so you really have to apply pressure to make the corners stick. It's not perfect by any means and you can tell the flaws in good day light but for $6 it's looks alright!I just finished the cig lighter/ashray area , all left is the doors and i'll see if it's possible to do the shift ****.
10-22-10 | 07:36 AM
#11

Lead Lap
Joined: Dec 2007
Posts: 461
Likes: 1
From: NY/GA
I am not having issues with wrinkles just air bubbles
. The material is great, it does not stick to itself but the adhesive is only medium strength so you really have to apply pressure to make the corners stick. It's not perfect by any means and you can tell the flaws in good day light but for $6 it's looks alright!
for air bubbles...use a very sharp blade over the bubble and push the material from the outside in towards the cut to let the air out...like this --->|<---
for the corners...use painters tape to press the corners down and let it sit for a while. then peel it off
10-22-10 | 07:46 AM
#12
Thread Starter
Pole Position
Joined: Jun 2010
Posts: 218
Likes: 0
From: Raleigh , NC
very creative
for air bubbles...use a very sharp blade over the bubble and push the material from the outside in towards the cut to let the air out...like this --->|<---
for the corners...use painters tape to press the corners down and let it sit for a while. then peel it off
for air bubbles...use a very sharp blade over the bubble and push the material from the outside in towards the cut to let the air out...like this --->|<---
for the corners...use painters tape to press the corners down and let it sit for a while. then peel it off
Do you think heating it up with a blow dryer will make it stick better? I tried that and it seemed to work but I want to make sure it's not all in my mind


