How to remove rear diff cover
 12-30-12, 05:11 PM
#1
Driver School Candidate
Thread Starter

Join Date: Dec 2012
Location: Nc
Posts: 10
Likes: 0
Received 0 Likes
on
0 Posts
I accidentally push in a 3 inces 3/8 tube inside.diff while refilling fluid. I need to open up diff.however, i cannot see or easily reach the top bolts so maybe some one here can help me with the procedure on how to remove the cover..
Last edited by Grease; 12-30-12 at 05:16 PM.
 12-30-12, 09:27 PM
#2

??? it just unscrews..... i have taken mine off while it was on the car before, im fixing to take my old one off and replace it with my P.C. one (yes i cleaned off the PC on the inside of that, dunno why he did that)
Last edited by sakataj; 12-30-12 at 09:41 PM.
12-31-12, 04:04 PM
#3
Driver School Candidate
Thread Starter
Join Date: Dec 2012
Location: Nc
Posts: 10
Likes: 0
Received 0 Likes
on
0 Posts
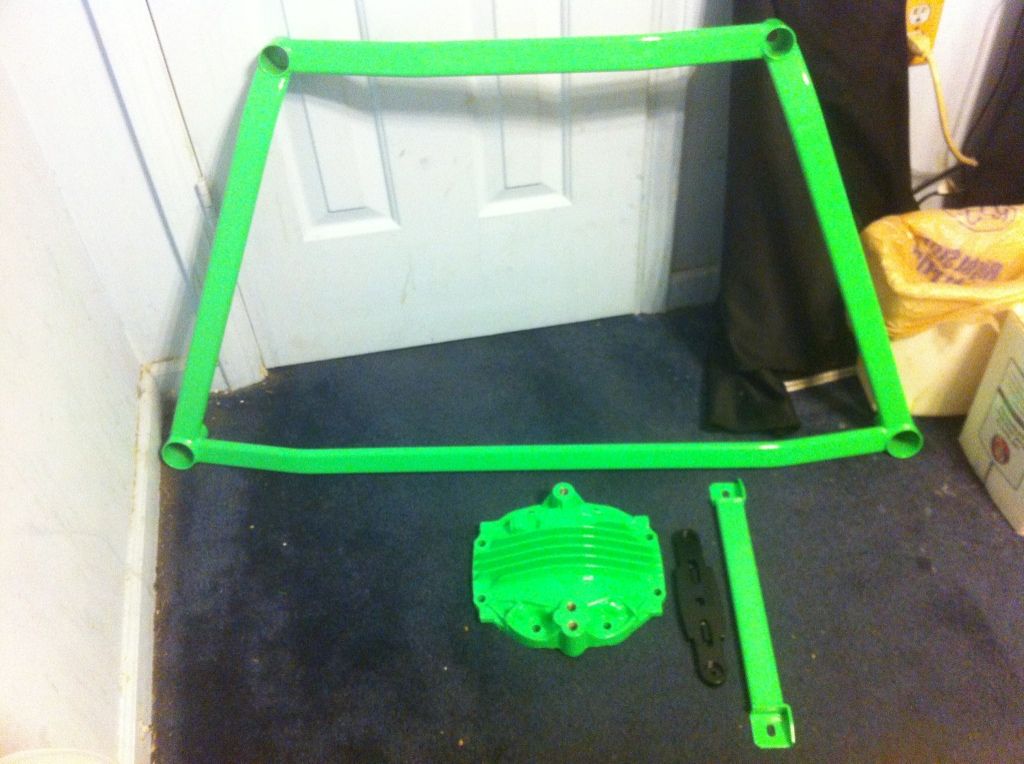
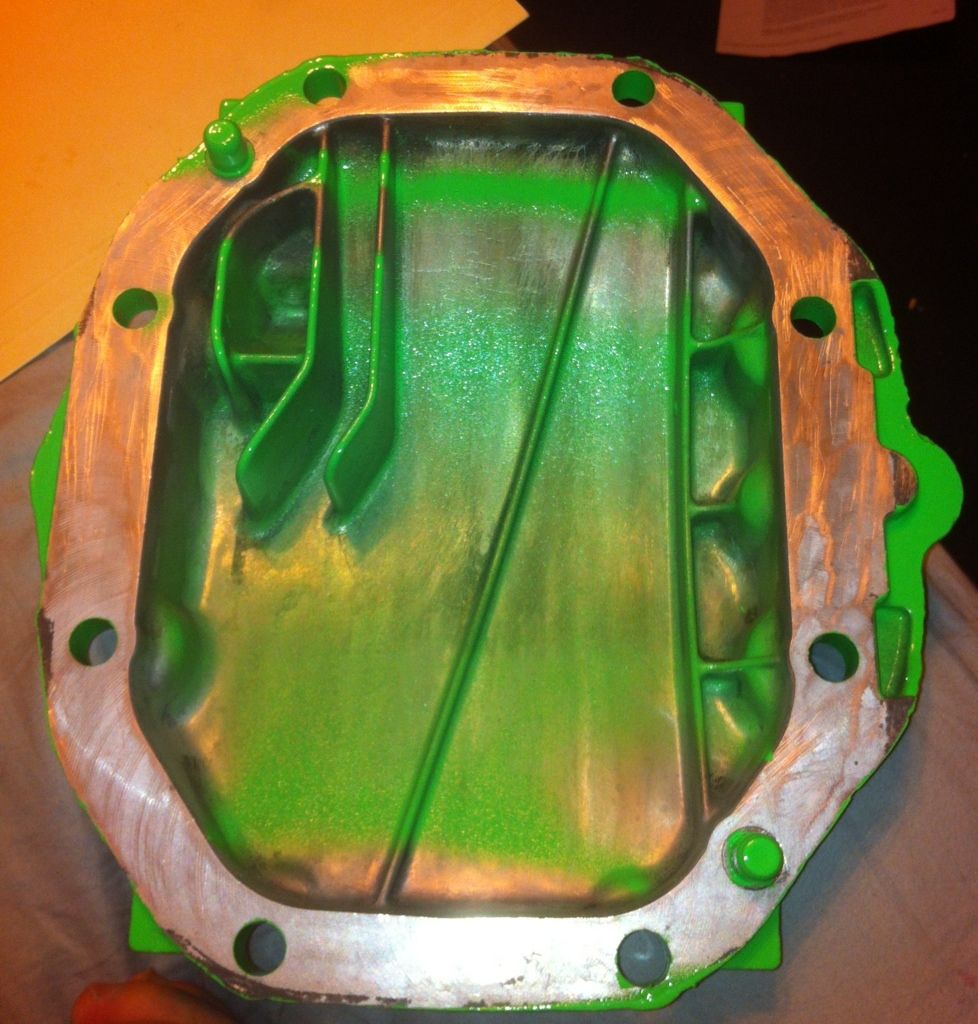
So I'm assuming you meant I only need to unscrew these two hex bolts in red shown in the attached picture and then proceed with the 6 or 8 bolts (in blue). And reinstalling will be just doing the reverse. I hope I have not damage anything yet as I drove it this morning with the plastic tube inside because I thought reinstalling will require moving or pushing the entire case forward which I think will be so difficult. I lost hope I guess and just hoped gears will cut into pieces and flush out when I drain the fluid again.
BTW. Nice color. I might do the same in red. Also will take picture of this process so I can share it to beginners like me.
BTW. Nice color. I might do the same in red. Also will take picture of this process so I can share it to beginners like me.
12-31-12, 04:40 PM
#4

support diff via jack unless your gonna bench press it down (not sure if your using a lift or driveway)
remove bolts from ears
remove 3 hex bolts you circled.
remove right and left sub frame brace, if you have never removed them (bolts) you will need to heat them other wise get ready to snap them.
once all done, lower diff via jack.
Access bolts to cover. use chisel tool to break seal.
remove bolts from ears
remove 3 hex bolts you circled.
remove right and left sub frame brace, if you have never removed them (bolts) you will need to heat them other wise get ready to snap them.
once all done, lower diff via jack.
Access bolts to cover. use chisel tool to break seal.
12-31-12, 06:52 PM
#5
Driver School Candidate
Thread Starter
Join Date: Dec 2012
Location: Nc
Posts: 10
Likes: 0
Received 0 Likes
on
0 Posts
I did not see anyone commenting or warning me that this is a difficult process so I'm assuming I can do this myself (no assistant) by just following the steps provided by ****-akdt. I'm going to do this with jack in my garage.
Questions:
1. What bolts from ears. Where is that in the picture?
2. Where is the right and left subframe brace? Could you help me locate that from the attached picture. Is this in one of the picture provided by sakataj. Which one?
3. Can I first loosen the 8 bolts while the 3 hex blts are attached (not lo0se)? So the case does not move when turning the 8 bolts out with pressure.
4. Do you guys think I should do this procedure? Or just leave that 5/8 dia / 3 inches plastic tube inside case and hope that eventually it will be chewed to pieces and come out in my next drain. Do you have thought that this can damage the components inside as it floats arounbd with the oil?
5. I'll be more fearless if I can see the procedure on video. Anyone seen one?
I really appreaciate your input here guys. And I really wish you can provide more infomation or tips, right tools, and warnings based on your experience as I'd like to first prep things I would need before I begin some work. And first perform the procedure mentally with your instructions.
Thanks.
Last edited by Grease; 01-01-13 at 02:17 AM.
01-01-13, 10:56 AM
#6
Bolts from ears is referring to the front 2 big bolts holding the diff in the car. There are a total of 5 bolts holding the diff into the car. Two big ones on the side towards the front of the car. They look more like small arms sticking out of the diff. Not really ears, but thats what some refer to them. Then theres the 3 big hex bolts on the diff cover itself. Make sure the diff is supported by a jack or something first, then once all of those bolts are out you can lower the diff. Also, you pull the eight 10mm hex bolts attaching the axles to the diff on each side first. Do that before anything else.
PS: I would highly suggest against leaving that rubber hose in there. Who know what that rubber will do when grinding around inside the gears. You could risk it, but you will be stranded on the side of the road if it fails. Then not to mention you will have to buy another diff and do this procedure anyways.
I was in the process of making a differential removal and installation video. Never finished it though lol.
01-02-13, 03:35 AM
#7
Driver School Candidate
Thread Starter
Join Date: Dec 2012
Location: Nc
Posts: 10
Likes: 0
Received 0 Likes
on
0 Posts
Thank you. I'll find all the bolts you mentioned this weekend and see if I can complete the procedure myself. Measure the bolt sizes and prep the right tools, extensions. But if you still have the tools in mind. Please share.
Also, I'm a little worried about below instruction from Jeff. It seems I have to detach/separate the left and right axle and not sure what to expect when reinstalling it back. Is there anything I should know when reinstalling the left and right axle?
Jeff's instruction.
"Also, you pull the eight 10mm hex bolts attaching the axles to the diff on each side first. Do that before anything else."
I hope this is purely plug and play kind of thing and nothing will be out of specs once all is reinstalled.
And I'm assuming reinstalling will just be the reverse.
I don't know the torque specs so hopefully someone can share that information to me as well.
Again, Thanks to all for the input.
Last edited by Grease; 01-02-13 at 06:37 AM.
Trending Topics
01-08-13, 06:38 PM
#8
Driver School Candidate
Thread Starter
Join Date: Dec 2012
Location: Nc
Posts: 10
Likes: 0
Received 0 Likes
on
0 Posts
Gave the work to a mechanic who charged me 100.00. And I was happy about that decision bec I think I could have either hurt myself or break something working in tight space.. You need a differential Jack for this task and not just the regular jack. I'm having problem uploading pictures so I'll just try tomorrow or the next time I logon.
01-08-13, 07:04 PM
#10
Gave the work to a mechanic who charged me 100.00. And I was happy about that decision bec I think I could have either hurt myself or break something working in tight space.. You need a differential Jack for this task and not just the regular jack. I'm having problem uploading pictures so I'll just try tomorrow or the next time I logon.
You need a trans/diff jack if your working from a lift.
A regular jack will do fine working from the ground.


Thread
Thread Starter
Forum
Replies
Last Post
tsxnbp
LS - 1st and 2nd Gen (1990-2000)
0
06-19-15 04:25 PM
Lexus97ES
ES - 1st to 4th Gen (1990-2006)
23
10-31-12 11:36 AM