How To: Hardwire a Radar Detector
 06-18-10, 06:15 PM
#1

Ive been looking for a good how to hardwire a radar detector in the 3gs and haven't been able to find one. I thought I'd tackle this and take some pics along the way to possibly help out anyone else who wants to do this. This should be pretty universal for any radar detector but for my purposes, i'll be using a smartcord from escort radar.
I thought about trying to wire it to the fuse panel into the cigarette lighter fuse using a piggy back fuse harness but I realized the fuse for the power outlet and cigarette lighter are on the passanger side footwell. It was too far for my cord to reach to the passanger side and put the remote mute button on the driver side so I decided to tap into the rear view mirror power. Btw sorry in advance for the pictures, they were taken with my blackberry so theyre not great, but you'll get the jist.
Things you will need:
-Scissors
-Phillips Head Screwdriver (preferably with a longer neck)
-Small Flat Head Screwdriver
-Electrical Tape
-20 Gauge Wire
First you will need to remove the cover right infront of the sunglass holder. This cover is held on by two clips. Don't be overly aggressive trying to get this out. Mine has white stress marks on the plastic around the clip because I tried to rip it out like king kong , luckily it didn't break.
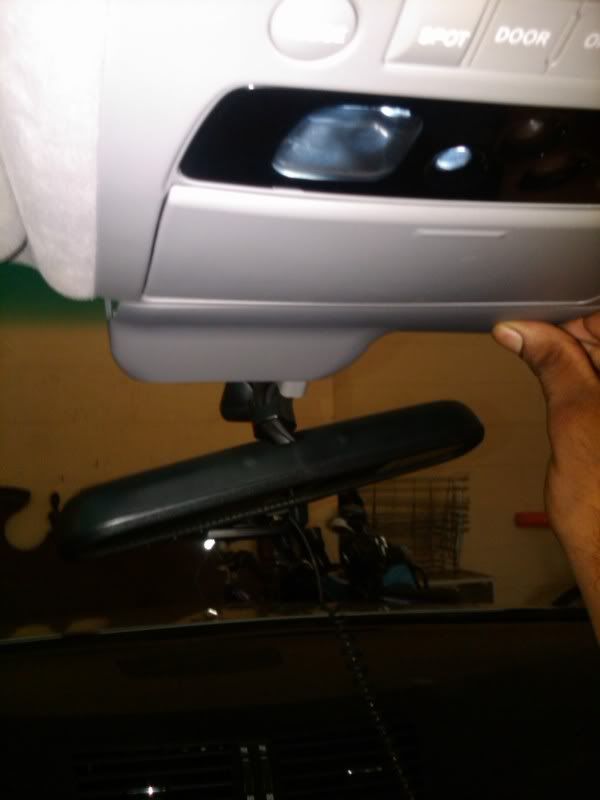
Next, open the sunglass holder and you will see two screw covers behind it. Take the flat head to pull off the covers and then unscrew the two screws.
The front of the dome control unit should be loose now and there are also two clips holding this in. Pull it down gently
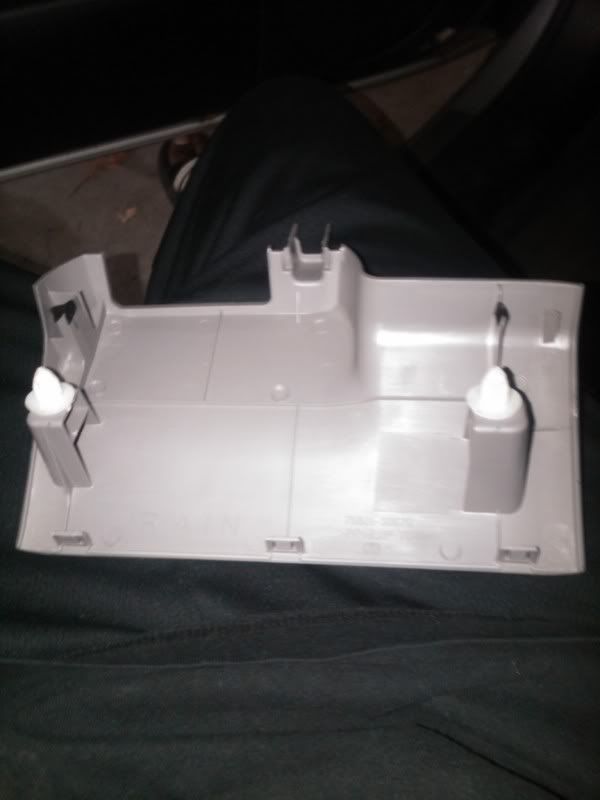
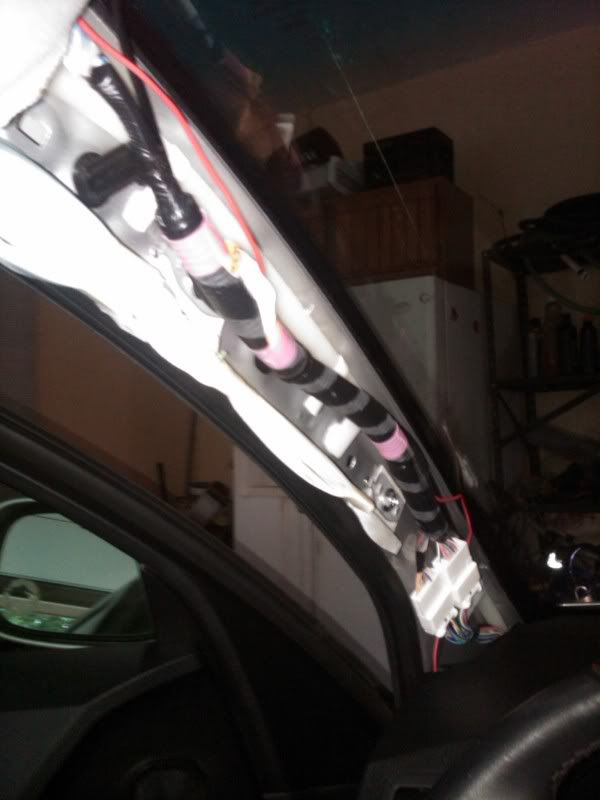
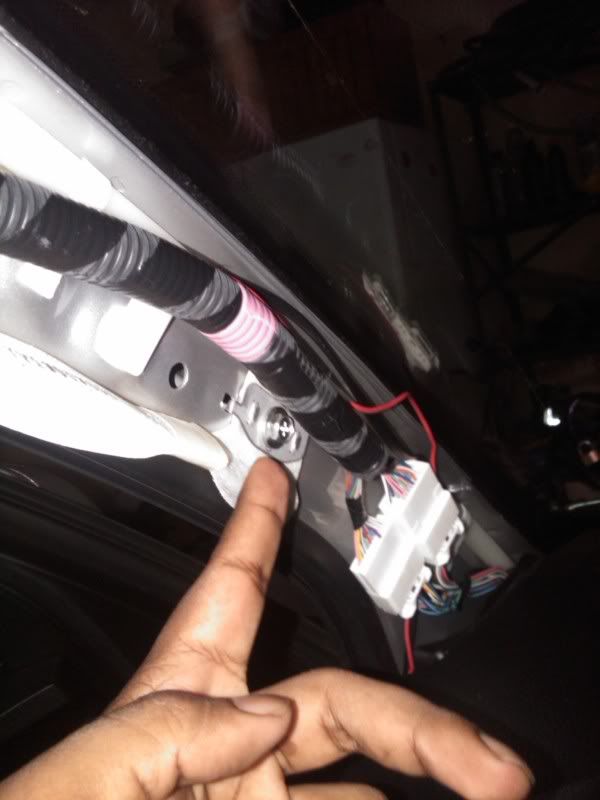
Now find the white wire harness going from the rear view mirror and unplug it. The button to unclip it is on the bottom where my thumb is
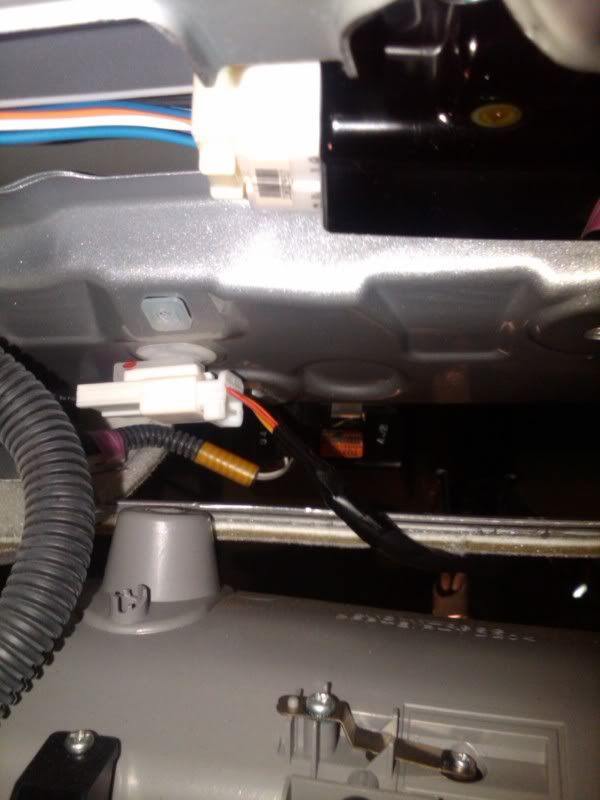
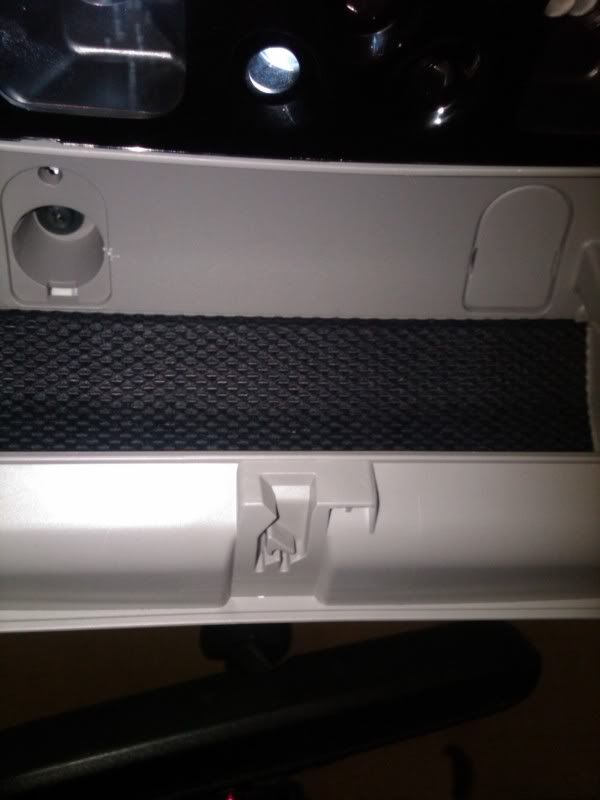
Manuever the wire out of the headliner so it is just hanging down infront of you and locate the ORANGE wire. In the pictures it shows I cut the red wire which happened to be a .86V line... the ORANGE wire is the 12V ignition wire you want to splice into.
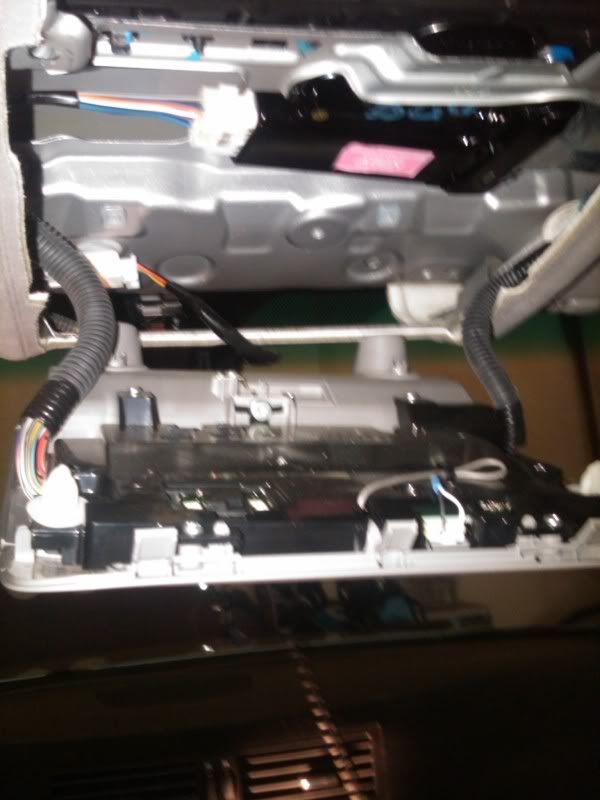
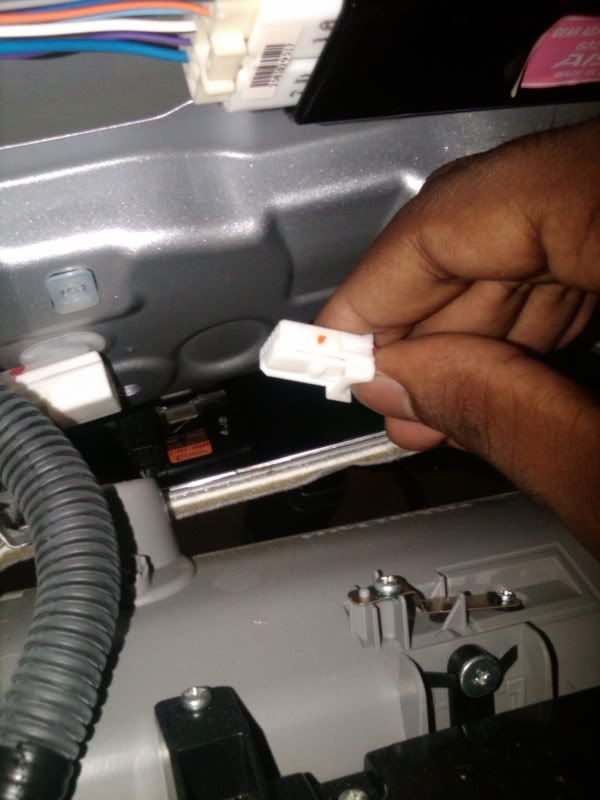
Splice into the orange wire however you want. The smartcord comes with a splicing connector and im sure almost all hardwire kits will come with one. I forgot about it and cut the orange wire in half, twisted all three wires together and wrapped it with electrical tape.
Before you go fully wrapping everything in electrical tape, test out the connection now to make sure your radar detector powers on. I took the screw from the sunglass holder and put it through the ground connector on the smartcord and shoved the screw into one of the holes in the ceiling above the dome control unit. If the radar detector turns on, awesome, if it doesn't take a break, grab a beer and troubleshoot.
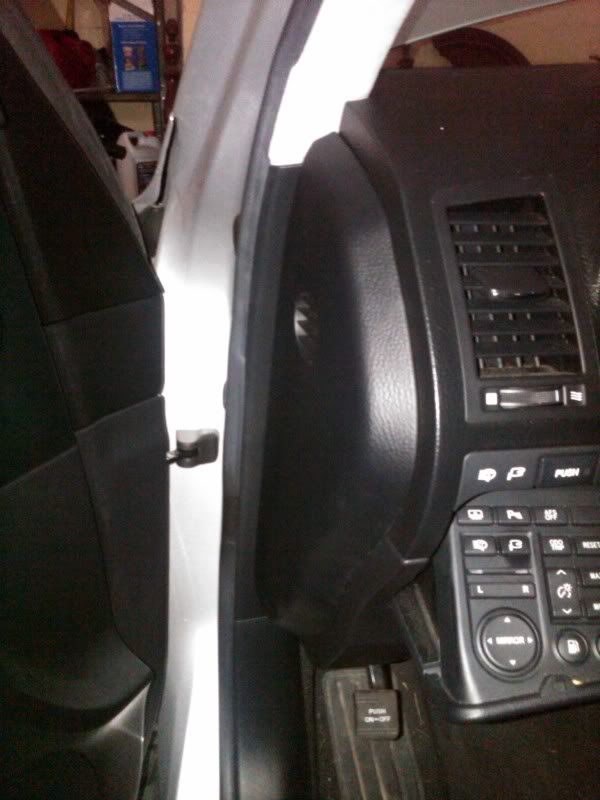
Now we have to remove the a-pillar. Remove this very gently, it is not on there very tight considering there is an airbag behind it. I ripped it out like an idiot again and something flew out that was essentially a hair clip... Im not sure if lexus is using hair clips to build their cars or if one of my friends lost one... maybe someone can chime in on where this goes or if it even belongs there.
Route the wire through the headliner by just pulling it out and tucking the wire underneath and move it along to the a-pillar. BE CAREFUL not to touch anything metal in the a-pillar. I touched a metal bracket and sparks flew, ended up blowing the dome light fuse . Route the 12V tapped wire near the existing wires so it wont interfere with the airbag.
yeah don't touch this.
open the door and remove this panel, I dunno what to call it so here's a picture
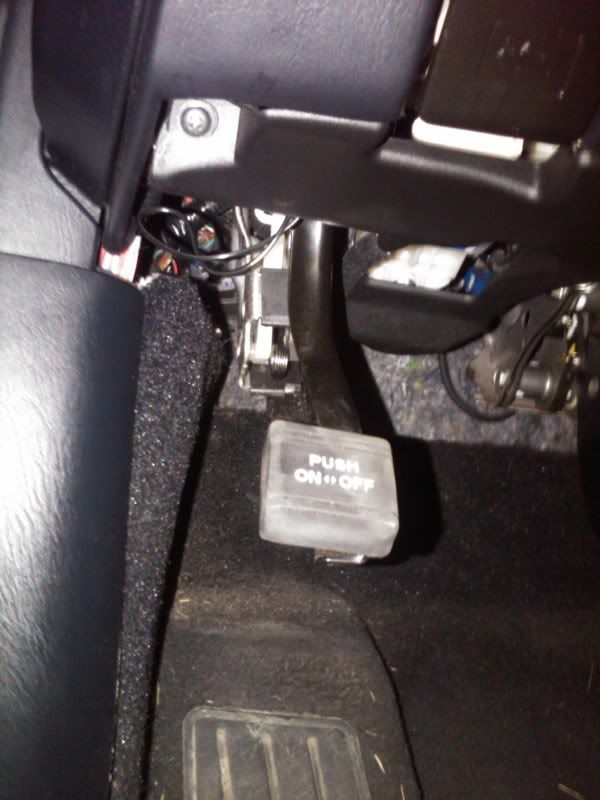
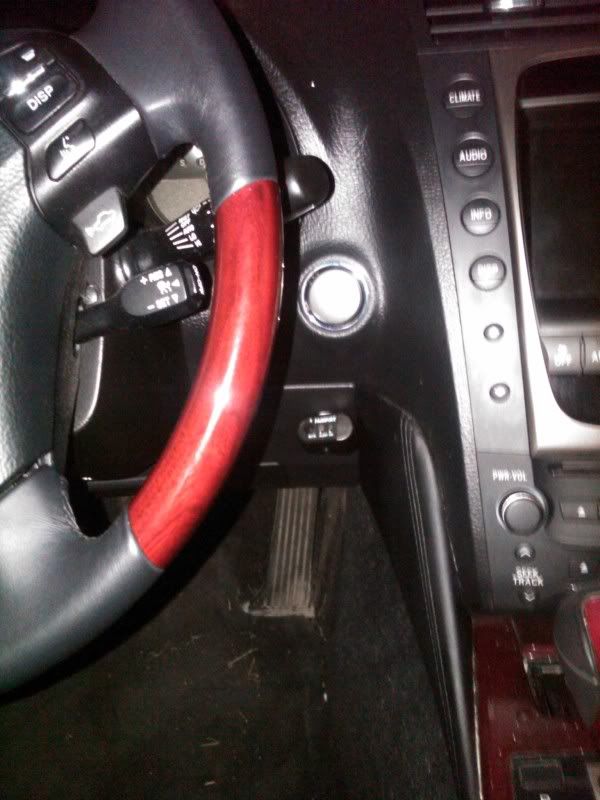
Once you bring the tapped wire down to near the parking brake lever and tuck the wire behind the above panel toward the firewall. Now figure out where you want to mount the remote mute button. I chose to mount it on the little plastic grate cover underneath the start/stop button. Double sided tape did not want to stick onto anything else but this little cover. Once you figure out the mounting spot, route the wires under the plastic cover in the footwell toward the parking brake lever. Connect the 12V tapped wire here to smartcord harness either by splicing or using a female end connector. For grounding, I choose a small screw by the parking brake lever.
top leftish of pic is the screw
Once you get this unscrewed, pull back both plastic covers just enough so you can slide the ground connector from the smartcord harness underneath both of the covers. You want the connector to be touching the bare metal hanger, line it all back up and screw it back together firmly.
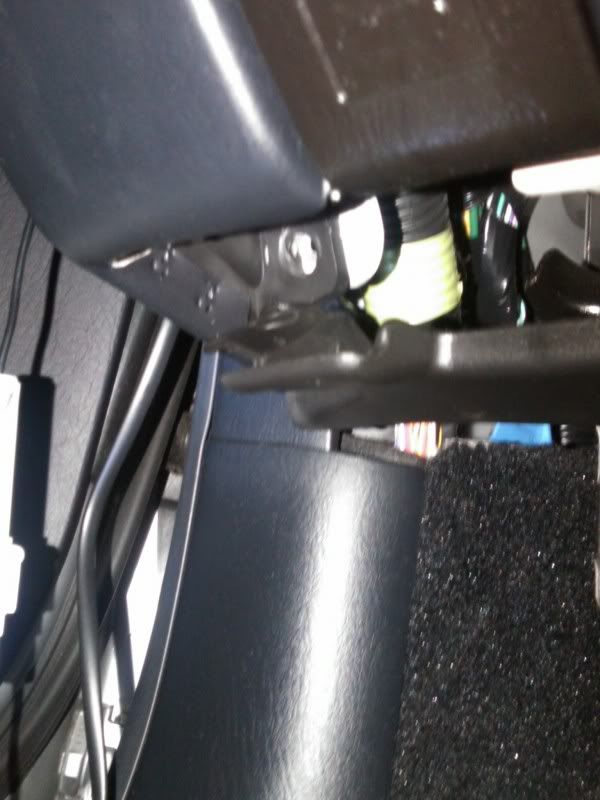
Plug your radar detector in and make sure it works, if not, you may need to sand down the metal hanger for the ground connector a little.
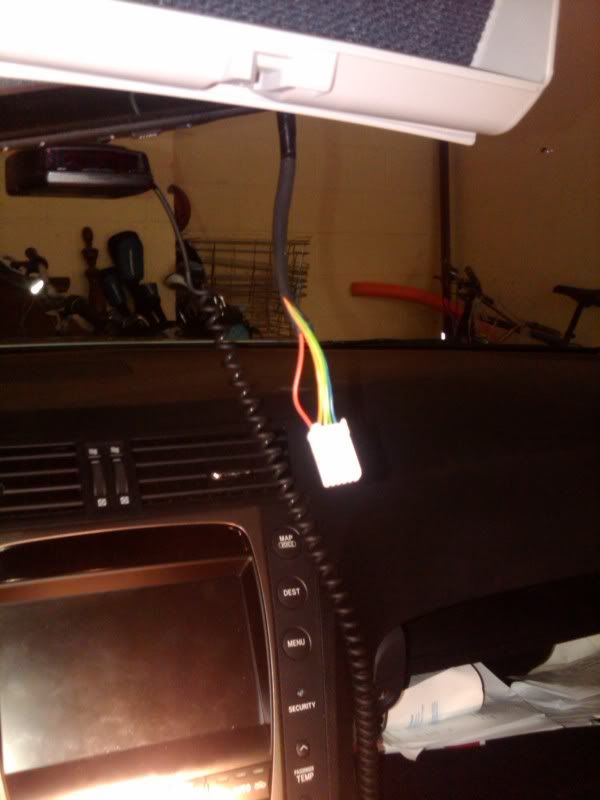
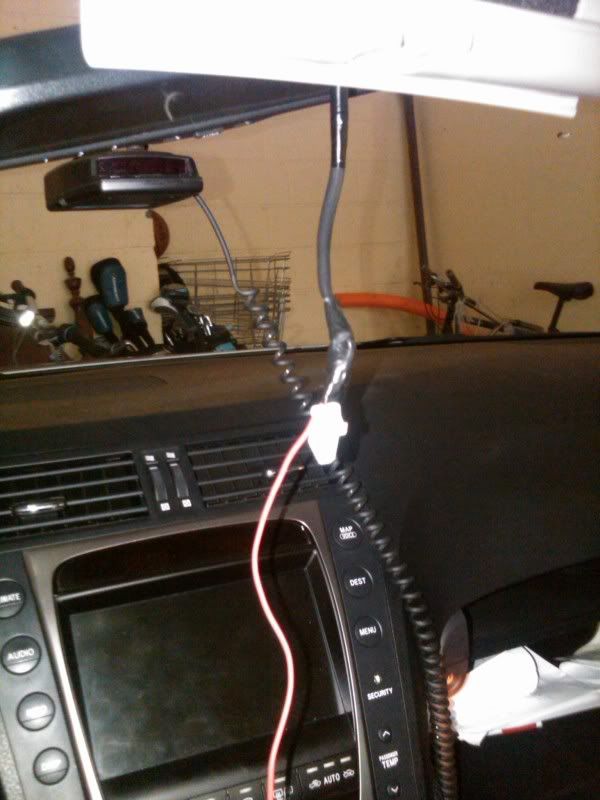
Now just route the telephone wire up the same way you brought the 12V tapped wire down and you're done. Just put everything back on the way it came off and you're finished.
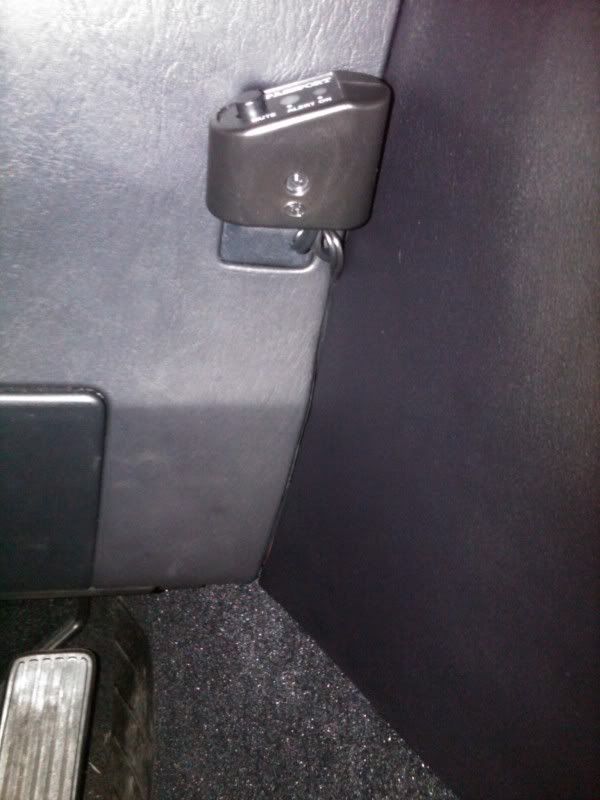
Here are some finished pics of my install
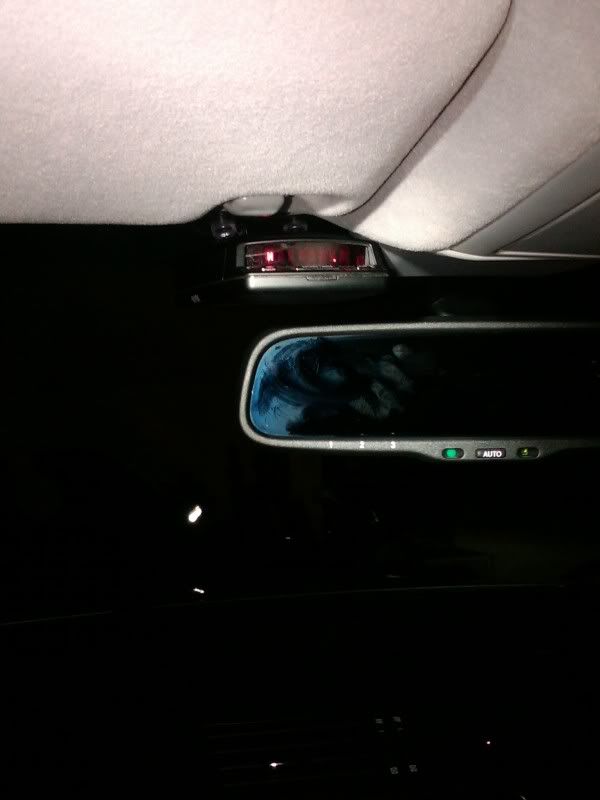
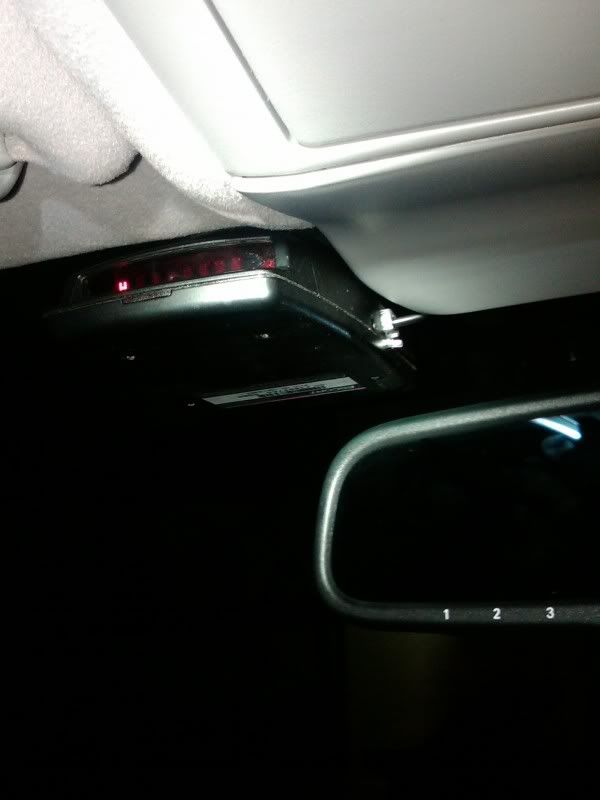
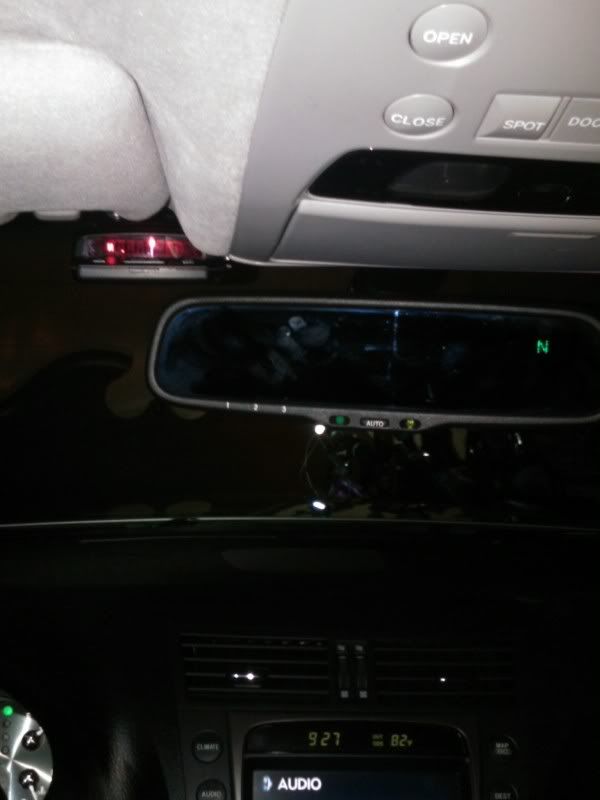
I expect this project should take ~ an hour to do. It took me longer because I tapped into the red wire and routed all the wires before realizing it didn't work... but in the end it was worth it. I love the look of the clean hidden install rather than the wire hanging down the middle of the windshield with the radar detector smack in the middle so cops and robbers can see it. Now its high enough for me to get range through suvs and out of sight so no one really knows I have one besides me.
I thought about trying to wire it to the fuse panel into the cigarette lighter fuse using a piggy back fuse harness but I realized the fuse for the power outlet and cigarette lighter are on the passanger side footwell. It was too far for my cord to reach to the passanger side and put the remote mute button on the driver side so I decided to tap into the rear view mirror power. Btw sorry in advance for the pictures, they were taken with my blackberry so theyre not great, but you'll get the jist.
Things you will need:
-Scissors
-Phillips Head Screwdriver (preferably with a longer neck)
-Small Flat Head Screwdriver
-Electrical Tape
-20 Gauge Wire
First you will need to remove the cover right infront of the sunglass holder. This cover is held on by two clips. Don't be overly aggressive trying to get this out. Mine has white stress marks on the plastic around the clip because I tried to rip it out like king kong
, luckily it didn't break. Next, open the sunglass holder and you will see two screw covers behind it. Take the flat head to pull off the covers and then unscrew the two screws.
The front of the dome control unit should be loose now and there are also two clips holding this in. Pull it down gently
Now find the white wire harness going from the rear view mirror and unplug it. The button to unclip it is on the bottom where my thumb is
Manuever the wire out of the headliner so it is just hanging down infront of you and locate the ORANGE wire. In the pictures it shows I cut the red wire which happened to be a .86V line...
the ORANGE wire is the 12V ignition wire you want to splice into.Splice into the orange wire however you want. The smartcord comes with a splicing connector and im sure almost all hardwire kits will come with one. I forgot about it and cut the orange wire in half, twisted all three wires together and wrapped it with electrical tape.
Before you go fully wrapping everything in electrical tape, test out the connection now to make sure your radar detector powers on. I took the screw from the sunglass holder and put it through the ground connector on the smartcord and shoved the screw into one of the holes in the ceiling above the dome control unit. If the radar detector turns on, awesome, if it doesn't take a break, grab a beer and troubleshoot.
Now we have to remove the a-pillar. Remove this very gently, it is not on there very tight considering there is an airbag behind it. I ripped it out like an idiot again and something flew out that was essentially a hair clip... Im not sure if lexus is using hair clips to build their cars or if one of my friends lost one...
maybe someone can chime in on where this goes or if it even belongs there. Route the wire through the headliner by just pulling it out and tucking the wire underneath and move it along to the a-pillar. BE CAREFUL not to touch anything metal in the a-pillar. I touched a metal bracket and sparks flew, ended up blowing the dome light fuse
. Route the 12V tapped wire near the existing wires so it wont interfere with the airbag.yeah don't touch this.
open the door and remove this panel, I dunno what to call it so here's a picture
Once you bring the tapped wire down to near the parking brake lever and tuck the wire behind the above panel toward the firewall. Now figure out where you want to mount the remote mute button. I chose to mount it on the little plastic grate cover underneath the start/stop button. Double sided tape did not want to stick onto anything else but this little cover. Once you figure out the mounting spot, route the wires under the plastic cover in the footwell toward the parking brake lever. Connect the 12V tapped wire here to smartcord harness either by splicing or using a female end connector. For grounding, I choose a small screw by the parking brake lever.
top leftish of pic is the screw
Once you get this unscrewed, pull back both plastic covers just enough so you can slide the ground connector from the smartcord harness underneath both of the covers. You want the connector to be touching the bare metal hanger, line it all back up and screw it back together firmly.
Plug your radar detector in and make sure it works, if not, you may need to sand down the metal hanger for the ground connector a little.
Now just route the telephone wire up the same way you brought the 12V tapped wire down and you're done. Just put everything back on the way it came off and you're finished.
Here are some finished pics of my install
I expect this project should take ~ an hour to do. It took me longer because I tapped into the red wire and routed all the wires before realizing it didn't work... but in the end it was worth it. I love the look of the clean hidden install rather than the wire hanging down the middle of the windshield with the radar detector smack in the middle so cops and robbers can see it. Now its high enough for me to get range through suvs and out of sight so no one really knows I have one besides me.
Last edited by Amalan; 06-20-10 at 12:54 PM.


Trending Topics

 02-23-12, 07:03 PM
#14
I had to tap into a different power source since the one above is a constant power source and is always on.. I just tapped into the ignition fuse for the power source and now I can just leave the RD there without having to worry about unplugging it when I leave the car..