When you click on links to various merchants on this site and make a purchase, this can result in this site earning a commission. Affiliate programs and affiliations include, but are not limited to, the eBay Partner Network.
What did you end up having to do in order to take the existing chrome pieces off? I'm the second owner of my gen 4 and noticed that the previous owner scuffed the bottom bumper ultimately causing the chrome to start peeling on the driver side chrome piece. My paint is the metallic black and wasn't sure if the black chrome would look good or not. Either way I need to replace at least one of these pieces and not sure how to get it off.
What did you end up having to do in order to take the existing chrome pieces off? I'm the second owner of my gen 4 and noticed that the previous owner scuffed the bottom bumper ultimately causing the chrome to start peeling on the driver side chrome piece. My paint is the metallic black and wasn't sure if the black chrome would look good or not. Either way I need to replace at least one of these pieces and not sure how to get it off.
scroll up and search the thread. The info is there. You'd have to take off the front bumper. Not that hard just take your time.
Thanks to this thread and the IS YouTube video, I was able to replace both of mine.
Rough steps below (following similar order to the video)
1. I took a picture of the current panel gapping, just to have a reference. Open hood and remove the two piece beauty cover. It's 11 push clips.
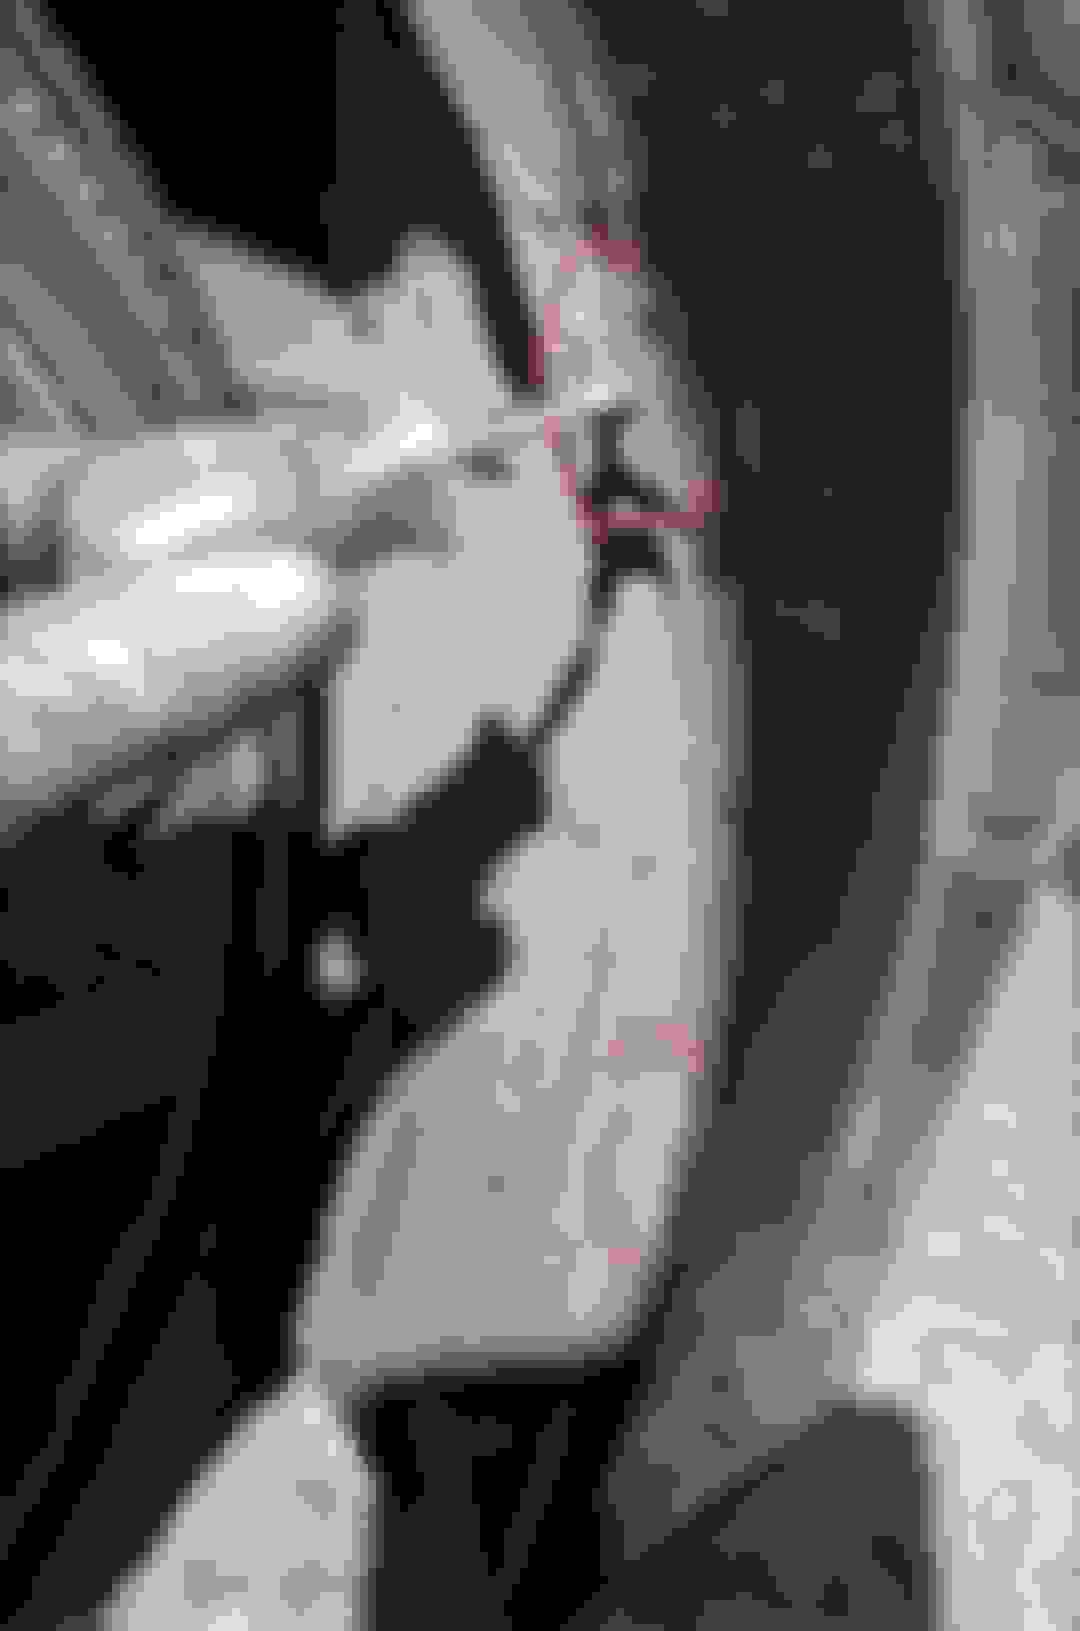
2. Remove two clips near each headlight (circled in red). I didn't have to remote the 10 mil or the Philips mentioned (they seem to be for the headlight). Circled in blue is the tab the bumper will "hold itself" in later steps.
3. Remove the 10mm black center bolt (mentioned in video). I went ahead and disconnected the radar connector as well (behind the badge)
4. Turn the steering wheel sharply one way. You only have to undo the two "flathead" clips in order to be able to pull liner enough to reach the 10mm. Twist the screw so it's horizontal and pull it out. I used a pick to lift the clip to unlatch it, but maybe pushing on it might also do the trick.
5. Peel back the liner enough to undo the 10 mm bolt. Repeat for other side. This is covered in the video.
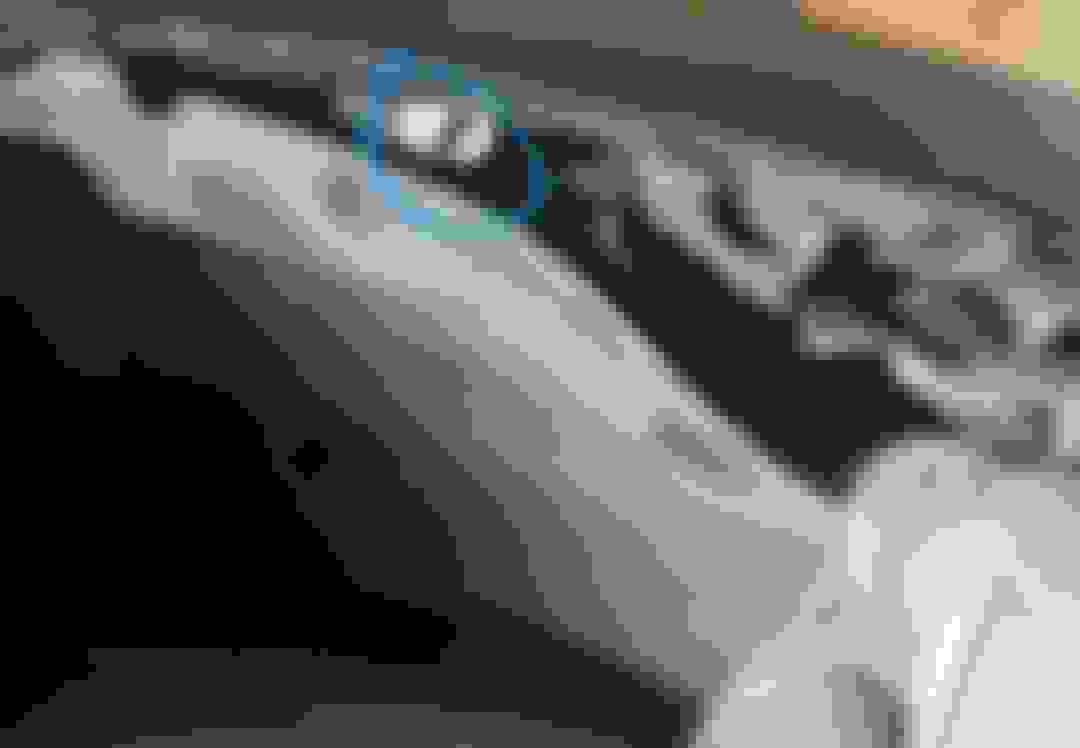
6. Undo the 10mm bolts on the underside. At least for mine, there were eight 10mm bolts that had washers, and two 10mm bolts with just a flange. So ten total bolts. Here is picture of half. Blue is the flange bolt and red are the bolts with washers.
7. Go by the liner and reach behind the bumper cover and pull outward. This is covered in the video. Do both sides.
8. Bumper will still be "held" in place by the tab from step 2. I laid down a movers blanket at this point. Lift the bumper off those and it should come loose.
9. You'll have to undo the parking sensor cable to let the bumper lay.
10. Remove the air dams as mentioned earlier in the thread. It's four Philips screws
11. Remove the six Philips screws behind the trim piece, as mentioned/circled earlier in the thread.
12. At this point, I think I ended up undoing the connectors to two of the parking sensors (in the grille) so I could have some more room. Circled in blue for one of the sides. I also started removing all the Philips screws around the edge and center in the grille to separate it from the number cover.
13. Once I got the grille separated, I found it useful to use a pick to separate the tabs so the chrome piece could come off.
I might have more pictures that I'll add tomorrow.


 05-13-21, 02:52 PM