When you click on links to various merchants on this site and make a purchase, this can result in this site earning a commission. Affiliate programs and affiliations include, but are not limited to, the eBay Partner Network.
So, my ‘13 GS350 F-Sport started to develop the dreaded moonroof rattle. After searching the forum I found the TSB related to the issue, and several posts about just replacing the seal. The seal was just $50 all in, so I ordered one and replaced it myself.
It was a really easy job. Only 30 minutes start to finish. I’ve seen videos where the whole glass panel was removed to change the seal. Then the whole tedious process to realigning and adjusting it. I didn’t go that route.
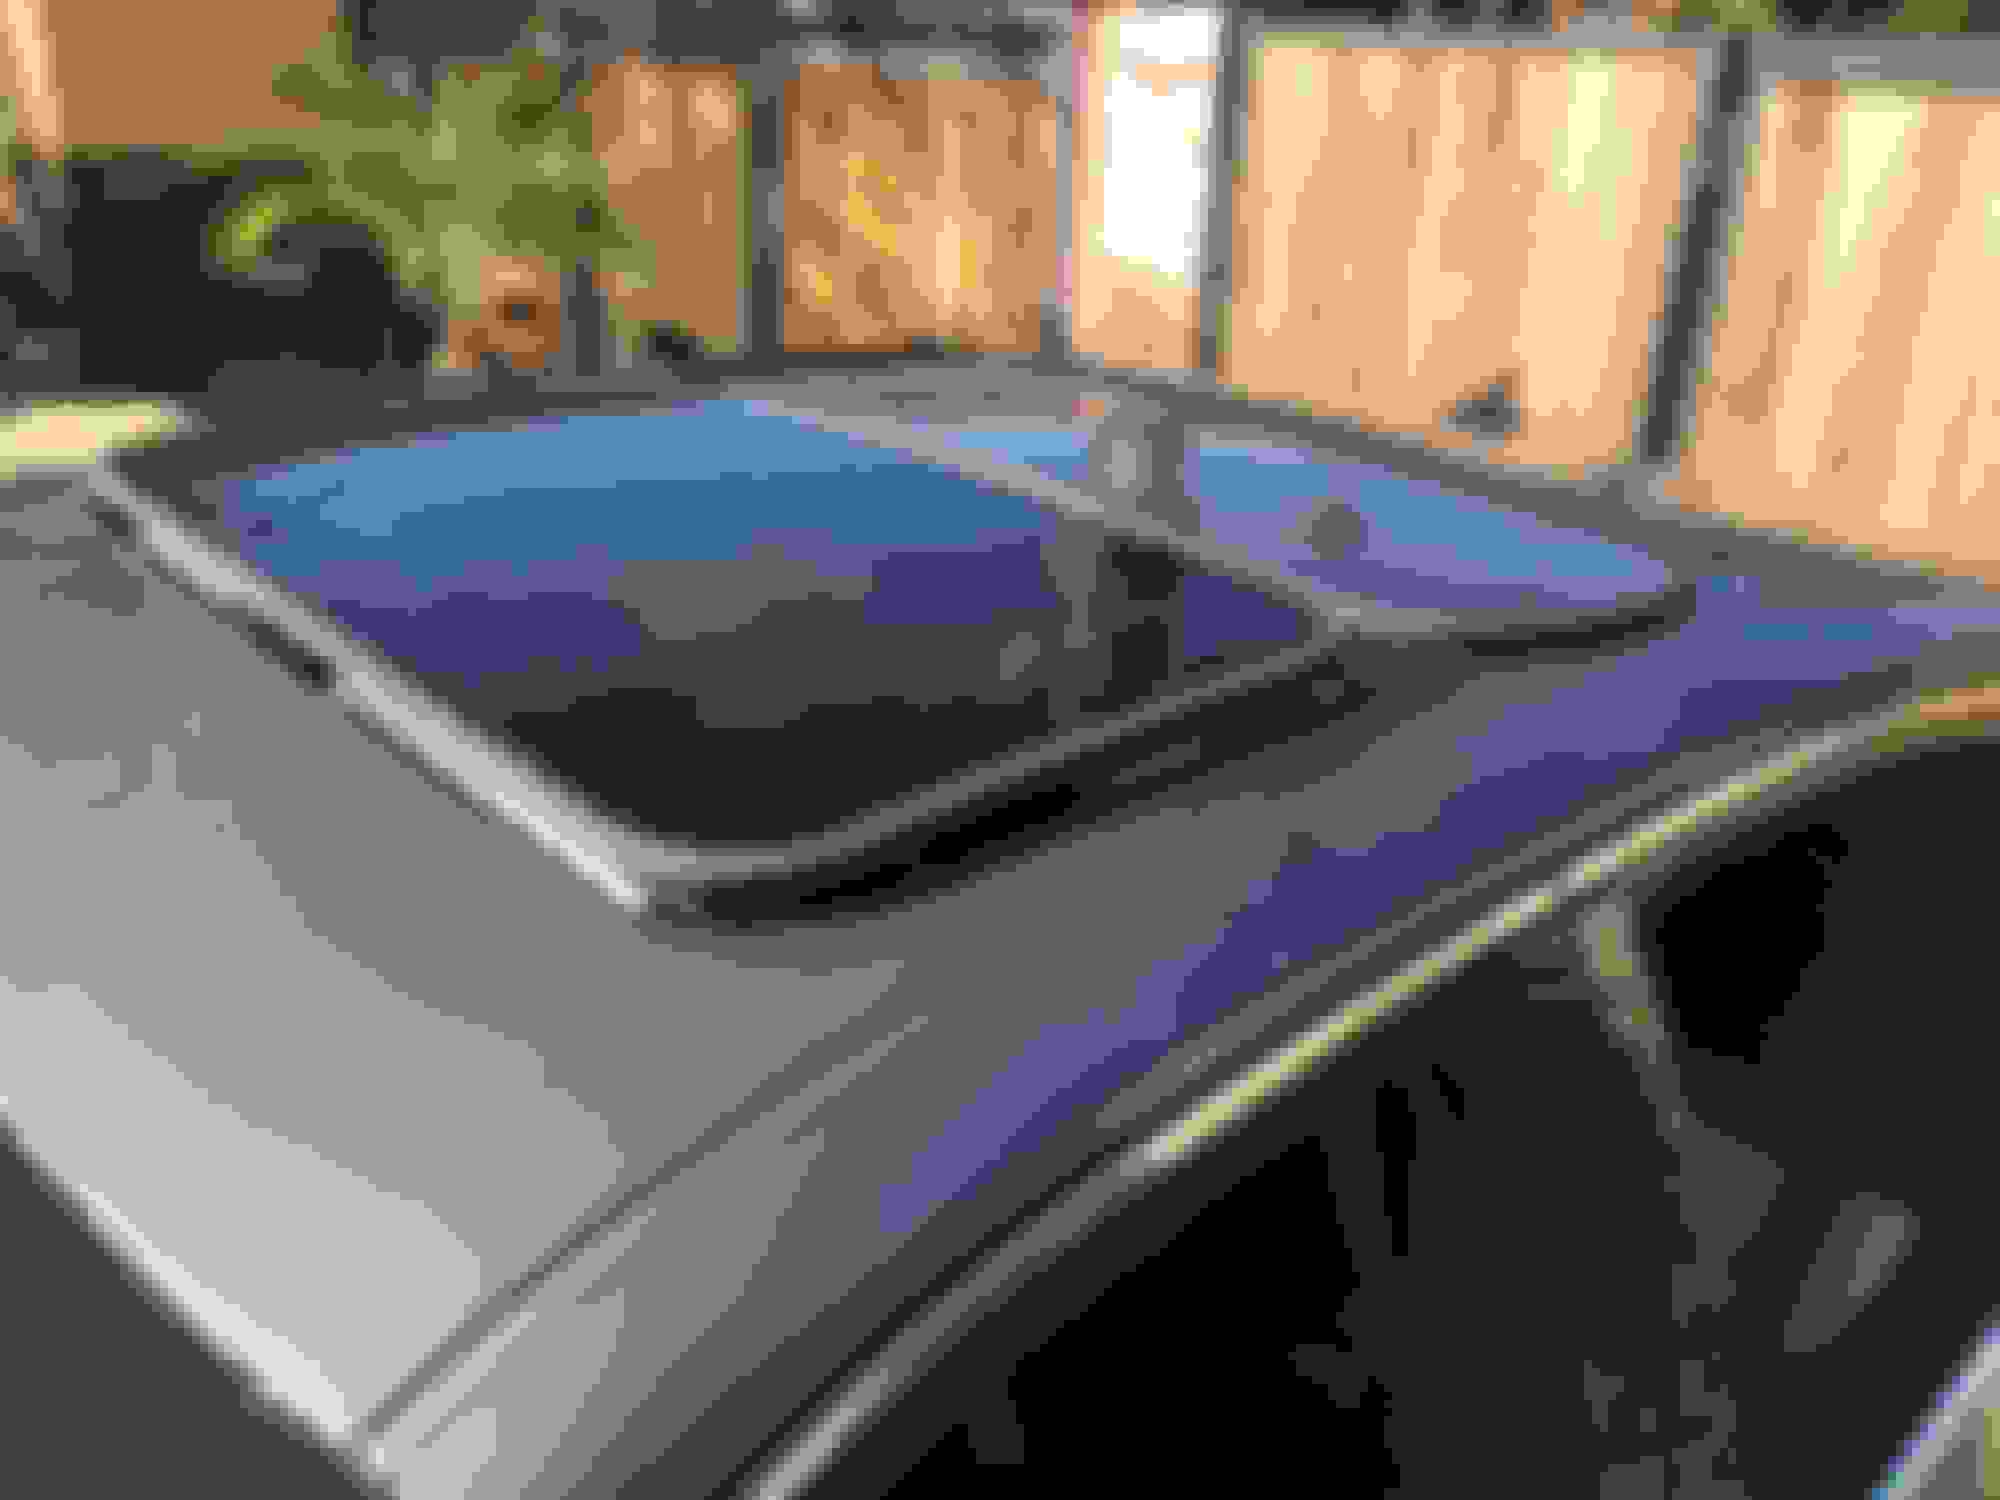
I only removed the 2 screws on the front corners of the panel and carefully tilted the front edge up to gain full access to the seal. I used the leather case from my multi tool to prop the front edge of the panel up while I worked on the seal. Removed and replaced the seal, dropped the panel back down, a simple adjustment to the front edge height, and done! The moonroof no longer rattles, clunks or ticks over every little imperfection in the road.
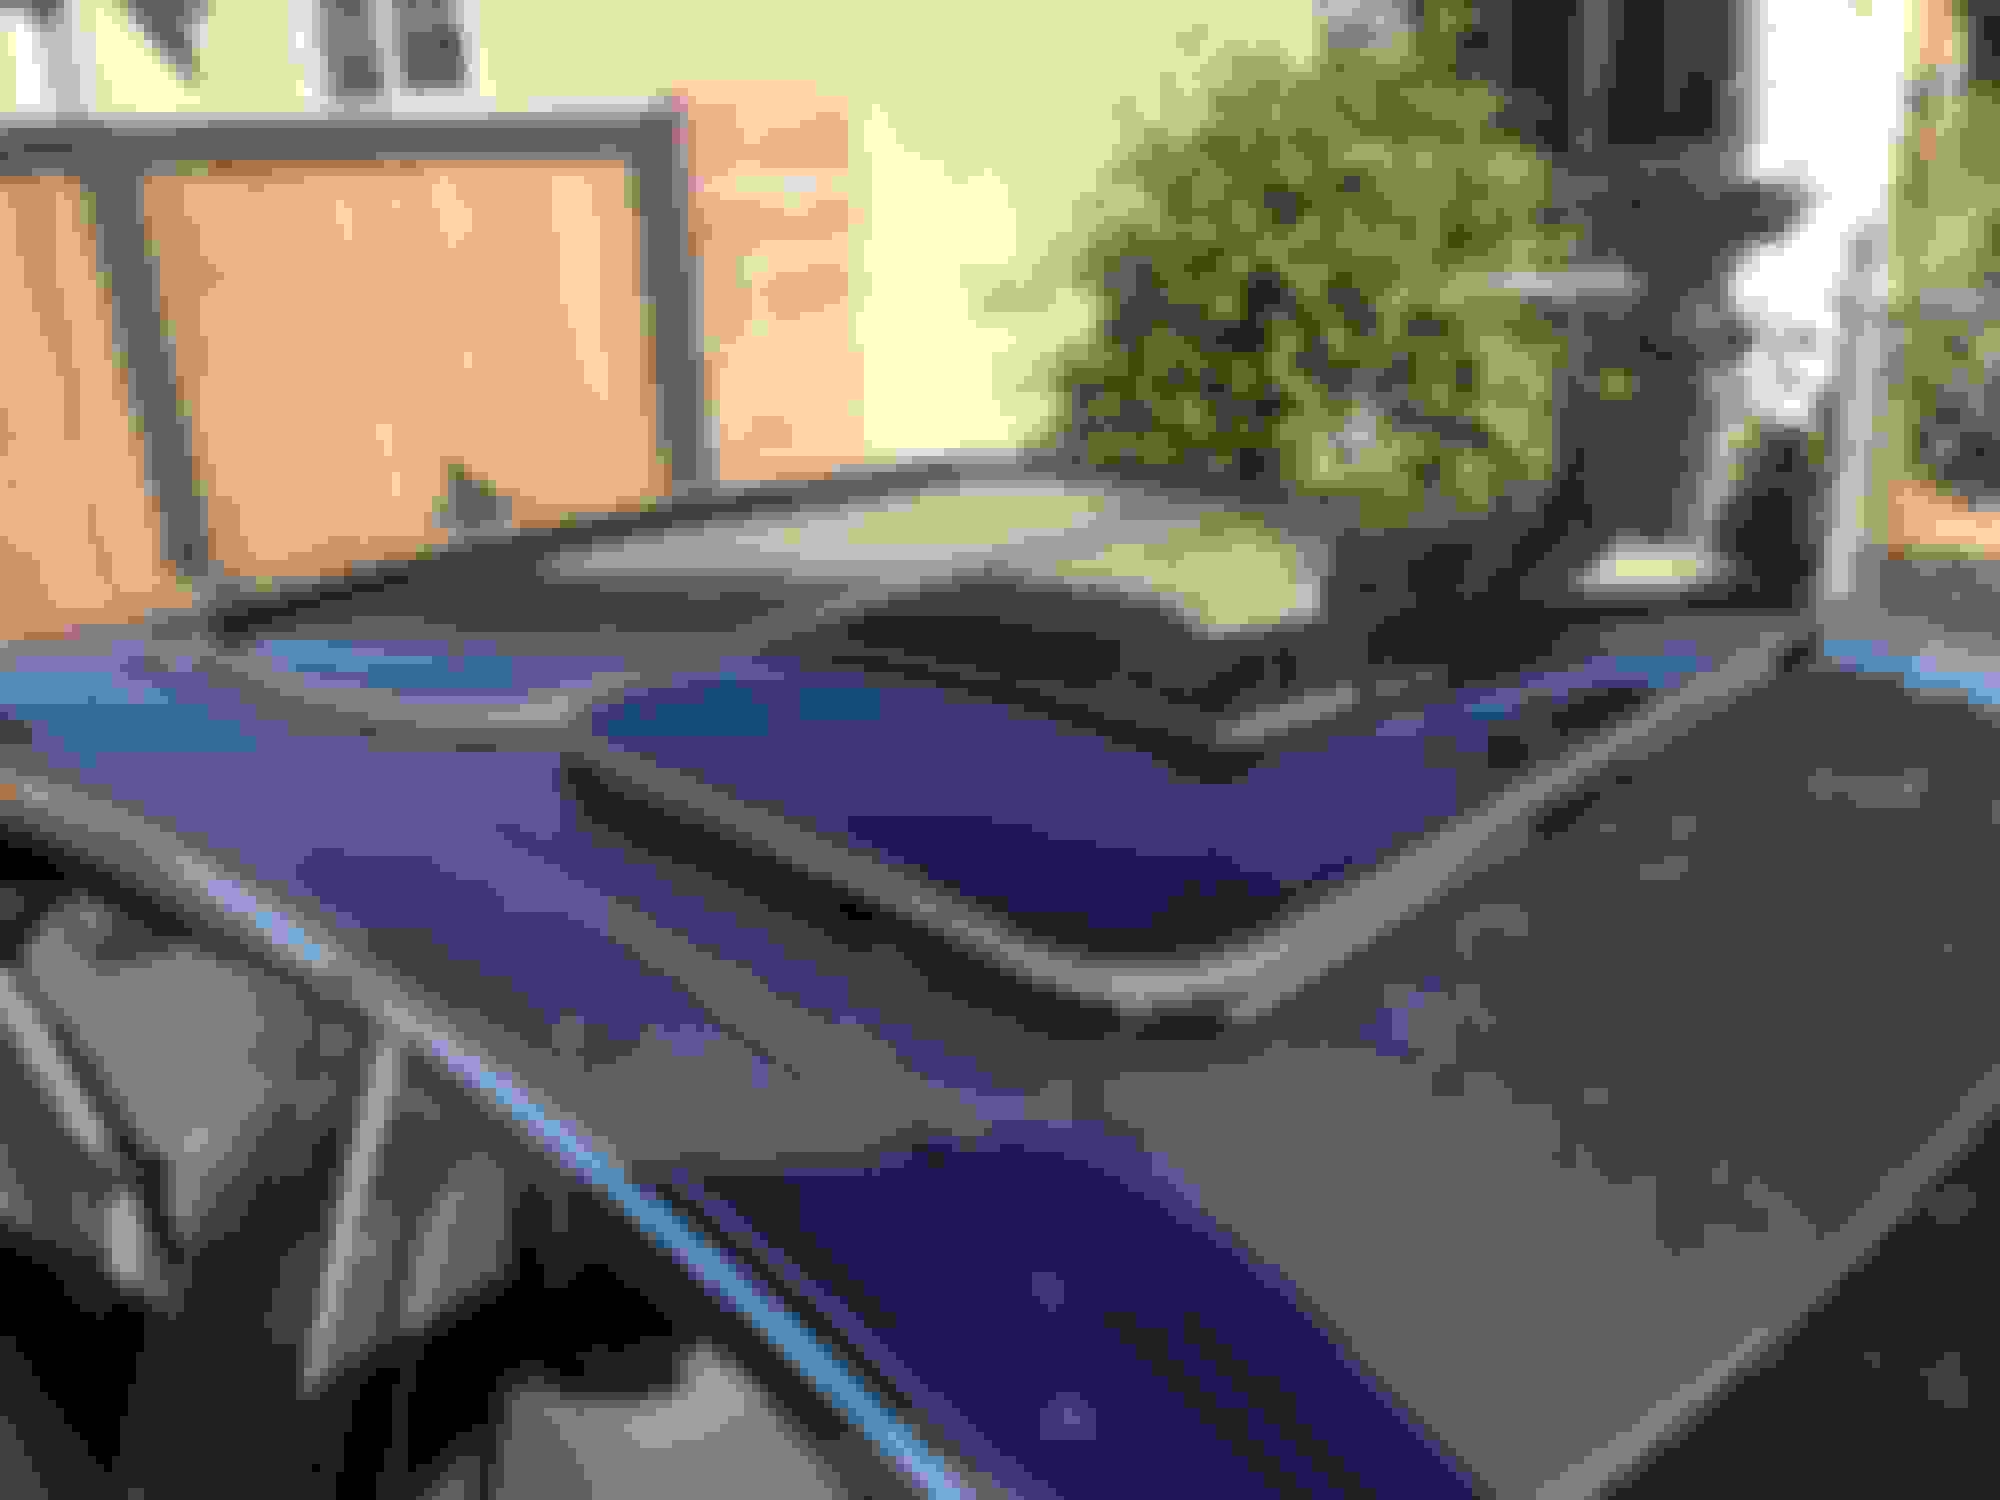
Dont mind the dirt. I figured if I’m going to put finger prints all over the roof, it’s better to do it before a car wash.
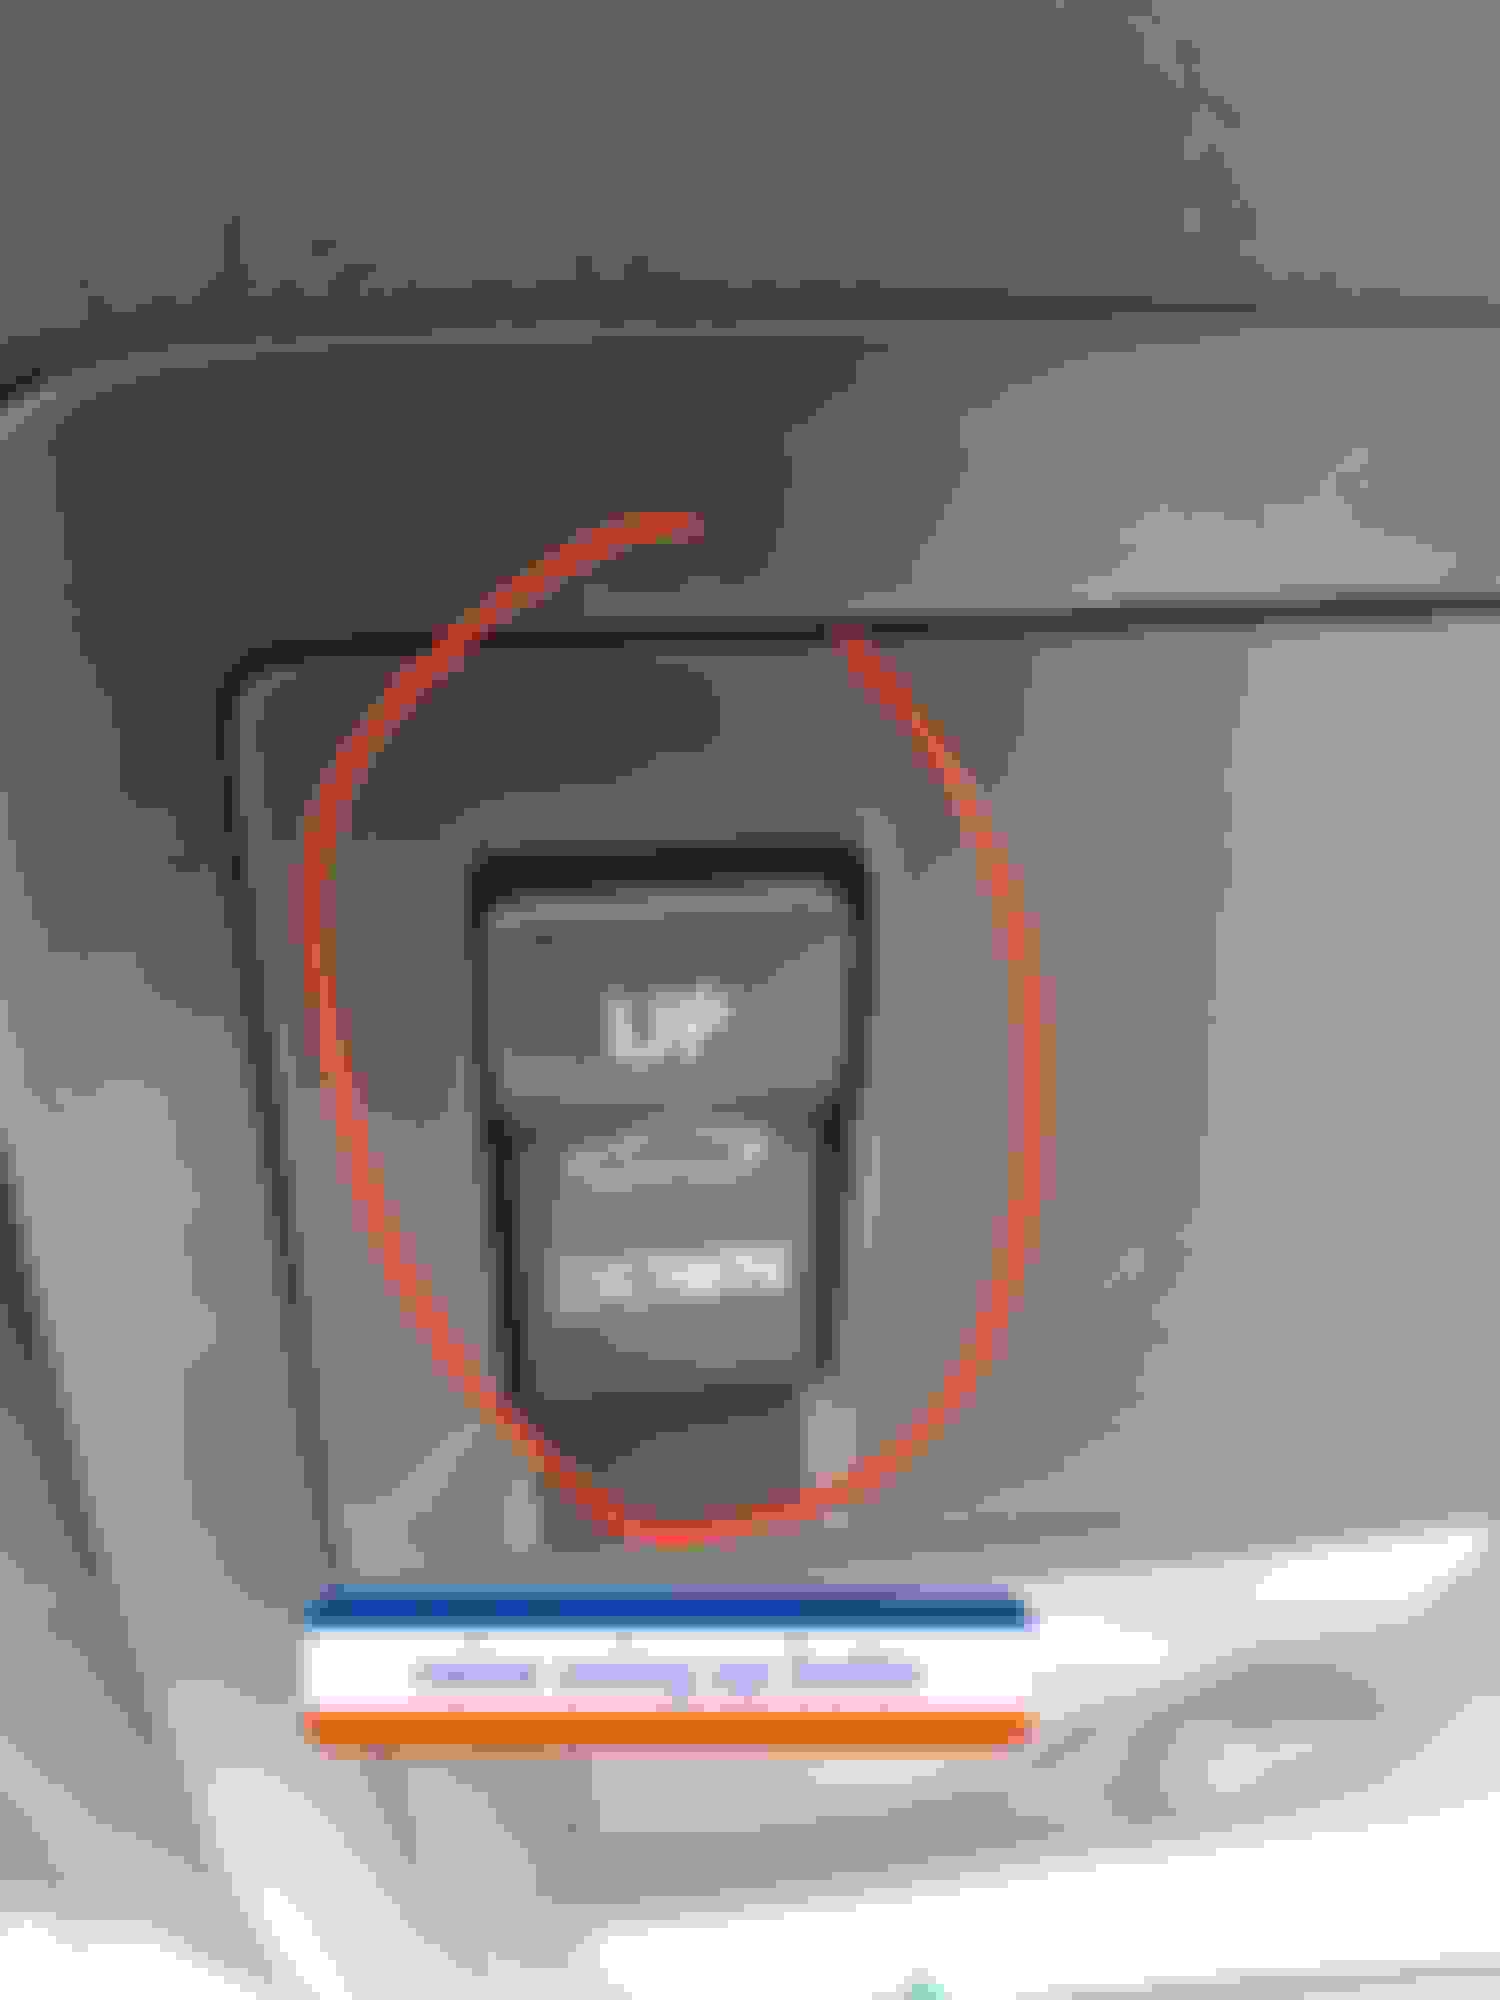
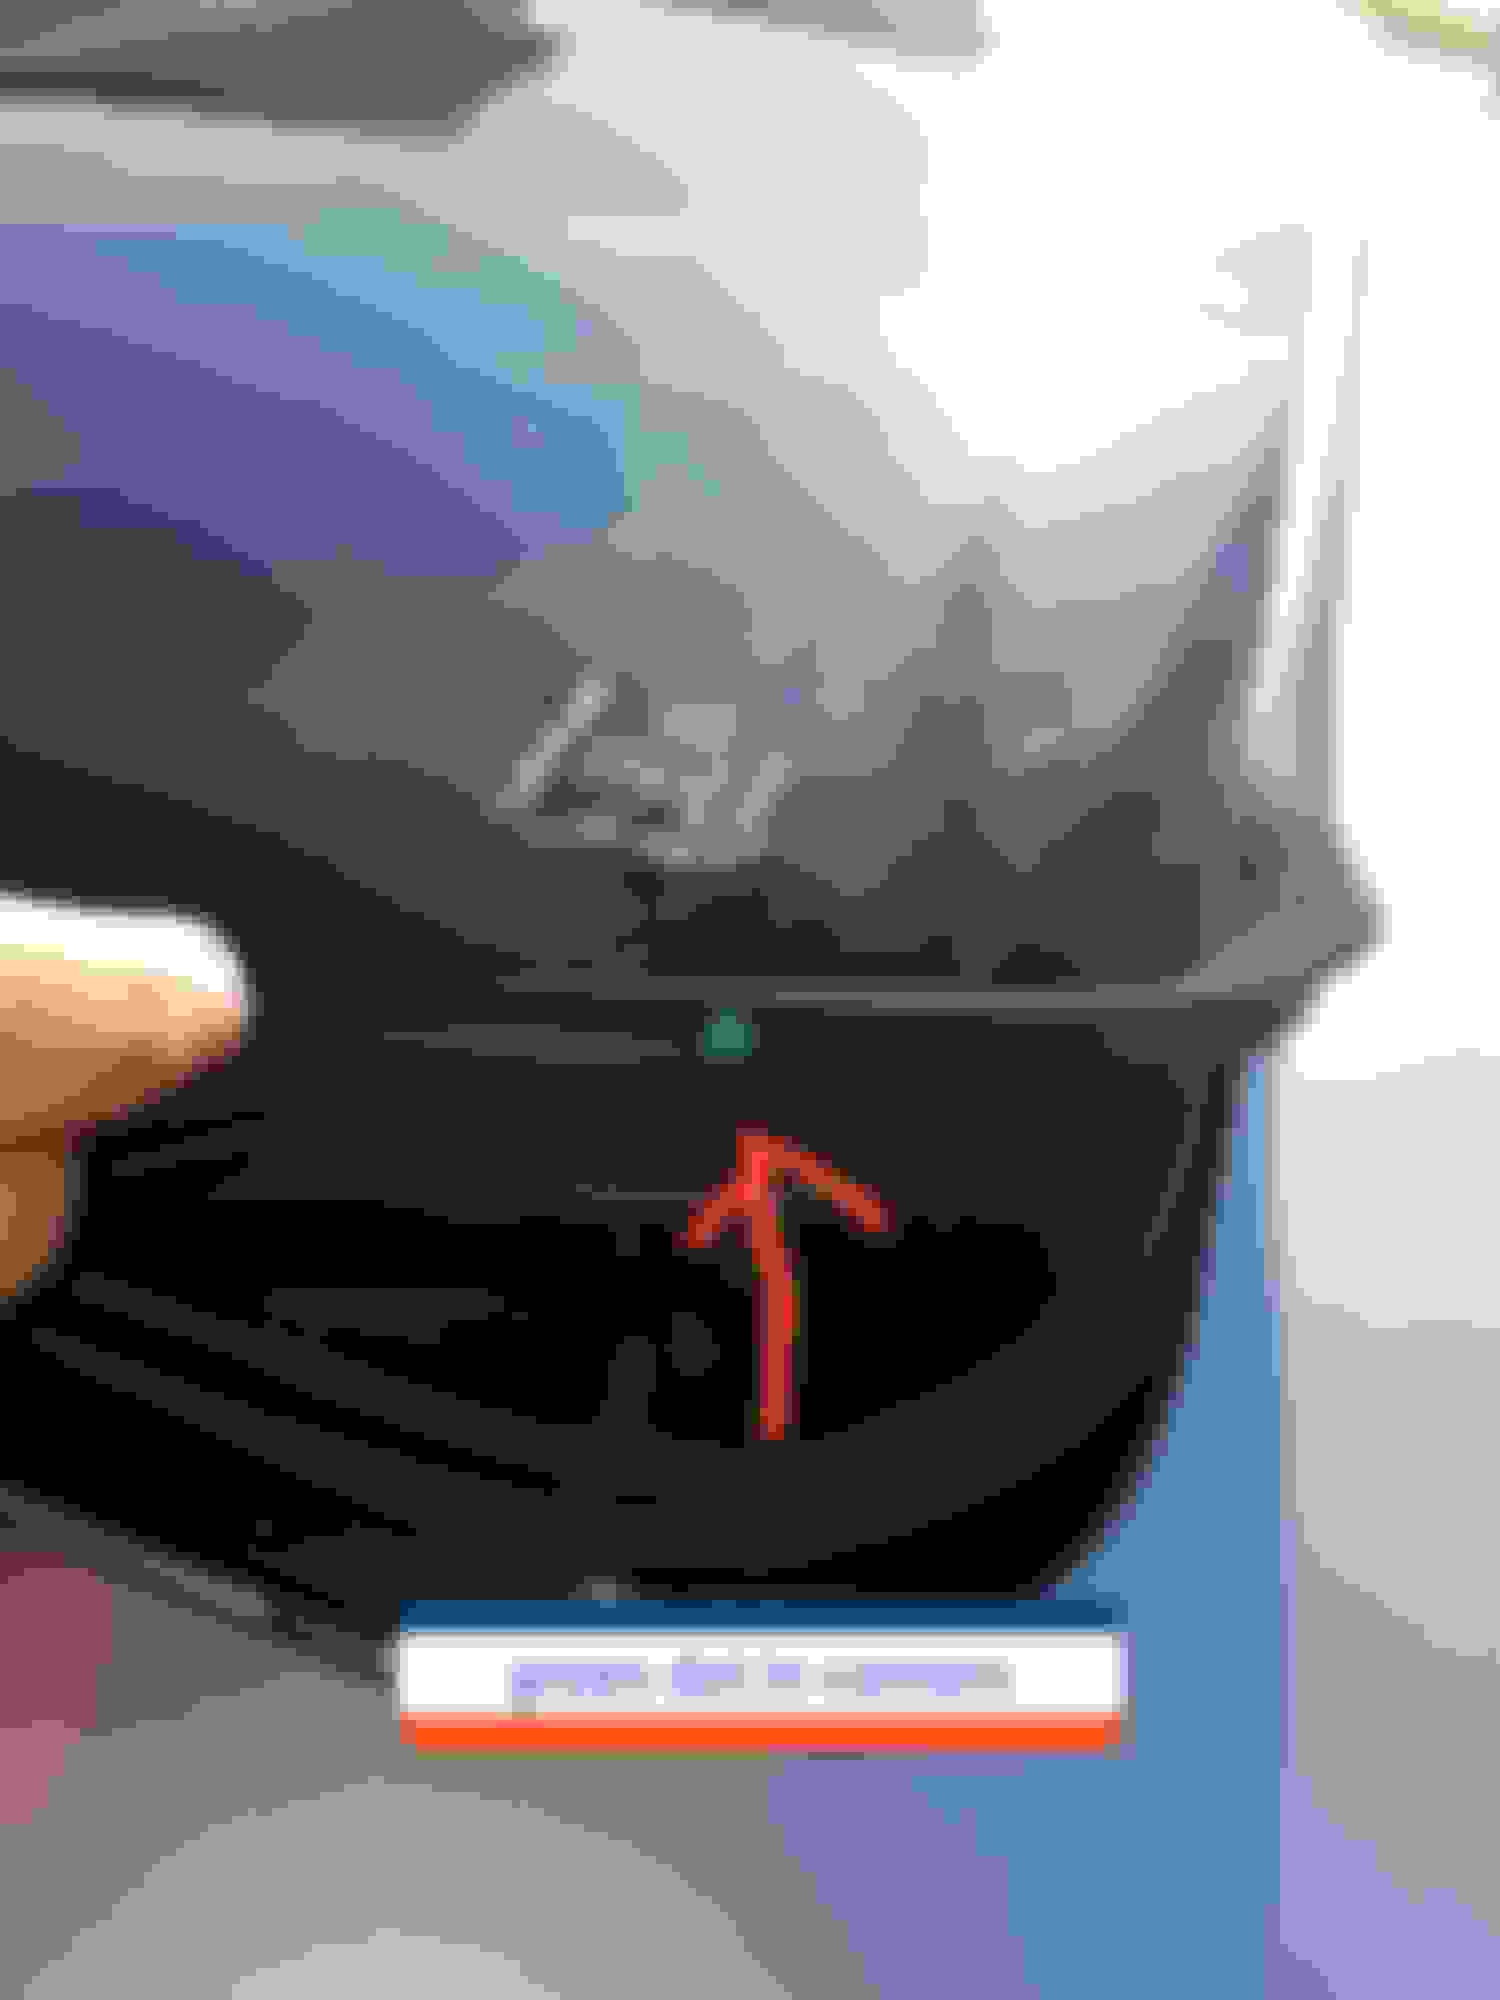
For added color and detail, see the following pics. First raise up the sunroof which exposes the accordian cover.
you can pull the accordian cover from the bottom or the top. i chose the bottom for ease. this then allows for access to the front torx bolt. this is the exposed torx screw. this is the same screw that you will have to readjust after putting the torx screw back in. i had to readjust these screws a couple times on each side to reposition the sunroof front height. I started from a corner pick one. you will notice a green dot that is on all 4 corners once the seal is removed. make note that there is a small indentation on the rear middle portion of the seal to help you align the seal properly instead of placing it on the front portion of the sunroof.To install the trim you will have fiddle with it to push it over the glass. once you have done a small portion the rest will go on readily. just be aware that the screws will need to be adjusted once you put the screws back in. not sure how the original poster avoided this step. it definitely beats doing the rears also. in total it took about 35-40 min total including front screw adjusting.
kudos to the original poster here and in the old thread. my clunking is now gone for 50 bucks.
Great post, thanks!
I had this problem on my CPO vehicle and Lexus replaced the cables, though I still get some slight rattling once in a while. I am guessing they didnt replace the seal and id much rather go this route than having them drop the headliner once again...
Originally Posted by uibalnme
So, my ‘13 GS350 F-Sport started to develop the dreaded moonroof rattle. After searching the forum I found the TSB related to the issue, and several posts about just replacing the seal. The seal was just $50 all in, so I ordered one and replaced it myself.
It was a really easy job. Only 30 minutes start to finish. I’ve seen videos where the whole glass panel was removed to change the seal. Then the whole tedious process to realigning and adjusting it. I didn’t go that route.
I only removed the 2 screws on the front corners of the panel and carefully tilted the front edge up to gain full access to the seal. I used the leather case from my multi tool to prop the front edge of the panel up while I worked on the seal. Removed and replaced the seal, dropped the panel back down, a simple adjustment to the front edge height, and done! The moonroof no longer rattles, clunks or ticks over every little imperfection in the road.
Dont mind the dirt. I figured if I’m going to put finger prints all over the roof, it’s better to do it before a car wash.
I had a rattle in my sun roof from the first week after I bought my RC-F I wonder if it was the same as posted here.
I finally had enough and had the dealership fix it, they replaced the entire sunroof assembly, so I have no idea if it was just the seal or if it was something different.. mine rattled when opened or closed, it groaned when it opened (sounded like the seal sticking to the car body) and the sunroof seemed to vibrate at highway speeds when it was fully opened (RC-F roof slides open to the outside of the vehicle)
For added color and detail, see the following pics. First raise up the sunroof which exposes the accordian cover.
you can pull the accordian cover from the bottom or the top. i chose the bottom for ease. this then allows for access to the front torx bolt. this is the exposed torx screw. this is the same screw that you will have to readjust after putting the torx screw back in. i had to readjust these screws a couple times on each side to reposition the sunroof front height. I started from a corner pick one. you will notice a green dot that is on all 4 corners once the seal is removed. make note that there is a small indentation on the rear middle portion of the seal to help you align the seal properly instead of placing it on the front portion of the sunroof.To install the trim you will have fiddle with it to push it over the glass. once you have done a small portion the rest will go on readily. just be aware that the screws will need to be adjusted once you put the screws back in. not sure how the original poster avoided this step. it definitely beats doing the rears also. in total it took about 35-40 min total including front screw adjusting.
kudos to the original poster here and in the old thread. my clunking is now gone for 50 bucks.
Last edited by protocol71; 11-13-17 at 10:29 PM.
Reason: props
The original poster doesn't have that middle indentation rear sticking up, are you sure, it's supposed to install that way with the indentation exposed?
Originally Posted by protocol71
For added color and detail, see the following pics. First raise up the sunroof which exposes the accordian cover.
you can pull the accordian cover from the bottom or the top. i chose the bottom for ease. this then allows for access to the front torx bolt. this is the exposed torx screw. this is the same screw that you will have to readjust after putting the torx screw back in. i had to readjust these screws a couple times on each side to reposition the sunroof front height. I started from a corner pick one. you will notice a green dot that is on all 4 corners once the seal is removed. make note that there is a small indentation on the rear middle portion of the seal to help you align the seal properly instead of placing it on the front portion of the sunroof.To install the trim you will have fiddle with it to push it over the glass. once you have done a small portion the rest will go on readily. just be aware that the screws will need to be adjusted once you put the screws back in. not sure how the original poster avoided this step. it definitely beats doing the rears also. in total it took about 35-40 min total including front screw adjusting.
kudos to the original poster here and in the old thread. my clunking is now gone for 50 bucks.

 11-05-17 | 04:39 PM