VAIS Technology ULM-81 install
 06-03-18, 02:39 PM
#1
Driver
Thread Starter

It's quite easy, maybe a 1/2 hour. I've had my ULM-81 for 6 months now and haven't had the opportunity to install it, but I was hardwiring my Valentine1 and dash cam today, so I decided to do this as well. I'd imagine that all of their products install similarly.
Beforehand you'll need a dash removal tool kit, I only used one of the tools which was the one similar to a butter knife. You'll also need some double sided tape to mount the box to the area behind the head unit, a 10mm socket/wrench/extension and an eye glass small flathead screwdriver.
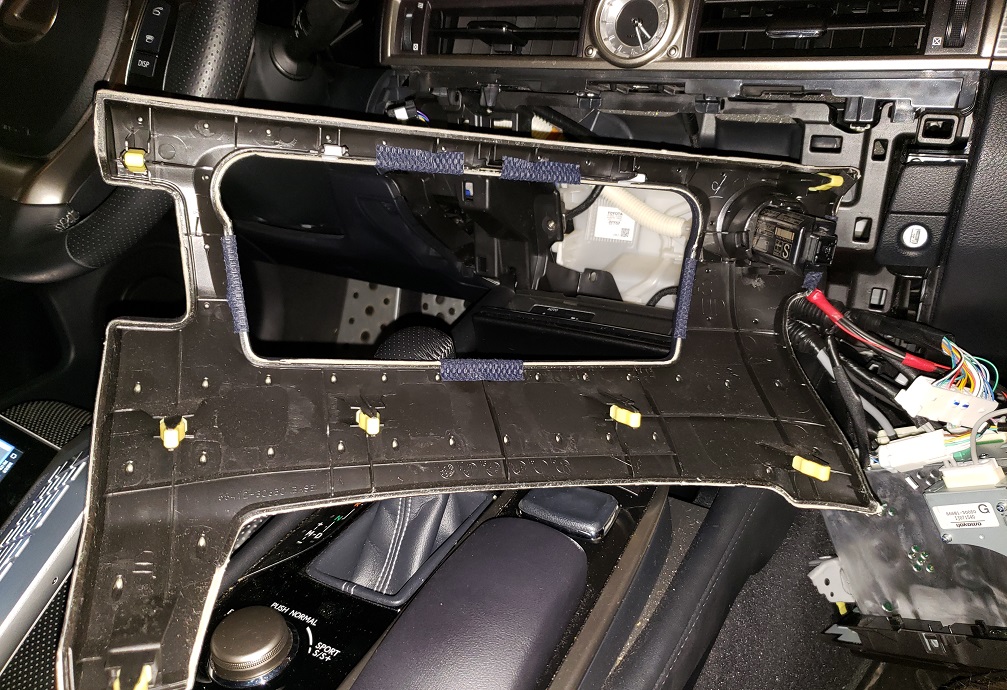
First remove the encapsulating dash piece around the radio, as you can see in the pictures it's only held in by spring loaded clips (I love you Toyota) and with the dash removal pieces you can get it out without damaging it with skill and patience, I started prying by the glove box button and once I had that corner loose I could work it around the entire edge.
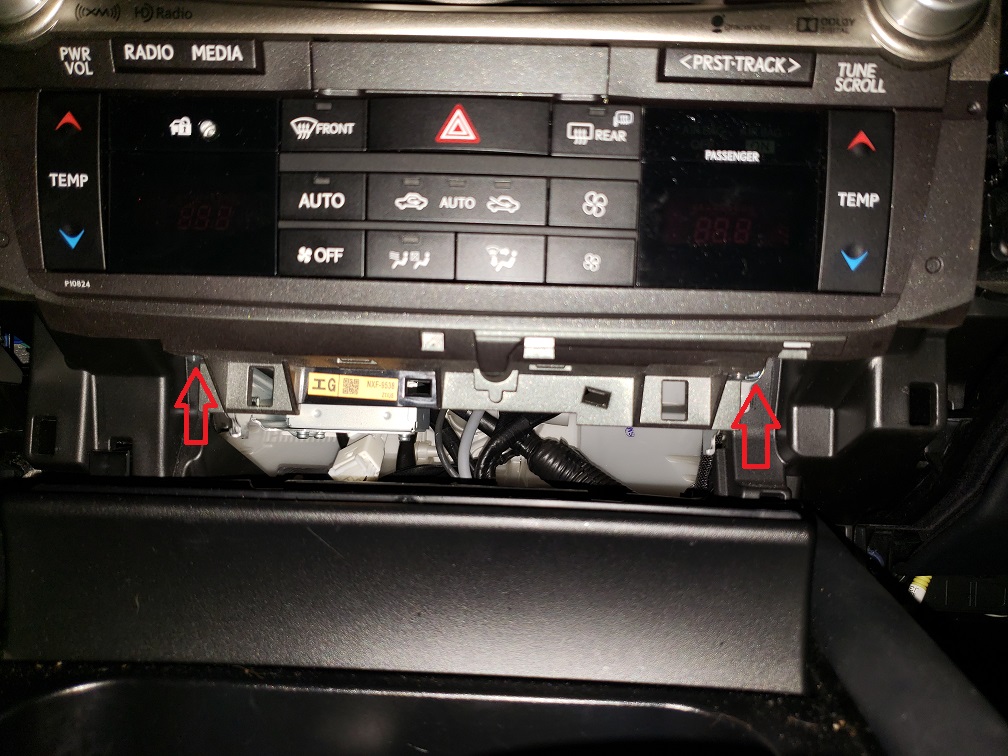
After pulling the dash cover off, there are (2) 10mm bolts that hold the radio/hvac in and they are at the bottom of the unit, unbolt them and pull the radio out.
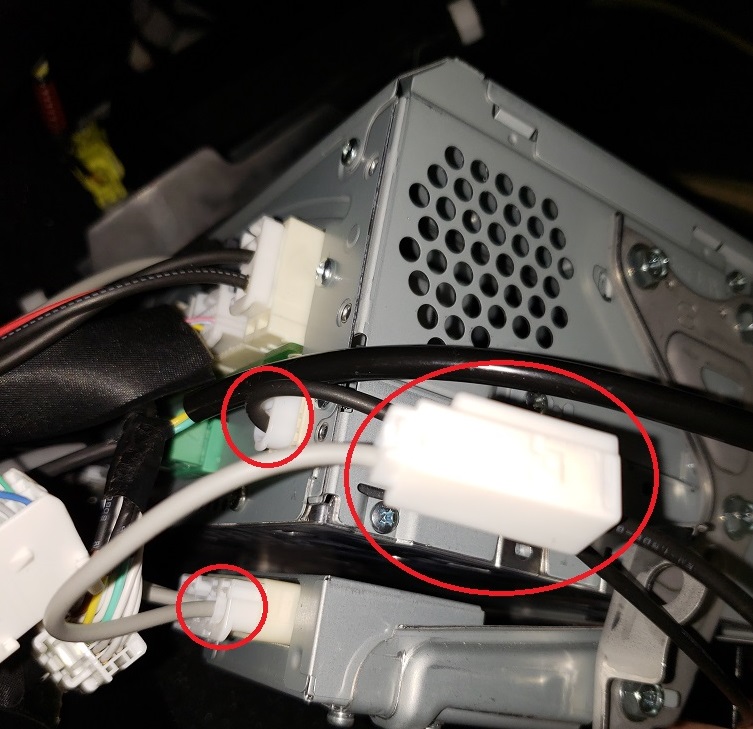
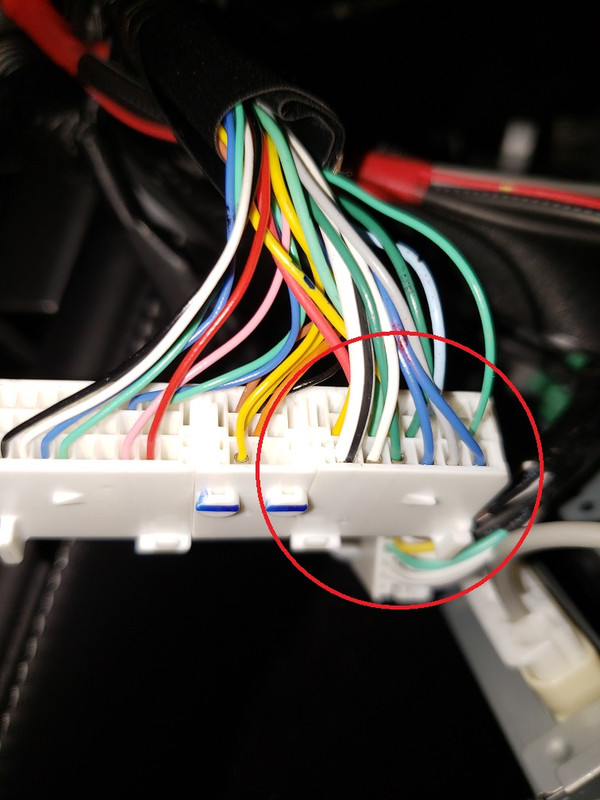
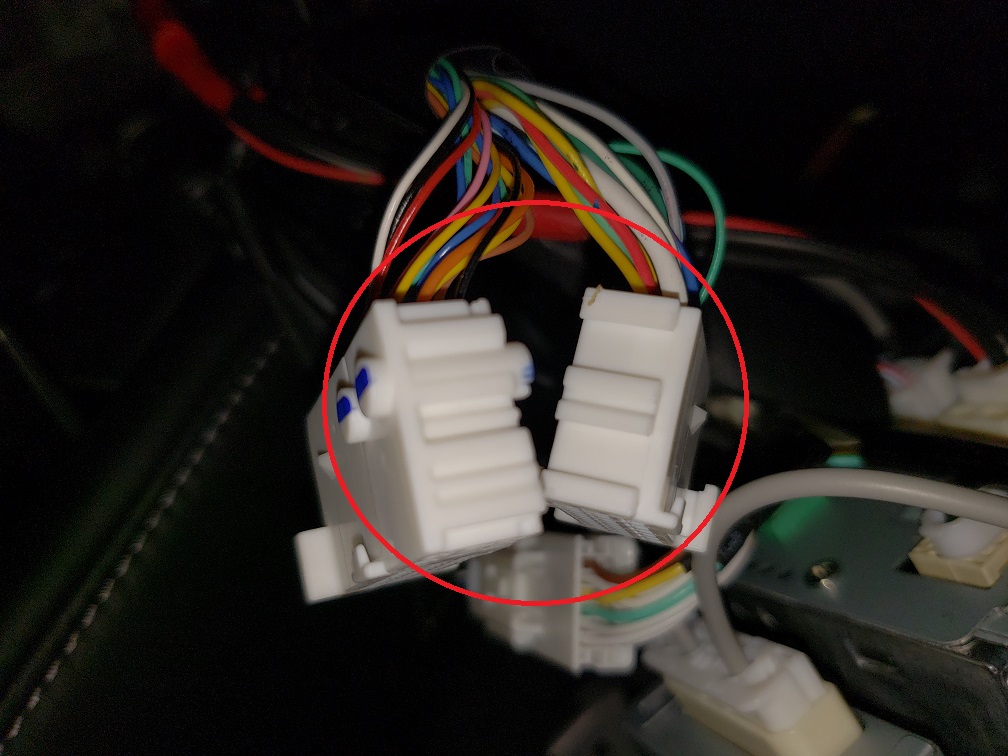
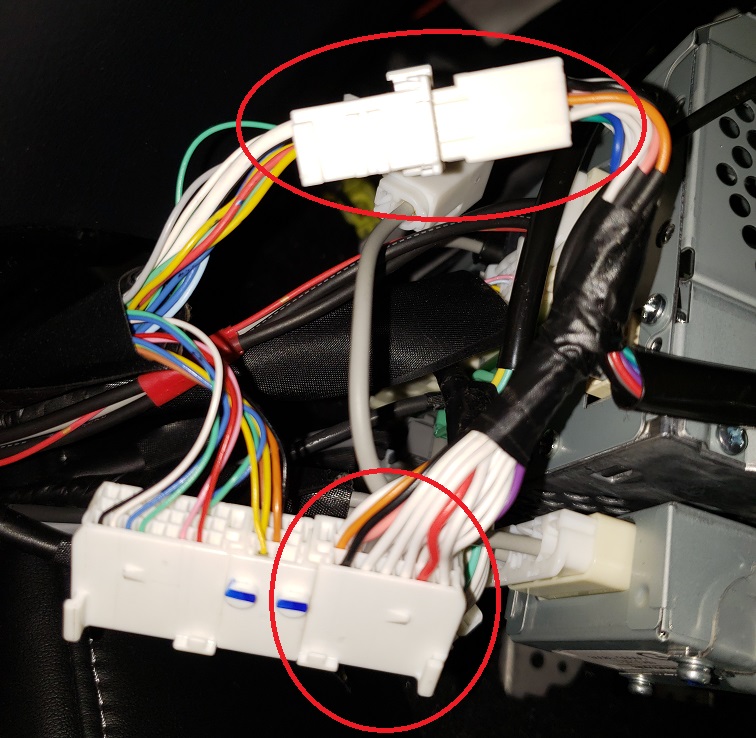
Now you have access to all of the connectors into the back of the unit, you'll need to bridge the gps antenna which is in the bottom right if you are facing the back of the unit, one of the connectors in the center/center right (not pictured, I forgot) and the most complicated connector that has a locking pivot mechanism on it. The connector is white and the locking pivot mechanism is grey (as you can see in the pictures) and the connectors interlock by sliding away from each other or into each other vertically. The instructions from VAIS aren't great, so hopefully the pictures I have taken will help.
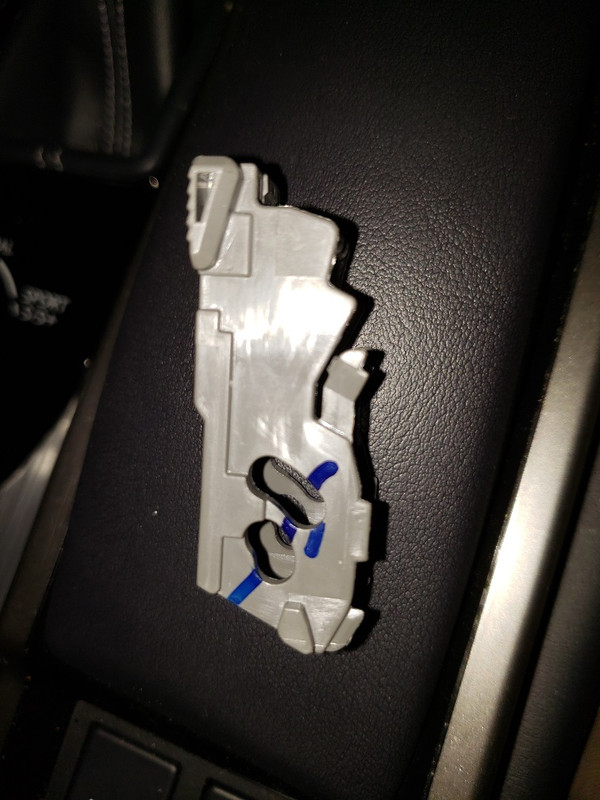
Pry off of the grey pivoting locking mechanism with the small flathead and then you can disassemble the connector it locks into place. After you have done this, you'll "T" into it as you've done with the other 2 connections. Slide the matching factory female connector out of place and slide the new VAIS female connector in its place and then snap the grey pivoting locking mechanism back in place, be sure to be careful with it and to see how the edges of it slide under another piece of the connector (pay attention or snap a picture of it before you disassemble it). After you slide the VAIS femae connector in place, then press the VAIS male connector into the factory female connector and the connector portion is done (see pictures).
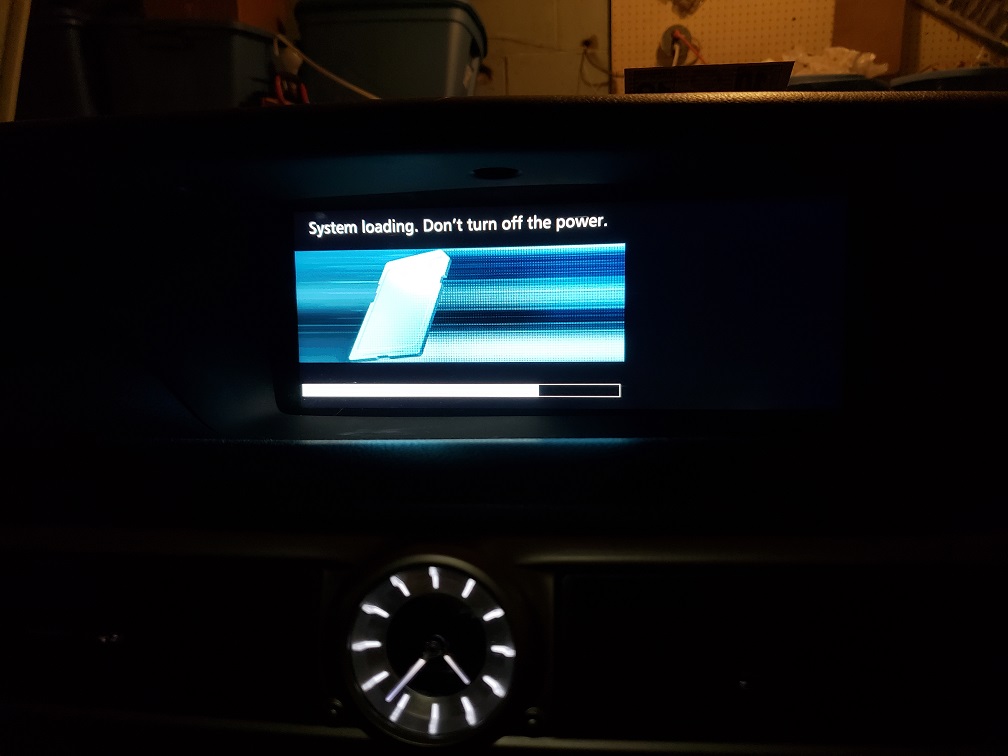
Now reassemble the dash the opposite way you took it apart and you are done. If you want to remove some of the limitations while at speed, follow the VAIS instructions attached to this post for that as well. If you see a blue/blank screen for 10 seconds and then the last picture, don't panic, that's normal. Enjoy!
Beforehand you'll need a dash removal tool kit, I only used one of the tools which was the one similar to a butter knife. You'll also need some double sided tape to mount the box to the area behind the head unit, a 10mm socket/wrench/extension and an eye glass small flathead screwdriver.
First remove the encapsulating dash piece around the radio, as you can see in the pictures it's only held in by spring loaded clips (I love you Toyota) and with the dash removal pieces you can get it out without damaging it with skill and patience, I started prying by the glove box button and once I had that corner loose I could work it around the entire edge.
After pulling the dash cover off, there are (2) 10mm bolts that hold the radio/hvac in and they are at the bottom of the unit, unbolt them and pull the radio out.
Now you have access to all of the connectors into the back of the unit, you'll need to bridge the gps antenna which is in the bottom right if you are facing the back of the unit, one of the connectors in the center/center right (not pictured, I forgot) and the most complicated connector that has a locking pivot mechanism on it. The connector is white and the locking pivot mechanism is grey (as you can see in the pictures) and the connectors interlock by sliding away from each other or into each other vertically. The instructions from VAIS aren't great, so hopefully the pictures I have taken will help.
Pry off of the grey pivoting locking mechanism with the small flathead and then you can disassemble the connector it locks into place. After you have done this, you'll "T" into it as you've done with the other 2 connections. Slide the matching factory female connector out of place and slide the new VAIS female connector in its place and then snap the grey pivoting locking mechanism back in place, be sure to be careful with it and to see how the edges of it slide under another piece of the connector (pay attention or snap a picture of it before you disassemble it). After you slide the VAIS femae connector in place, then press the VAIS male connector into the factory female connector and the connector portion is done (see pictures).
Now reassemble the dash the opposite way you took it apart and you are done. If you want to remove some of the limitations while at speed, follow the VAIS instructions attached to this post for that as well. If you see a blue/blank screen for 10 seconds and then the last picture, don't panic, that's normal. Enjoy!

The following 3 users liked this post by gte:

 11-25-18, 07:15 AM
#5

It's quite easy, maybe a 1/2 hour. I've had my ULM-81 for 6 months now and haven't had the opportunity to install it, but I was hardwiring my Valentine1 and dash cam today, so I decided to do this as well. I'd imagine that all of their products install similarly.
Beforehand you'll need a dash removal tool kit, I only used one of the tools which was the one similar to a butter knife. You'll also need some double sided tape to mount the box to the area behind the head unit, a 10mm socket/wrench/extension and an eye glass small flathead screwdriver.
First remove the encapsulating dash piece around the radio, as you can see in the pictures it's only held in by spring loaded clips (I love you Toyota) and with the dash removal pieces you can get it out without damaging it with skill and patience, I started prying by the glove box button and once I had that corner loose I could work it around the entire edge.
After pulling the dash cover off, there are (2) 10mm bolts that hold the radio/hvac in and they are at the bottom of the unit, unbolt them and pull the radio out.
Now you have access to all of the connectors into the back of the unit, you'll need to bridge the gps antenna which is in the bottom right if you are facing the back of the unit, one of the connectors in the center/center right (not pictured, I forgot) and the most complicated connector that has a locking pivot mechanism on it. The connector is white and the locking pivot mechanism is grey (as you can see in the pictures) and the connectors interlock by sliding away from each other or into each other vertically. The instructions from VAIS aren't great, so hopefully the pictures I have taken will help.
Pry off of the grey pivoting locking mechanism with the small flathead and then you can disassemble the connector it locks into place. After you have done this, you'll "T" into it as you've done with the other 2 connections. Slide the matching factory female connector out of place and slide the new VAIS female connector in its place and then snap the grey pivoting locking mechanism back in place, be sure to be careful with it and to see how the edges of it slide under another piece of the connector (pay attention or snap a picture of it before you disassemble it). After you slide the VAIS femae connector in place, then press the VAIS male connector into the factory female connector and the connector portion is done (see pictures).
Now reassemble the dash the opposite way you took it apart and you are done. If you want to remove some of the limitations while at speed, follow the VAIS instructions attached to this post for that as well. If you see a blue/blank screen for 10 seconds and then the last picture, don't panic, that's normal. Enjoy!
 11-25-18, 11:55 AM
#7


Thread
Thread Starter
Forum
Replies
Last Post