When you click on links to various merchants on this site and make a purchase, this can result in this site earning a commission. Affiliate programs and affiliations include, but are not limited to, the eBay Partner Network.
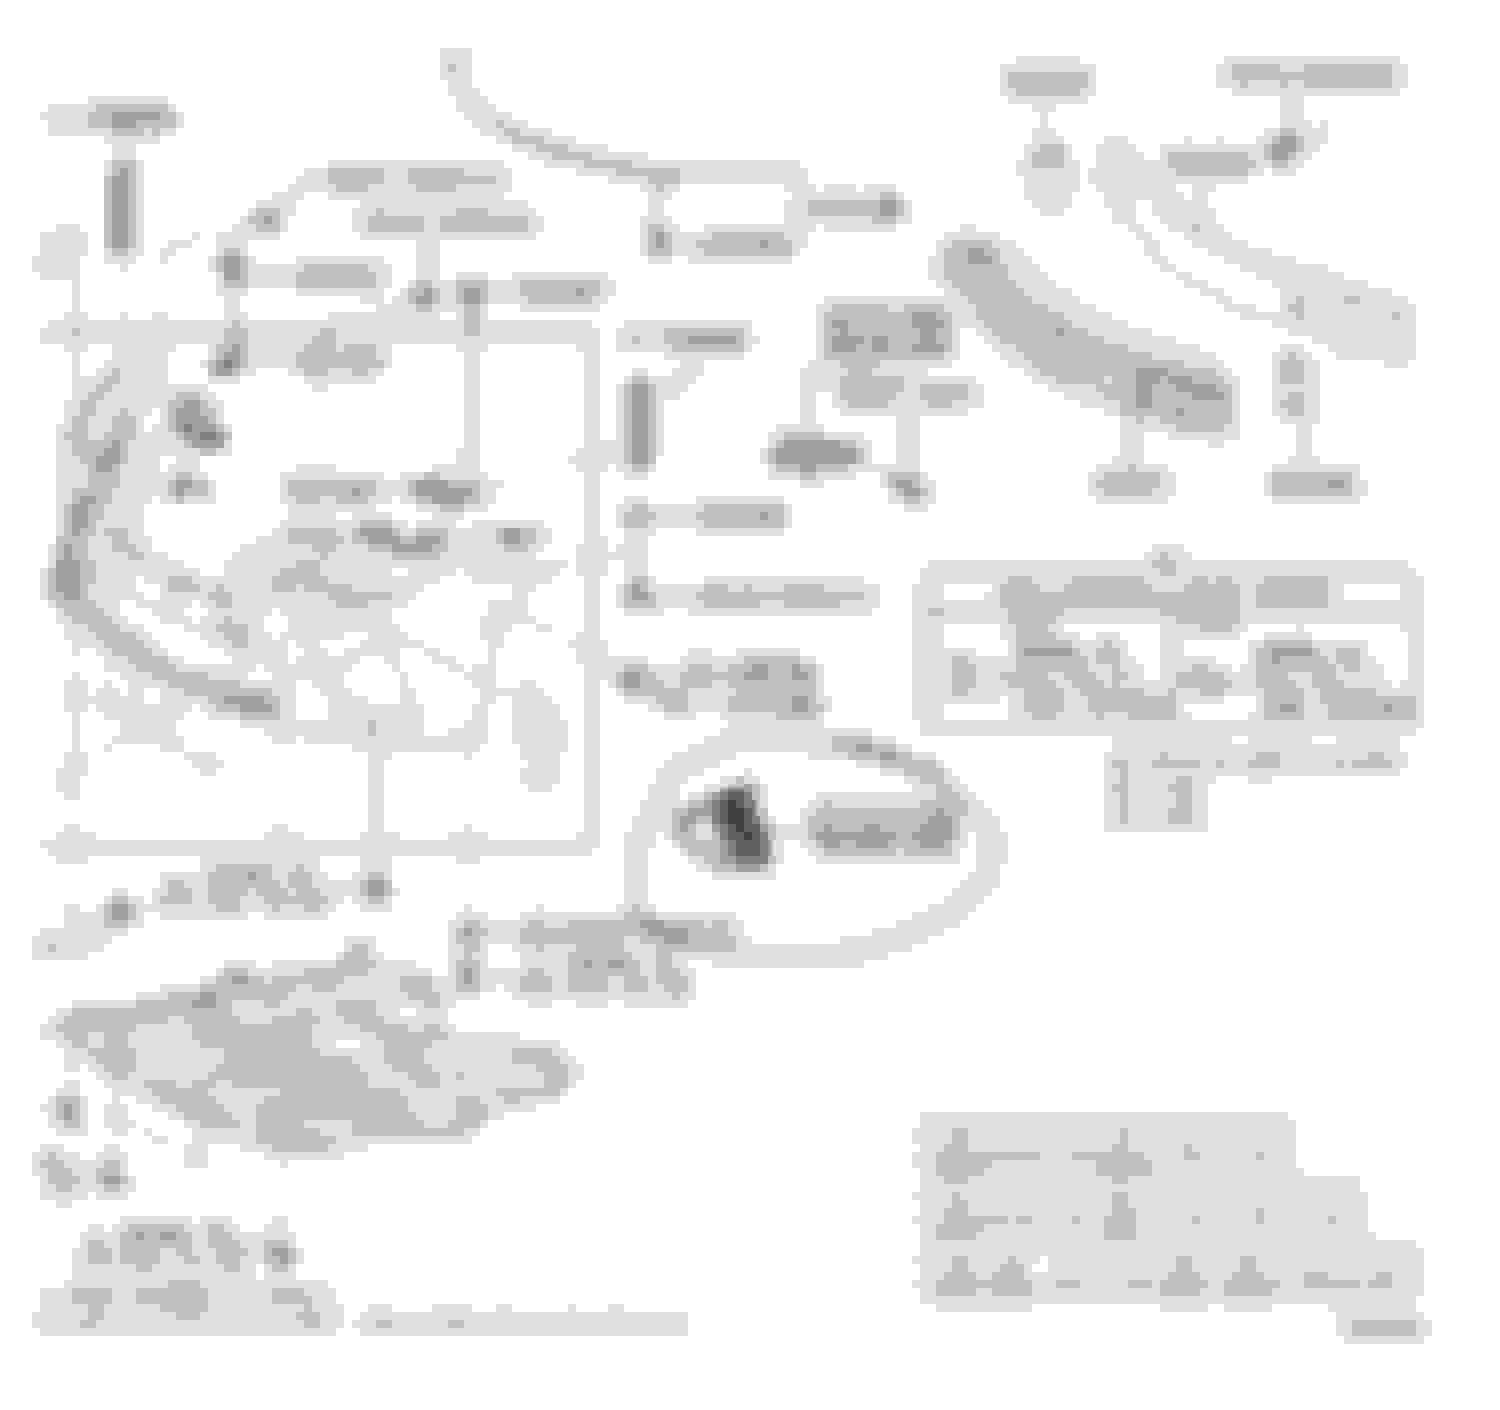
Looking to upgrade the GARNISH, RADIATOR GRILLE on 2016 GS F, but wanted to see if if anyone has a step by step on removing and replacing the grilles. I added a picture with item circled. Thanks in advance.
Engine Bay Trim (x8) Push and Pull Clips
Push down every clip and you can easily pull the trim out.
Would recommend slowly removing the trim to prevent clips from jumping out and falling into engine bay.
(x1) 10mm
10mm bolt hidden under engine bay trim
(x1) 10mm
Same 10mm bolt from previous photo; it is connected to the bumper.
Disconnect plug that leads to the Lexus emblem, or it can be done later.
(x4) Pop and pull clips
After removing engine bay trim, remove 4 pop and pull clip
Wheel Well (x1) 10mm bolt behind fender liner
(x1) Twist and Pull fender clip
(x1) Pop and Pull fender clip
10mm Bolt
Starting from either side, 10mm bolt below either front fender.
(x10) 10mm Bolts
Continue to remove all 10mm bolts starting from either side.
(x10) 10mm Bolts
Recommend using impact gun to remove for added convenience
Step 1. Pull side of bumper out, closest to the wheel well. Step 2. Place hand near the radiator vent area for leverage and pull upwards towards you Step 3. After removing the engine bay trim and 4 pop and pull clips, lift the corner of the spindle grill to fully free the bumper
Stay cautious when pulling out the bumper to prevent small chance of damage.
(x3) Electrical Plugs
Depending on whether you disconnected the center plug previously, keep some grip on the bumper and disconnect the plugs, then set down.
(x7) Tabs (interior)
These tabs hold onto the radiator grill using hook style edges.

 11-20-21, 06:53 PM