
Where Have you Mounted Your Radar Detector!
 01-08-13 | 02:58 PM
#16
Driver
Joined: Dec 2012
Posts: 155
Likes: 0
From: New York
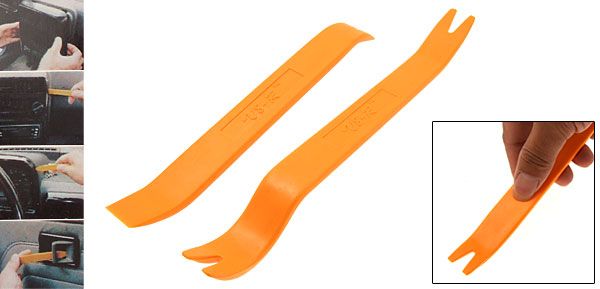
With this tool they put in the side of the panel and carefully started to pull down. The clips are storng in there.
 01-08-13 | 05:15 PM
#18

Lexus Test Driver
Joined: Mar 2011
Posts: 813
Likes: 7
From: MO
Nope. Forget the fancy tools. Forget the fancy descriptions. It's like falling off a log.
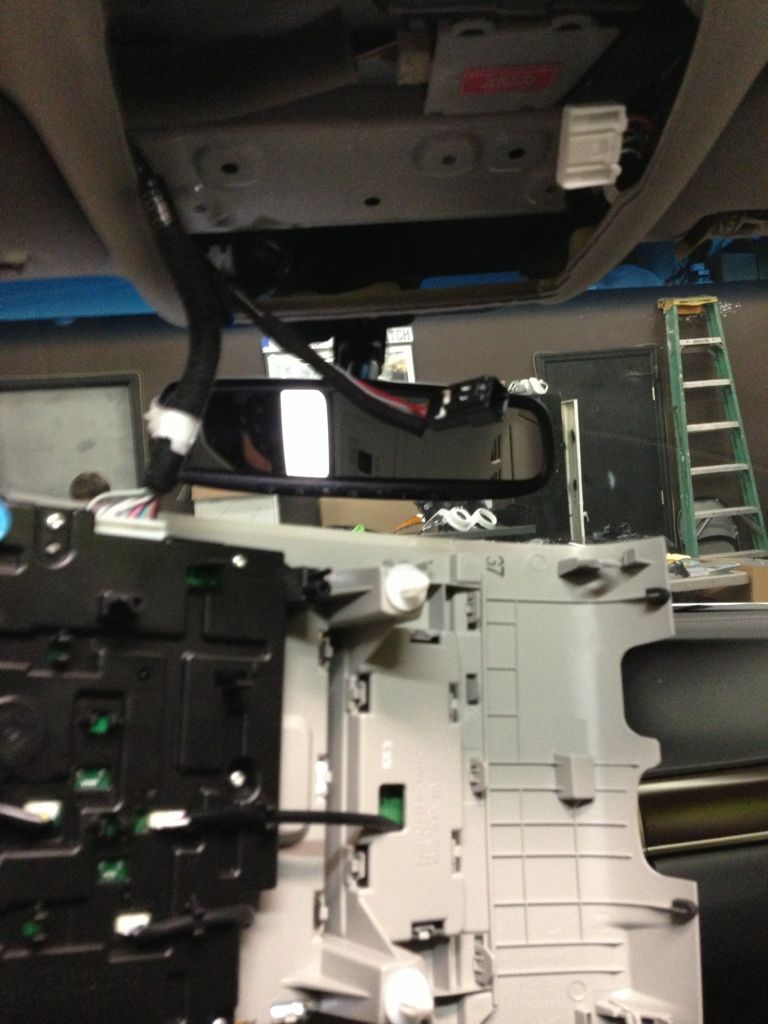
Put your fingertips on the windshield and gradually pull them back toward the headliner until they hook under the trim piece openings for the rain sensor/other gizmo. Gradually apply pulling force until panel's front snaps let go (it'll take a surprising amount of force, but apply it GRADUALLY). Then move your fingers back as far as you can on the driver's and passenger's sides of the trim piece and gradually rock from side to side while pulling down. The next set of snaps will let go. Repeat until panel falls away as in pictures.
Reassembly: after you've done your thing, start re-engaging snaps starting from the back. Work your way forward toward the windshield until you get to the last set of snaps. Then, you need to hook one side before the other and ... bend ... the front slightly (bow it out) and will fit it into its slot. Work it and get a feel for it. Once you get it, you'll never miss again. Good luck.
Oh, and maker sure your hands are SURGEON-clean before you start. You don't want to leave ugly smears on your headliner.
Last edited by williakz; 01-08-13 at 05:21 PM.
01-09-13 | 08:03 AM
#19
Simon, is it possible to tap into the rain sensor instead of the having to remove the rear view mirror? I read on a Lexus IS post where they were able to tap into the rain sensor, it seemed to be much more easier to remove. Not sure if this is also possible on the GS. Or is the rain sensor and review mirror wiring all located under the trim piece in your picture? Thanks.
01-09-13 | 07:01 PM
#20
Driver
Joined: Dec 2012
Posts: 155
Likes: 0
From: New York
Simon, is it possible to tap into the rain sensor instead of the having to remove the rear view mirror? I read on a Lexus IS post where they were able to tap into the rain sensor, it seemed to be much more easier to remove. Not sure if this is also possible on the GS. Or is the rain sensor and review mirror wiring all located under the trim piece in your picture? Thanks.
01-09-13 | 07:54 PM
#21
Lexus Test Driver
Joined: Mar 2011
Posts: 813
Likes: 7
From: MO
I recommend tapping the rain sensor circuit with a mirror tap (shortie will do fine), then into a double-ended phone jack connector (F-F RJ11/12) then a short phone cable (RJ11/12) from the connector to your detector. Everything except the phone cord is hidden under the trim piece shown. Nice and neat and easily removed when you get rid of the car - new owners HATE mods previous owners have done. Good luck.
01-10-13 | 06:33 AM
#22
Yes, yes, yes. You tap into the rain sensor wire harness which is attached to the trim piece shown. Note: if you are purchasing the "Mirror Tap" product, make sure you get the 12" NOT the standard 8" which is too short to service a radar detector mounted on the mirror stalk. Note also that even the 12" tap may be too short depending on the distance to the power connector on your particular detector.
I recommend tapping the rain sensor circuit with a mirror tap (shortie will do fine), then into a double-ended phone jack connector (F-F RJ11/12) then a short phone cable (RJ11/12) from the connector to your detector. Everything except the phone cord is hidden under the trim piece shown. Nice and neat and easily removed when you get rid of the car - new owners HATE mods previous owners have done. Good luck.
I recommend tapping the rain sensor circuit with a mirror tap (shortie will do fine), then into a double-ended phone jack connector (F-F RJ11/12) then a short phone cable (RJ11/12) from the connector to your detector. Everything except the phone cord is hidden under the trim piece shown. Nice and neat and easily removed when you get rid of the car - new owners HATE mods previous owners have done. Good luck.
https://www.clublexus.com/forums/is-...end-mount.html
Last edited by DaVeyBoyTX; 01-10-13 at 06:49 AM.
01-10-13 | 10:17 AM
#23
Lexus Test Driver
Joined: Mar 2011
Posts: 813
Likes: 7
From: MO
Grow a set, pull the f*ng panel, use a voltmeter to find 12VDC and ground, tap it, run the power cord, install the mount, test everything, snap panel back, and smile. Your choice.
01-13-13 | 10:38 PM
#24
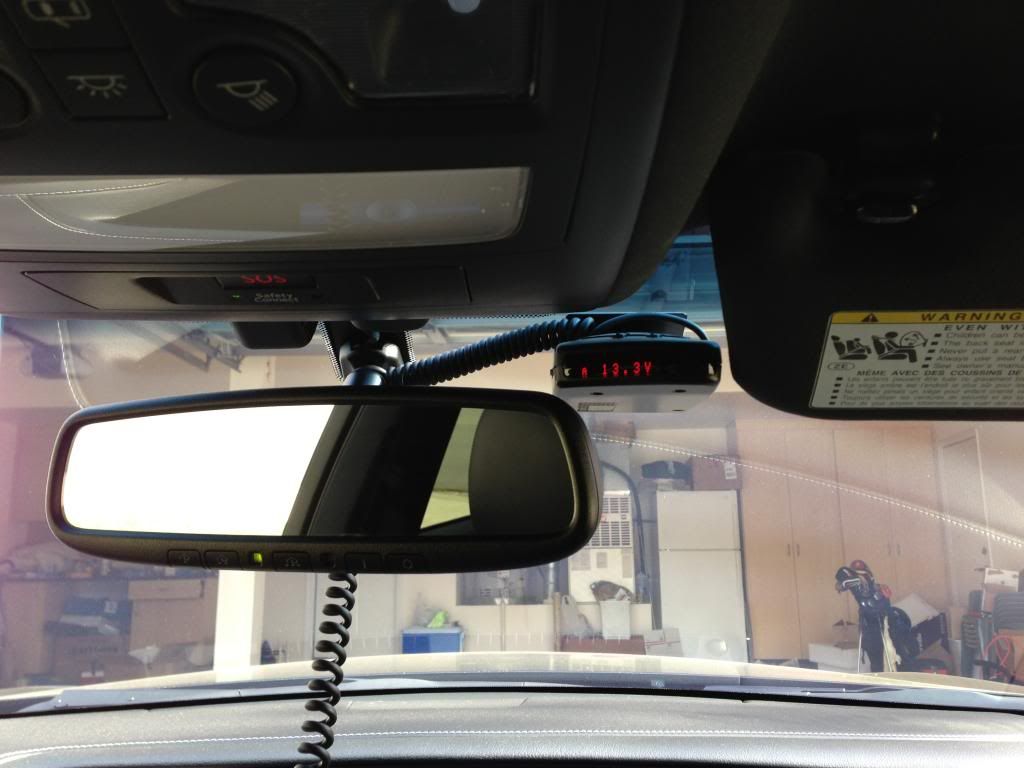
Just put my new Passport 8500 x50 BLACK up. This new model is almost half the weight of the old one (5.5oz vs 9oz). I purchased the mount from fleabay, uses 3M double sided tape instead of suction cups. It feels super strong but will have to wait until summer to see how well it holds up. I'm planning to hardwire the RD to the mirror and is waiting for the cord. Was going to do the hardwire to the fuse box but our fuse box is not big enough to accommodate the add-a-circuit.
Double sided 3M mounting plate:
From driver's seat:
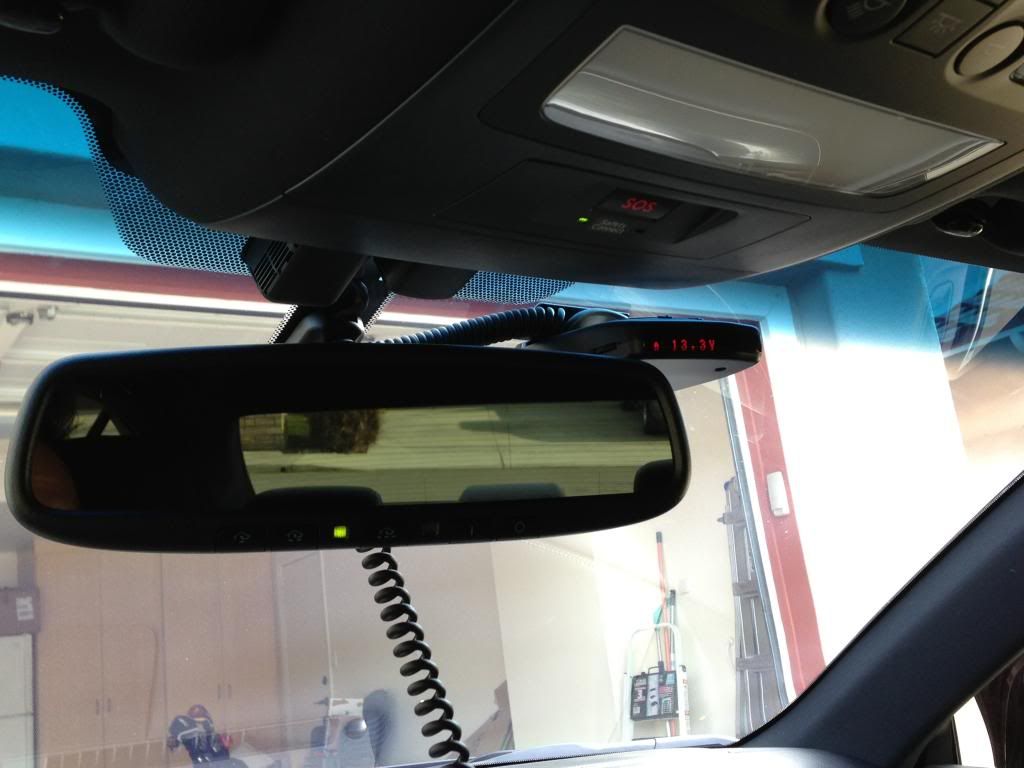
From center, notice small clearance from rear view mirror, had to adjust mirror to its most downward and leftward position to allow enough clearance. But still enough clearance on top so rear facing radar sensor has good view of rear:

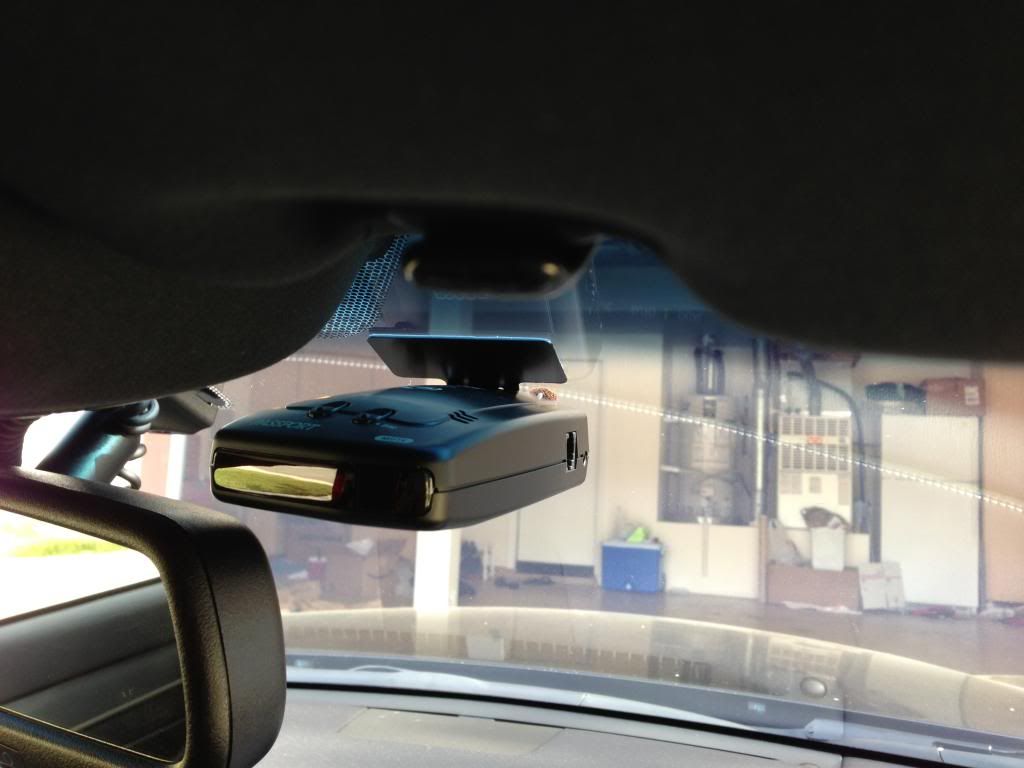
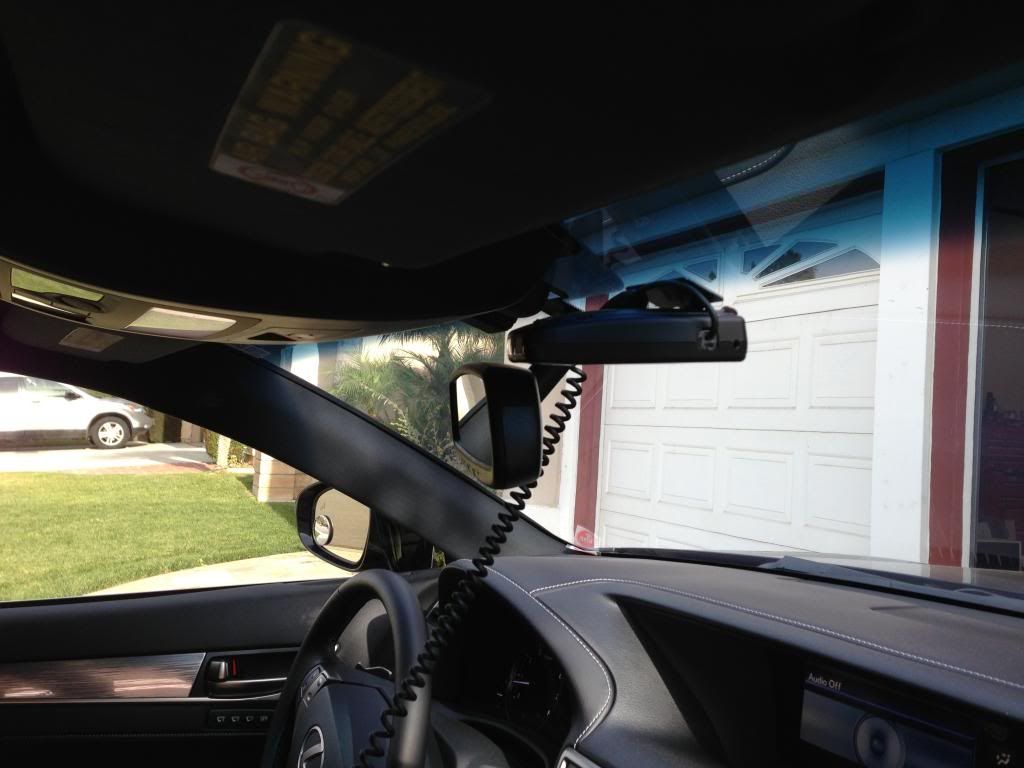
Here notice passenger side visor is down without touching the RD. I don't like mounting the RD right under the rearview mirror. First it's too noticeable from the outside. Second if a cop pulls you over the RD will stick out like a sore thumb.
Finally from the passenger side. Notice RD is high enough to be out of sight yet still under the dark band with good visibility toward the front and rear. Also high mounting will help shield the RD from the sun:
Double sided 3M mounting plate:
From driver's seat:
From center, notice small clearance from rear view mirror, had to adjust mirror to its most downward and leftward position to allow enough clearance. But still enough clearance on top so rear facing radar sensor has good view of rear:
Here notice passenger side visor is down without touching the RD. I don't like mounting the RD right under the rearview mirror. First it's too noticeable from the outside. Second if a cop pulls you over the RD will stick out like a sore thumb.
Finally from the passenger side. Notice RD is high enough to be out of sight yet still under the dark band with good visibility toward the front and rear. Also high mounting will help shield the RD from the sun:
01-14-13 | 09:54 AM
#25
Lexus Test Driver
Joined: Mar 2011
Posts: 813
Likes: 7
From: MO
Good location choice. Note that with the Escort units, the "rear facing" port is for LASER, not radar. And, as laser detection is functionally useless - when detector alerts, speed already acquired - there is no need to consider clearance for the rear laser port. To my knowledge, only the Valentine unit has true rear facing RADAR and requires a clear path to the rear. That said, your placement is optimal for radar, which is the strength of the X50. Good luck with your mount and upcoming hardwire.
01-15-13 | 06:43 PM
#26

Intermediate
Joined: Oct 2001
Posts: 259
Likes: 10
From: NJ
Has anybody gotten power by tapping into a fuse block below the dash?
There's a fuse block below/behind the glove box that has fuses for the power outlets (one for the center console and another for the outlet for the back seat). I'm hoping to tap into one of those for my Valentine, using the hard wire adapter that comes with it - vampire clamp for the hot, and spade connector wire to attach to a ground screw.
Going to that circuit seems to be the safest way to go, because no "car" systems are on it.
01-15-13 | 06:49 PM
#27
i just replace the suction cups once they go bad
they arent too much and usually when the cups give out only 1 goes
i also do have it hardwired so just take out the RD to hide it when you arent in your car, it'll lessen the heaviness and prevent theft too
they arent too much and usually when the cups give out only 1 goes
i also do have it hardwired so just take out the RD to hide it when you arent in your car, it'll lessen the heaviness and prevent theft too
01-16-13 | 08:54 AM
#28

Pole Position
Joined: Dec 2008
Posts: 240
Likes: 4
From: PA
Simon, is it possible to tap into the rain sensor instead of the having to remove the rear view mirror? I read on a Lexus IS post where they were able to tap into the rain sensor, it seemed to be much more easier to remove. Not sure if this is also possible on the GS. Or is the rain sensor and review mirror wiring all located under the trim piece in your picture? Thanks.
For reference, the wiring for the rain sensor (in my car) consists of three wires. One white, one green and one red (actually, it's sort of pink). The mirrortap had 2 wires. One black and one red. I inserted the red from the mirrortap into the red for the sensor and the the black from the mirrortap into the white for the sensor.
Now that i've done it once, it's literally a 5 or 10 minute job. It took me quite a lot longer because I had to read the wires and I found that if you totally remove the trim panel (instead of leaving it partially plugged in), you lose power to everything else in the vicinity including the mirror and the sensor. I thought my multimeter was broken....DUH!
The following users liked this post:
Niralsp88 (06-12-21)
01-17-13 | 06:59 AM
#29
For reference, the wiring for the rain sensor (in my car) consists of three wires. One white, one green and one red (actually, it's sort of pink). The mirrortap had 2 wires. One black and one red. I inserted the red from the mirrortap into the red for the sensor and the the black from the mirrortap into the white for the sensor.
01-17-13 | 08:09 AM
#30

Driver
Joined: Apr 2012
Posts: 136
Likes: 2
From: California
I just clip mine to the bottom of the passenger sun visor in the closed position. (I put some foam on the inside to keep it horizontal and it has a clear "view" out of the front and back). I also purchased the Savvy unit and the concealed display. The concealed display is great as it shuts off the lights on the main unit and replicates it right in front of you. No one outside the car can see the flashing lights.
I put the concealed display on my steering wheel, which fits well if you don't have the eye/sleep monitor thing (I installed it with Velcro in approximately the same location). The Saavy plugs into the diagnostic port under the dash for power (and it also mutes the detector if your speed is under a selectable threshold setting). So theres a small cord running from the concealed unit to the Savvy unit under the dash (easily concealed) and a long cord running from the Savvy to the main unit on the passenger visor.
I simply ran the power cord (thin black telephone-like wire), from under the dash to the inside of the driver's door, behind the rubber door seal to the top of the door, and then out accross the pillar (the only visable part), and under the headliner by just tucking it in where it meets the front windshield. It comes out where the rain sensor is located, but it's small and black and not noticeable at all (especially if you have the black FSport headliner). Then I route it through where the sun visor is attached and plug it in. It looks very close to a custom install, and no taping wires whatsoever. If anyone is interested, I'll take some pictures.