
Convert 4" door speakers to 6"
 02-04-09, 10:16 AM
#1
I'm not sure if a write up has been made, but heres what I've got so far. I'll skip the formalities and start the write up after door has been removed, to be honest, if you cant remove the door panel maybe you shouldnt do the convert 
Remove complete door speaker assembly
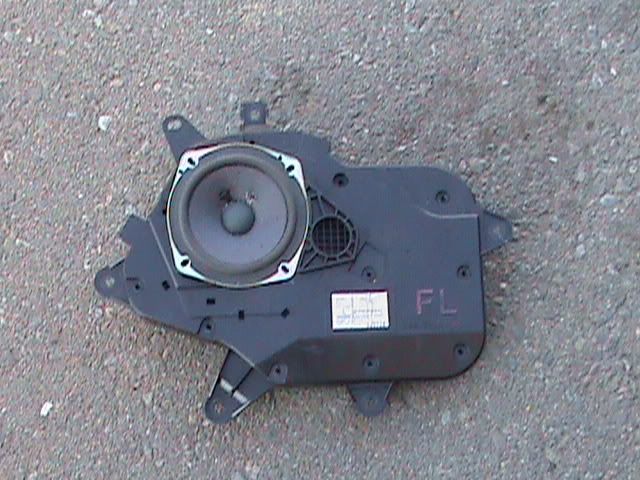
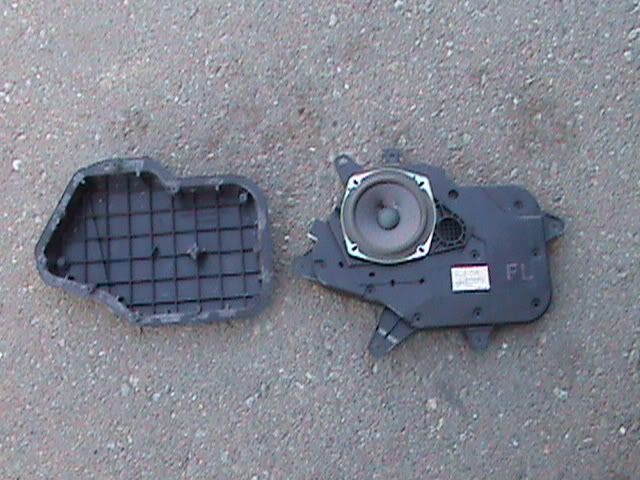
Remove the 9 screws to disassemble it
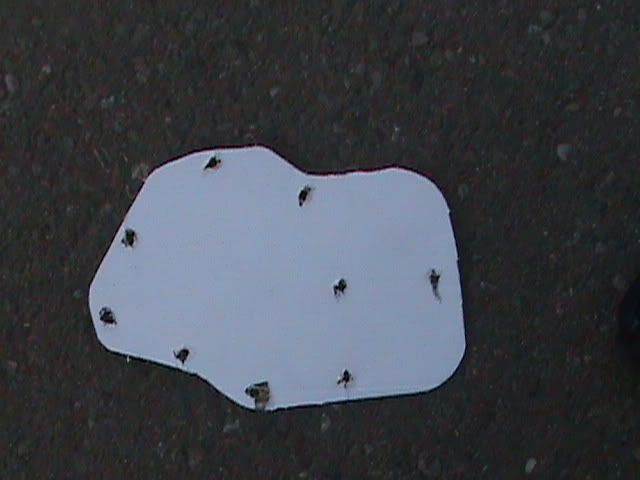
Flip the bottom part over and trace it out on cardboard, if you press it against the cardboard hard enough, you will leave the indention's of where the screw holes need to be drilled
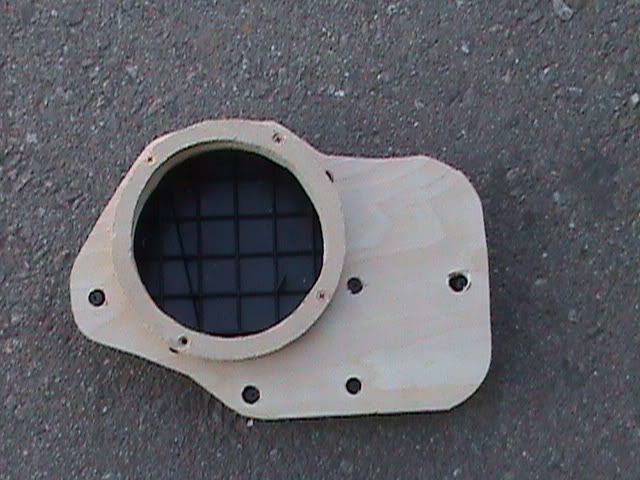
Trace template on wood panel and cut out. Mark all the screw holes and drill out.
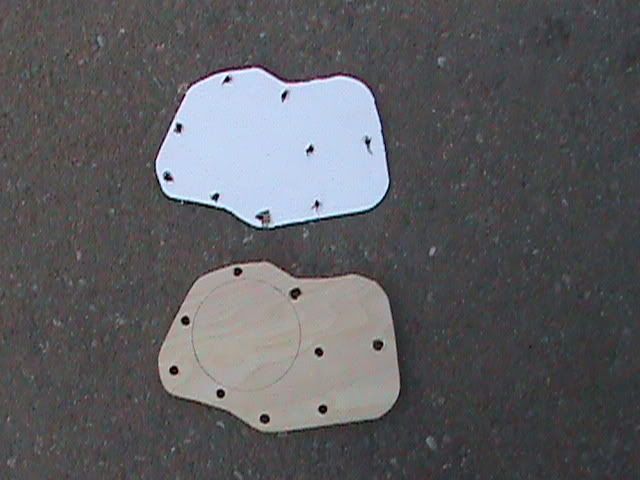
Now depending on what type of speakers you're using, mounting depth will differ and spacers will be needed to raise the woofer/coaxial. Remember though you only have a clearance of 4"
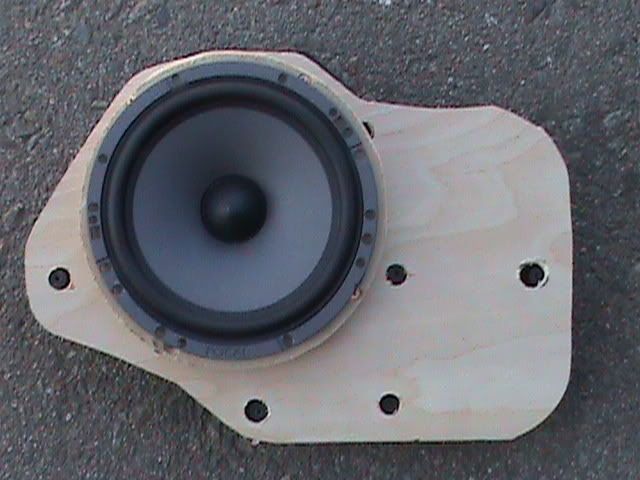
Here is the finished product You can throw some material over it and fiberglass it, but really no need to since its not seen...
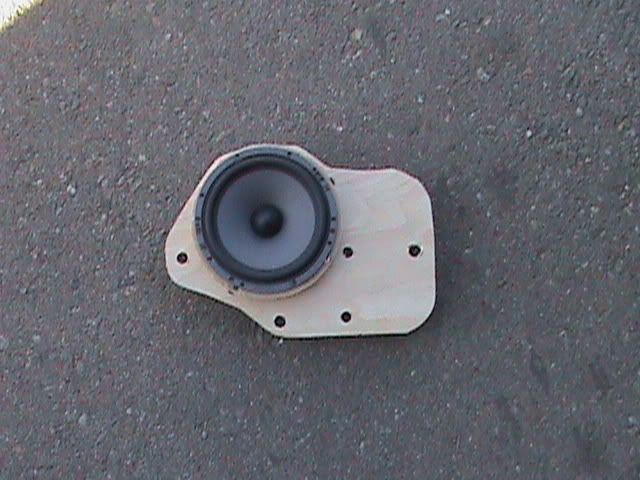
Now when you split apart the top and bottom, you will notice that around the edges and around the nipples where the screws go in there are shim like dealios that will need to be shaved down so that the "plate" you make will fit flush. Around the "nipples" it looks like this / \ on each side, those need to be shaved as well to make it look like this ||. I'm yet to remove the other side and am not sure if you can use the same template (backwards) I hope so, it will save a bit of time. I'll probably add some dynamat on the inside may or may not help.
Remove complete door speaker assembly
Remove the 9 screws to disassemble it
Flip the bottom part over and trace it out on cardboard, if you press it against the cardboard hard enough, you will leave the indention's of where the screw holes need to be drilled
Trace template on wood panel and cut out. Mark all the screw holes and drill out.
Now depending on what type of speakers you're using, mounting depth will differ and spacers will be needed to raise the woofer/coaxial. Remember though you only have a clearance of 4"
Here is the finished product You can throw some material over it and fiberglass it, but really no need to since its not seen...
Now when you split apart the top and bottom, you will notice that around the edges and around the nipples where the screws go in there are shim like dealios that will need to be shaved down so that the "plate" you make will fit flush. Around the "nipples" it looks like this / \ on each side, those need to be shaved as well to make it look like this ||. I'm yet to remove the other side and am not sure if you can use the same template (backwards) I hope so, it will save a bit of time.
I'll probably add some dynamat on the inside may or may not help.
Last edited by Mr Jokster; 02-04-09 at 11:03 AM.
 02-04-09, 11:04 AM
#2

now that guys will save you some time/money a installer/shop will charge you. my hats off for that. it really is simple and cheaper than some of the ones people buy online or the installers will charge you. if you really wanna start getting creative you can start doing them outta fiberglass or go back and fill in the wood gaps with body filler and make a GREAT looking one like i have done in years past
ty sir.....for the money saving write up
ty sir.....for the money saving write up
02-04-09, 12:09 PM
#3
yea, I may or may not do some fiber glassing. What stops me is that it wont be seen On my other car I made complete custom plates for the car. I fiber glassed one and after all the work I said, what the heck, cant see them anyways! :P. We'll see if I get bored enough.
On my other car I made complete custom plates for the car. I fiber glassed one and after all the work I said, what the heck, cant see them anyways! :P. We'll see if I get bored enough.
02-04-09, 12:18 PM
#4
yeah but sound quality wont escape between the holes in the woods if u use filler. either way its a good write up that will save people a few hundred if they doing some of their own audio stuff.
i submitted this to nigel to post in his sticky https://www.clublexus.com/forums/gs-...ou-search.html
hope u dont mind
and he's another 2 to help with sound quality
https://www.clublexus.com/forums/lex...er-thread.html
https://www.clublexus.com/forums/lex...ont-in-gs.html
you'll notice dave cleaned his up and painted them in last post
Last edited by sakataj; 02-04-09 at 12:30 PM.


Thread
Thread Starter
Forum
Replies
Last Post
e-man
Lexus Audio, Video, Security & Electronics
2
08-04-04 08:56 PM
Rit&Booner
ES - 1st to 4th Gen (1990-2006)
1
06-08-03 08:21 PM